Plantronics C460 1.9GHz Cordless Phone User Manual
Plantronics Inc 1.9GHz Cordless Phone Users Manual
UserManual.wiki
>
Plantronics
>
C460 User Manual
Users Manual
Navigation menu
Upload a User Manual
Namespaces
Wiki Guide
HTML
PDF
Info
Views
User Manual
Discussion / Help
Navigation


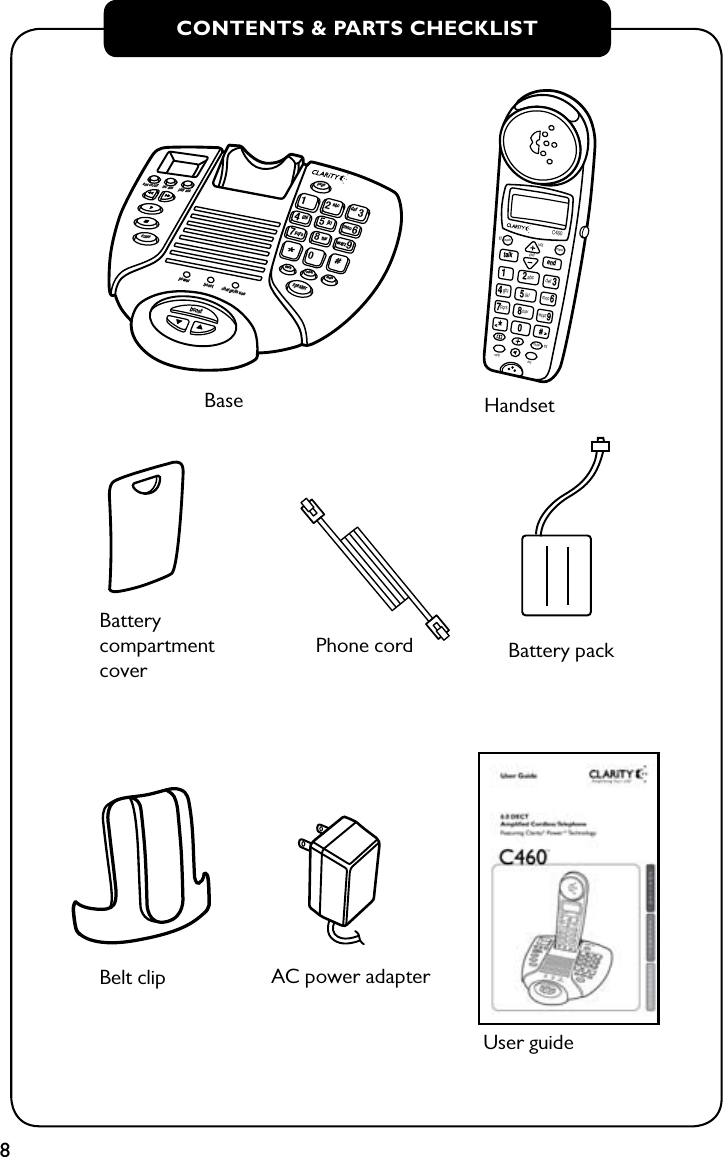
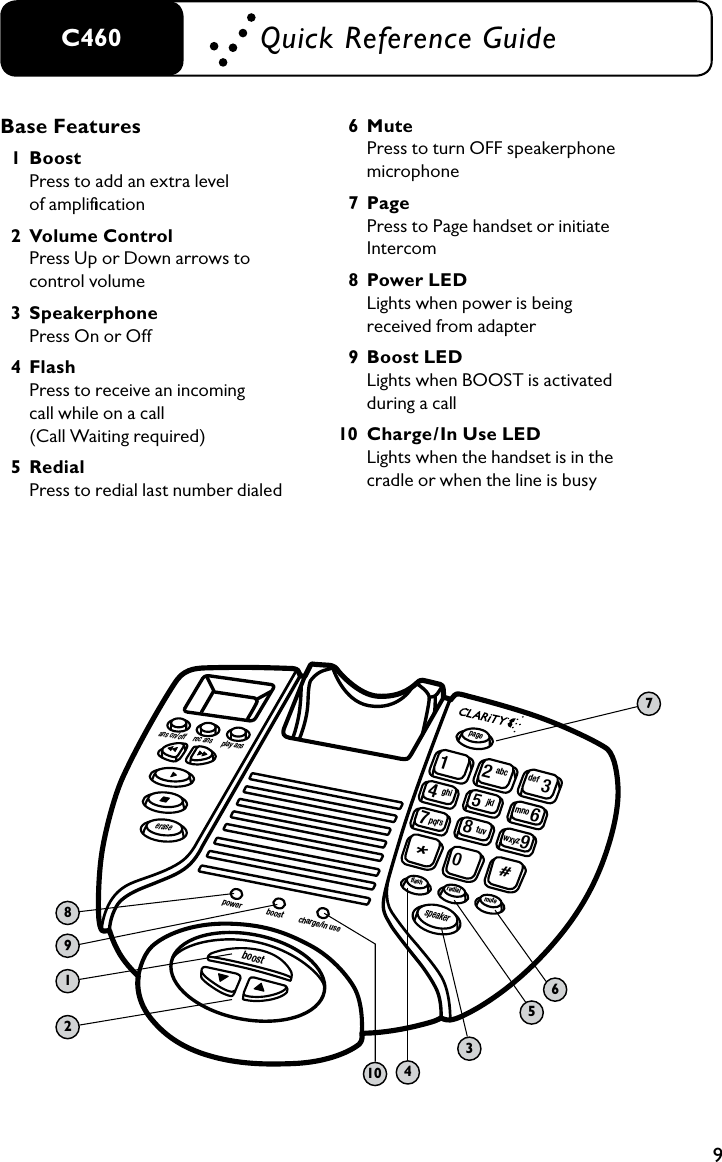
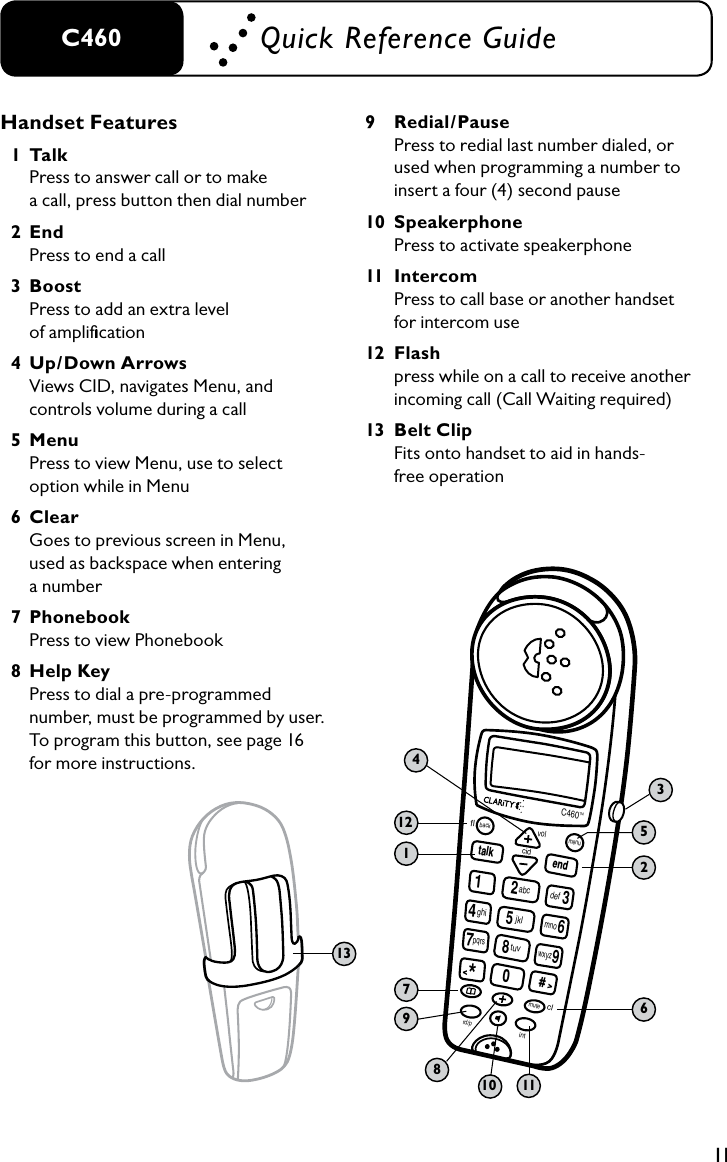
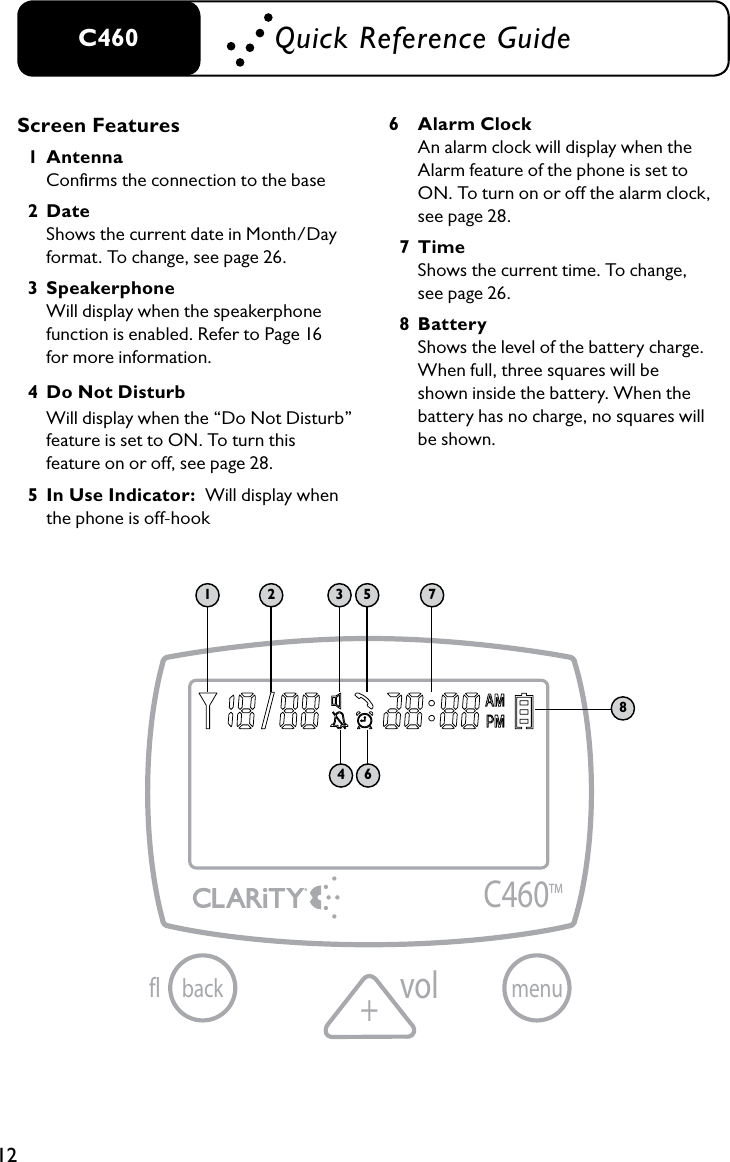


![17TELEPHONE OPERATIONSspeakerphone. This HELP button can be used to store a doctor, neighbor, of family member’s phone number. This number is not pre-programmed for 911 and Clarity does not suggest storing 911 into the phone memory.To assign a number to this button, the number must first be stored in the phone-book. For instructions on how to store a number into the phonebook, see page 23. While viewing the number in the phonebook, press and hold the HELP key for three (3) seconds. There will be an audible beep to confirm the assigning of the button. This will also create a new entry in the phone book titled [Ambulance].FlashThe FLASH (FL on handset) button is activated to use custom calling services such as Call Waiting or Three Way Calling. Please contact your local telephone company for information on these services.RedialPress REDIAL (RD/P on handset) to call last number dialed. The last number dialed (up to 24 digits) is stored in the redial memory until another number is dialed.PageTo page a handset from the base, press the PAGE button on the base followed by the number of the handset (1-4). If there is only one handset used with the base, it is “Handset 1.” Each additional handset that is purchased for the C460 is assigned two (2) through four (4) in numerical order.Example: To page Handset 1: Press the PAGE button on the base, followed by the “1” key on the dial pad.PauseProgramming in a pause will cause the phone to wait four (4) seconds before dialing additional numbers. This feature may be used when it is necessary to dial an access code (9, for example). Wait for the second dial tone, and then dial the outgoing number. Press the RD/P button on the handset at the required point during the memory storage process to program a pause.MutePress the Mute key on the base to turn off the microphone while using the Speakerphone.](https://usermanual.wiki/Plantronics/C460/User-Guide-1018132-Page-17.png)