Plantronics D645 Bluetooth Headset User Manual Layout 1
Plantronics Inc Bluetooth Headset Layout 1
UserManual.wiki
>
Plantronics
>
D645 User Manual
Users Manual
Navigation menu
Upload a User Manual
Namespaces
Wiki Guide
HTML
PDF
Info
Views
User Manual
Discussion / Help
Navigation
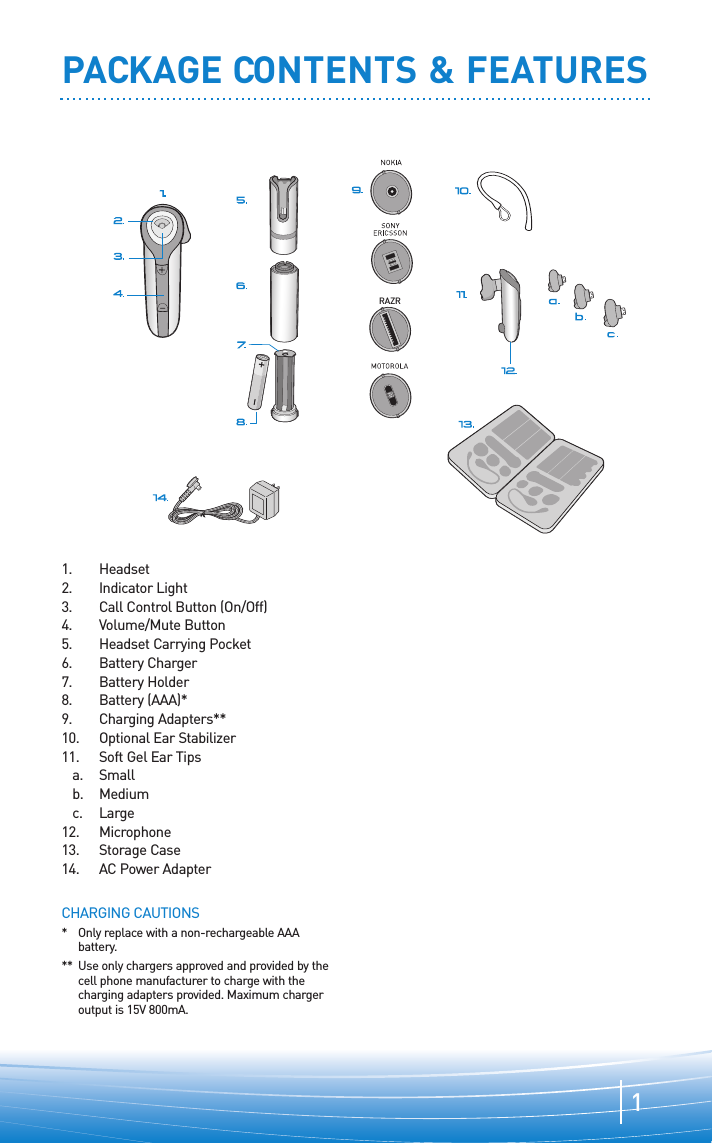
![Register Your Product OnlineVisit www.plantronics.com/productregistration to register your product online so we can provideyou with the best possible service and technical support.TABLE OF CONTENTSPackage Contents and Features/[Spanish] 1Connecting the Components/ 2Charging/ 3Powering/ 4Pairing/ 5Adjusting Fit/ 6Using Your Headset/ 7Indicator Lights/ 9Accessories/ 10Troubleshooting/ 11Technical Assistance/ 12Warranty/ 12Regulatory Notices/ 13](https://usermanual.wiki/Plantronics/D645/User-Guide-602399-Page-2.png)
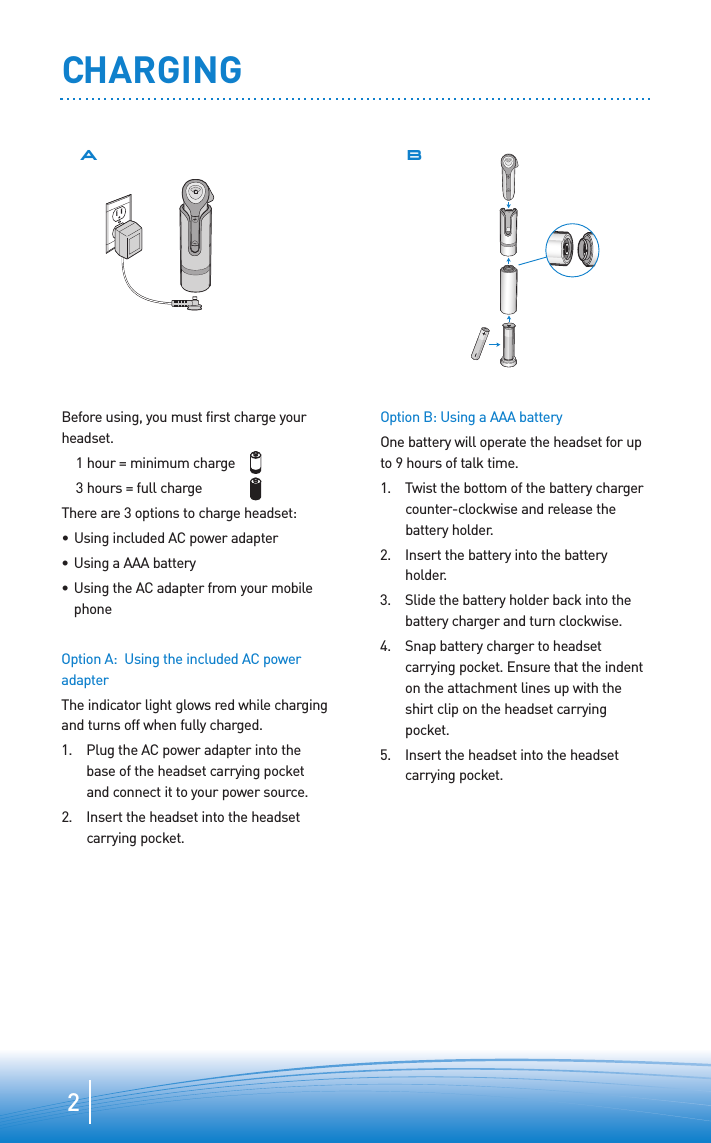
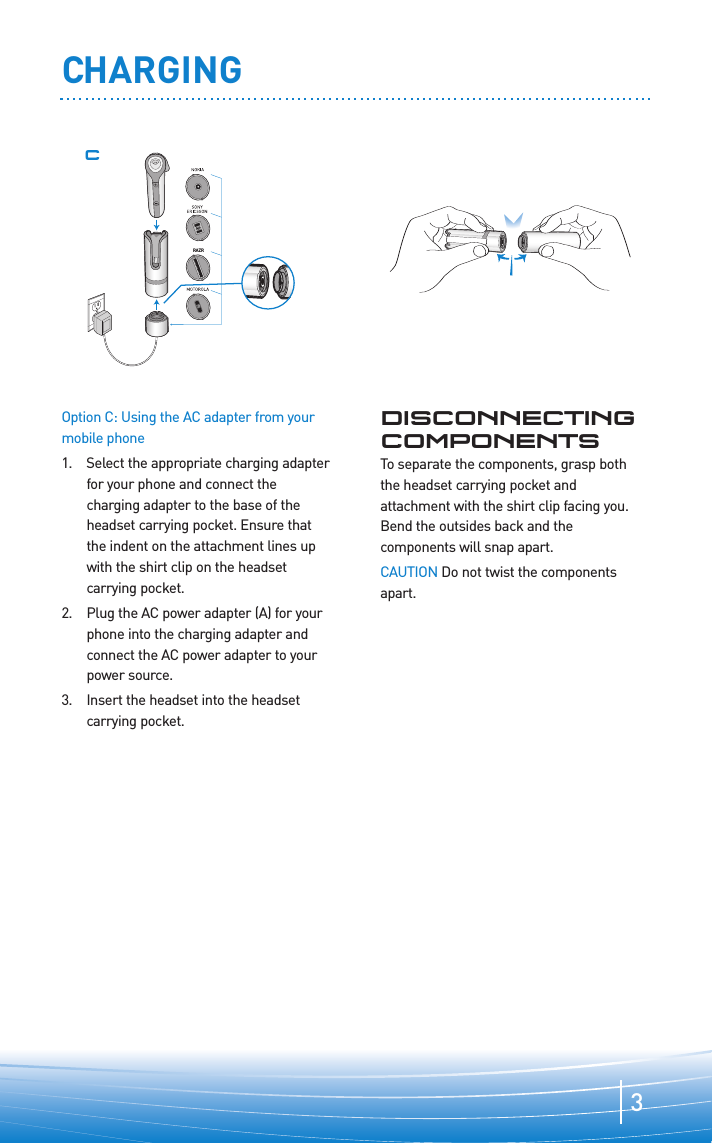
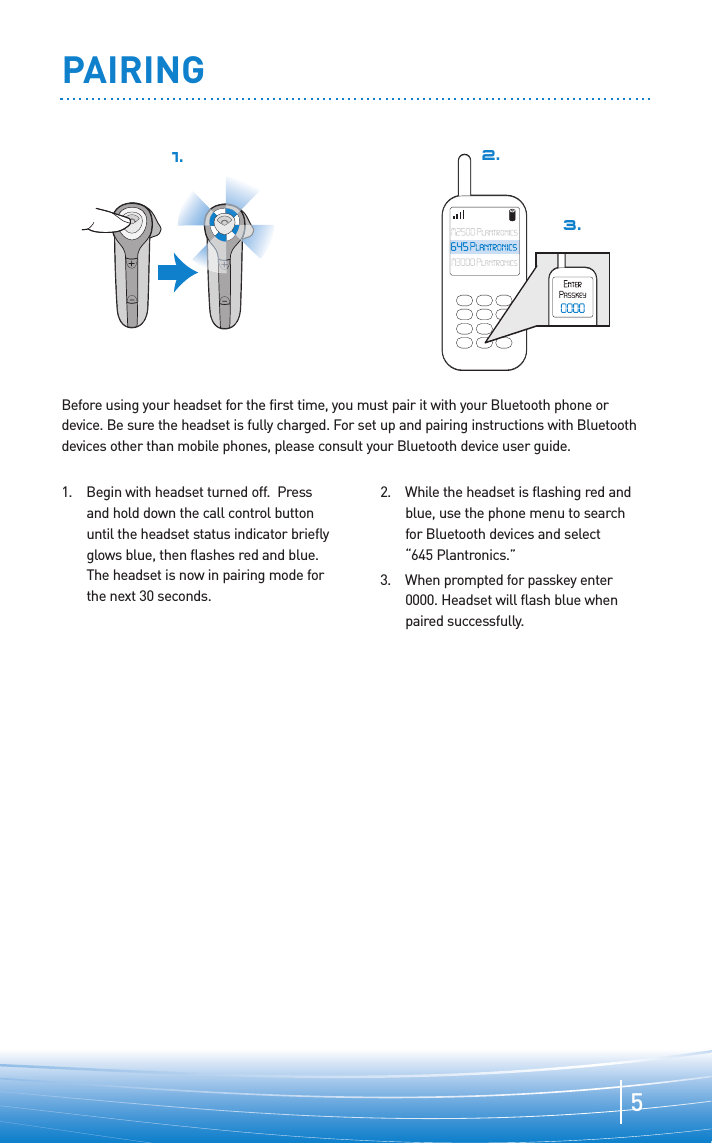
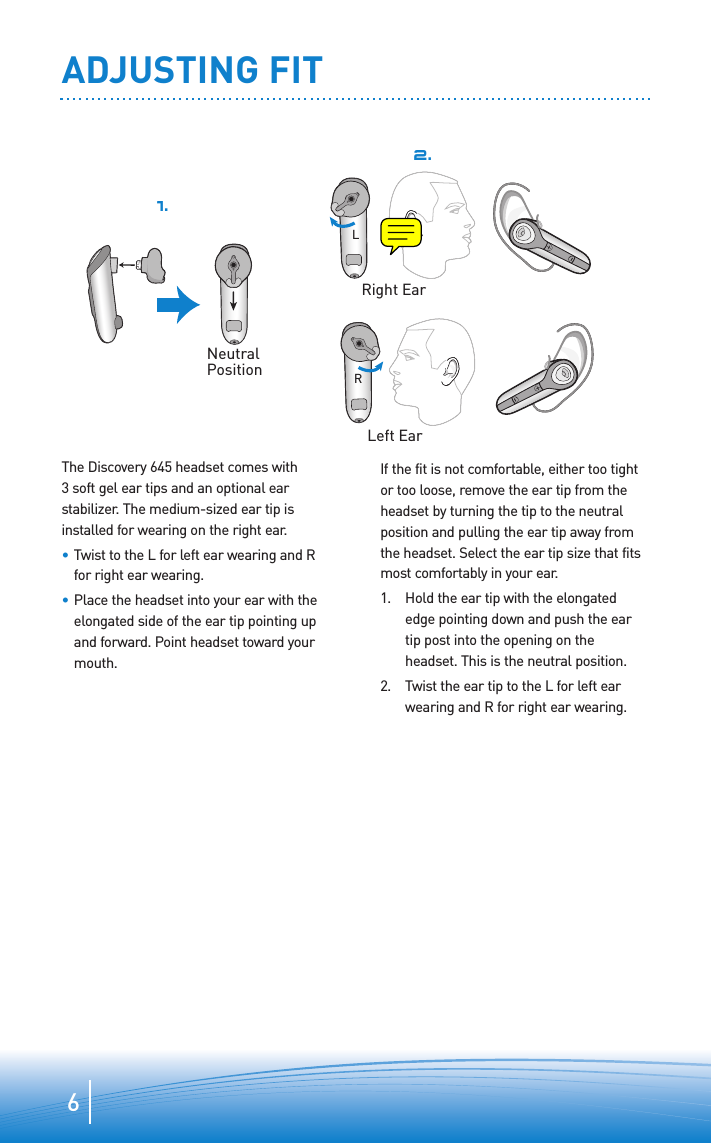
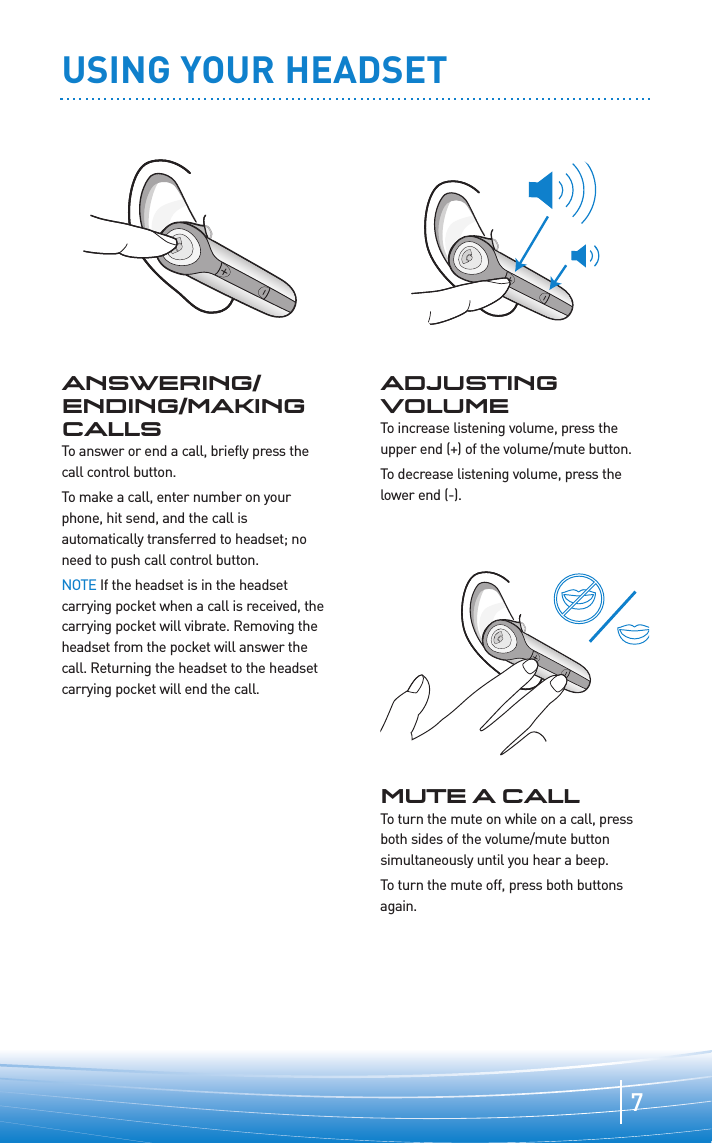
![4POWERINGCHARGING INDICATOR LIGHTS1. Turn on the headset by pressing andholding the call control button until theindicator light glows blue. If you arewearing the headset, you will hear abeep when the power turns on. Theindicator light will flash blue every 6seconds when the power is on.NOTE When the headset is on, the indicatorlight will indicate the charge level of theheadset.2. Turn off the headset by pressing thecall control button for 6-8 seconds untilthe indicator light glows red or until youhear the beep. The indicator lightremains unlit when the power is off.“BEEP”3 red flashes = greater than 2/3 battery charge[spanish]2red flashes = 1/3 to 2/3 battery charge1red flash = less than 1/3 battery charge](https://usermanual.wiki/Plantronics/D645/User-Guide-602399-Page-6.png)
![9INDICATOR LIGHTSHeadset Status Headset Indicator LightPowering on Blue appears and flashes every 6 seconds[Spanish]Power on Blue flashes every 6 seconds[Spanish]Powering off Red appears and goes off[Spanish]Power off —[Spanish]Charging battery Red is on[Spanish]Battery fullycharged Red goes off[Spanish]Pairing mode Blue/red flashes for 30 seconds[Spanish]Missed call Blue/red flashes infrequently. Press any button to cancel[Spanish]Ringing Blue/red flashes rapidly[Spanish]On Line Indicator (OLI) Blue flashes every 10 seconds[Spanish]Lowbattery Red flashes[Spanish]](https://usermanual.wiki/Plantronics/D645/User-Guide-602399-Page-11.png)