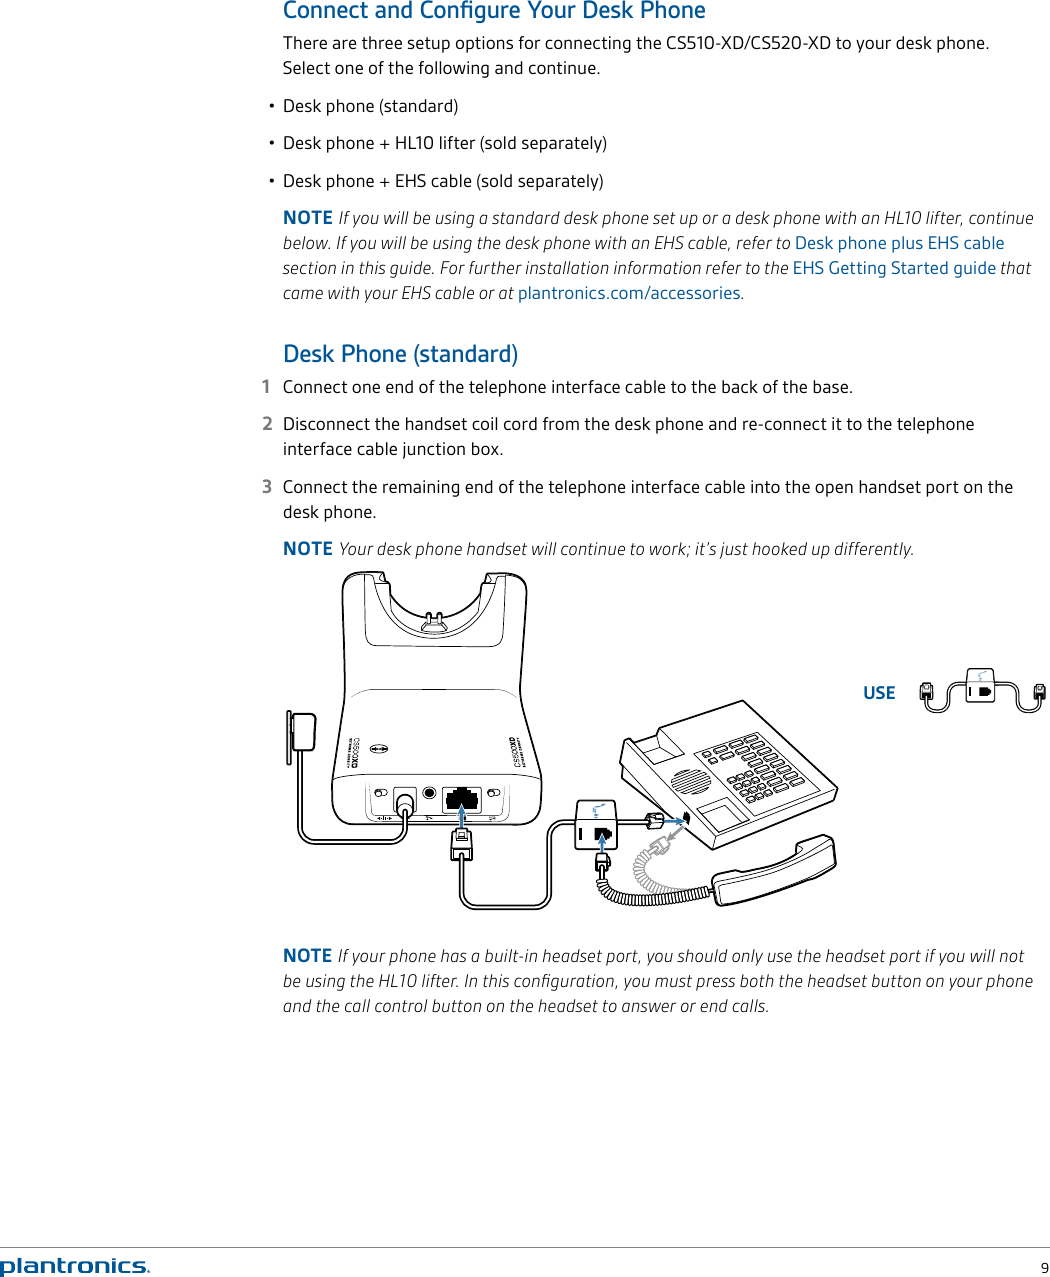
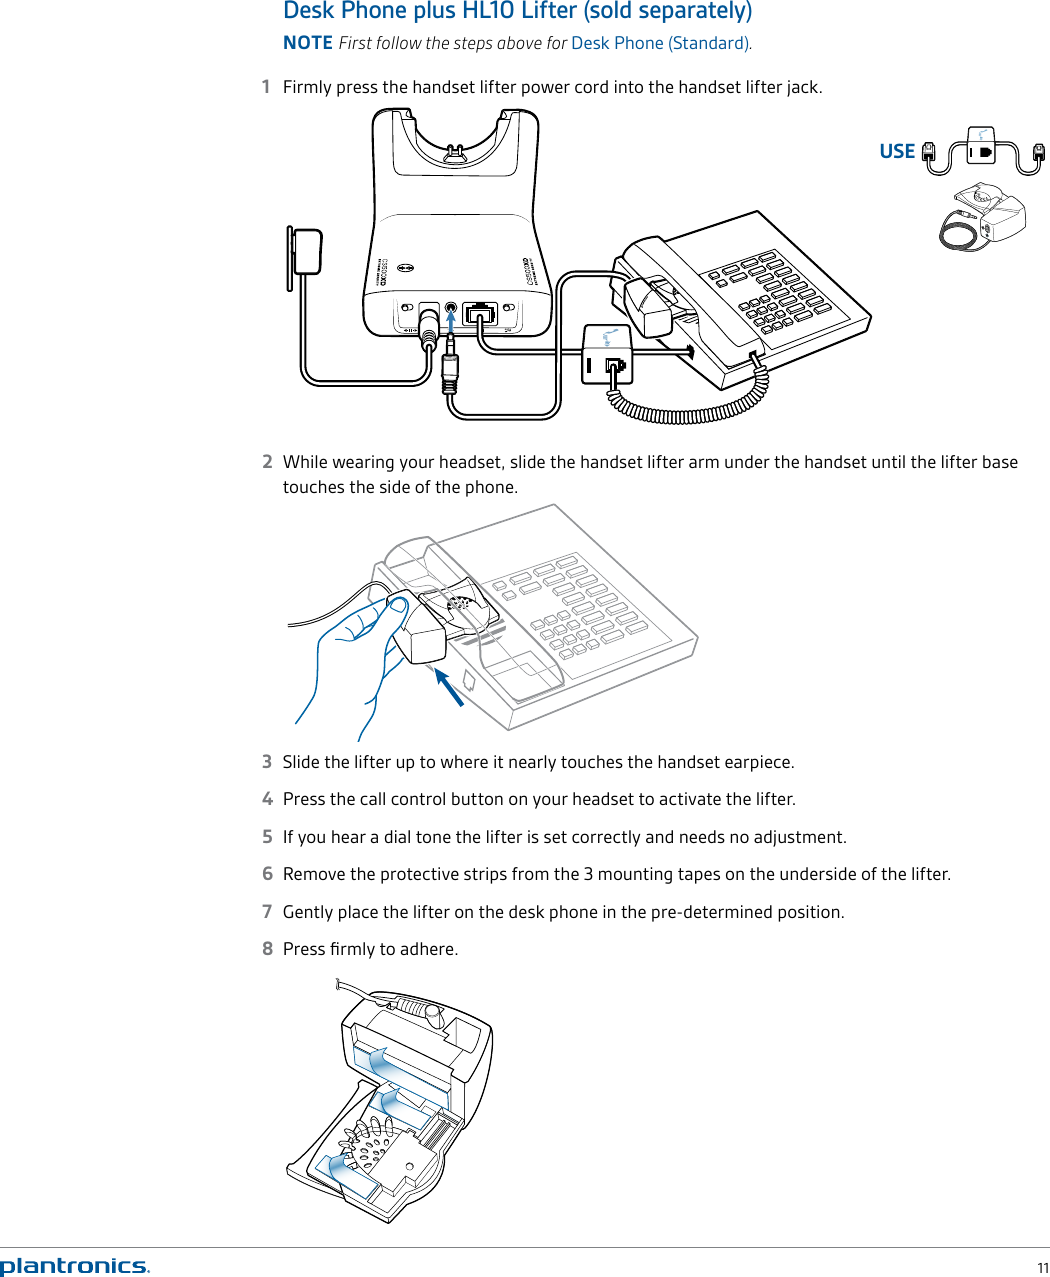
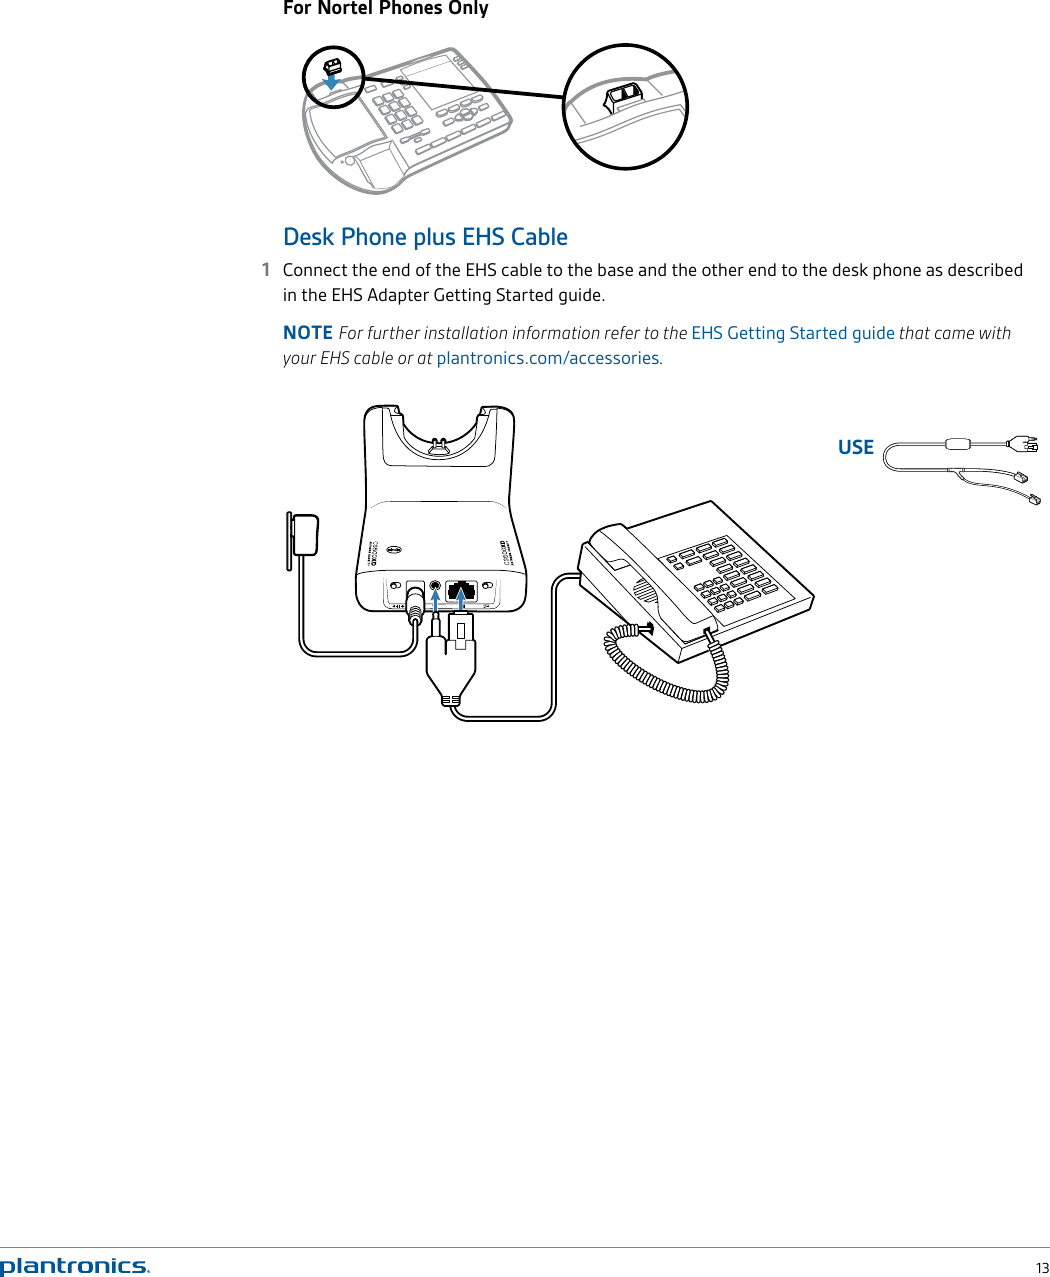
Plantronics WH3X0XD1 900MHz Monaural and Binaural Headsets User Manual User Guide
Plantronics Inc 900MHz Monaural and Binaural Headsets User Guide
UserManual.wiki
>
Plantronics
>
WH3X0XD1 User Manual
>
User Guide
Contents
1.
Quick Start Guide
2.
User Guide
User Guide
Navigation menu
Upload a User Manual
Namespaces
Wiki Guide
HTML
PDF
Info
Views
User Manual
Discussion / Help
Navigation

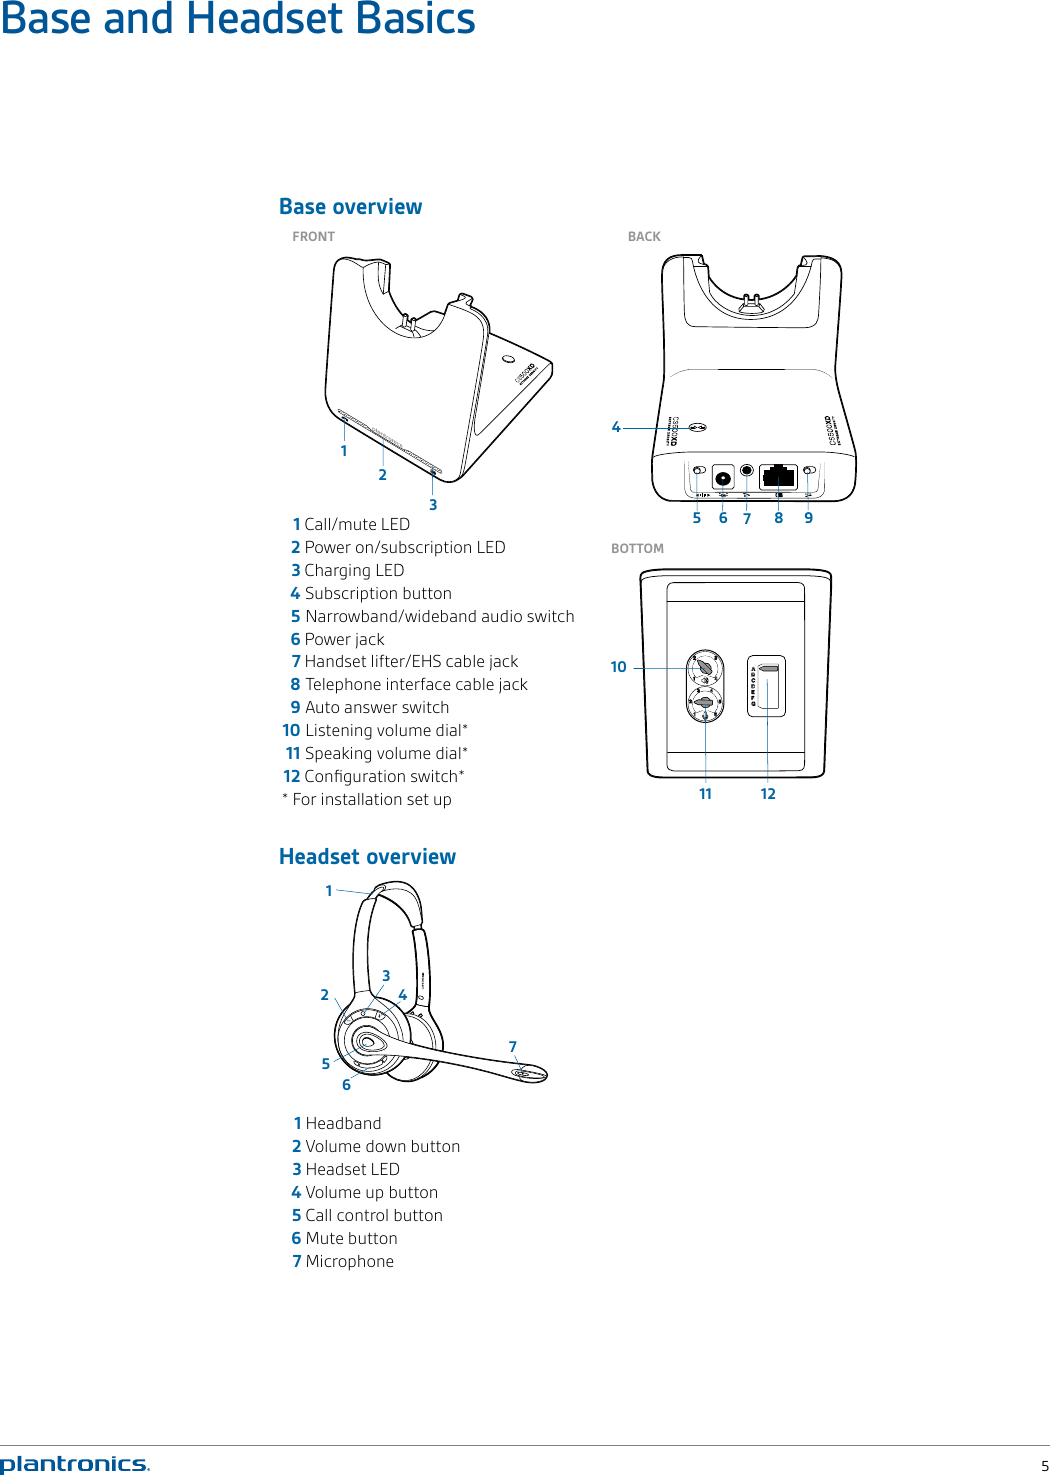

![15Now that you’ve adjusted your headset and connected your desk phone, read this section to learn about the headset features, how to use the controls and more. Headset Controls 543121 Volume [–] button Press to lower volume2 Headset LED Flashes green when in use3 Call control buttonPlace, answer, end a call Briefly press the call control button4 Mute button Press to mute/unmute 5 Volume [+] button Press to increase volumeIMPORTANT For your safety, do not use headset at high volumes for extended periods of time. Doing so can cause hearing loss. Always listen at moderate levels. For more information on headsets and hearing visit: plantronics.com/healthandsafety.Talk TimeWith a single full charge, the CS510-XD/CS520-XD will provide up to 12 hours of talk time in narrowband mode and 8 hours in wideband mode. Talk time will be reduced when headset is used consistently at a long distance from the base. Your Headset](https://usermanual.wiki/Plantronics/WH3X0XD1.User-Guide/User-Guide-3680492-Page-15.png)
![16BatteryThis product has a replaceable battery. To ensure replacement batteries meet Plantronics high quality standards and for optimal performance, only use replacement batteries provided by Plantronics.Low Battery WarningIf you are on a call and the headset battery is critically low, you will hear a repeated single low tone every 15 seconds indicating that the battery is low. You should recharge the headset immediately. If you are not on a call and press the call control button, you will hear three low tones if the battery is critically low. You should recharge the headset immediately.Muting Your Headset During a CallTo mute/unmute the call, press the mute button. When mute is activated on the primary headset, the Call/mute LED on the base will be solid red and you will hear three high tones (you will still be able to hear the caller). Adjusting Your Headset VolumeFine-tune your headset volume by pressing the volume [+] button to increase or the volume [–] button to decrease. Make set up volume adjustments for the desk phone with the volume dials on the base.Out of Range Warning TonesIf you are on a call and go out of the operating range, you will hear three low tones. You will hear a single mid tone when you are back in range. If you stay out of range, an active call will be suspended. The call will be re-established when you walk back into range. If you remain out of range for more than 5 minutes, the system will drop the call.If you are not on a call and go out of the operating range and then press the call control button, you will hear a single tone for the button press and three low tones for the failure to make a link.](https://usermanual.wiki/Plantronics/WH3X0XD1.User-Guide/User-Guide-3680492-Page-16.png)