Primo BTS-007 True wireless earphone User Manual S6 V1 1
Primo International Co., Ltd. True wireless earphone S6 V1 1
Primo >
user manual
1
THE MANUAL
2HOW TO WEAR
Light Indicator
1HOW TO CONNECT
b.Press both earbuds power button at the same time and hold the power button for
about 8 seconds until the Bluetooth light indicator flashes between blue and red
alternatively,you can hear a voice message,double-click the left earbud's button,
you can hear “Searching...”, then left and right Headset began to automatically match,
match the shell after the success of the left to hear the channel prompt.
c.The above steps to do once, the machine will automatically match in the future.
2.Connect to a bluetooth device
a.Press and hold the power button for 4 seconds until the bluetooth light indicator
flashing,after hear the channel prompt and prepare to pairing.
b.Select “S6tws” or box label model from the list of Bluetooth devices in your
mobile phone.
Support V4.2 or above versions of Bluetooth devices
1. Pairing the Earbuds
a.Turn off the earbuds.
4 5
3HOW TO USE
Power/Call button
Power/Call button
Left Channel
Right Channel
Microphone
Ear cap
Earbud changing point
Charging Switch
Charging Indicator
Ear hook
USB charge port
Charging of earphones
The earphones are equipped with a built-in rechargeable battery which is not removable. When
using the device for the first time, ensure that the battery is fully charged.
Connect a charging cable to the charge port of the earphones, and
plug the cable into a standard USB 5V outlet. During charging, the
light indicator will flashes. When the deviceis fully charged, the
indicator will turn red.Then unplug the travel charging cable from
the USB power outlet and the changing box.
Use only charging adapter approved by authentication. Unapproved or non-standard
USB 5V outlet may result in damaging the earphones, or explosion under
extreme conditions, andwill void the product warrant.
•
When the earphones battery level is low
The headphones will repeat a “battery level low, please recharge” voice message, and at
same time, the light indicator will blink red. If the headphones is out of power during a call,
the call is automatically transferred back to the phone.
Repeated charging and discharging of the earphones will decrease the battery
performance over time. This is normal for any rechargeable battery.
•
Do not make or receive calls during charging. To answer a call,always unplug
the charging cable first.
•
To conserve energy, if not using, unplug the travel charging cable from the earphones.
Because the travel charger does not have a power button, please unplug the travel
charging cable from the socket before disconnecting from the power source. During
usage, the travel charging cable should be kept close to the socket.
•
2
3 6
Series
True Wireless Earphone
Button functions
Press and hold the call button for 4 seconds to turn the
•
•
•
•
•
Press the call button to answer or end a call.
During music playback, short press to pause or play the music.
When there is an incoming call, press and hold the call button
2 seconds to reject the call.
When standby,
Button Function
Power/Call button
• Press the button charging indicator on start to charge the earbuds,
press twice charging indicator off stop to charge the earbuds.
• In general, the headset is placed inside the box,Earbuds will
automatically charged.
In the shutdown state, press and hold the button for 6-8 seconds to
force into the pairing mode.
•
↑
•
When the headset is fully charged, the headset light changes from red to blue
Press twice in succession to redial the
last call.
earphones on or off.
or
L M S
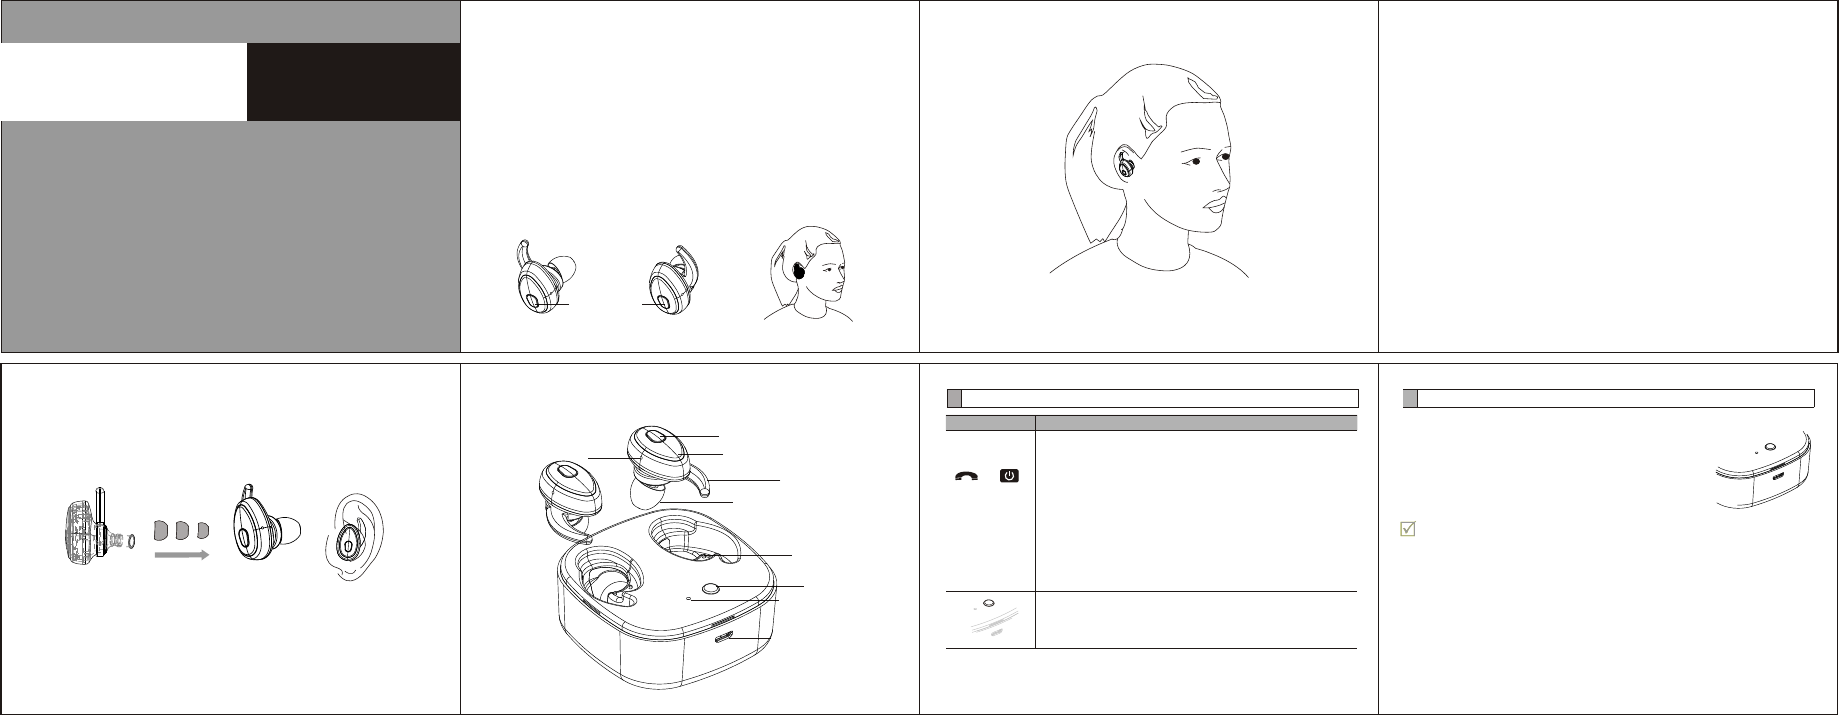
Choose your own ear cap
Note ! different models of ear cap shape will be different
TWS
When the device is connected to the headset only one headset has sound, It means the machine pairing
is not successful, please refer to the first step to re-operation
NOTE: This equipment has been tested and found to comply with the limits for a
Class B digital device, pursuant to part 15 of the FCC Rules. These limits are
designed to provide reasonable protection against harmful interference in a
residential installation. This equipment generates uses and can radiate radio
frequency energy and, if not installed and used in accordance with the instructions,
may cause harmful interference to radio communications. However, there is no
guarantee that interference will not occur in a particular installation. If this
equipment does cause harmful interference to radio or television reception, which
can be determined by turning the equipment off and on, the user is encouraged to
try to correct the interference by one or more of the following measures:
- Reorient or relocate the receiving antenna.
- Increase the separation between the equipment and receiver.
-Connect the equipment into an outlet on a circuit different from that to which the
receiver is connected.
-Consult the dealer or an experienced radio/TV technician for help
Changes or modifications not expressly approved by the party responsible for
compliance could void the user's authority to operate the equipment.
This device complies with Part 15 of the FCC Rules. Operation is subject to the
following two conditions:
(1) this device may not cause harmful interference, and
(2) this device must accept any interference received, including interference that
may cause undesired operation.