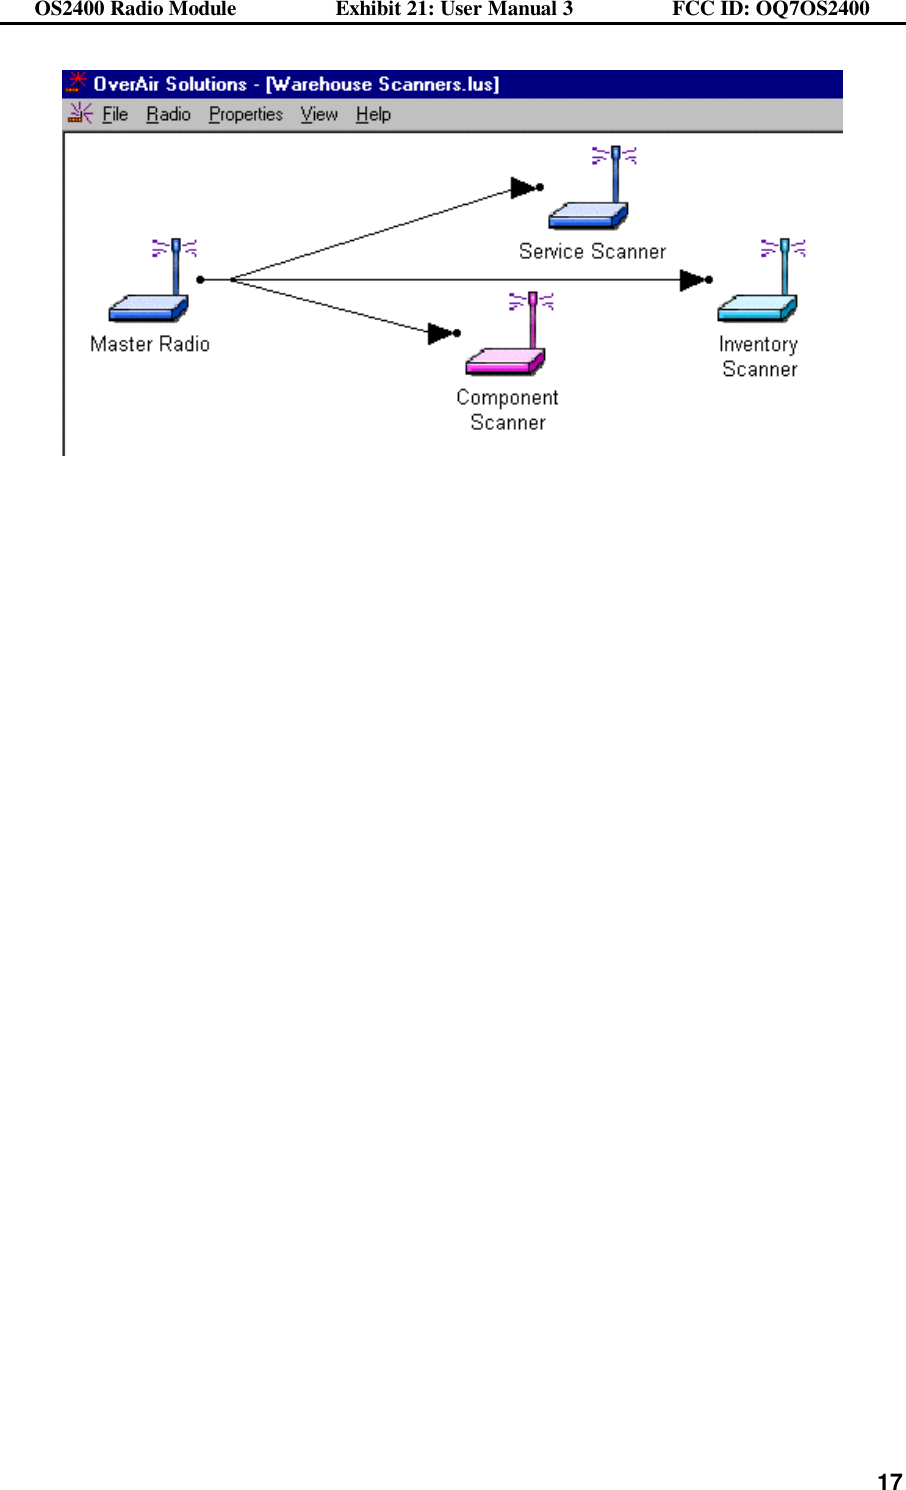
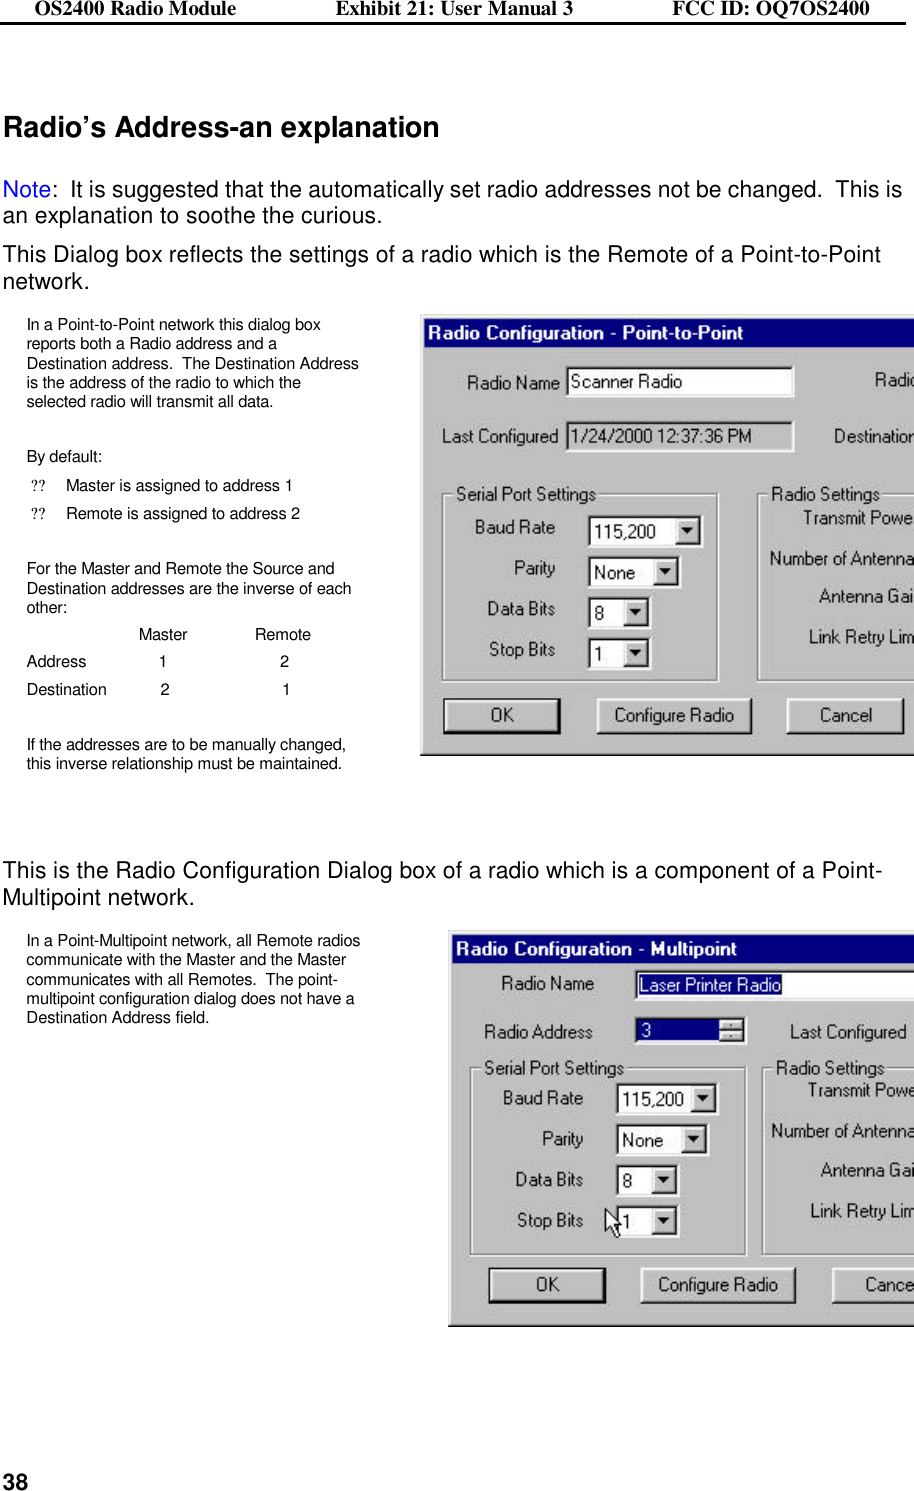
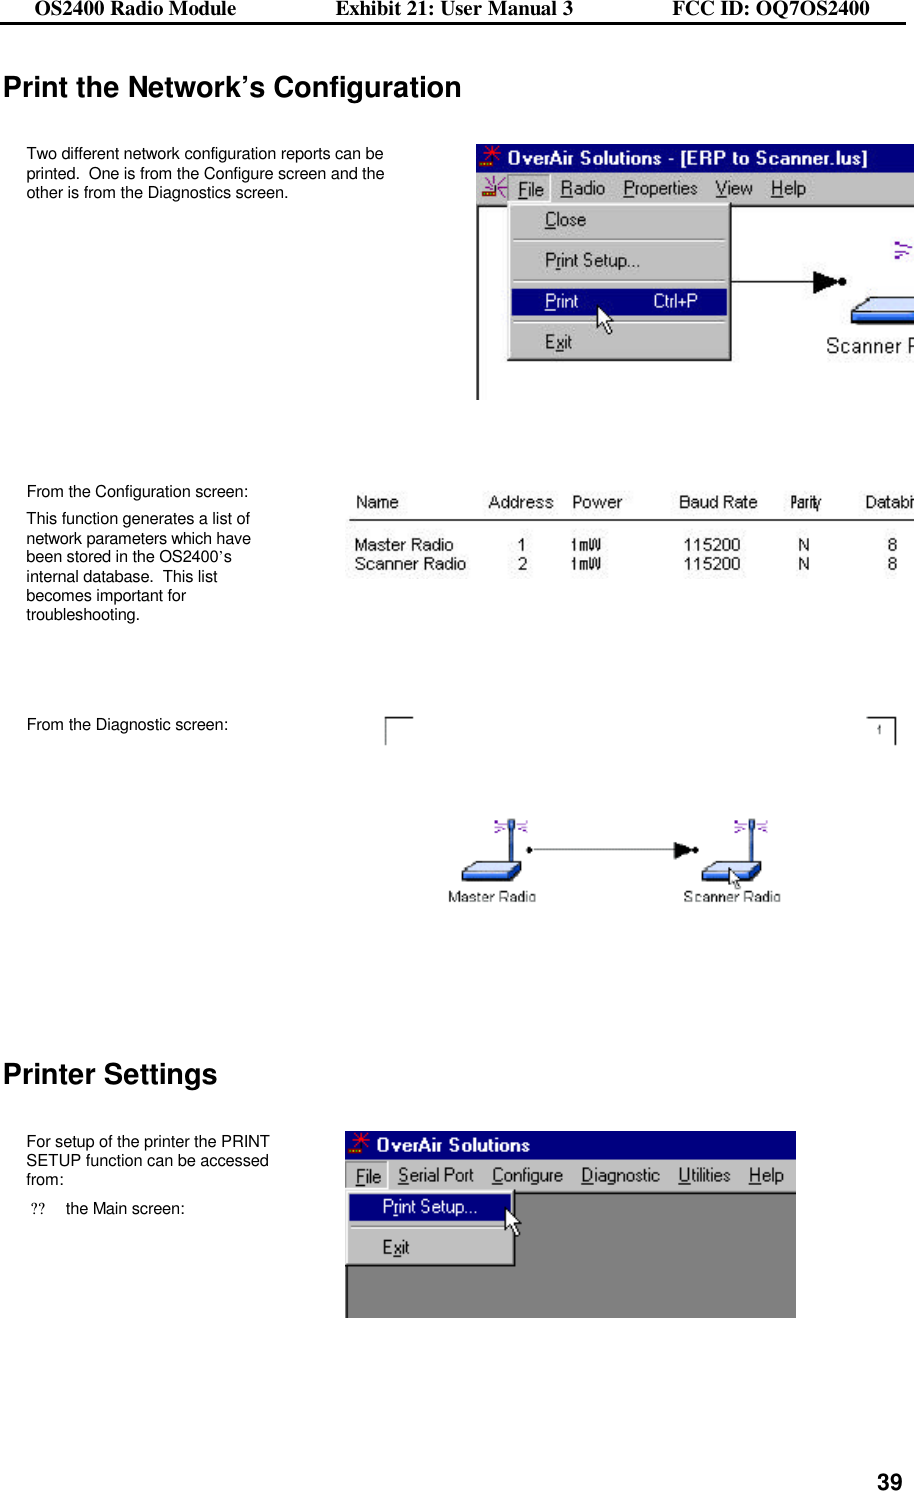
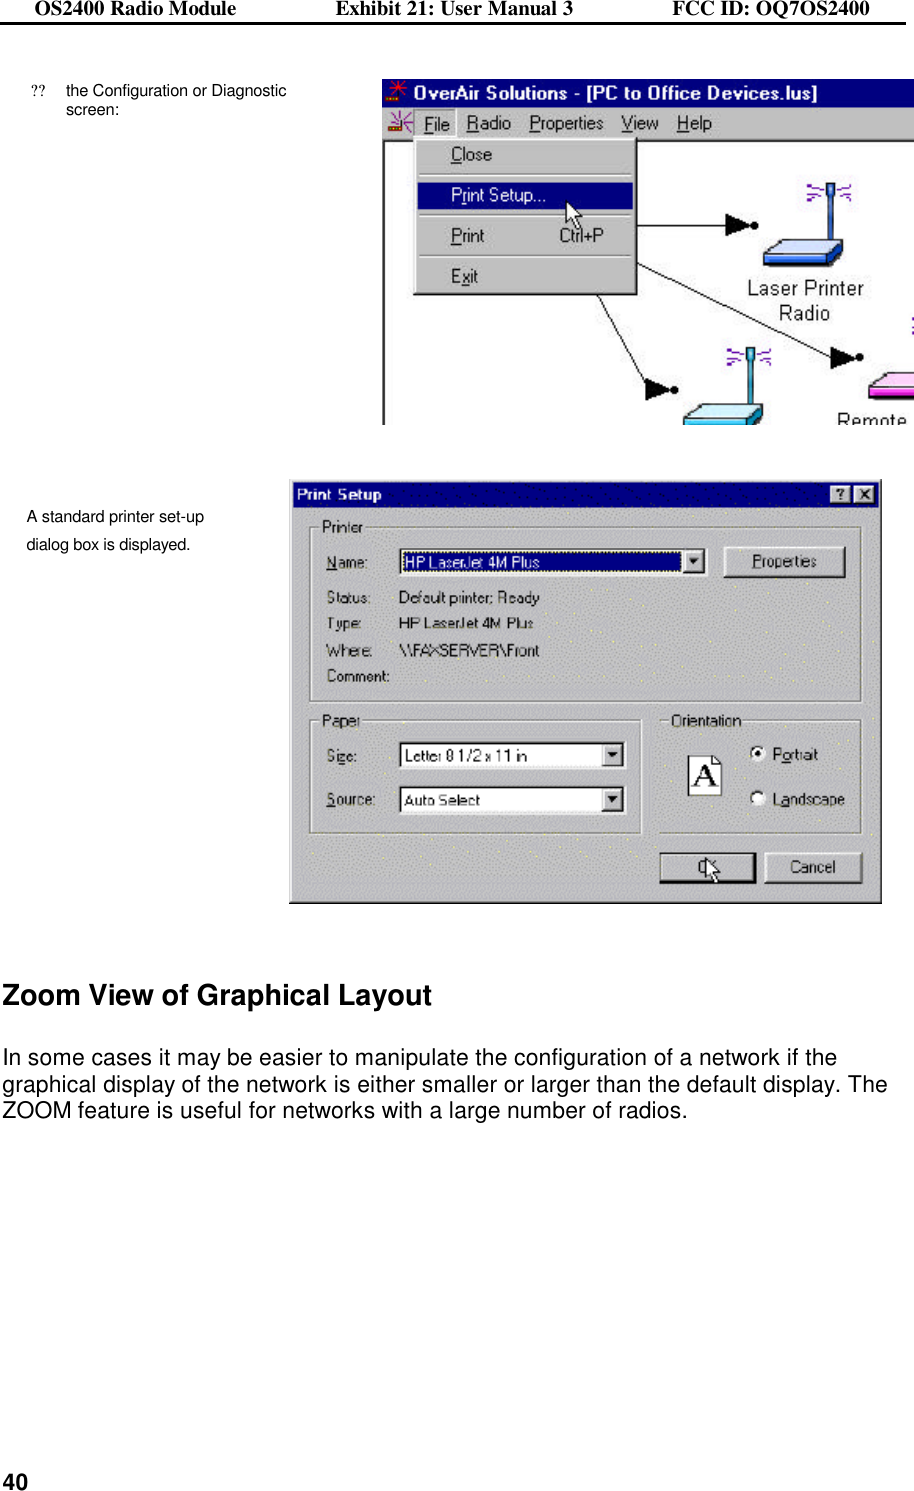
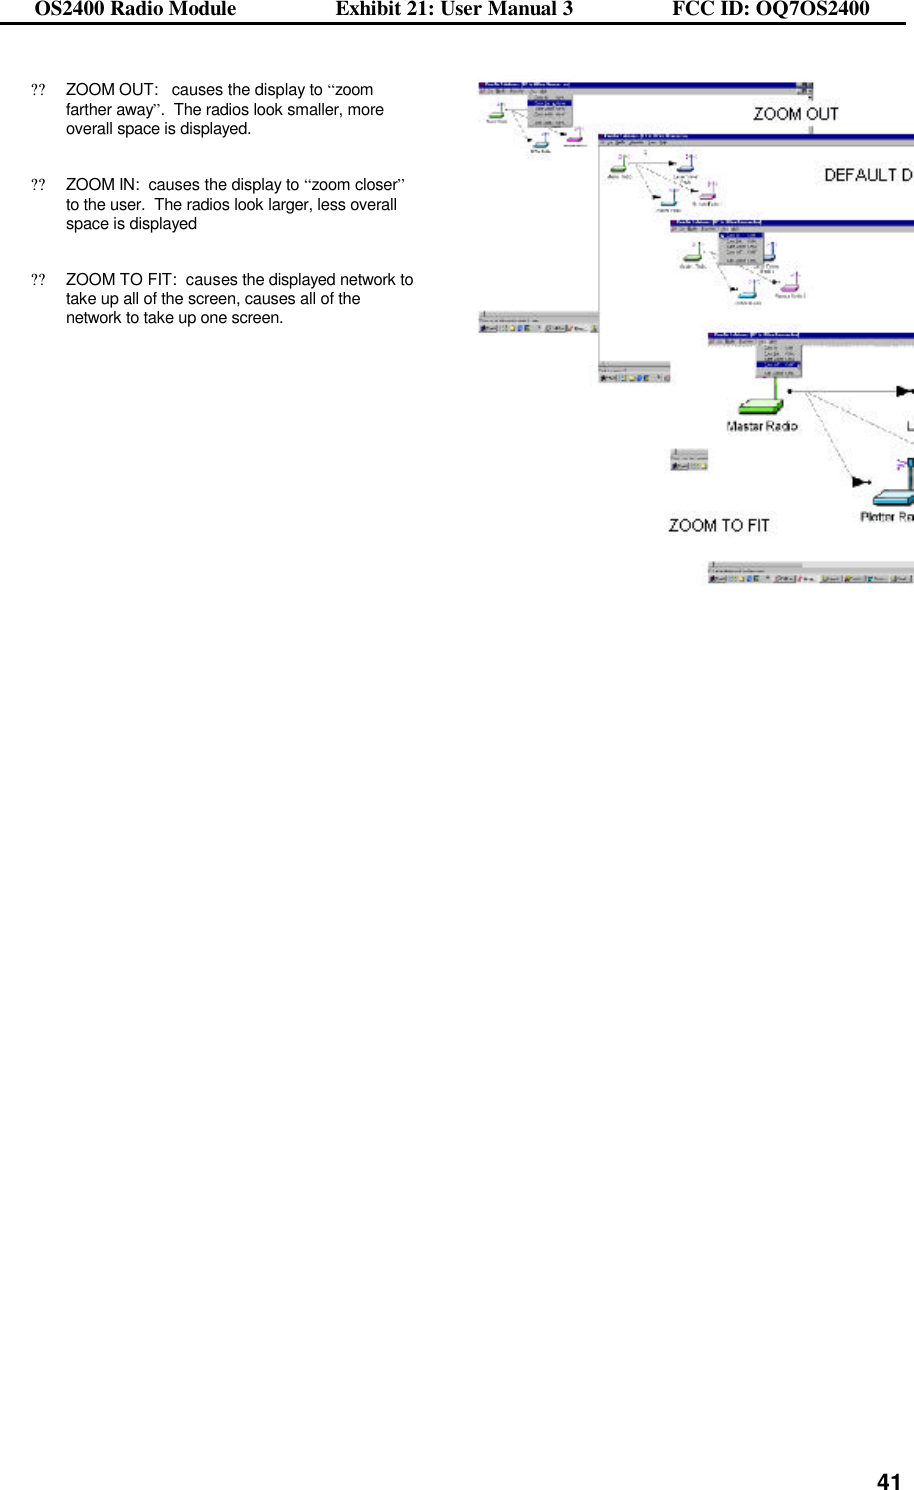
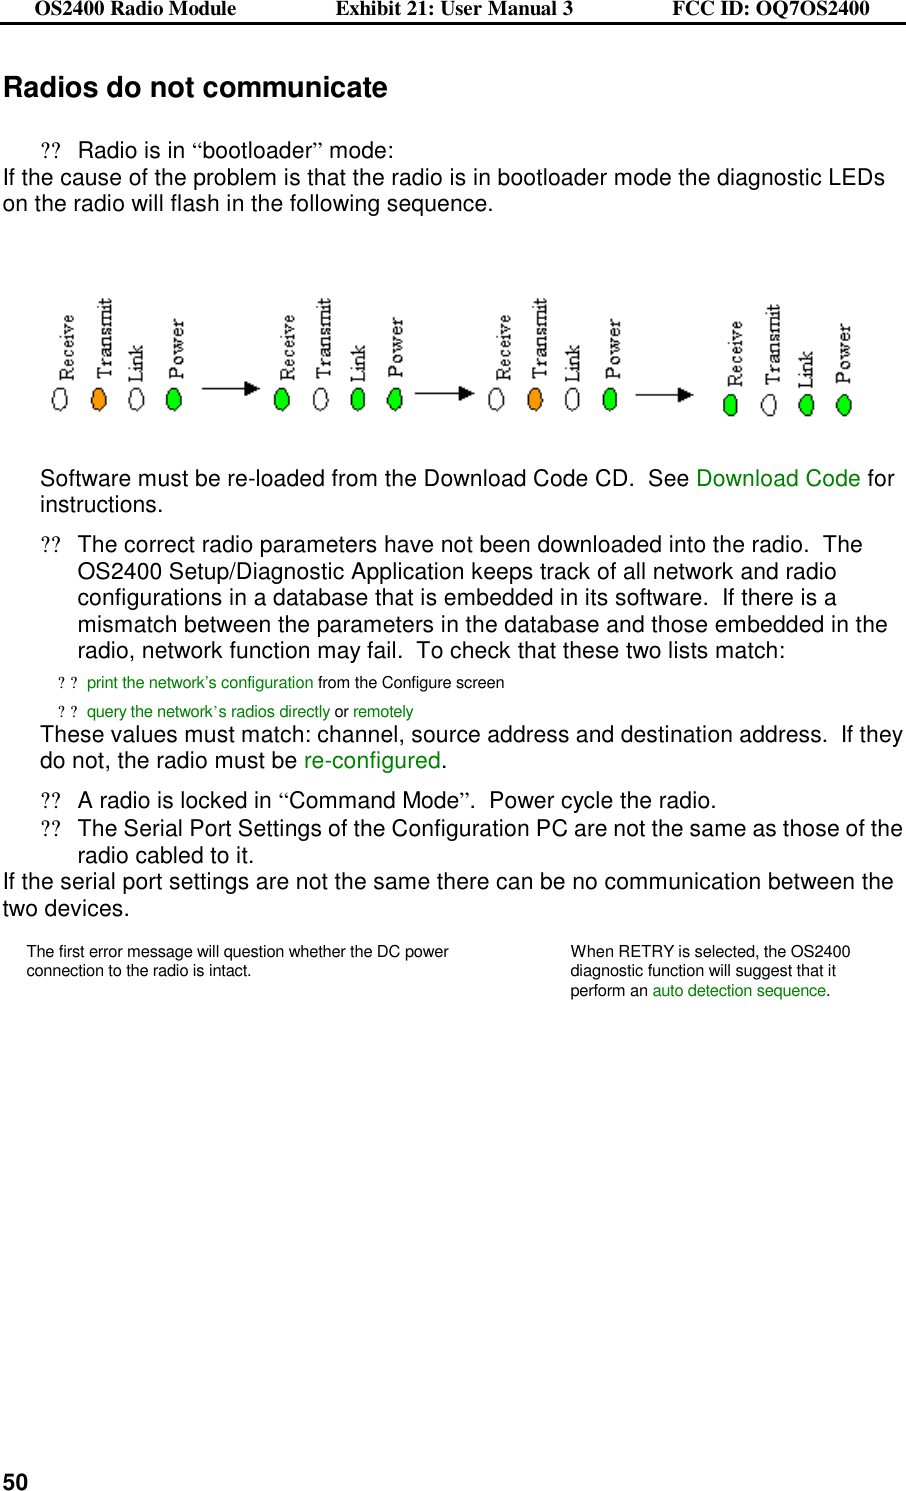
ProSoft Technology OS2400 Spread Spectrum Transmitter MODULE User Manual E21 Users Manual 3
ProSoft Technology, Inc Spread Spectrum Transmitter MODULE E21 Users Manual 3
Contents
- 1. Exhibit 12
- 2. E13 NewUserManual
- 3. E21 Users Manual 3
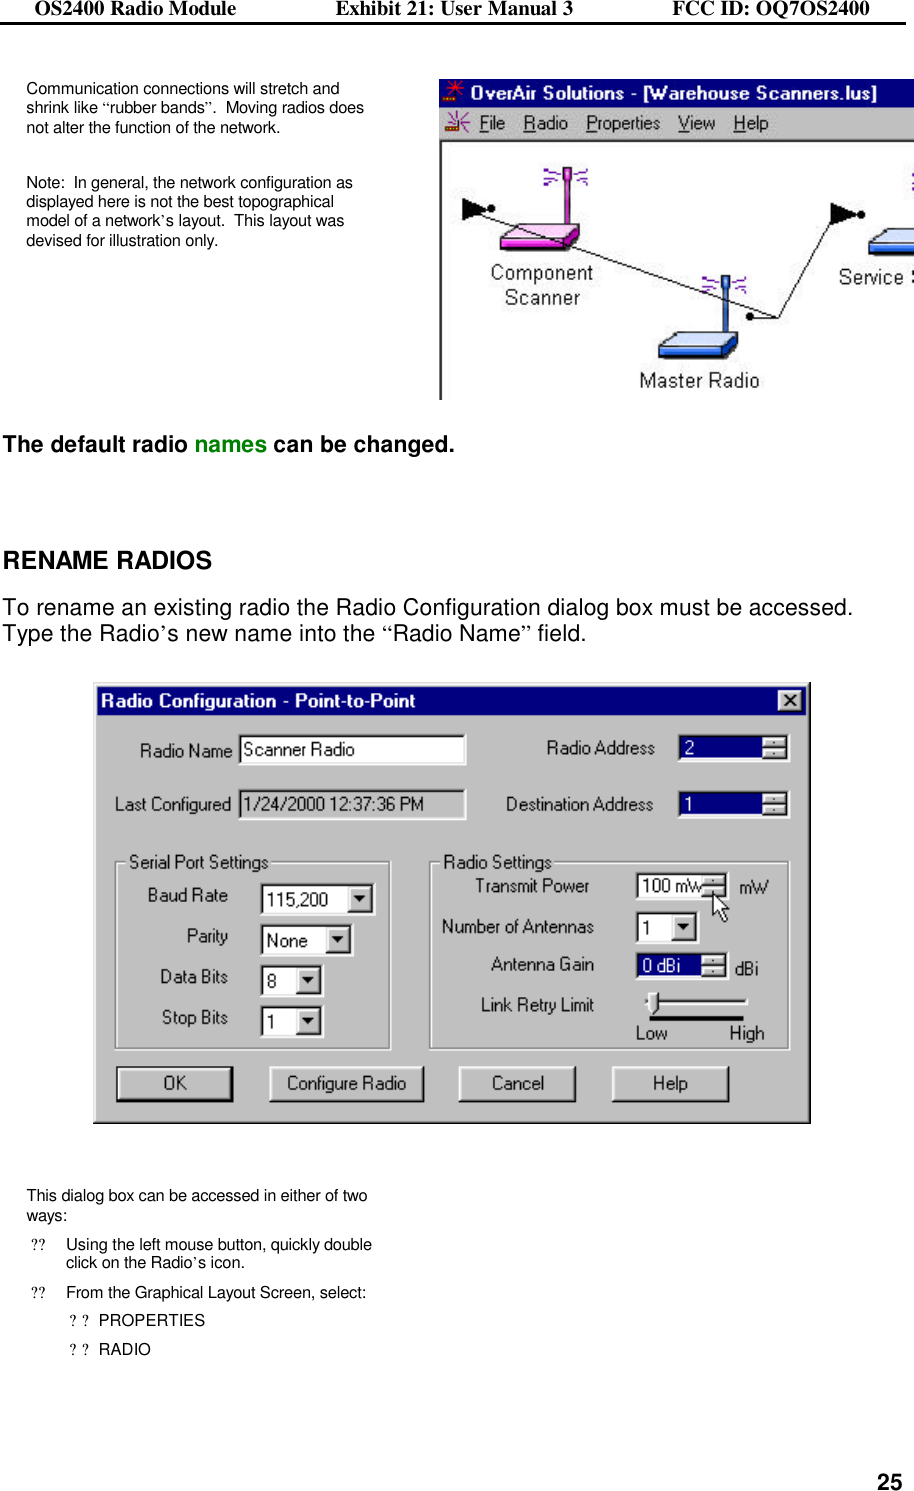
E21 Users Manual 3