Qingdao Unique Develop UNIQUE-P08 Unique Printer User Manual UN P
Qingdao Unique Products Develop Co.,Ltd Unique Printer UN P
UserManual.wiki
>
Qingdao Unique Develop
>
UNIQUE P08 User Manual
Users Manual
Navigation menu
Upload a User Manual
Namespaces
Wiki Guide
HTML
PDF
Info
Views
User Manual
Discussion / Help
Navigation
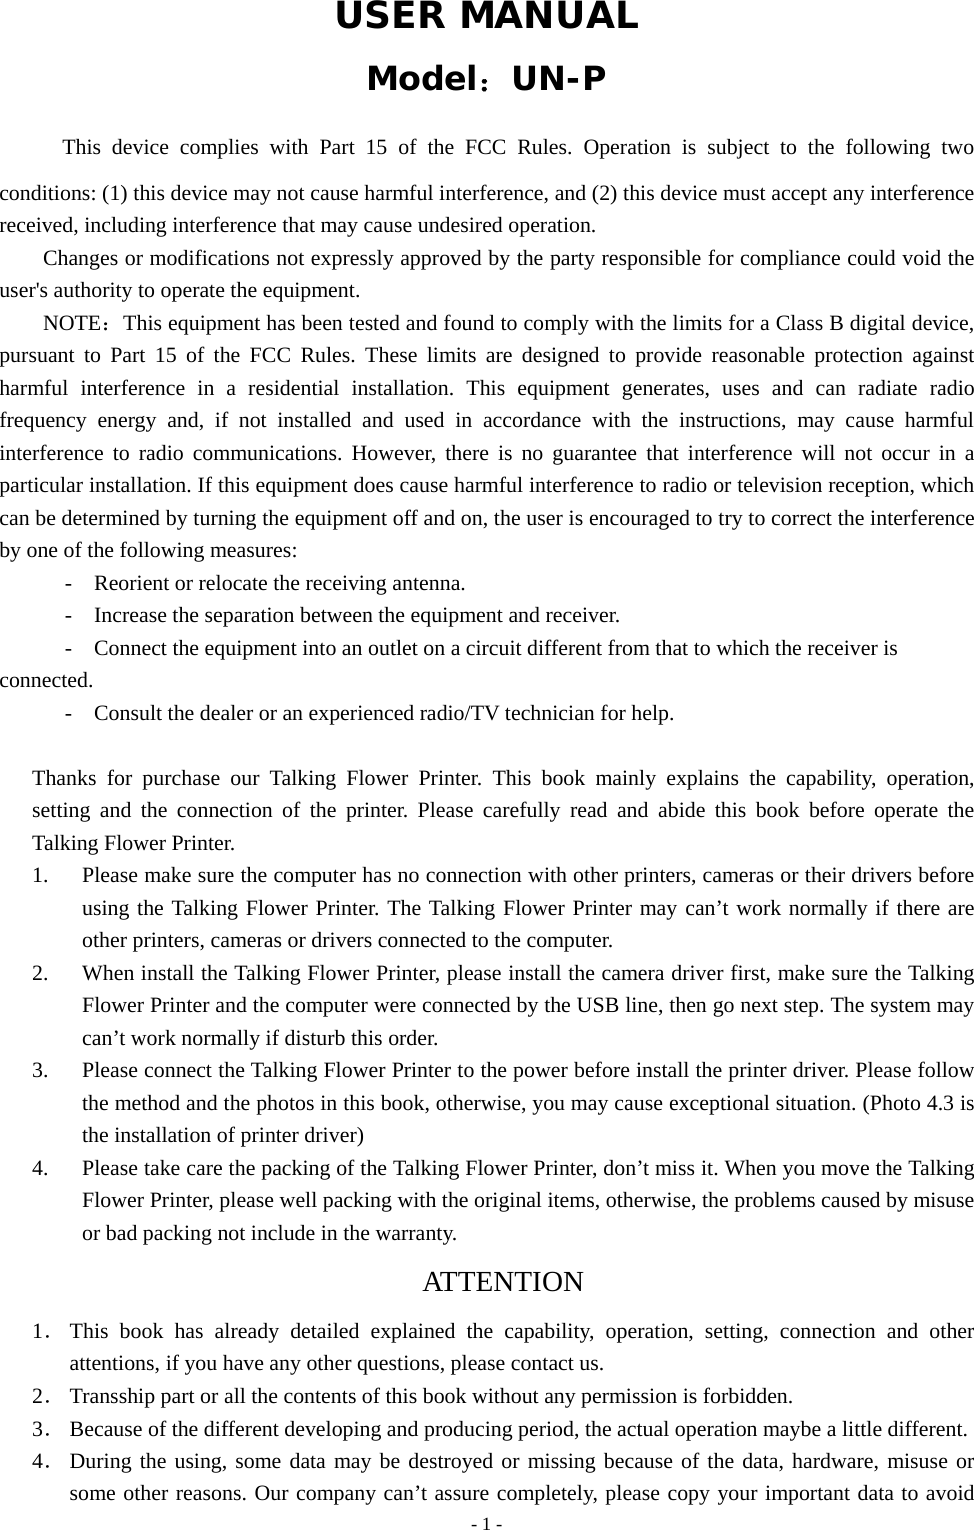

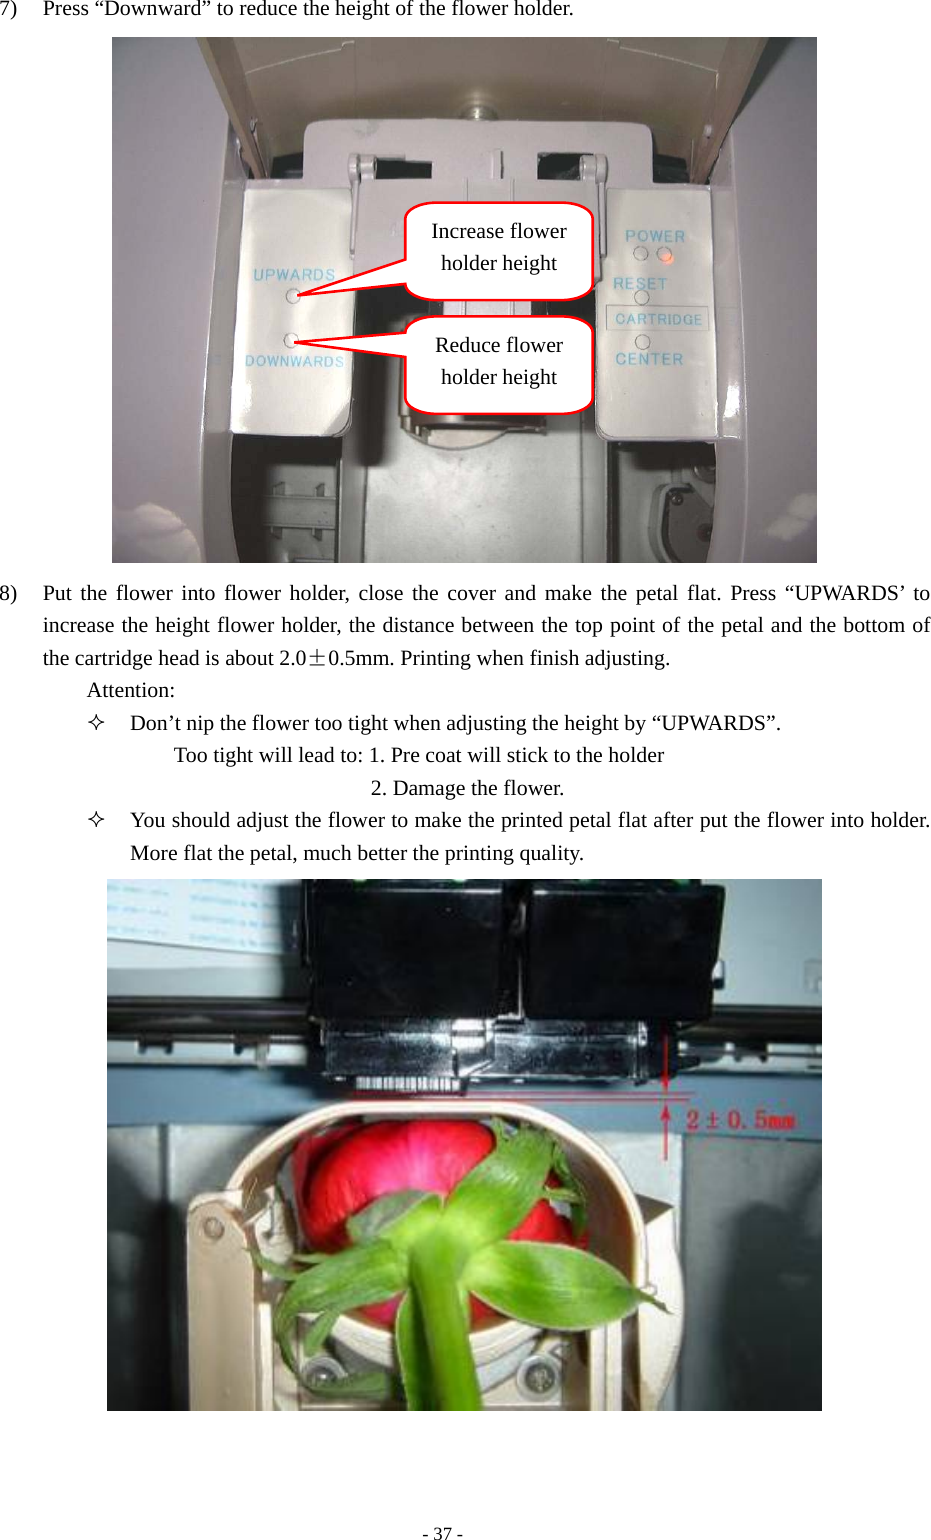
![- 10 - D. Install printer driver 1) Click “Printer driver” on the installation interface. 2) Click “install” 3) Click “Install” 4) Set the left ink cartridge as: “Color [26]”, “No, it is new”; set the right ink cartridge as: “No ink cartridge”. Then click “Next”. Left Click Left Click Left Click](https://usermanual.wiki/Qingdao-Unique-Develop/UNIQUE-P08/User-Guide-942776-Page-10.png)
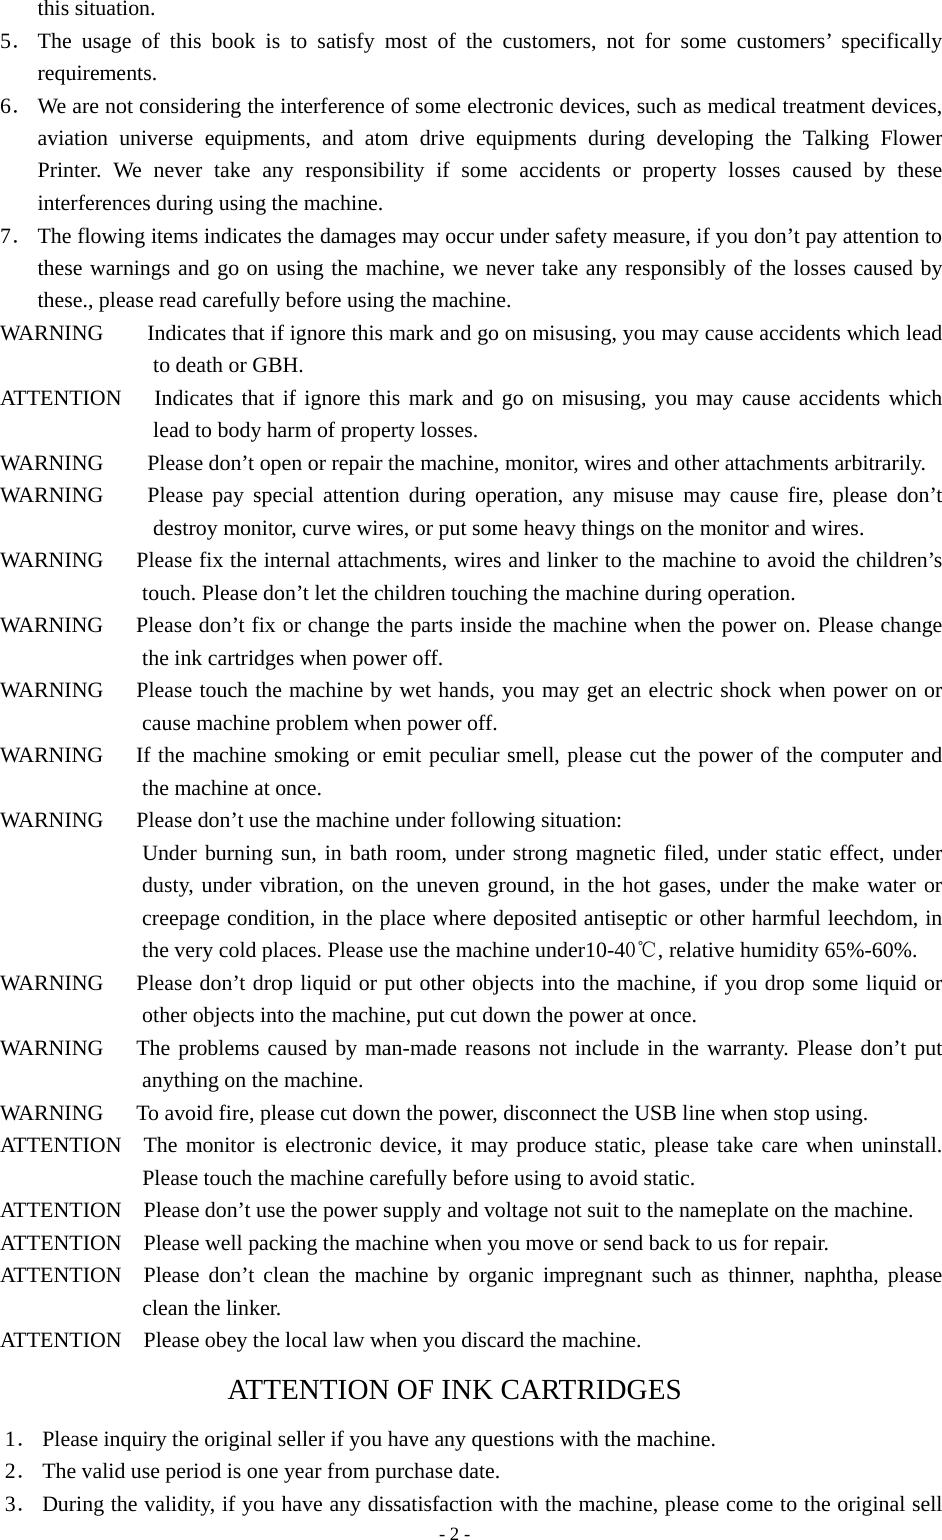
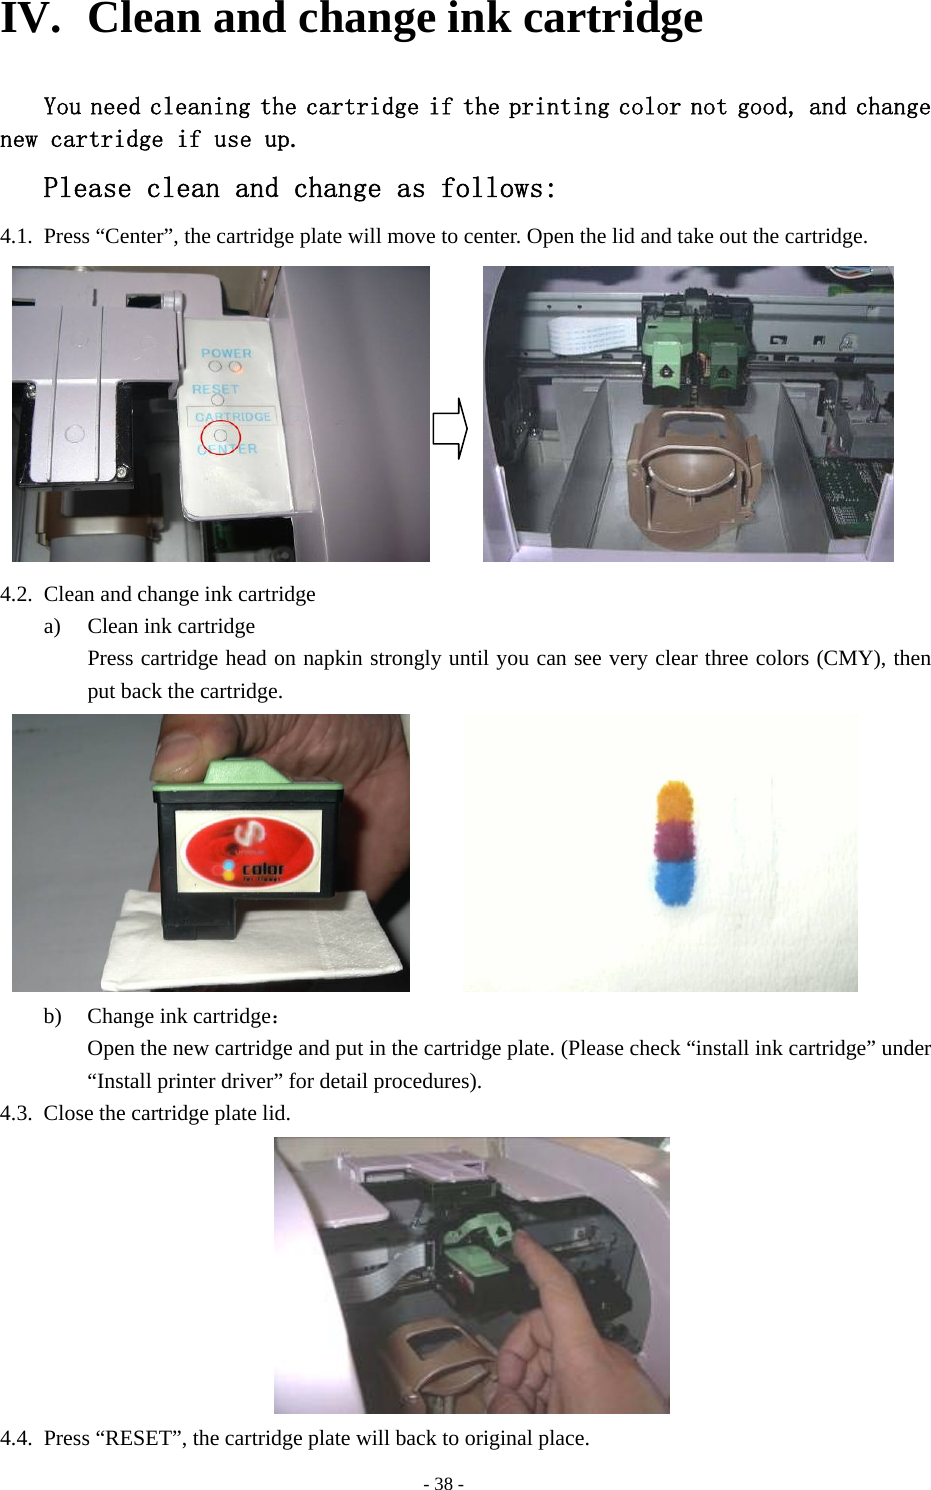
![- 11 - 5) Click “Exit” 2.4 Install Talking Flowers gallery 1) Click “Gallery” 2) Click “Install” Left Click 1. Set as “Color [26]”2. Set as “No, it is new”3. Set as “No ink cartridge” 4. Left Click Left Click](https://usermanual.wiki/Qingdao-Unique-Develop/UNIQUE-P08/User-Guide-942776-Page-11.png)

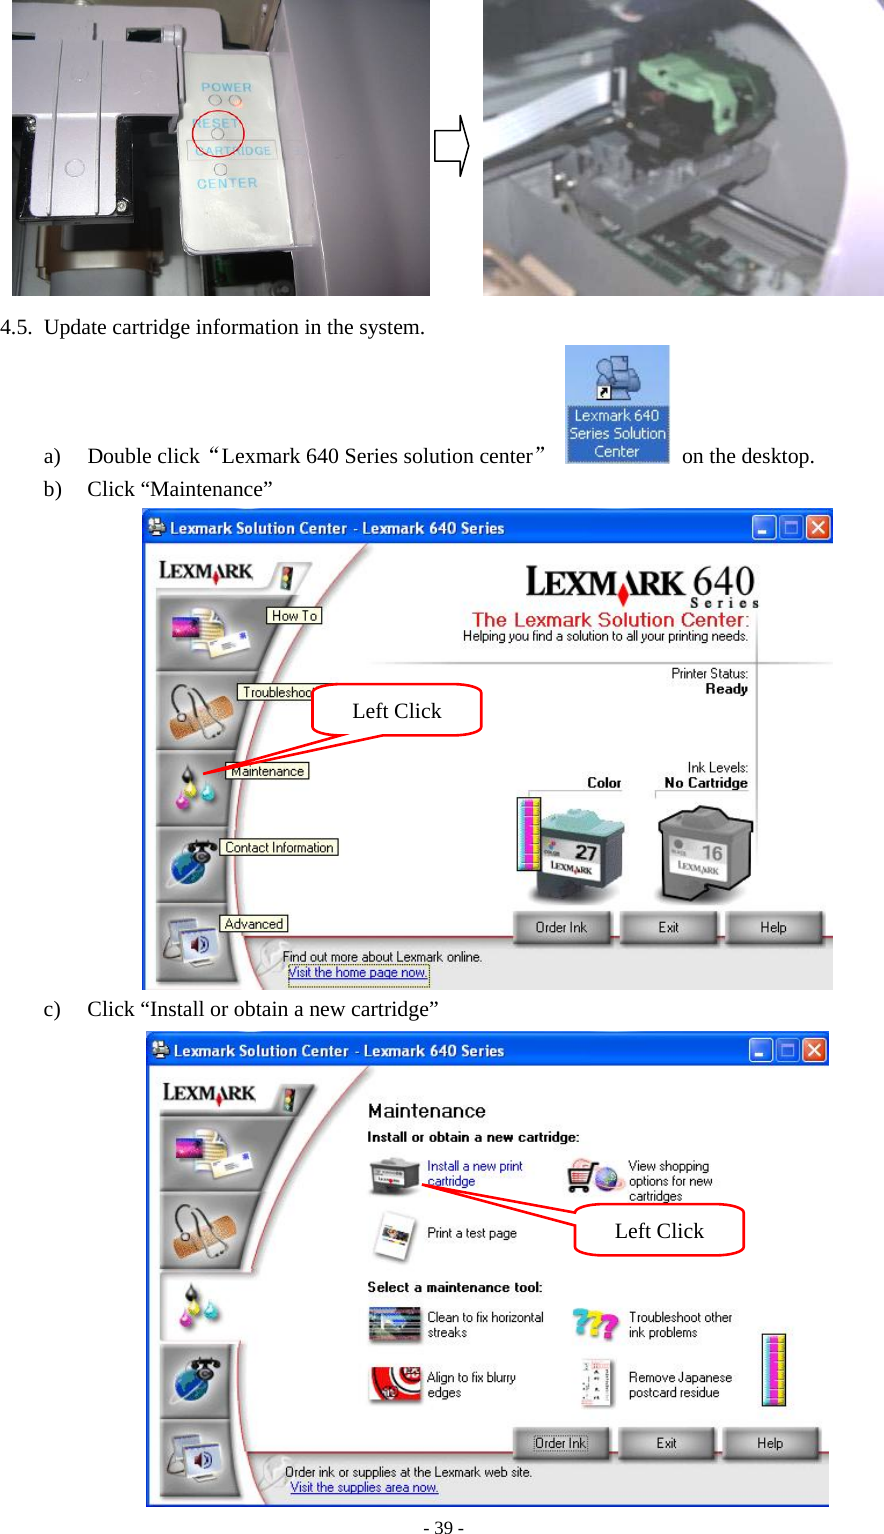
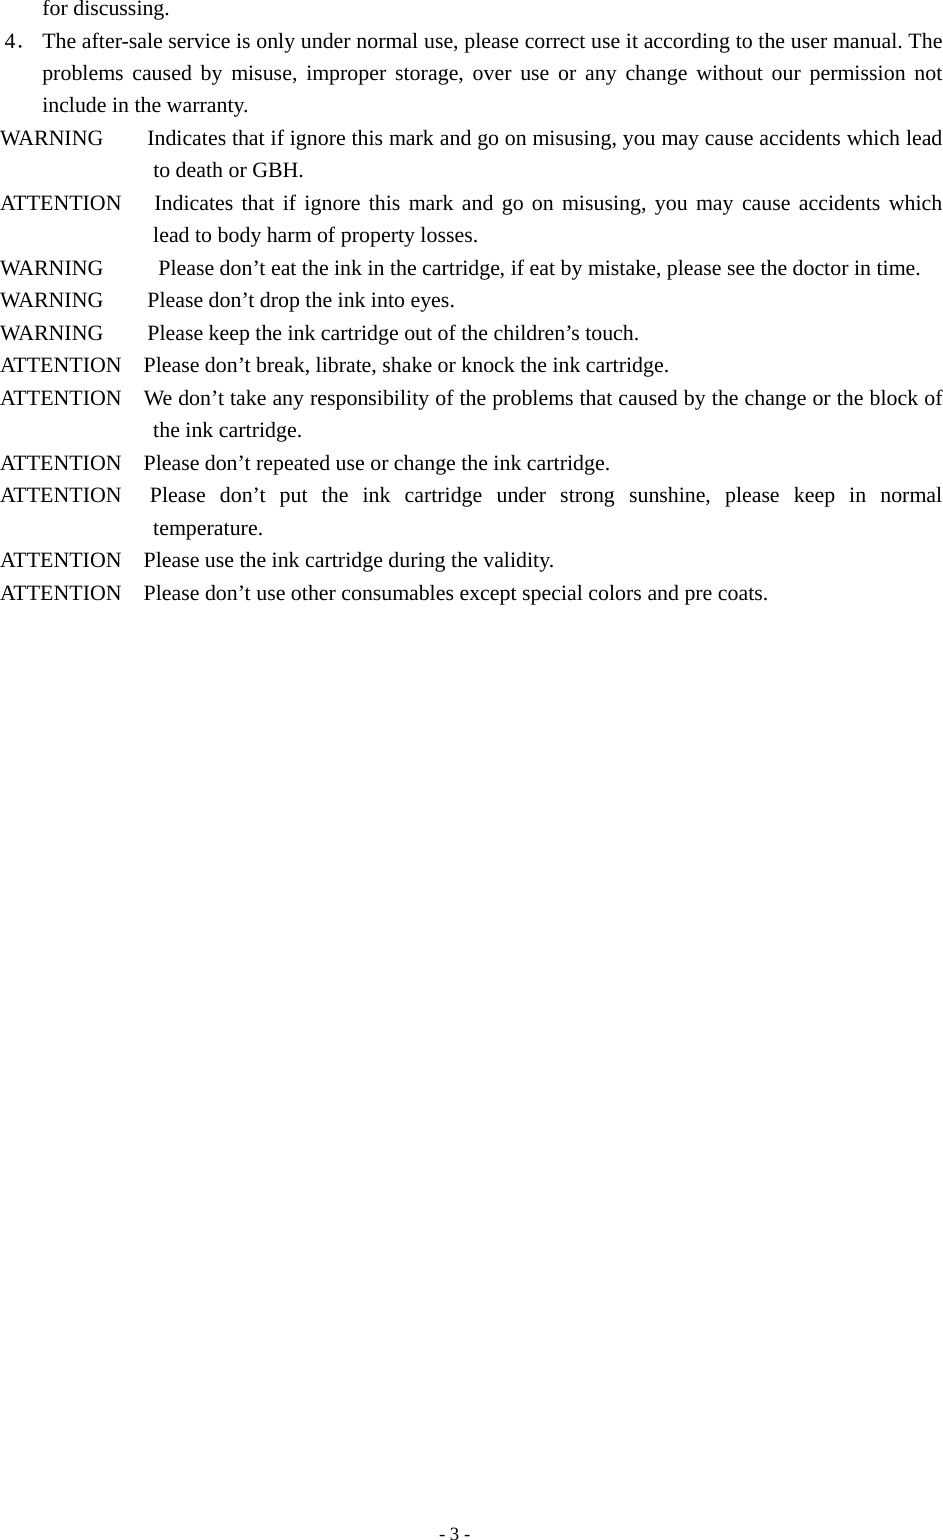
![- 40 - d) Click “Next” to go on. e) Choose the type of the installed cartridge. f) Set the left cartridge as “Color [26]”, “No, it is new”, set the right cartridge as “No cartridge”, then click “Next”. g) Click “Exit”. 1. Set as “Color [26]” 2. Set as “No, it is new” 3. Set as “No cartridge” 4. Left Click Left Click Left Click](https://usermanual.wiki/Qingdao-Unique-Develop/UNIQUE-P08/User-Guide-942776-Page-40.png)