Quanta Computer APOLLO PDA phone with GPRS EDGE WiFi and BT User Manual O2 Apollo User s manual Eng
Quanta Computer Inc PDA phone with GPRS EDGE WiFi and BT O2 Apollo User s manual Eng
UserManual.wiki
>
Quanta Computer
>
APOLLO User Manual
Manual
Navigation menu
Upload a User Manual
Namespaces
Wiki Guide
HTML
PDF
Info
Views
User Manual
Discussion / Help
Navigation


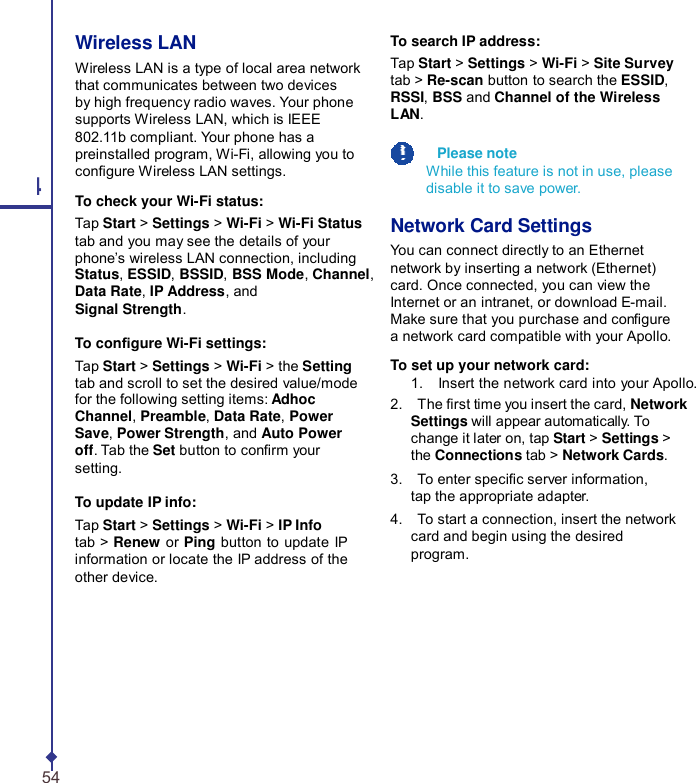
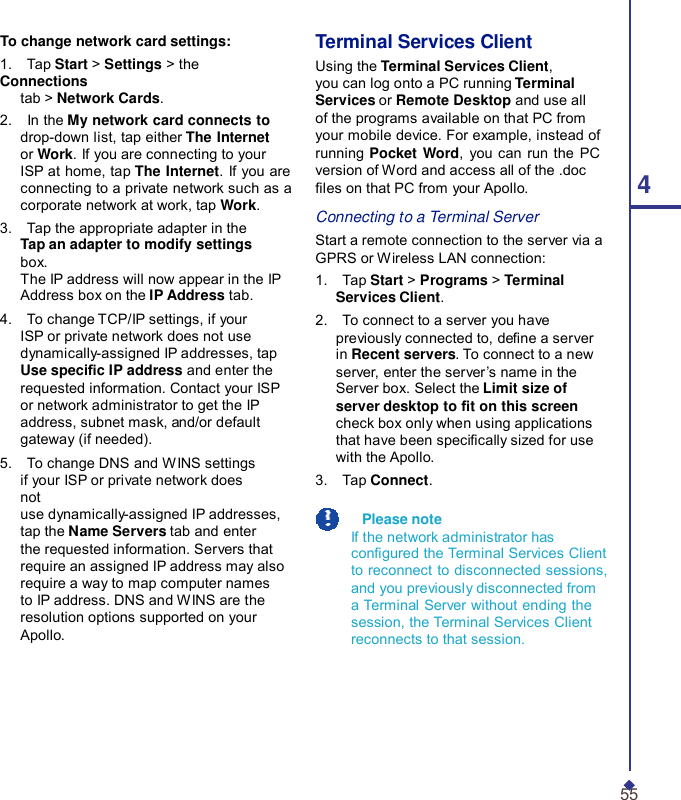
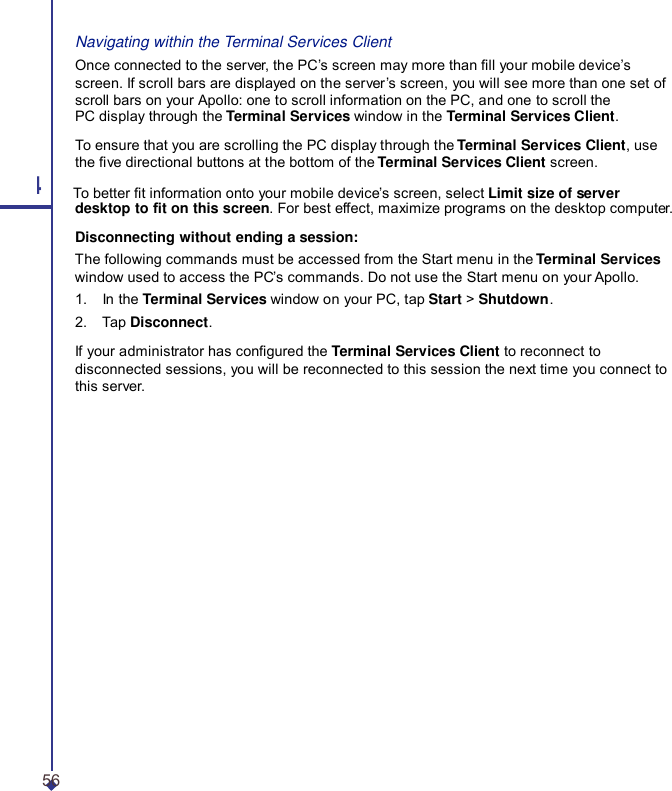
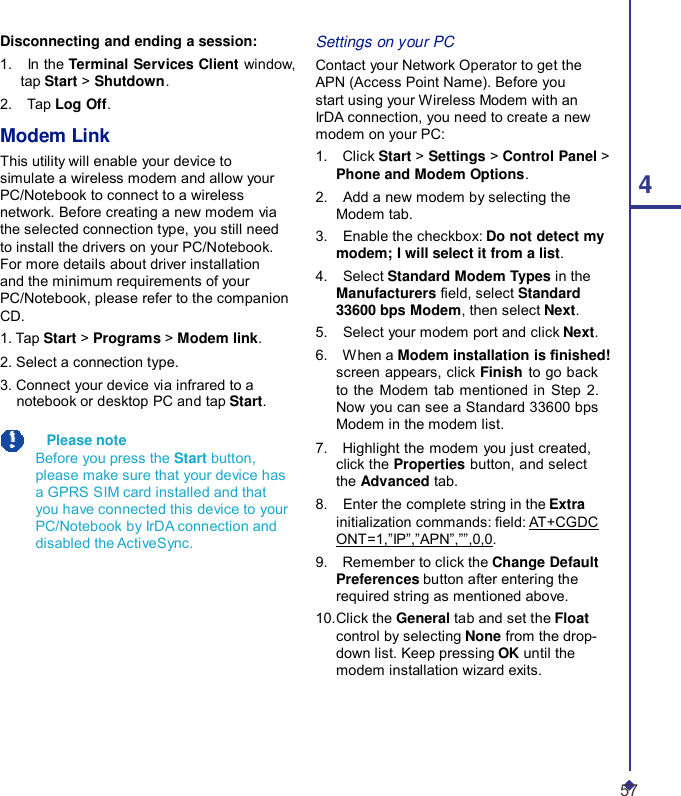
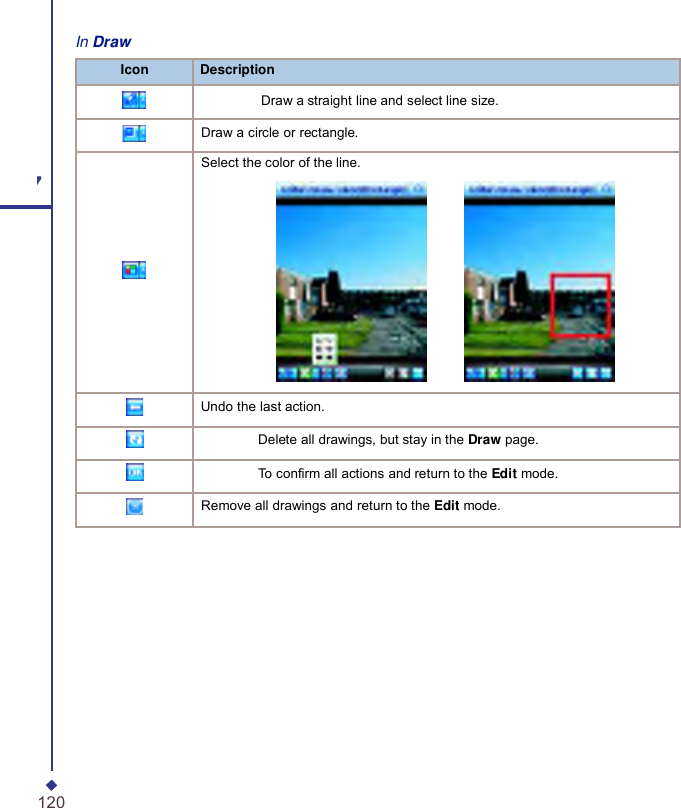
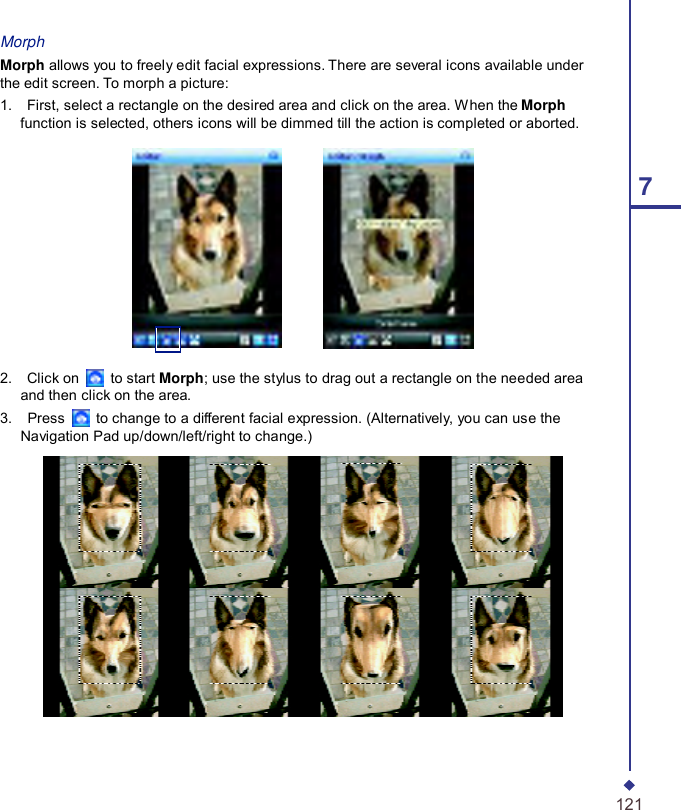
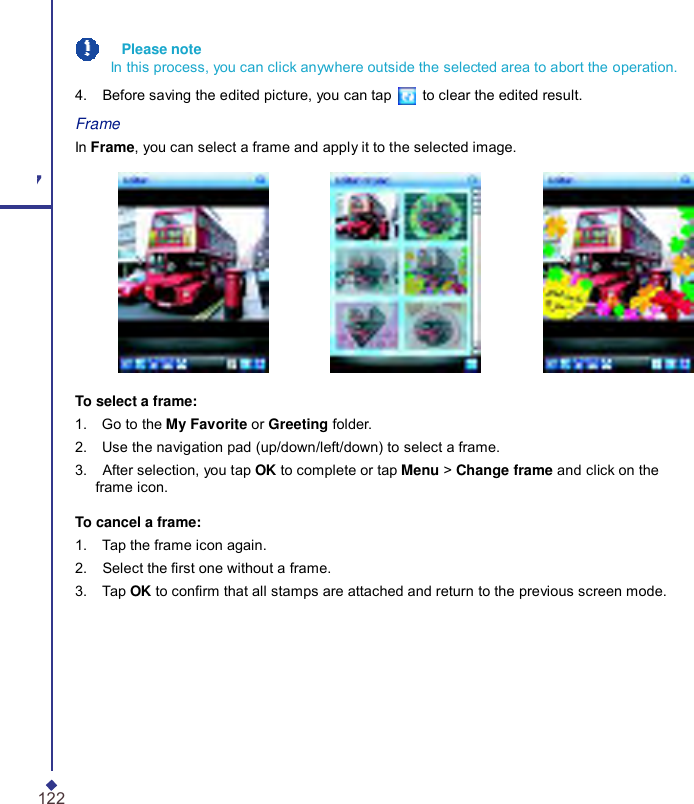
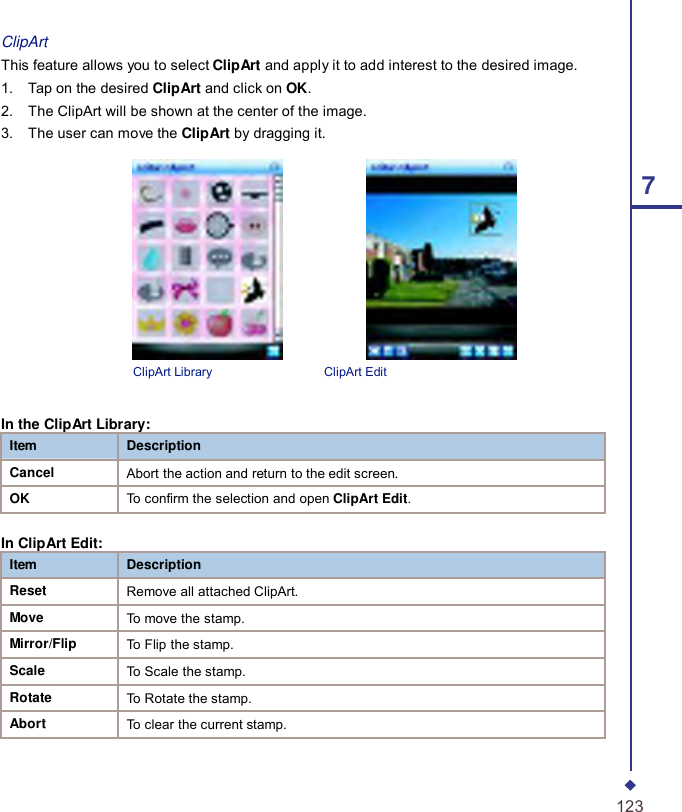
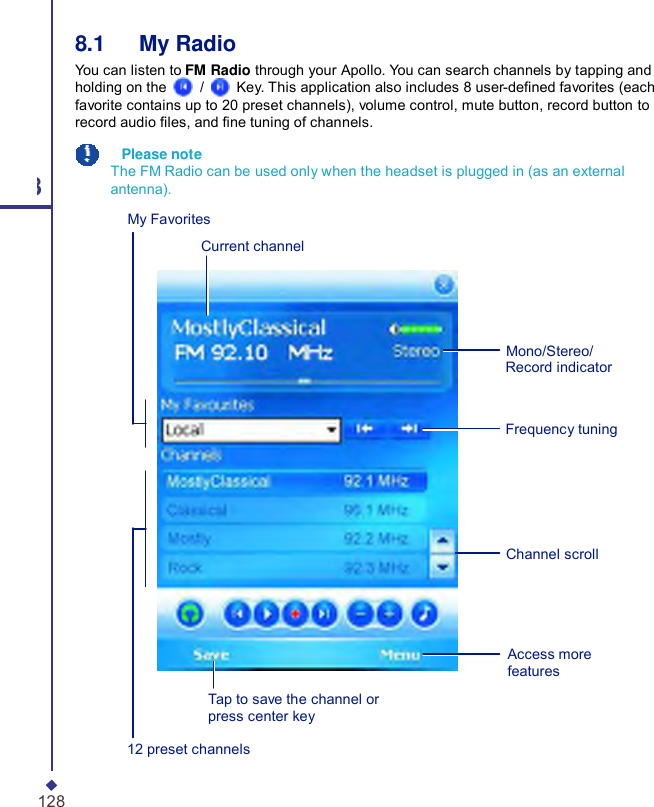
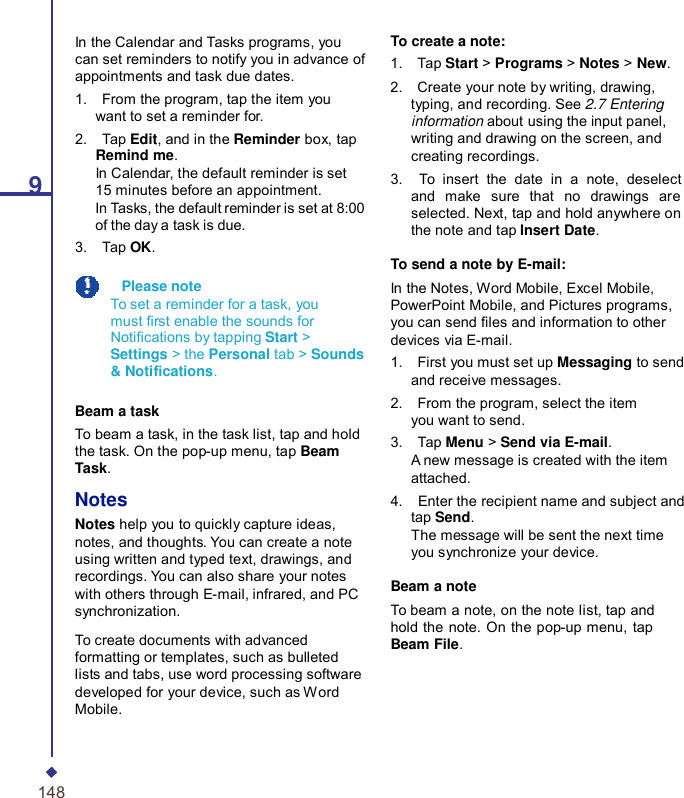
![1. Tap Start > Settings > Connections tab. 2. Tap Bluetooth > Devices tab > New Partnership. Your device searches for other Bluetooth devices and displays them in the list. 3. Tap the name of the other device in the list and then Next. 4. In PIN, enter a PIN of 1 to 16 characters and tap Next. 5. Enter the same PIN on the other device. 6. If necessary, in Name, edit the name of the other device. 7. Tap Finish. Please note Make sure that the two devices are within 10 meters of one another and that the Bluetooth is in discoverable mode on both devices. To accept a Bond: 1. Make sure that the Bluetooth is turned on and in discoverable mode. 2. When prompted to bond with the other device, tap OK. 3. In PIN, enter a PIN of between 1 and 16 characters, and tap Next. You must enter the same PIN that was entered on the device requesting the bond. 4. If you want, in Name, edit the name of the device requesting the bond. 5. Tap Finish. The bond is created. You can now exchange information with the other device. To rename a Bond: 1. Tap Start > Settings > Connections tab. 2. Tap Bluetooth > Devices tab. 3. Tap the bond to rename. 4. In Name, enter a new name for the bond. 5. Tap Finish. To delete a Bond: 4 1. Tap Start > Settings > Connections tab. 2. Tap Bluetooth > Devices tab. 3. Tap and hold the bond to delete. 4. Tap Delete. Beaming Information with Bluetooth: 1. Tap and hold an item to beam, such as an appointment in Calendar, a task in Tasks, a contact card in Contacts, or a le in File Manager. 2. Tap Beam [type of item]. 3. Tap the device that you want to send the beam. The item is beamed to the device you selected. If the device that you want to beam to does not appear on the list, make sure that it is turned on, in discoverable mode, and within 10 meters of your device. Also, make sure that your Bluetooth is turned on. 49](https://usermanual.wiki/Quanta-Computer/APOLLO/User-Guide-731240-Page-49.png)