Quanta Computer QF3A Media AIO PC User Manual
Quanta Computer Inc Media AIO PC
UserManual.wiki
>
Quanta Computer
>
QF3A User Manual
User Manual
Navigation menu
Upload a User Manual
Namespaces
Wiki Guide
HTML
PDF
Info
Views
User Manual
Discussion / Help
Navigation


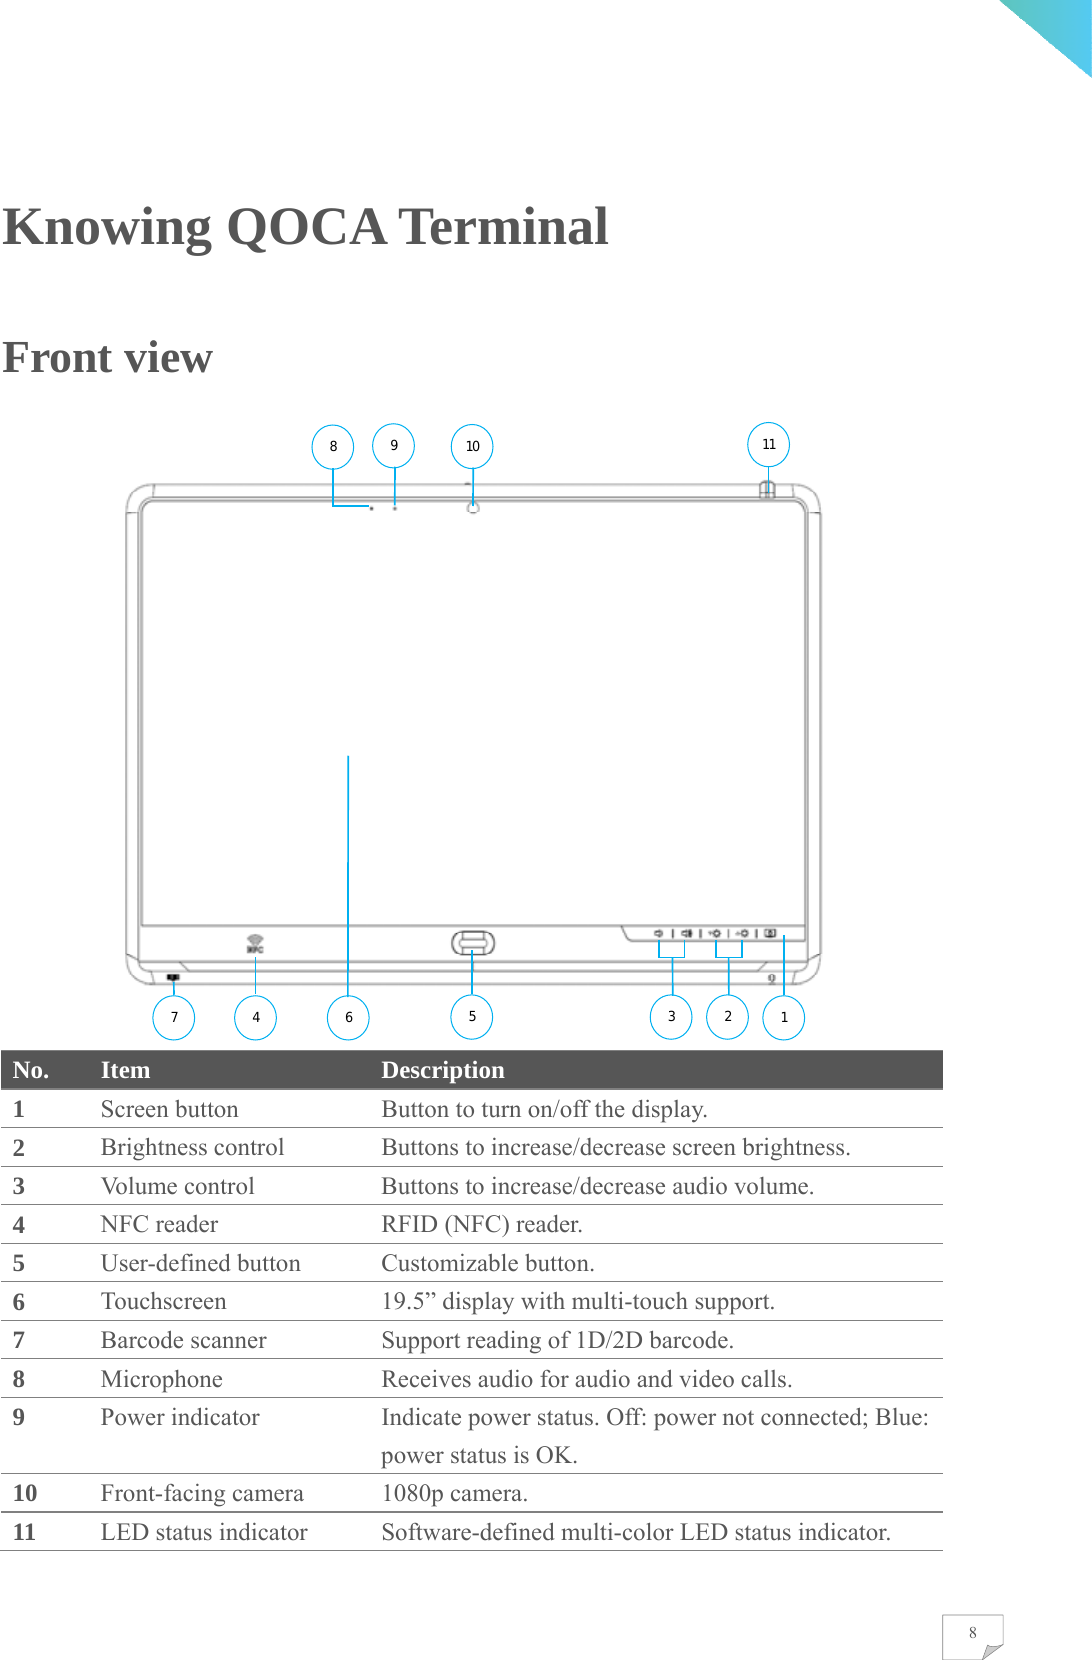
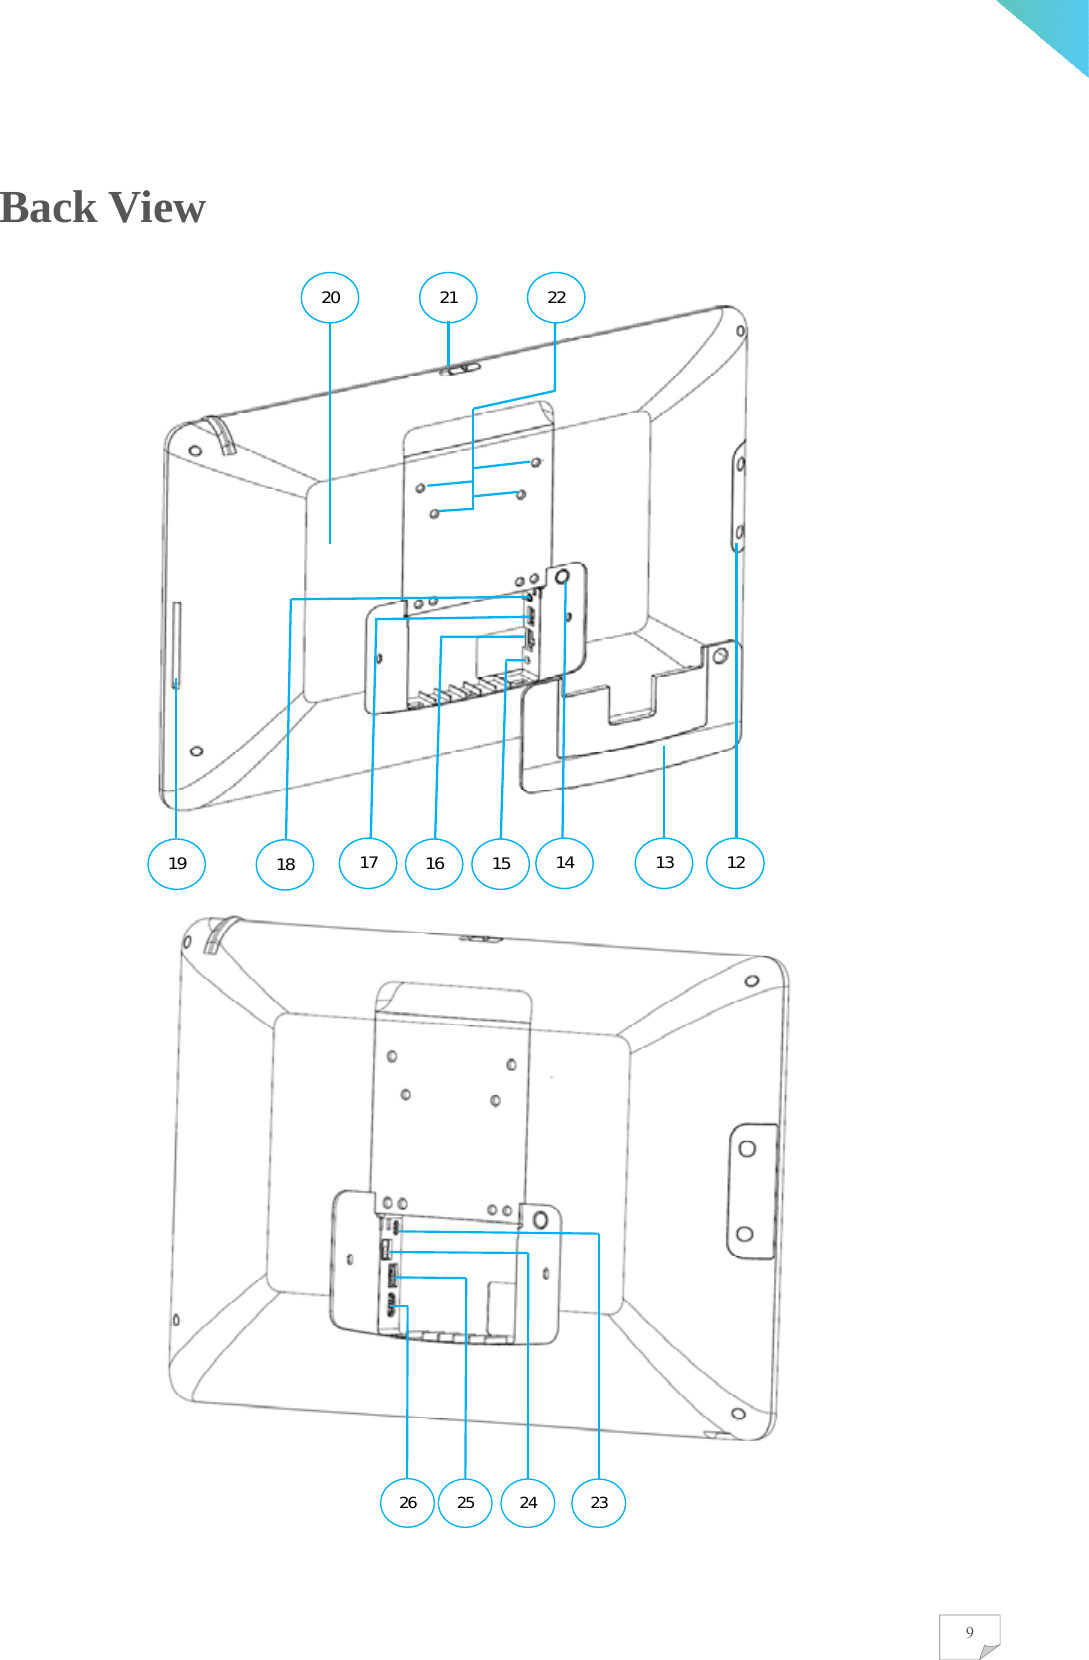

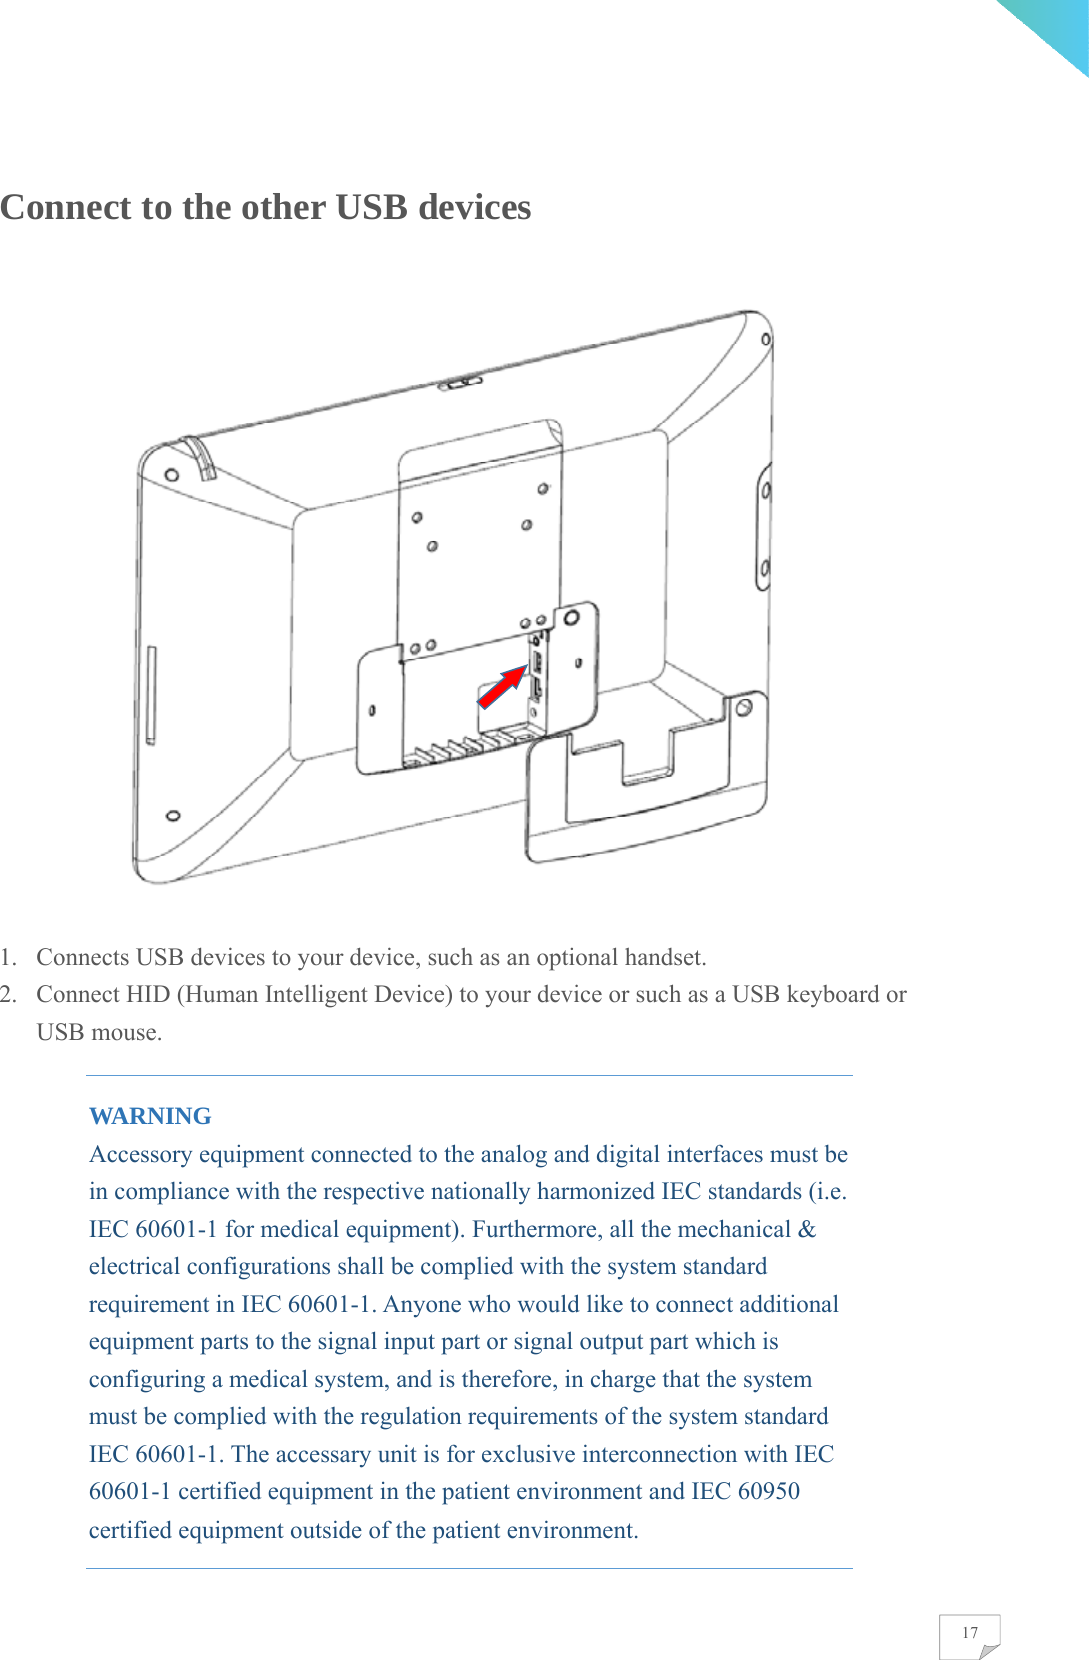
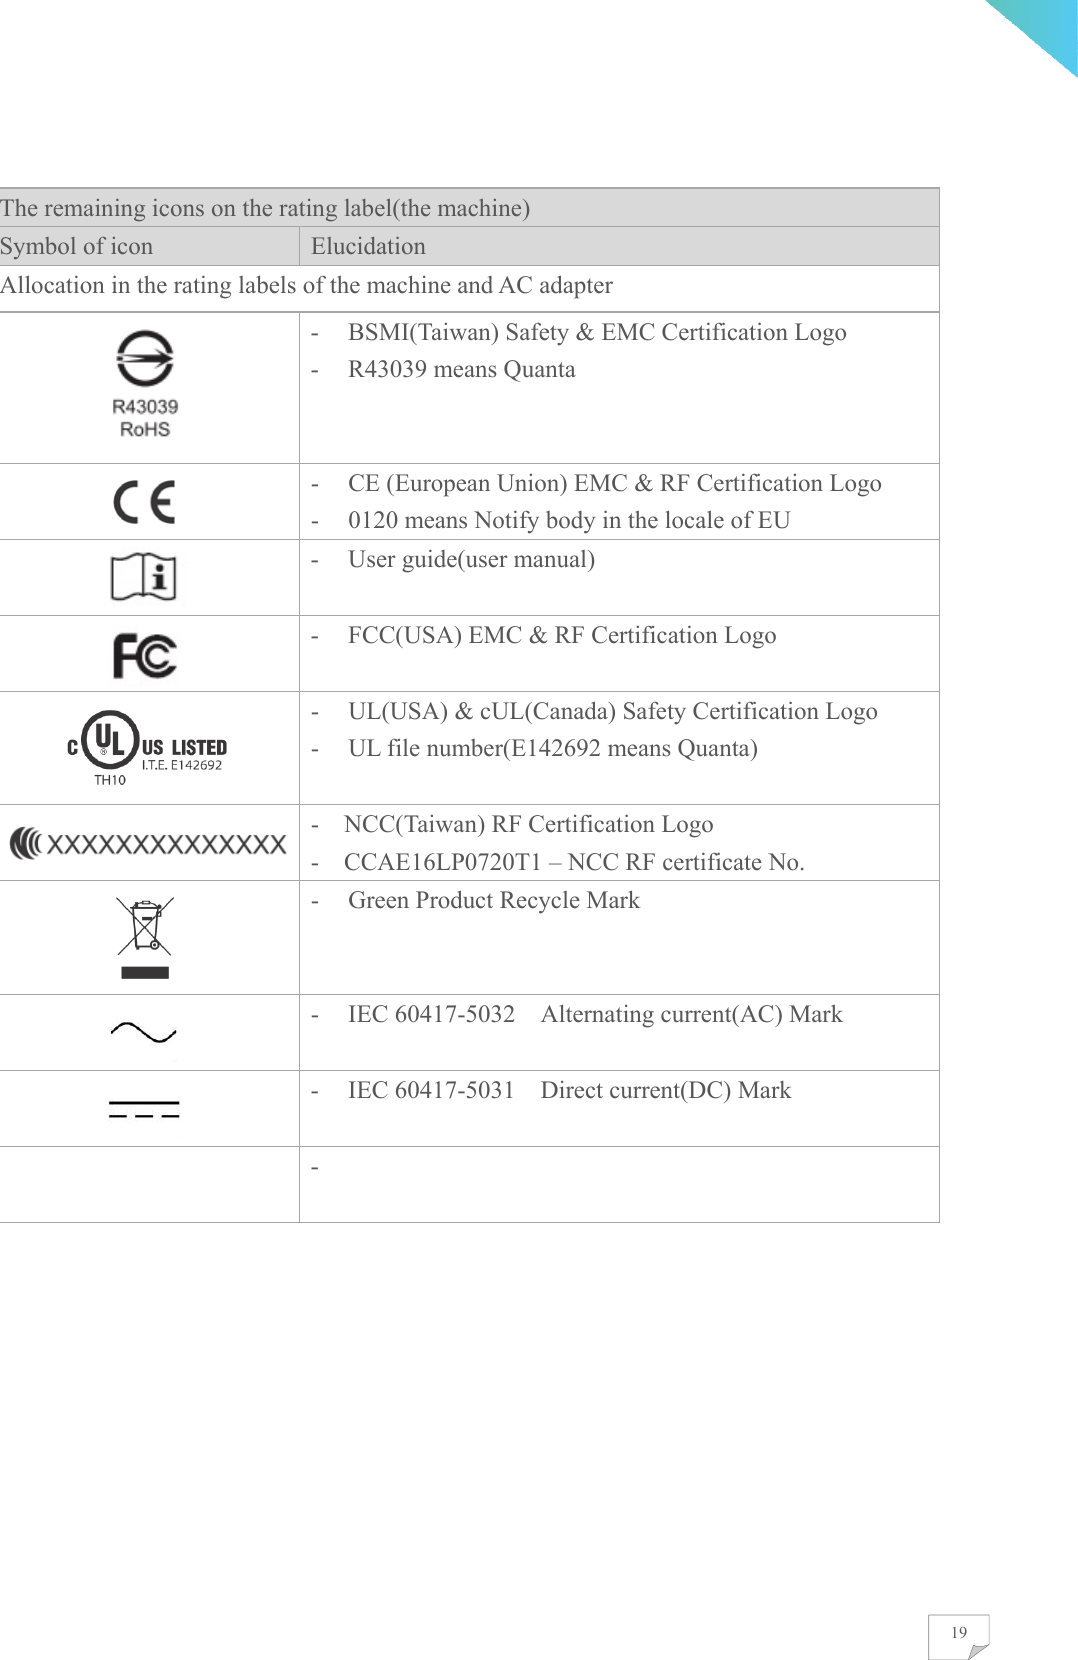
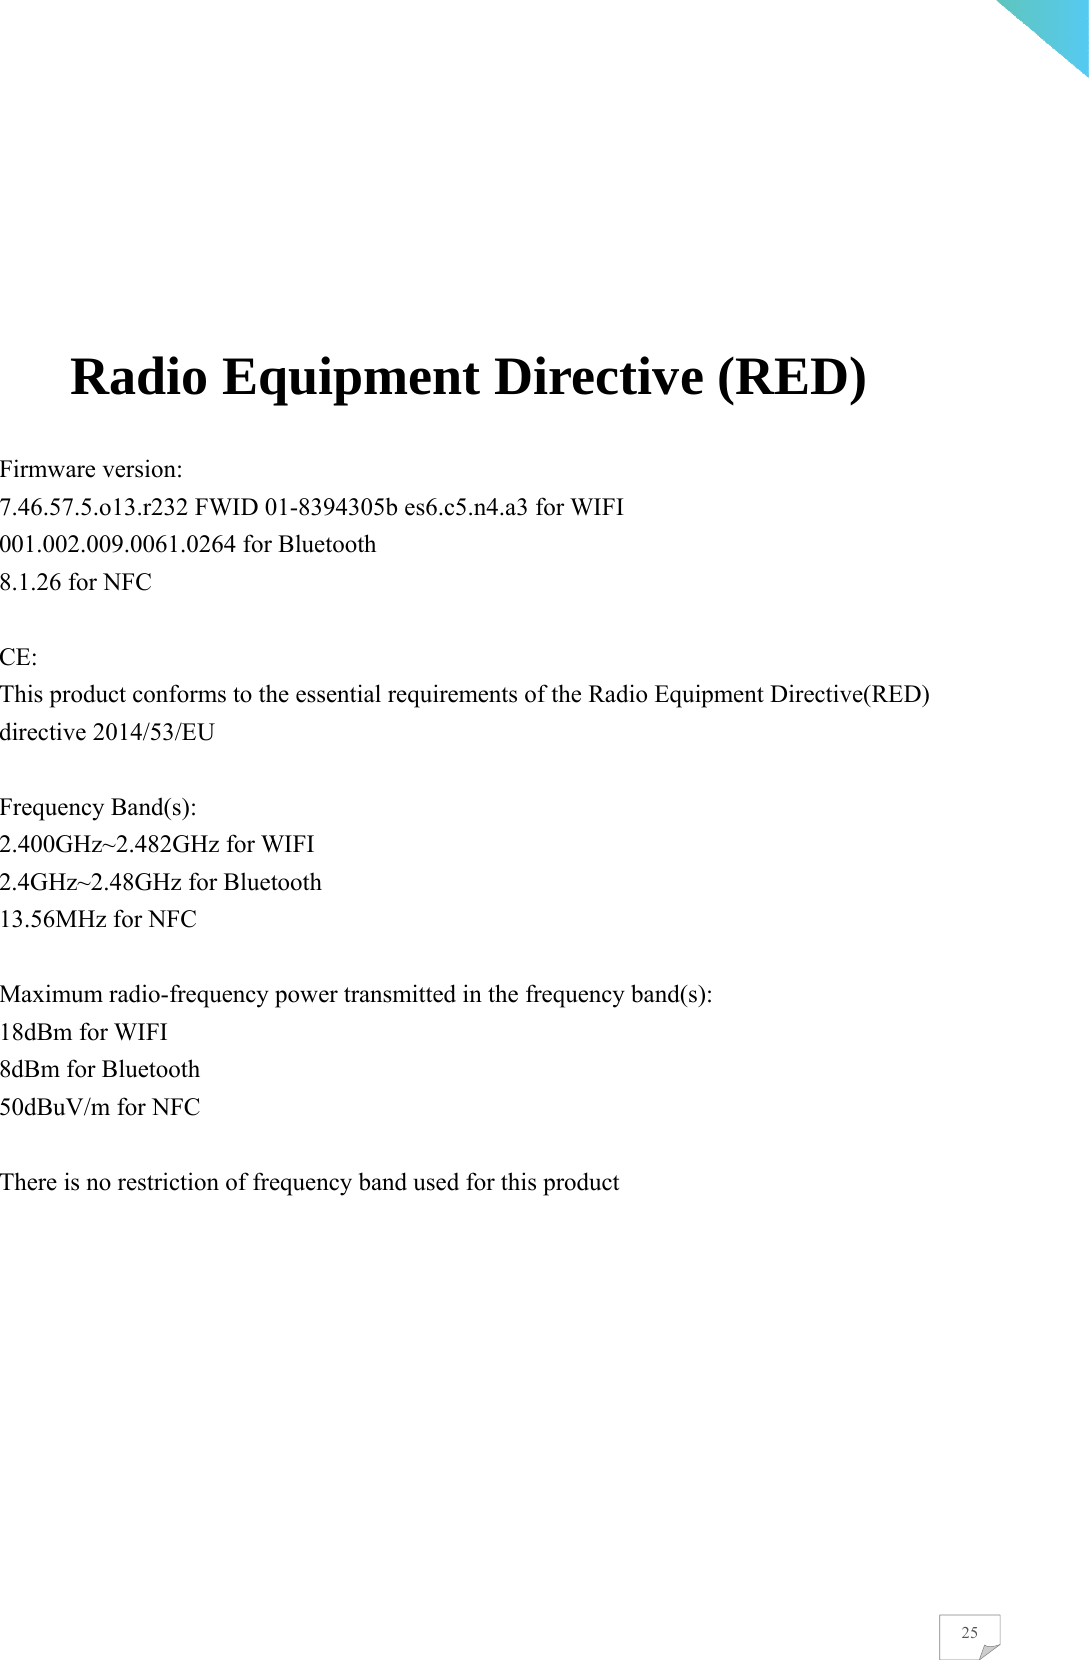
![18Elucidations of the Icons Displayed Printing icons on the front bezel & the back cover Symbol of icon Elucidation Allocation in the front bezel - Sleep(Suspend) touch button - Brightness up touch button - Brightness down touch button - Volume up touch button - Volume down touch button - NFC sensing reader - User-defined button(Customized button) - Phone/MIC jack - Barcode sensing reader Allocation in the back cover - Stand-by button [Sleep(Suspend) button (press 1 second)] - USB port(Type A x 2) - Ethernet jack - DC-IN jack Allocation in the right side of the back cover - Slot of the smart card reader](https://usermanual.wiki/Quanta-Computer/QF3A/User-Guide-3511968-Page-19.png)