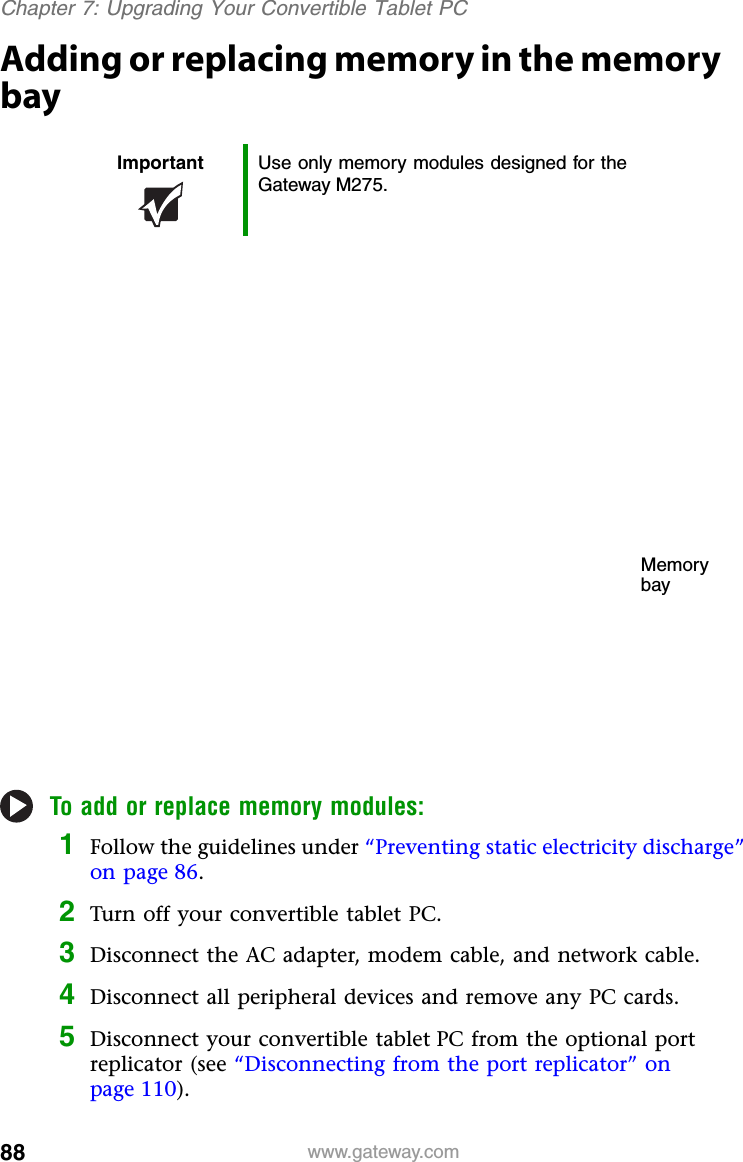
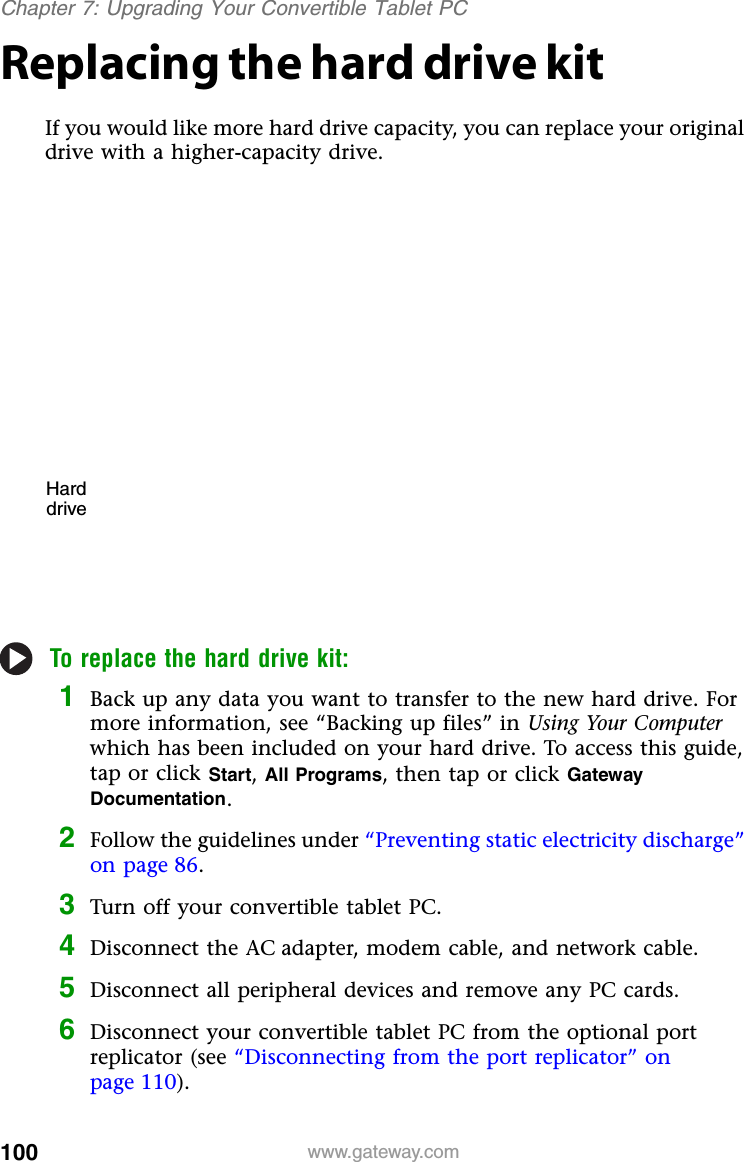
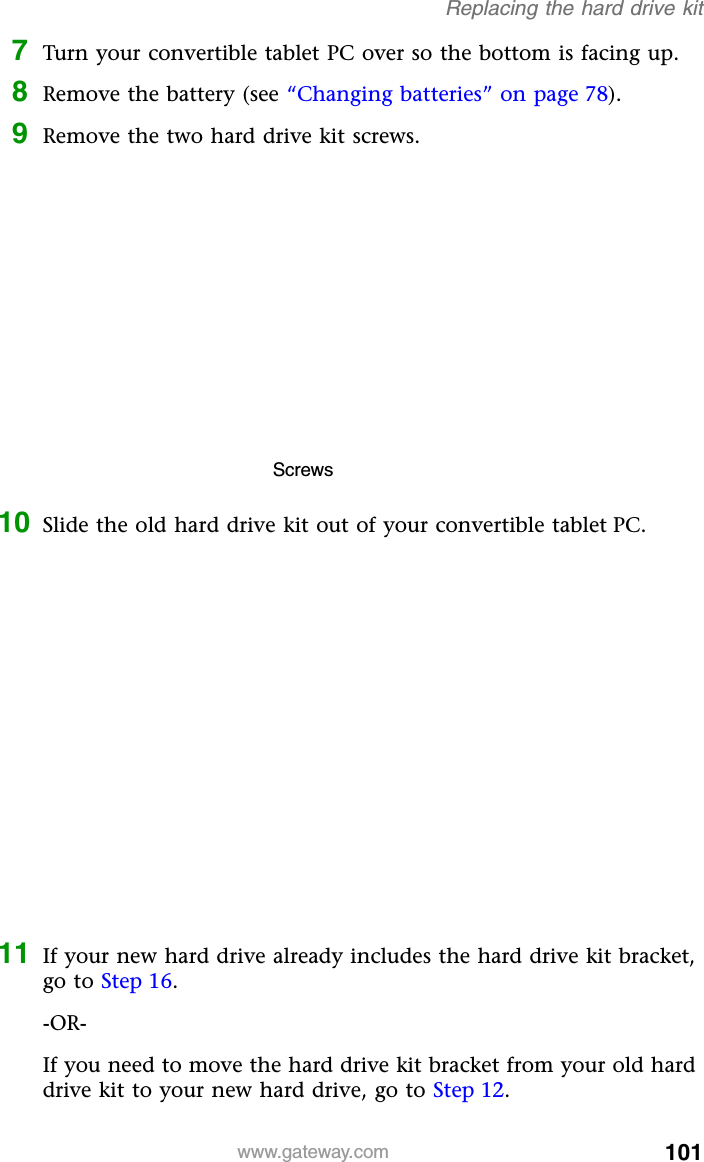
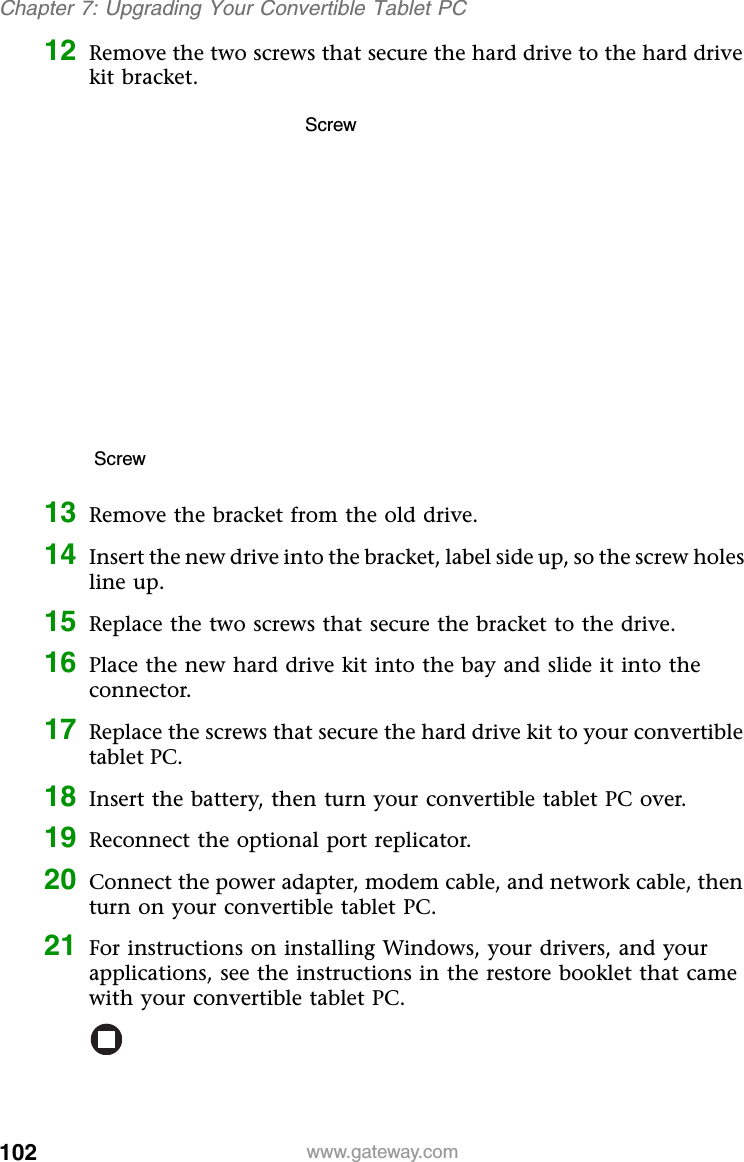
Quanta Computer TA1WM3B2915ABG Notebook Computer User Manual Using the Gateway M280 Convertible Tablet PC
Quanta Computer Inc Notebook Computer Using the Gateway M280 Convertible Tablet PC
UserManual.wiki
>
Quanta Computer
>
TA1WM3B2915ABG User Manual
User manual rev
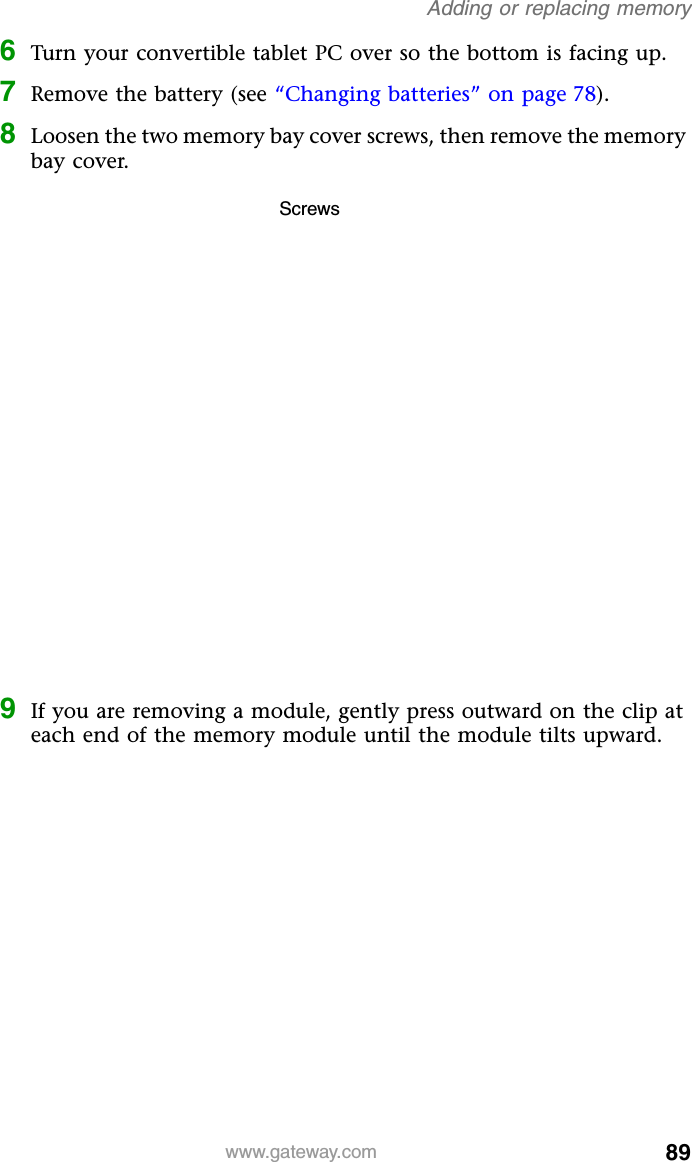
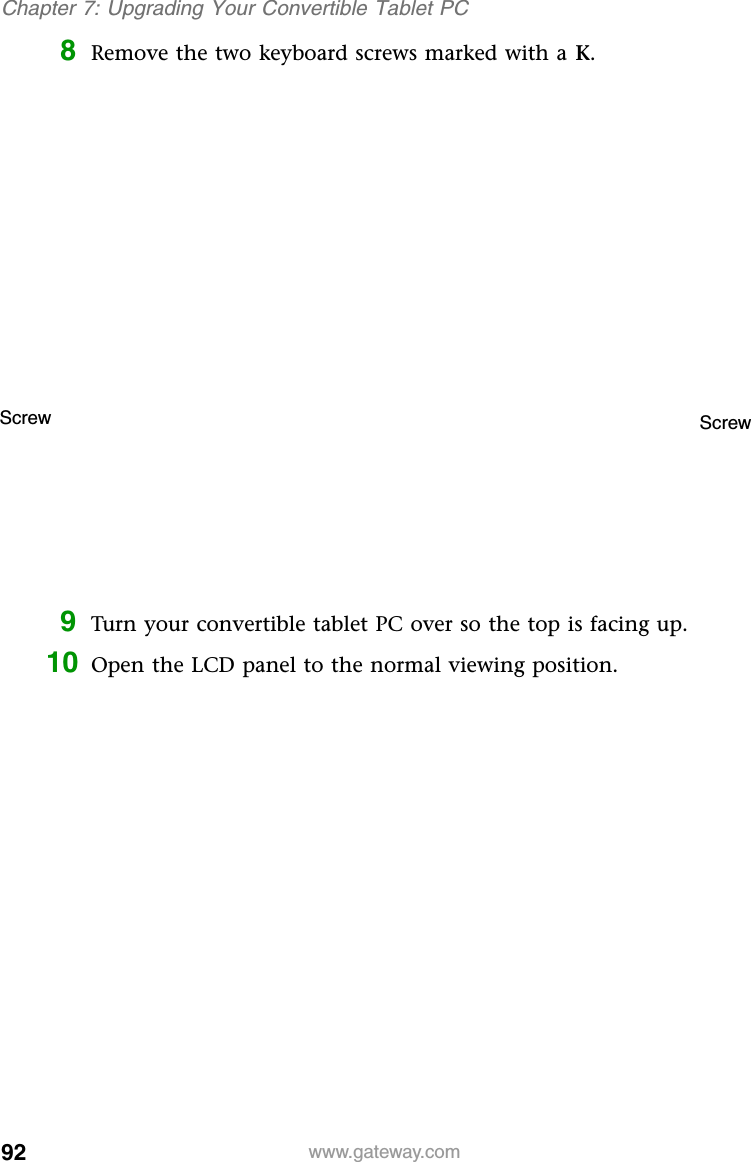
Navigation menu
Upload a User Manual
Namespaces
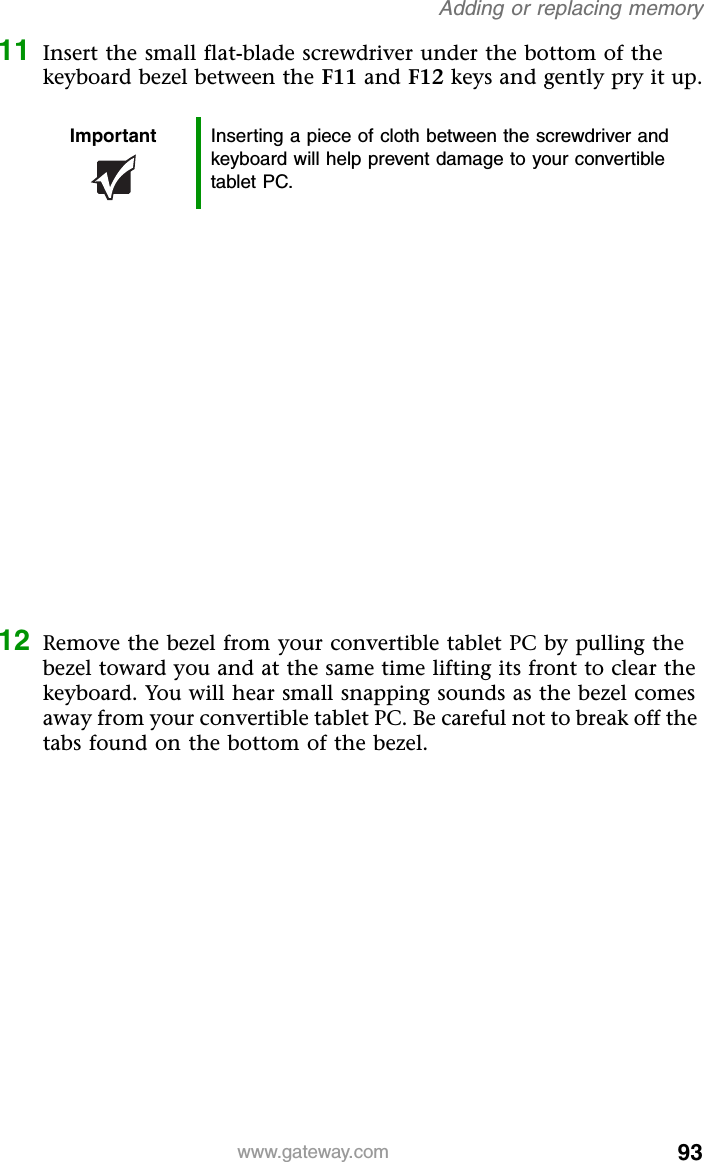
Wiki Guide
HTML
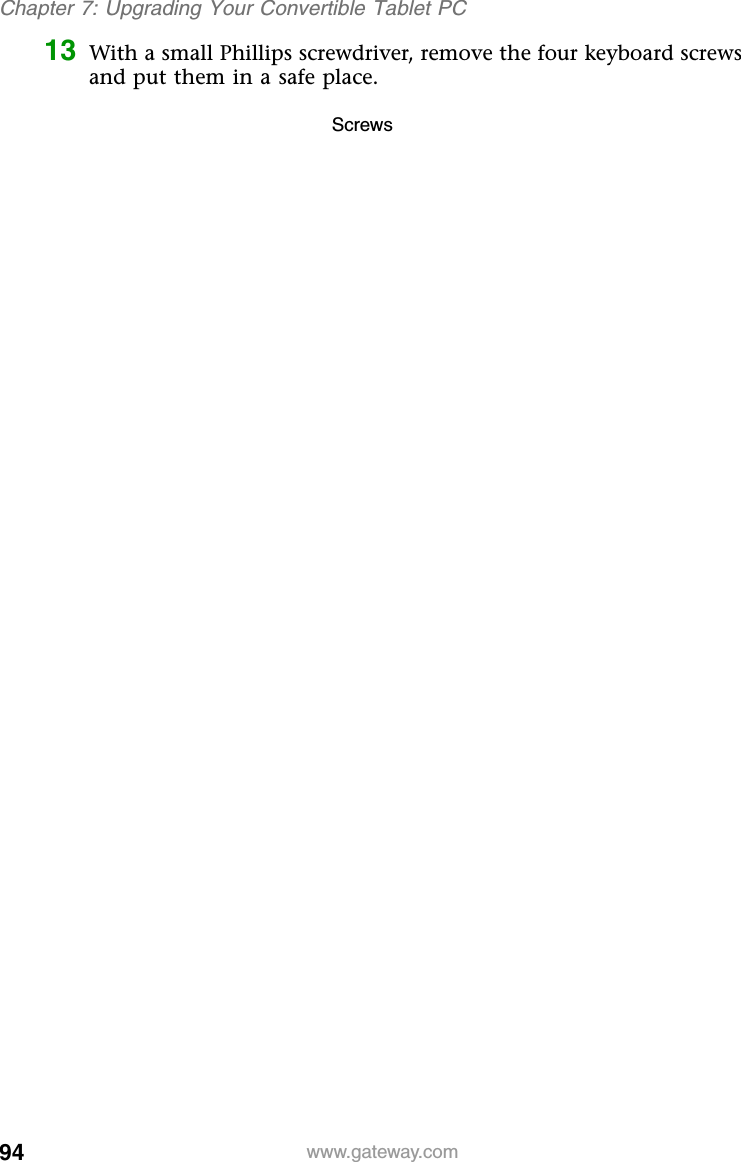
PDF
Info
Views
User Manual
Discussion / Help
Navigation

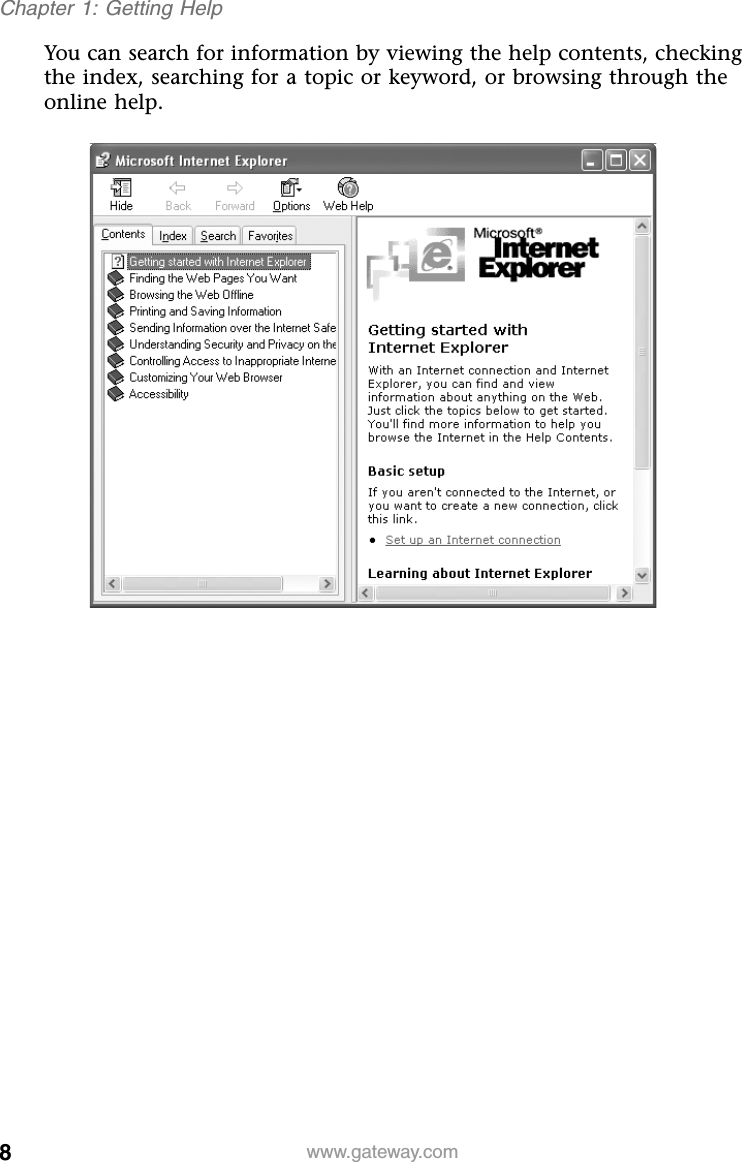
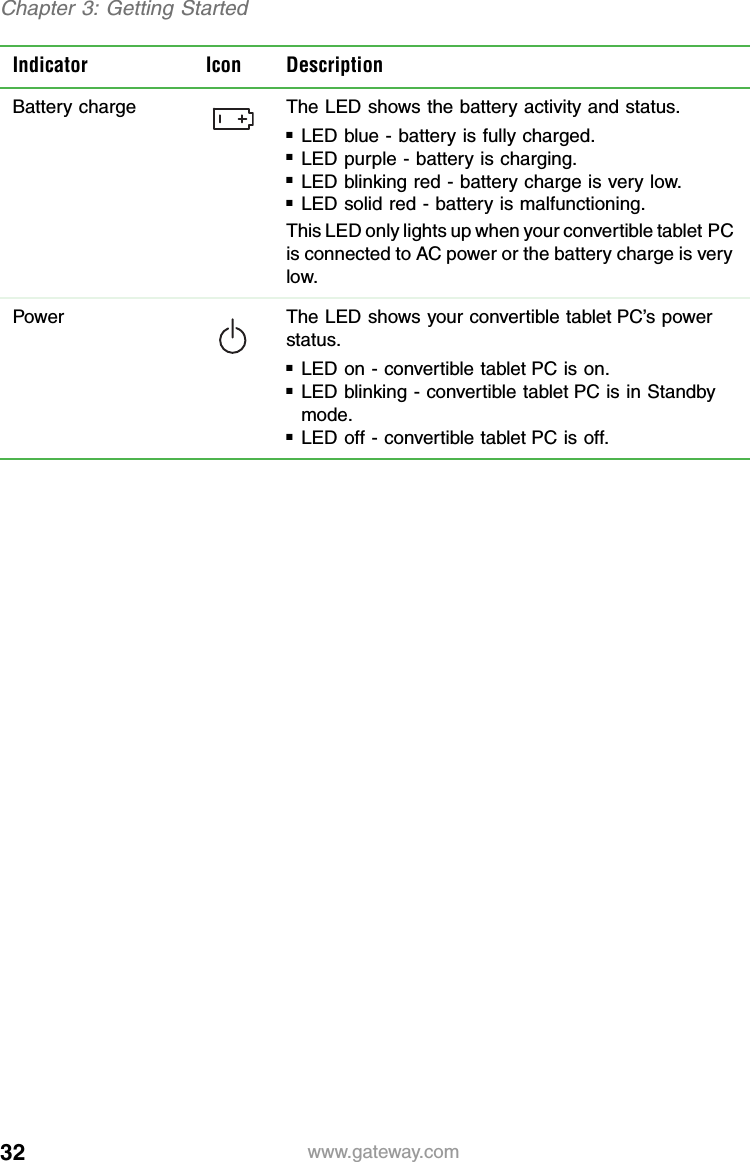
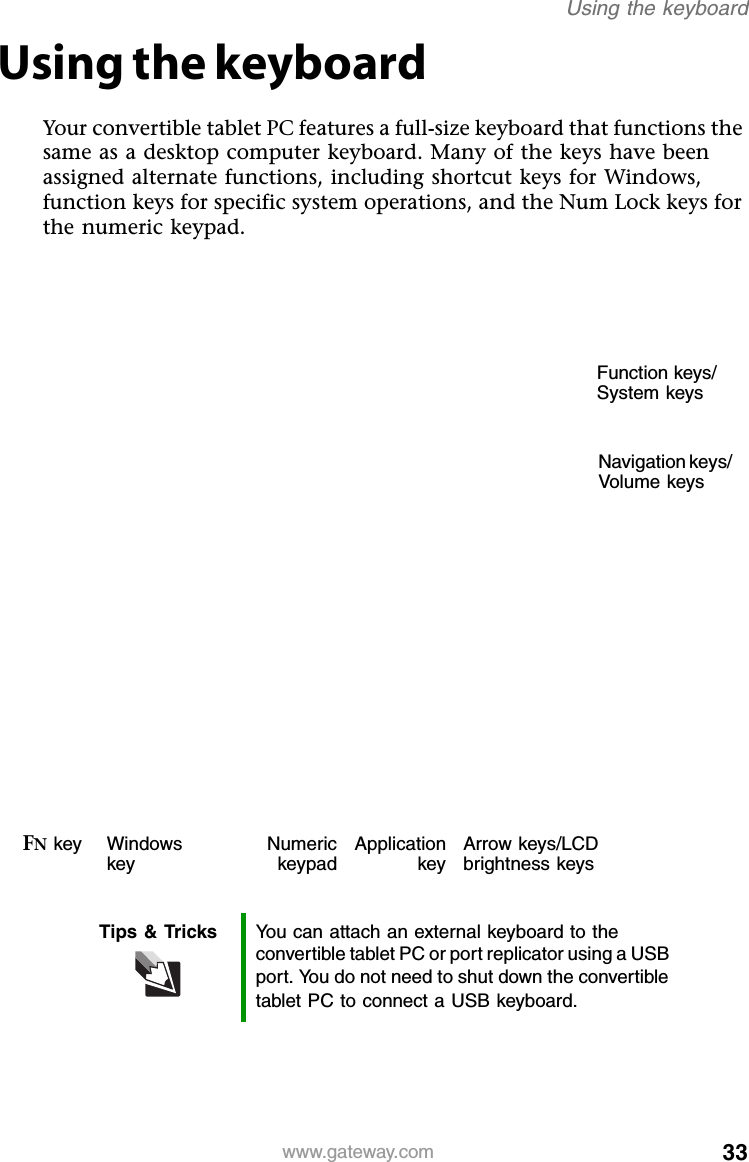
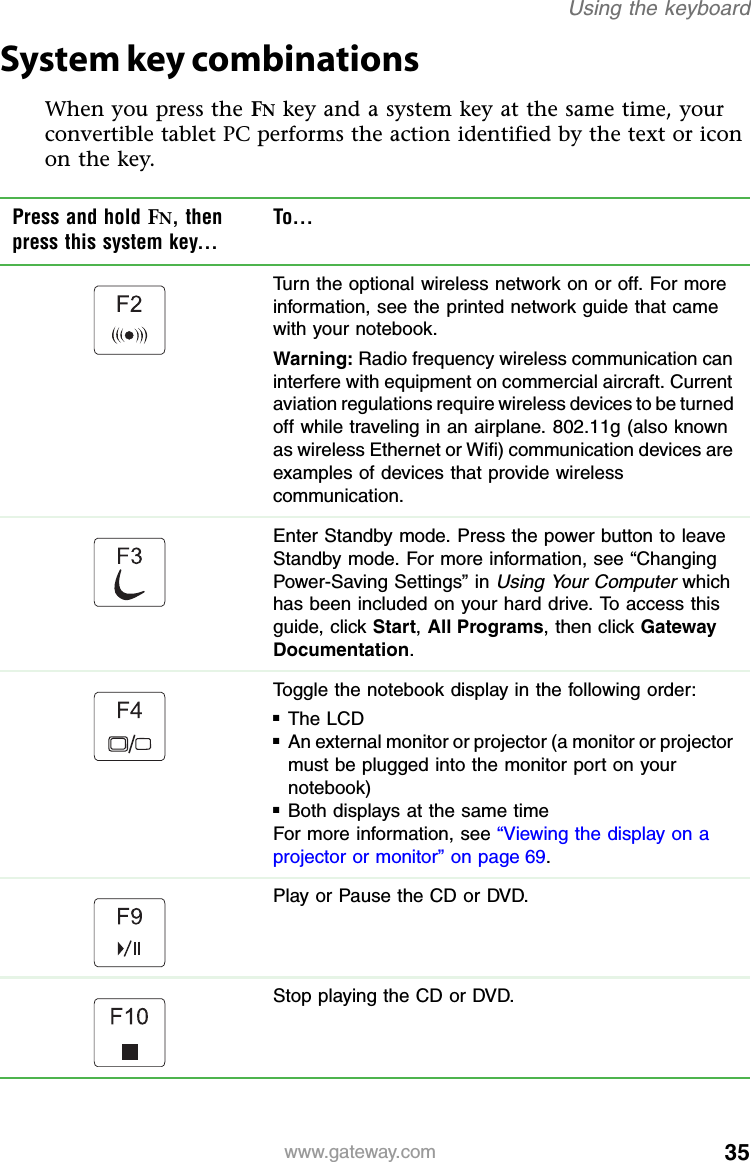
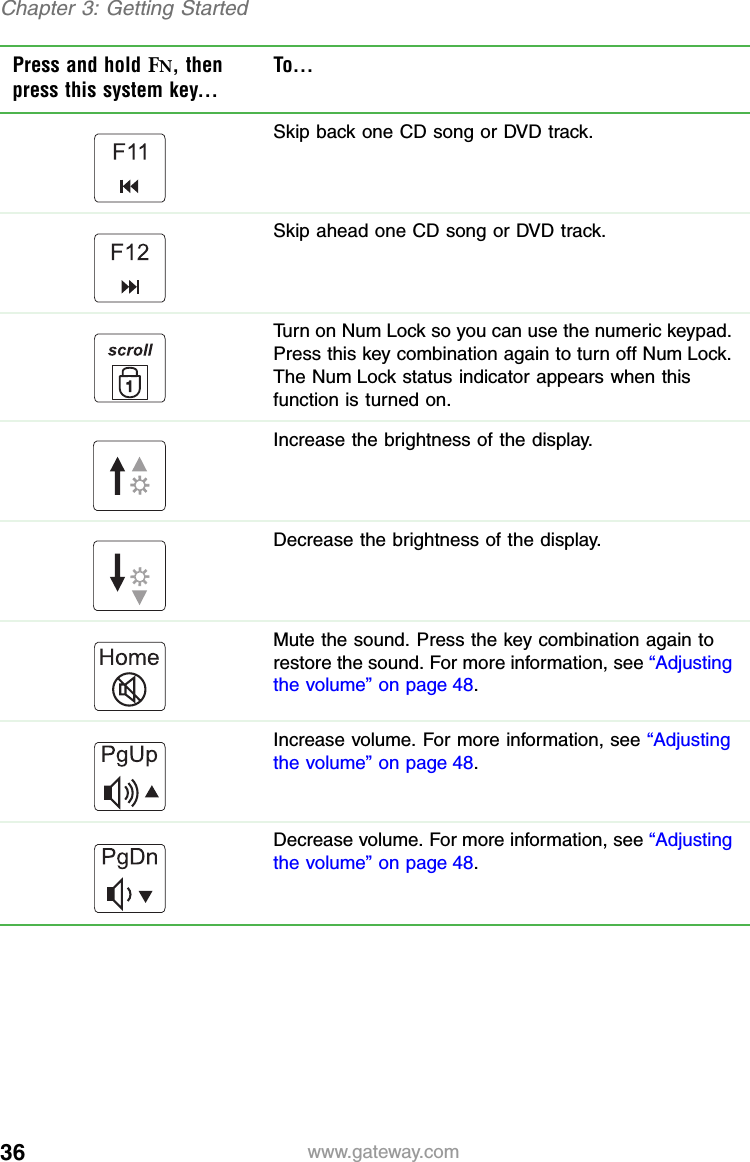
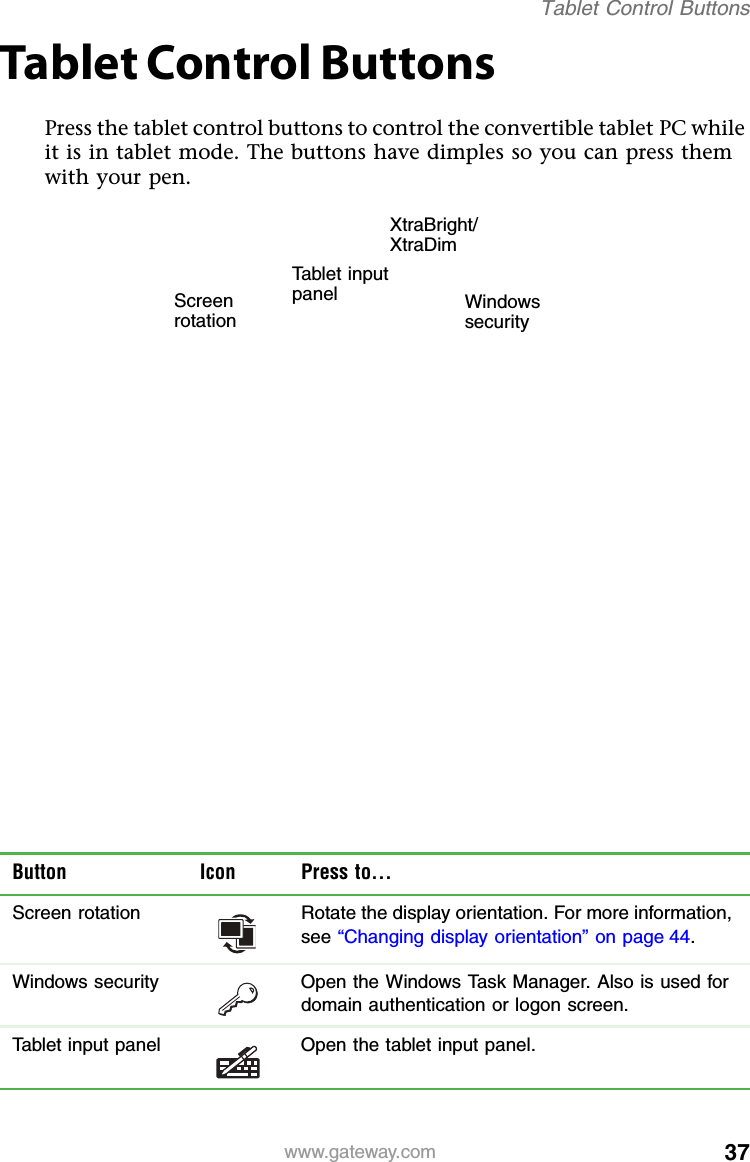
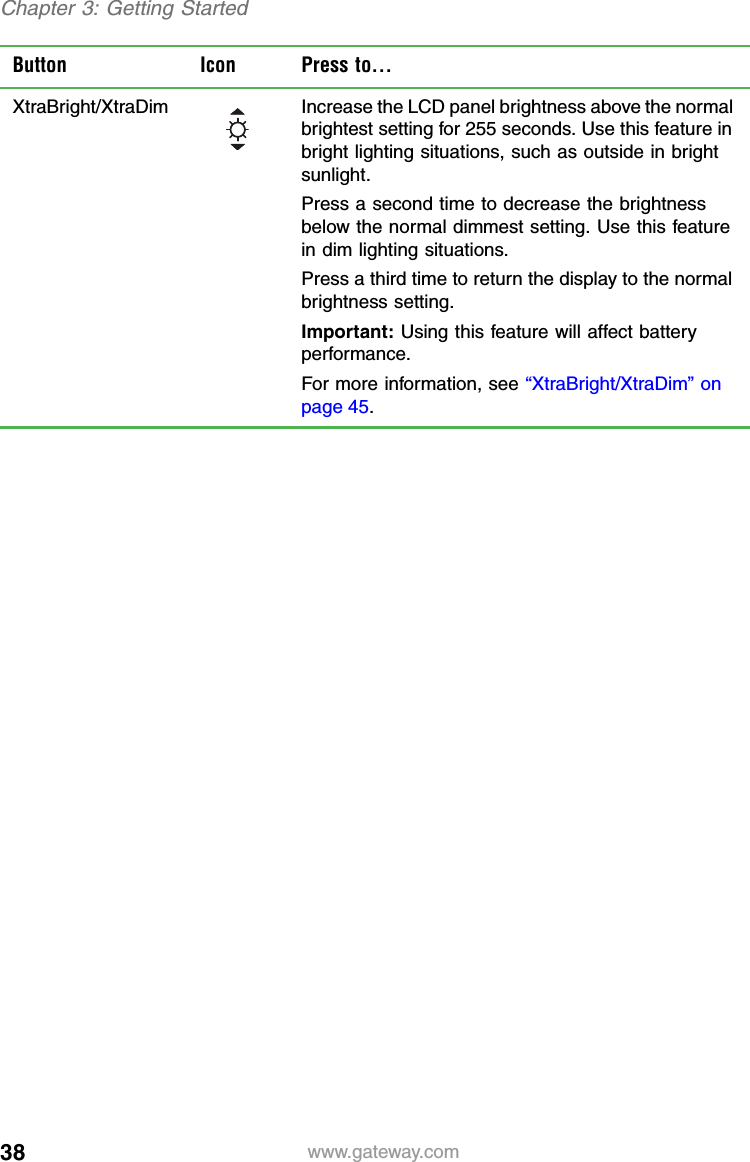
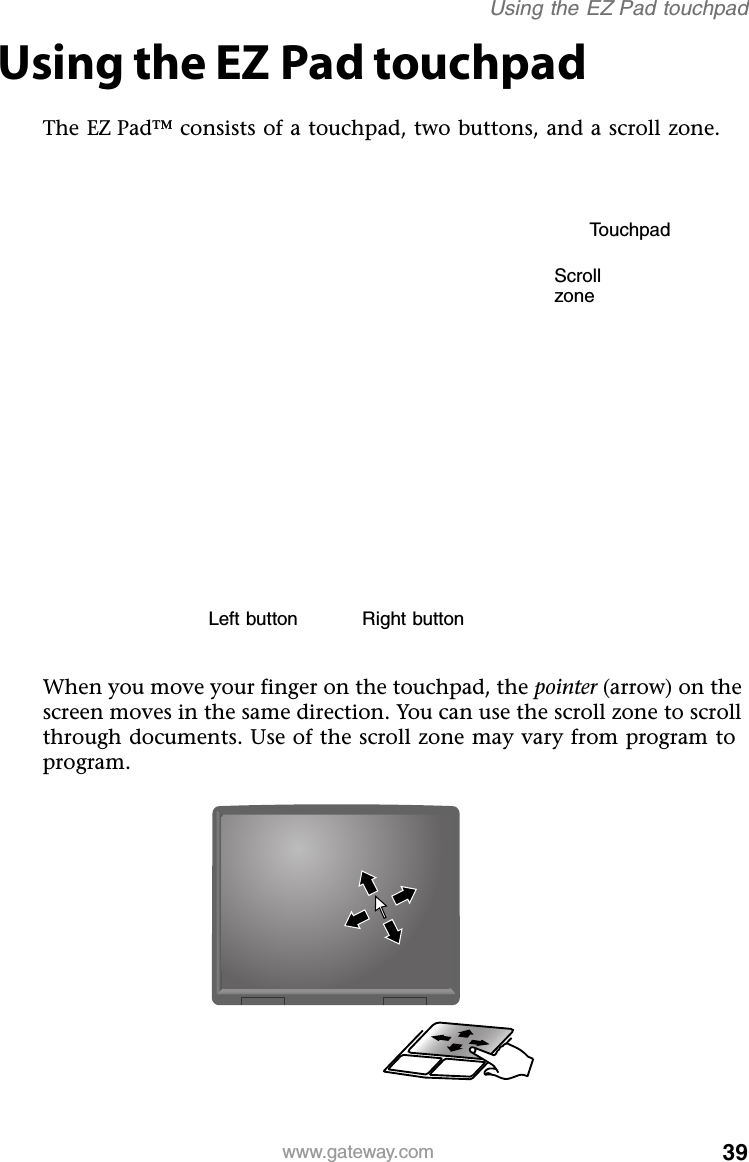
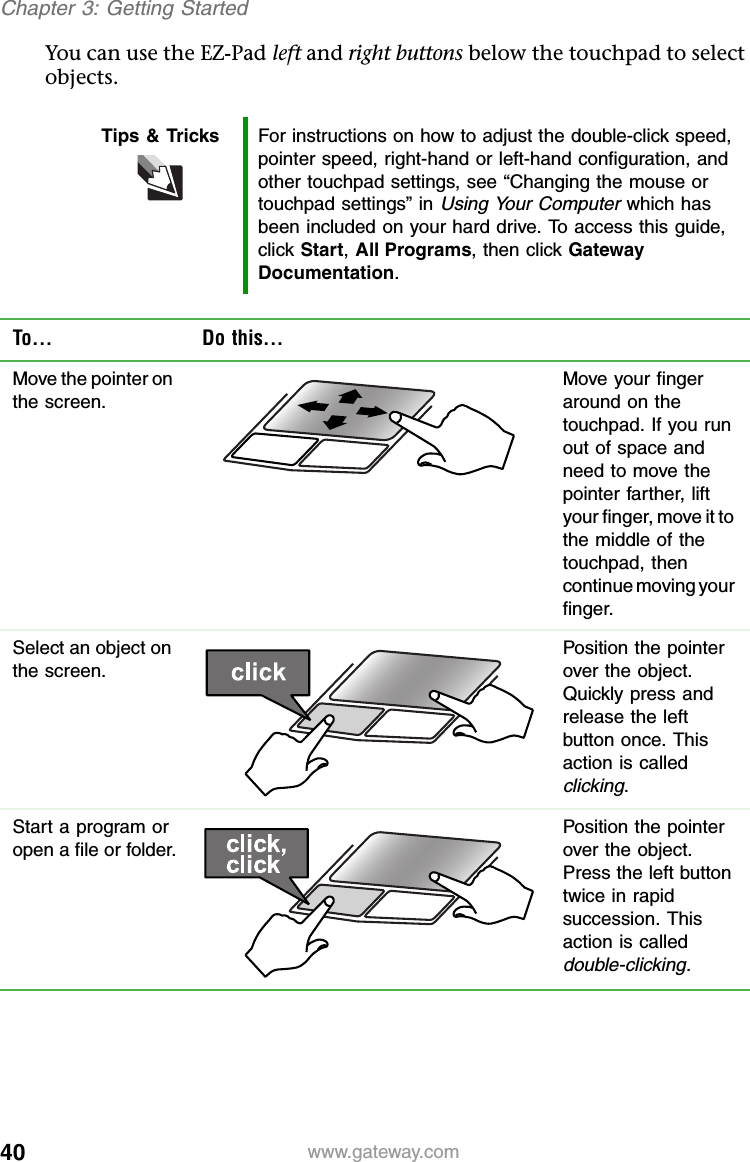
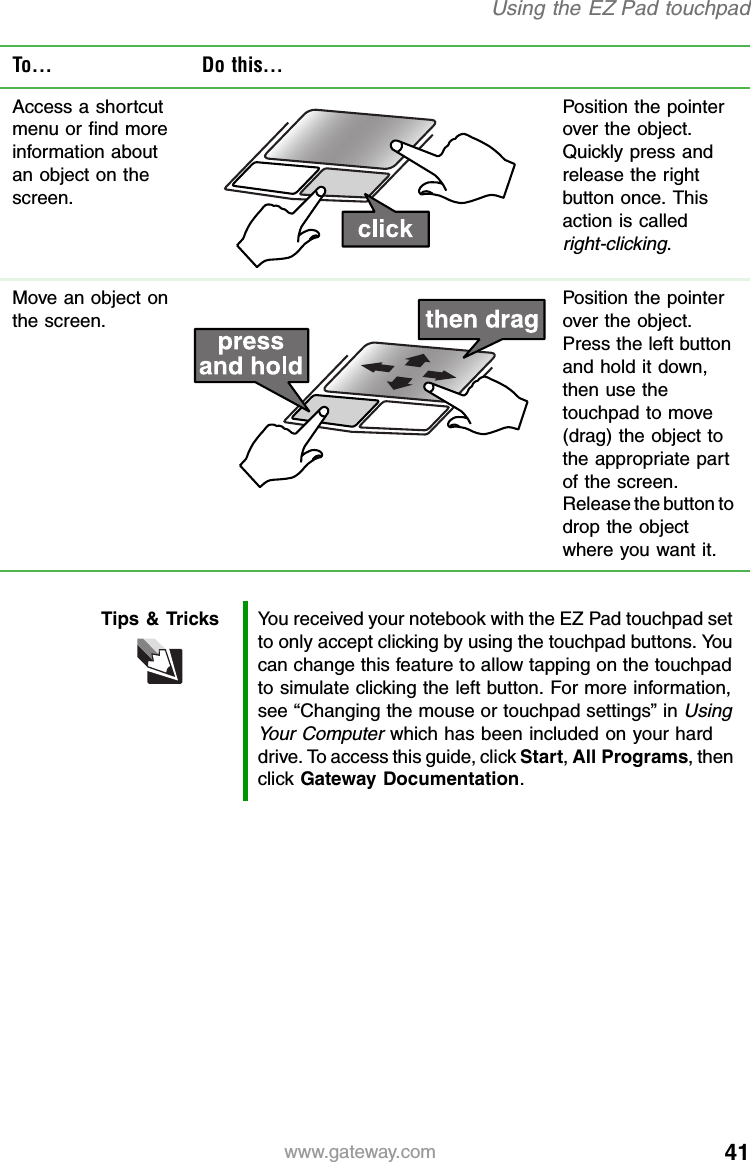


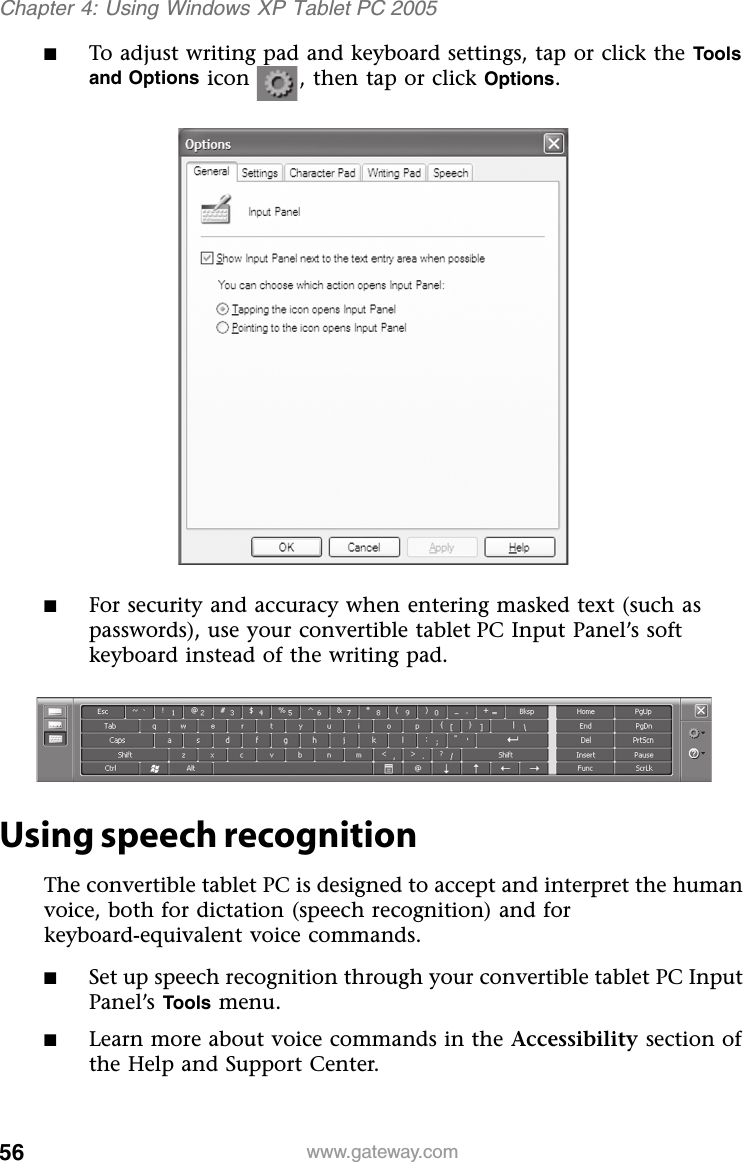


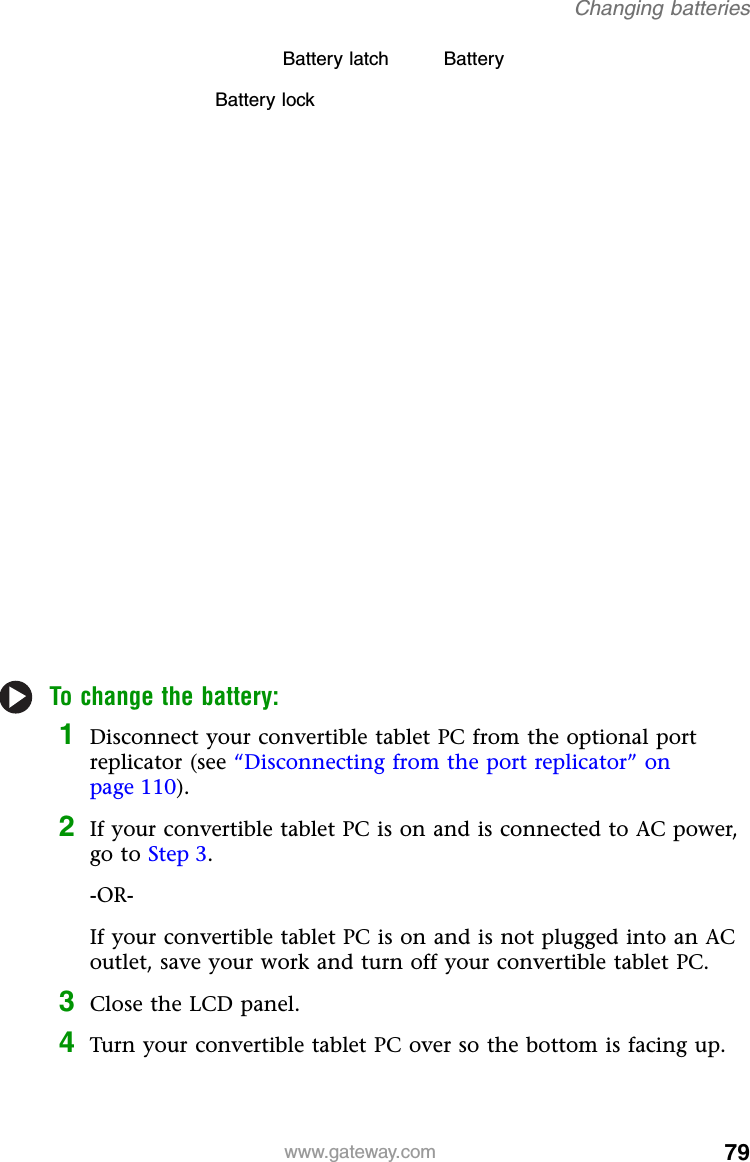
![78 www.gateway.comChapter 6: Managing Power5Open the Exit menu, then highlight Exit Saving Changes and press ENTER.6Select Yes, then press ENTER.The battery recalibration process begins and a screen opens showing you the progress. The entire process will take several hours.When the recalibration has finished, the message “Press [Esc] key to exit” appears.7Press ESC. The battery charge indicator now displays an accurate battery charge. If the battery charge indicator does not show an accurate charge, contact Gateway Customer Care.Changing batteriesIf your convertible tablet PC is connected to AC power, you can change the battery while your convertible tablet PC is turned on. If your convertible tablet PC is not plugged into an AC outlet, you must turn your convertible tablet PC off while changing the battery.Important Do not interrupt the battery recalibration process. If recalibration is interrupted, you must start the process over again.Warning Danger of explosion if battery is incorrectly replaced.Replace only with a battery specifically manufactured for your Gateway convertible tablet PC. Discard used batteries according to local hazardous material regulations.The battery used in this device may present a fire or chemical burn hazard if mishandled. Do not disassemble, heat above 212°F (100°C), or incinerate. Dispose of used battery promptly. Keep away from children.](https://usermanual.wiki/Quanta-Computer/TA1WM3B2915ABG/User-Guide-570147-Page-82.png)