Quantum Instruments COP A Wireless Radio Commander Unit for Digital Cameras to Control Remote Flashes User Manual User s Manual
Quantum Instruments Inc A Wireless Radio Commander Unit for Digital Cameras to Control Remote Flashes User s Manual
User's Manual

1 Introduction
The Co-Pilot can control the exposure of three Remote Groups (R1, R2, and
R3) or two Remote Groups (R1, R2) and a local Qflash T5d-R.
A Remote Group can consist of :
Quantum Trio
and / or
Qflash T5d-R with an FW8R or FW7Q receiver
and / or
Any non Quantum flash that can be triggered by a sync signal, with
an FW8R or FW7Q.
Any number of remotes may be combined in a Remote Group, for the same
mode / exposure.
To separately set exposures of remote flashes, set them, to different Remote
Groups.
Qflash® Co-Pilot
QF91
Shoe Mount Wireless Radio
Commander for Qflash 5d-R
and TRIO
Operating Instructions
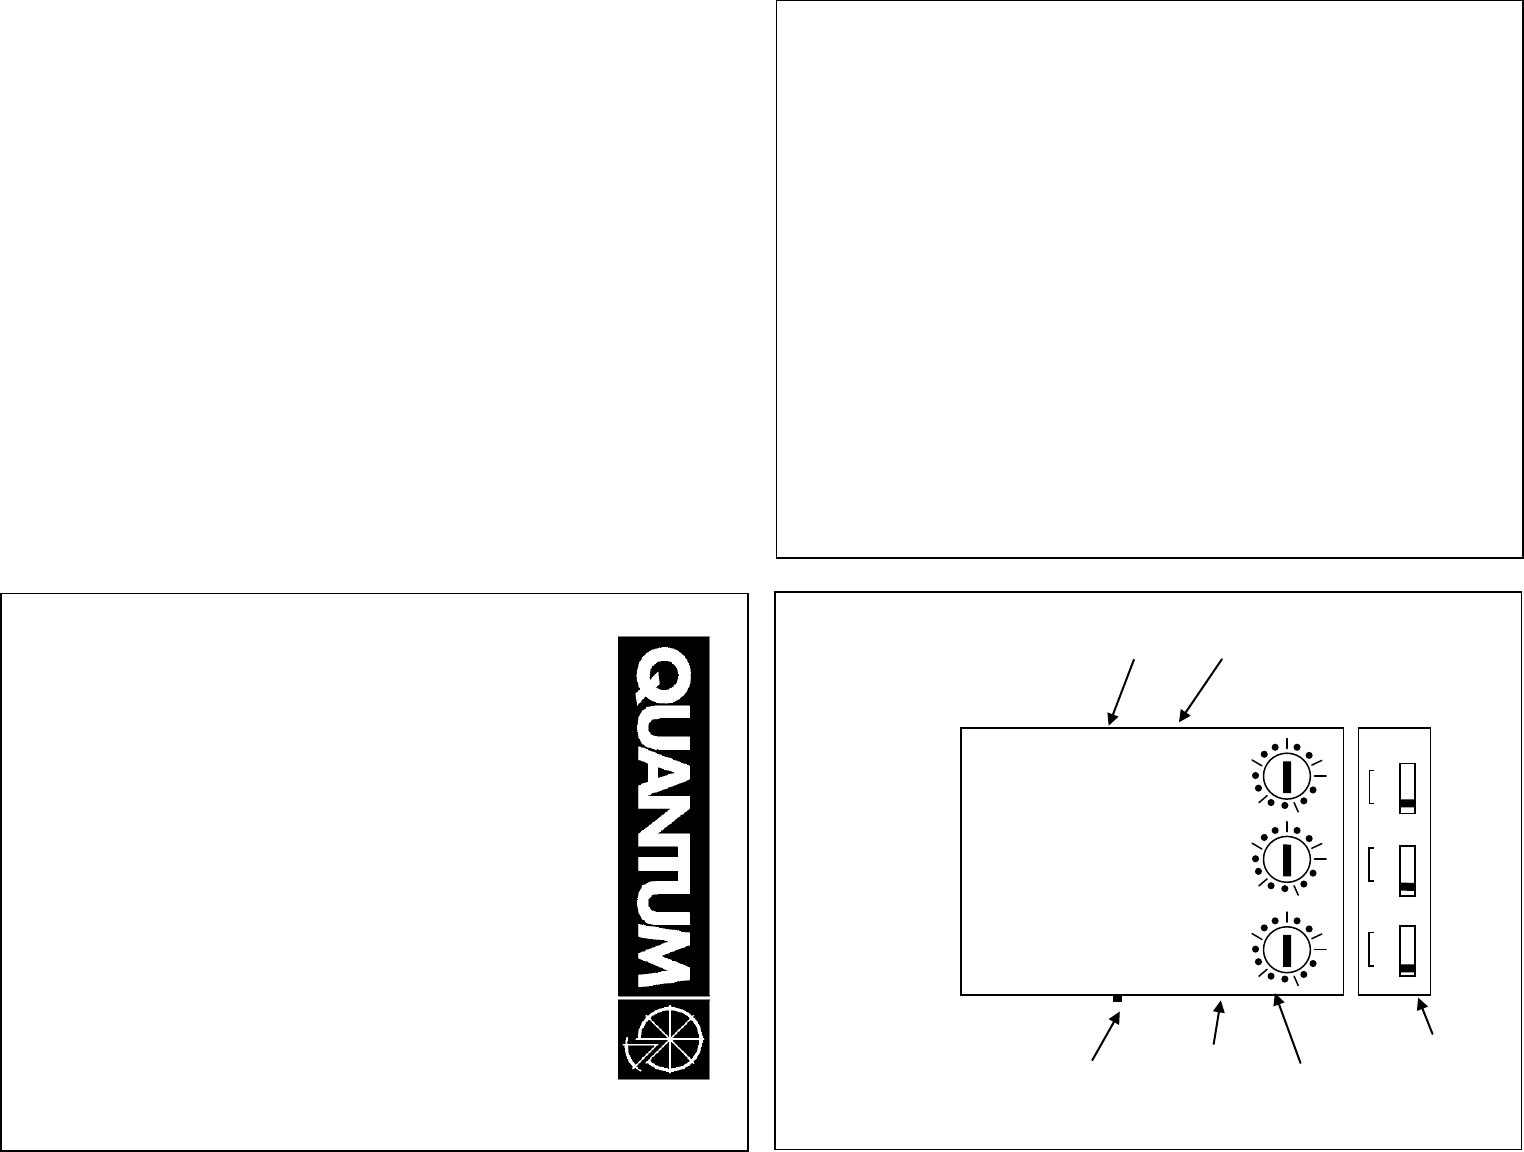
CHAN
OFF
ON
AF
Ratio / Manual Power
setting control for
Remote R1, R2, R3
MAN – TTL
Mode switch for
Remote R1, R2, R3
Channel select
switch 0 - 7
USB connector
ACCY connector for
Qflash T5d-R
ON / OFF switch
AF – Auto Focus
light is ON
R1 R2 R3 / LOCAL
M TTL M TTL M TTL

2.2 Using a Qflash T5d-R with an FW8R or FW7Q
receiver as a remote
Press the mode button, on the Qflash t5d-R, then use the up or down
buttons to select Wireless Remote Group 1 or Wireless Remote
Group 2.
The Qflash T5d-R may display a message that it needs a signal from the
Local flash to activate this mode. The message will disappear when you
set up the Co-Pilot
Set the channel on the FW8R or FW7Q. There are eight channels
available, 0 through 7.
NOTE: Set all zones to ON.
2.3 Using a Non Quantum flash as a remote
Connect a flash unit to a FW8 or FW10w receiver. Set the channel on the
receiver, to the same channel set on Co-Pilot.
Use the ZONE switches to select the remote group. Zone 1 ON = Remote
Group R1, Zone 2 ON = Remote Group R2, Zone 3 ON = Remote Group R3.
NOTE: When using a non Quantum flash the Co-Pilot will provide a sync
signal to fire the flash, but will not control the exposure. The MAN-TTL mode
switch for this Group must be set to M.
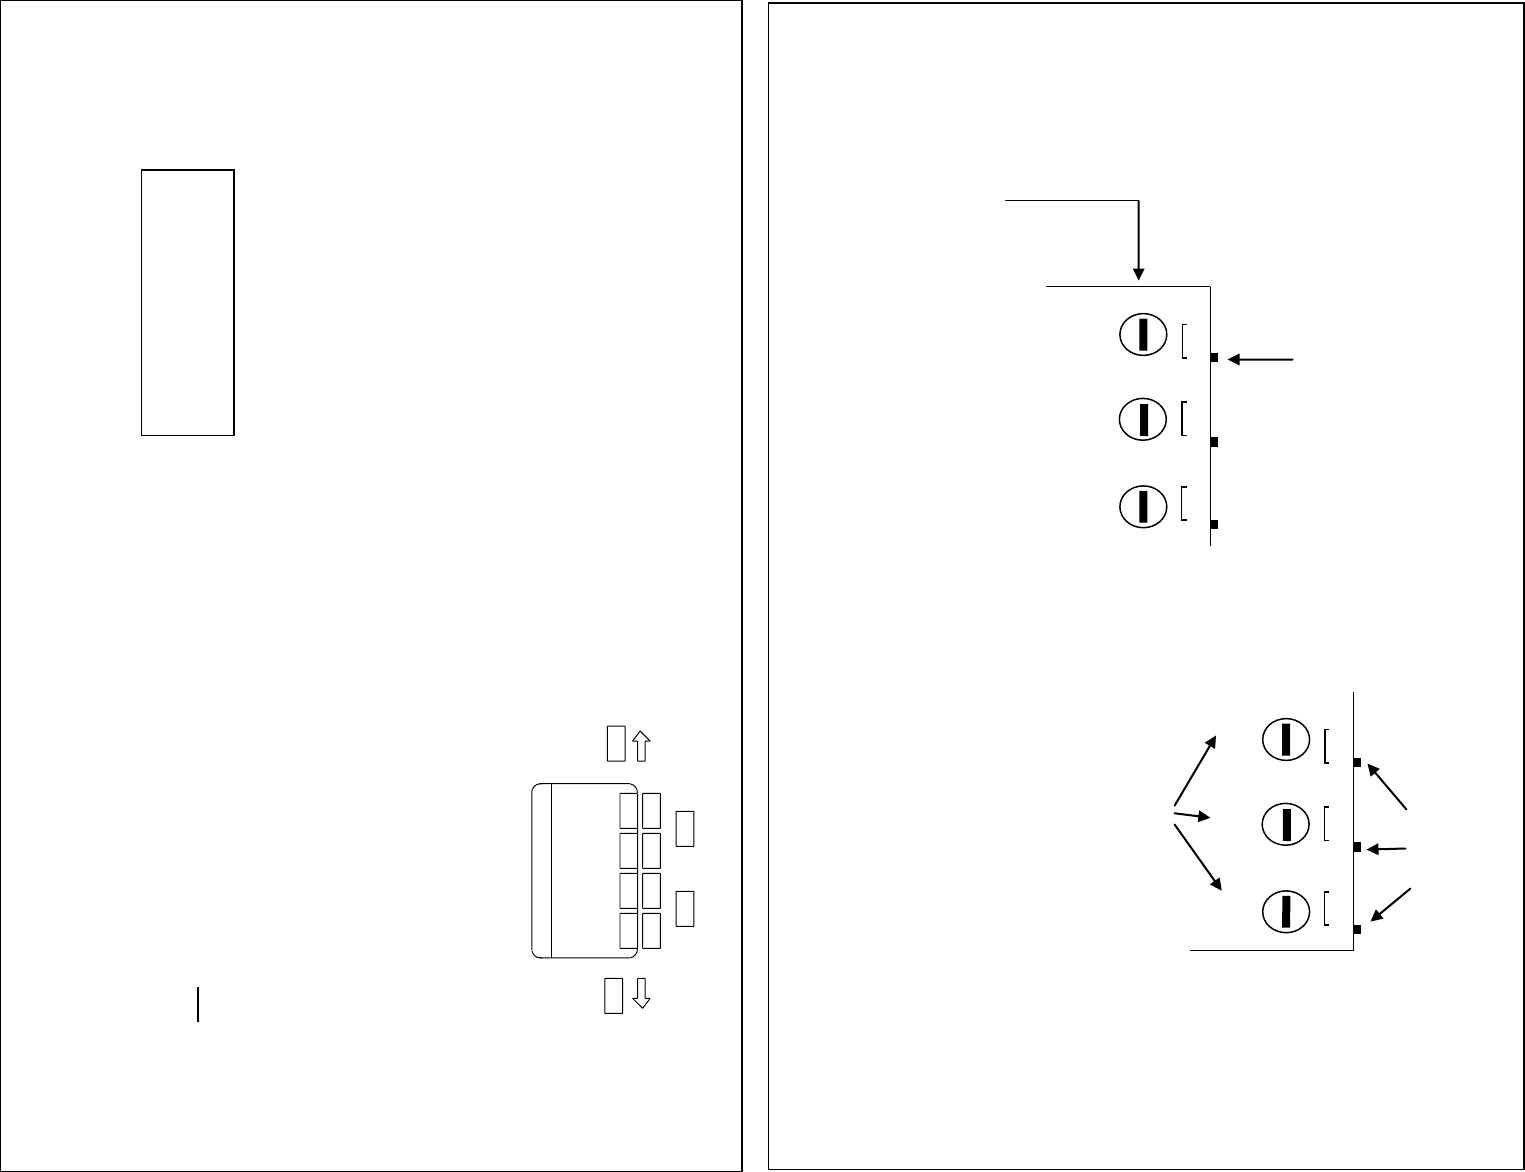
3 .2 Local Qflash T5d-R connected
When a Qflash T5d-R is connected to the Co-Pilot ACCY connector, Group R3
becomes the Local ratio control
Remotes will operate in Groups R1, R2 only.
RATIO / MANUAL POWER SETTINGS – this control adjusts the ratio of the
local Qflash T5d-R, when the Qflash is in QTTL mode. Ratio settings can be
set from -27 to +2.
MODE switch – this control is disabled when a Qflash T5d-R is connected to
the Co-Pilot. The MODE button on the local Qflash T5d-R overrides the
mode setting.
2 Setting up the Remote Groups
A remote Group can consist of
Quantum Trio set to Remote Group R1, R2, R3
Qflash T5d-R set to Wireless Group R1, R2. When used with
an FW8R or FW7Q receiver.
Any non Quantum flash that can be triggered by an external sync
signal from an FW8R or FW10w.
Note: All channels must be set to the same channel number.
2.1 Using a Quantum Trio as a remote
Press the mode button, on the Trio, use the left or right arrow buttons to
select Wireless Remote Group. Press one of the soft keys to choose R1,
R2, or R3.
Press the RADIO softkey to set the channel. There are eight channels
available, 0 through 7.
NOTE: There is no need to set the ZONES when using Wireless Remote
Groups with the Trio.
3 Co-Pilot setup
The Co-Pilot can control the exposure of three Remote Groups (R1, R2, and
R3) or two Remote Groups (R1, R2) and a local Qflash T5d-R.
A Remote Group can consist of a Quantum Trio, Qflash T5d-R with an FW8R
or FW7Q receiver, or any non Quantum flash that can be triggered by a sync
signal. The Co-Pilot will fire a non Quantum flash but not control it’s exposure.
3 .1 No Local Qflash T5d-R connected
Each Remote Group has two controls.
R1, R2, and R3 (when no Qflash T5d-R is connected to the ACCY connector)
RATIO / MANUAL POWER SETTINGS – this control adjusts the exposure of
the Remote Group. Ratio settings can be set from -27 to +2. Manual power
settings can be set from 1/16- to 1/1. This control also has an OFF position.
When set in the OFF position the flash in the Remote Group will not fire.
MODE switch – this control sets the mode of the Remote Group to M (manual)
or TTL. If the Remote Group is a Quantum Trio or Qflash T5d-R
Note : When using a non Quantum flash as a Remote Group set the MODE
switch to M.
MODE
SET
REMOTE GROUP R1
AUTO F 5.6 7
3.6 –32 FT ISO 200
FIRE OPT SAVE RADIO
+
-
R1 R2 R3 / LOCAL
M TTL M TTL M TTL
R1 R2 R3 / LOCAL
M TTL M TTL M TTL
WIRELESS GROUP R1
TO ACTIVATE CONTROL FROM
LOCAL QFLASH TURN LOCAL
QFLASH OFF THEN ON

Industry Canada Statement
This Class B digital apparatus complies with Canadian ICES-003.
Cet appareil numerique de la classe B est conforme a la norme NMB-003
du Canada.
This device complies with Industry Canada license-exempt RSS
standard(s).
Operation is subject to the following two conditions:
(1) this device may not cause interference, and
(2) this device must accept any interference, including interference that may
cause undesired
operation of the device.
Cet appareil est conforme avec Industrie Canada exempt de licence Rss
standard(s).
Son fonctionnement est soumis aux deux conditions suivantes :
(1) cet appareil ne peut causer d'interferences, et
(2) cet appareil doit accepter toute interference, y compris des interferences
qui peuvent provoquer un
fonctionnement indesirable du peripherique.
The installer of this radio equipment must ensure that the antenna is located
or pointed such that it does not emit RF field in excess of Health Canada
limits for the general population: consult Safety Code 6, obtainable from
Health Canada’s website www.hc-sc.gc.ca/rpb.
Conformite aux normes FCC Cet equipement a ete teste et trouve conforme
aux limites pour un dispositif numerique de classe B, conformement a la Partie
15 des reglements de la FCC. Ces limites sont con cues pour fournir une
protection raisonnable contre les interferences nuisibles dans une
installation residentielle.
Cet equipement genere, utilise et peut emettre des frequences radio et, s'il
n'est pas installe et utilize conformement ment aux instructions du fabricant,
peut causer des interferences nuisibles aux communications radio.
Rien ne garantit cependant que I'interference ne se produira pas dans une
installation particuliere. Si cet equipement provoque des interferences
nuisibles a la reception radio ou de television, qui peut etre determine en
comparant et en I'eteignant, I'utilisateur est encourage a essayer de corriger
les interference par une ou plusieurs des mesures suivantes:
• Reorienter ou deplacer I'antenne de reception.
• Augmenter la distance entre I'equipement et Ie recepteur.
• Branchez I'appareil dans une prise sur un circuit different de celui auquel Ie
recepteur est connecte.
• Consultez votre revendeur ou un technicien radio / TV pour
assistance.Avertissement
Les changements ou modififications a cet appareil sans expressement
approuvee par la partie responsable de conformite pourraient annuler
I'autorite de I'utilisateur de faire fonctionner cet equipement.
Operation is subject to the following two conditions:
(1) this device may not cause interference, and
(2) this device must accept any interference, including interference that may
cause undesired
operation of the device.
This equipment has been tested and found to comply with the limits for a
Class B digital device, pursuant to Part 15 of the FCC Rules. These limits are
designed to provide reasonable protection against harmful interference in a
residential installation.
This equipment generates, uses, and can radiate radio frequency energy and,
if not installed and used in accordance with the instructions, may cause
harmful interference to radio communications. However, there is no guarantee
that interference will not occur in a particular installation. If this equipment
does cause harmful interference to radio or television reception, which can be
determined by turning the
equipment off and on, the user is encouraged to try to correct the interference
by one or more of thefollowing measures:
-Reorient or relocate the receiving antenna.
-Increase the separation between the equipment and receiver.
-Connect the equipment into an outlet on a circuit different from that to which
the receiver is connected.
-Consult the dealer or an experienced radio/TV technician for help.
IMPORTANT – CAUTION
Changes or modifications to this equipment could void your authority
to use this product under the equipment authorization granted by the
regulating agencies
Quantum Instruments Inc.
10 Commerce Drive, Hauppauge NY 11788-3968 USA
Tel: 1-631-656-7400 Fax: 1-631-656-7410
www.qtm.com
Pxxxx