RAL DIAGNOSTICS 405000 Tag Reader User Manual 12060 V05 User Guide RAL Stainer EN Emitech
RAL DIAGNOSTICS Tag Reader 12060 V05 User Guide RAL Stainer EN Emitech
UserManual.wiki
>
RAL DIAGNOSTICS
>
405000 User Manual
USERS MANUAL
Navigation menu
Upload a User Manual
Namespaces
Wiki Guide
HTML
PDF
Info
Views
User Manual
Discussion / Help
Navigation


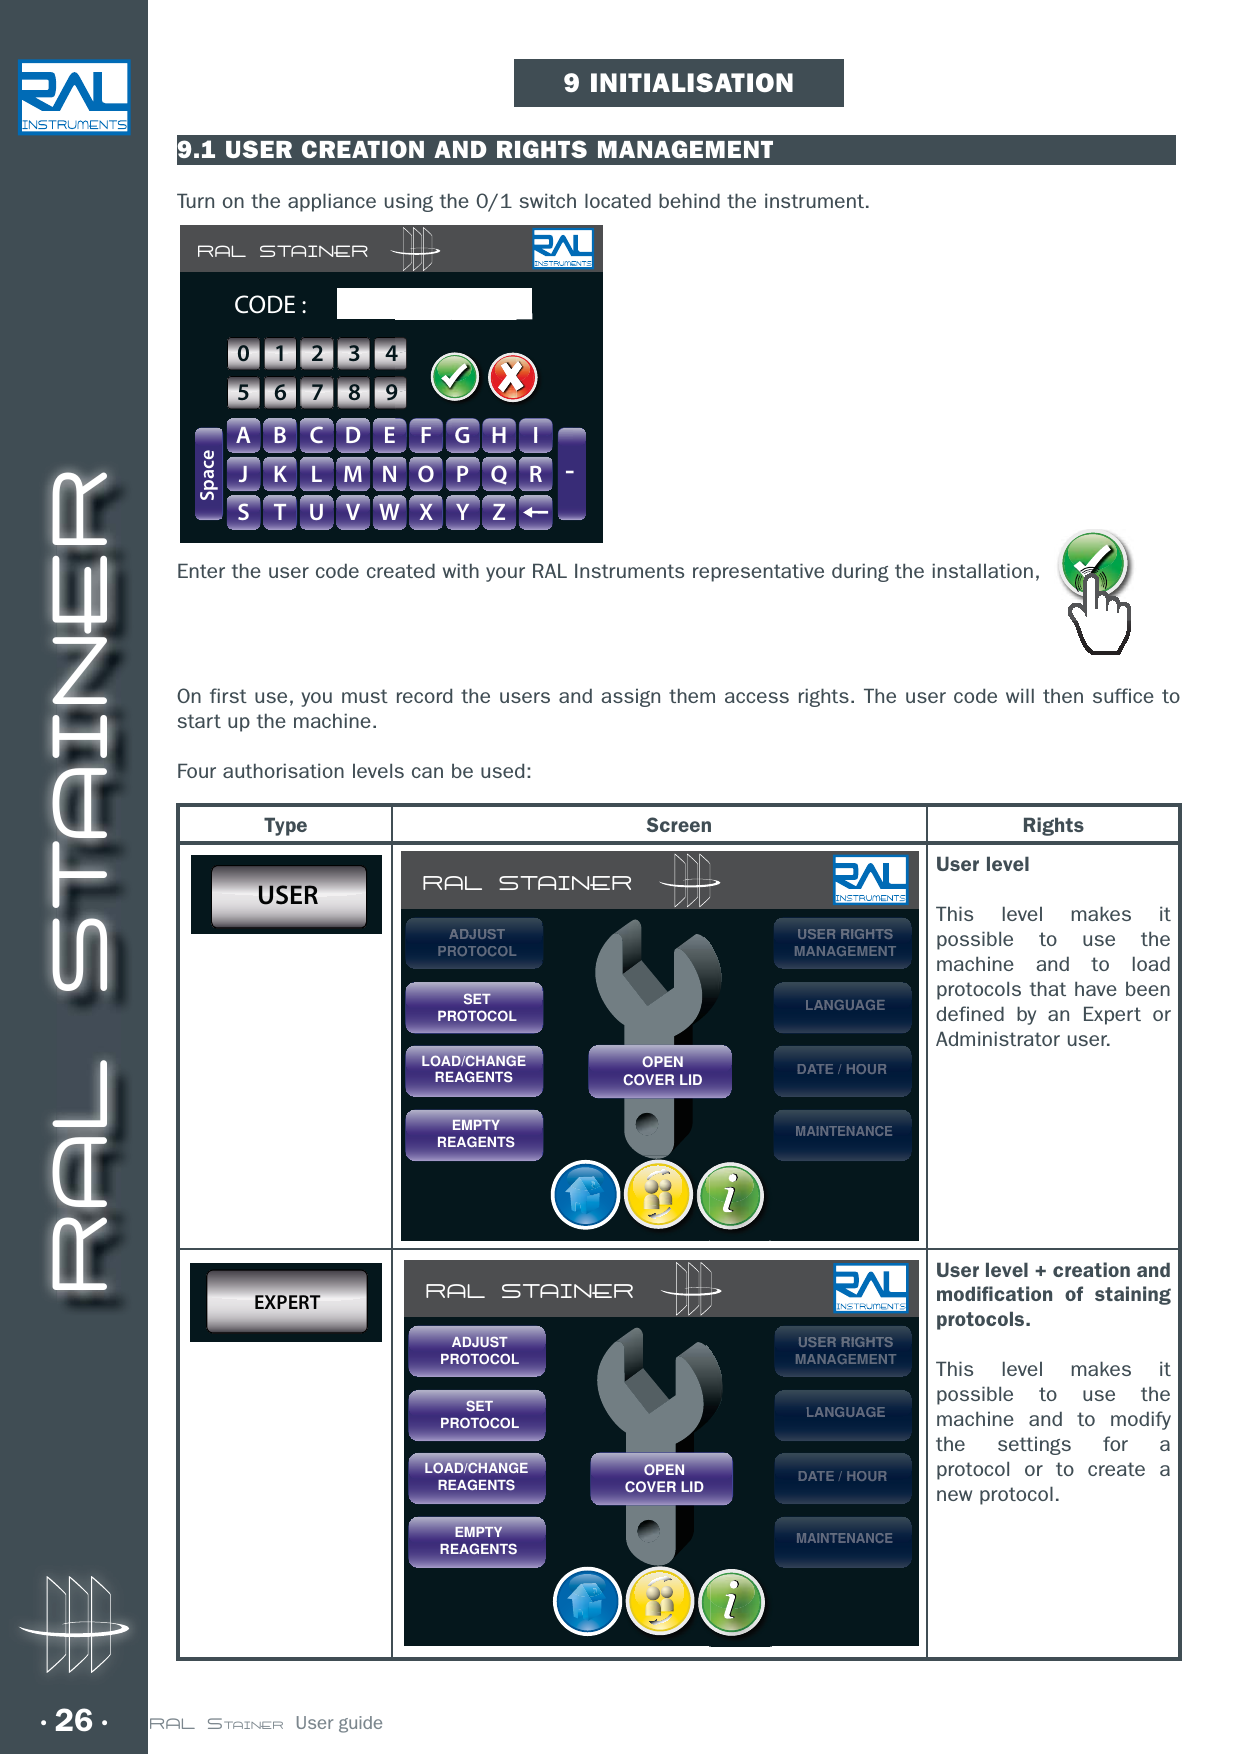
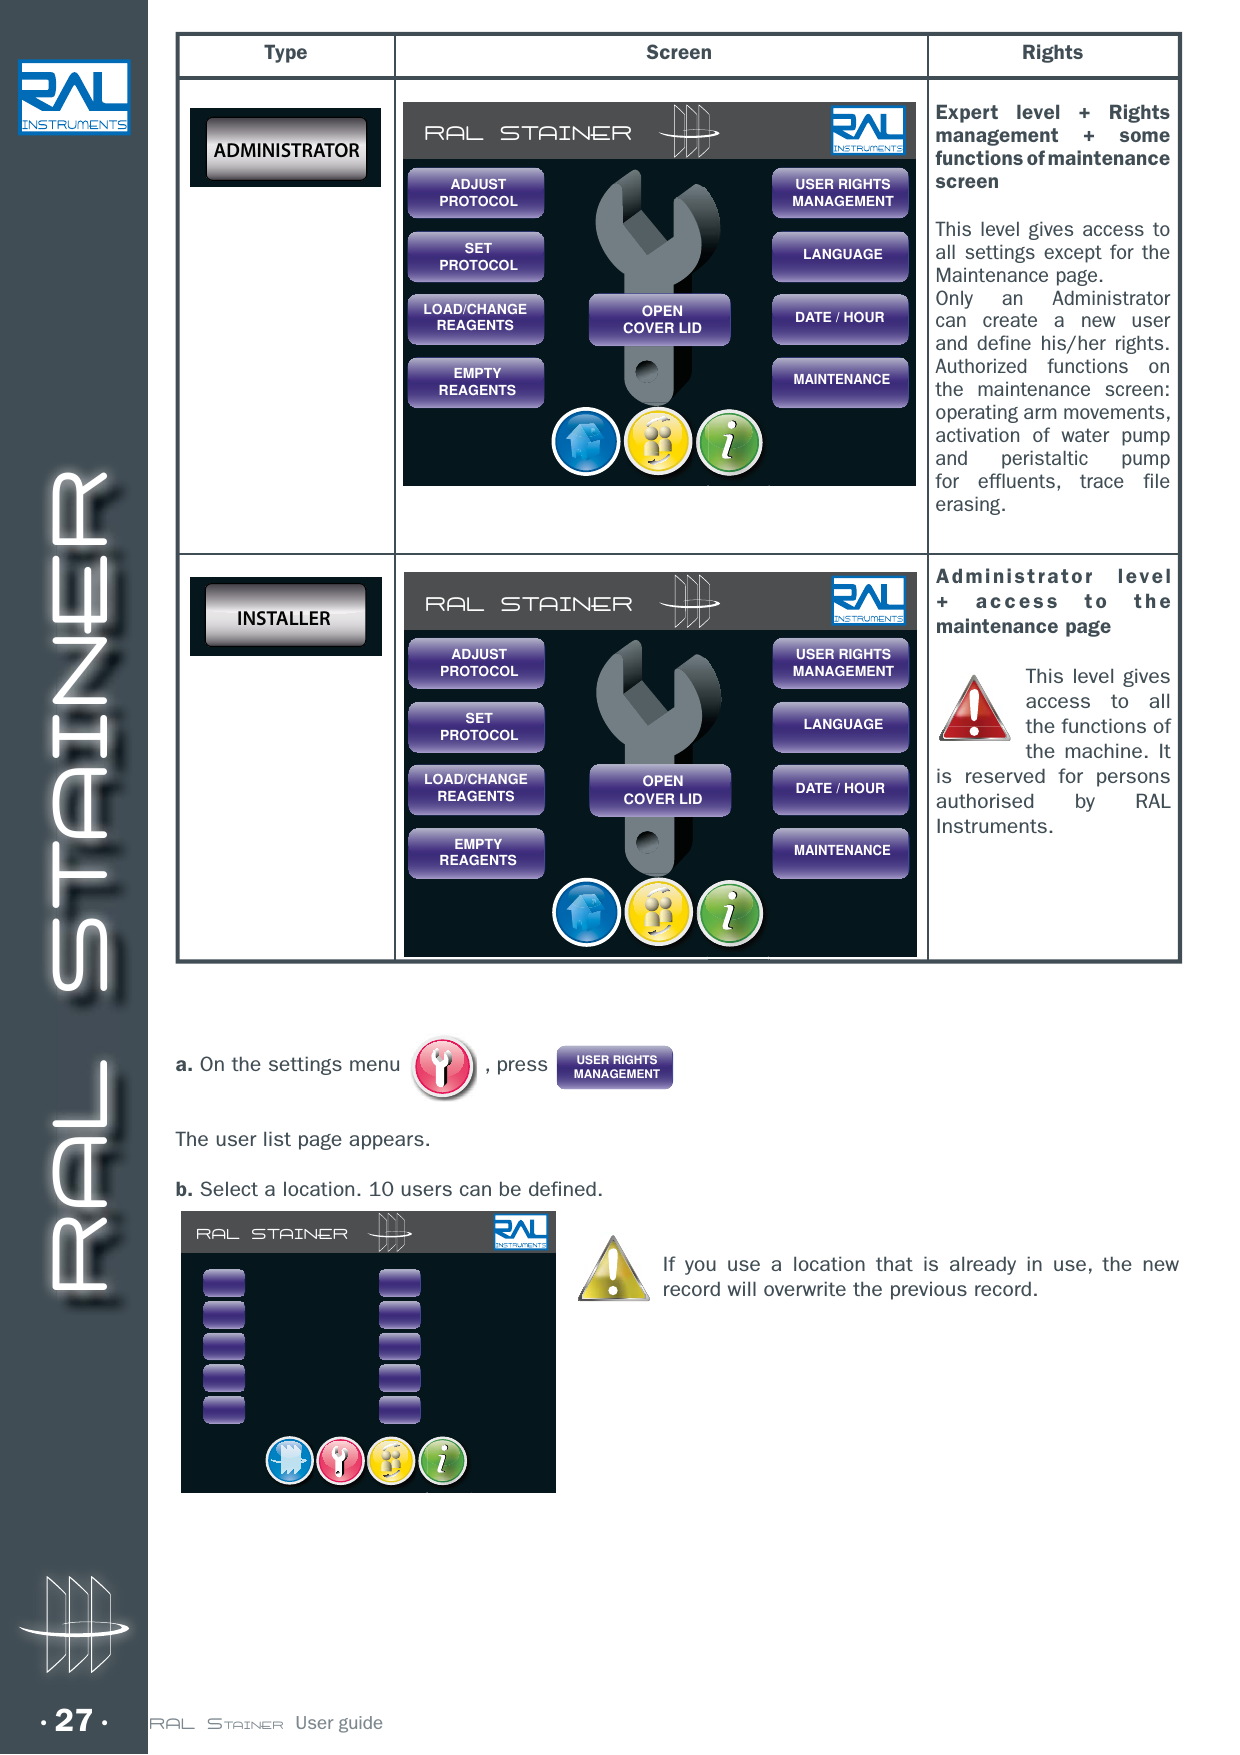
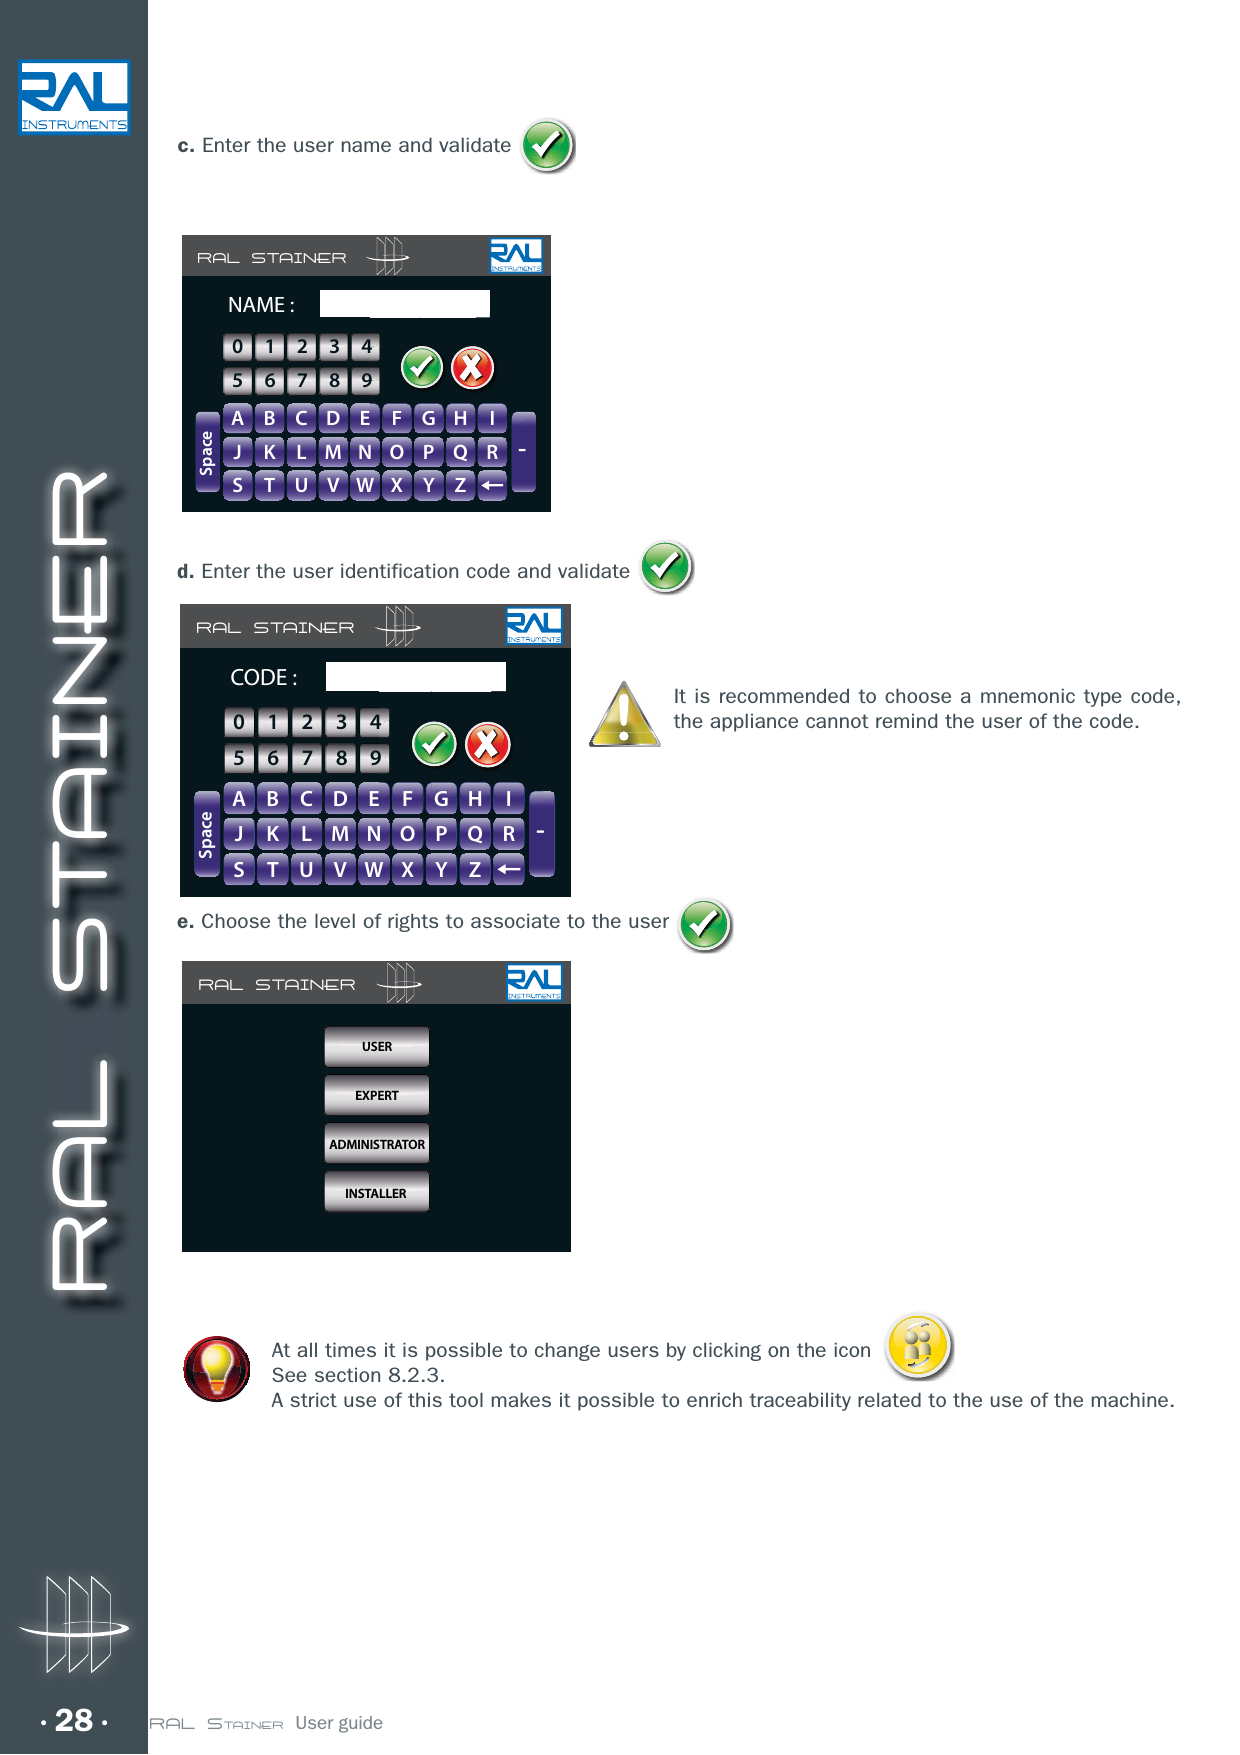
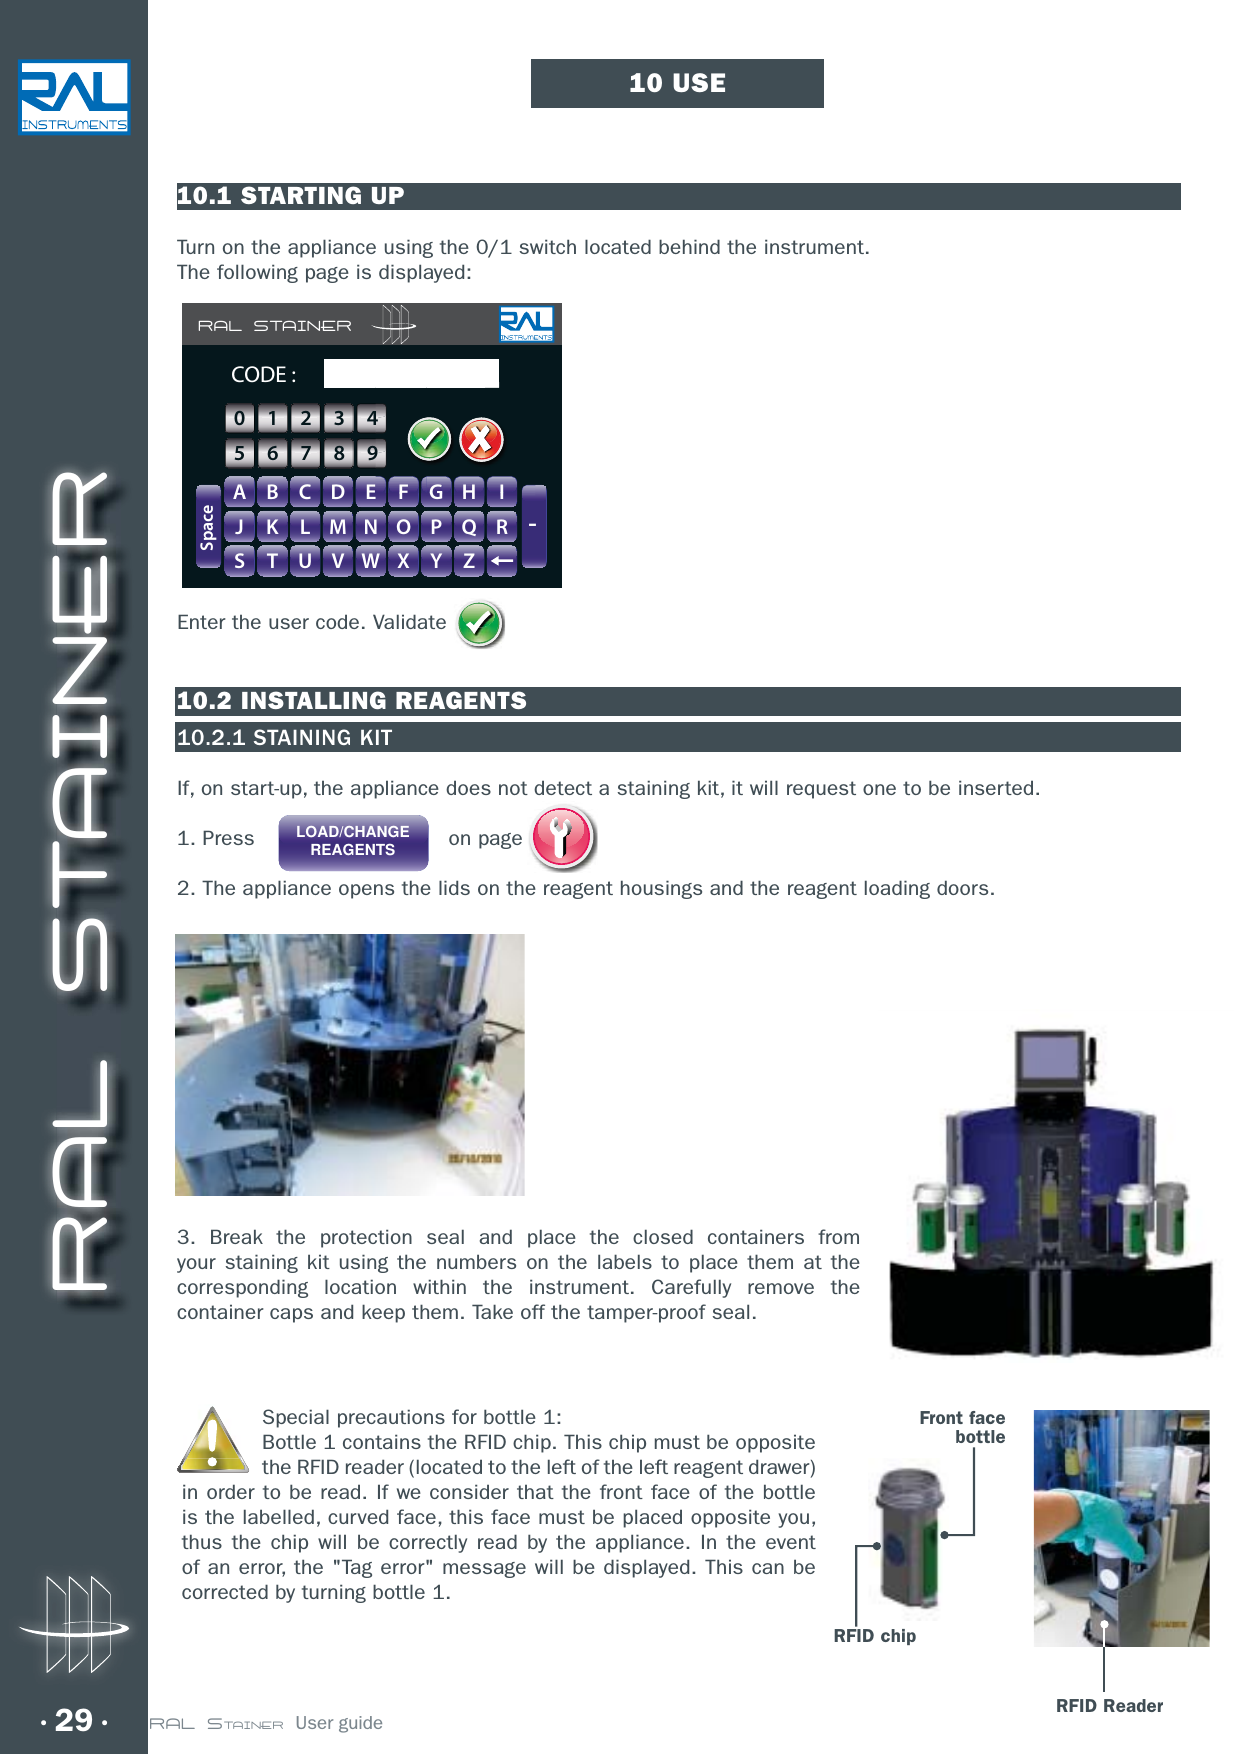
![RAL STAINER25 RAL STAINER User guide8.2.5 ALPHANUMERIC AND NUMBER KEYBOARDThese dialogue pages are used in several parts of the interface.They are used to enter numbers from 1 to 9, letters, add a space [Space] or a hyphen [-].The key is used to cancel entered characters.On the number page, the cursor passes automatically from minutes to seconds.Then press : or . RAL STAINERA B C D E F G H IJ K L M N O P Q RS T U V W X Y Z-SpaceGHIIFFGGHH0123456789RAL STAINER0123456789](https://usermanual.wiki/RAL-DIAGNOSTICS/405000/User-Guide-2151694-Page-25.png)