RDI Technology CA810A WIRELESS CAMERA User Manual M410A FCC IC English 1
RDI Technology (Shenzhen) Co., Ltd. WIRELESS CAMERA M410A FCC IC English 1
UserManual.wiki
>
RDI Technology
>
CA810A User Manual
User Manual
Navigation menu
Upload a User Manual
Namespaces
Wiki Guide
HTML
PDF
Info
Views
User Manual
Discussion / Help
Navigation


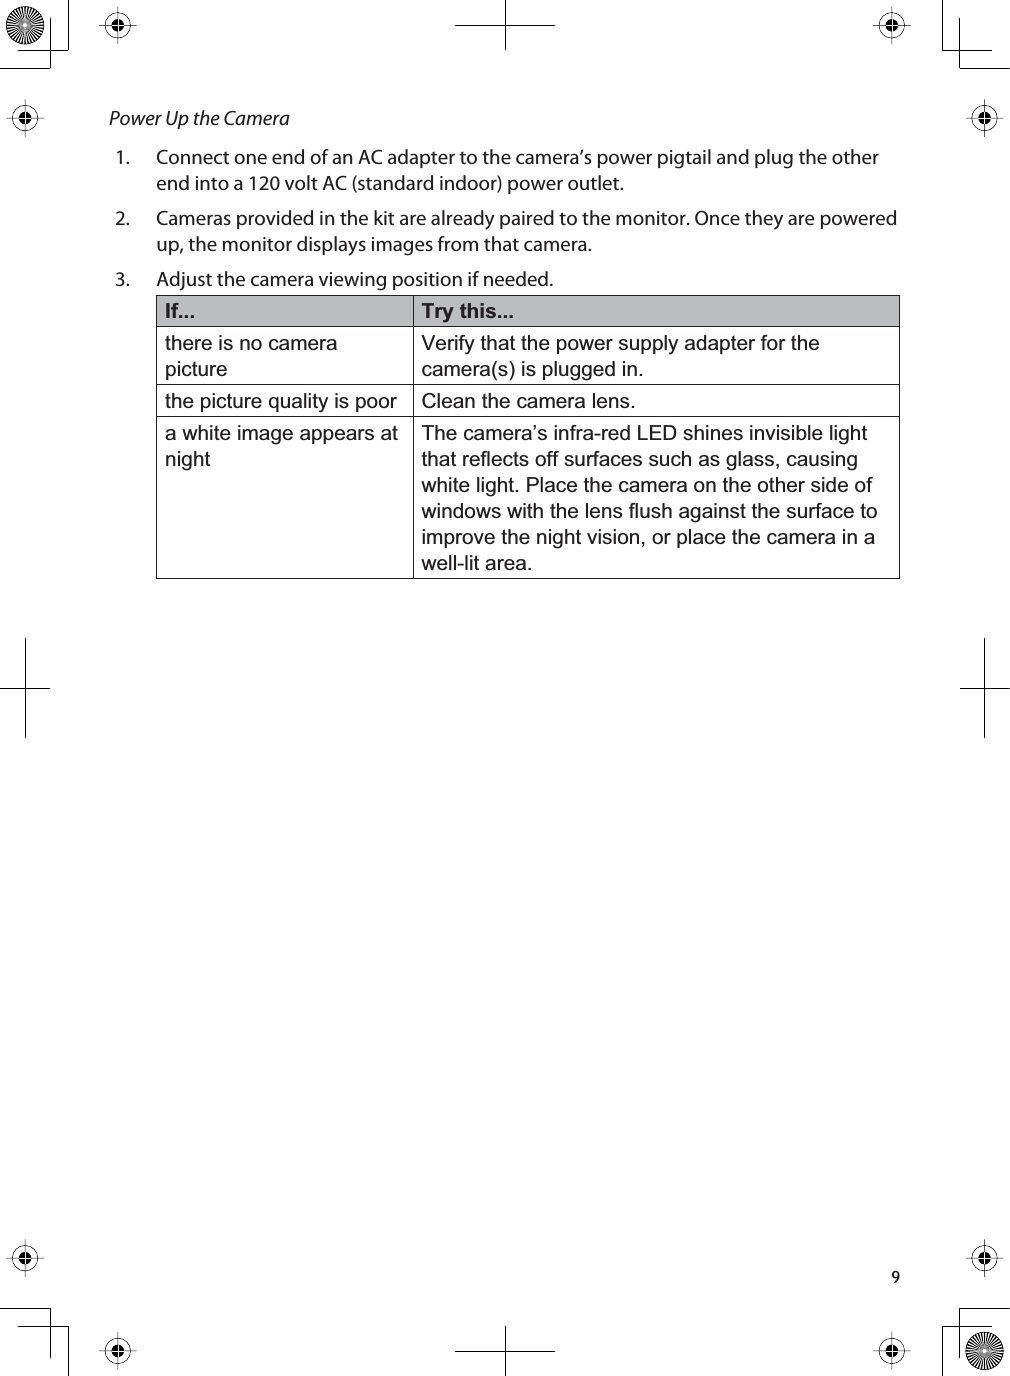
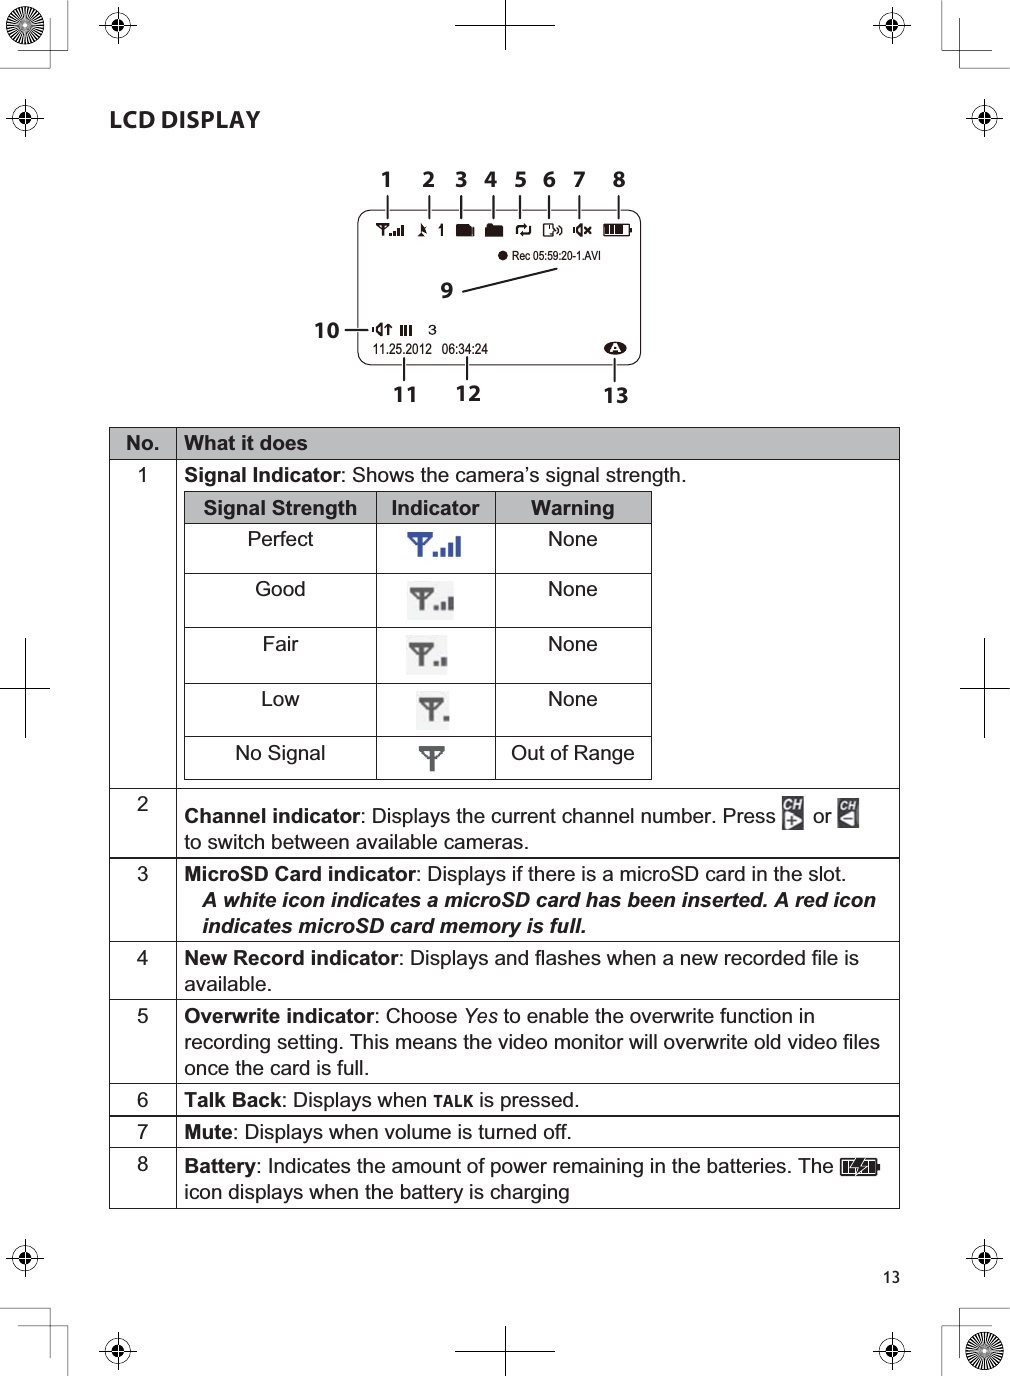
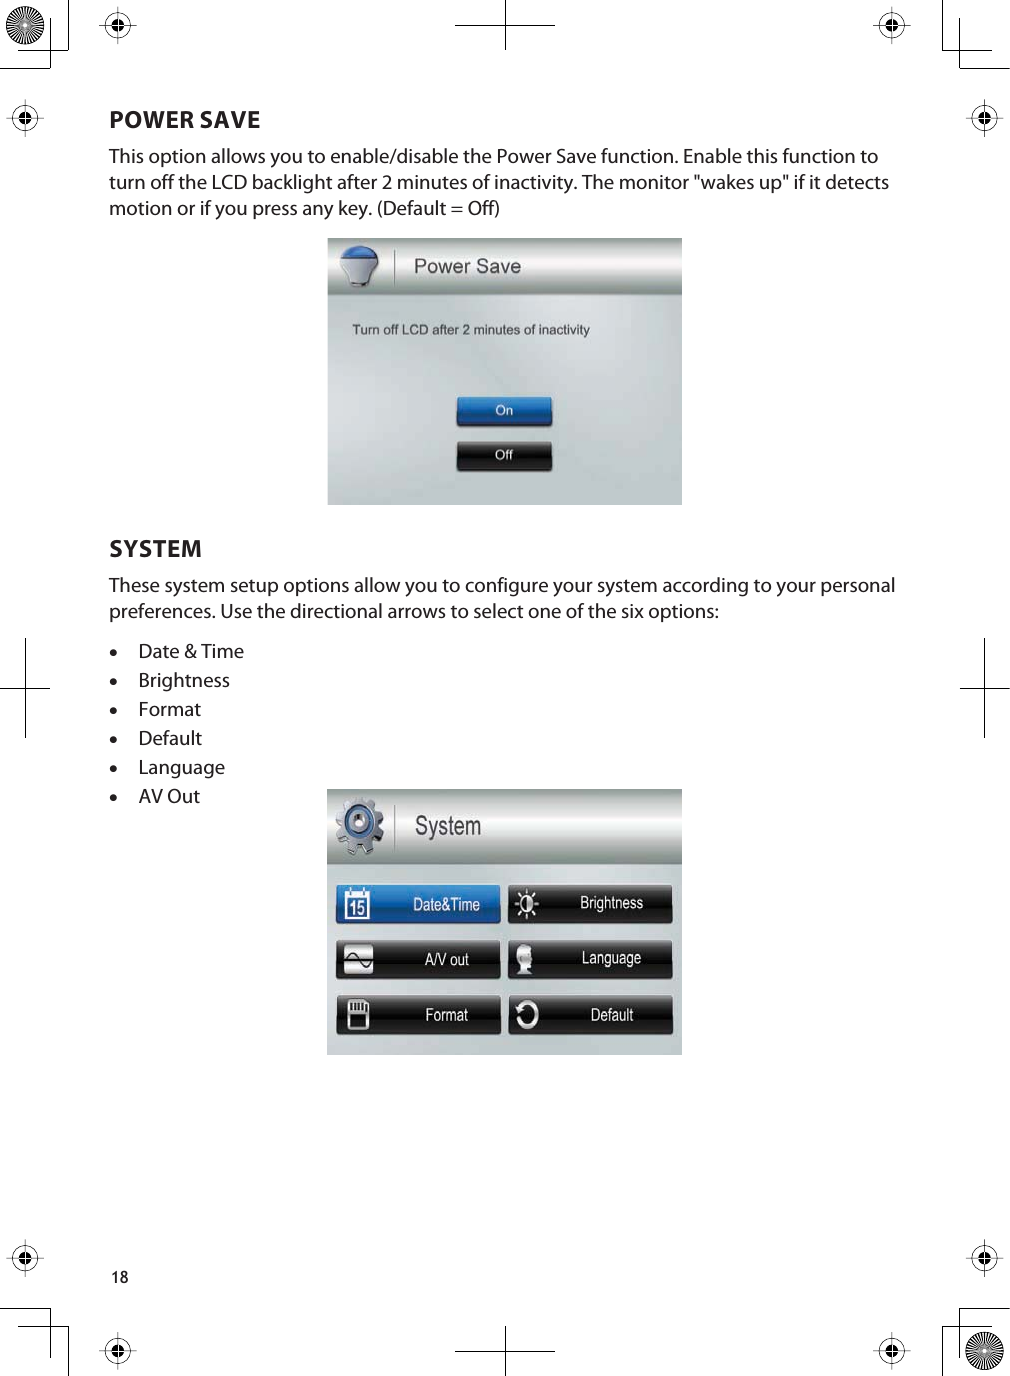
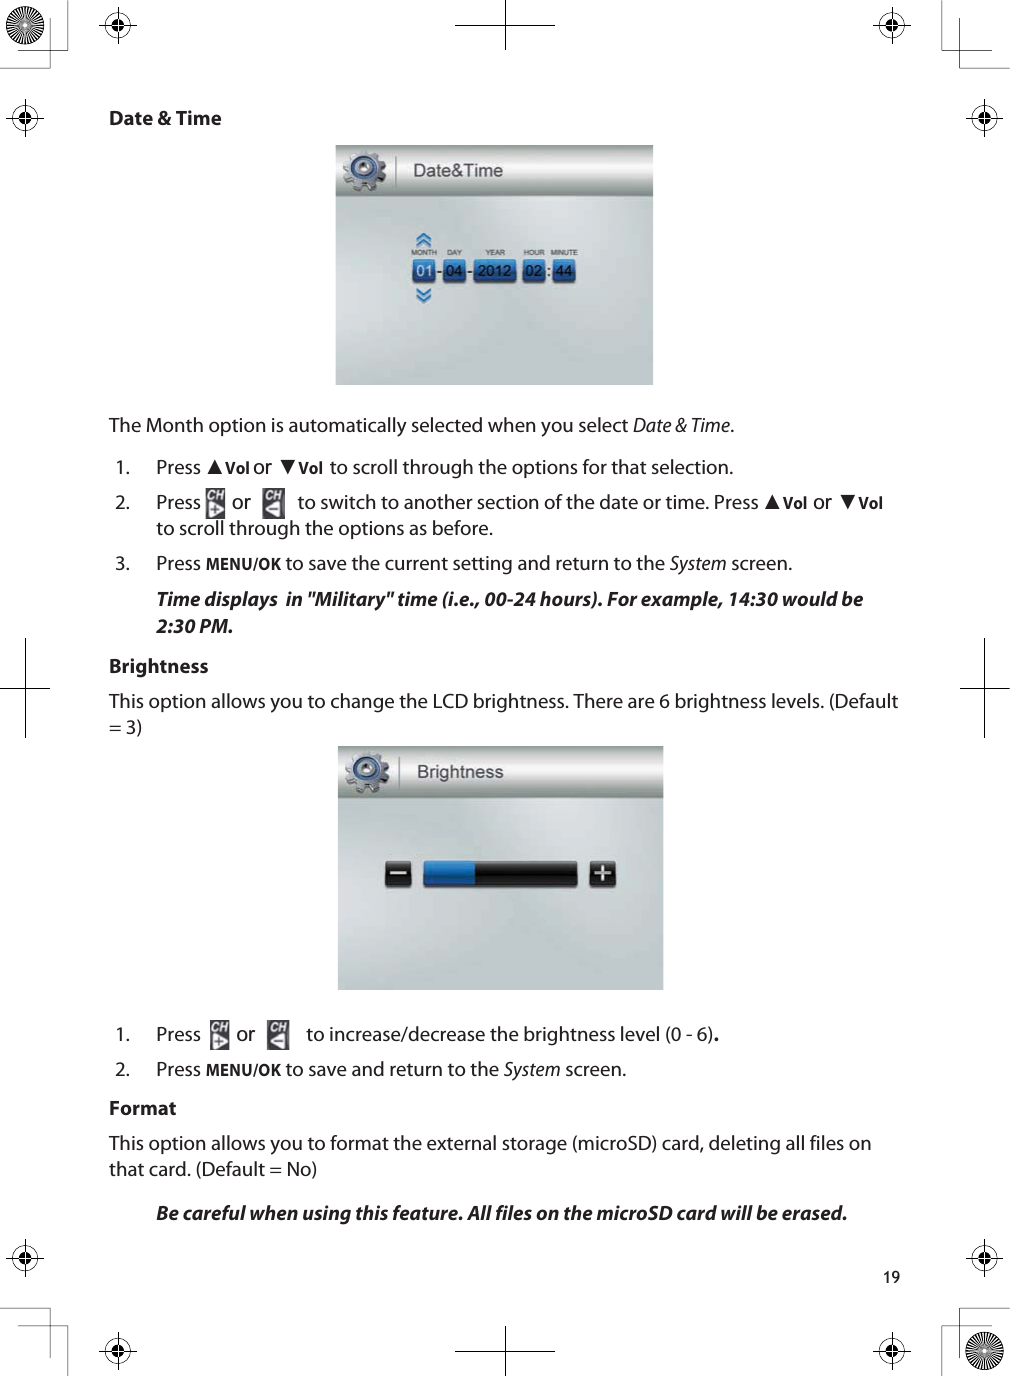
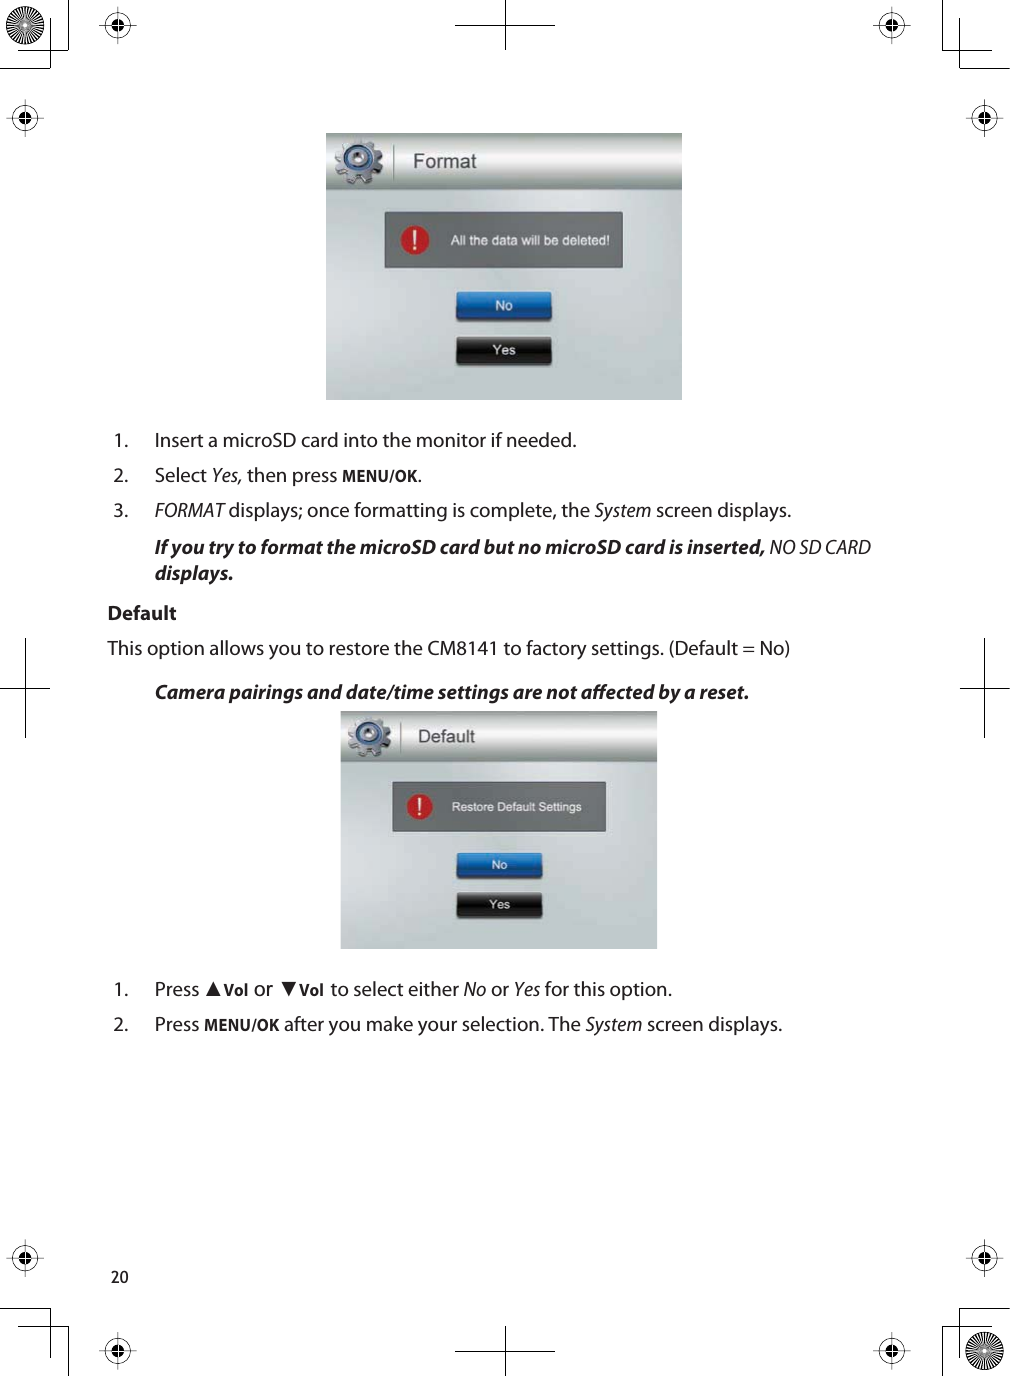
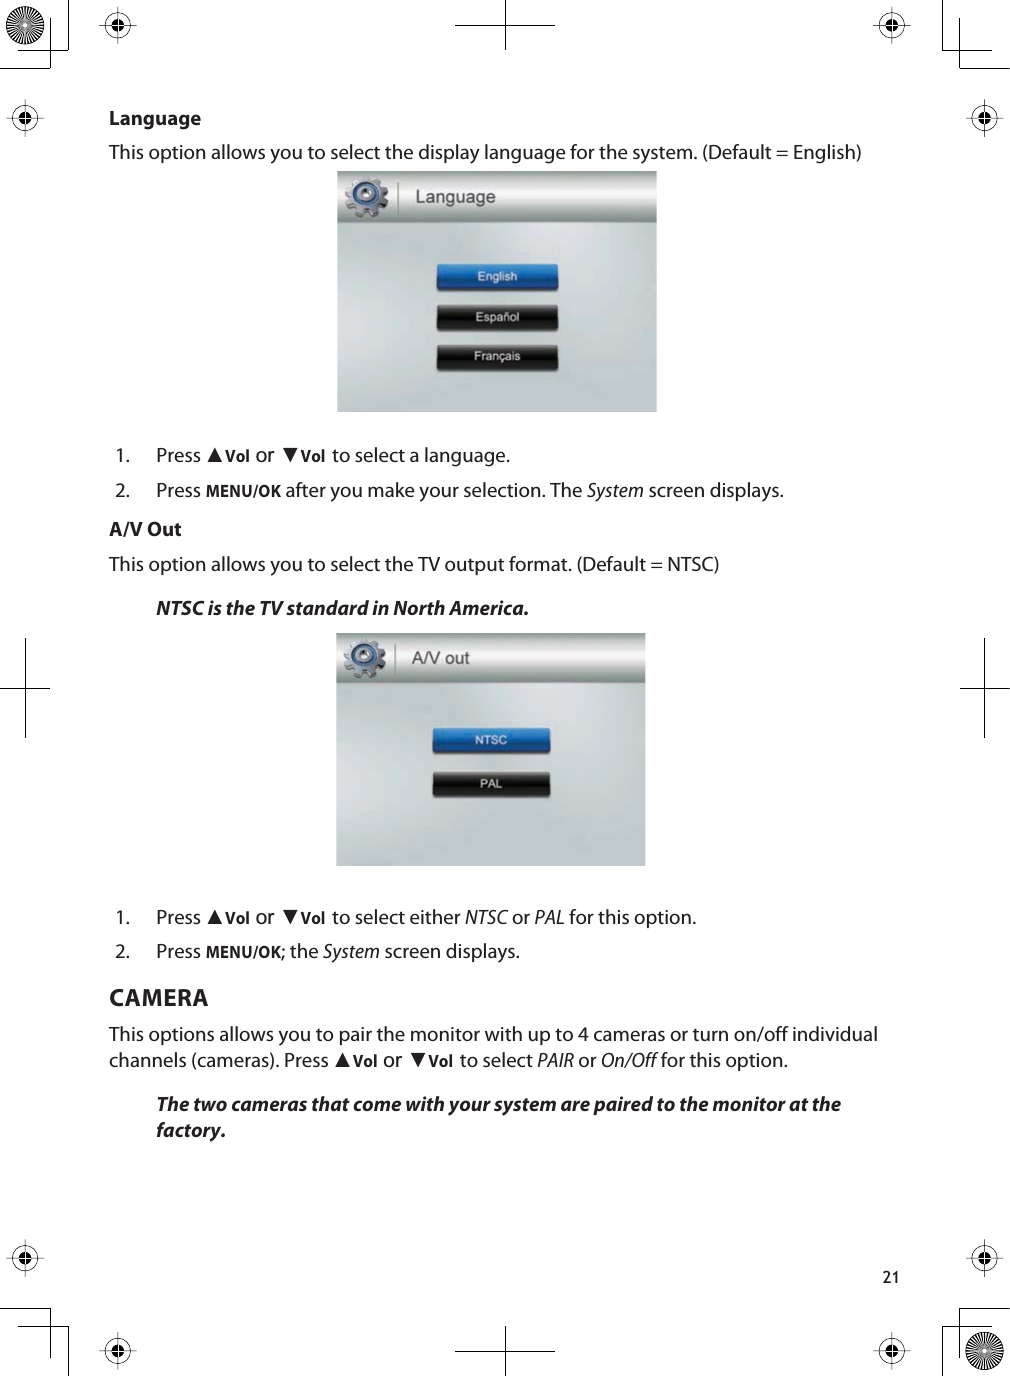
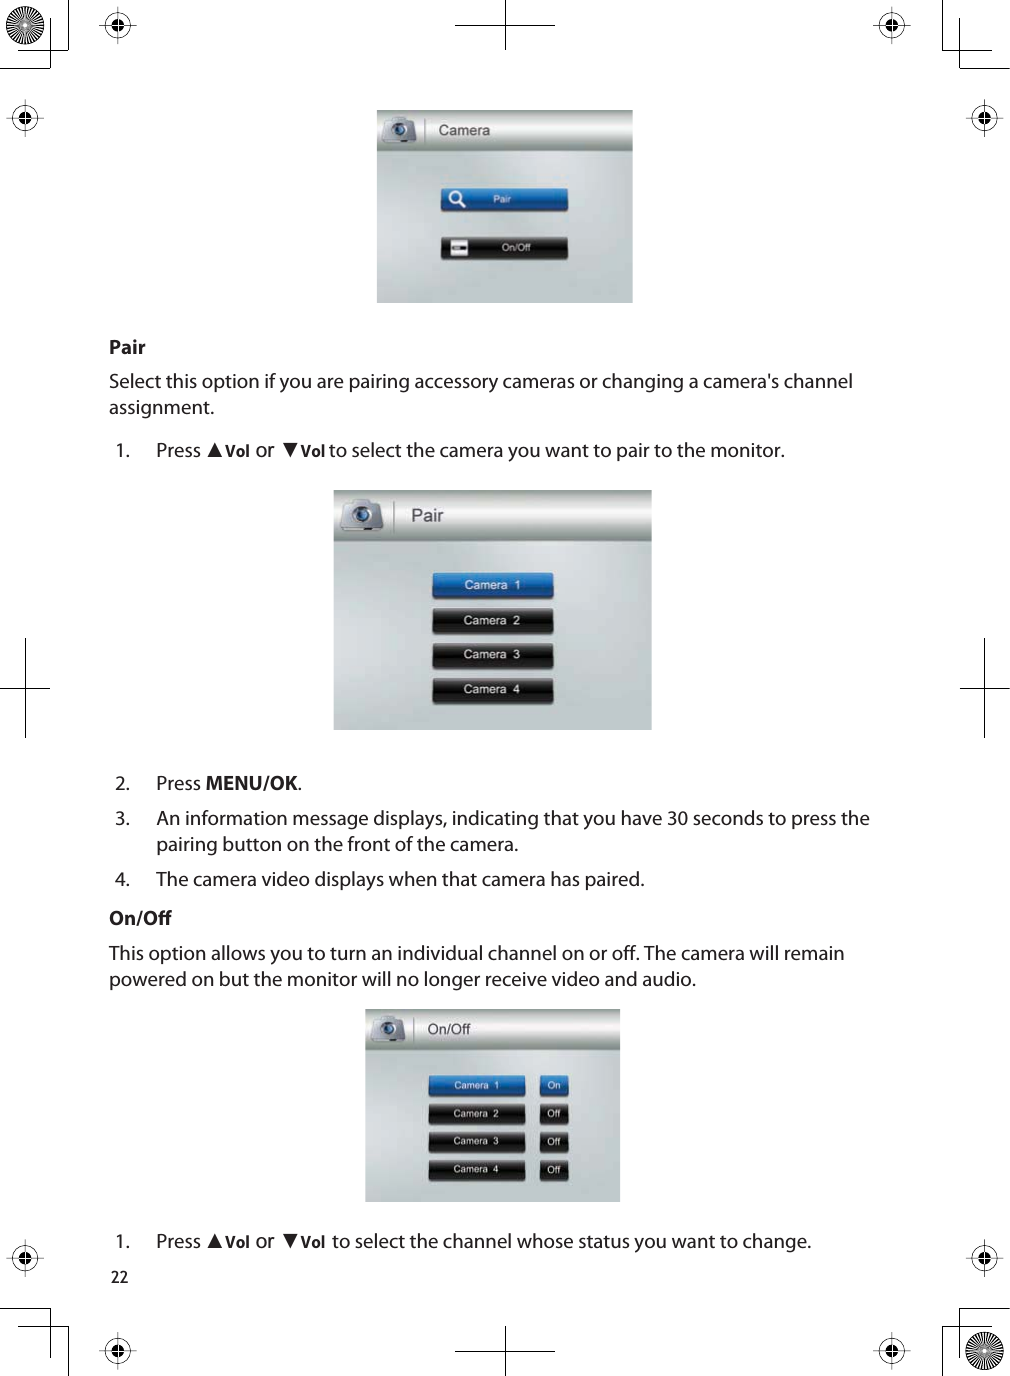
![17CM8141 SYSTEM MENUSPress to access the CM8141 system menu options. Use the navigating buttons to navigate up/down/left/right in the menu, and press MENU/OK to conrm a setting.dŚĞDĂŝŶŵĞŶƵŽƉƟŽŶƐĂƌĞ͗ůĞƌƚWŽǁĞƌ^ĂǀĞ^LJƐƚĞŵĂŵĞƌĂZĞĐŽƌĚ1. Press or to change options. The icon for the selected option enlarges.2. PressMENU/OK to select that option.ALERTThis option allows you to set the alert volume for the unit. There are 6 levels plus o. [Default = O (mute)]. Press or to increase or decrease the alert volume.](https://usermanual.wiki/RDI-Technology/CA810A/User-Guide-1890536-Page-17.png)