RDI Technology CA810A WIRELESS CAMERA User Manual M410A FCC IC English 1
RDI Technology (Shenzhen) Co., Ltd. WIRELESS CAMERA M410A FCC IC English 1
User Manual
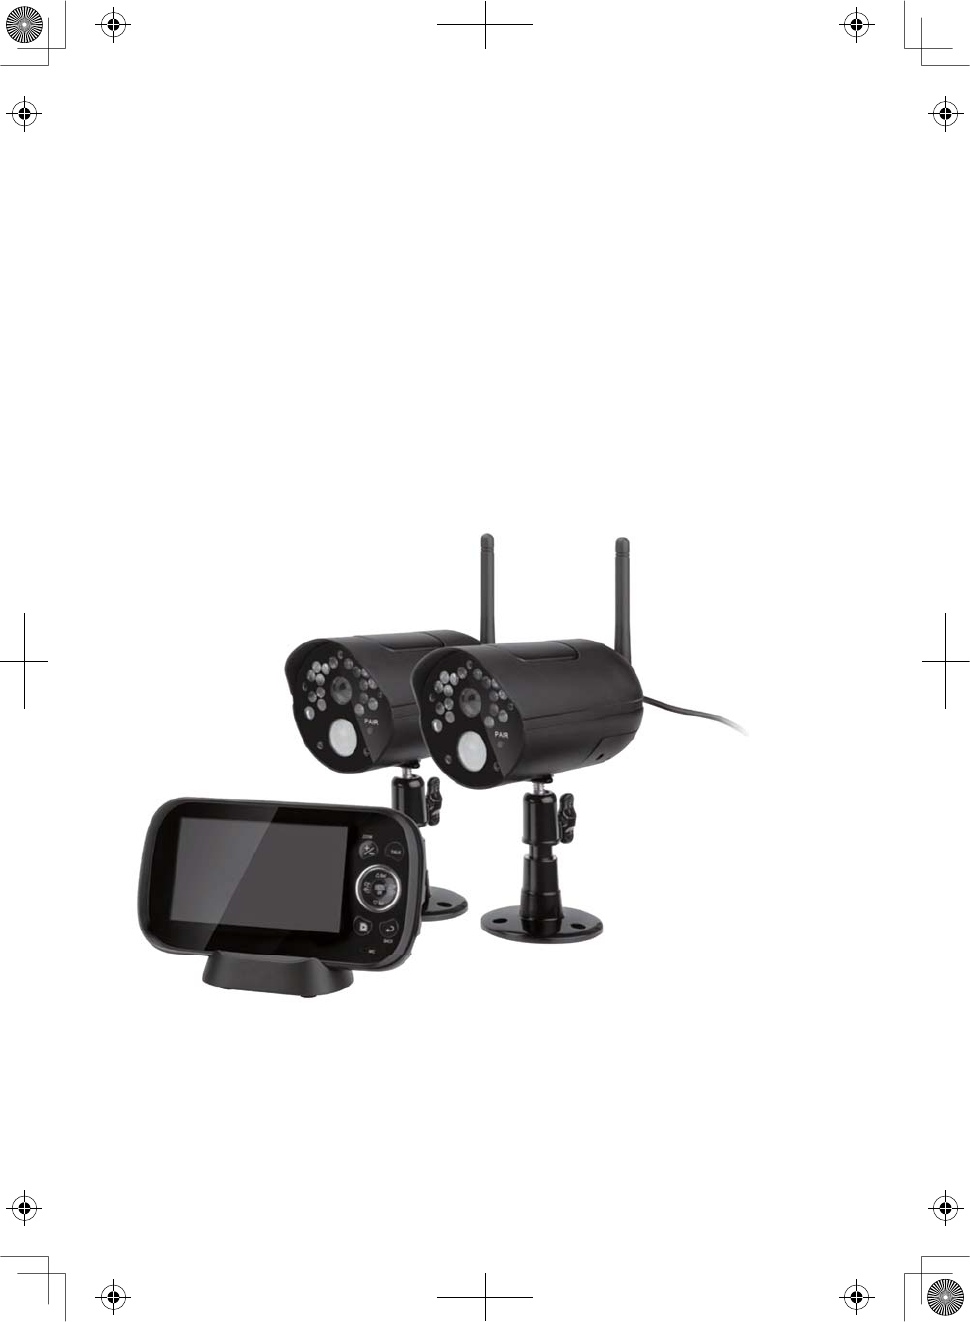
CM8141
WIRELESS VIDEO
SURVEILLANCE
Owner’s Manual
CONTENTS
OVERVIEW..................................................................................................5
USING THE MANUAL ....................................................................................................................5
CM8141 FEATURES .......................................................................................................................5
GETTING STARTED .....................................................................................6
WHAT'S INCLUDED .......................................................................................................................6
INSTALLATION................................................................................................................................6
General Placement Considerations ..................................................................................................... 6
Installing Your Monitor ............................................................................................................................7
Installing the Camera ................................................................................................................................ 7
BASIC OPERATION .................................................................................. 10
WIRELESS Monitor ...................................................................................................................... 10
WIRELESS CAMERA .................................................................................................................... 12
Front & Back Controls .............................................................................................................................12
LCD DISPLAY ................................................................................................................................ 13
USING THE CM8141................................................................................................................... 14
Viewing Modes .........................................................................................................................................14
Common Operations ..............................................................................................................................14
CM8141 SYSTEM MENUS ....................................................................... 17
ALERT.............................................................................................................................................. 17
POWER SAVE ................................................................................................................................ 18
SYSTEM .......................................................................................................................................... 18
Date & Time ................................................................................................................................................19
Brightness ...................................................................................................................................................19
Format..........................................................................................................................................................19
Default..........................................................................................................................................................20
Language ....................................................................................................................................................21
A/V Out.........................................................................................................................................................21
CAMERA......................................................................................................................................... 21
Pair.................................................................................................................................................................22
...........................................................................................................................................................22
RECORD.......................................................................................................................................... 23
Video Quality .............................................................................................................................................23
Trigger Recording Time .........................................................................................................................23
Motion Sensitivity ....................................................................................................................................24
Schedule Recording ................................................................................................................................25
Overwrite ....................................................................................................................................................26
SPECIAL FEATURES ................................................................................. 27
RECORDING VIDEO .................................................................................................................... 27
Manual Recording ....................................................................................................................................27
VIEWING RECORDED VIDEO ................................................................................................... 27
DELETING RECORDED FILES ................................................................................................... 28
USING THE INTERCOM .............................................................................................................. 28
VIEWING LIVE VIDEO ................................................................................................................. 28
Viewing On Your TV ................................................................................................................................28
Viewing On Your Computer .................................................................................................................28
Viewing on Your Wireless Device or Remote Computer ...........................................................29
PAIRING ACCESSORY CAMERAS ........................................................................................... 30
MAINTAINING YOUR SYSTEM ................................................................ 31
MONITOR....................................................................................................................................... 31
CAMERAS ...................................................................................................................................... 31
Troubleshooting..................................................................................... 32
.......................................................................................... 33
MONITOR....................................................................................................................................... 33
General.........................................................................................................................................................33
Monitor ........................................................................................................................................................33
CAMERA......................................................................................................................................... 34
General.........................................................................................................................................................34
Camera.........................................................................................................................................................34
5
OVERVIEW
USING THE MANUAL
This manual is set up in eight sections:
xOverview. This general section tells you how to use this manual. It also lists the system's
features.
xGetting Started. This section lists the hardware that should have been in your box and
how to set it up.
xBasic Operations. This section describes your equipment's function keys in detail. It also
provides a list of basic operations in an abbreviated format, referencing screen details in
the next section.
x
screen and how it is used.
xSpecial Features. This section tells you about the CM8141 special features, such as
how to connect your surveillance system to Skype™ and access it from your remote
computer or other wired/wireless devices.
xMaintaining Your System. This section provides tips on how to keep your CM8141
hardware clean and in excellent working condition.
xSolving Problems. Troubleshooting tips are located here.
CM8141
x
If any items are missing or damaged, contact our Customer Care Line immediately.
Never use damaged products!
CM8141 FEATURES
x4.3” LCD monitor with built-in rechargeable Lithium Polymer battery (up to 4.5 hours)
xUp to 500 ft. wireless transmission range
xUp to 40 ft. motion detection/night vision range
xCamera out of range alert
xRecord to microSD card (4GB microSD card included but will support up to 32GB)
xBuilt-in microphones and speakers (cameras and monitor) support Intercom function
for two-way audio communication
xIP65 weather-rated VGA resolution cameras (2 included)
xSystem expandable up to 4 cameras total (additional cameras sold separately)
xSimultaneous Quad view
xDigital zoom, pan, and tilt
xSchedule recording setting
xAV Out to view video on TV
xUSB Out for remote Skype™ connection
6
GETTING STARTED
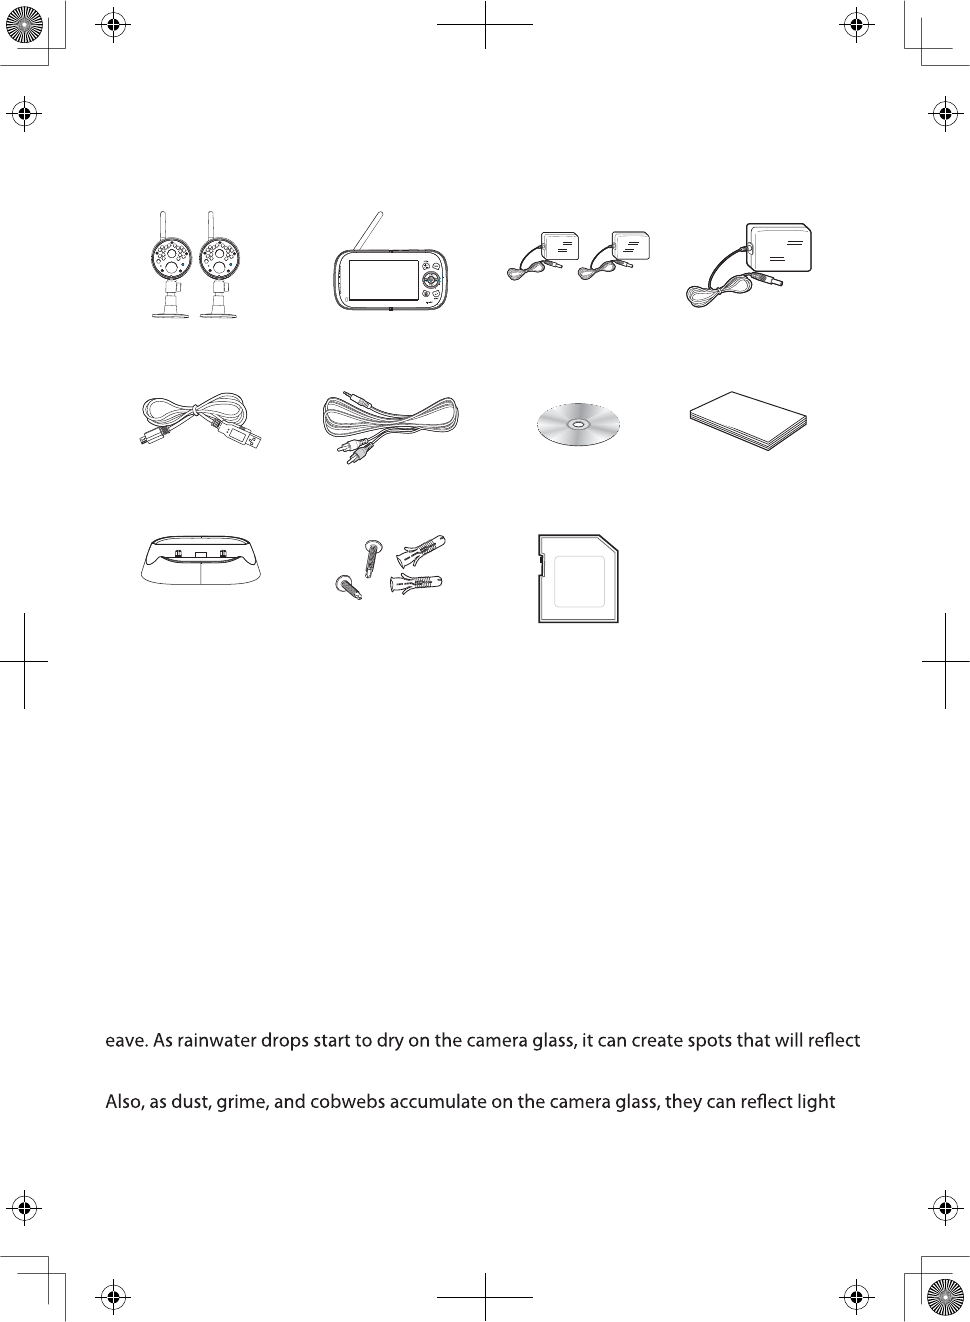
WHAT'S INCLUDED
Digital Wireless
Cameras (2)
Digital Wireless
Monitor (1)
Camera Power
Adapters (2)
Monitor Power
Adapter (1)
USB Cable AV Cable CD User Manual
Receiver Cradle Screws and
anchors
(6 each)
4G MicroSD Card
(Adapter not
shown)
If any items are missing or damaged, contact our Customer Care Line immediately.
Never use damaged products!
INSTALLATION
General Placement Considerations
The cameras included with your monitor are weatherproof and have an IP65 weather
rating. Water can be sprayed on them and they will still work; however, the cameras cannot
be submerged underwater.
Although the cameras can be exposed directly to the rain, it is recommended that, if they
are used outdoors, they be mounted under some type of cover like a patio overhang or
the light from the infrared LEDs used for night vision, thus causing lower quality video.
from the infrared LED and might lower video quality. Periodically clean the lens glass with a
soft cloth.
Consider the following when placing cameras:
7
xClear line of sight video transmission distance is up to 500 ft.
—Walls, especially brick and concrete, shorten the transmission distance.
—Placement next to windows allows better transmission.
xAvoid having a direct light source in view of the camera. This includes street lights,
ceiling or floor lamps, spotlights in the driveway, etc.
xThe cameras are equipped with built-in infra-red LEDs so you can use night vision for
24-hour surveillance. The LEDs automatically activate at night and the picture viewed
turns to black and white. The night viewing range is up to 40 ft. Avoid pointing the
camera lens directly at clear glass; the night vision LEDs will cause a blurred image.
xOptimized motion detection range is up to 40 ft. The farther away an object is, the less
accurate the motion detection.
xAvoid pointing the camera directly at any bushes, tree branches, or moving objects
that might naturally move due to winds. Otherwise, the motion detection feature may
record unnecessarily.
x
Out of Range
displays when the monitor and camera are too far apart. Reposition the
equipment.
xA Low Battery icon displays when you need to recharge the battery.
Installing Your Monitor
Out of the box, your monitor has enough power to be used when you place and install the
cameras. You can check the camera placement and angle before you physically screw the
camera stands into place.
After you have installed the cameras and set up the monitor, plug the AC adapter power
output cable into the 5V POWER input of the cradle or monitor. Plug the power plug into a
wall outlet or surge protector.
If you are powering the monitor through the cradle, insert the monitor into the
cradle at this point.
Installing the Camera
You can mount the camera with the stand on the bottom (for a flat surface such as a table-
top), on the side (for a wall), or on the top (for the ceiling). When you are positioning the
camera, you might want to bring the monitor along; it’s much easier to get the camera into
the right position when you have the monitor handy.
Mount the Camera Base
The following tools are required:
xElectric Drill
x5mm Drill Bit
xNo. 2 Philips Screwdriver
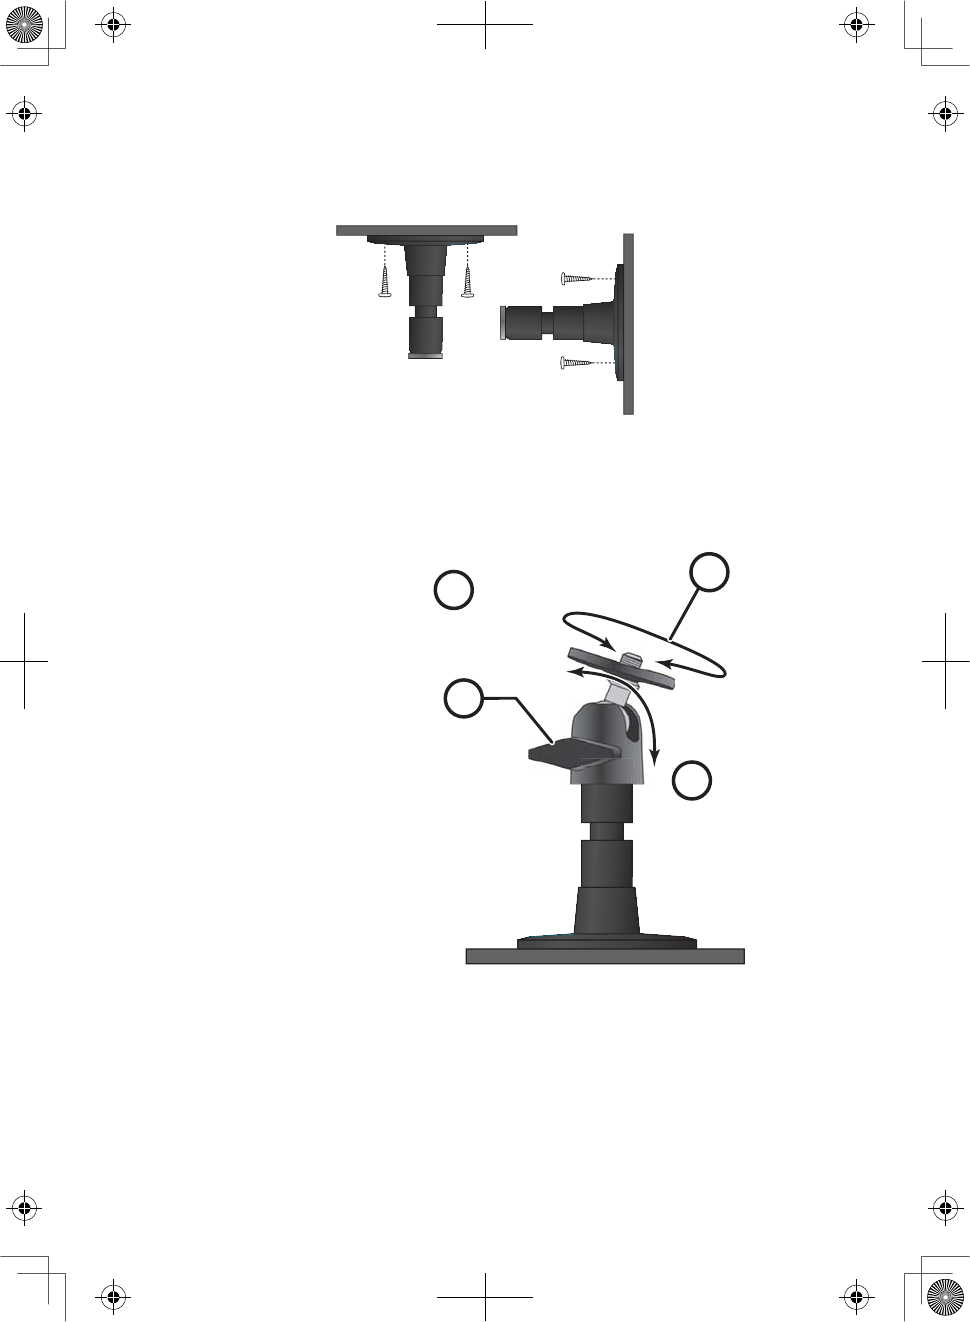
1. Hold the base of the camera stand where you want to mount it and mark the location
of the screw holes.
8
2. Drill holes using the 5mm drill bit.
3. Insert anchors.
4. Use the included screws to attach the base to the wall or ceiling. You can also screw
the base into a at surface such as a tabletop if needed.
5. Before attaching the camera, tug gently on the stand to make sure it is securely in
place.
Attach the camera
1. For each camera, attach
the camera bracket to the
mounting screw. You can
attach the stand to the top or
the bottom of the camera as
needed. Tighten it a few turns,
then turn the camera to face
the direction you want.
2. Tighten the camera brace up
against the camera to secure it
into place.
3. Unlock the mounting post by
turning the wingnut to the left
a few turns.
4. Set the mounting post to the
correct angle, then tighten the
wingnut until the post is locked
into place.
5. Attach the antenna to the rear of the camera.
Power Up the Monitor
1. Press and hold the
POWER
button on the left side of the monitor for 1 - 2 seconds to
turn it on.
2. The monitor displays the title screen and then displays the live view.
1
2
4
3
Loosen the
wingnut to
unlock the
mounting
post.
Attach the camera
to the mounting
screw and turn it
to the desired
direction.
Adjust the post to
the correct angle,
then tighten the
wingnut to lock the
post into place.
Tighten the brace against
the camera to
secure it
in place.
9
Power Up the Camera
1. Connect one end of an AC adapter to the camera’s power pigtail and plug the other
end into a 120 volt AC (standard indoor) power outlet.
2. Cameras provided in the kit are already paired to the monitor. Once they are powered
up, the monitor displays images from that camera.
3. Adjust the camera viewing position if needed.
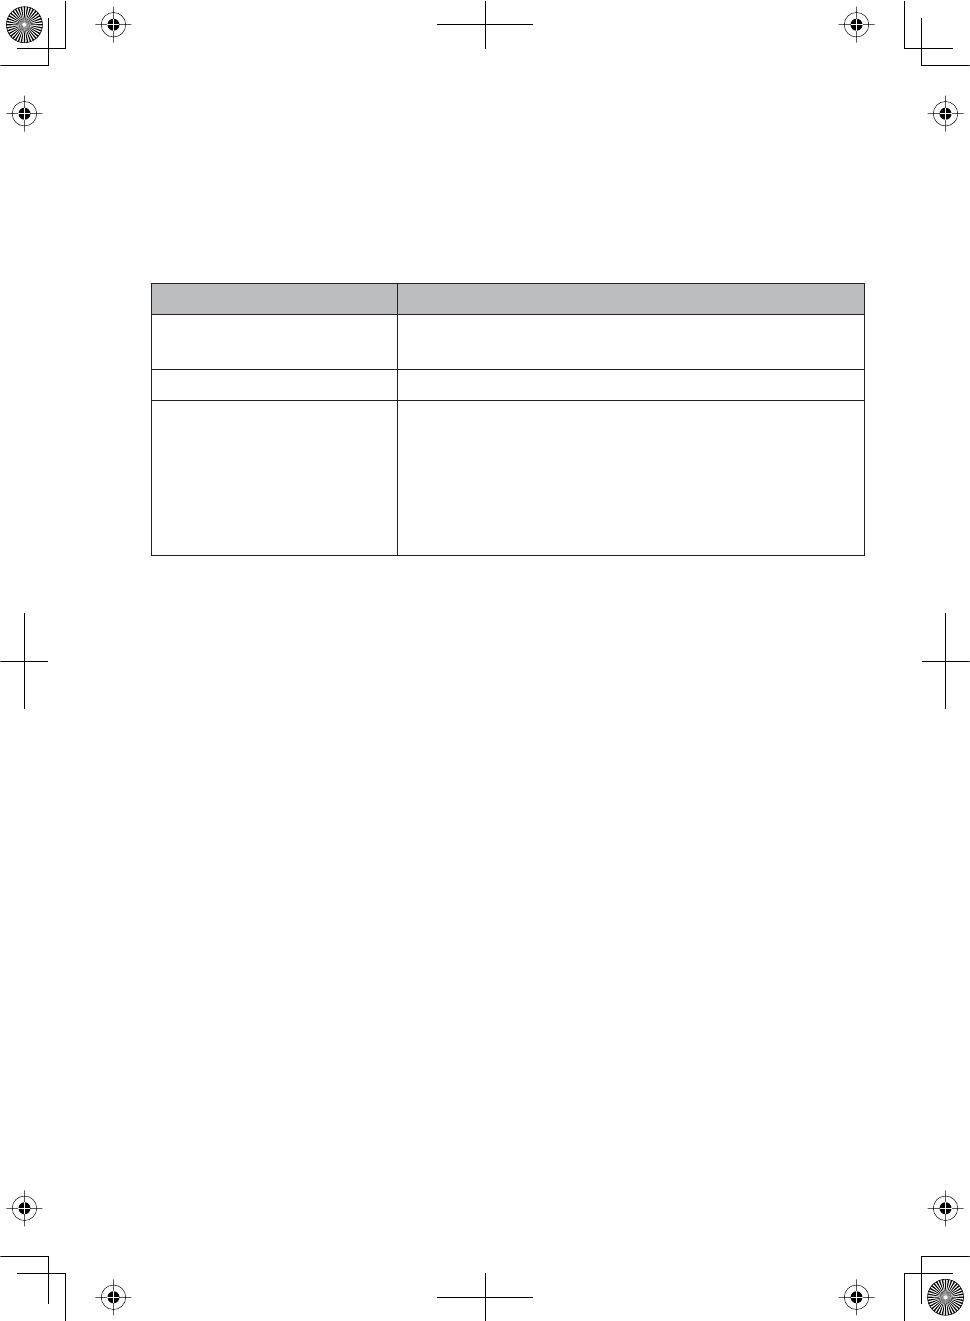
If... Try this...
there is no camera
picture
Verify that the power supply adapter for the
camera(s) is plugged in.
the picture quality is poor Clean the camera lens.
a white image appears at
night
The camera’s infra-red LED shines invisible light
that reflects off surfaces such as glass, causing
white light. Place the camera on the other side of
windows with the lens flush against the surface to
improve the night vision, or place the camera in a
well-lit area.
10
BASIC OPERATION
WIRELESS MONITOR
123 4
5
6
7
8
9
10
13
11
14
15
16
17
18
19
12
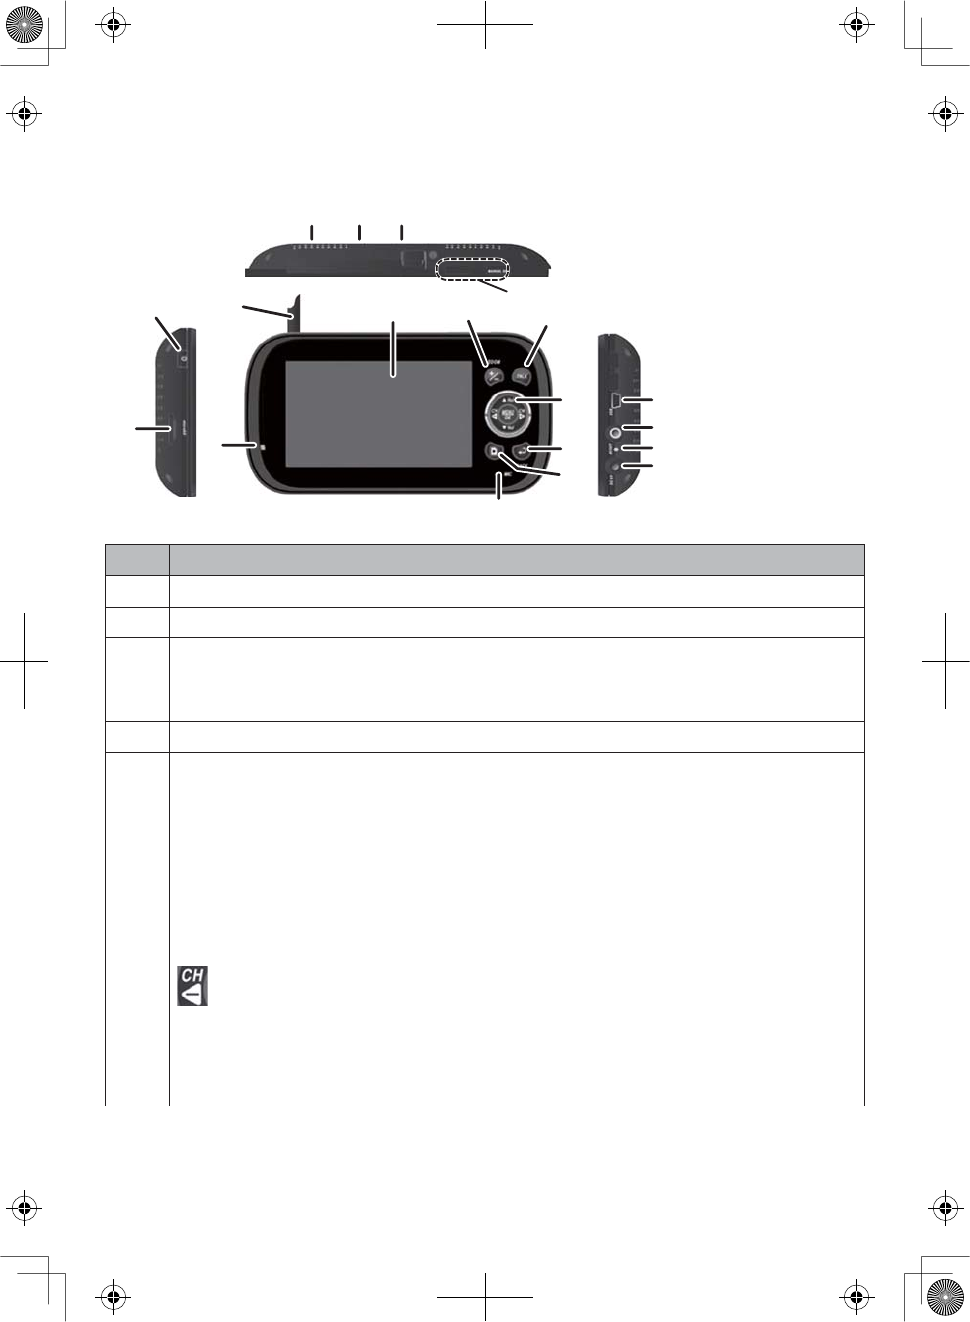
No. What it does
1Antenna: Receives signals (video and audio) from cameras.
2LCD Screen: Displays video from the cameras.
3Zoom (+/−): Set the image to double size. In Zoom mode, use the navigation
buttons to see the parts of the image not displayed on the LCD screen.
Return it to original size by selecting Zoom again.
4Talk: Press and hold while in Live view mode to talk to the camera side.
5Navigation Controls: Use the controls in Live view, Menu mode, and
Playback mode. You can use these controls in Zoom mode as well.
Vol, Vol
rMove up or down in Menu mode.
rIncrease or decrease the volume in Live view.
rPlay and Pause in Playback mode ( Vol ).
rStop in Playback mode ( Vol ).
rMove left in Menu mode.
rPress this button to change viewing camera channel in Live view.
rFast backward in Playback mode.
11
No. What it does
r.PWFSJHIUJO.FOVNPEF
r1SFTTUIJTCVUUPOUPDIBOHFWJFXJOHDBNFSBDIBOOFMJO-JWFWJFX
r'BTUGPSXBSEJO1MBZCBDLNPEF
Menu/OK
3UHVVWRDFFHVVWKHCM8141PHQX
&RQILUPVHOHFWLRQVJO.FOVNPEF
6Back3UHVVWKLVEXWWRQWRUHWXUQWRSUHYLRXVVFUHHQ
7Video Playback 'XULQJOLYHYLGHRSUHVVWRJRWRWKH
Play File
VFUHHQ
8Microphone)RUWZRZD\DXGLRWRFDPHUD
9Power On LED
r0O#BUUFSZDBQBDJUZHPPE
r'MBTIJOH-PXCBUUFSZ
10 Monitor Stand%XLOWLQVWDQGIRUZKHQPRQLWRULVQRWLQFUDGOH
11 Speaker0VUQVUTPVOESFDFJWFEGSPNDBNFSB
12 Reset Button,QVHUWDEOXQWWKLQREMHFWVXFKDVDQXQEHQWSDSHUFOLSLQWR
WKHUHVHWEXWWRQKROHRQWKHEDFNRIWKHPRQLWRU
13 Manual Rec1SFTTUIJTCVUUPOUPTUBSU.BOVBM3FDPSEJOHNPEF1SFTTBHBJOUP
TUPQSFDPSEJOH
14 Power button5VSOTNPOJUPSPOBOEPí1SFTTBOEIPMEBGFXTFDPOETMPOHFS
UPUVSONPOJUPSPí
15 microSDNJDSP4%DBSETMPU
16 USB Port6TFT64#DBCMFUPDPOOFDUUIFUIFNPOJUPSUPUIFDPNQVUFSGPSSFNPUF
BDDFTTVTJOH4LZQF™
17 AV OUT6TFT"7DBCMFUPDPOOFDUUIFNPOJUPSUPUIF57UPWJFXMJWFWJEFP
18 Charging LED indication
r(SFFO#BUUFSZJTGVMMZDIBSHFE
r3FE#BUUFSZJTDIBSHJOH
19 Power input (DC 5V)$POOFDUUIFJODMVEFE7%$QPXFSBEBQUPSUPQPXFS
UIFNPOJUPSBOEPSDIBSHFUIFNPOJUPSCBUUFSZXIFOUIFNPOJUPSJTOPUJOUIF
DSBEMF
12
WIRELESS CAMERA
Front & Back Controls
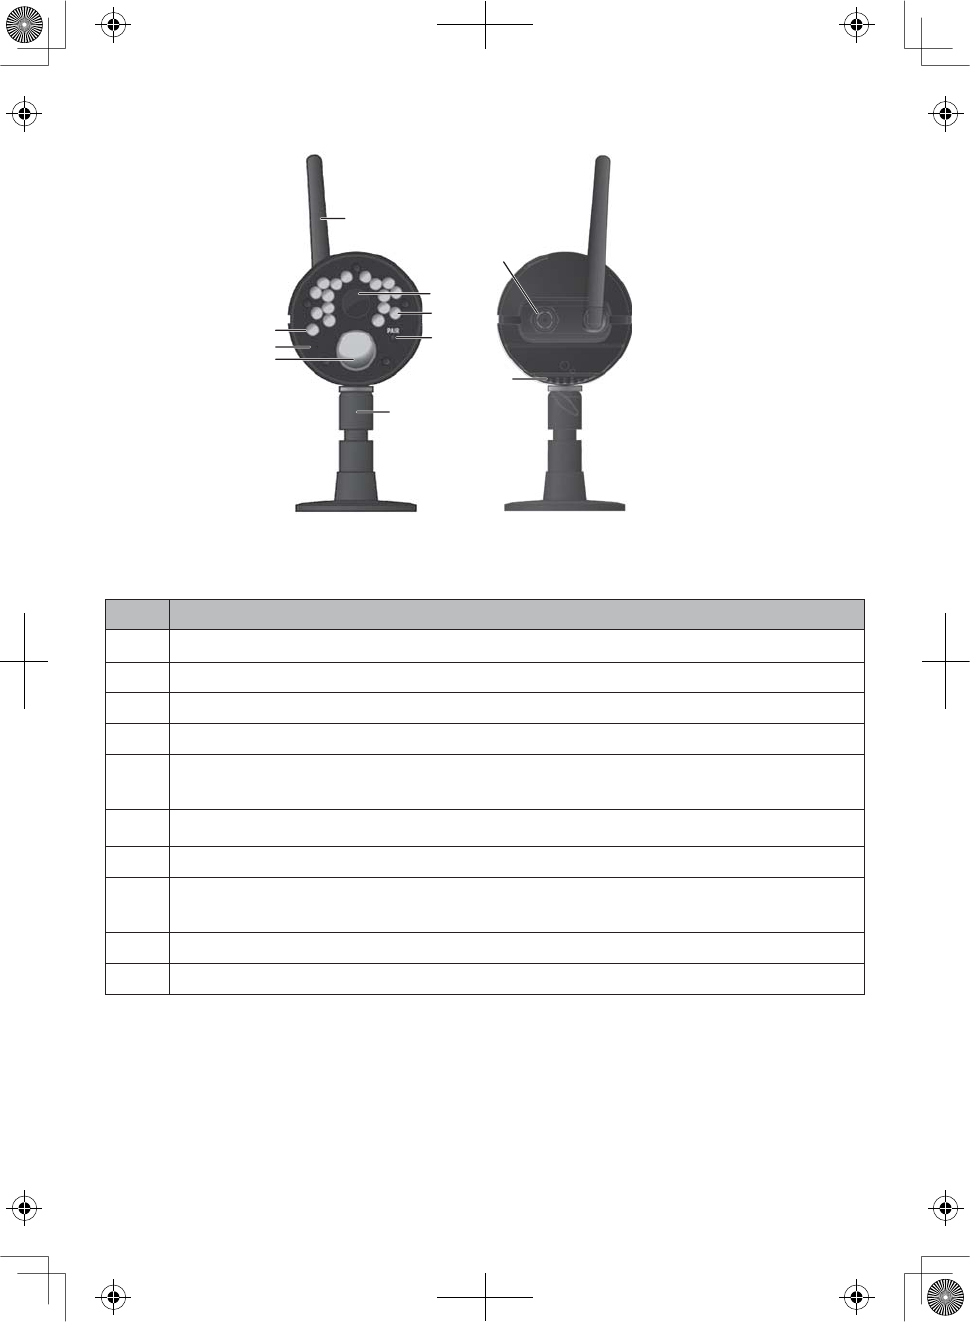
No. What it does
1Camera Antenna: Sends signals to the monitor.
2Light sensor: Measures light intensity to activate IR LEDs for night vision.
3Microphone: Receives sounds from the area near the camera.
4PIR sensor: Detects motion within camera's line of sight.
5Camera Lens: Mechanism through which the cameras view surroundings
and record images.
6Infrared LED: Infrared LEDs provide viewing in no/low light conditions.
7Pair: Press this button to pair the camera to the monitor.
8Camera stand: Connects to the camera to allow multiple mounting
positions.
9Speaker
:
Transmits sound from the monitor (intercom).
10 Power Input (9V DC): Connect to power adapter.
1
5
6
7
2
3
4
8
FRONT BACK
9
10
13
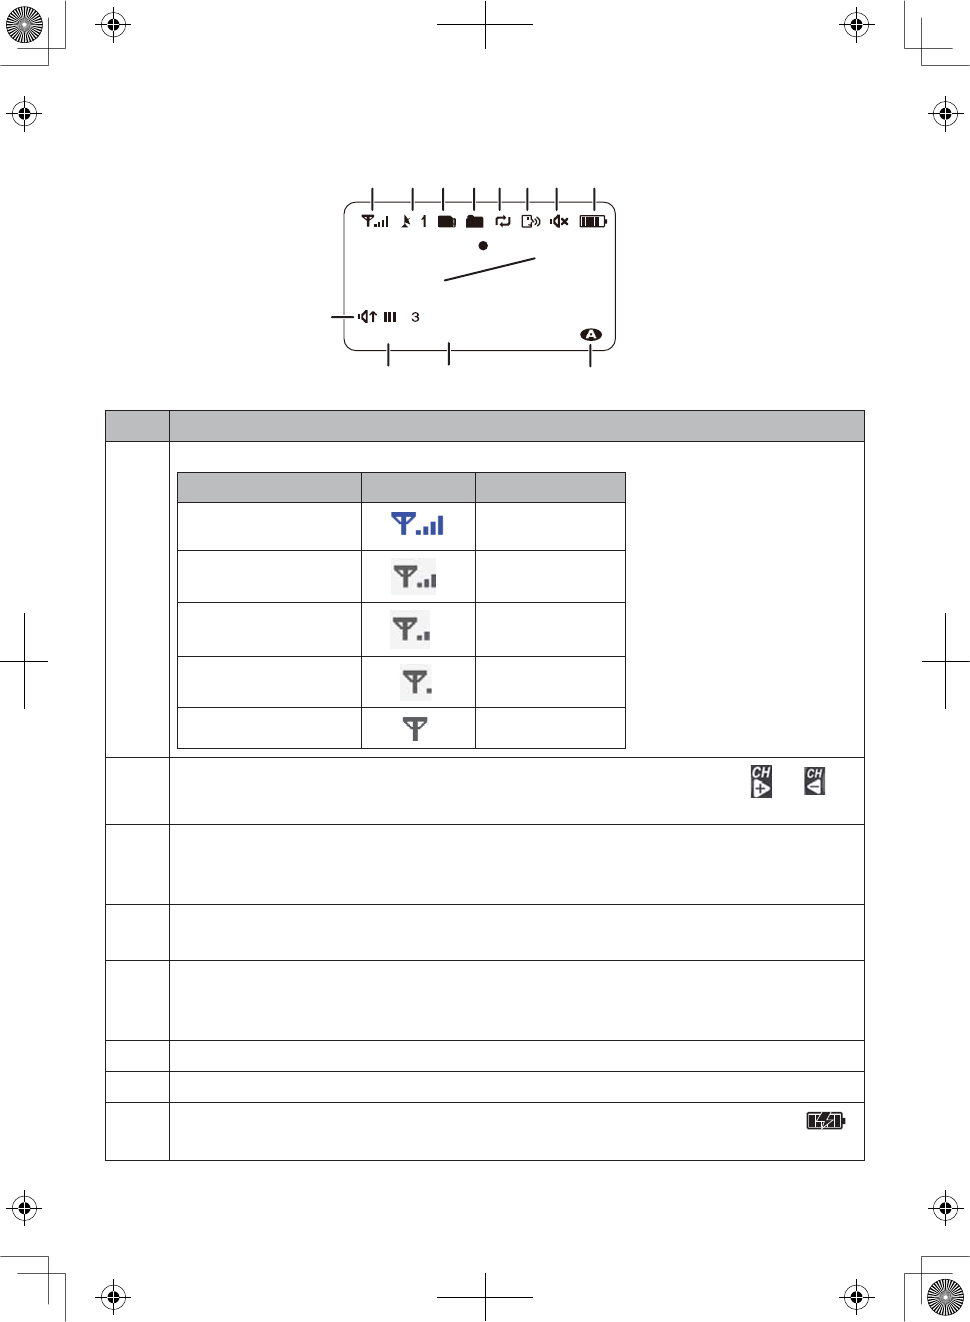
LCD DISPLAY
No. What it does
1Signal Indicator: Shows the camera’s signal strength.
Signal Strength Indicator Warning
Perfect None
Good None
Fair None
Low None
No Signal Out of Range
2Channel indicator: Displays the current channel number. Press or
to switch between available cameras.
3MicroSD Card indicator: Displays if there is a microSD card in the slot.
A white icon indicates a microSD card has been inserted. A red icon
indicates microSD card memory is full.
41HZ5HFRUG indicator: Displays and flashes when a new recorded file is
available.
52YHUZULWHLQGLFDWRU: Choose
Yes
to enable the overwrite function in
recording setting. This means the video monitor will overwrite old video files
once the card is full.
6Talk Back: Displays when
TALK
is pressed.
7Mute: Displays when volume is turned off.
8Battery: Indicates the amount of power remaining in the batteries. The
icon displays when the battery is charging
Rec 05:59:20-1.AVI
11.25.2012 06:34:24
1234567 8
9
13
12
11
10
14
No. What it does
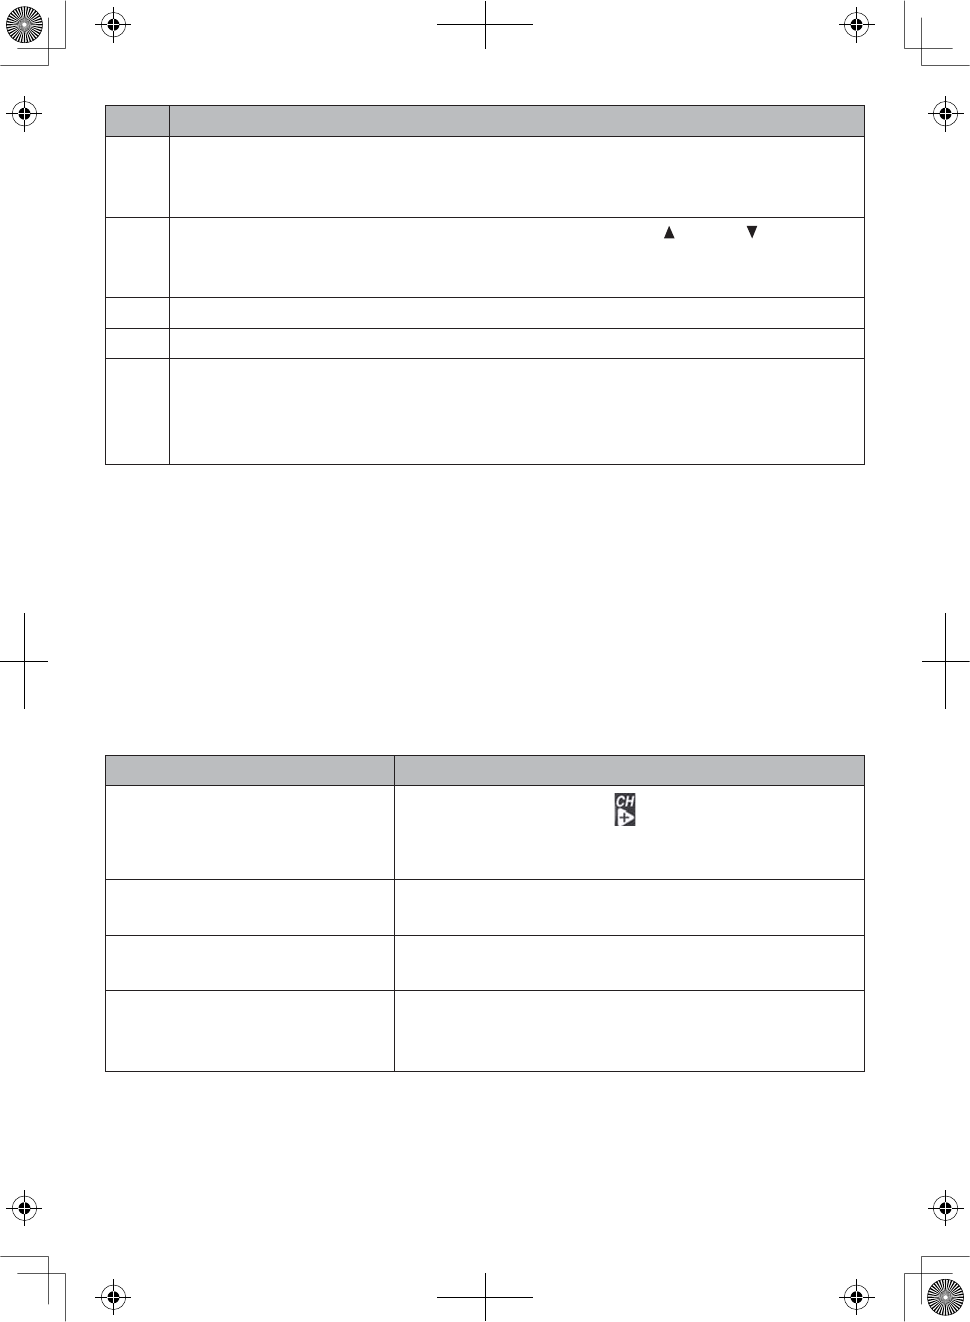
9Current Recording Status: Displays when the monitor is recording video.
The file name displays in hour/minute/second/recording camera format
(05.59.20-1).
10 Volume indicator: This icon displays when you press Vol or Vol. An
arrow indicates the last volume adjustment direction and status bars indicate
the volume level.
11 Current Date: Displays the date in MM.DD.YYYY format.
12 Current Time: Display the time in HH:MM:SS format.
13 Auto Recording indicator: Icon appears when the camera’s motion
detection function has been triggered. The camera records for 15, 30, or 60
seconds, depending on how it is set in the
Trigger Recording Time
screen.
You can also select OFF to disable the function.
USING THE CM8141
Viewing Modes
In Live view, video displays live images from the camera in the following modes:
Quad mode: Monitor displays video from all cameras on a single screen in 4 quadrants.
Single mode: Monitor displays video from one camera at a time.
Scan mode: Monitor displays video from one camera at a time, but cycles through all
cameras one by one.
Common Operations
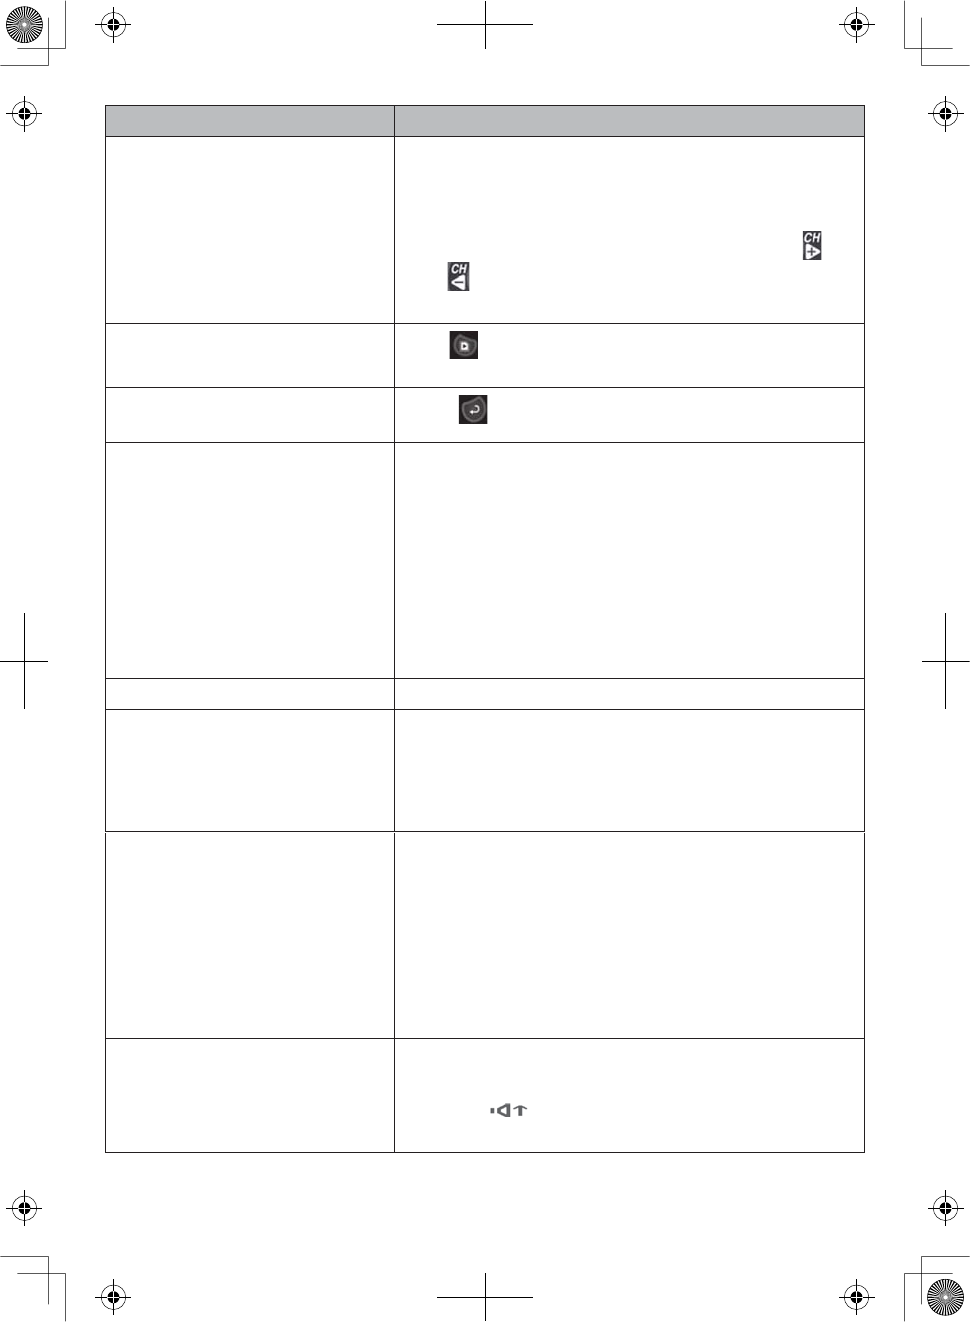
To... Do This...
Change between quad view,
single view, and scan for Live
view
From Quad view, press to cycle the screens in
the following order:
Scan - CH1 - CH2 - CH3 - CH4 - Quad
Manually start recording Press
MANUAL REC
on top of the monitor (see page
27).
Set up to record automatically Refer to
Schedule Recording
from the
Record
menu
(see page 25).
Manually stop/cancel
recording in Manual, Motion,
or Schedule Record mode
Press
MANUAL REC
on top of the monitor (see page
27).
15
To... Do This...
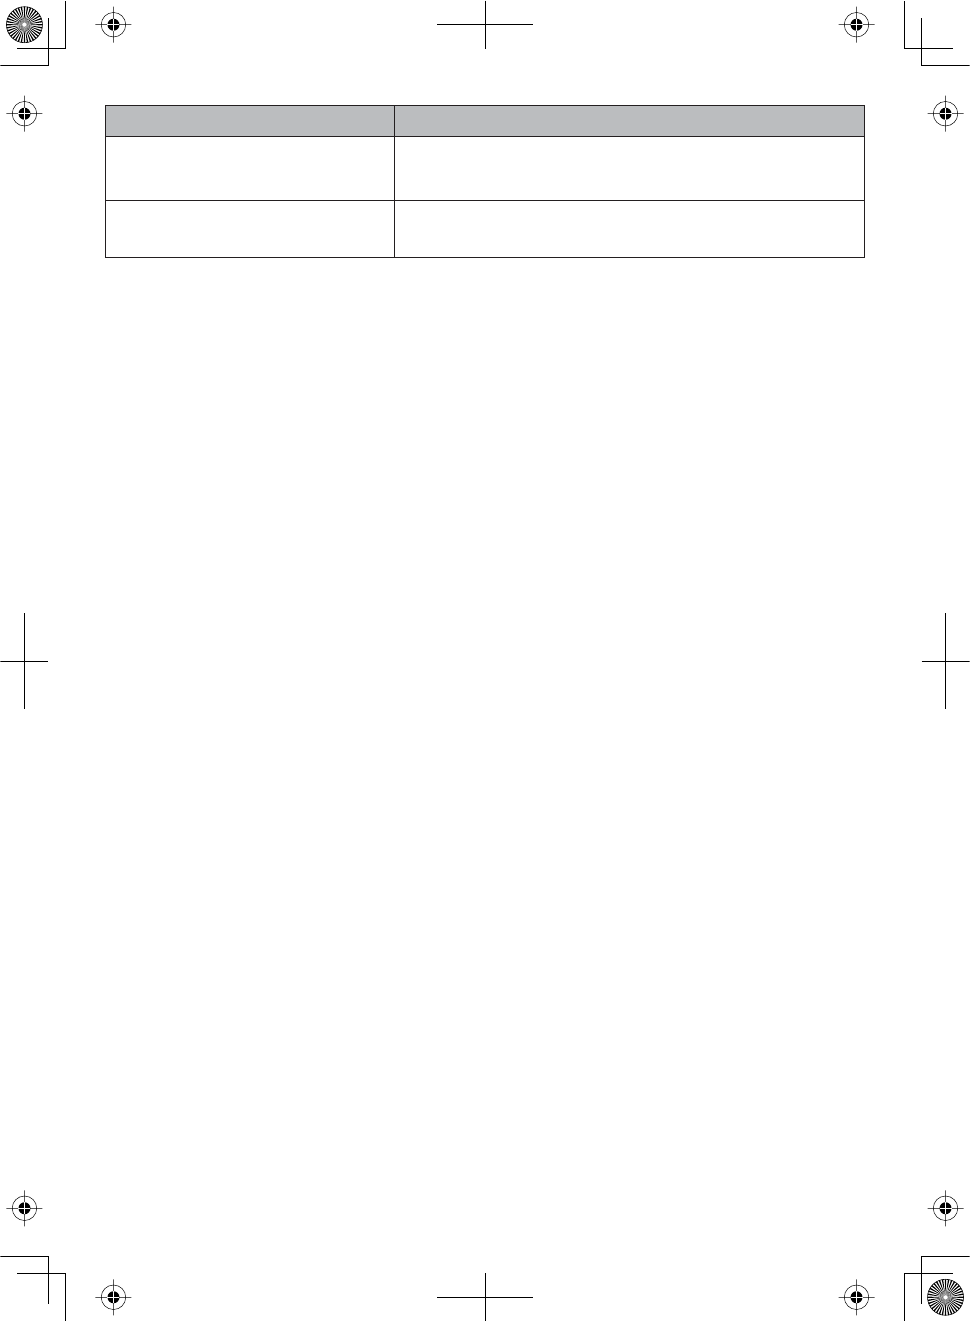
Manually cancel a Scheduled
Record
1. Select
Record/Schedule Record
.
2. Select the specific day whose recording
schedule you want to cancel.
3. When that day's schedule displays, use or
buttons to turn that day's schedule to
Off
(see page 25).
Playing back a recording on
the CM8141 monitor Press
.
The
PlayFile
screen displays. See page 27 for
details.
Cancel watching a recorded
video
Press .
Watching recorded video on
PC or television
To view on PC: Place the CM8141's microSD card
in the PC's memory slot (microSD card adapter
included). You can play the files from the card itself
or copy the files to your computer and play them
from that destination.
To view on TV: Use the AV cable to connect
the monitor to the TV. Use the monitor's control
buttons to access the recorded video on your
system's microSD card.
Set the date and time See
System/Date&Time
, page 19.
Transfer a recording from
the monitor's SD card to the
computer.
1. Remove the memory card from the monitor
and insert it in an adapter.
2. Insert the SD adapter into your PC.
3. Select a destination to store the files.
Watch live video on your
smartphone
1. Be sure both your home computer and
smartphone/device have Skype™ accounts.
2. Set up your home computer to view live video.
3. Use Skype™ on your smartphone/device to
call your home computer.
4. When you are connected, you will see live
video. (See page 29 for details.)
Adjust CM8141 volume 1. Press ŸVol (increase volume) or źVol
(decrease volume) when viewing a camera.
2. The icon displays, then turns off after 5
seconds of inactivity.
16
To... Do This...
How do you use the Intercom? 1. Press and hold
TALK
.
2. Release to hear reply.
How do you delete individual
recorded files?
Select the red X next to the file name on the
Play
File
screen. See page 28 for details.
17
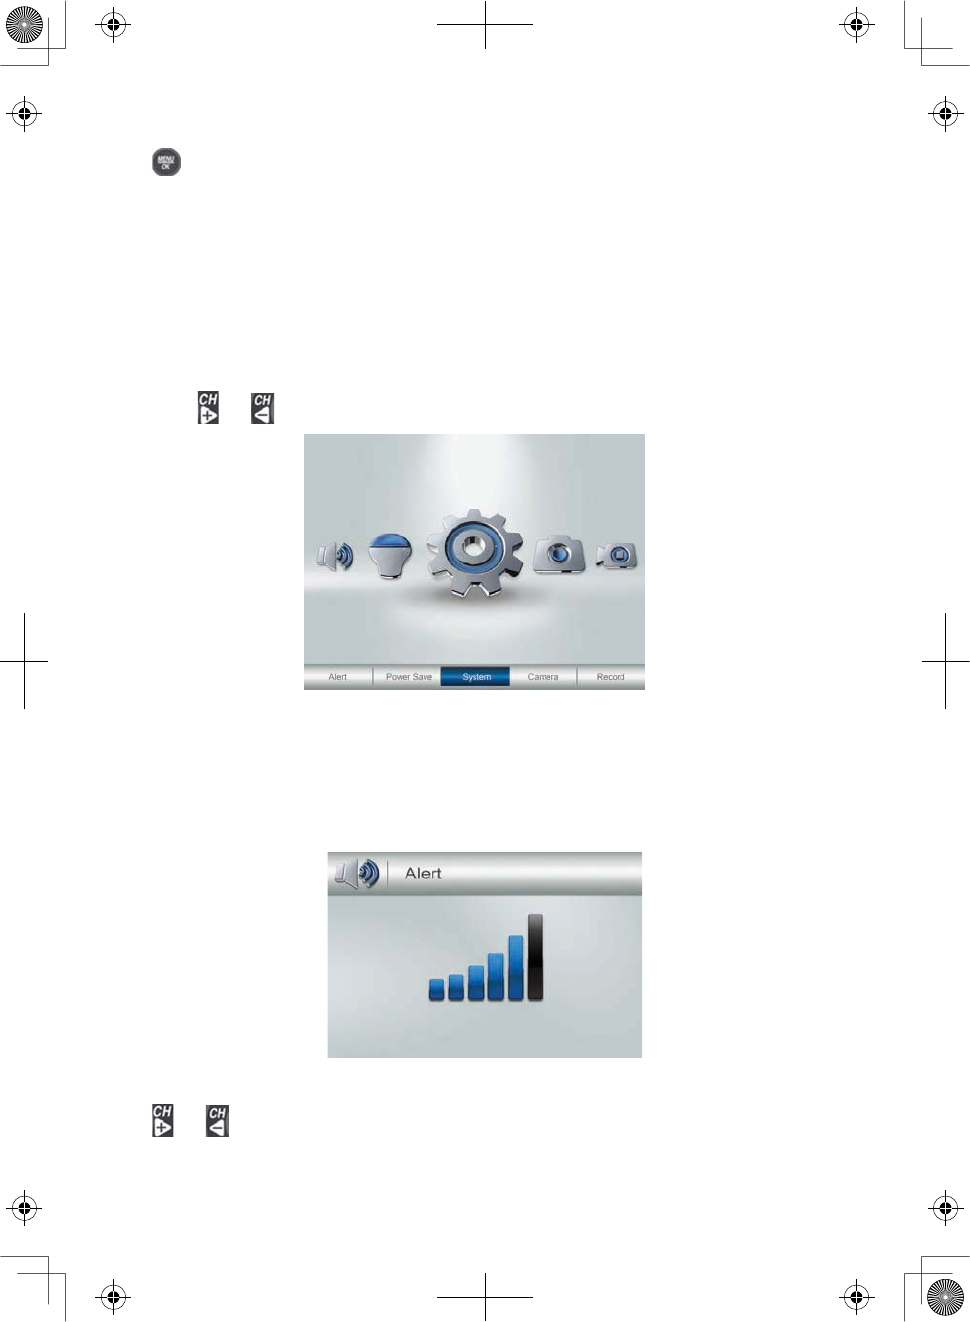
CM8141 SYSTEM MENUS
Press to access the CM8141 system menu options. Use the navigating buttons to
navigate up/down/left/right in the menu, and press
MENU/OK
to conrm a setting.
dŚĞDĂŝŶŵĞŶƵŽƉƟŽŶƐĂƌĞ͗
ůĞƌƚ
WŽǁĞƌ^ĂǀĞ
^LJƐƚĞŵ
ĂŵĞƌĂ
ZĞĐŽƌĚ
1. Press or to change options. The icon for the selected option enlarges.
2. Press
MENU/OK
to select that option.
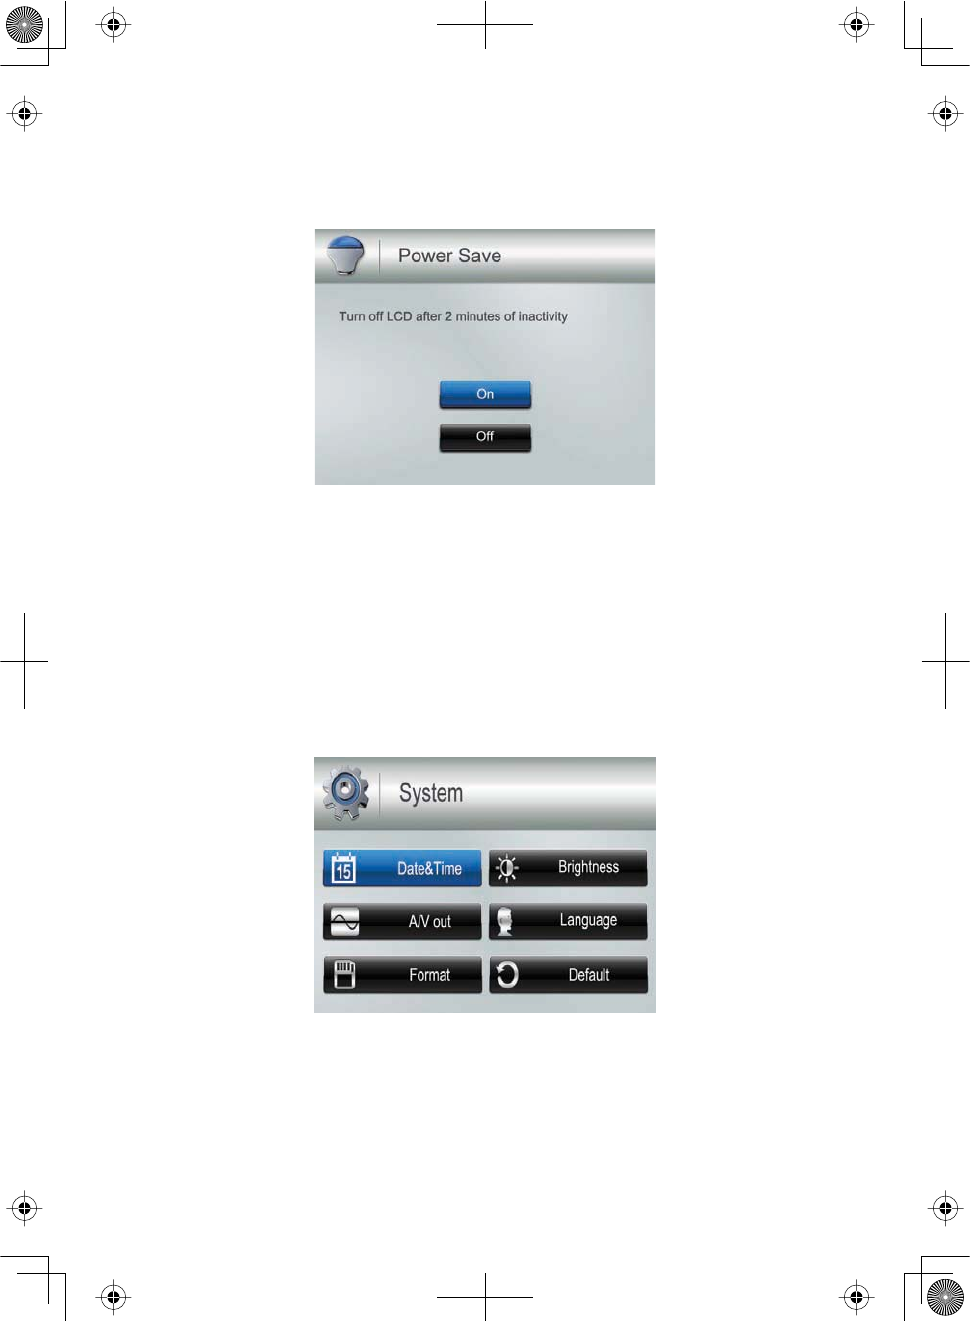
ALERT
This option allows you to set the alert volume for the unit. There are 6 levels plus o.
[Default = O (mute)].
Press or to increase or decrease the alert volume.
18
POWER SAVE
This option allows you to enable/disable the Power Save function. Enable this function to
turn off the LCD backlight after 2 minutes of inactivity. The monitor "wakes up" if it detects
motion or if you press any key. (Default = Off)
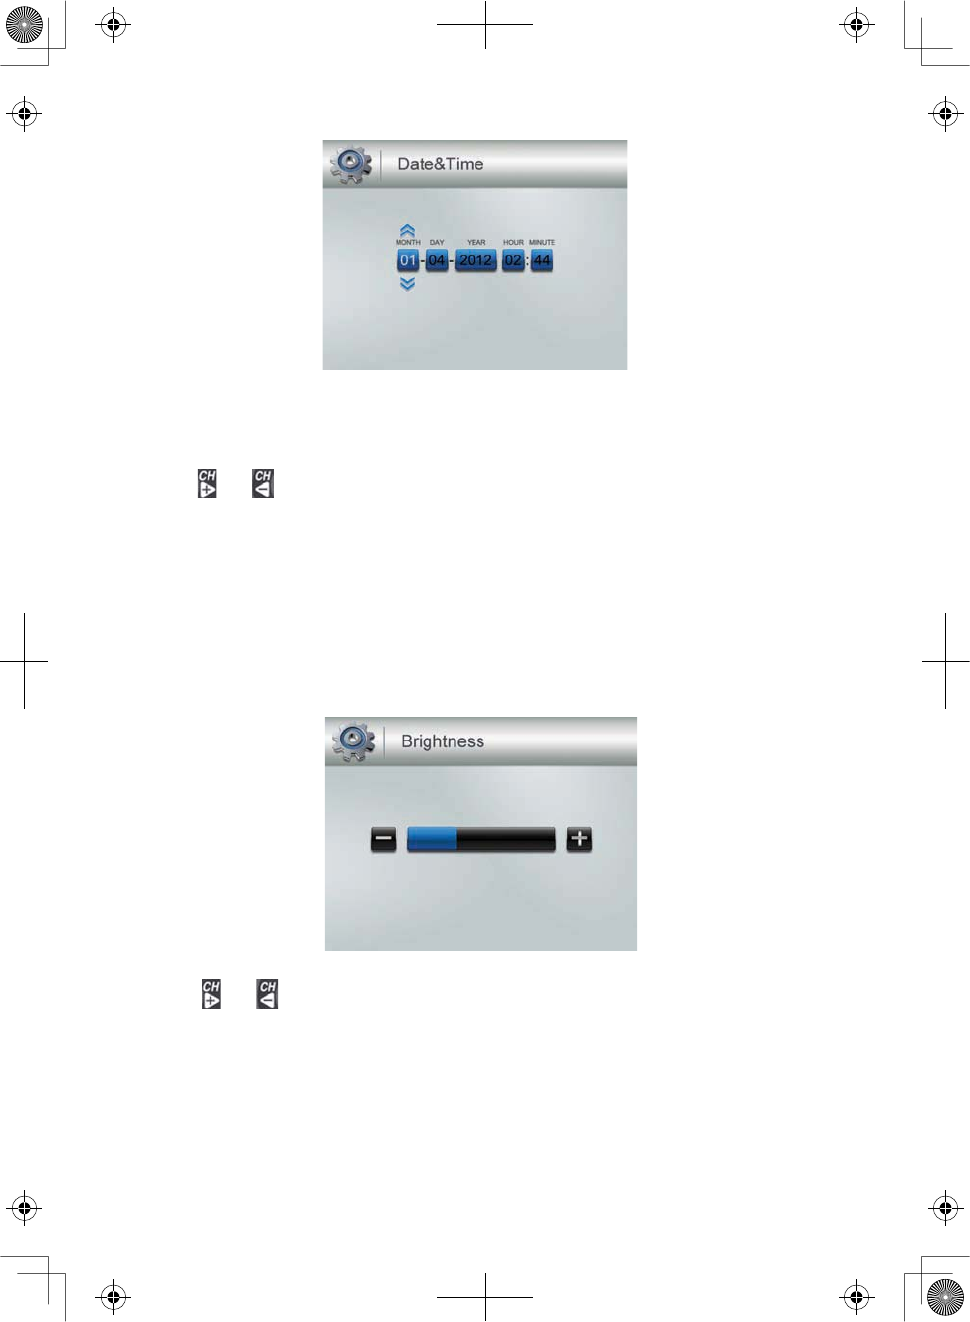
SYSTEM
These system setup options allow you to configure your system according to your personal
preferences. Use the directional arrows to select one of the six options:
xDate & Time
xBrightness
xFormat
xDefault
xLanguage
xAV Out
19
Date & Time
The Month option is automatically selected when you select
Date & Time
.
1. Press Ÿ
Vol
RUź
Vol
to scroll through the options for that selection.
2. Press or to switch to another section of the date or time. Press Ÿ
Vol
RUź
Vol
to scroll through the options as before.
3. Press
MENU/OK
to save the current setting and return to the
System
screen.
Time displays in "Military" time (i.e., 00-24 hours). For example, 14:30 would be
2:30 PM.
Brightness
This option allows you to change the LCD brightness. There are 6 brightness levels. (Default
= 3)
1. Press or to increase/decrease the brightness level (0 - 6).
2. Press
MENU/OK
to save and return to the
System
screen.
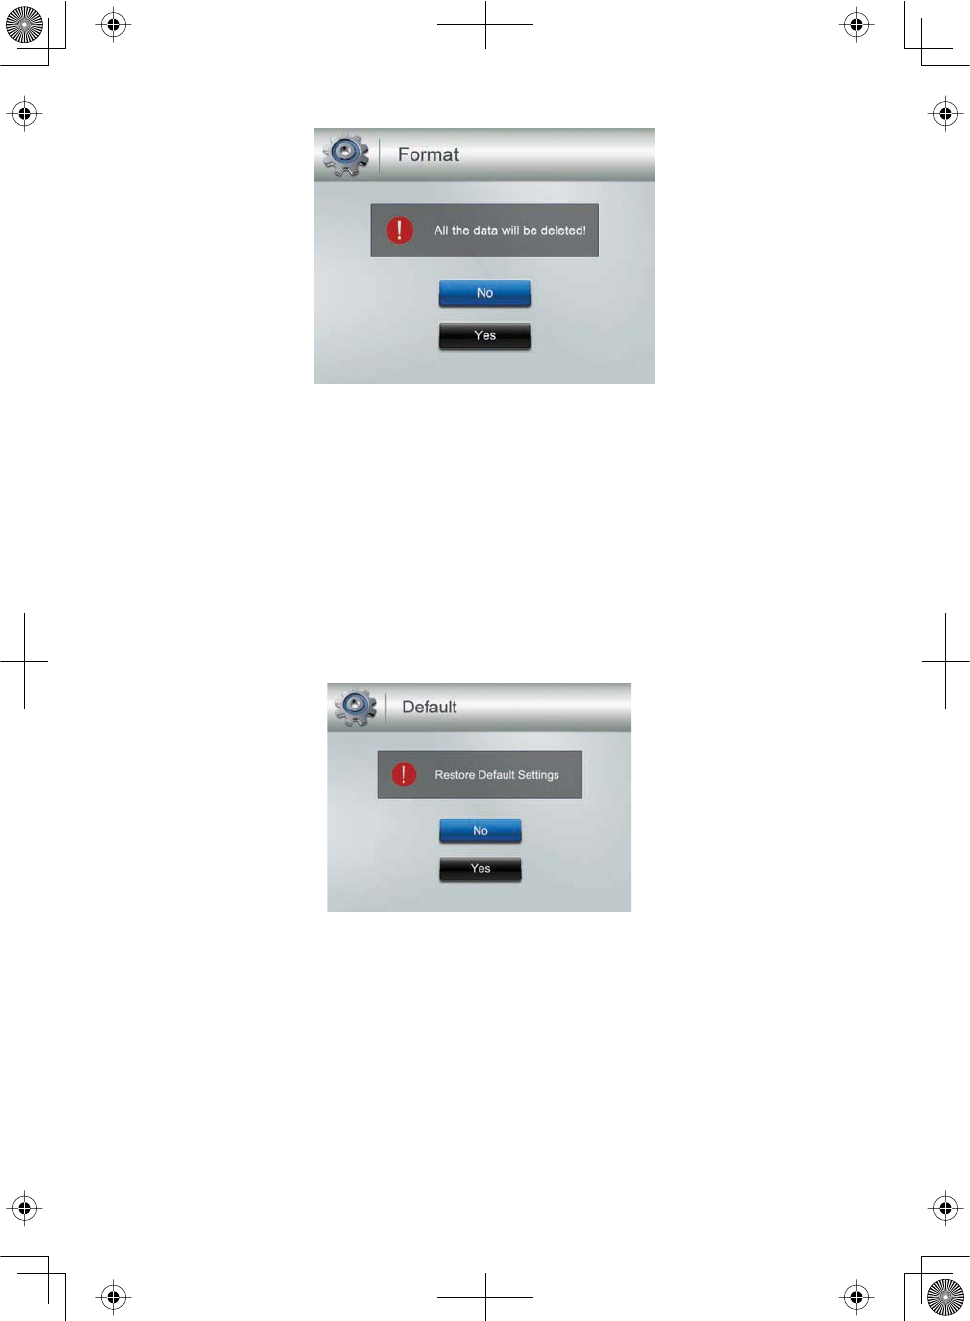
Format
This option allows you to format the external storage (microSD) card, deleting all files on
that card. (Default = No)
Be careful when using this feature. All files on the microSD card will be erased.
20
1. Insert a microSD card into the monitor if needed.
2. Select
Yes,
then press
MENU/OK
.
3.
FORMAT
displays; once formatting is complete, the
System
screen displays.
If you try to format the microSD card but no microSD card is inserted,
NO SD CARD
displays.
Default
This option allows you to restore the CM8141 to factory settings. (Default = No)
Camera pairings and date/time settings are not aected by a reset.
1. Press Ÿ
Vol
or ź
Vol
to select either
No
or
Yes
for this option.
2. Press
MENU/OK
after you make your selection. The
System
screen displays.
21
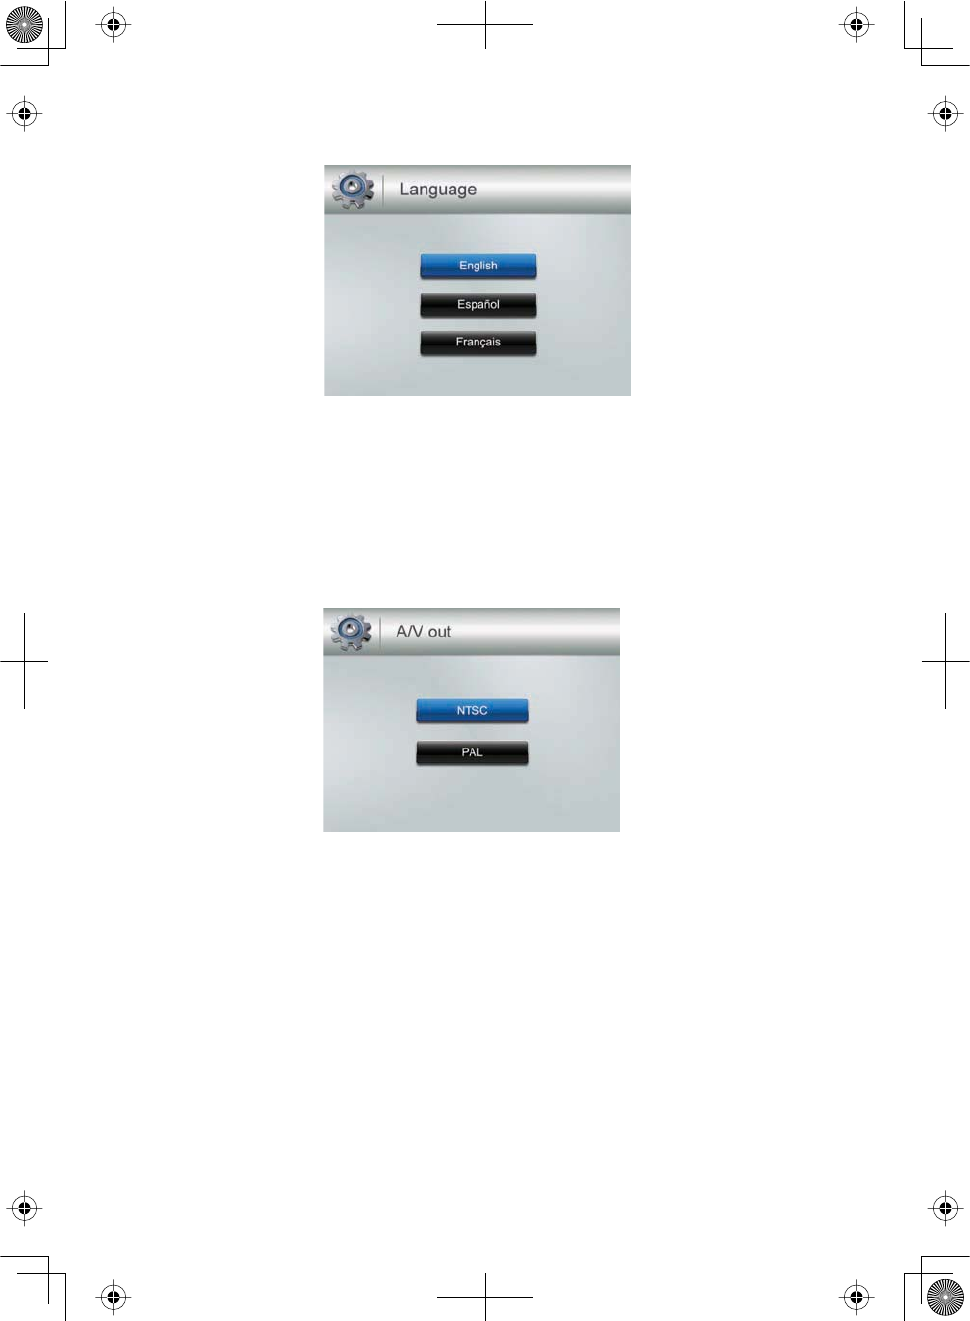
Language
This option allows you to select the display language for the system. (Default = English)
1. Press Ÿ
Vol
RUź
Vol
to select a language.
2. Press
MENU/OK
after you make your selection. The
System
screen displays.
A/V Out
This option allows you to select the TV output format. (Default = NTSC)
NTSC is the TV standard in North America.
1. Press Ÿ
Vol
RUź
Vol
to select either
NTSC
or
PAL
for this option.
2. Press
MENU/OK
; the
System
screen displays.
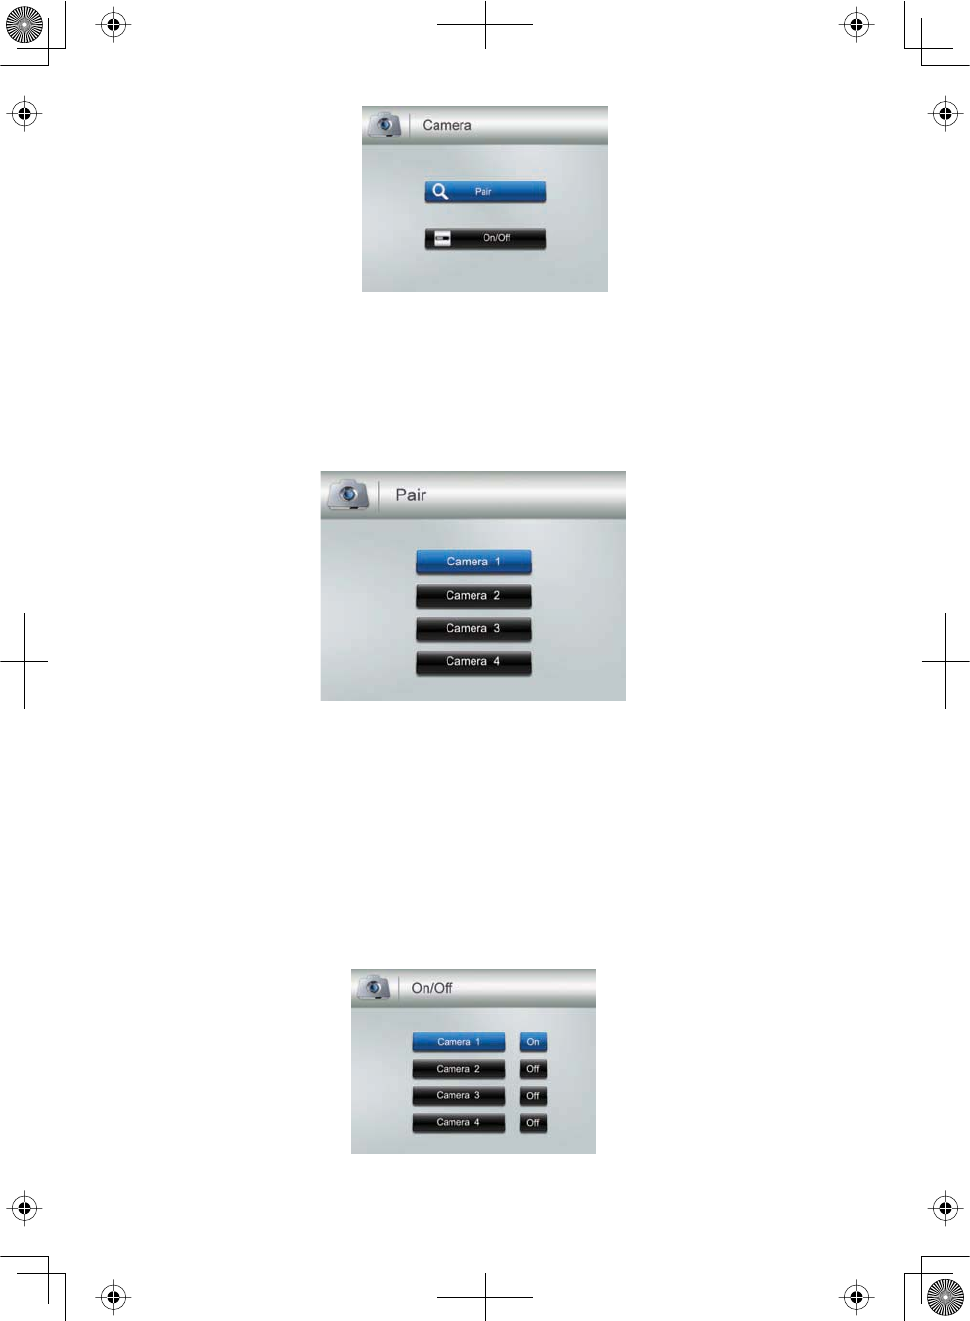
CAMERA
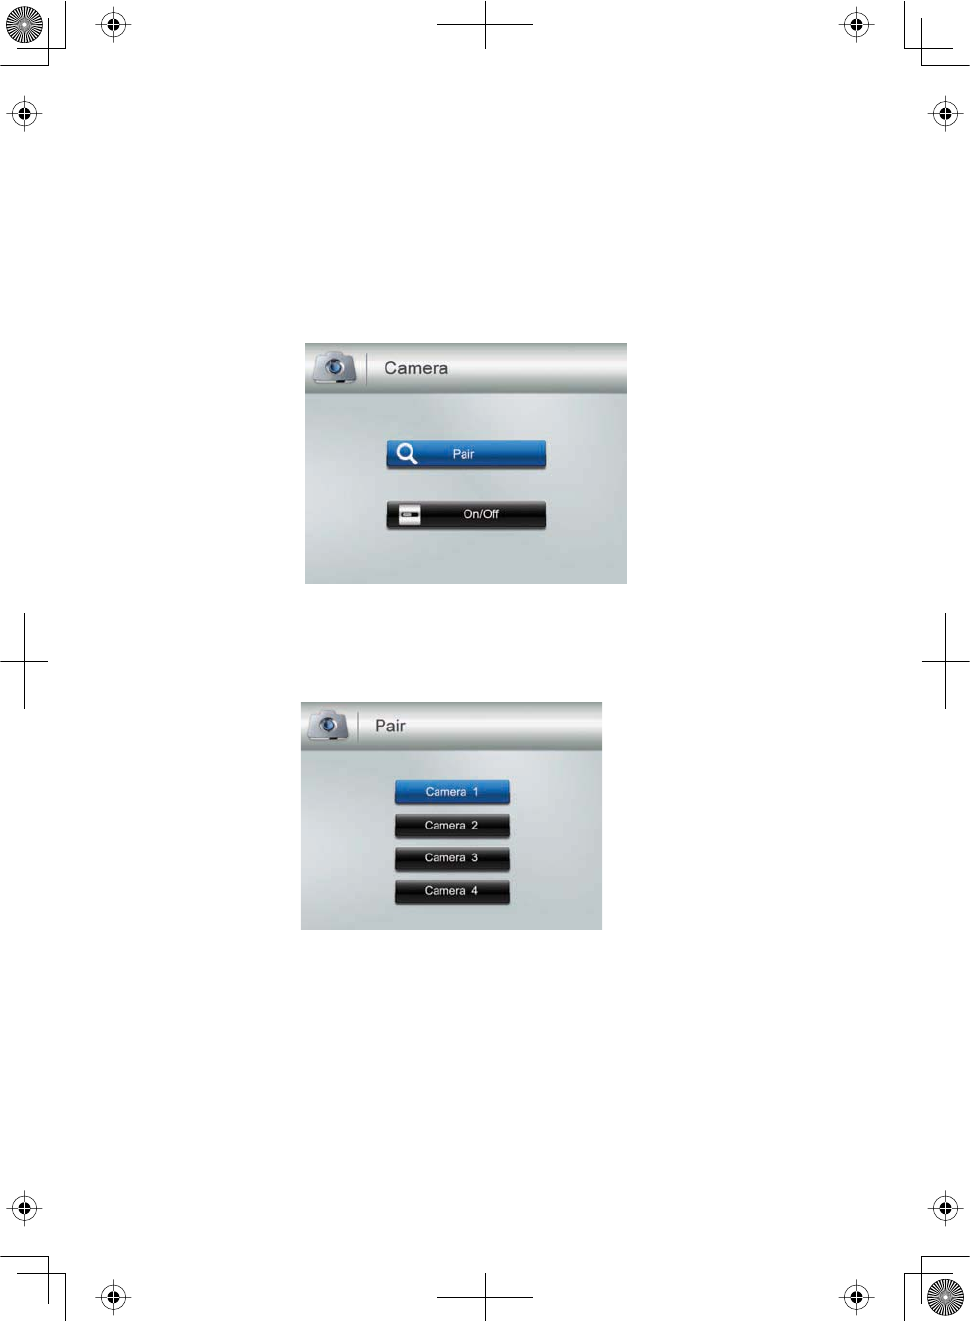
This options allows you to pair the monitor with up to 4 cameras or turn on/off individual
channels (cameras). Press Ÿ
Vol
RUź
Vol
to select
PAIR
or
On/Off
for this option.
The two cameras that come with your system are paired to the monitor at the
factory.
22
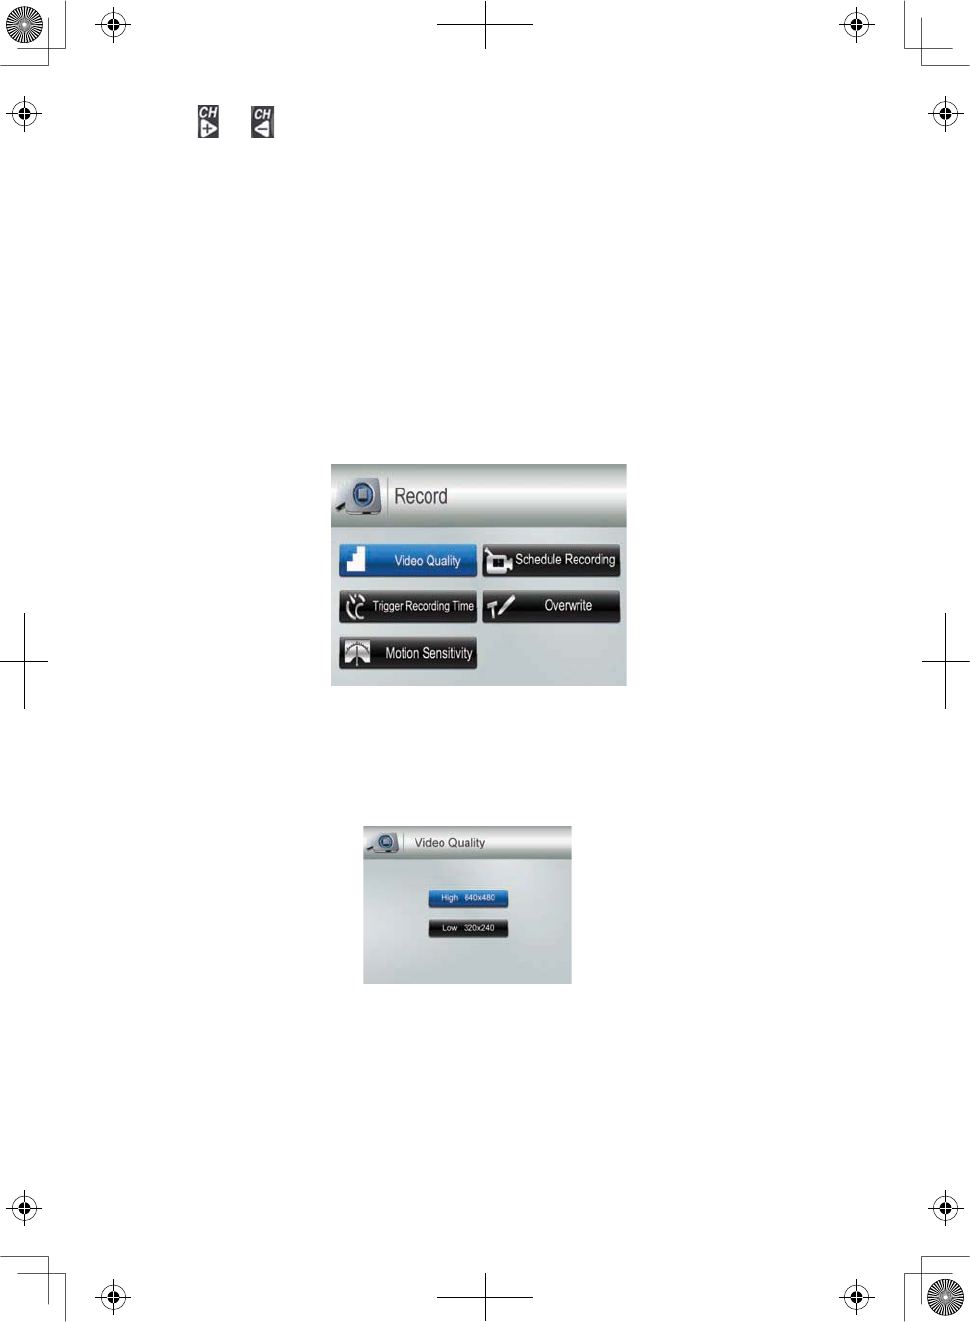
Pair
Select this option if you are pairing accessory cameras or changing a camera's channel
assignment.
1. Press Ÿ
Vol
RUź
Vol
to select the camera you want to pair to the monitor.
2. Press MENU/OK.
3. An information message displays, indicating that you have 30 seconds to press the
pairing button on the front of the camera.
4. The camera video displays when that camera has paired.
On/O
This option allows you to turn an individual channel on or off. The camera will remain
powered on but the monitor will no longer receive video and audio.
1. Press Ÿ
Vol
RUź
Vol
to select the channel whose status you want to change.
23
2. Press or to change the setting (
On
or
Off
).
3. Press MENU/OK to confirm the setting. The main
Camera
screen displays.
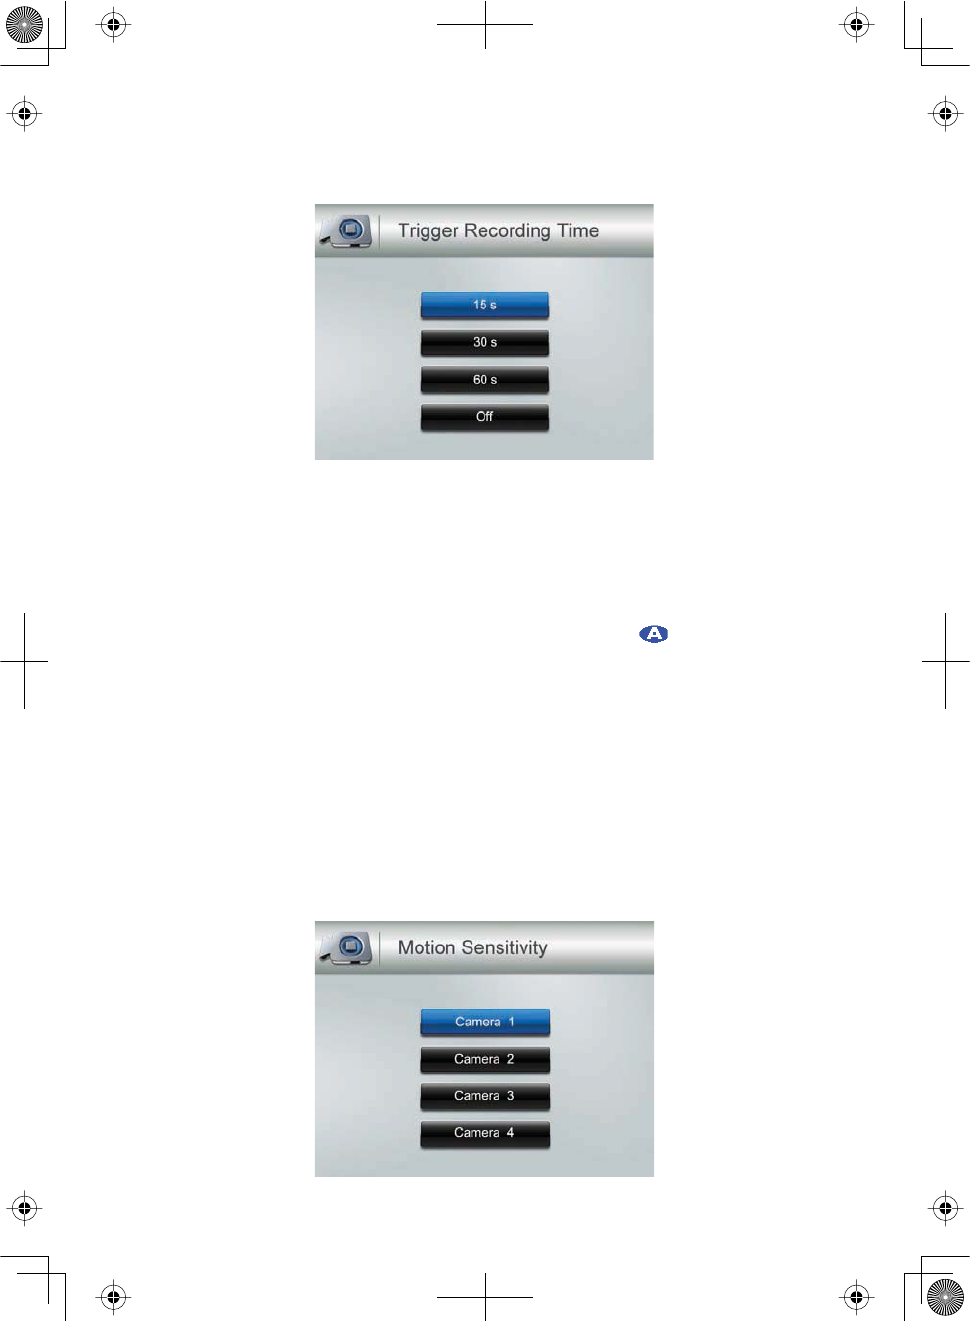
RECORD
The
Record
screen contains 5 sub-screens that help you establish the quality level of your
recordings and a repeatable one week recording schedule.
xVideo Quality
xTrigger Recording Time
xMotion Sensitivity
xSchedule Recording
xOverwrite
Video Quality
This option allows you to preset the output video quality for the unit. (Default = High 640
× 480)
1. Press Ÿ
Vol
RUź
Vol
to choose between higher quality (
High 640x480
) and lower
quality (
Low 320x240
) video output.
2. Press MENU/OK. The
Record
screen displays.
Trigger Recording Time
Various things can alert the system to begin recording. These triggers range from the wind
blowing a tree branch into tan outside camera's line of sight to someone walking into a
24
room. This option lets you set how long the system will record once it has been triggered.
(Default = 30 s)
1. Press Ÿ
Vol
RUź
Vol
to select the recording time.
2. Press MENU/OK.
If you select
Off
, the system won’t start to record, even if a trigger occurs and
motion detection is enabled.
If you select a recording duration (15, 30, or 60 seconds), displays during
recording.
3. The
Record
screen displays.
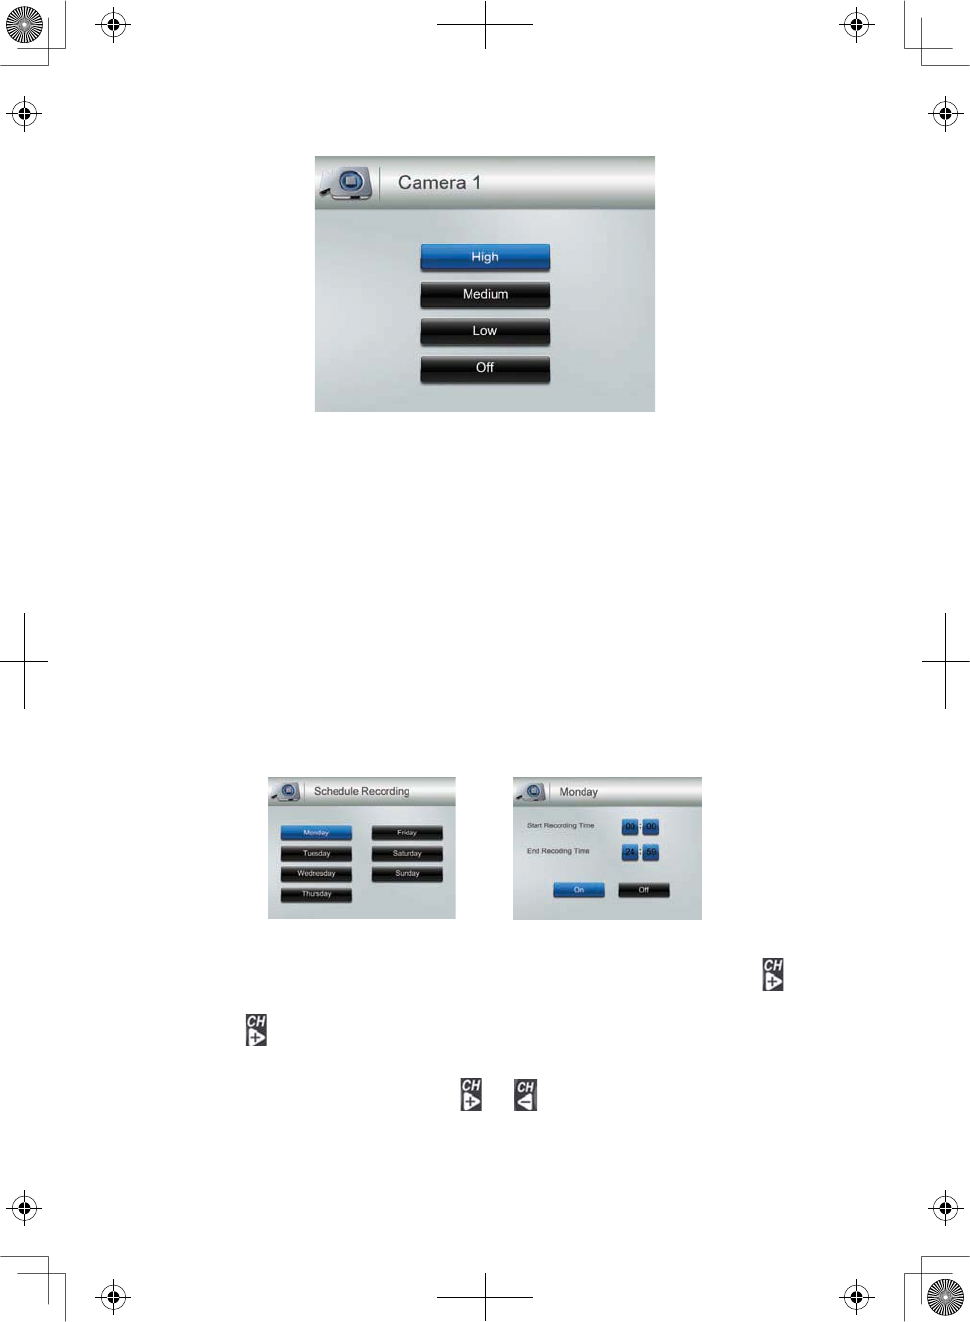
Motion Sensitivity
This option allows you to set the motion sensitivity for each channel individually. For
example, if Camera 1 is an outside camera, you could set the sensitivity lower. This could
keep the cameras from triggering over small movements, such as the breeze moving a tree
branch. (Default = Low)
1. Press Ÿ
Vol
RUź
Vol
to select the channel whose sensitivity you want to adjust and
press
MENU/OK
.
25
2. The camera's sensitivity levels display on the next screen. Select the sensitivity level
and press
MENU/OK
.
3. The
Motion Sensitivity
screen displays again.
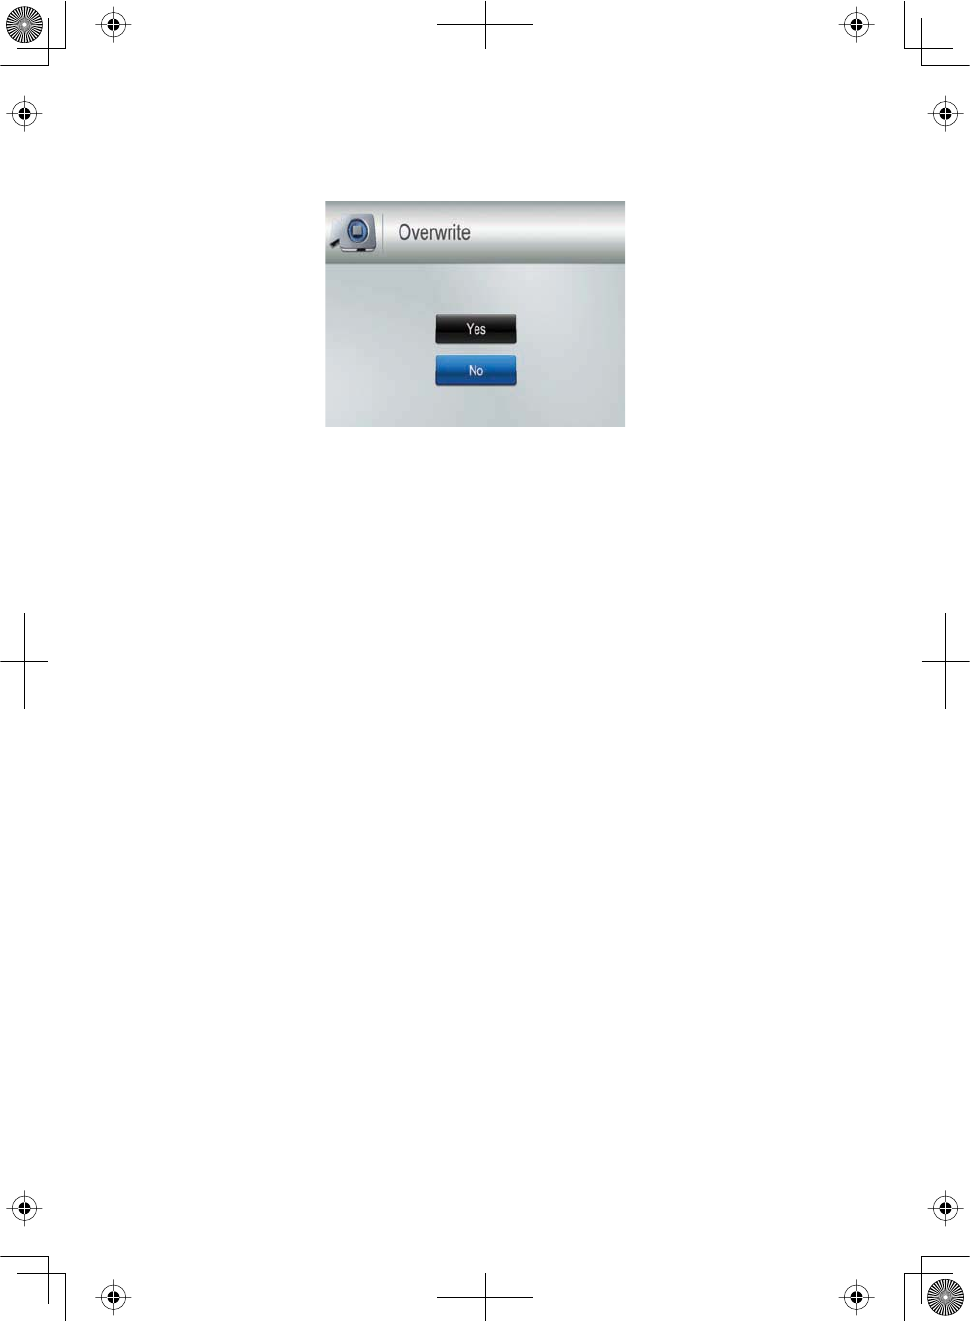
Schedule Recording
This option allows you to create a weekly recording schedule. This weeky schedule
repeats until you change it. You can set each day separately, and you can also set that
day's schedule to turn on or off. For example, if you have camera 1 set to record your back
yard every evening from 20:00 hours (8:00 PM) until 23:00 hours (11:00 PM) but you will
be having a party in the back yard that evening, you can turn off that day's scheduled
recording. (Default = Monday / Start Recording Time:00:00 / End Recording Time: 00:00 /
Off)
1. From the
Record
screen, select
Schedule Recording
and press
MENU/OK
. The
Schedule
Recording
screen displays. Select a day and press
MENU/OK
. The start and end time
setting screen for that day displays.
2. Using Ÿ
Vol
RUź
Vol
, scroll to set the recording start and end times. Press after
each selection to move to the next. For example, set Start Recording Time - Hours,
then press to move to Start Record Time - Minutes.
3. After you set
End Recording Time
and press Ź; set the recording schedule for that day
on or off. Use the directional arrows ( or ) to select
On
or
Off
.
4. Press
MENU/OK
to set your selection. The
Schedule Recording
screen displays.
26
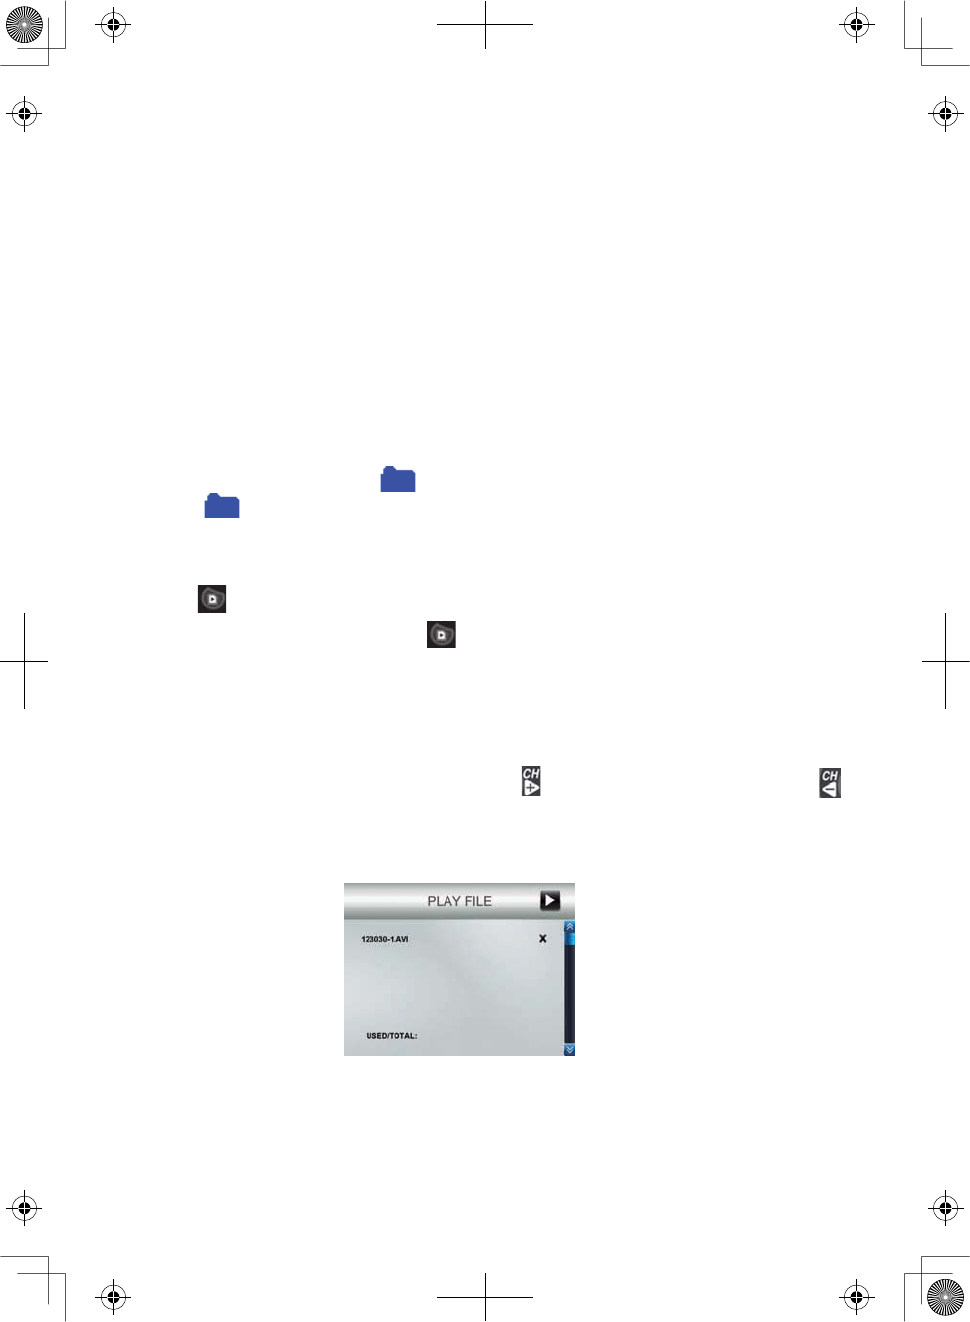
Overwrite
When the microSD card is full, the new video recording overwrites the oldest video
recording. Select
Yes
to enable this function. (Default = No)
27
SPECIAL FEATURES
RECORDING VIDEO
Video records on the 4GB microSD card included in your package (the CM8141 will support
up to a 32GB microSD card). You can set up a recording schedule so the CM8141 records
automatically (see page 25), or you can manually start recording.
Manual Recording
Be sure a microSD card is inserted into the microSD card slot.
1. Press Manual Rec on the top of the monitor. The monitor records in 10 minute blocks.
2. Press Manual Rec again to cancel manual recording.
In Recording mode, only the TALK button and sound are active.
When there is new recorded le, (yellow) ashes on the LCD screen. When the microD
card is full , (red) ashes.
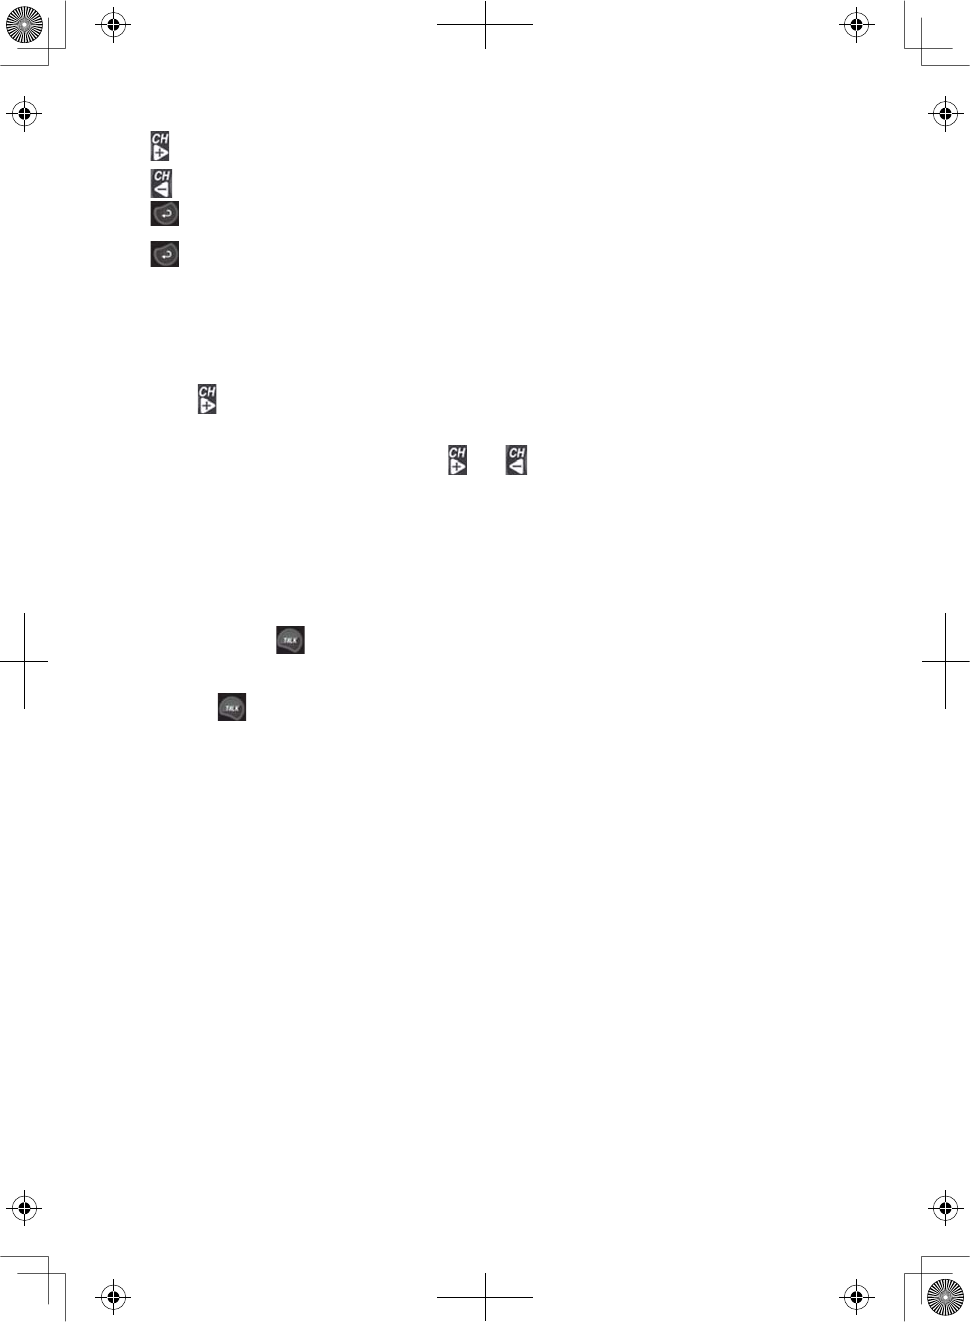
VIEWING RECORDED VIDEO
1. Press to enter the
Play File
list.
2. Select the Video folder and press .
3. That folder contains other folders sorted by date (Format = YYMMDD). For example:
120330 means the videos in this folder are recorded on March 30th, 2012. Press Ÿ
Vol
or ź
Vol
to select a folder you want to view and press
MENU/OK
to open that folder and
browse the les inside.
If there are multiple pages of folders, press to move to the next page. Press
to return to the previous page.
4. Inside that folder are record les, sorted by time. For example: 123030_1 means the
video is recorded at 12:30:30 and from camera 1.
5. Select the video you want to view and press
MENU/OK.
The video plays on the LCD
screen.
6. Use the navigation buttons to manage the video:
Ÿ
Vol
- Pause, play video
28
ź
Vol
- Stop
r - Forward (up to x16 speed)
r - Backward (up to x16 speed)
r - Exit the video
r - After you exit the video, exits Playback function
DELETING RECORDED FILES
You can delete a specic recorded videole or an entire folder of les. A red "X" displays to
the right of folders and recorded video les on the
Play File
screen.
1. Press to highlight the red "X" beside the folder or le you want to delete. Press
MENU/OK
.
2. A conrmation screen displays. Use RU WRVHOHFW
Yes
3UHVV
MENU/OK
.
USING THE INTERCOM
The Intercom feature lets you talk to whomever is within camera range.
1. Make the camera you want to establish an intercom link with the full screen live view
camera.
2. Press and hold on the monitor.
3. Speak clearly into the microphone.
4. Release to listen to the response.
VIEWING LIVE VIDEO
The CM8141 let you view live video from your system on your television or home
PC. You can also use Skype™ to view your system on a remote PC or wireless devices such
as an iPhone®, iPad®, or AndroidTM smartphone or tablet.
Viewing On Your TV
1. Connect the monitor to your television using the AV Output cable (included).
2. The monitor screen goes blank and the TV screen displays the camera output.
The monitor controls still operate while the system is connected to the TV. You can
change cameras, set the cameras to scan through each in sequence, etc.
Viewing On Your Computer
1. Insert the CD included in your package into your PC.
For Windows: Select the USB Driver le and double-click to run the program.
For MAC: Double-click on the .MAC driver to release the ZIP le. Locate the PKG le
and double-click to run the program.
29
2. For Windows: Follow the instructions from the InstallWizard. Select
Finish
to complete
the installation.
Found New Hardware
displays.
For MAC: Follow the instructions on the screens. Select
Close
to complete installation.
An
Installation Successful
screen displays.
3. Connect your home computer to the monitor with the USB cable (included). The
monitor screen goes blank and the PC displays the camera video. Your CM8141
system is now connected to your home PC.
Viewing on Your Wireless Device or Remote Computer
Setup
1. Follow the procedures to view live video on your computer (see page 28).
2. Set up a Skype™ account linked to your CM8141. Please refer to www.skype.com for
details on setting up this free account.
Be sure the Skype™ account is set to "Auto Answer."
3. Set up a Skype™ account on your wireless device or remote computer.
4. Invite the other Skype™ account into your contacts; accept the invitation from the
invited account.
Viewing
1. Determine which camera you want to be available for remote viewing. Set it as the
Live view camera (see page 14).
2. If you have not already installed the USB driver, install it now (see page 28).
3. Connect the CM8141 to your home computer using the USB cable.
4. Activate Skype™.
5. From your wireless device or remote computer, call the Skype™ account for the
CM8141. Because that account was set up with Auto Answer, you should see live vide
from the camera you set up in Step 1.
You must have a separate Skype™ account to call the home computer. You cannot
use your home computer's Skype™ account to call itself.
VIEWING RECORDED VIDEO ON YOUR COMPUTER
The les that record on the CM8141 record onto the microSD card in AVI format. You can
take that card and play it on your computer. You will need:
CM8141 microSD card
MicroSD card adapter for laptop (included) or SD card reader for other systems (not
included)
1. Remove microSD card from the CM8141. Place it in the adapter and insert adapter
into your PC.
2. Navigate to the SD card on your system.
30
3. Select the les you want to view and click
Open
.
4. The les begin playing, in order, through your default media player.
PAIRING ACCESSORY CAMERAS
The two cameras that come with your CM8141 are paired to your monitor at the factory. If
you add cameras, install them and then pair the camera to the monitor.
1. Press
MENU/OK
to bring up the
System
screen.
2. Select the Camera option.
3. Select
Pair
and then press
MENU/OK.
The
Pair
screen displays. The pairing function
assigns each camera to a dierent channel on the wireless monitor (up to 4 cameras),
and is necessary for conguring additional cameras.
4. Select the channel you want to pair the camera to and press
MENU/OK
. The
Press Pair
Key
message screen displays.
5. Within 30 seconds, press
PAIR
on the camera’s face. Once the camera pairs to the
monitor, it will be immediately viewable on the monitor.
31
MAINTAINING YOUR SYSTEM
MONITOR
As you use your monitor, keep the screen clean by wiping it with a microfiber cloth to
remove fingerprints, dust, etc.
CAMERAS
When dust and grime builds up on the camera lens and glass, it affects night vision
capability. The infrared light reflects off of the dust and grime, limiting the camera’s
“vision.” Use a microfiber cloth to regularly clean the cameras or when night vision video is
cloudy or unclear.
32
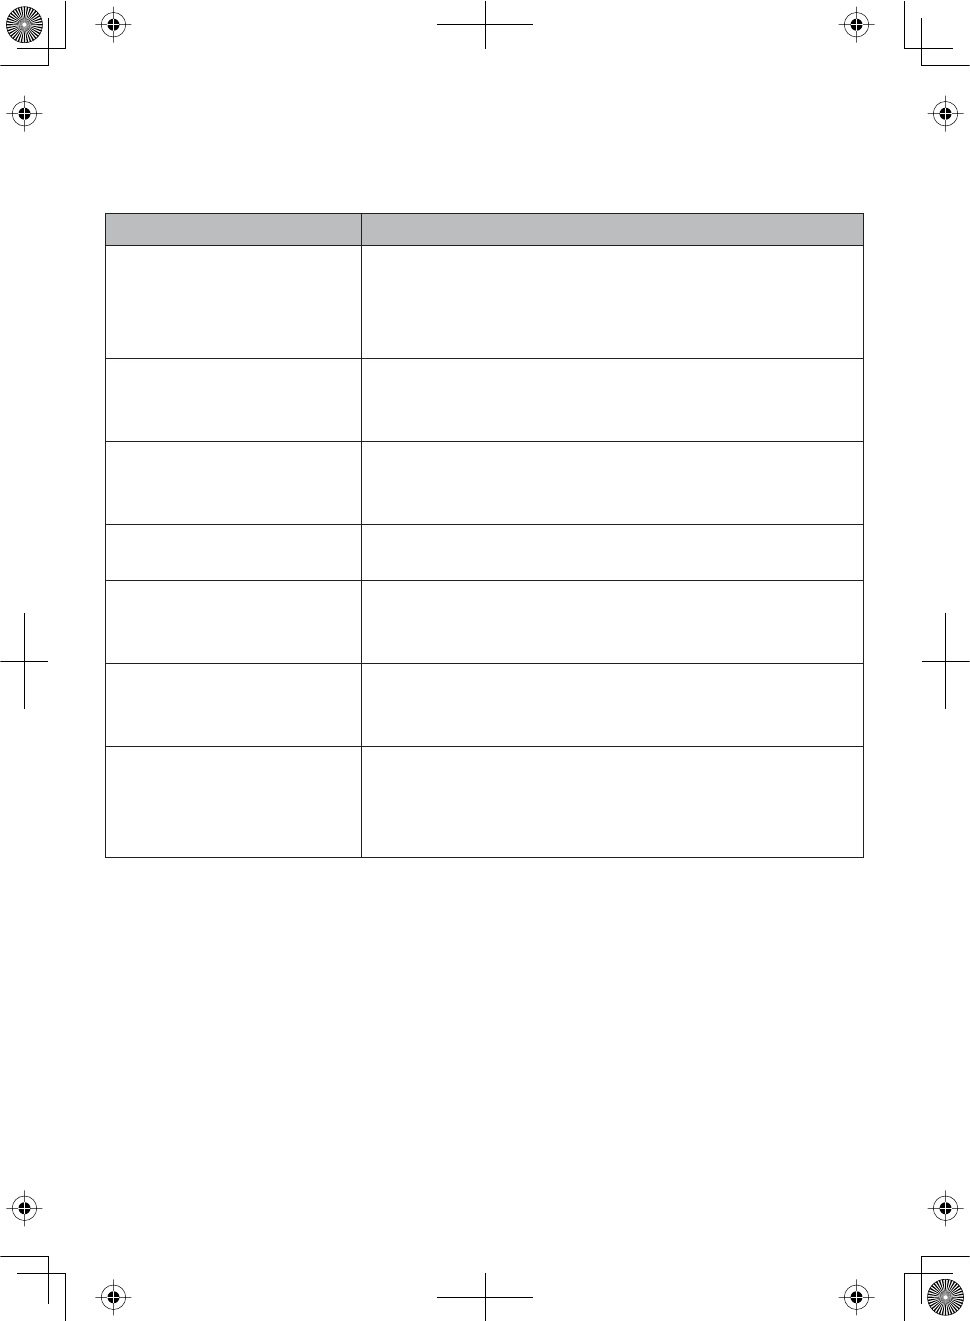
TROUBLESHOOTING
If you have problems with the system, there is often a quick and simple solution. Please try
the following:
Problem Solution
No picture rCheck all camera connections.
rVerify that the AC adapter is plugged in.
rMake sure the monitor is ON.
rMake sure the camera is in range.
The picture keeps
dropping
rMove the camera closer to the monitor.
rReposition the camera , monitor, or both to improve
reception.
No sound rIncrease the volume.
rMake sure there is sound within range of the camera’s
microphones.
Loud, screeching noises
(Audio feedback)
Move the camera and the monitor farther apart.
The picture is choppy rMove the camera and monitor closer to each other.
rRemove any obstructions between the camera and
monitor.
The picture appears grainy
(using AV Out to view on
TV/Monitor)
rView les on a smaller TV/PC monitor.
rTry viewing through your TV’s Picture-In-Picture
function, if available.
Recording problems rMake sure the microSD card is inserted correctly.
rCheck that the microSD card memory is not full.
rVerify that the microSD card is compatible with the
CM8141. It can support up to 32GB microSD card.
33
SPECIFICATIONS
MONITOR
General
Operating frequency range 2.400 ~ 2.4835GHz
RX sensitivity – 81dBm
Spread spectrum FHSS
Modulation type GFSK
Data Rate 2 Mbps
Communication range 500 ft Line of Sight
Monitor
Display size/type 4.3” TFT LCD
Resolution H: 480; V: 272
Power requirement 5.0V DC ± 5%
Power consumption 350mA (Normal)
900mA (Charging)
Operating temperature
range
– 10 ~ 40˚C
Operating humidity range Within 85% RH
RoHS Compliance Yes
Battery life 4.5 hours
Private ID for connection Yes
Recording storage 4GB microSD card (included). Supports up to 32GB.
Housing material Plastic
34
CAMERA
General
Operating frequency range 2.400 ~ 2.4835GHz
TX power 15dBm (typical)
Spread spectrum FHSS
Modulation type GFSK
Data Rate 2 Mbps
Communication range 500 ft Line of Sight
Camera
Image sensor type
(Manufacturer/Model #)
1/4” color CMOS image sensor (OV7725)
Effective pixel H: 640; V: 480
Image processing MJPEG
Image resolution 640x480 @ 10fps
320x240 @ 20fps
Lens 3.6mm F2.0
Exposure Auto
White balance Auto
Power requirement 9.0Vdc ±5%
Power consumption 160mA (IR LED Off)
350mA (IR LED On)
Operating temp range –10 ~ 50˚C
Weatherproof IP65
RoHS Compliance Yes
Camera Housing Material Plastic
Recycling and Disposal Information
IDo not dispose of electronic devices or any of their components (especially
batteries and LCD displays) in your municipal trash collection.
IConsult your local waste management authority or a recycling organization like
Earth911.com
IIf you are unable to locate proper recycling facilities in your area, please return this
product to for recycling.
35
FCC Compliance Information
Part 15 Compliance Statement
This device complies with Part 15 of the FCC Rules. Operation is subjected to the
following two conditions: (1) this device may not cause harmful interference, and
(2) this device must accept any interference received, including interference that
may cause undesired operation.
This equipment has been tested and found to comply with limits for a Class B
digital device, pursuant to Part 15 of the FCC rules and ETSI (EN) 300328. These
limits are designed to provide reasonable protection against harmful interference
in residential installations. This equipment generates, uses, and can radiate radio
frequency energy, and if not installed and used in accordance with the instructions,
may cause harmful interference to radio communications.
However, there is no guarantee that interference will not occur in a particular
installation. If this equipment does cause interference to radio or television
equipment reception, which can be determined by turning the equipment o and
on, the user is encouraged to try to correct the interference by one or more of the
following measures:
fReorient or relocate the receiving antenna.
fMove the equipment away from the monitor.
fPlug the equipment into an outlet on a circuit dierent from that to which the
monitor is connected.
fConsult the dealer or an experienced radio/television technician for additional
suggestions.
CAUTION! Any changes or modifications to this equipment not expressly
approved by the party responsible for compliance could void your
authority to operate the equipment.
RF Exposure Information
The antenna used for this transmitter must be installed to provide a separation
distance of at least 20 cm (7.9”) from all persons and must not be collocated or
operating in conjunction with any other antenna or transmitter.
IC Compliance Information
Radio Equipment Notice
The term “IC:” before the radio certication number only signies that Industry
Canada technical specications were met. Operation is subject to the following
two conditions: (1) this device may not cause interference, and (2) this device
must accept any interference, including interference that may cause undesired
36
operation of the device. “Privacy of communications may not be ensured when
using this device”.
CE Compliance Information
Products with CE Marking comply with EMC Directive (2004/108/EC); Low Voltage
Directive (73/23/EEC); R&TTE(1999/5/EC) issued by the Commission of the
European Community. Compliance with these directives implies conformity to the
following European Norms:
IEMC: EN 301 489
ILVD: EN 60950
IRadio: EN 300 328