RDI Technology WL892 WiFi Camera User Manual WL892
RDI Technology (Shenzhen) Co., Ltd. WiFi Camera WL892
Users manual
WL892 User Manual
WiFi camera
Android version
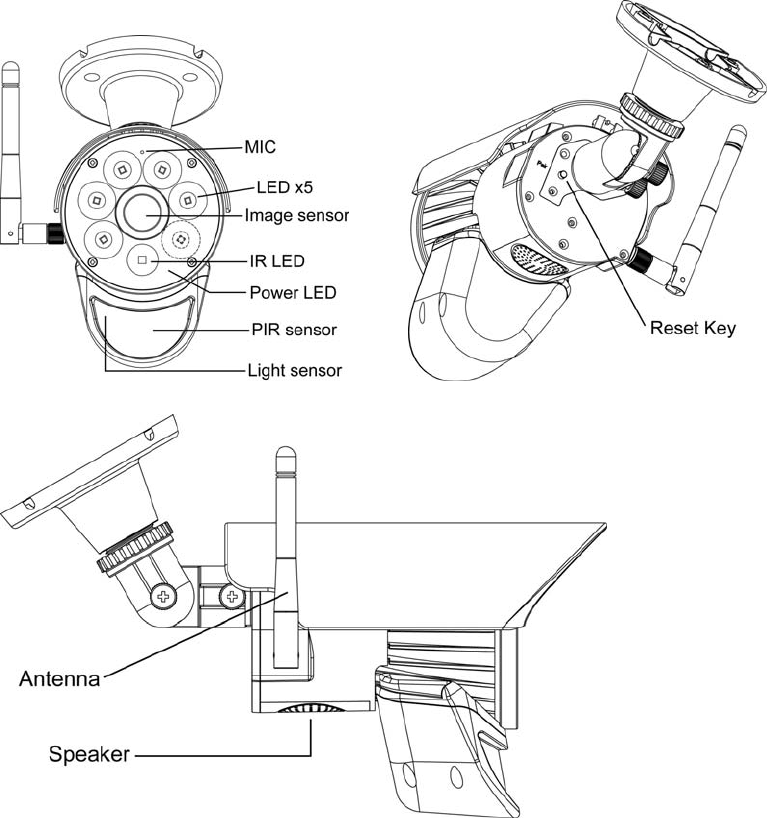
Camera Overview
1
Getting Start
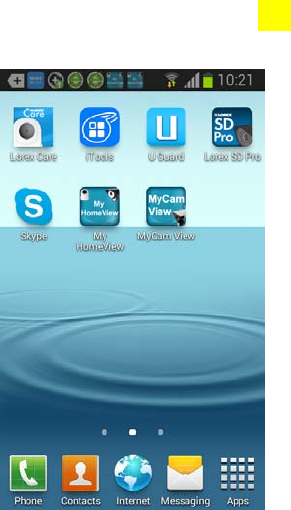
1. Go to App store to download and install My HomeView into your Android
phone (support Android 4.1 or above).
2 Install and set up the camera
1) carefully unpack the camera
2) Attach power adapters to the cameras. Plug into power
3) Press “ reset” button on the back of the camera, the power LED flash quickly
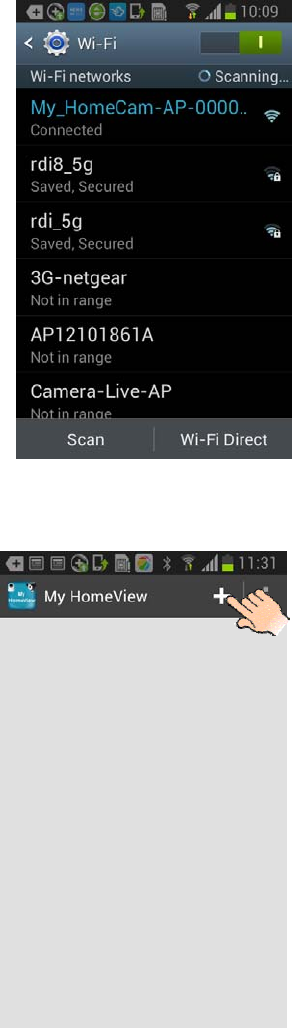
3 There are two options to connect the camera with cell-phone: direct
connection and internet connection
3.1 Internet Connection
1) Make sure cell-phone is connected to the local network and the power LED of the
camera is in fast flash mode.
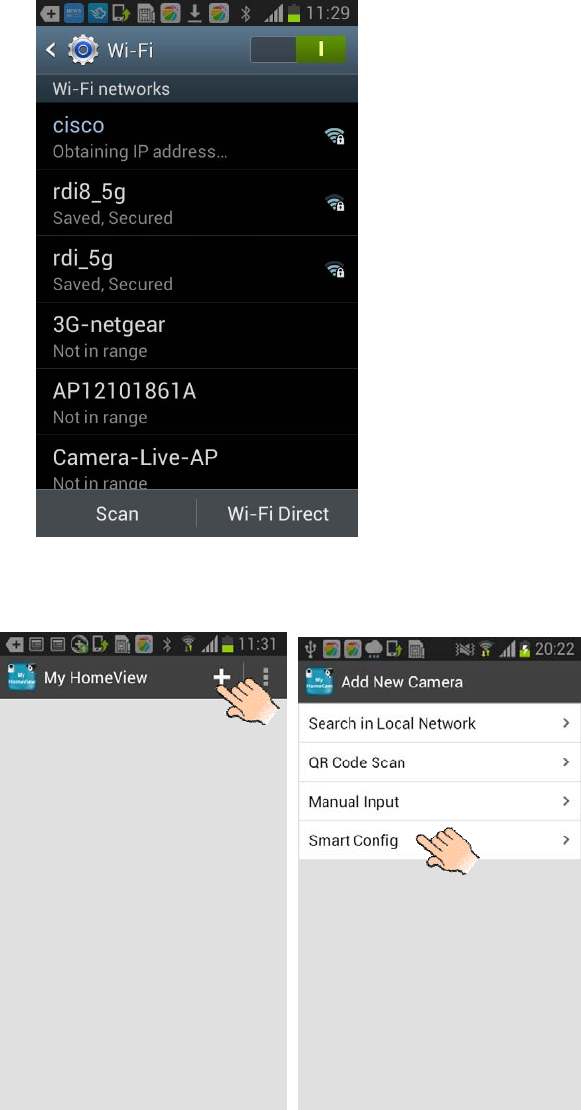
2
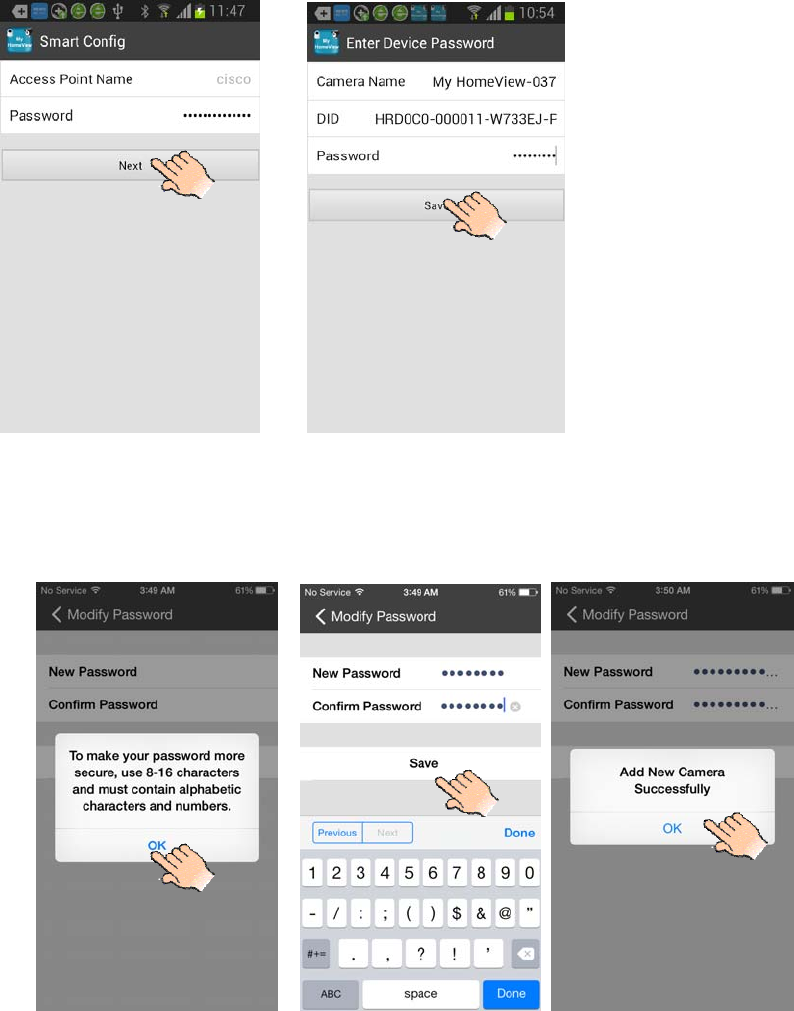
2) Enter My HomeView, press”+” to add camera, and touch smart config
3) Input the local network password on the pop-up, then input camera password
(000000)on next pop-up, touch “save” to complete the connection
3
Notice: while you first add the camera, to make the camera password more secure,
you need to change the password. Reset the new password and touch “Save”.
3.2 Direct connection
1) Press the “reset” button on the camera, the power LED will light up continuously.
4
2) Press “setting button” of your cell-phone to search the camera Wi-Fi, touch the
camera Wi-Fi to connect.
3) Enter My HomeView, and touch “+” to add the camera.
5
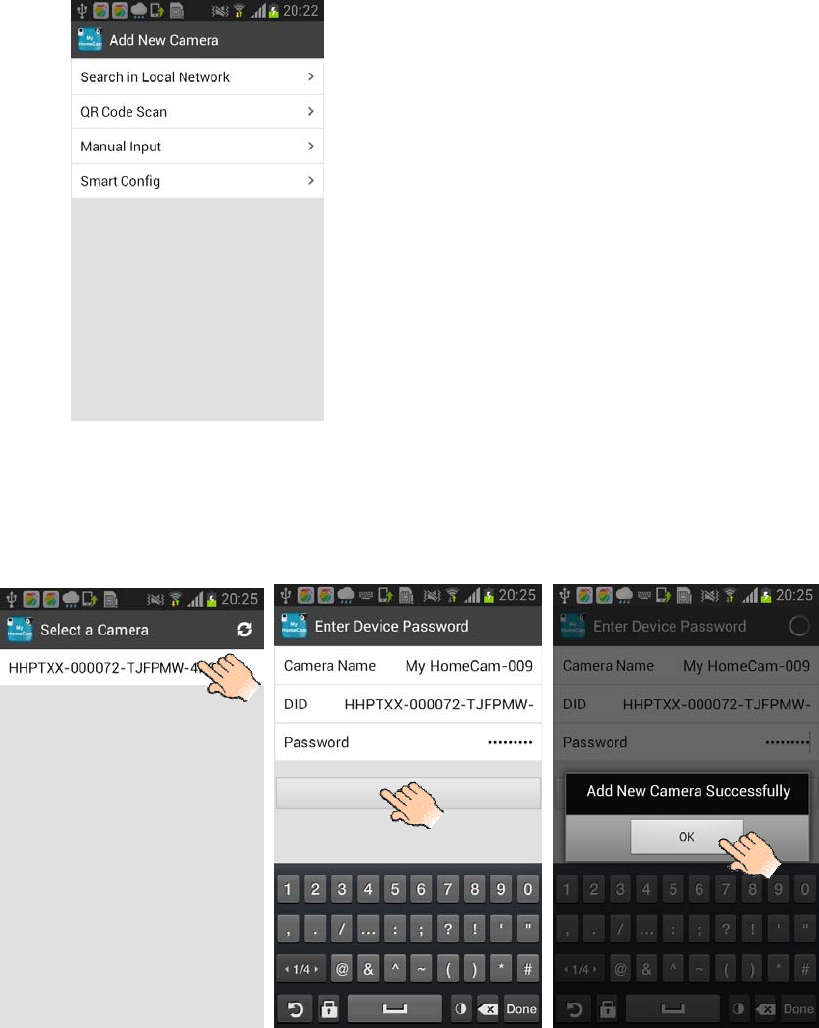
4) There are three ways to complete direct connection: search in local network, QR
code scan, manual input.
a. Search in Local network
Touch “ Search in local network”, it will automatically search the camera, then touch the
selected camera and get the camera name and DID, input the camera password(000000)
and press “Save” to complete the connection.
6
b. QR code scan
Touch QR code scan, and scan the QR code attached on the back of the camera, then
get the camera name and DID, input the camera password( 000000) and touch “Save” to
complete the connection.
c. Manual input
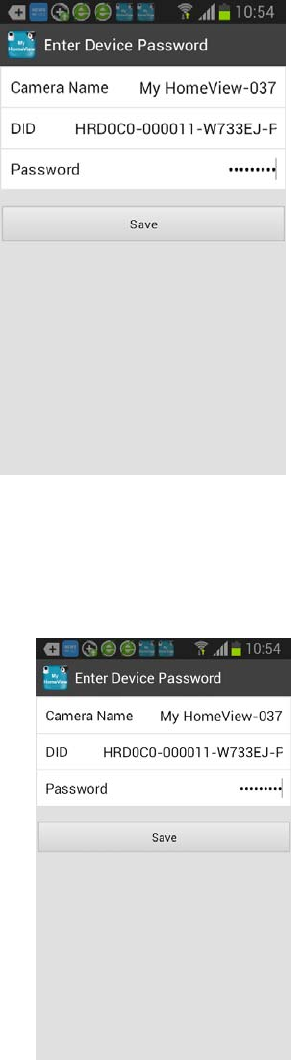
Touch Manual input, and get the camera name, input the DID attached on the back of the
camera and camera password (000000), then touch “Save” to complete the connection.
7
In any mode (power LED in any mode), press and hold the camera reset button for more
than 5 seconds will change camera to factory default mode, power LED will be in fast flash
mode.
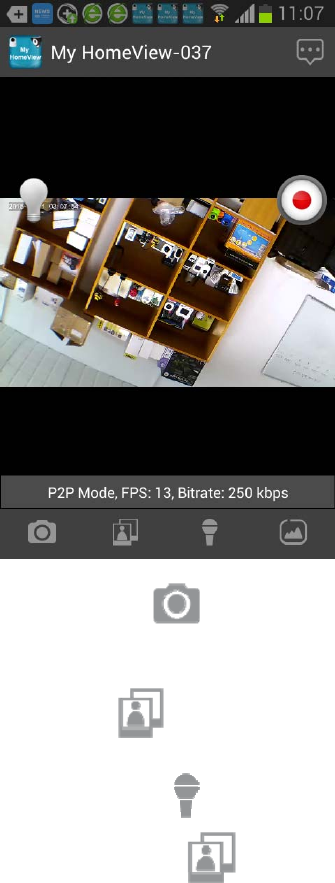
4 In Live View
While the connection is completed, you can see the live video on the phone.
4.1 There are seven icons on live video.
1Snap shot Icon : Touch this button, the video image you are watching will be saved
automatically on your smart phone memory card .
2 View icon : press this icon to view Snapshot photos already taken
3 Talk-back icon : press this icon to activate the two-way communication function
4 Resolution Setting : tap this button to set video quality ( High or Low)
8
5 Manual Recording Button : tap this button to manual recording, and tap again to
stop manual recording ( manual recording lasts 2
minutes every time, however, automatic record only
lasts 15 seconds per trigger )
6 light Icon : tap this icon to control the LED light on or off.
7 Advanced Setting Button : tap this button to enter advanced setting, you can
upgrade the camera firmware if necessary, modify
password, set sensitivity of motion detection, push
notification on or off, event list ( seeing the recording file),
file overwrite file(on or off), check SD Card Management,
Video Rotation, Time Zone, WLAN Networks, Light
Settings.
4.2 Some Important Submenus In Advanced Setting
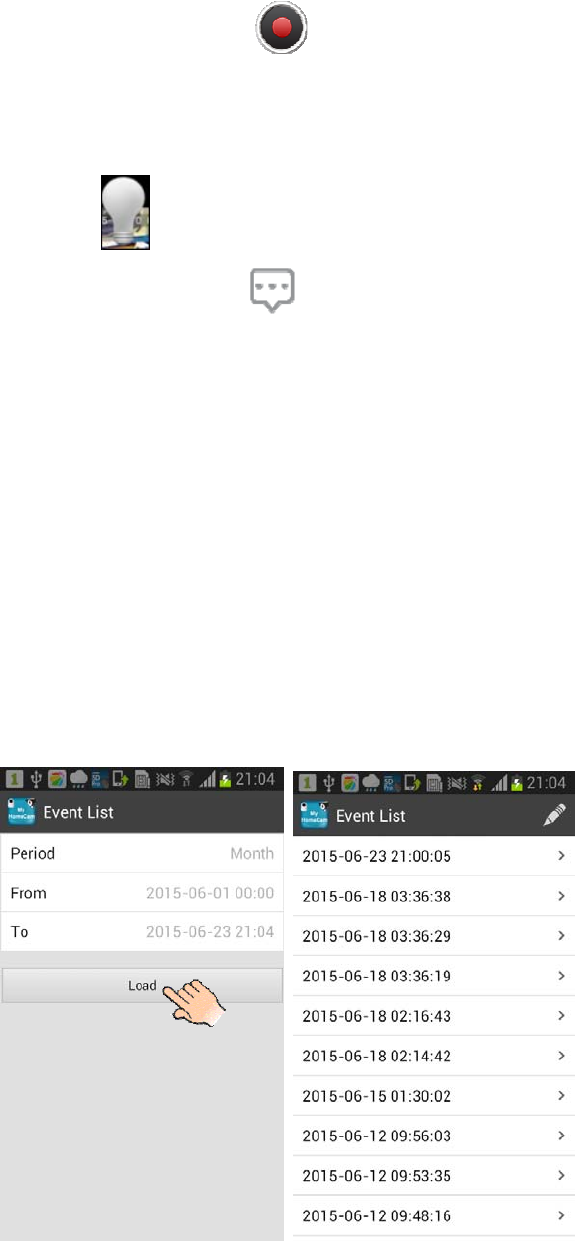
1) Event list: touch “Event list” to check the recording file, the recorded videos enable to
be selected by time.
9
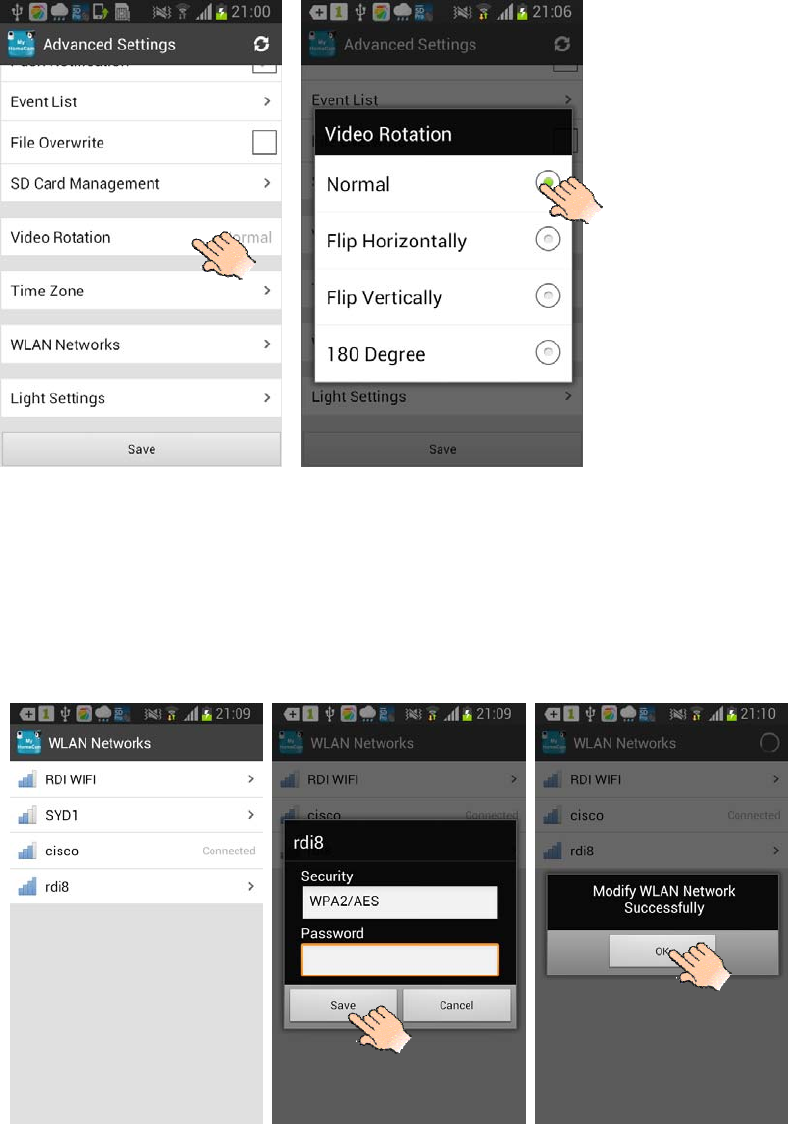
2) Video Rotation: the camera can be placed on a flat surface, wall or ceiling, you need to
set the video rotation (Normal, Flip Horizontally, Flip Vertically, 180 degree) for better
video image.
2) WLAN Networks: when your cell-phone and camera are in direct connection, you can
use WLAN network to choose a local router for the WF692, and change the camera to
internet mode.
Touch WLAN Networks and select the local network, input your local Wi-Fi password.
Press “Save” to complete setting.
Whilethecameraisconnectedtotherouter,pleaserestartthecamera,andyouwillenableto
useanyWi‐FiorGSMsignaltoseethevideofromtheapp.
10
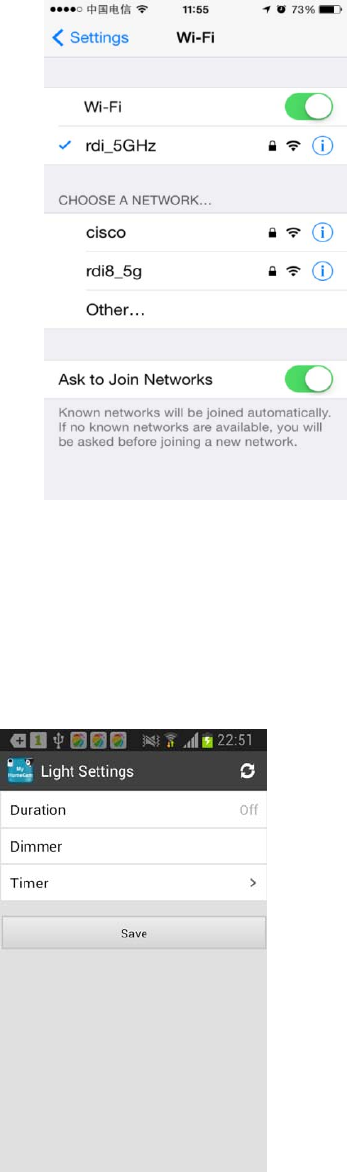
4) Light Setting: you can set duration of the camera light (off, 1 minute, 3 minutes, 10
minutes), Dimmer ( 25%, 50%, 75%,100%)and Timer( the time for light on or off, repeat)
as per your preference.
5 . Notice
11
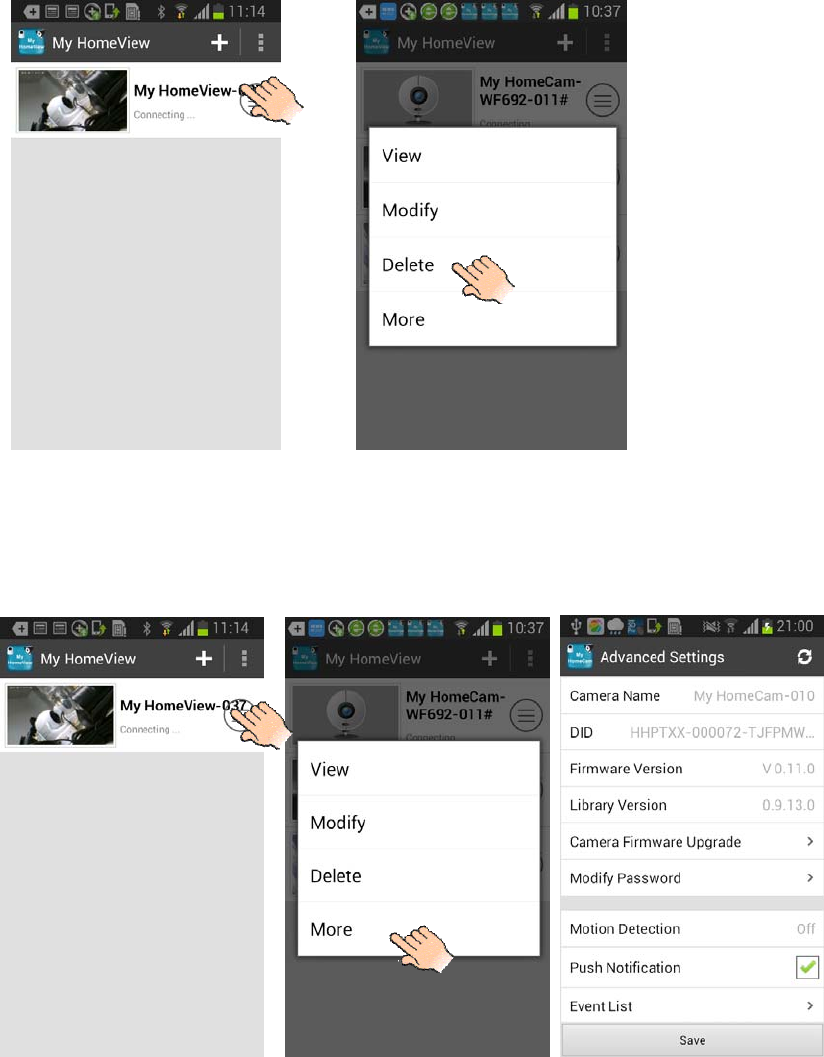
1 if you want to delete the camera, you can touch the right icon of the connected camera ,
and then choose delete.
2 You can inter the advanced setting directly by touch the icon of the connected camera,
and choose more. Details as following pictures show.
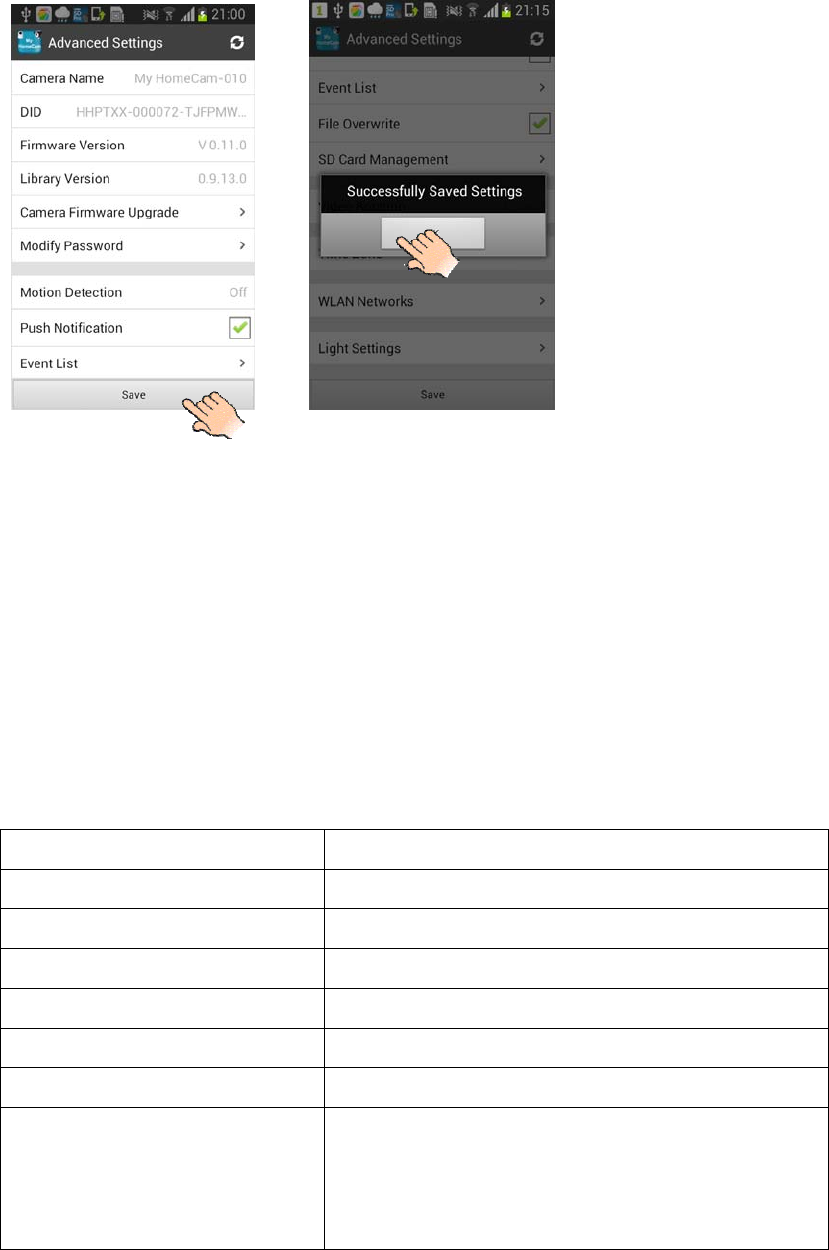
3 Once the advanced setting is completed, please remember to Press “ Save”and “OK” to
preserve the setting.
12
4DefaultWi‐FiCamera:press“reset”buttonofthecameraformorethan5secondsand
thenrelease,thepowerLEDwillflashquickly.Thedefaultsettingcompletes.
5 Whilethecameraisinlostconnection,pleasepressthescreenandpulldown,itwill
automaticallyreconnect(refresh).
Specification
Item Specification
Power supply DC 5V ±5%
Wi-Fi Frequency range 2.412GHZ-2.462GHZ(Channel 1-11)
Wi-Fi Security WPAPSK
Wi-Fi Standard IEEE 802.11b/g/n,1T1R
Video Encode H.264 VGA, 720P
Image Sensor Type OV9712 CMOS Image Sensor
Wi-Fi transmitting power
11b:<18dBm
11g:<14dBm
11n:<13dBm

13
Receive Sensitivity(typical)
11M: -86dBm@8% (typical)
54M: -73dBm@10% (typical)
130M : -66dBm@10% (typical)
Transmission distance 80m line of sight
Resolution 720P(1280 x 720), VGA(640 x 480),
QVGA(320 x 240)
Speaker Output Differential 8ohm/0.5W
Operating Temperature -20°C ~ 60° (-4°F ~ 140°F)