RGIS RM2BTI RM2 BT Imager User Manual RM2 ver1 0x
RGIS LLC RM2 BT Imager RM2 ver1 0x
UserManual.wiki
>
RGIS
>
RM2BTI User Manual
User Manual
Navigation menu
Upload a User Manual
Namespaces
Wiki Guide
HTML
PDF
Info
Views
User Manual
Discussion / Help
Navigation

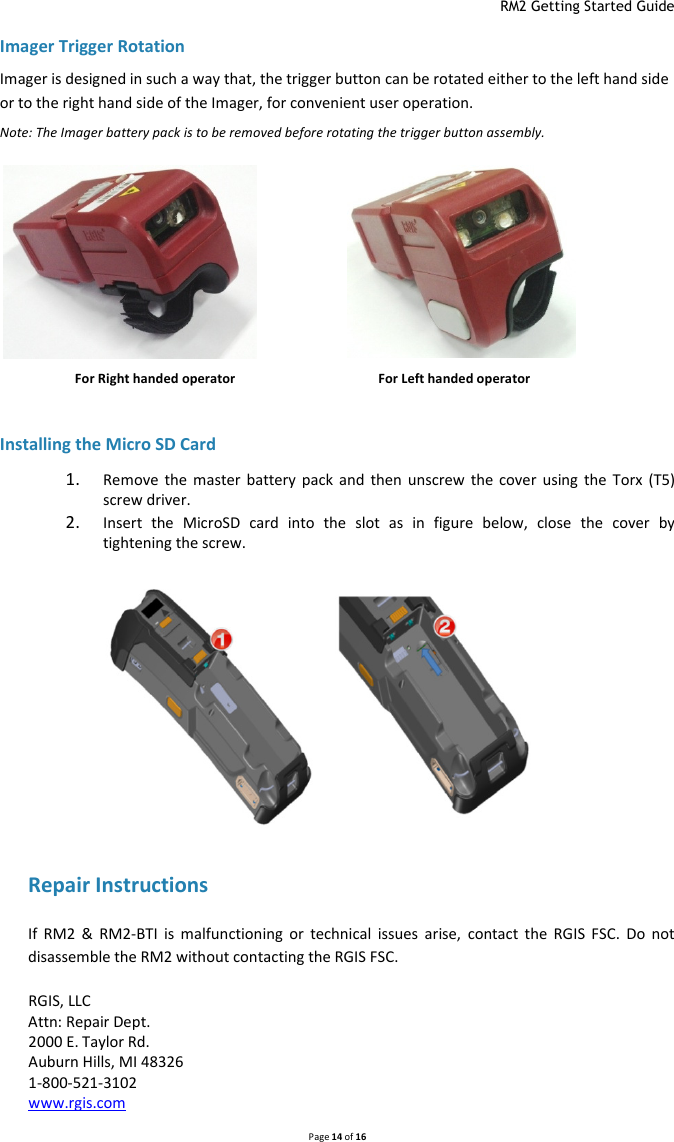
![RM2 Getting Started Guide Page 16 of 16 not found any biological effects. Some studies have suggested that some biological effects might occur, but such findings have not been confirmed by additional research. RM2 and RM2-BTI has been tested and found to comply with FCC/IC radiation exposure limits set forth for an uncontrolled environment and meets the FCC radio frequency (RF) Exposure Guidelines and RSS-102 of the IC radio frequency (RF) Exposure rules. Les connaissances scientifiques dont nous disposons n’ont mis en évidence aucun problème de santé associéà l usage des appareils sans fil à faible puissance. Nous ne sommes cependant pas en mesure de prouver que ces appareils sans fil à faible puissance sont entièrement sans danger. Les appareils sans fil à faible puissance émettent une énergie fréquence radioélectrique (RF) très faible dans le spectre des micro-ondes lorsqu’ils sont utilisés. Alors qu’une dose élevée de RF peut avoir des effets sur la santé (en chauffant les tissus),l’exposition à de faibles RF qui ne produisent pas de chaleur n’a pas de mauvais effets connus sur la santé.De nombreuses études ont été menées sur les expositions aux RF faibles et n’ont découvert aucun effet biologique. Certaines études ont suggéré qu’il pouvait y avoir certains effets biologiques, mais ces resultants n’ont pas été confirmés par des recherches supplémentaires. [ ( )] a été testé et jugé conforme aux limites d’exposition aux rayonnements énoncées pour un environnement non contrôlé et respecte les règles les radioélectriques (RF) de la FCC lignes directrices d'exposition et d’exposition aux fréquences radioélectriques (RF) CNR-102 de l’IC. CE Notice (European Notice): The Conformite Europene symbol found on this product indicates compliance to the EMC Directive and the Low Voltage Directive of the European Union. This means that the product meets the following technical standards: EN 55022(CISPR22), EN 55024(CISPR24)(IEC 61000 4-2,4-3,4-5,4-6,4-8,4-11), EN 61000 3-2(IEC 61000 3-2),EN 61000 3-3(IEC 61000 3-3),EN60950(IEC 60950 3rd Ed;1999;2000). Battery Notice: The sealed batteries that work with this product comply with all applicable shipping regulations as prescribed by industry and legal standards. Commercial Use Notice: The RM2 & RM2-BTI is for commercial, work-related use by RGIS employees for inventory, merchandising, mapping or other data collection purposes only. The device is not intended for sale. Radio Frequency (RF) Notice: This transmitter must not be co-located or operated in conjunction with any other antenna or transmitter. This equipment complies with FCC radiation exposure limits set forth for an uncontrolled environment and meets the FCC radio frequency (RF) Exposure Guidelines. This equipment should be installed and operated keeping the radiator at least 20cm or more away from person’s body. Units intended for use in the United States are set for use on channels 1-11.The user has no access to modify these settings and should in no way try to alter the radio settings. Changes or modifications not expressly approved by RGIS could void the user’s authorization to operate the equipment.](https://usermanual.wiki/RGIS/RM2BTI/User-Guide-2751227-Page-16.png)