Radio Active Design UV-1GBP UV-1G Belt Pack User Manual TITLE GOES HERE
Radio Active Design, LLC UV-1G Belt Pack TITLE GOES HERE
UserManual.wiki
>
Radio Active Design
>
UV 1GBP User Manual
User Manual
Navigation menu
Upload a User Manual
Namespaces
Wiki Guide
HTML
PDF
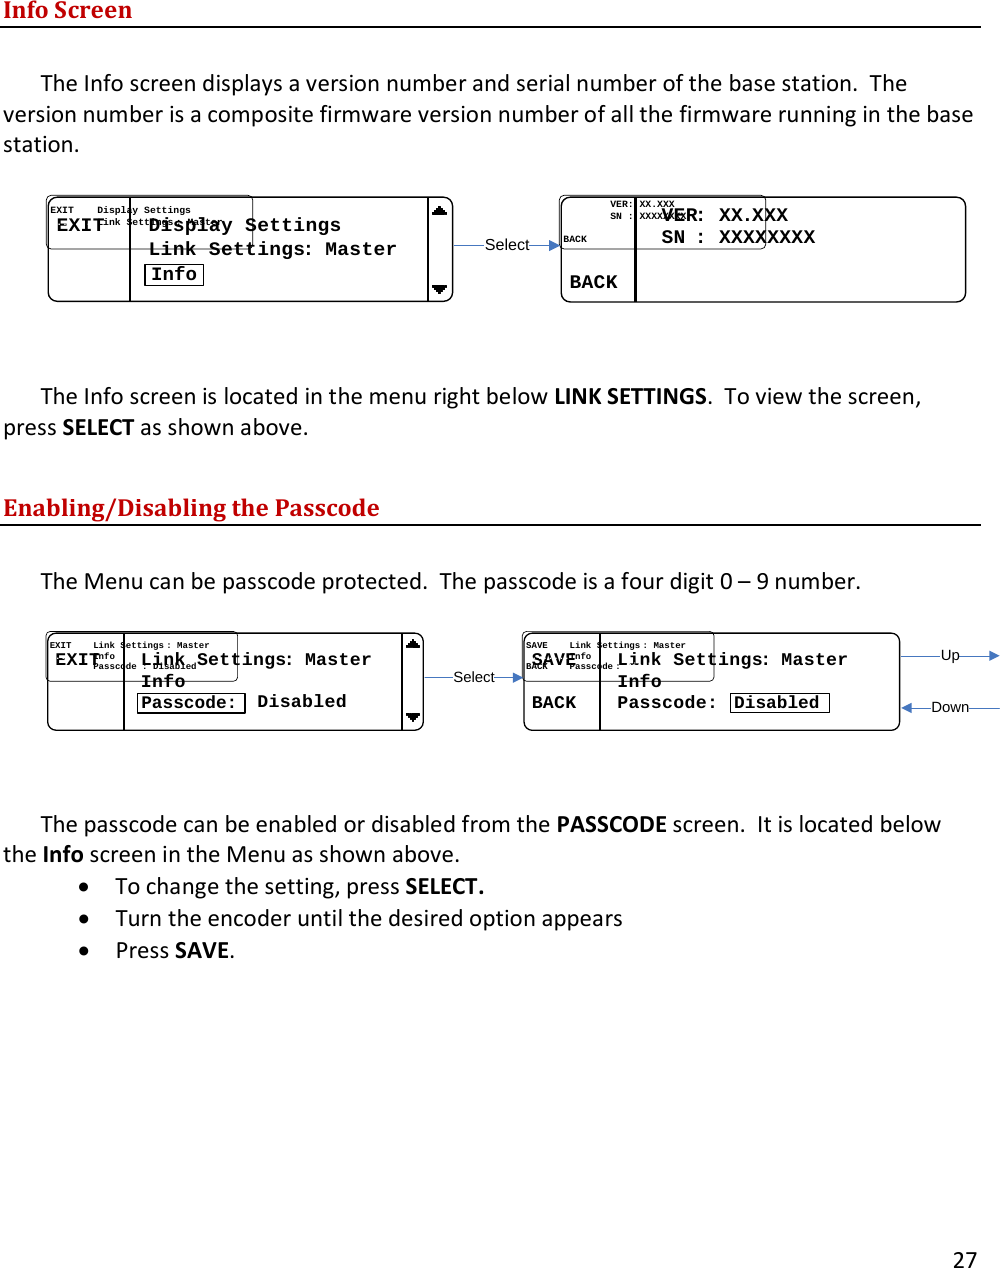
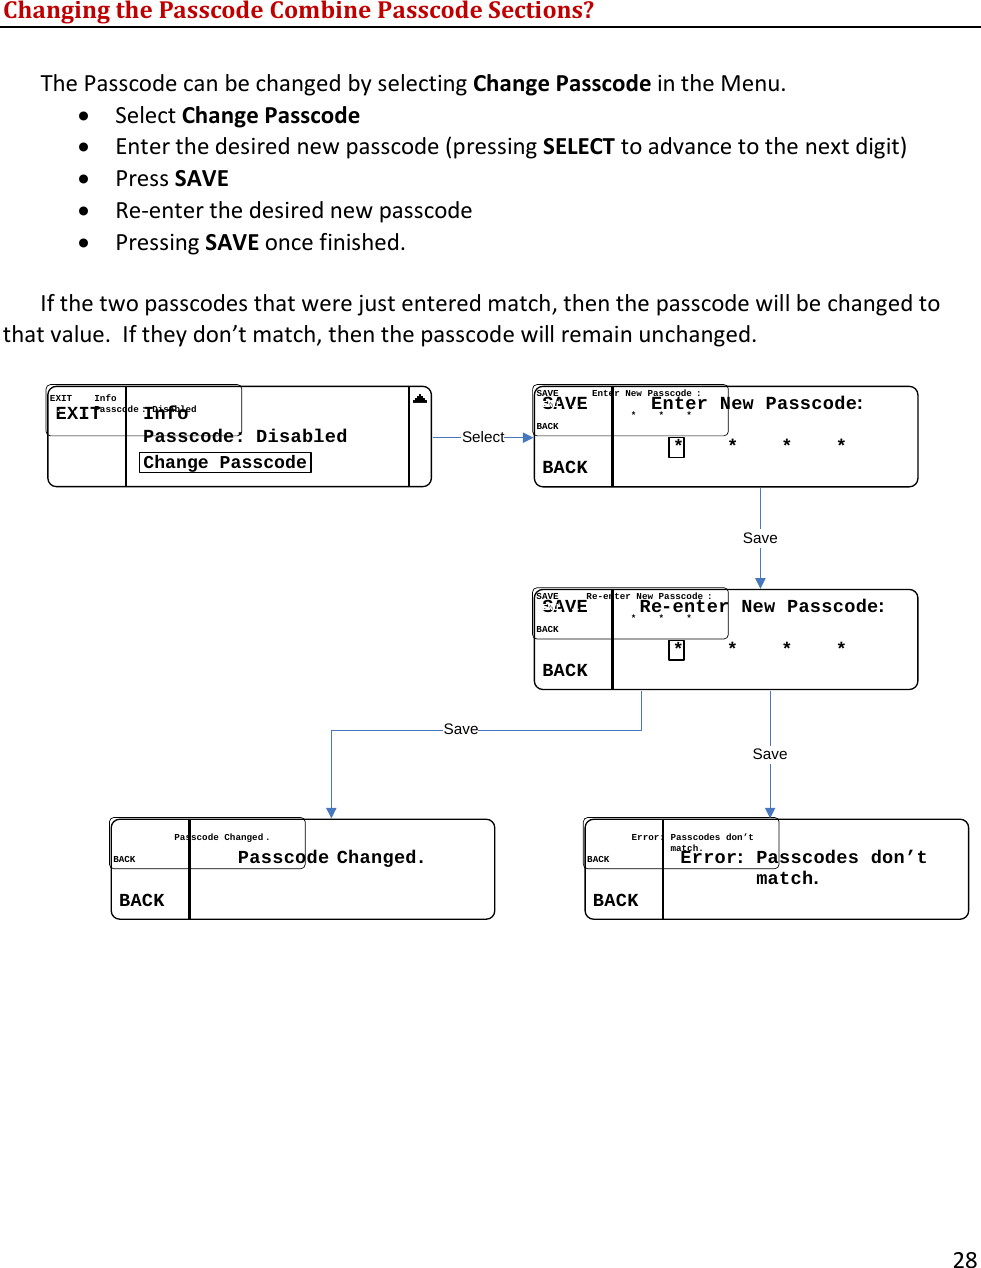
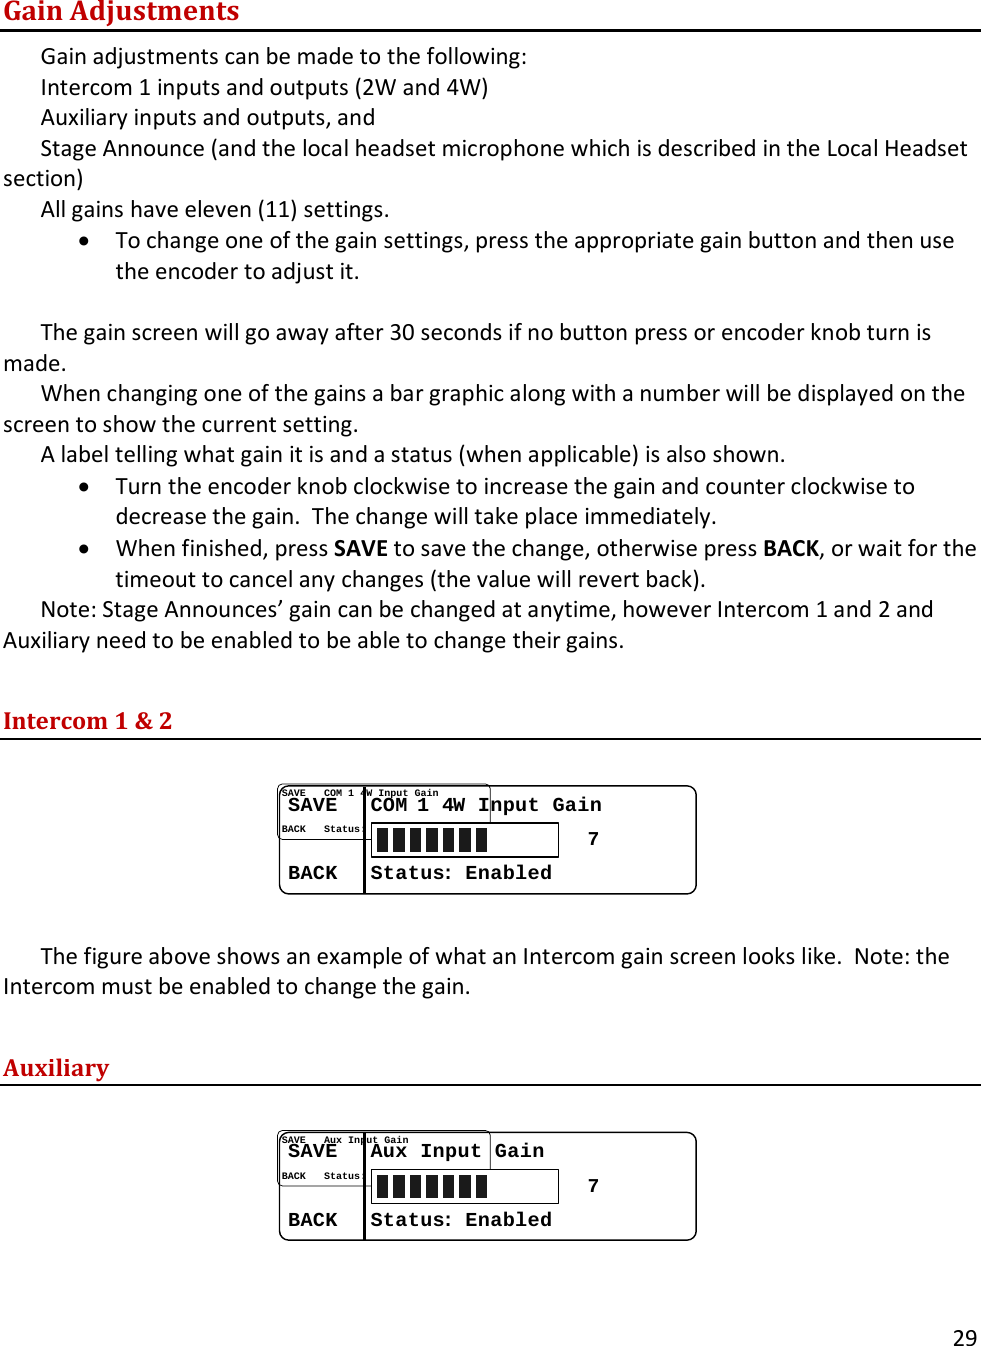
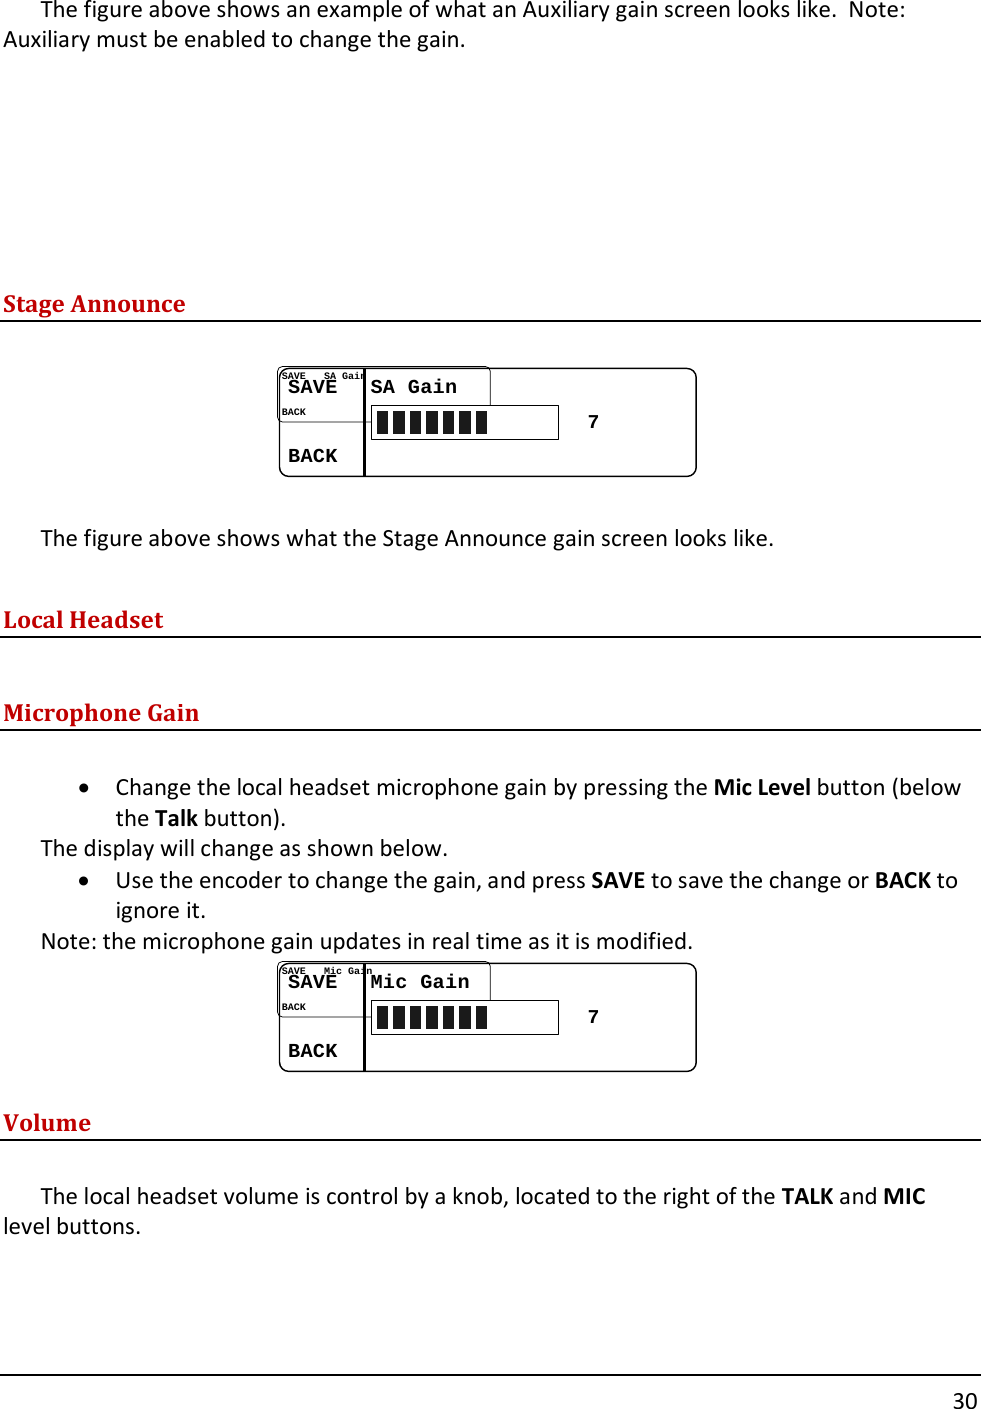
Info
Views
User Manual
Discussion / Help
Navigation


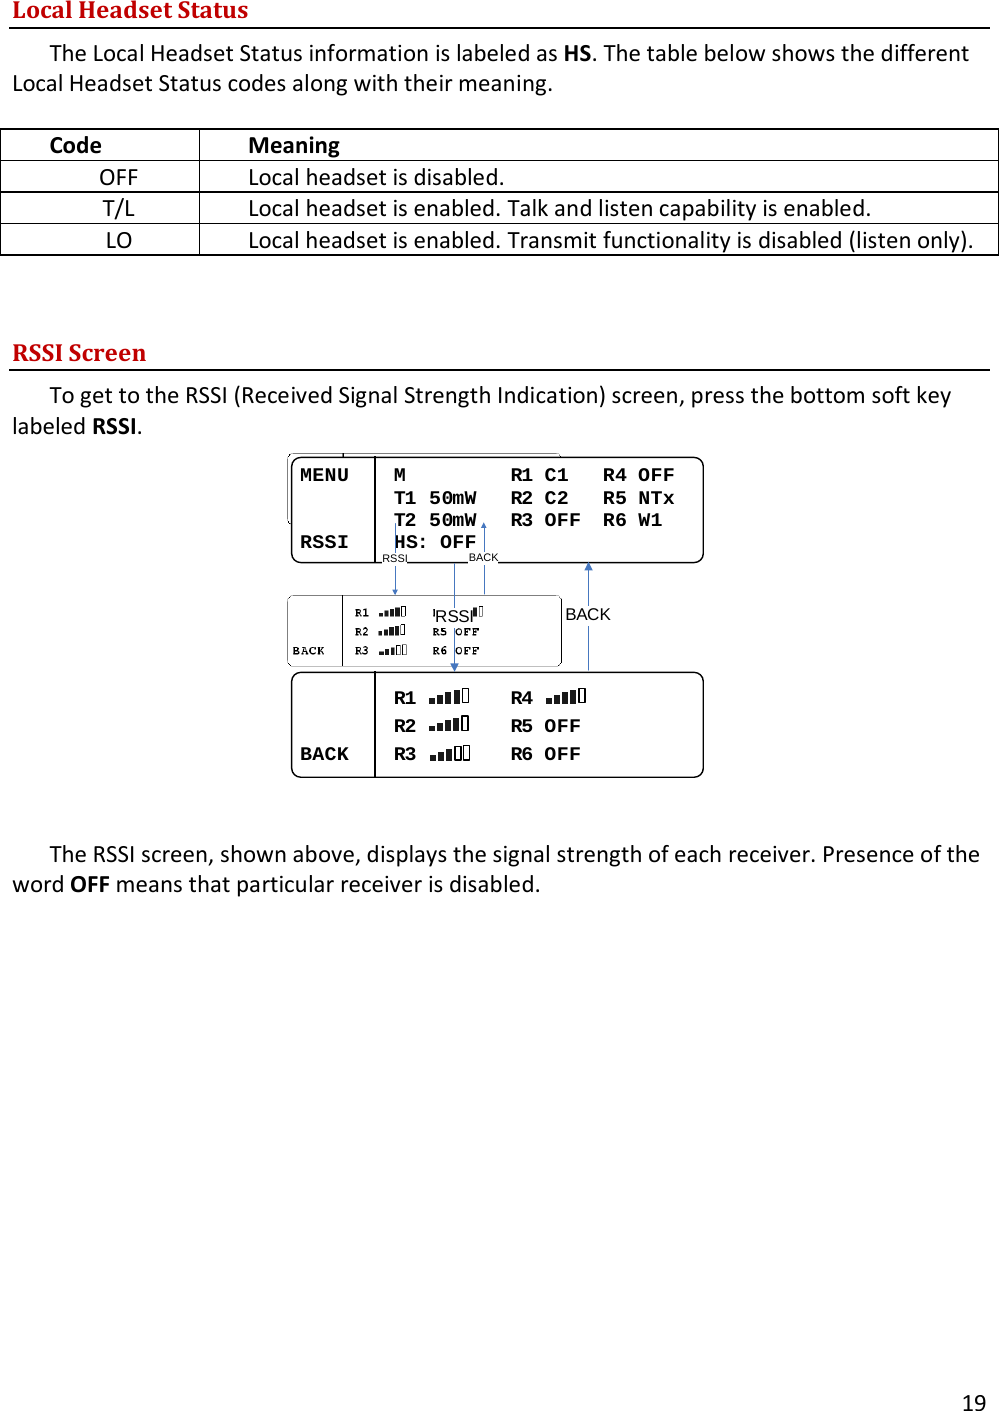
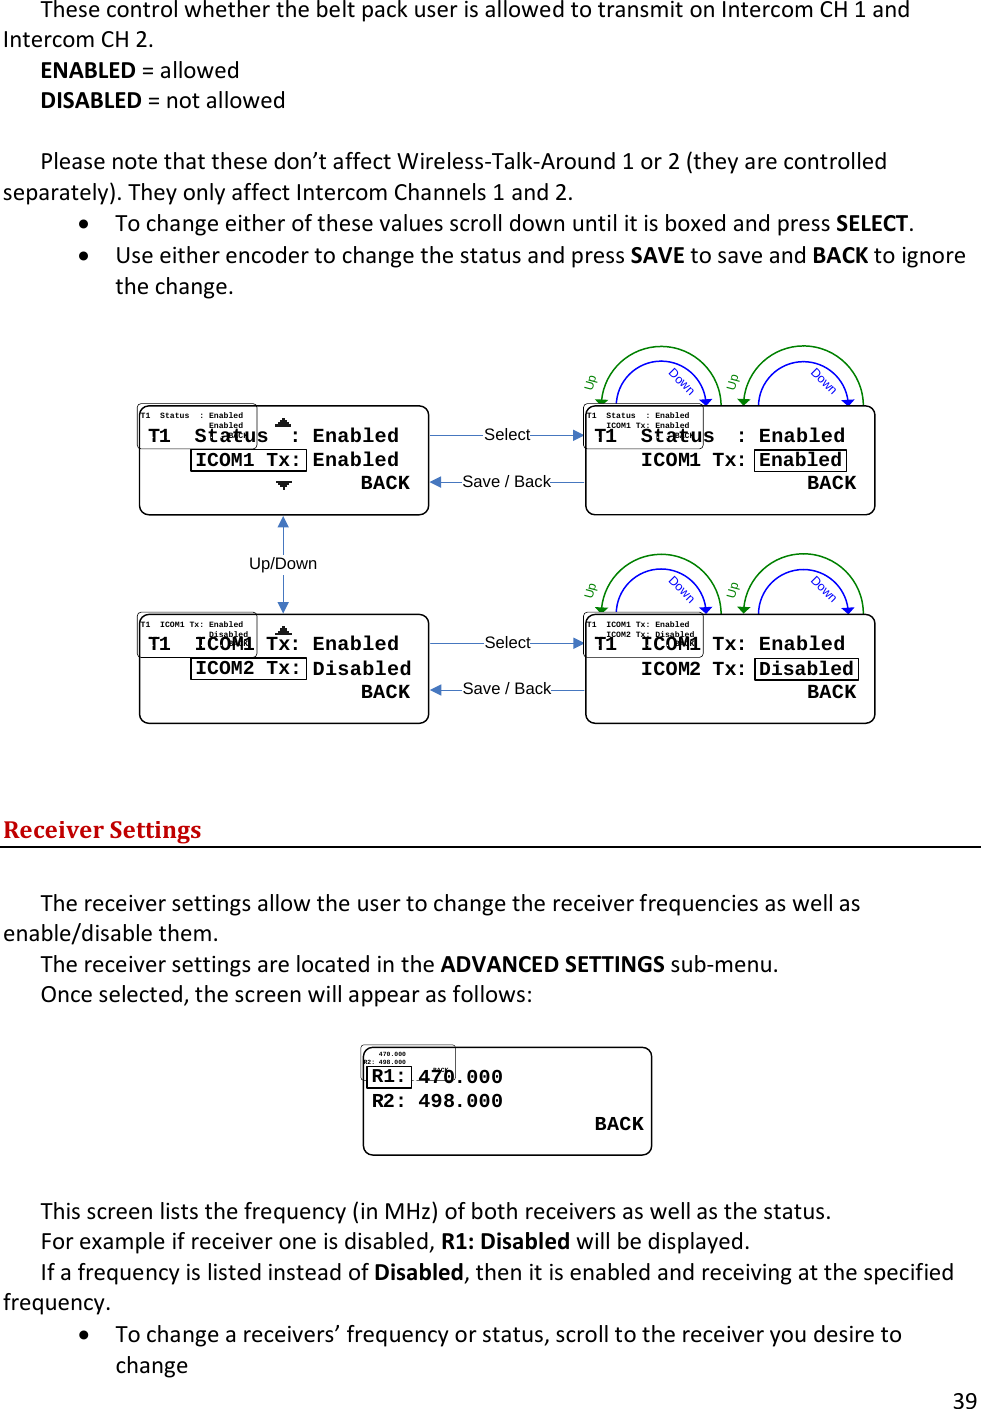
![41 SIG SIG: : BATTBATT::CAMERA 1 DIRECTORWTA 1&2 SAChannel 1Button Label Channel 2Button Label This sub-menu allows the user to change, edit, remove, and add new labels. Once the Channel Labels menu is entered, the screen will appear as follows: EditEdit//Remove LabelsRemove Labels BACK BACKChange Labels • Press SELECT to change what label is assigned to each Intercom. Intercom CH 1 is on the left. Intercom CH 2 is on the right. • Press SELECT to change which one gets changed. • Use either encoder to scroll through the list of labels. • Press SAVE to save your changes or BACK to ignore them. Select Director DirectorSAVE BACKSAVE BACKCamera 1Camera Camera 11SAVE BACKSAVE BACKDirector • To view the label list, or edit or remove a label, select the Edit/Remove Labels option in the Channel Labels sub-menu. The screen will appear as follows: CAMERA CAMERA 11REMOVEREMOVE........................BACKBACKDIRECTOR Select..IRECTORIRECTORSAVESAVE..........[[AA--ZZ]]........BACKBACKD • Use either encoder to scroll through the list. • Press SELECT to edit the currently selected label. The left (CH 1) encoder changes the currently selected character. The right (CH 2) encoder changes the group. There are three groups: capital letters (A-Z), numbers (0-9), and symbols (SYM).](https://usermanual.wiki/Radio-Active-Design/UV-1GBP/User-Guide-2147472-Page-41.png)
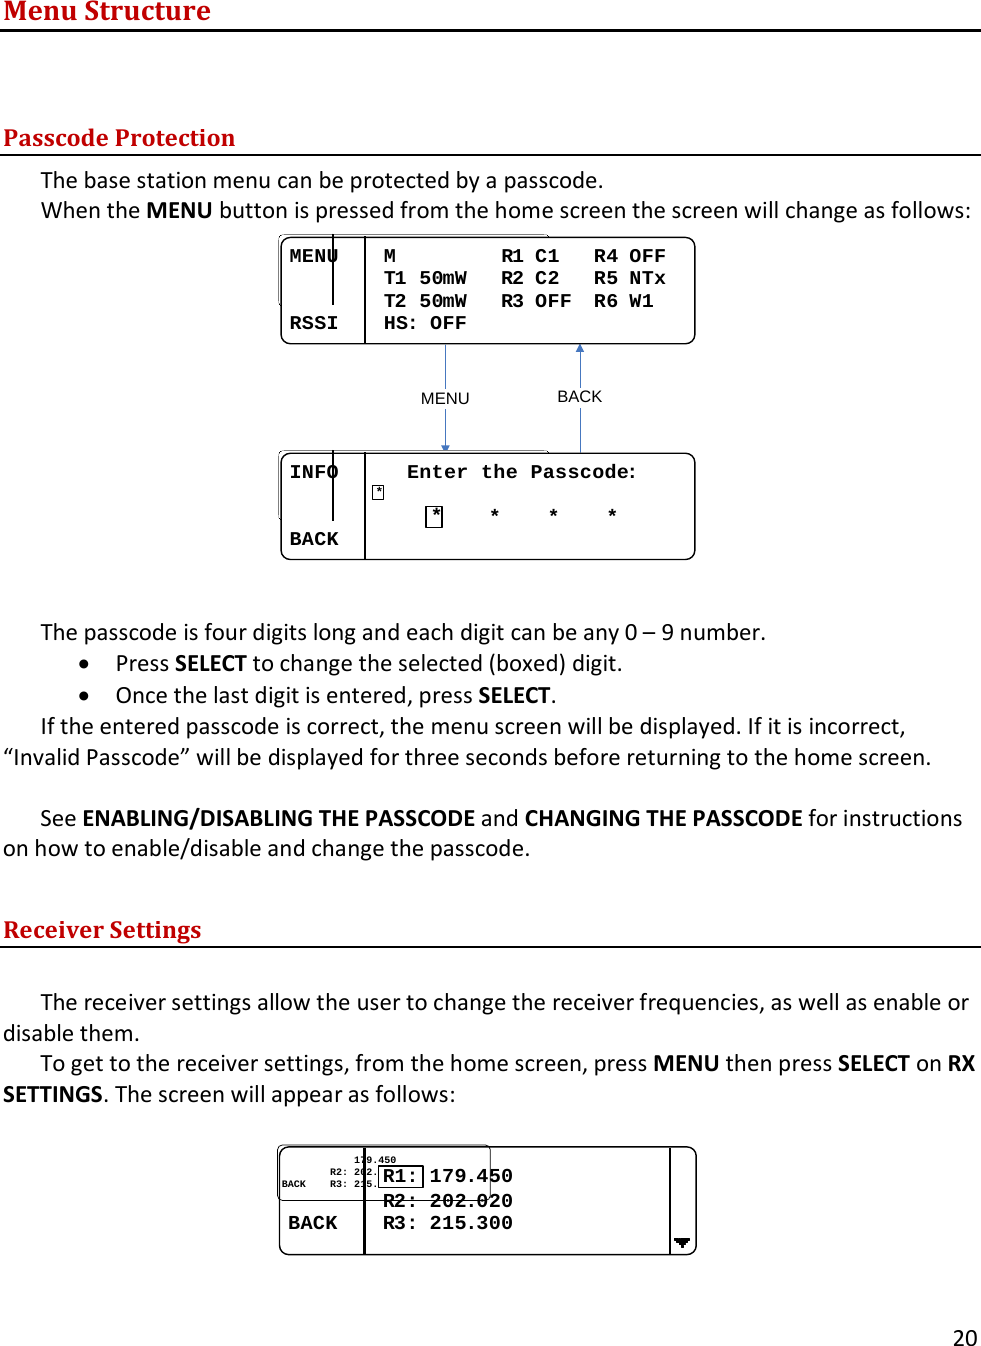
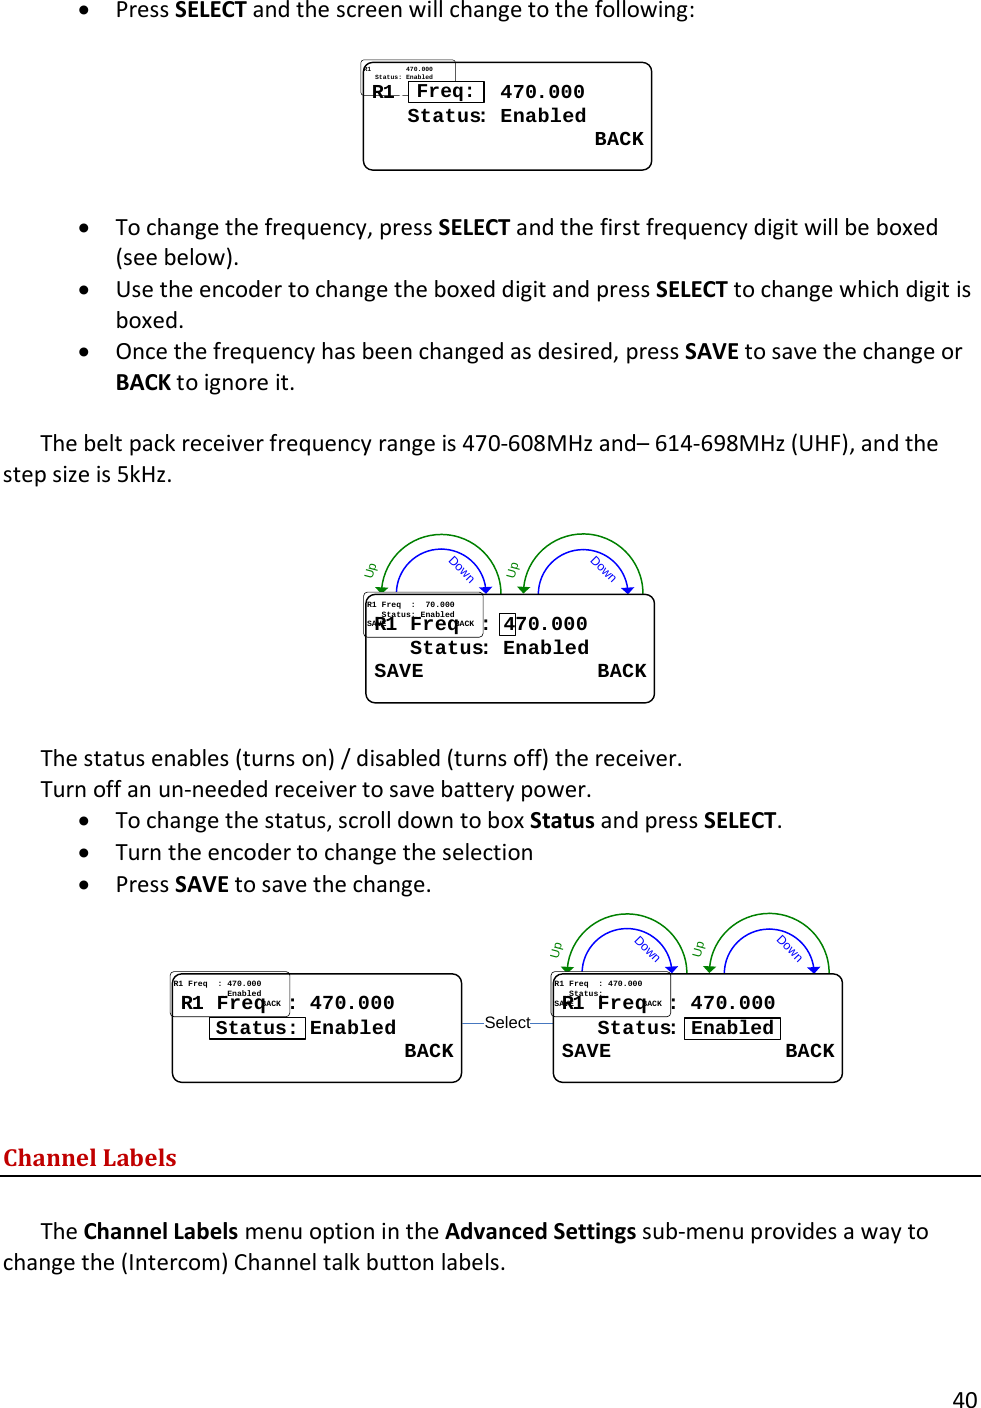
![42 • Press SELECT to change the selected character. • Press the left soft key labeled REMOVE to remove the currently selected label as shown below. Are you sure you wantAre you sure you wantto remove DIRECTORto remove DIRECTOR ??NO YESNO YESDIRECTOR removedDIRECTOR removed !!........................................OKOKCAMERA CAMERA 11REMOVEREMOVE........................BACKBACKDIRECTOR RemoveYes • To add a label to the list, select the Add New Label option in the Channel Labels sub-menu. Labels are allowed to be a maximum of eight characters, and the controls are the same as editing. The left (CH 1) encoder changes the currently selected character. The right (CH 2) encoder changes the group. There are three groups: capital letters (A-Z), numbers (0-9), and symbols (SYM). • Press SELECT to change the selected character. SelectEditEdit//Remove LabelsRemove Labels BACK BACKAdd New LabelJoe’s CH addedJoe’s CH added !!........................................OKOKJoe’s CJoe’s CADDADD............[[AA--ZZ]]........BACKBACKHAdd Soft Button Labels The Soft Button Labels menu option in the Advanced Settings sub-menu provides a way to change the soft (programmable) talk buttons.](https://usermanual.wiki/Radio-Active-Design/UV-1GBP/User-Guide-2147472-Page-42.png)