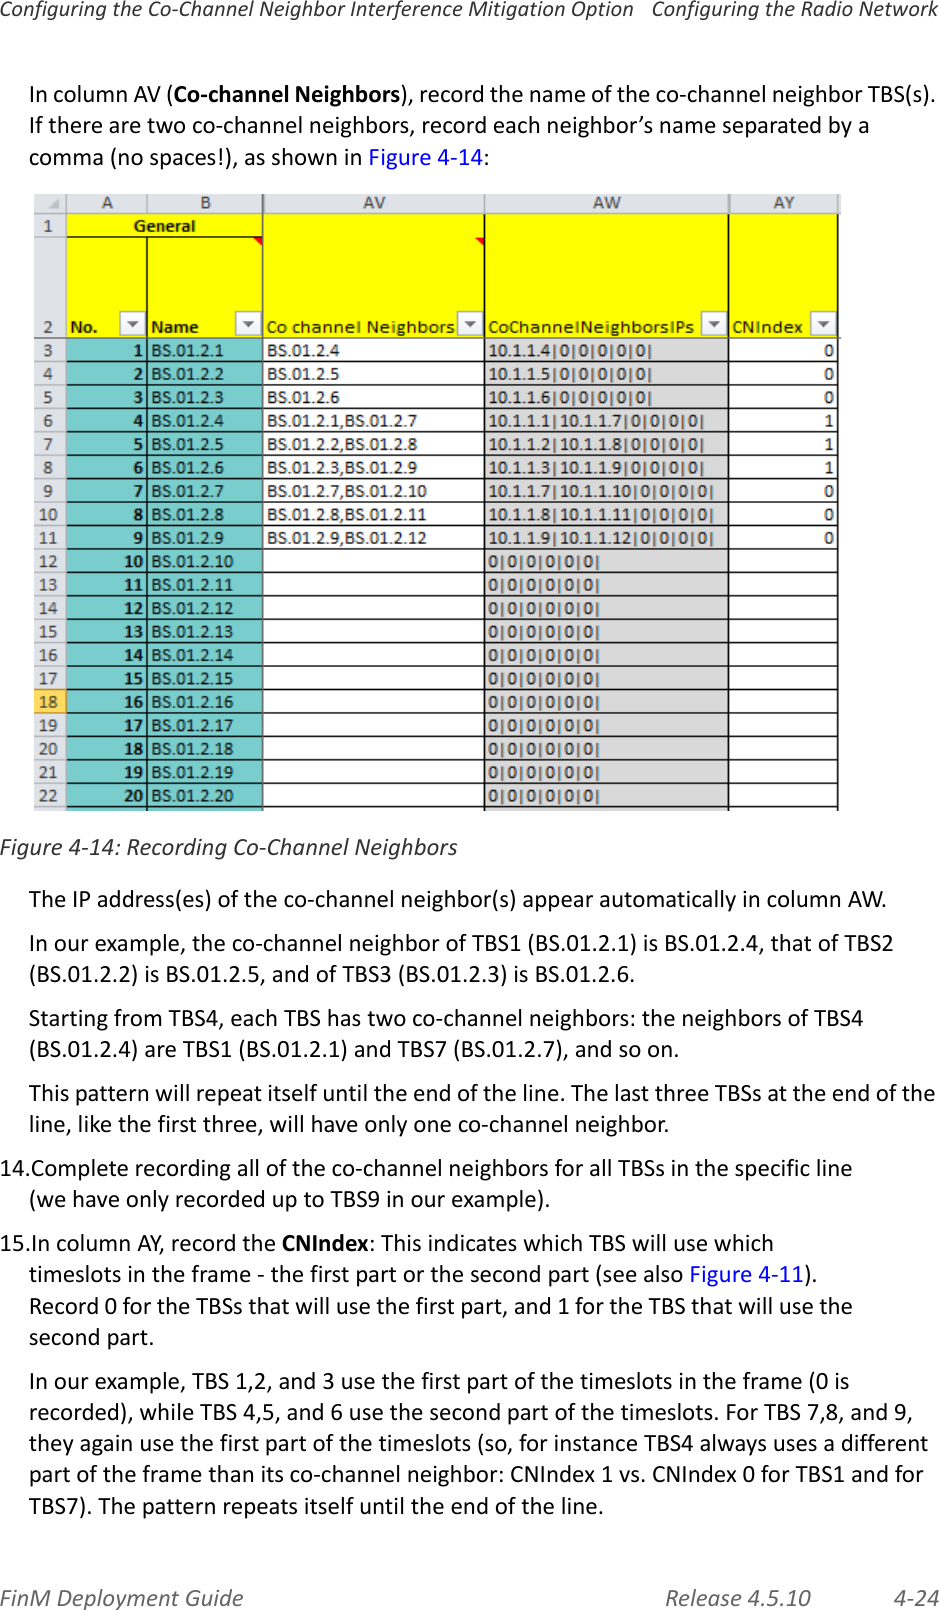
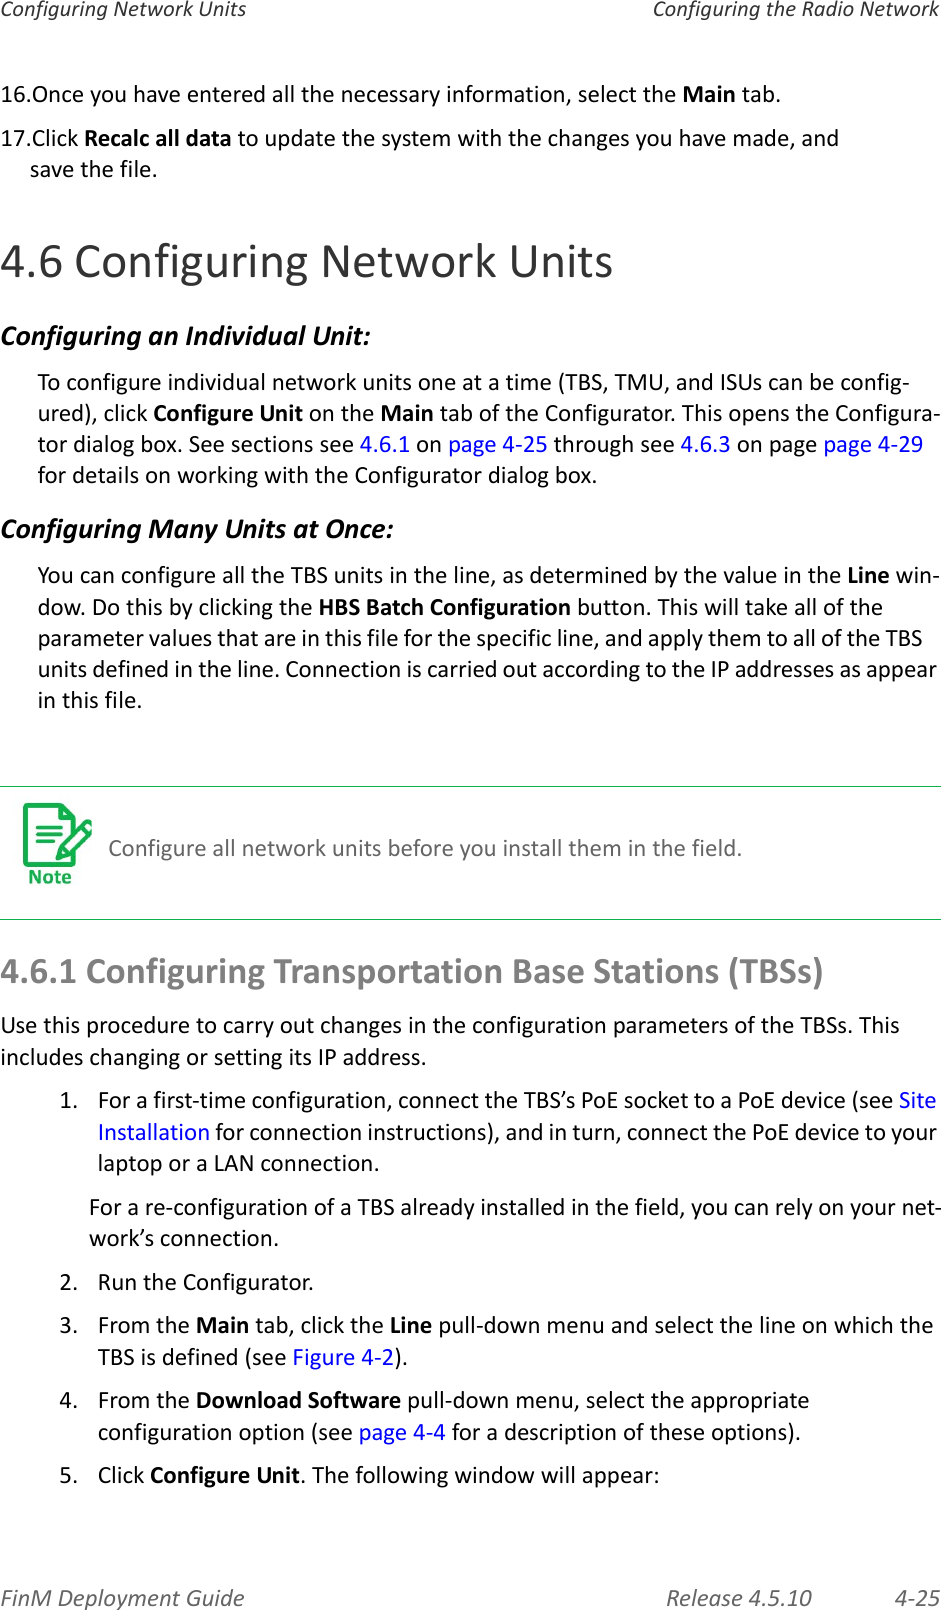
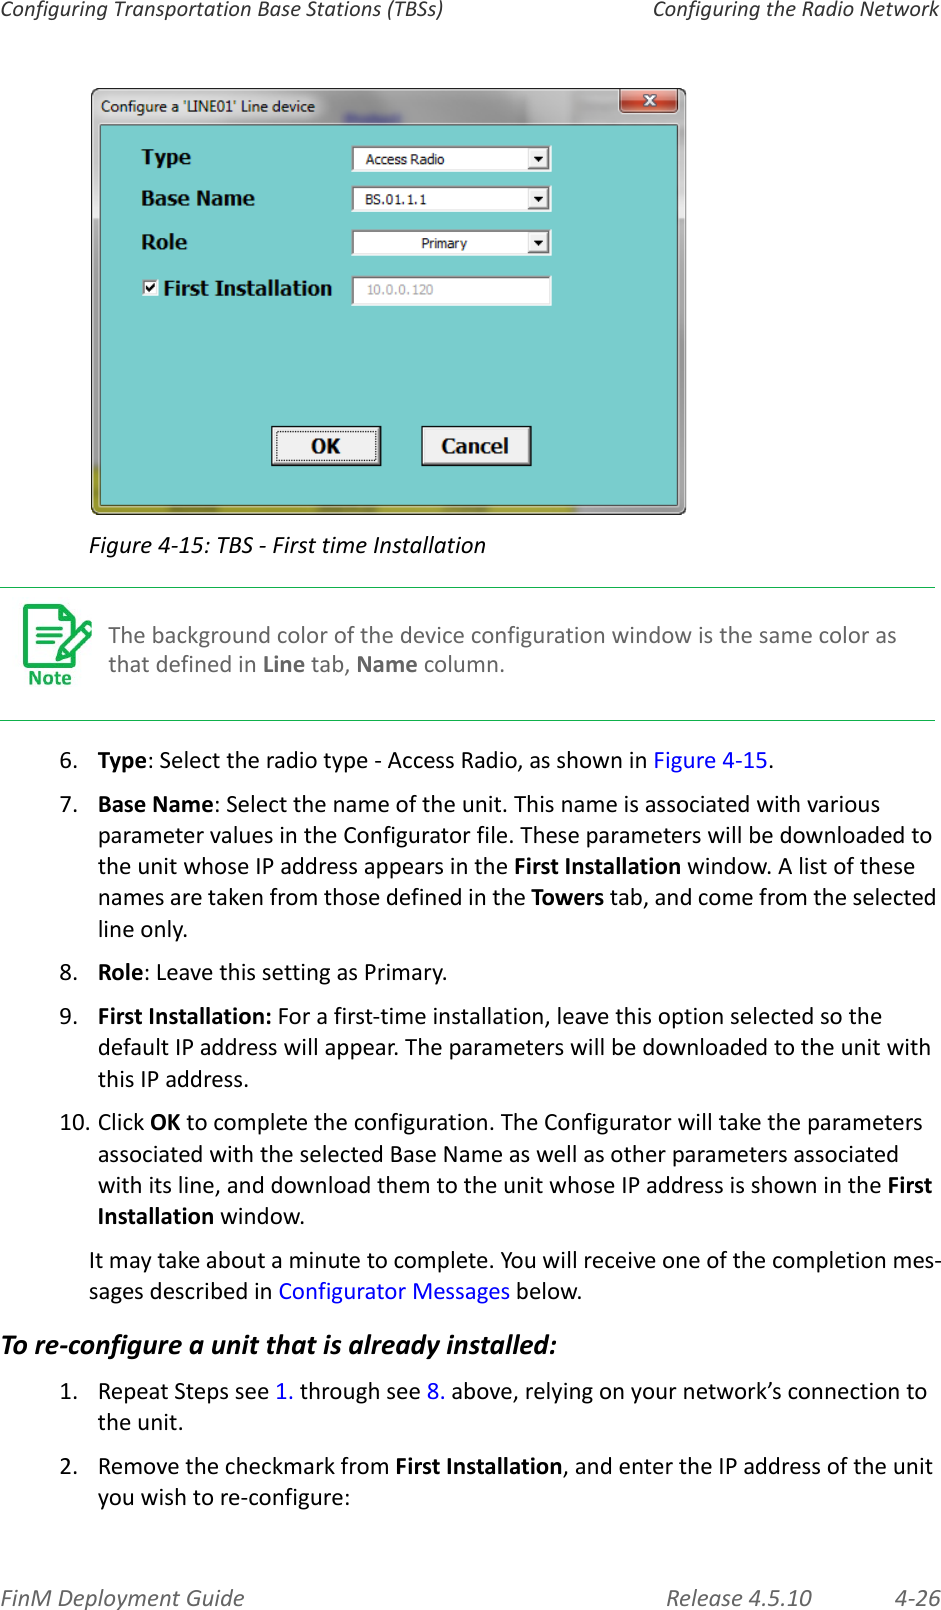
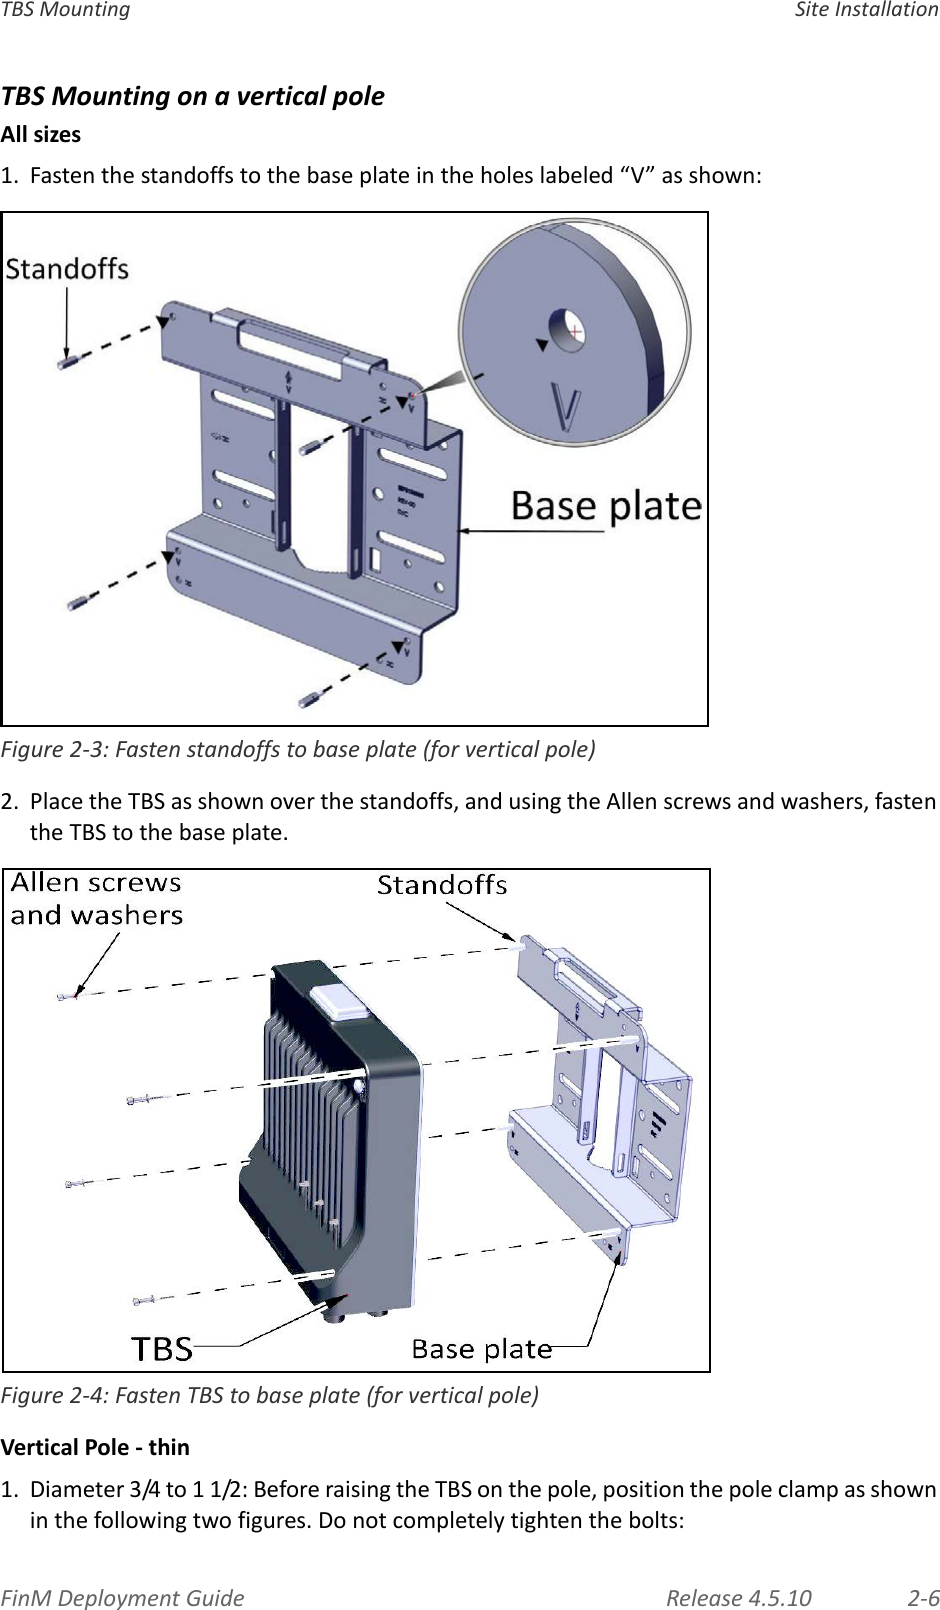
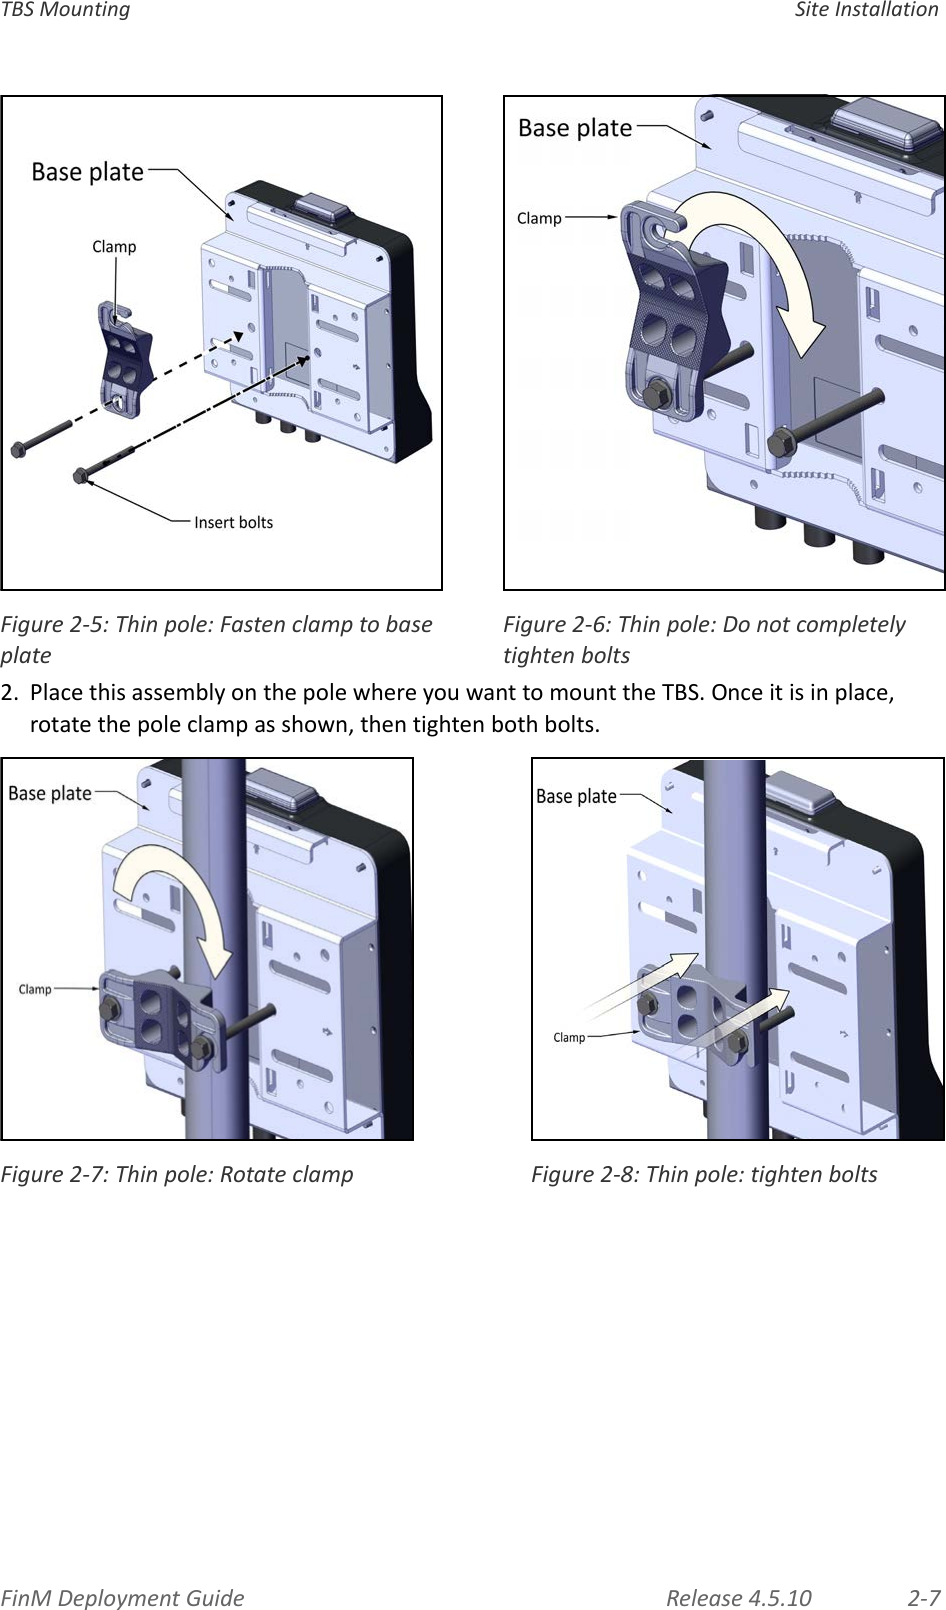
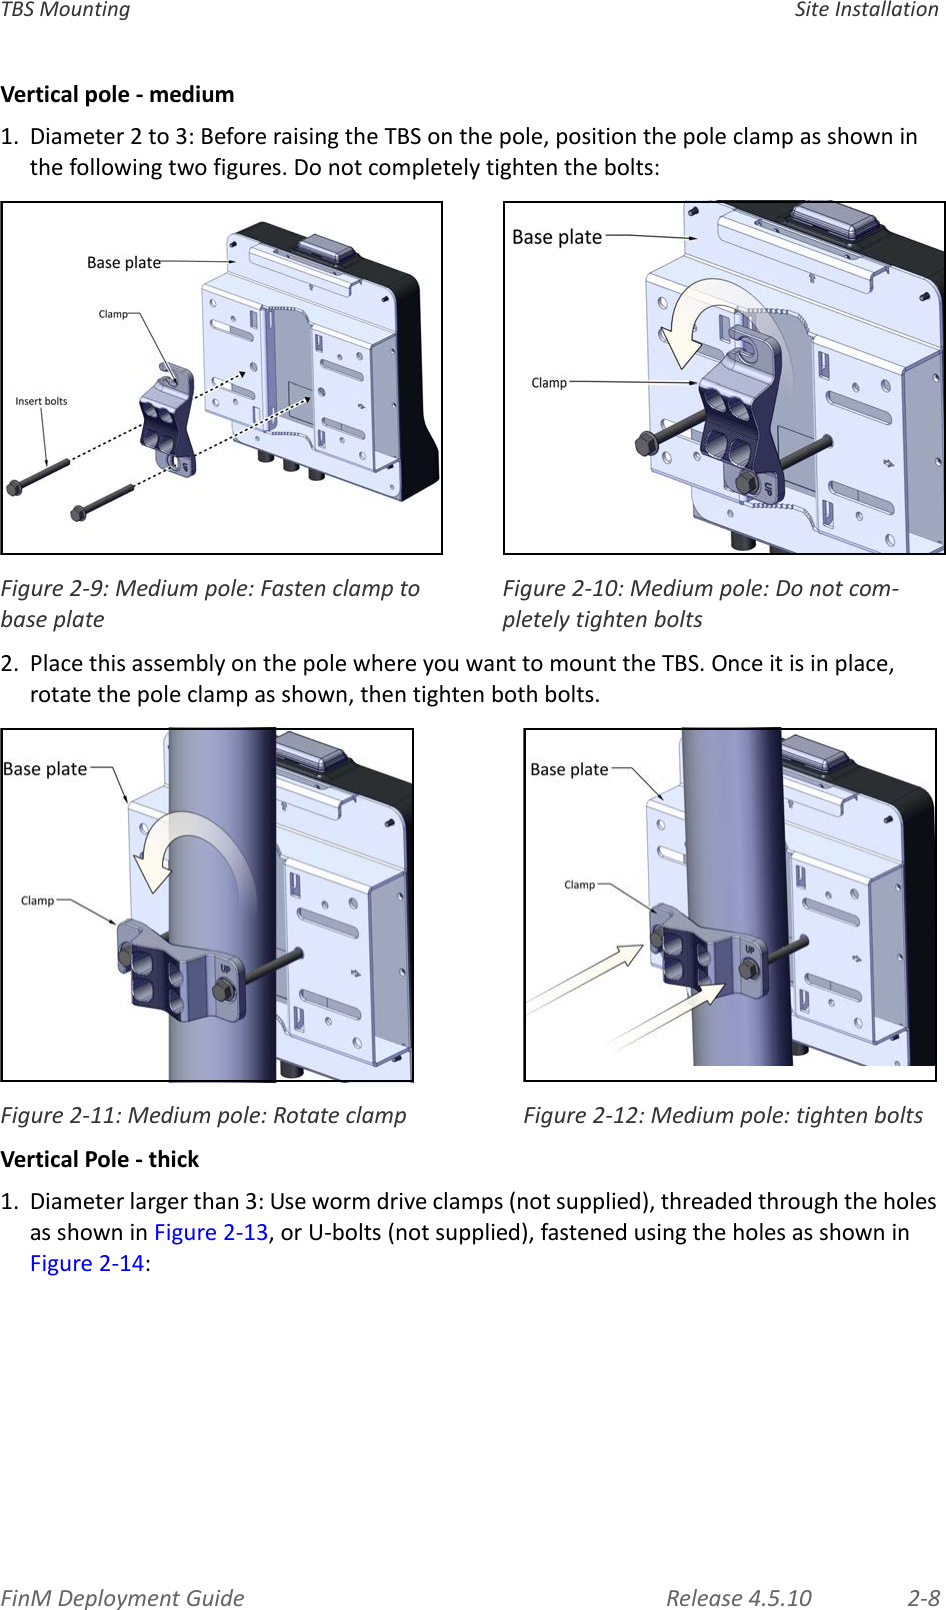
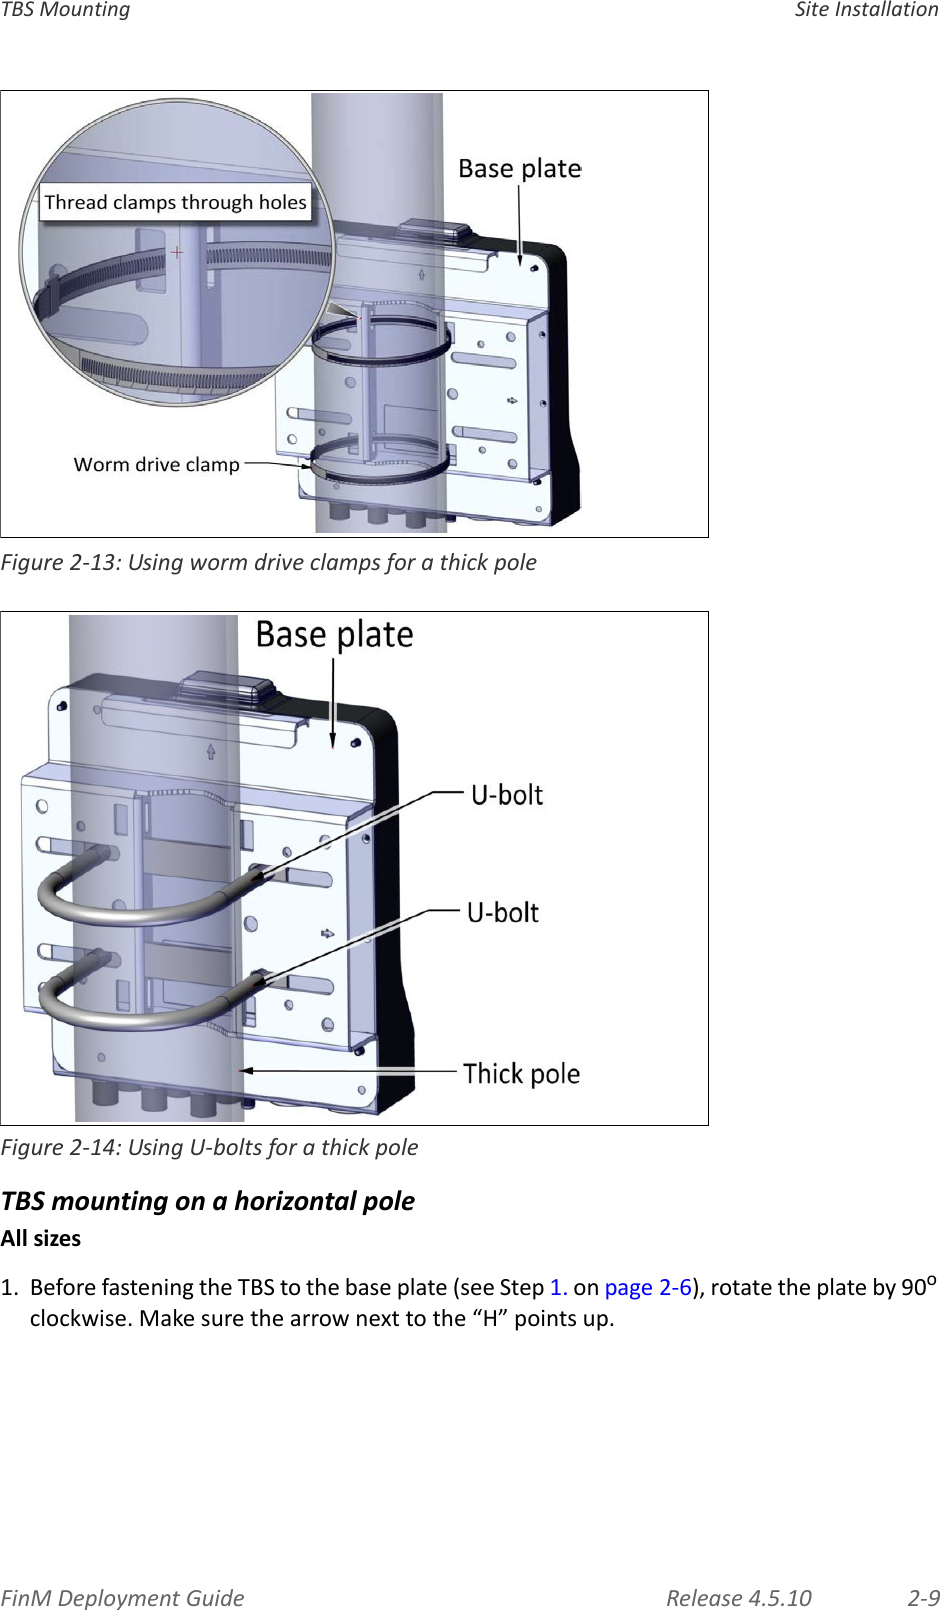
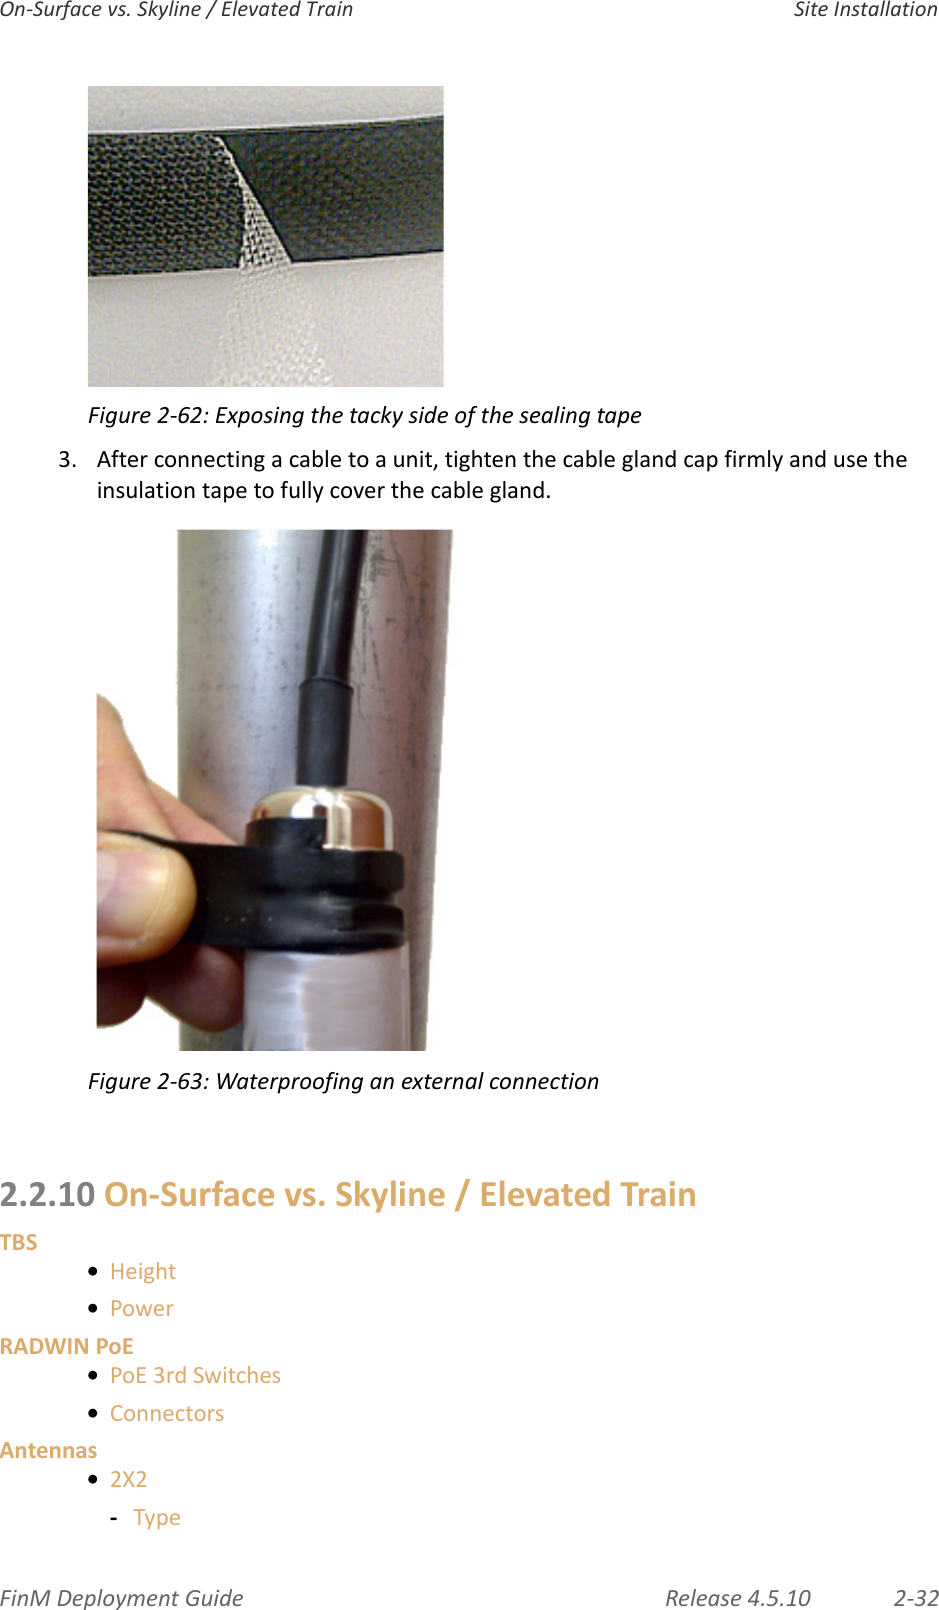
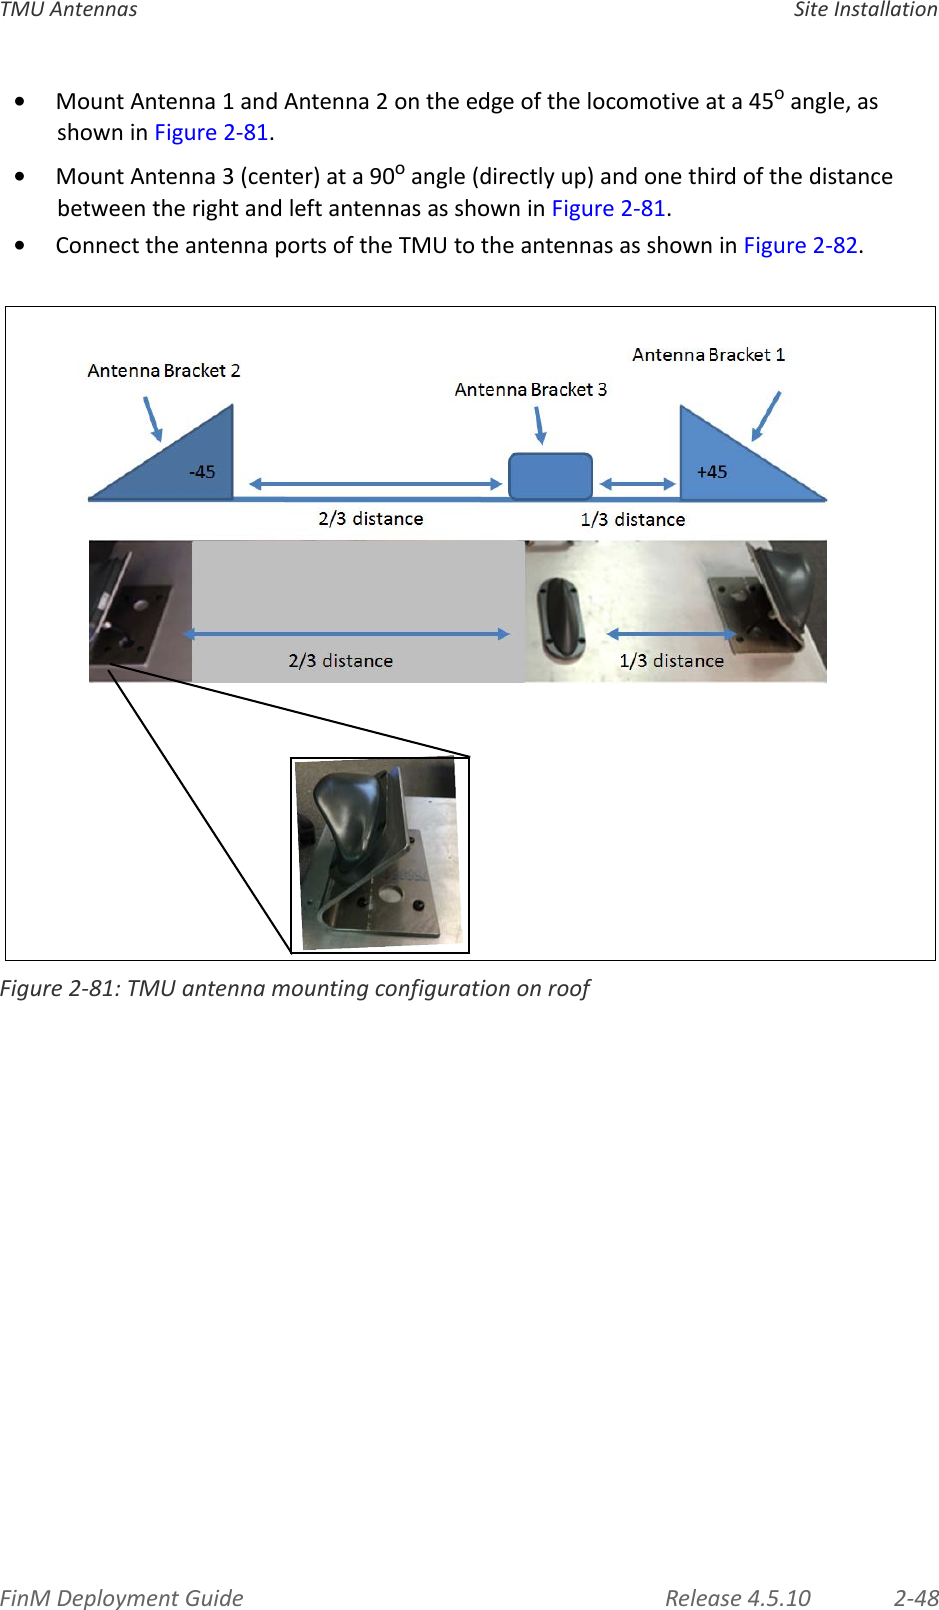
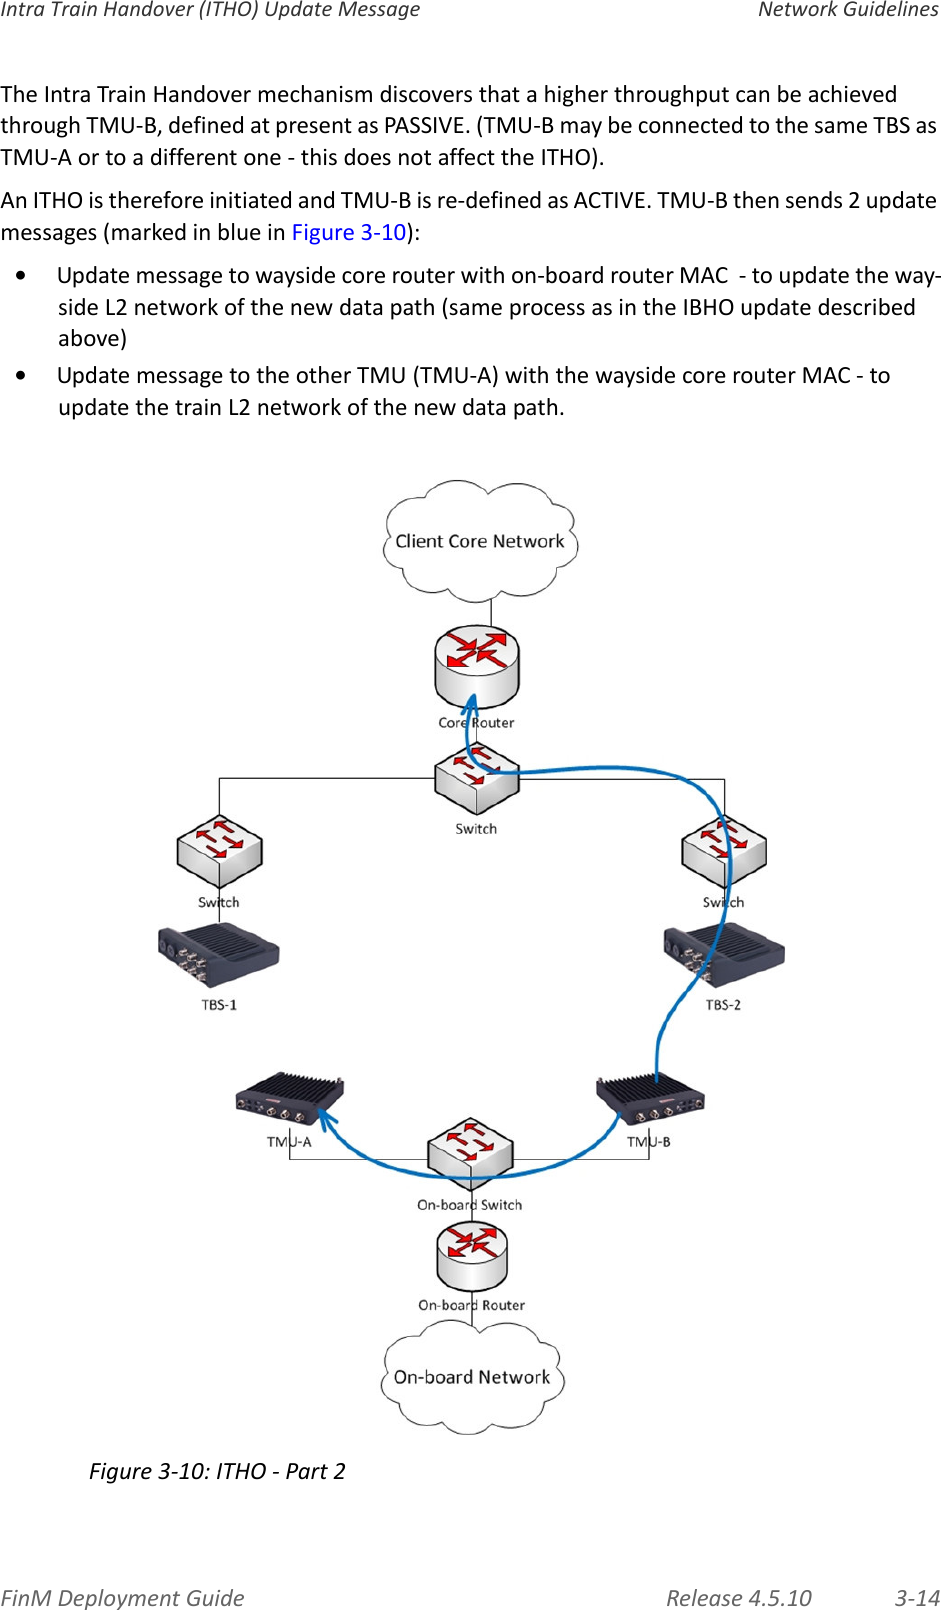
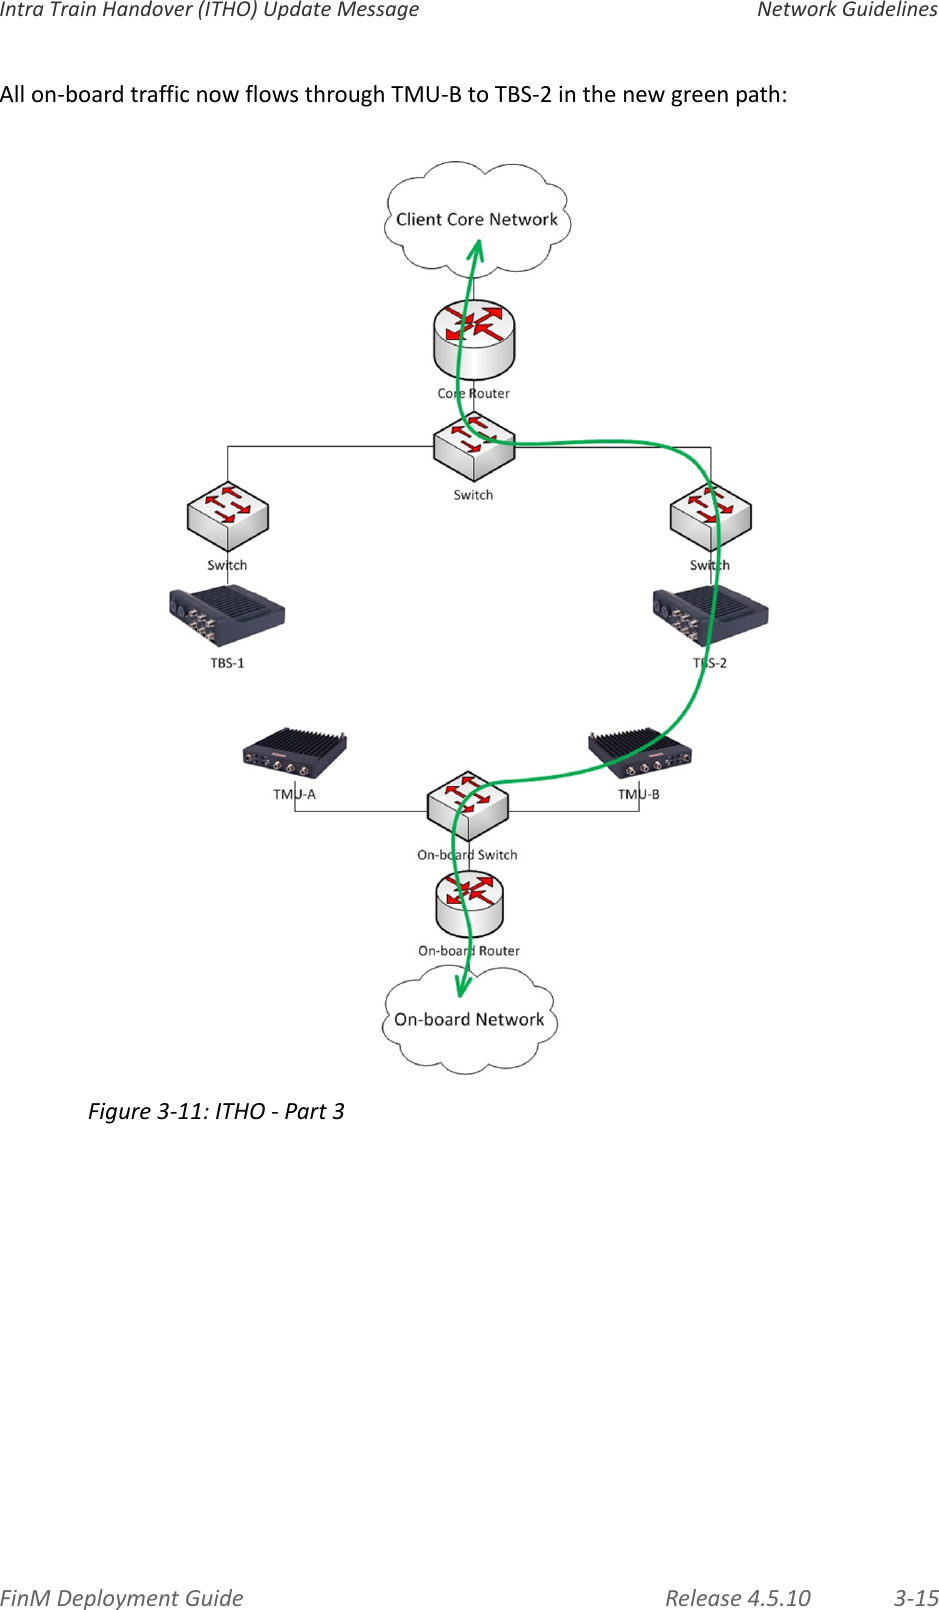
Radwin 5XACMOD3C 5 GHz 802.11ac 3x3 RF Module User Manual UM Transportation 4 5 10 4Regulation
Radwin Ltd. 5 GHz 802.11ac 3x3 RF Module UM Transportation 4 5 10 4Regulation
UserManual.wiki
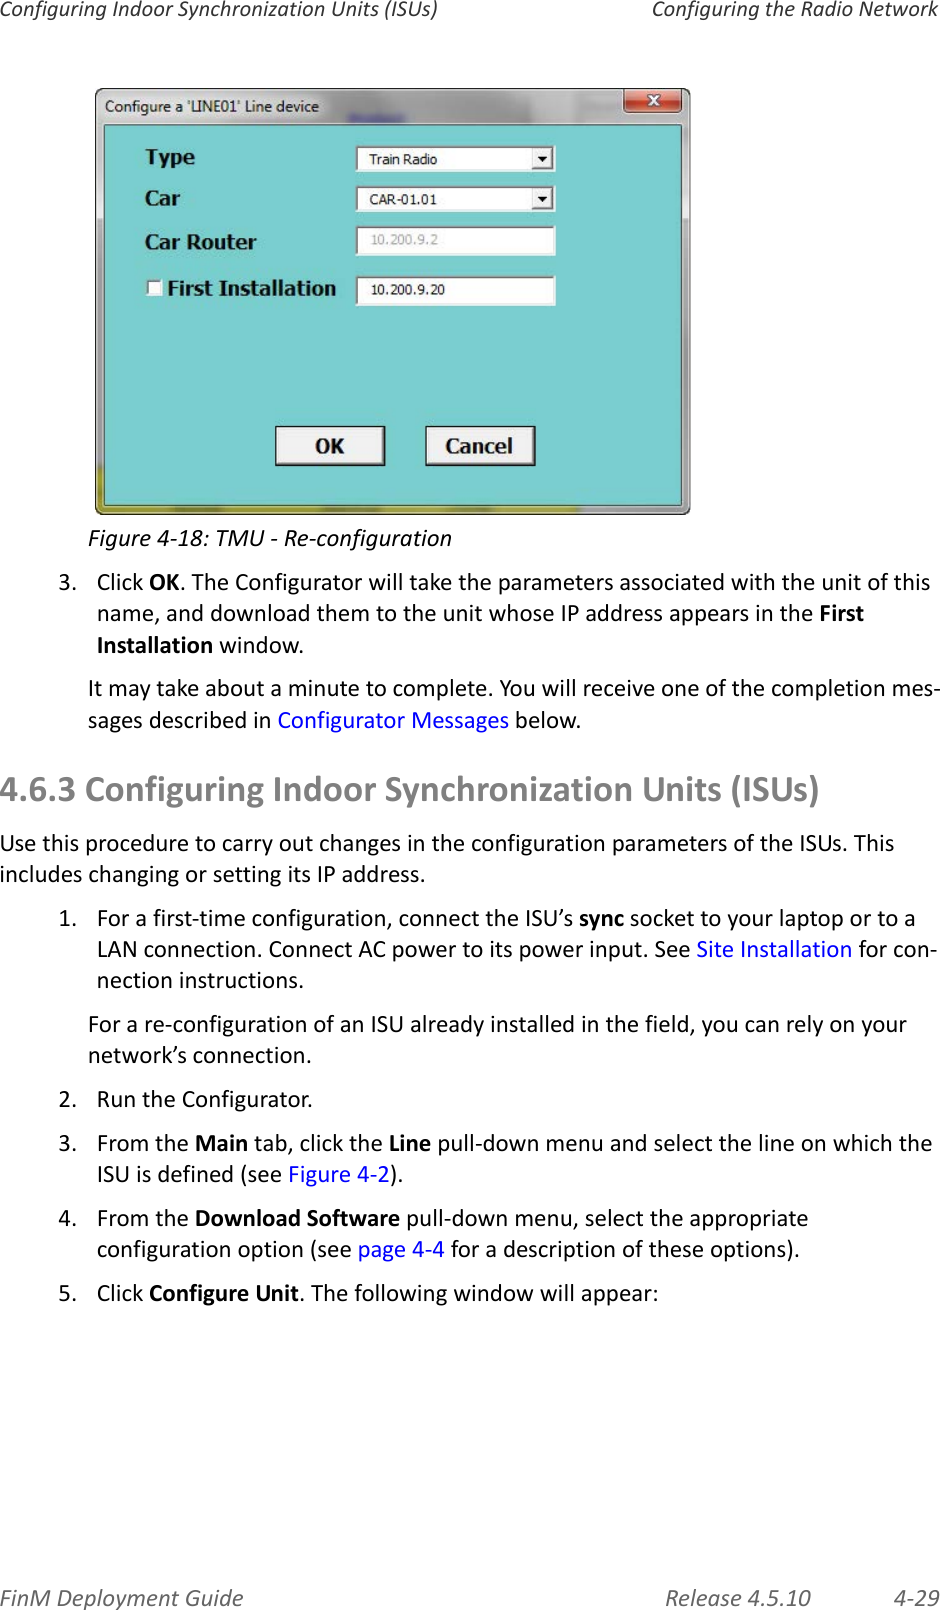
>
Radwin
>
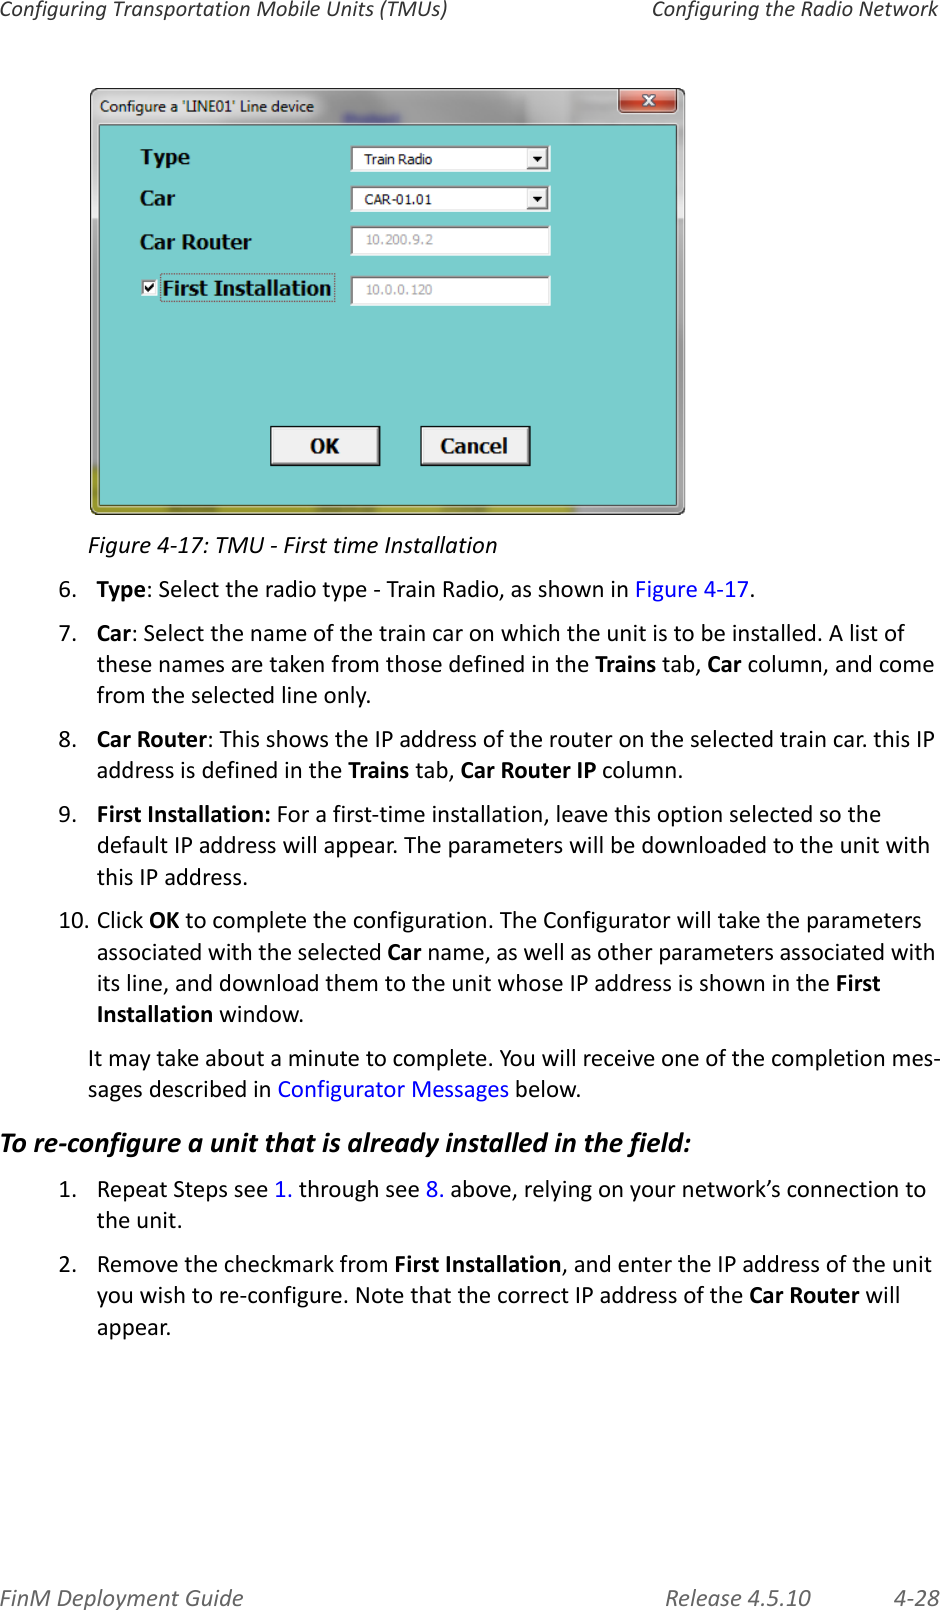
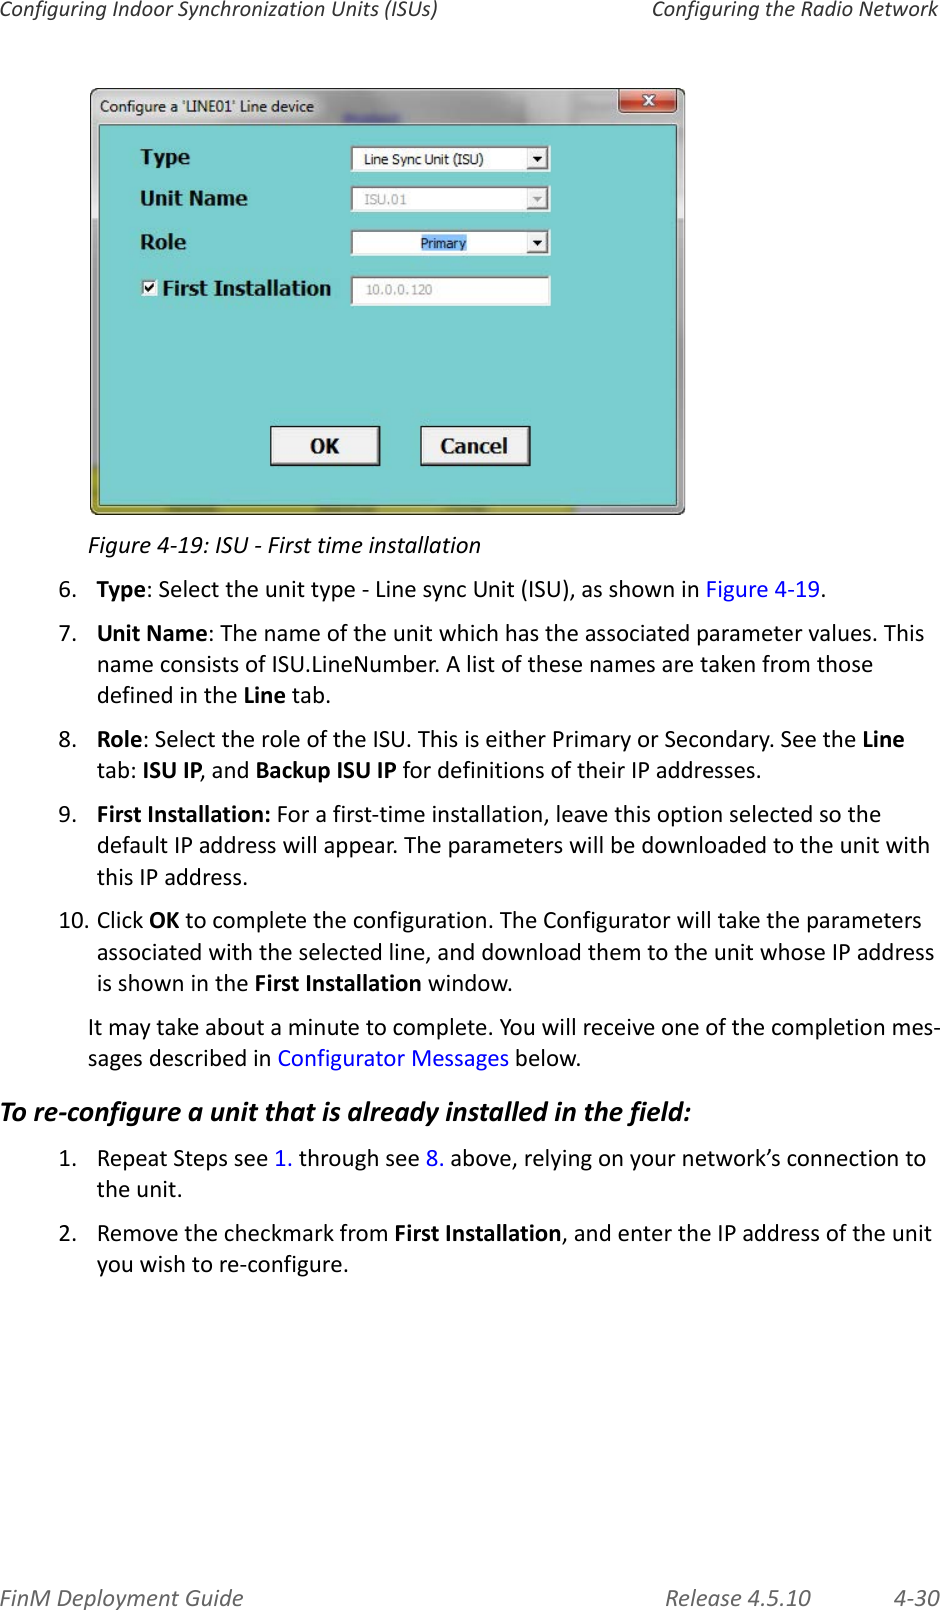
5XACMOD3C User Manual
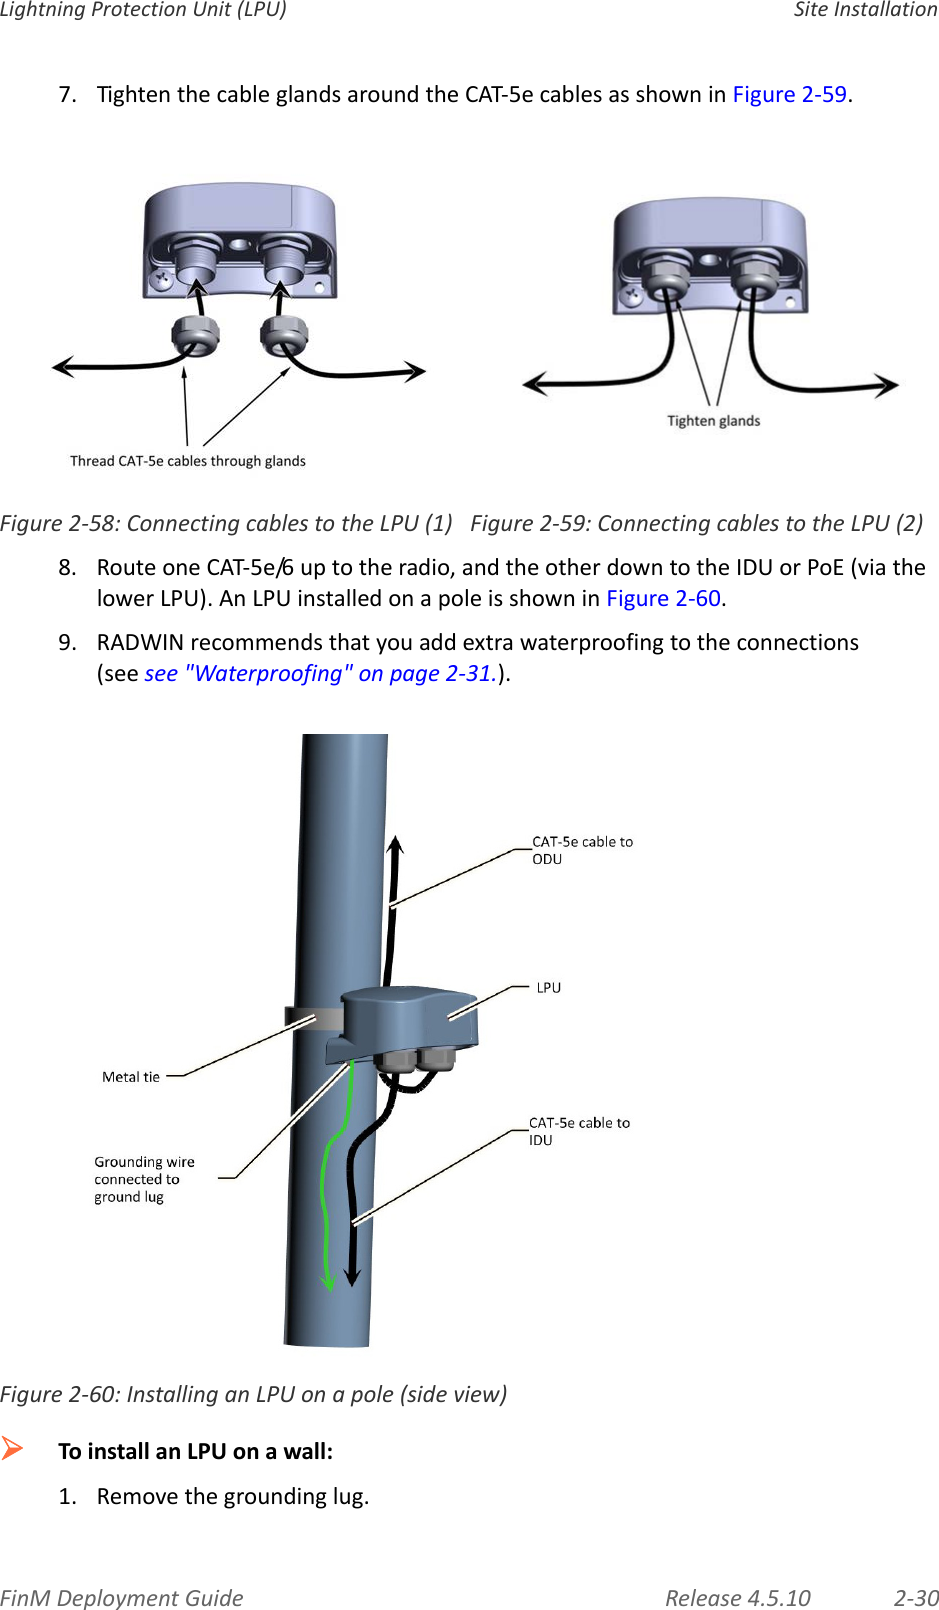
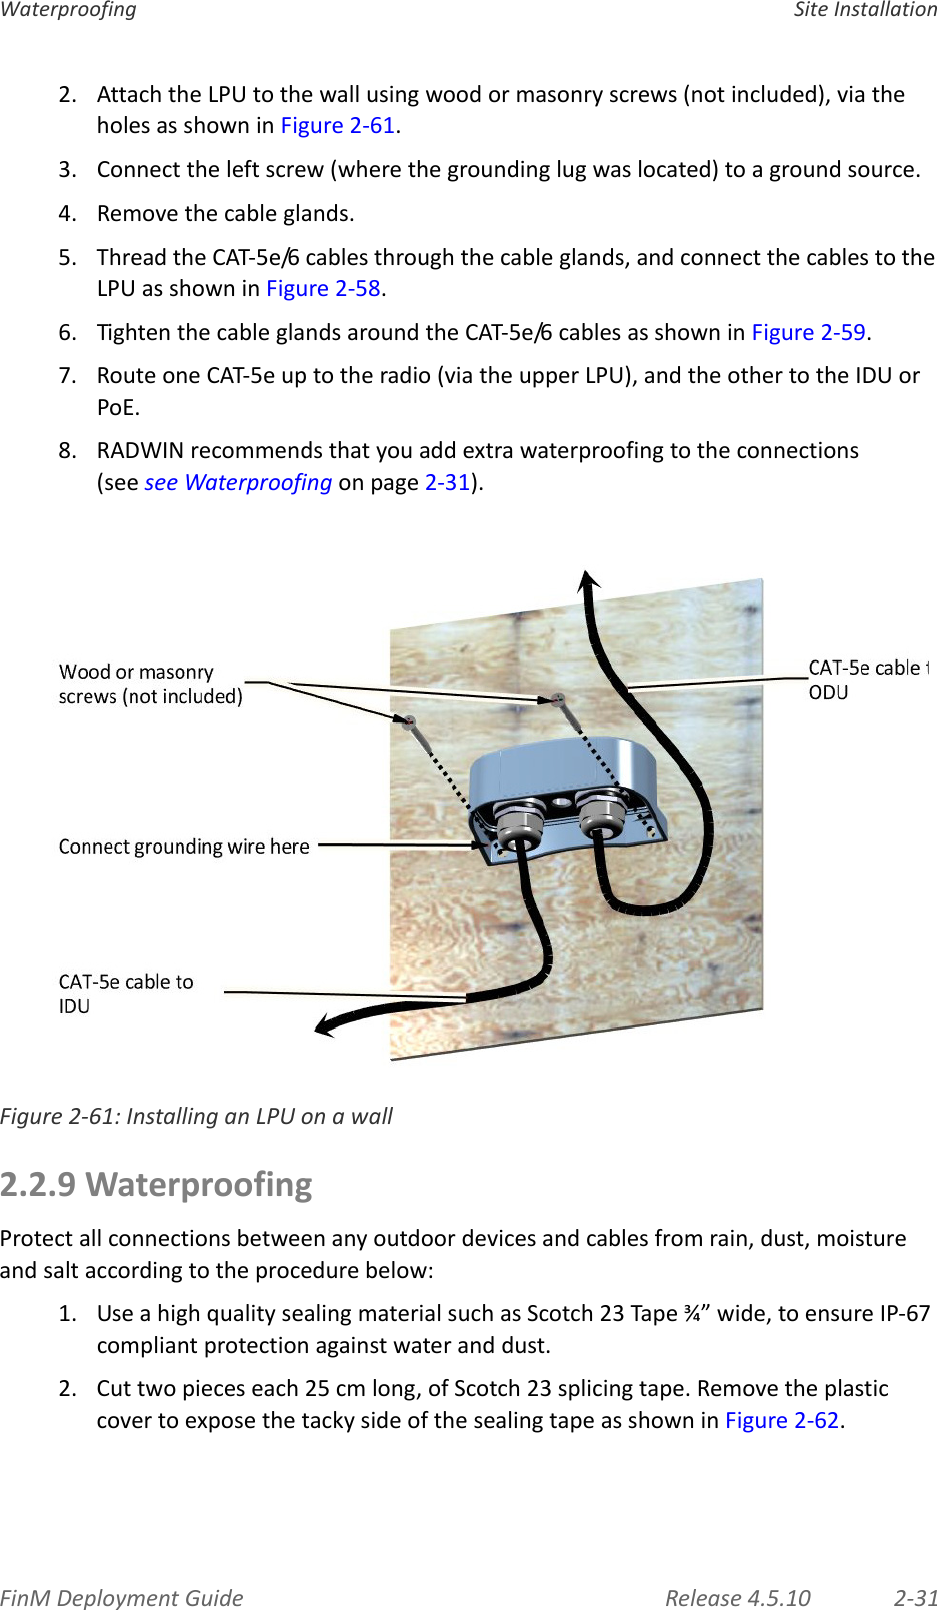
User Manual
Navigation menu
Upload a User Manual
Namespaces
Wiki Guide
HTML
PDF
Info
Views
User Manual
Discussion / Help
Navigation

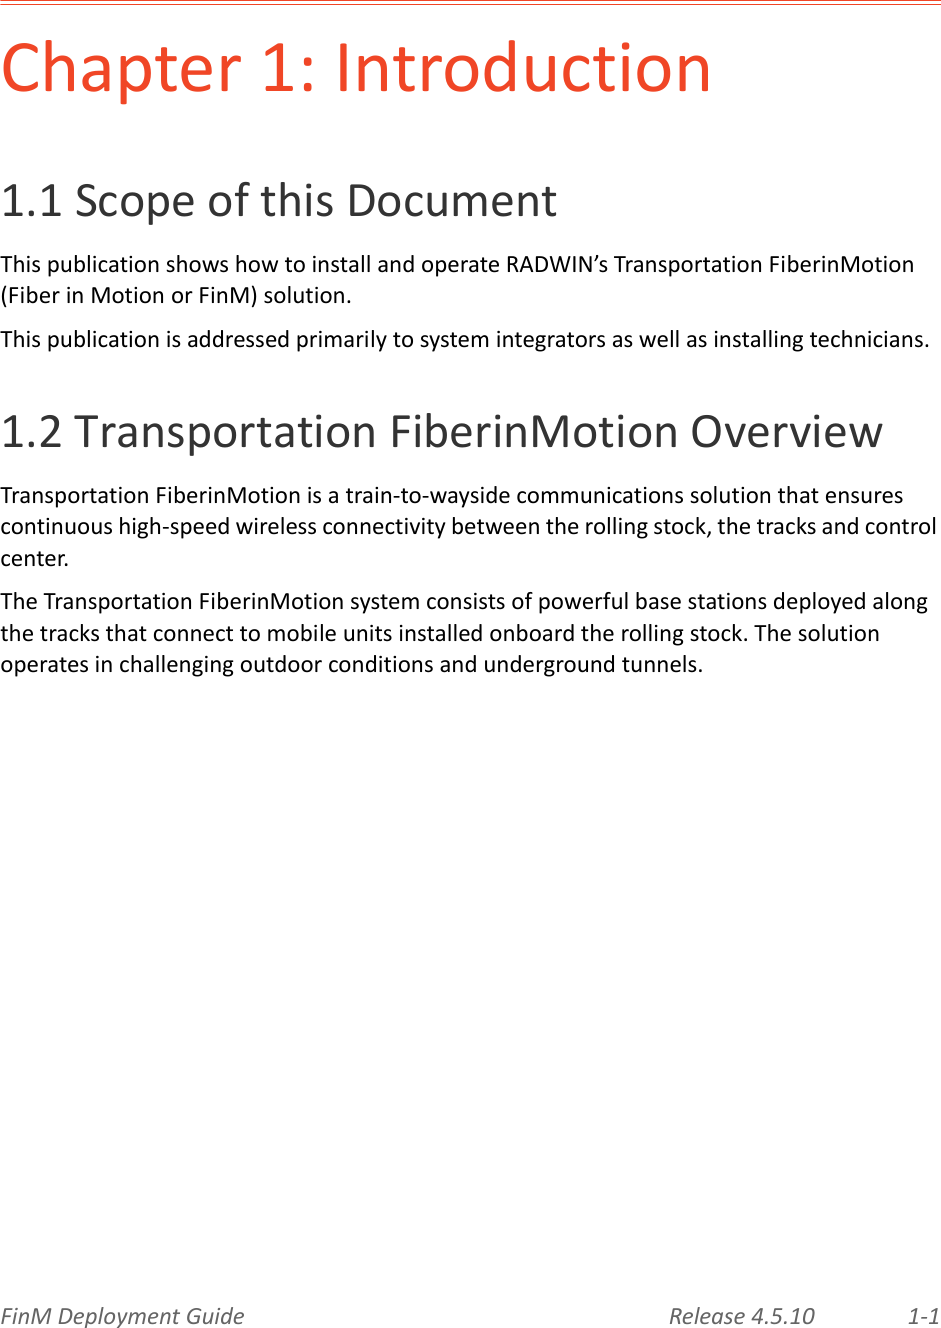


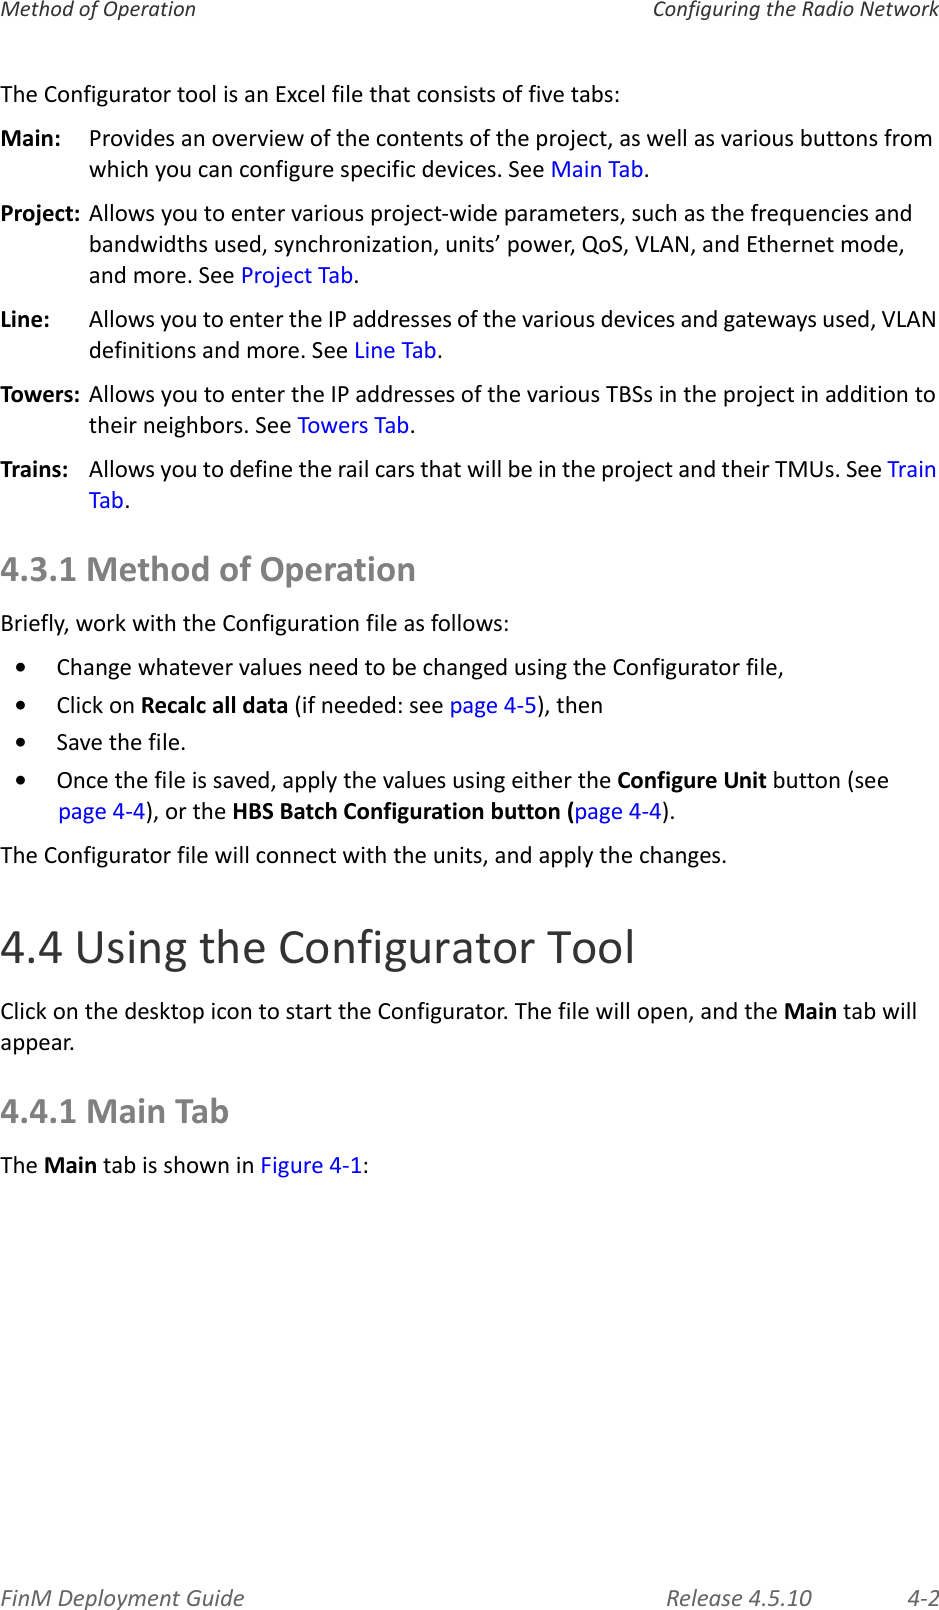
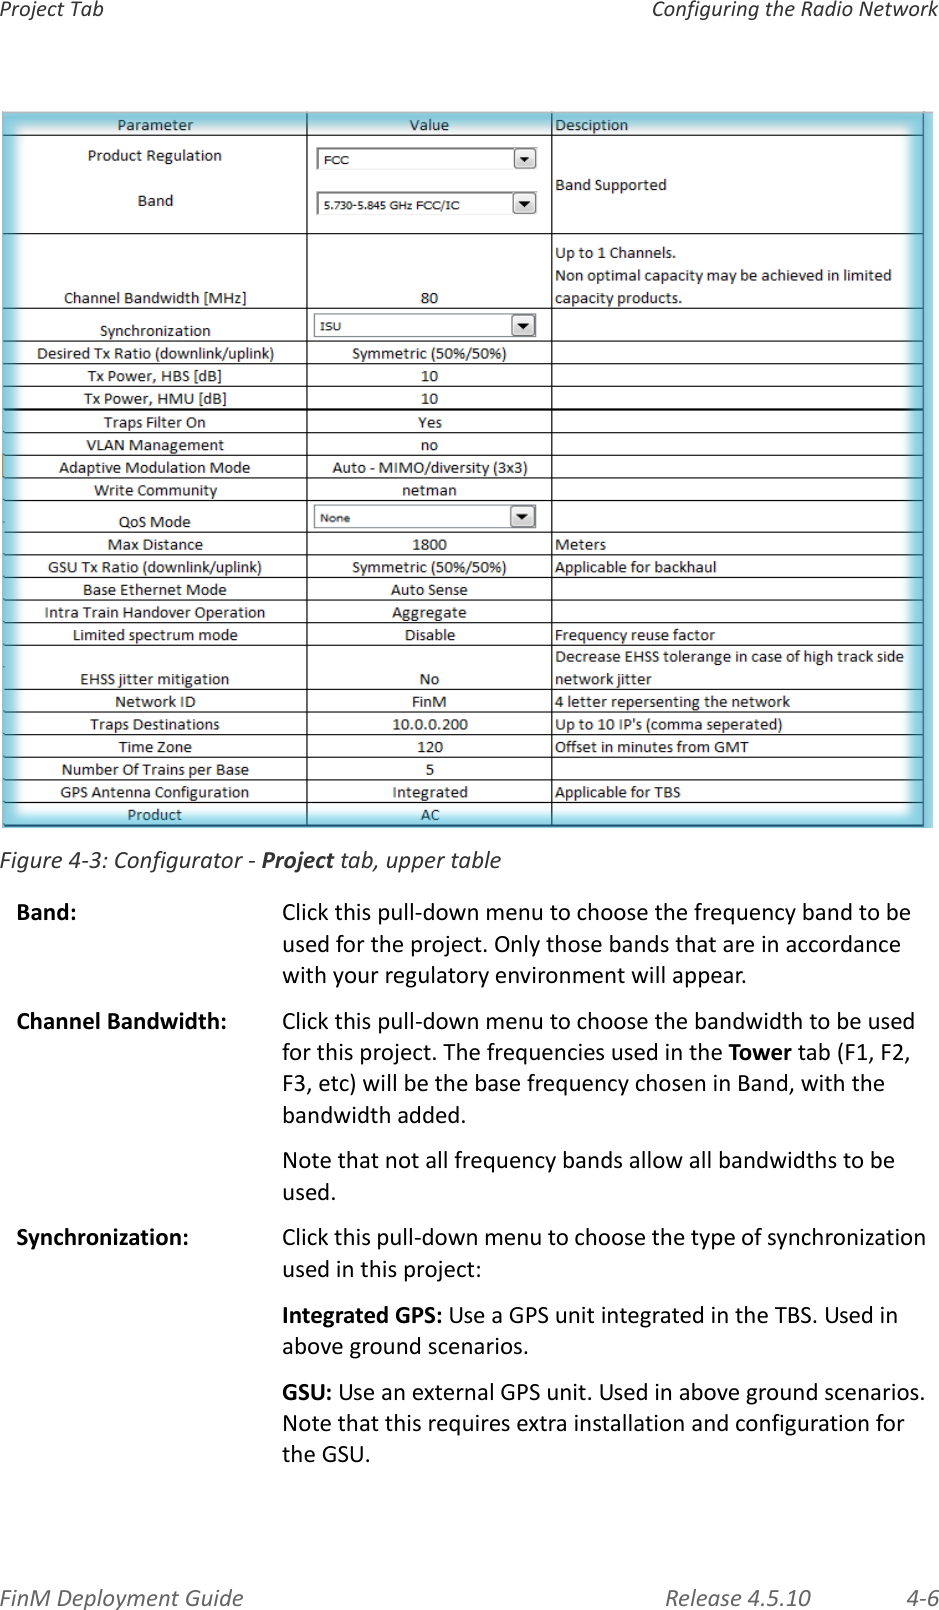
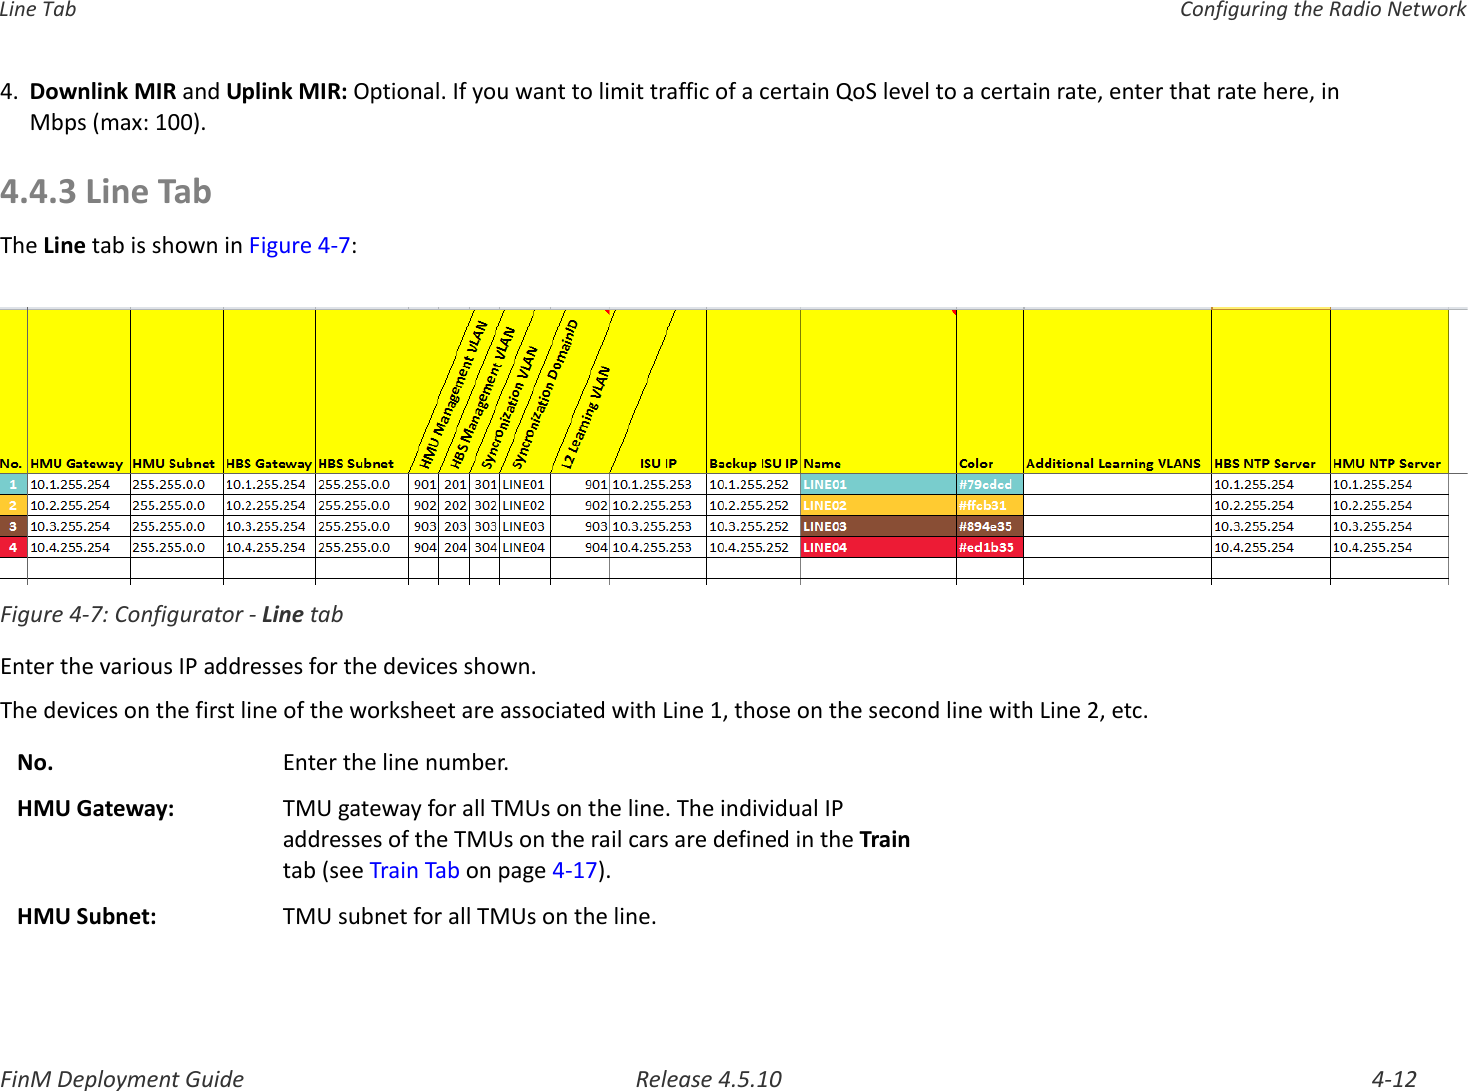
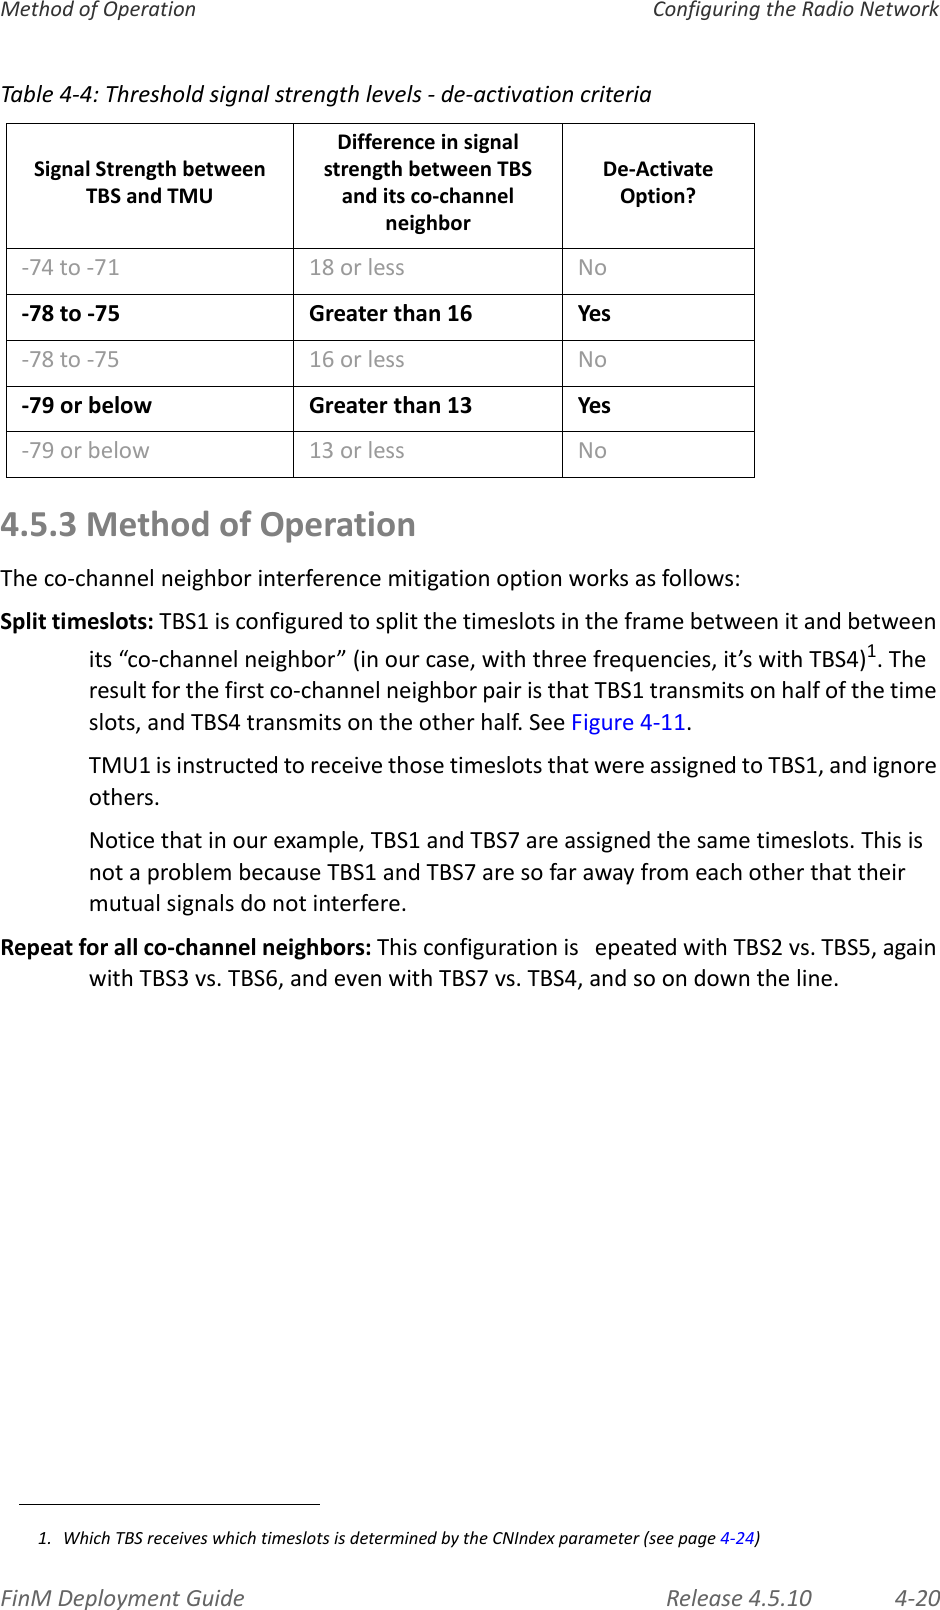
![FinMDeploymentGuide Release4.5.10 4‐7ProjectTab ConfiguringtheRadioNetworkISU:UsetheIndoorSynchronizationUnit.Usedinbelowgroundscenarios.None:DonotusesynchronizationDesiredTxRatio(downlink/uplink):Symmetric(50/50):UsethisifthereisnosignificantdifferenceinthetransmissionconditionsbetweenTBS‐>TMUandTMU‐>TBS.MaxUplink(20/80):Usethisifyourprojectrequirestheuplink(TMU‐>TBS)tobemuchstrongerthanthedownlink(TBS‐>TMU).Uplink(30/70):Usethisifyourprojectrequirestheuplink(TMU‐>TBS)tobestrongerthanthedownlink(TBS‐>TMU).Downlink(70/30):Usethisifyourprojectrequiresthedownlink(TBS‐>TMU)tobestrongerthantheuplink(TMU‐>TBS).MaxDownlink(80/20):Usethisifyourprojectrequiresthedownlink(TBS‐>TMU)tobemuchstrongerthantheuplink(TMU‐>TBS).TxPower,HBS[dB]: Maximumistypically25dB,minimumis0.Setthevaluethatwillgiveyouthebestthroughputwiththeleastnoise.TxPower,HMU[dB]: Maximumistypically25dB,minimumis0.Setthevaluethatwillgiveyouthebestthroughputwiththeleastnoise.TrapsFilterOn: Enablethistofilterthetrapstothosethatarerelevantforyourproject.Ifthisisnotenabled,theneverychangeortrap‐notmatterhowtrivial‐willberecorded,andyourtrapslistwillquicklybecomeverylargeandcumbersome.Werecommendtoenablethisparameter.VLANManagement: EnableifyourprojectisusingaVLAN.AdaptiveModulationMode:MIMO:(Multi‐In,Multi‐Out)Setthetransmissionmethodtouseonedatastream,butmultipledatasignals.Thisisusefulinalessnoisyenvironmentthatrequiresahighercapacity,butwheredropswillnotlikelyoccur,suchaswhenthetrainisstoppedatastation.Diversity:Setthetransmissionmethodtousemorethanonedatastream.Thisisusefulwhenthetrainistravellinginanoisyenvironmentorwhendropsarelikelytooccur,suchasduringfastmovement.AutoMIMO/Diversity:SetthesystemtoautomaticallydetecttheconditionstoswitchbetweenMIMOandDiversity.WriteCommunity: Setthelinkpasswordhere.](https://usermanual.wiki/Radwin/5XACMOD3C/User-Guide-3785057-Page-88.png)