Realtek Semiconductor RTL8188CE 802.11B/G/N RTL8188CE MINICARD User Manual
Realtek Semiconductor Corp. 802.11B/G/N RTL8188CE MINICARD
UserManual.wiki
>
Realtek Semiconductor
>
RTL8188CE User Manual
>
Users Manual
Contents
1.
User Manual
2.
Warning Statements inside Users Manual
3.
Users Manual
4.
Manual host
5.
manual module
6.
user manual I
7.
user manual II
8.
User Manual module
Users Manual
Navigation menu
Upload a User Manual
Namespaces
Wiki Guide
HTML
PDF
Info
Views
User Manual
Discussion / Help
Navigation
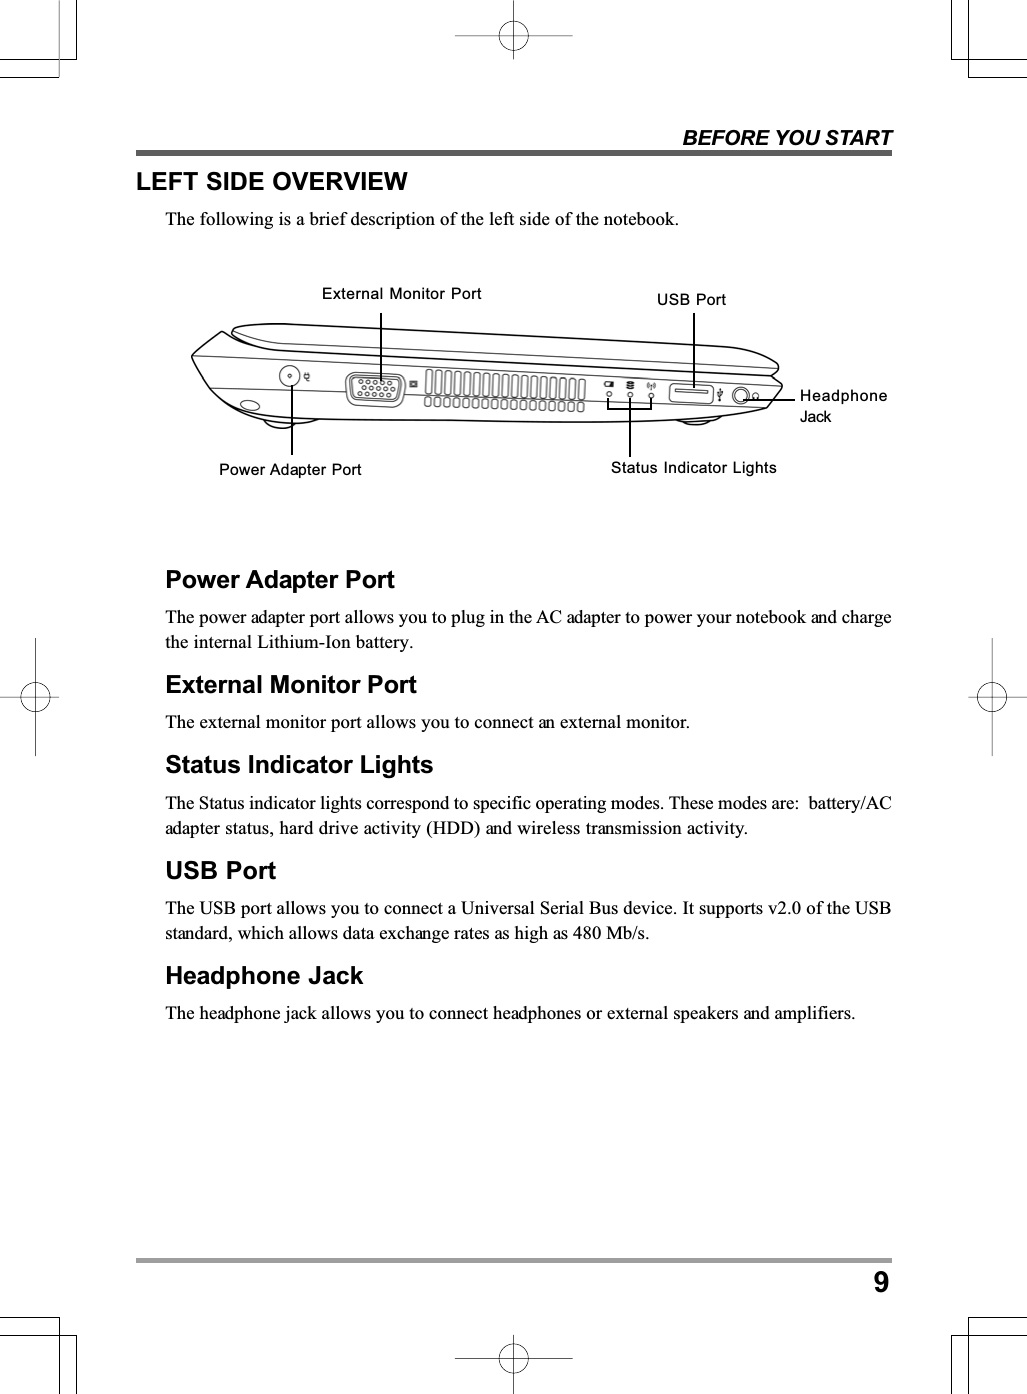
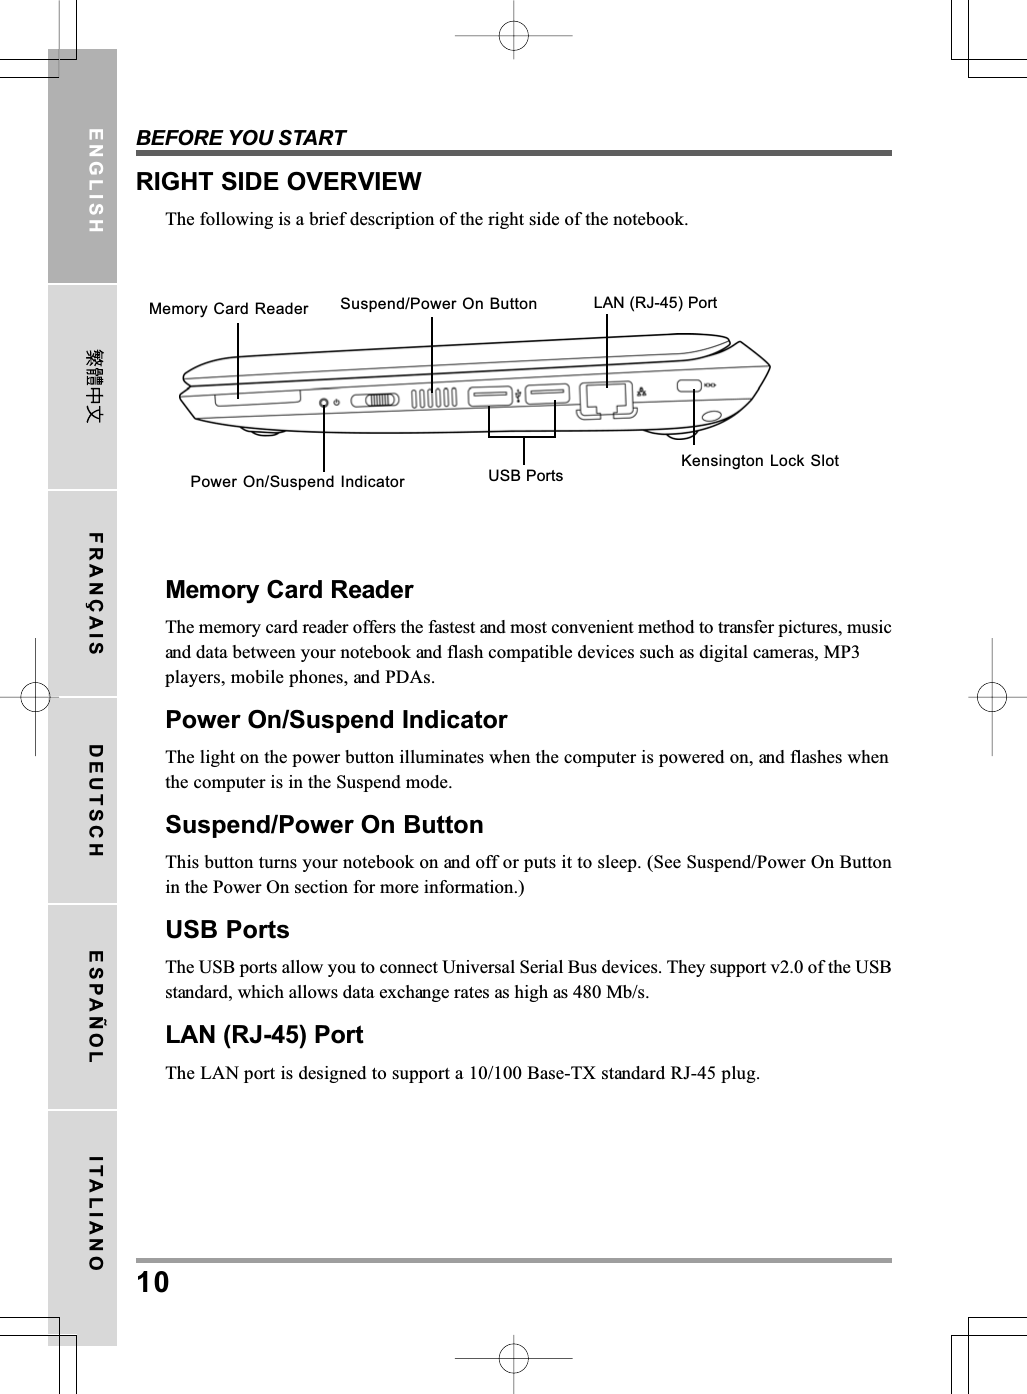
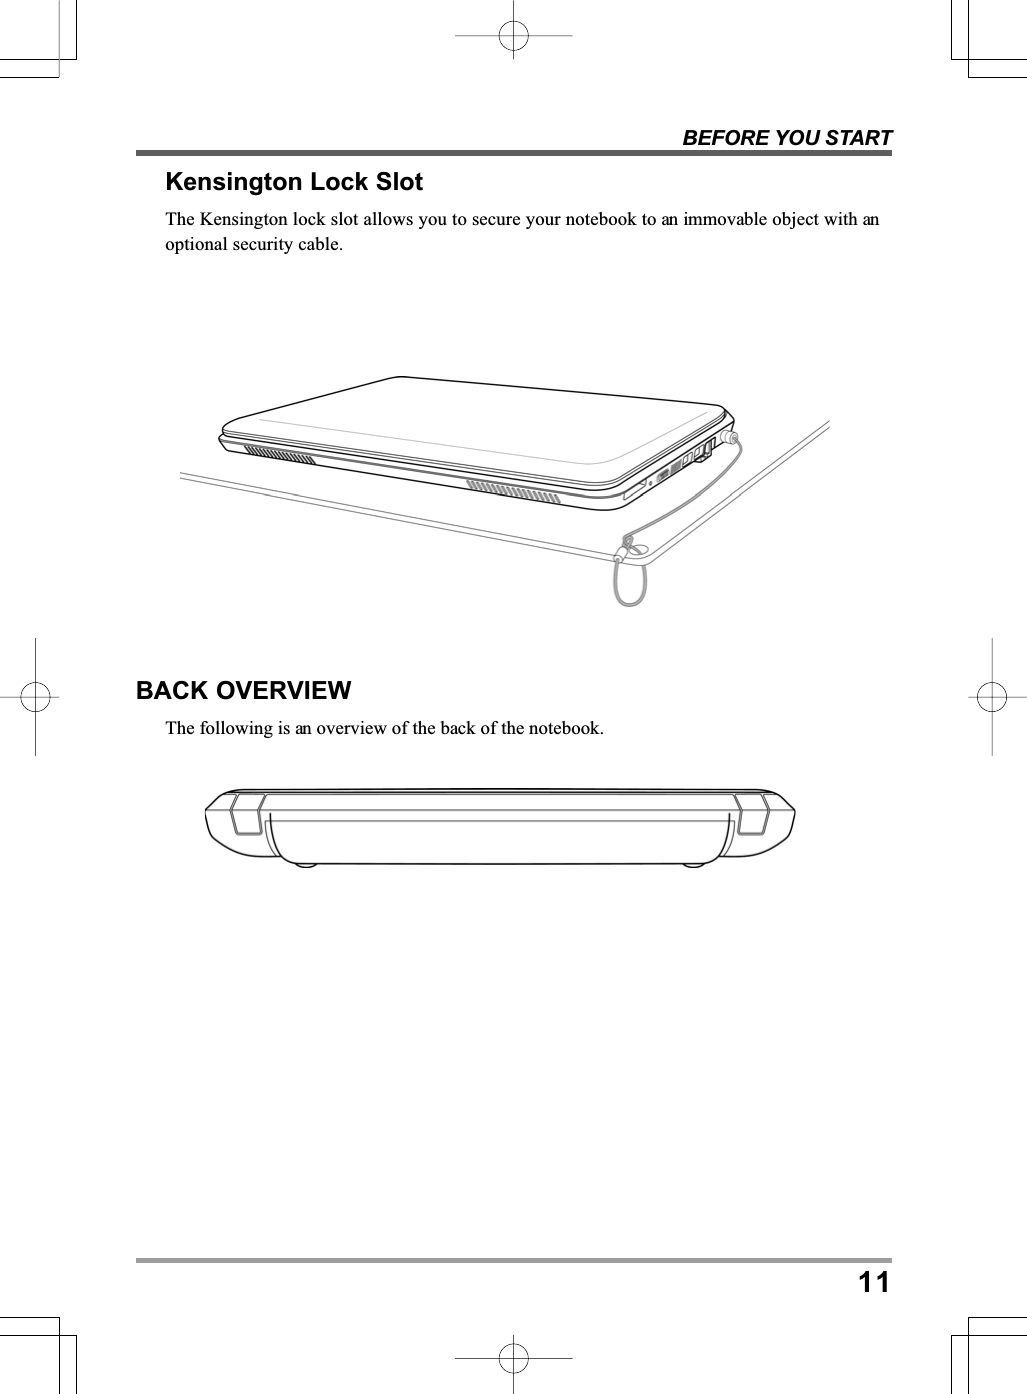
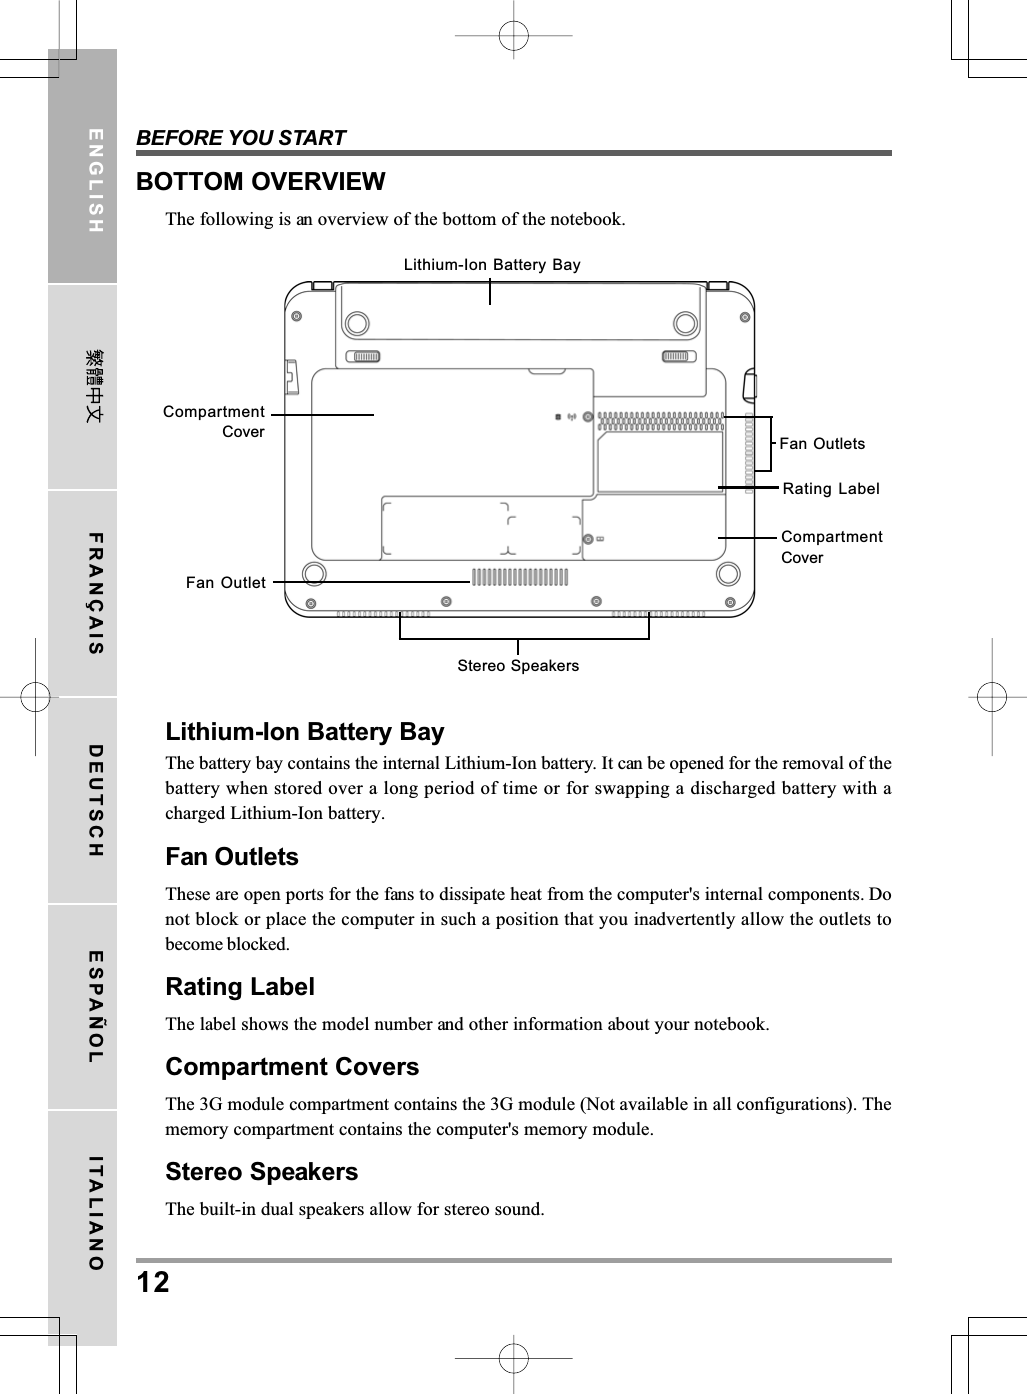
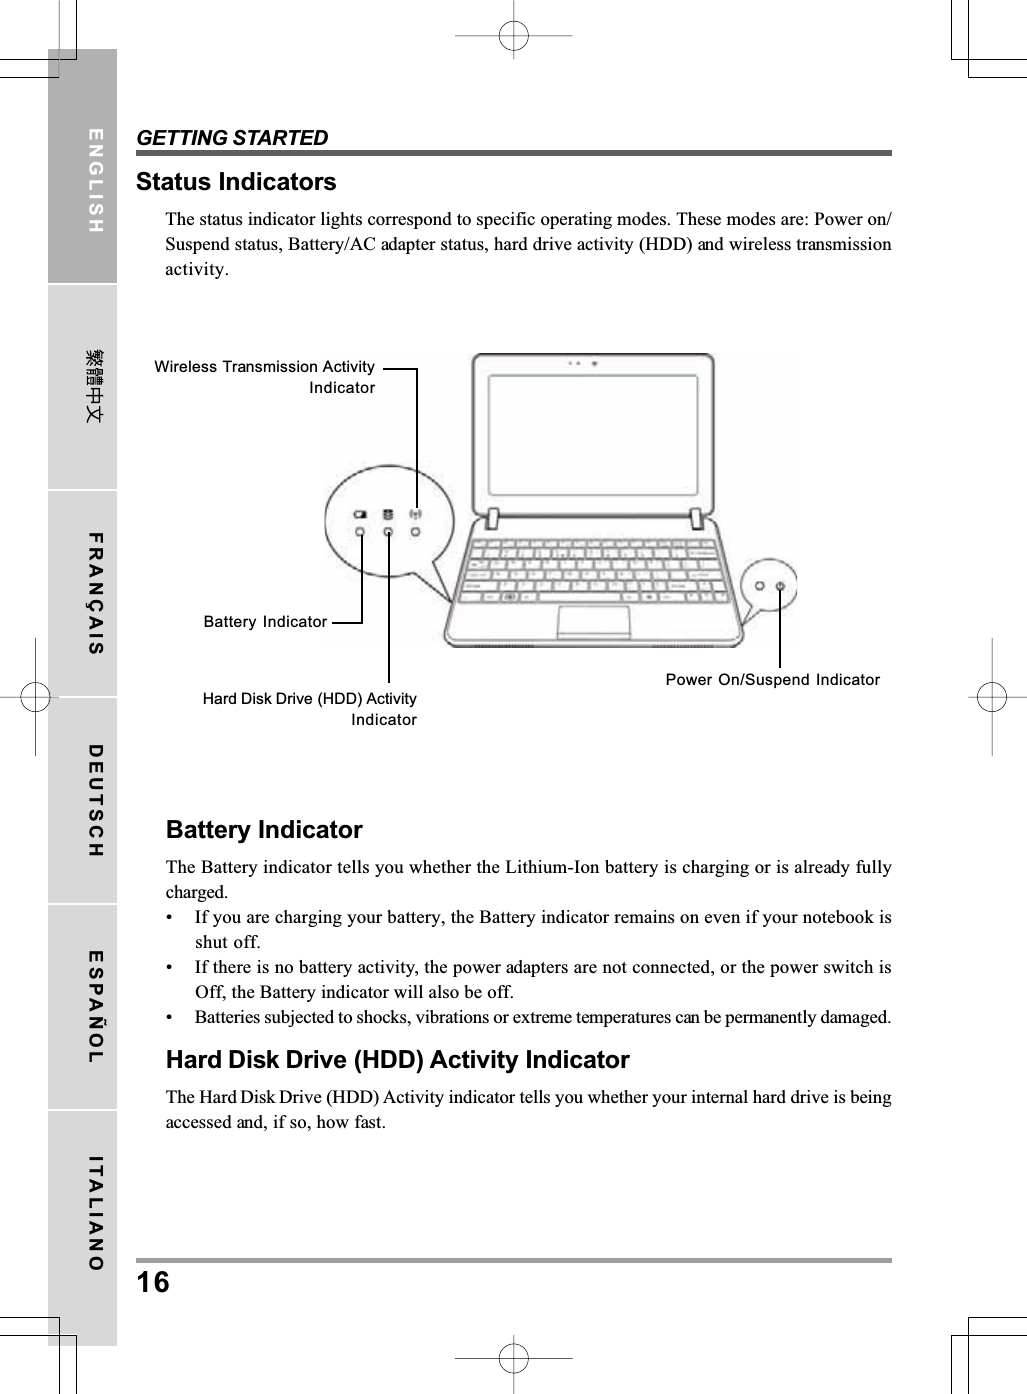
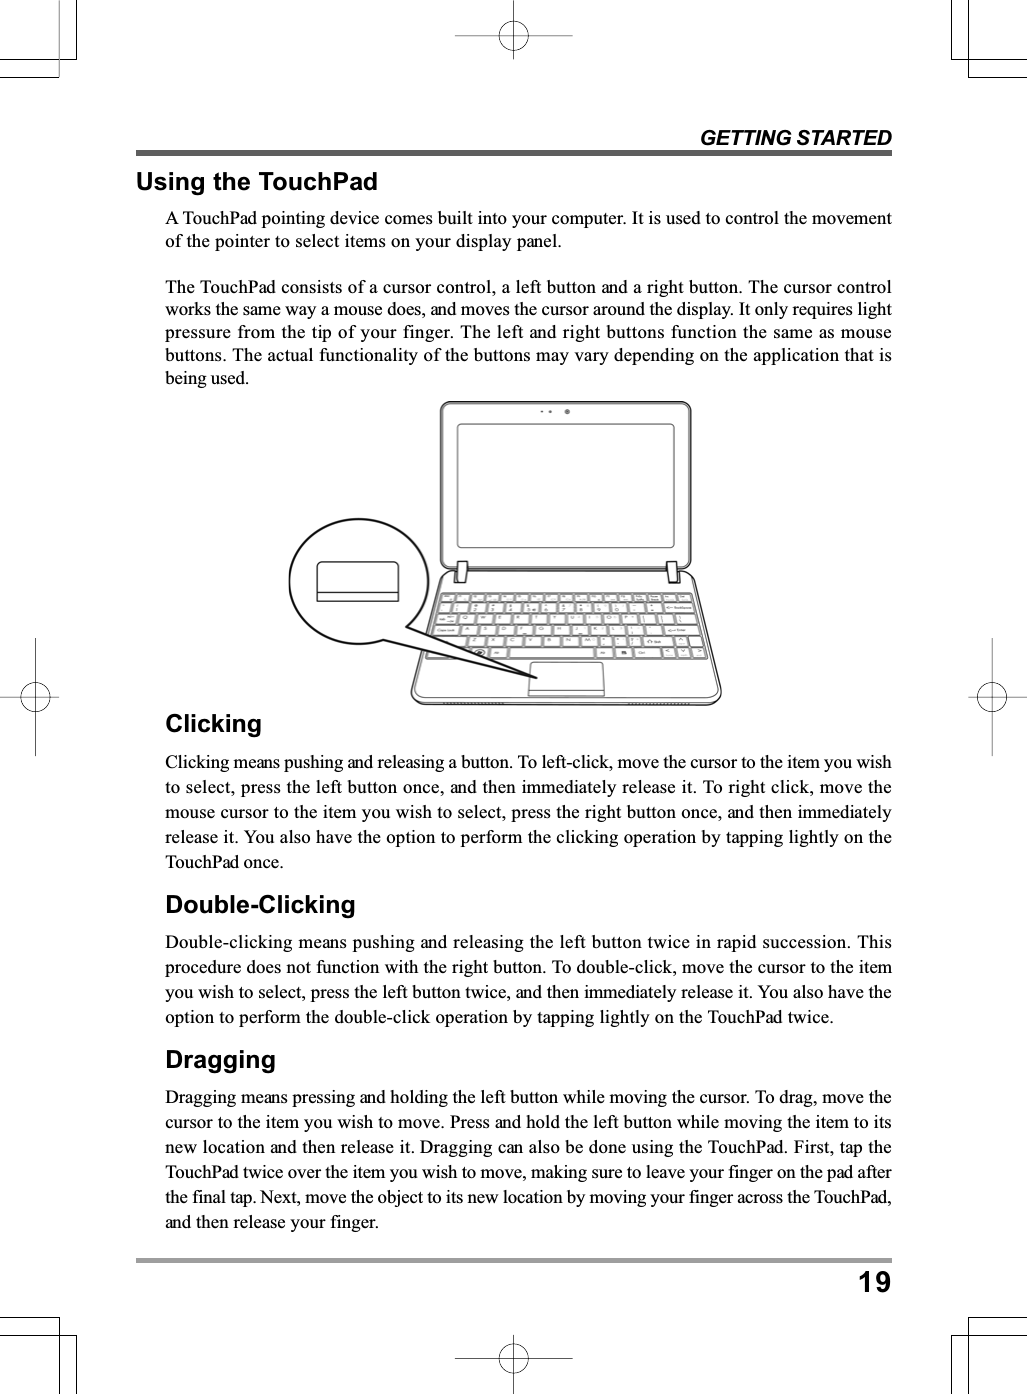
![GETTING STARTED18ENGLISH FRANÇAIS DEUTSCH ESPAÑOL ITALIANOUsing Function KeysYour computer has 12 function keys, F1 through F12. The functions assigned to these keys differfor each application. You should refer to your software documentation to find out how these keysare used.The [FN] key provides extended functions for the notebook and is always used in conjunctionwith another key.• [FN+F1]: Places the notebook in Suspend mode. Pressing the Power button returns it toactive mode.• [FN+F2]: Enables or disables the wireless network connection. Press this key combinationto enable Wireless LAN connection. Press and hold this key combination to enable 3Gnetwork connection.• [FN+F3]: Allows you to change your selection of where to send your display video. Eachtime you press the combination of keys you will step to the next choice. The choices, inorder, are: built-in display panel only, both built-in display panel and external monitor, orexternal monitor only.• [FN+F4]: Decreases the screen Brightness.• [FN+F5]: Increases the screen Brightness.• [FN+F6]: Mutes the computer's volume.• [FN+F7]: Decreases the computer's volume.• [FN+F8]: Increases the computer's volume.• [FN+F9]: Plays or pauses the current multimedia track.• [FN+F10]: Stops the current multimedia track.• [FN+F11]: Goes to the previous multimedia track.• [FN+F12]: Goes to the next multimedia track.• [FN+Esc]: Enables or disables the Bluetooth function.](https://usermanual.wiki/Realtek-Semiconductor/RTL8188CE.Users-Manual/User-Guide-1372515-Page-18.png)