Realtek Semiconductor RTL8188CE 802.11b/g/n RTL8188CE User Manual I
Realtek Semiconductor Corp. 802.11b/g/n RTL8188CE I
UserManual.wiki
>
Realtek Semiconductor
>
RTL8188CE User Manual
>
user manual I
Contents
1.
User Manual
2.
Warning Statements inside Users Manual
3.
Users Manual
4.
Manual host
5.
manual module
6.
user manual I
7.
user manual II
8.
User Manual module
user manual I
Navigation menu
Upload a User Manual
Namespaces
Wiki Guide
HTML
PDF
Info
Views
User Manual
Discussion / Help
Navigation
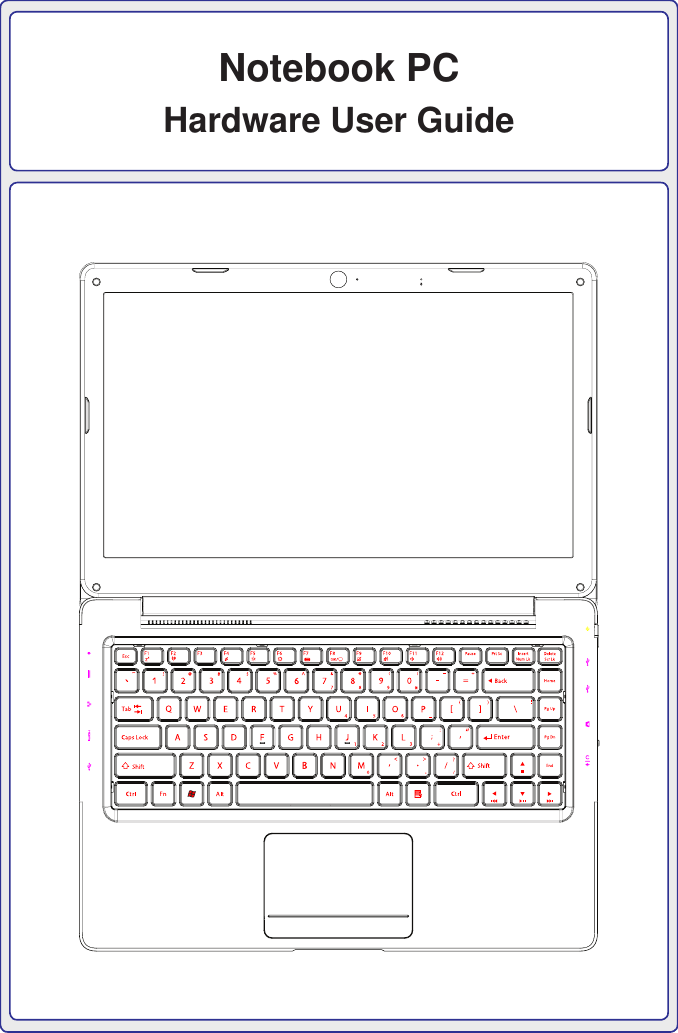
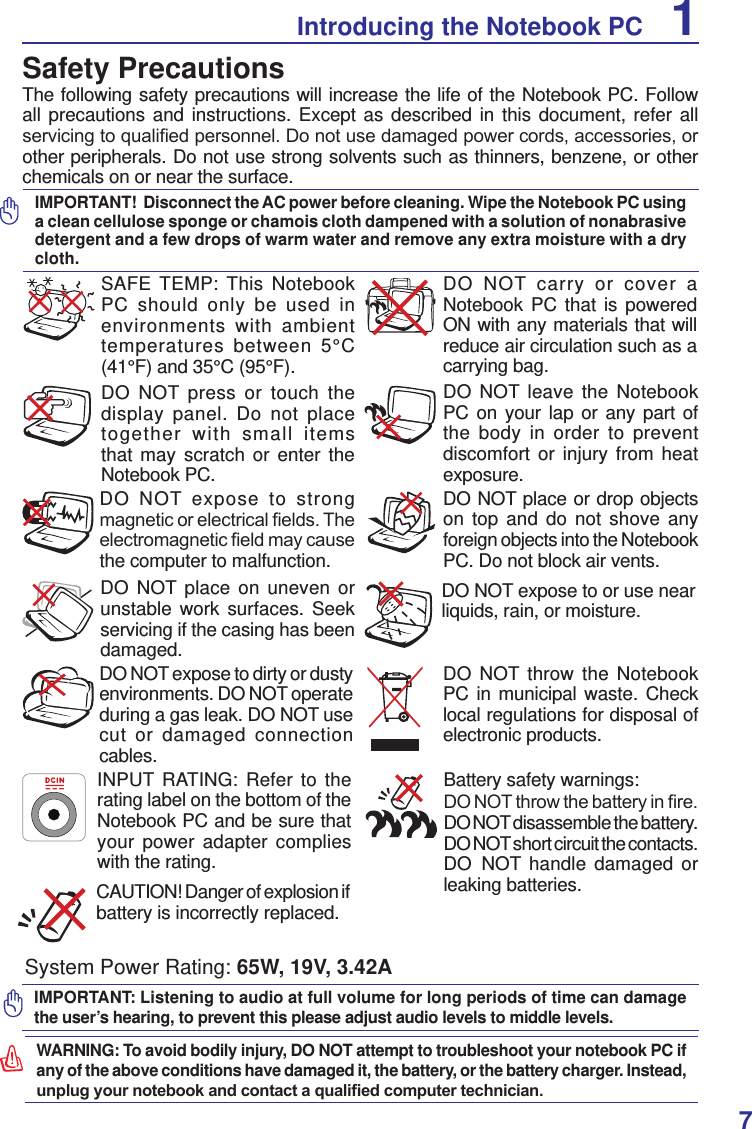
![61 Introducing the Notebook PCGeneral OverviewThis document provides information on the various components in the Notebook PC and how to use them� The following are the major sections of this document:1� Introducing the Notebook PC Introduces you to the Notebook PC and its documentation�2� Knowing the Parts Gives you information on the Notebook PC’s components�3� Getting Started Gives you information on getting started with the Notebook PC�4� Using the Notebook PC Gives you information on using the Notebook PC’s components�Notes For The UserA few notes and warnings in bold are used throughout this document that you should be aware of in order to complete certain tasks safely and completely� These notes have different degrees of importance as described below:TIP: Tips and useful information for completing tasks.IMPORTANT! Vital information that must be followed to prevent damage to data, components, or persons.WARNING! Important information that must be followed for safe operation.Text enclosed in < > or [ ] represents a key on the keyboard; do not actually type the < > or [ ] and the enclosed letters. < > [ ]NOTE: Tips and information for special situations.](https://usermanual.wiki/Realtek-Semiconductor/RTL8188CE.user-manual-I/User-Guide-1752414-Page-6.png)

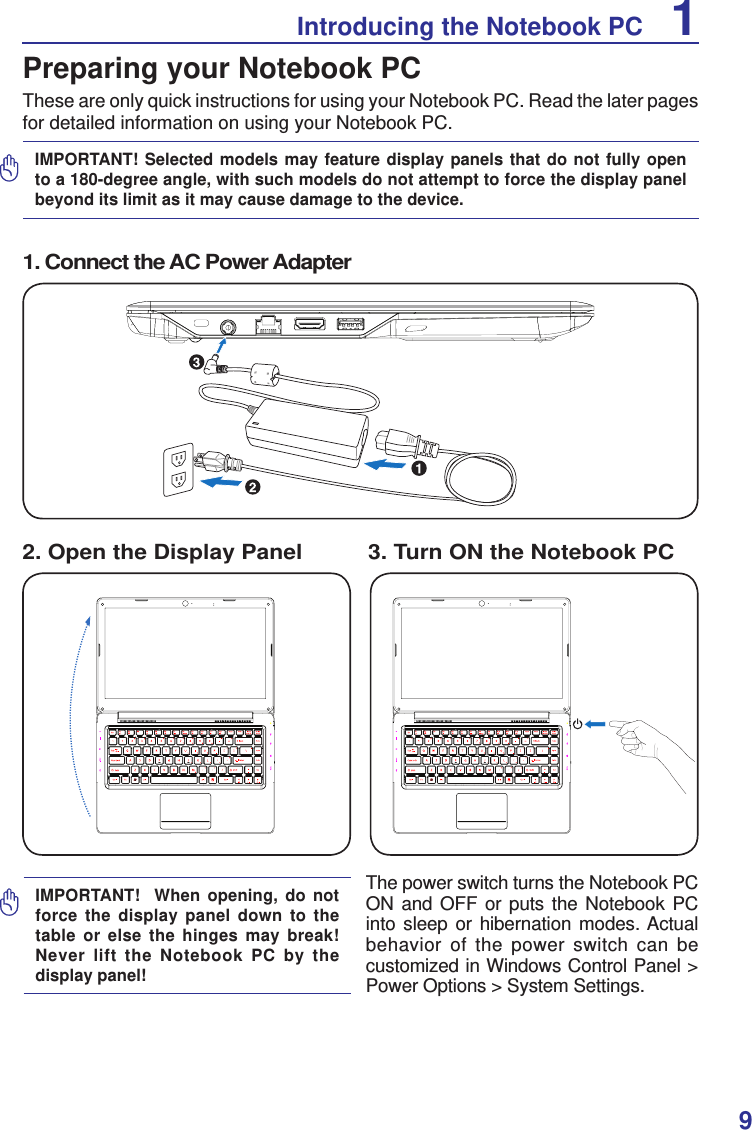


![203 Getting StartedIMPORTANT! To protect the hard disk drive, always wait at least 5 seconds after turning OFF your Notebook PC before turning it back ON. NOTE: Before bootup, the display panel ashes when the power is turned ON. This is part of the Notebook PC’s test routine and is not a problem with the display.WARNING! DO NOT carry or cover a Notebook PC that is powered ON with any materials that will reduce air circulation such as a carrying bag.Powering ON the Notebook PCThe Notebook PC’s power-ON message appears on the screen when you turn it ON� If necessary, you may adjust the brightness by using the hot keys� If you need to run the BIOS Setup to set or modify the system conguration, press [F2] upon bootup to enter the BIOS Setup. If you press [Tab] during the splash screen, standard boot information such as the BIOS version can be seen. Press [ESC] and you will be presented with a boot menu with selections to boot from your available drives�Power OptionsThe power switch turns ON and OFF the Notebook PC or puts the Notebook PC into sleep or hibernation modes� Actual behavior of the power switch can be customized in Windows Control Panel “Power Options�” For other options, such as “Switch User, Restart, Sleep, or Shut Down,” click the arrowhead next to the lock icon�Restarting or RebootingAfter making changes to your operating system, you may be prompted to restart the system� Some installation processes will provide a dialog box to allow restart� To restart the system manually, choose Restart�IMPORTANT! Do not use emergency shutdown while data is being written; doing so can result in loss or destruction of your data.Emergency ShutdownIn case your operating system cannot properly turn OFF or restart, there is a manual way to shutdown your Notebook PC:Hold the power button over 4 seconds](https://usermanual.wiki/Realtek-Semiconductor/RTL8188CE.user-manual-I/User-Guide-1752414-Page-20.png)
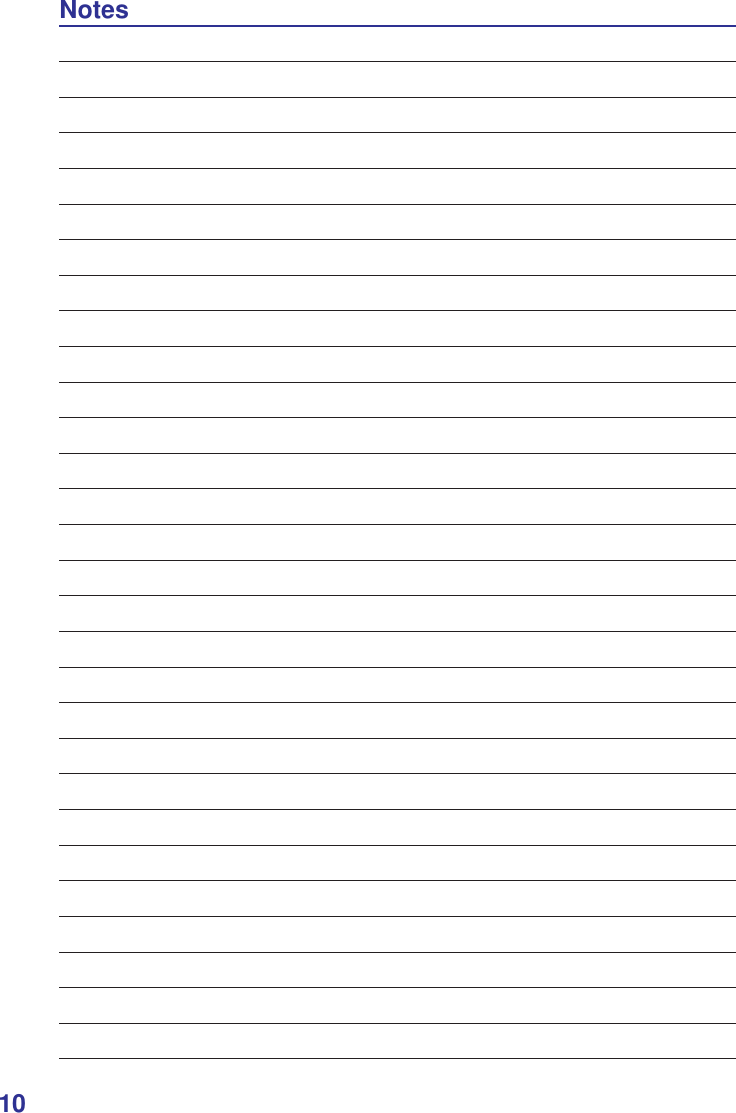
![223 Getting StartedSleep and HibernatePower management settings can be found in the Windows > Control Panel > Power Options. In System Settings, you can dene “Sleep/Hibernate” or “Shut Down” for closing the display panel or pressing the power button� “Sleep” and “Hibernate” saves power when your Notebook PC is not in use by turning OFF certain components� When you resume your work, your last status (such as a document scrolled down half way or email typed half way) will reappear as if you never left� “Shut Down” will close all applications and ask if you want to save your work if any are not saved�Hibernate is the same as Suspend-to-Disk (STD) and stores your current data and status on the hard disk drive� By doing this, RAM does not have to be periodically refreshed and power consumption is greatly reduced but not completely eliminated because certain wake-up components like LAN needs to remain powered� “Hibernate” saves more power compared to “Sleep”� Click the Start button and the arrowhead next to the lock icon to see this option� Recover by pressing the power button� (NOTE: The power indicator will be OFF in this mode�)Sleep is the same as Suspend-to-RAM (STR)� This function stores your current data and status in RAM while many components are turned OFF� Because RAM is volatile, it requires power to keep (refresh) the data� Click the Start button and the arrowhead next to the lock icon to see this option� You can also use the keyboard shortcut [Fn F1] to activate this mode. Recover by pressing any keyboard key except [Fn]. (NOTE: The power indicator will blink in this mode.)Power Management ModesThe Notebook PC has a number of automatic or adjustable power saving features that you can use to maximize battery life and lower Total Cost of Ownership (TCO)� You can control some of these features through the Power menu in the BIOS Setup� ACPI power management settings are made through the operating system� The power management features are designed to save as much electricity as possible by putting components into a low power consumption mode as often as possible but also allow full operation on demand�Thermal Power ControlThere are three power control methods for controlling the Notebook PC’s thermal state. These methods cannot be congured by the user and should be known in case the Notebook PC should enter these states� The following temperatures represent the chassis temperature (not CPU)�• The fan turns ON for active cooling when temperature reaches the safe upper limit.• The CPU decreases speed for passive cooling when the temperature exceeds the safe upper limit�• The system shuts down for critical cooling when temperature exceeds the maximum safe upper limit�](https://usermanual.wiki/Realtek-Semiconductor/RTL8188CE.user-manual-I/User-Guide-1752414-Page-22.png)