Recon Dynamics AT10A Asset Tracking Transmitter User Manual manual
Recon Dynamics, LLC Asset Tracking Transmitter manual
UserManual.wiki
>
Recon Dynamics
>
AT10A User Manual
manual
Navigation menu
Upload a User Manual
Namespaces
Wiki Guide
HTML
PDF
Info
Views
User Manual
Discussion / Help
Navigation
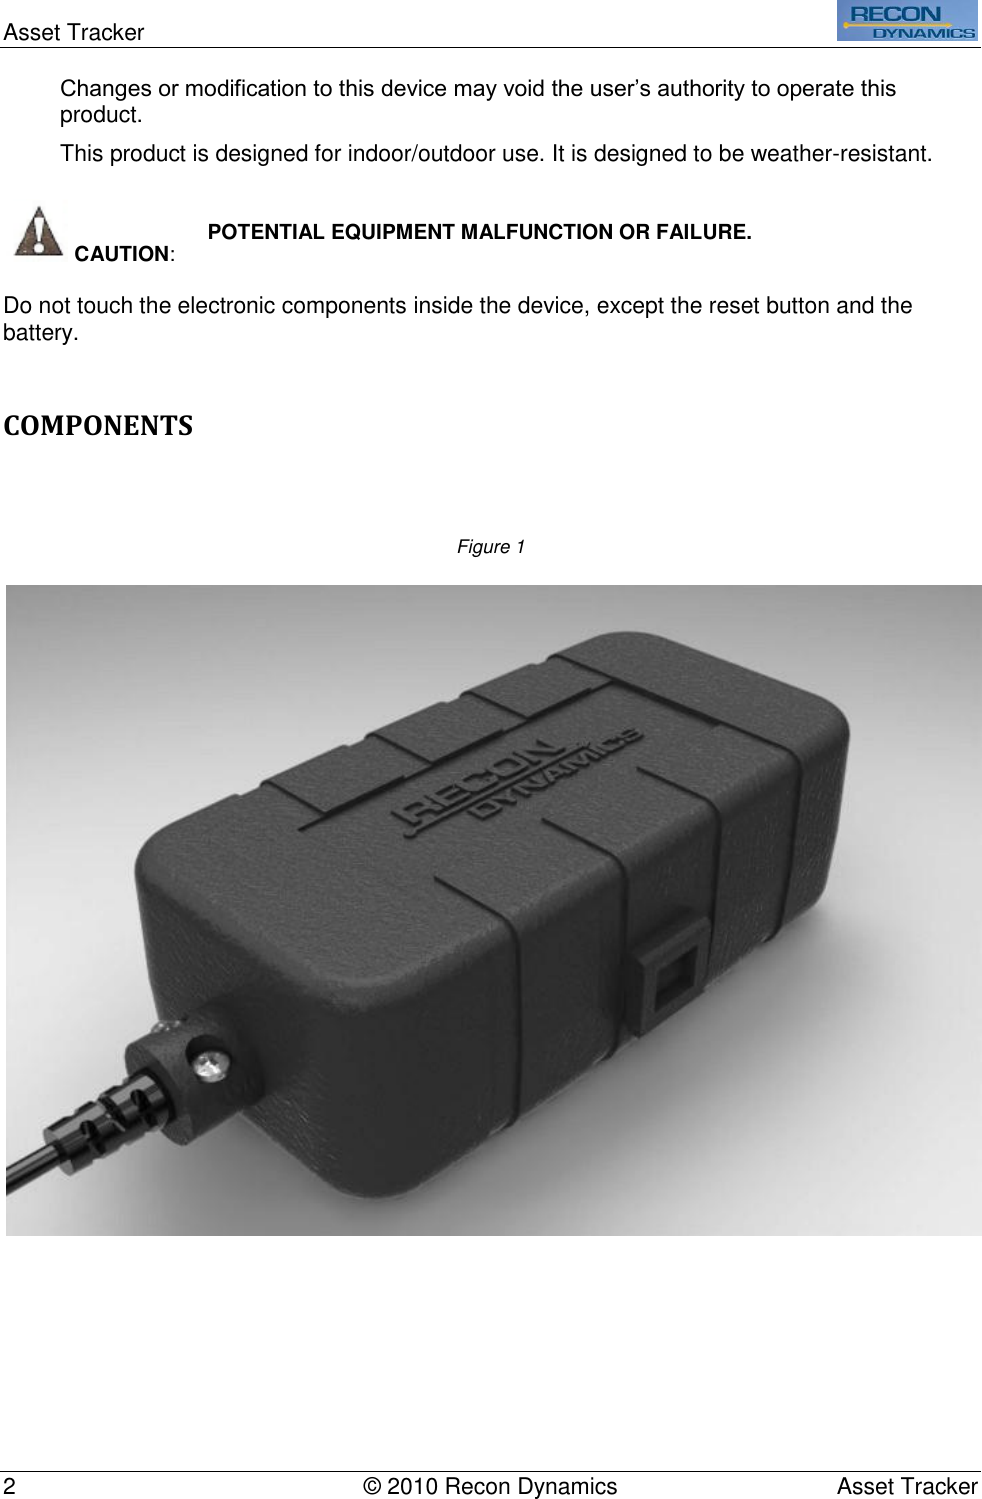
![Asset Tracker 4 © 2010 Recon Dynamics Asset Tracker PREVENTION OF FALSE ALARMS The majority of alarms that occur are false. These situations happen every day due to user error, incorrect installation or improper maintenance of the system. False alarms will limit the responsiveness to the system, and become a general inconvenience. As the number of false alarms increases, authorities have become less likely to respond to alarm systems due to this problem. Many of these situations can be avoided by following some very simple practices. Ensure all users are properly trained on the operation of the system Lock all protected doors, windows or any other asset attached to a sensor Check that motion detectors are not obstructed. Do not allow sources of heat or sound in range of the motion or vibration sensors. Check that premises are cleared and assets secured before setting the system. Turn off all noise sources - radios, compressors, generators, heavy equipment, etc. Know how to cancel an alarm or turn off the system before activating. If a false alarm is tripped notify the system administrator immediately. Test the system on a monthly basis to ensure proper functionality. Recommended Locations Secure product off the ground [above 3 feet (.91m)] to ensure better communication. Place as high as possible on the asset to allow unobstructed transmissions to the system. When possible mount the Asset Tracker with the Recon Dynamics logo oriented up like is shown in Figure 1. This provides the optimum antenna orientation. Recommended for use on mobile equipment, containers, gates and remote assets. Charging the Battery This wireless sensor contains a rechargeable 3.7V lithium polymer battery. From a single charge the battery can provide up to two years of device use depending on the amount of use. To Charge The Battery 1. Locate the charging port on the side of the Asset Tracker. 2. Uncover the charging port by removing the plug from the housing. Do not use excessive force as the plug is connected to the housing and will need to be replaced when charging is complete. 3. Plug in the selected charging unit Note: If the unit is charging correctly, the LED on the circuit board will be red. 4. Disconnect the charger when the LED on the circuit board turns green,](https://usermanual.wiki/Recon-Dynamics/AT10A/User-Guide-1401667-Page-4.png)