Red Bear DUO RedBear Duo User Manual
Red Bear Company Limited RedBear Duo
UserManual.wiki
>
Red Bear
>
DUO User Manual
User Manual
Navigation menu
Upload a User Manual
Namespaces
Wiki Guide
HTML
PDF
Info
Views
User Manual
Discussion / Help
Navigation
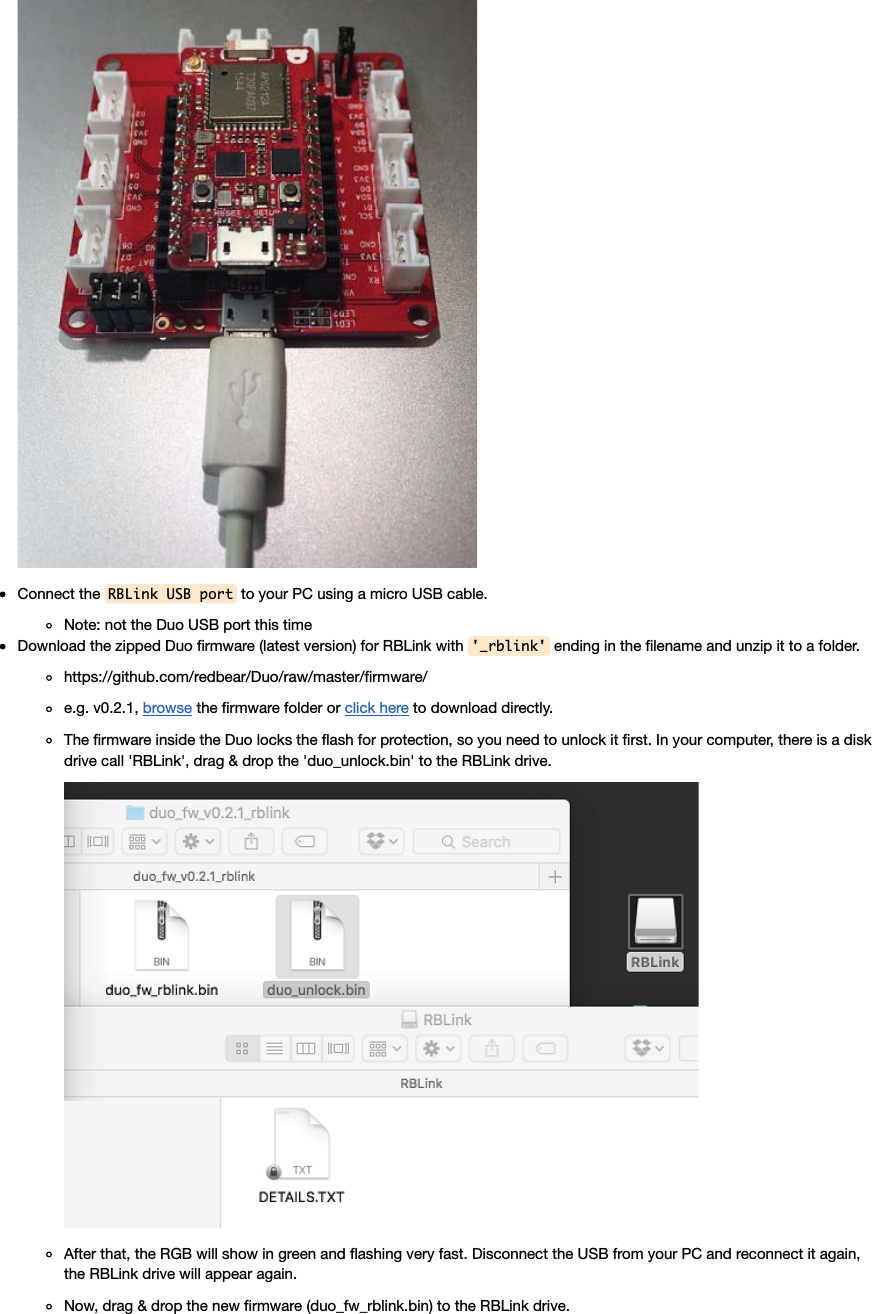
![To update System-Part1, type: $ dfu-util -d 2b04:d058 -a 0 -s 0x08020000 -D duo-system-part1.bin To update System-Part2, type: $ dfu-util -d 2b04:d058 -a 0 -s 0x08040000 -D duo-system-part2.bin To update User-Part, type: $ dfu-util -d 2b04:d058 -a 0 -s 0x080C0000 -D duo-user-part.bin To update factory reset image, type: $ dfu-util -d 2b04:d058 -a 2 -s 0x140000 -D duo-fac-tinker.binSample output: dfu-util 0.8 Copyright 2005-2009 Weston Schmidt, Harald Welte and OpenMoko Inc. Copyright 2010-2014 Tormod Volden and Stefan Schmidt This program is Free Software and has ABSOLUTELY NO WARRANTY Please report bugs to dfu-util@lists.gnumonks.org dfu-util: Invalid DFU suffix signature dfu-util: A valid DFU suffix will be required in a future dfu-util release!!! Opening DFU capable USB device... ID 2b04:d058 Run-time device DFU version 011a Claiming USB DFU Interface... Setting Alternate Setting #0 ... Determining device status: state = dfuIDLE, status = 0 dfuIDLE, continuing DFU mode device DFU version 011a Device returned transfer size 4096 DfuSe interface name: "Internal Flash " Downloading to address = 0x08020000, size = 38492 Download [=========================] 100% 38492 bytes Download done. File downloaded successfully After updating the firmware, press the onboard 'RESET' button to run the new firmware.RBLink:Stack the Duo on top of the RBLink through the connectors.](https://usermanual.wiki/Red-Bear/DUO/User-Guide-2959284-Page-4.png)