Ricoh RFAPL03 Color Copier User Manual 2 Short Confidential
Ricoh Company Ltd Color Copier 2 Short Confidential
UserManual.wiki
>
Ricoh
>
RFAPL03 User Manual
>
User Manual_2 (Short Confidential)
Contents
1.
User Manual(Connecting to the Interface) (Short Confidential)
2.
User Manual(Seting Telephone HandSet) (Short Confidential)
3.
User Manual(Setting Fax Interface) (Short Confidential)
4.
User Manual_1 (Short Confidential)
5.
User Manual_2 (Short Confidential)
User Manual_2 (Short Confidential)
Navigation menu
Upload a User Manual
Namespaces
Wiki Guide
HTML
PDF
Info
Views
User Manual
Discussion / Help
Navigation
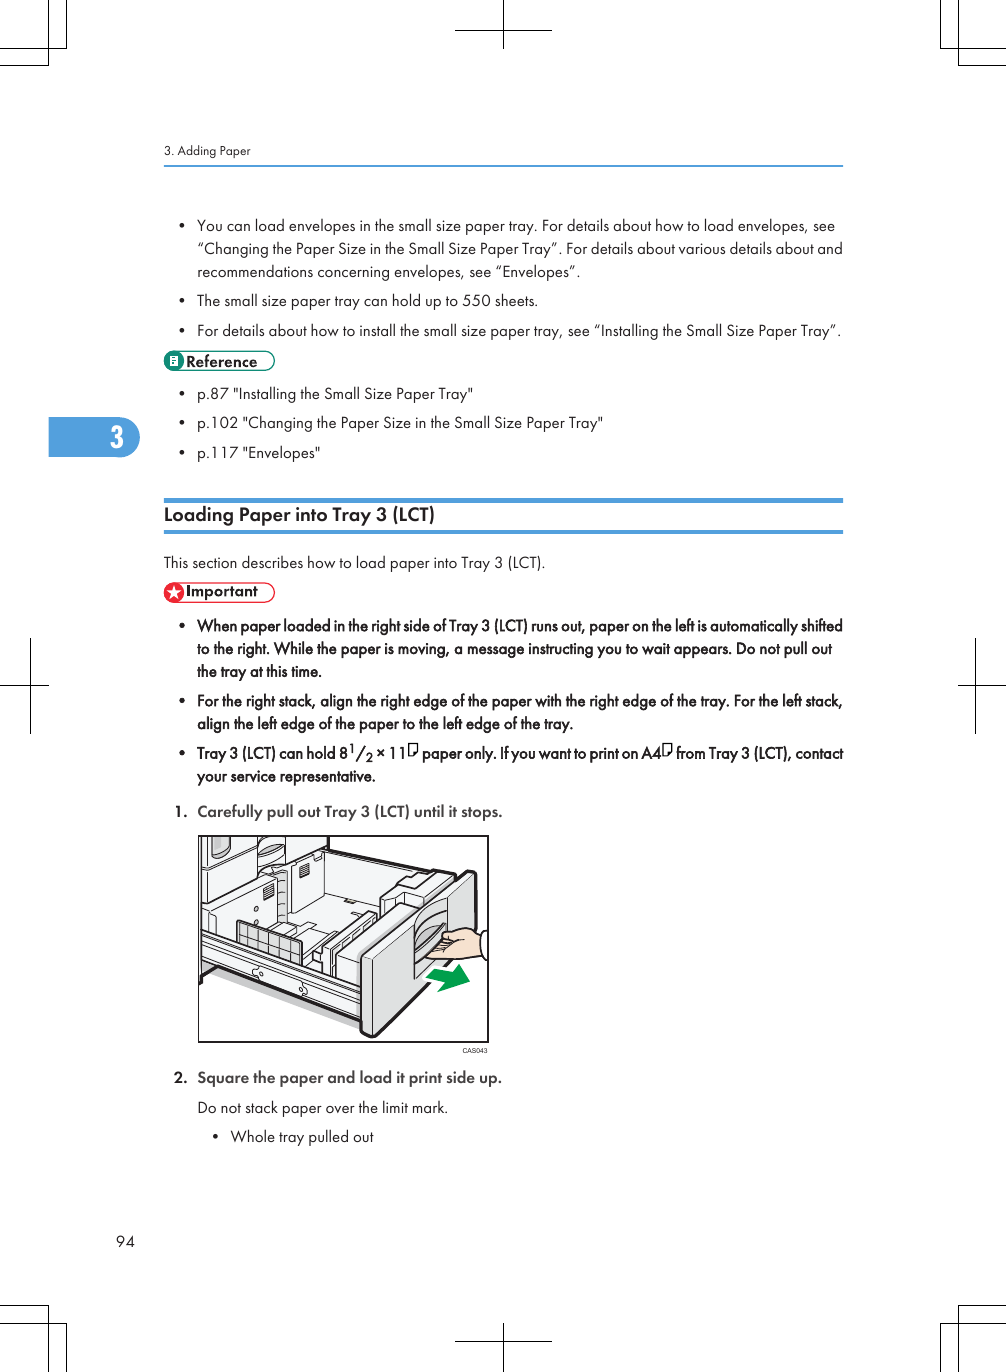
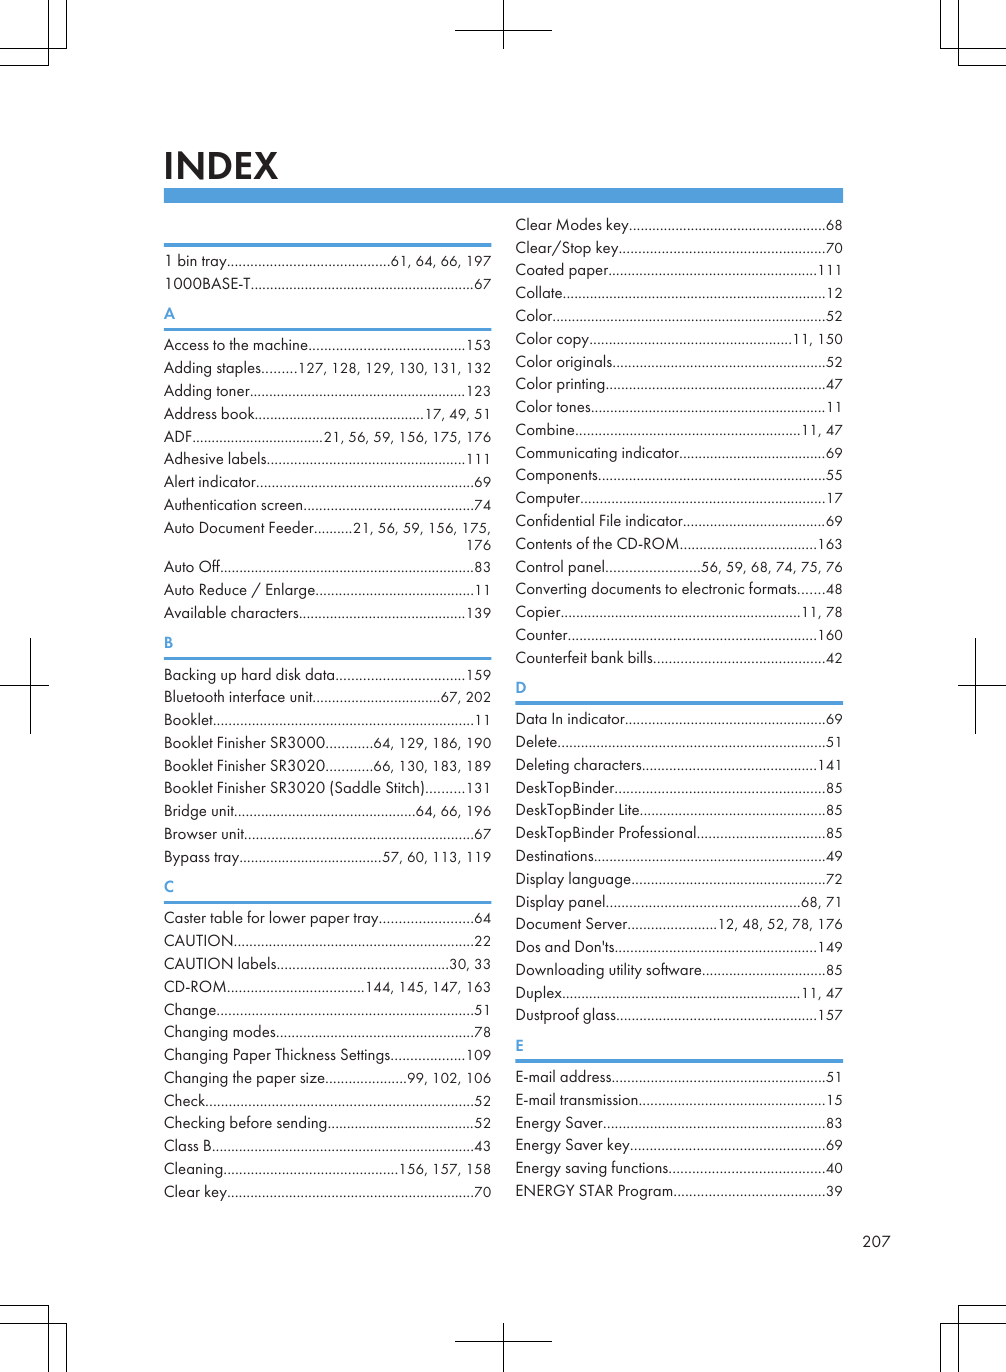
![1. Open the right cover of the large capacity tray (LCT).CAS0892. Load the paper in the tray along the edge on the back.Load the paper print side down.CAS0903. Press the [Down] key.The bottom plate is moving down.CAS0914. Load paper by repeating steps 2 and 3.5. Close the right cover of the large capacity tray (LCT).• The tray can hold up to 1,200 sheets.3. Adding Paper963](https://usermanual.wiki/Ricoh/RFAPL03.User-Manual-2-Short-Confidential/User-Guide-1332453-Page-4.png)
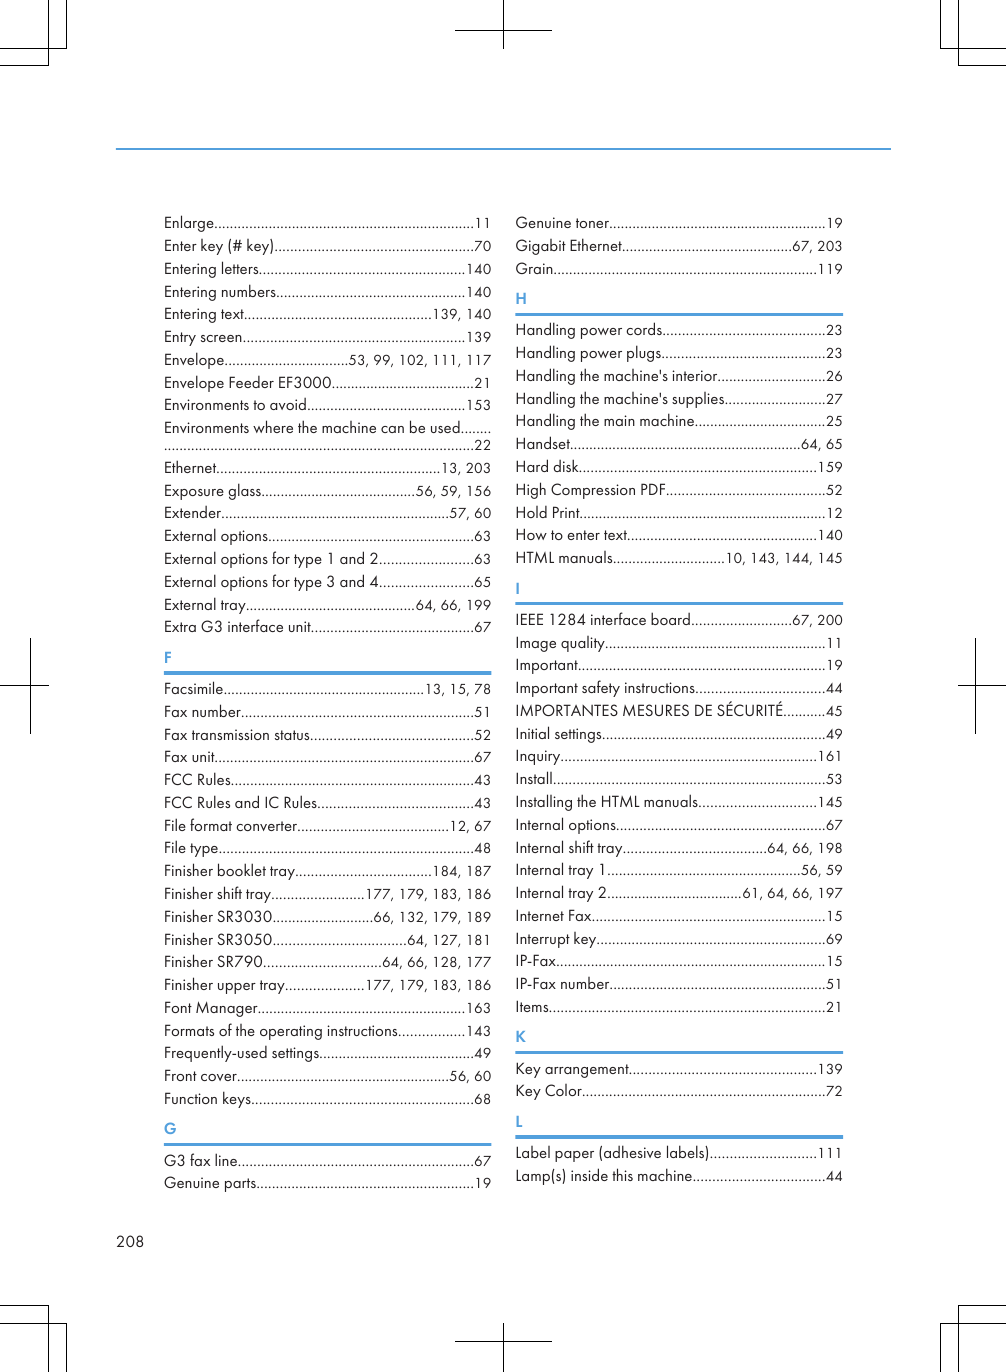
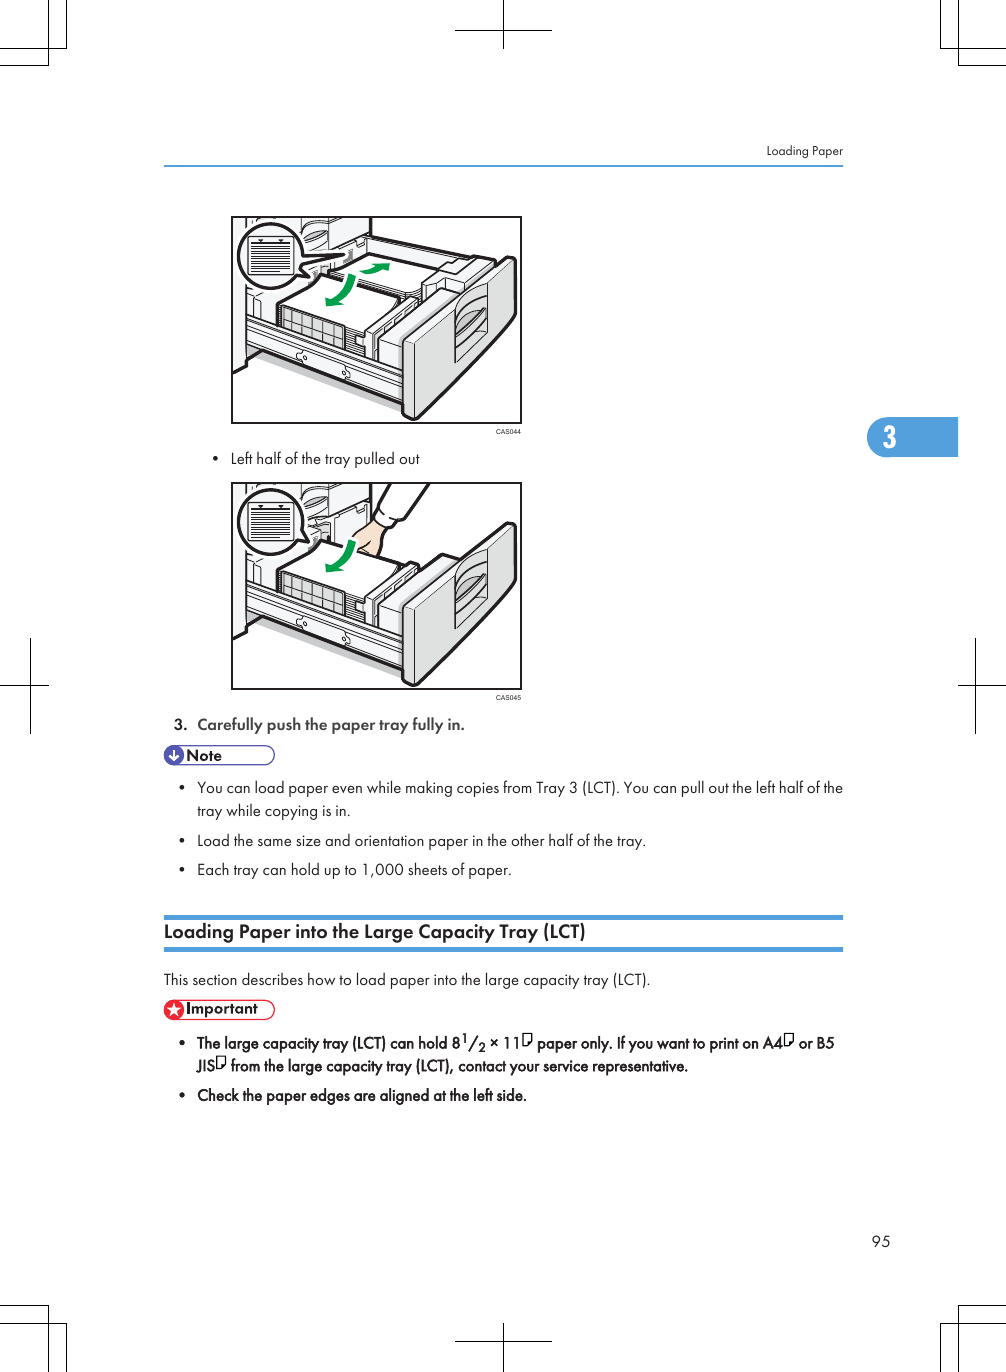
![Loading Orientation-Fixed Paper or Two-Sided PaperThis section describes loading paper that has a specified orientation and printing side (such as letterheadpaper).Orientation-fixed (top to bottom) or two-sided paper (for example, letterhead paper, punched paper, orcopied paper) might not print correctly, depending on how the originals and paper are placed. Set[Letterhead Setting] to [Yes] in [Input / Output] under [Copier / Document Server Features], and then placethe original and paper as shown below. For details about Letterhead Setting, see “Copier and DocumentServer Features”, Copy and Document Server Reference . For details about printing with the printerfunction, see “Printing on Orientation-Fixed or Two-Sided Paper”, Printer Reference .Original OrientationExposure glass ADF• Copy• ScannerLoading Paper973](https://usermanual.wiki/Ricoh/RFAPL03.User-Manual-2-Short-Confidential/User-Guide-1332453-Page-5.png)
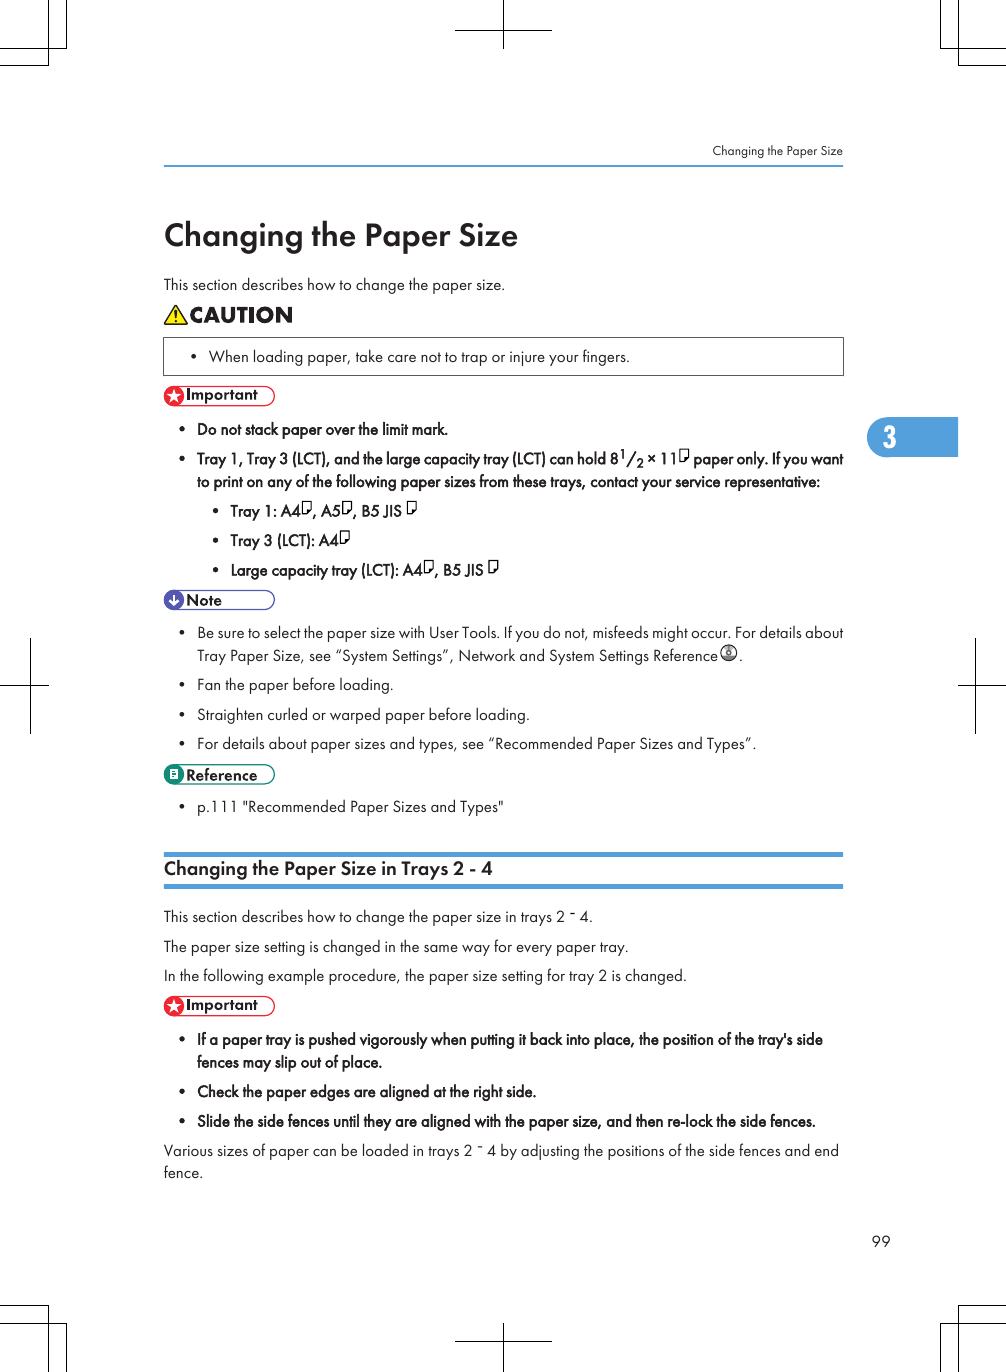
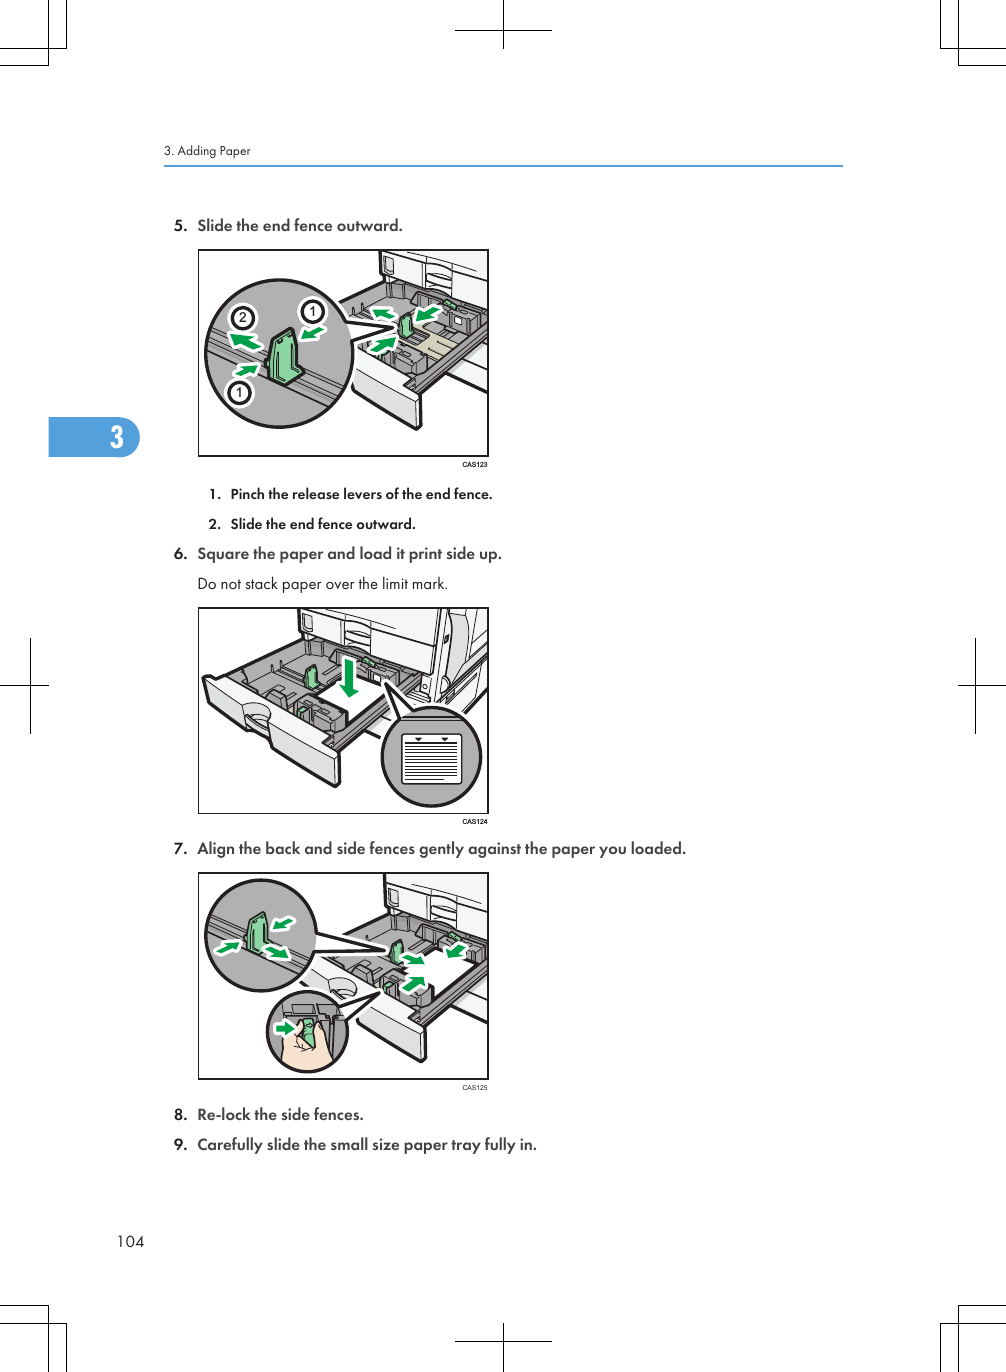

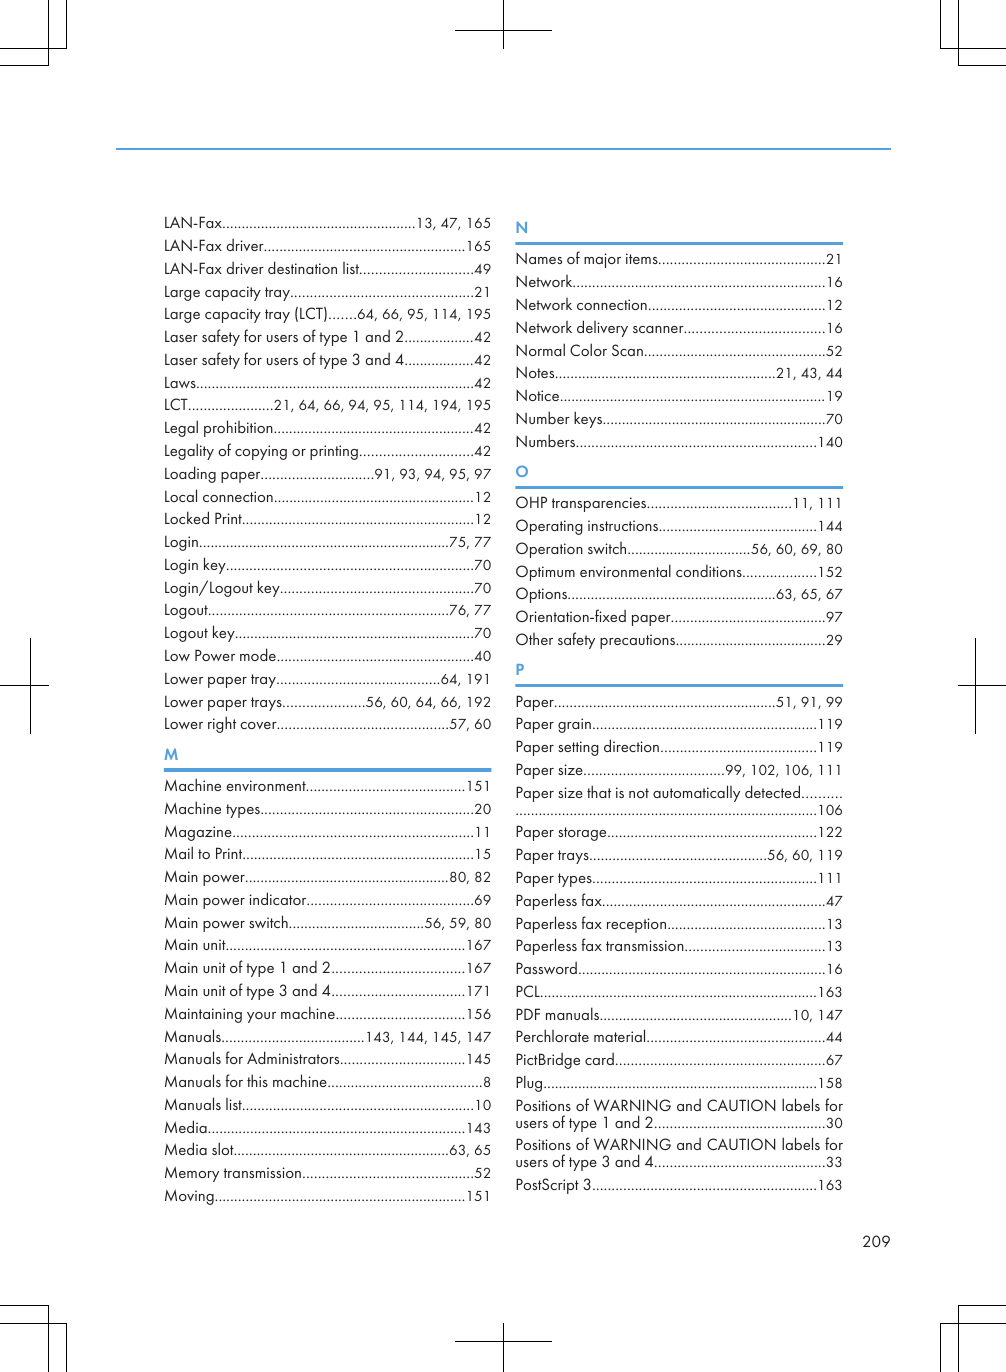
![Changing to a Size That Is Not Automatically DetectedIf you load a paper size that is not selected automatically, you need to specify the paper size with thecontrol panel. This section describes how to load such paper.This section explains how to load these paper taking 81/4 × 14 as an example.1. Press the [User Tools/Counter] key.CAS0982. Press [System Settings].3. Press the [Tray Paper Settings] tab.3. Adding Paper1063](https://usermanual.wiki/Ricoh/RFAPL03.User-Manual-2-Short-Confidential/User-Guide-1332453-Page-14.png)
![4. Select the tray for which you want to change the paper settings.5. Select the loaded paper size and feed direction, and then press [OK].The set paper size and feed direction is displayed.6. Press the [User Tools/Counter] key.The initial display is shown.• For details about paper sizes selected automatically, see “Recommended Paper Sizes and Types”.• If you want to print on paper that is selected automatically after printing on a paper size that is notselected automatically, you must return the setting to “Auto Detect”. Reload the paper, and select“Auto Detect” in step 5. The setting is returned to “Auto Detect”.Changing the Paper Size1073](https://usermanual.wiki/Ricoh/RFAPL03.User-Manual-2-Short-Confidential/User-Guide-1332453-Page-15.png)
![Changing Paper Thickness SettingsSelect [Plain Paper 1] or [Plain Paper 2] depending on the type of plain paper.If in System Settings, [Tray Paper Settings], you set “Paper Thickness” to [Plain Paper] for each tray's [PaperType], you must then select [Maintenance], [Plain Paper Setting] and specify either [Plain Paper 1] or [PlainPaper 2], depending on the thickness of the loaded paper.The default setting is Plain Paper 2.• Select [Plain Paper 1] when paper weight is between 60 g/m2 (16 lb. Bond) and 74 g/m2 (20 lb.Bond).• Select [Plain Paper 2] when paper weight is between 75 g/m2 (20 lb. Bond) and 81 g/m2 (20 lb.Bond).1. Press the [User Tools/Counter] key.CAS0982. Press [Maintenance].Changing Paper Thickness Settings1093](https://usermanual.wiki/Ricoh/RFAPL03.User-Manual-2-Short-Confidential/User-Guide-1332453-Page-17.png)
![3. Press [Plain Paper Setting].4. Select the plain paper type for each tray depending on the paper to be set and press [OK].5. Press [Exit].6. Press [Exit].• In System Settings, [Tray Paper Settings], for each tray's [Paper Type] you can specify “PaperThickness”. For details about paper thickness, see “Recommended Paper Sizes and Types”.• p.111 "Recommended Paper Sizes and Types"3. Adding Paper1103](https://usermanual.wiki/Ricoh/RFAPL03.User-Manual-2-Short-Confidential/User-Guide-1332453-Page-18.png)
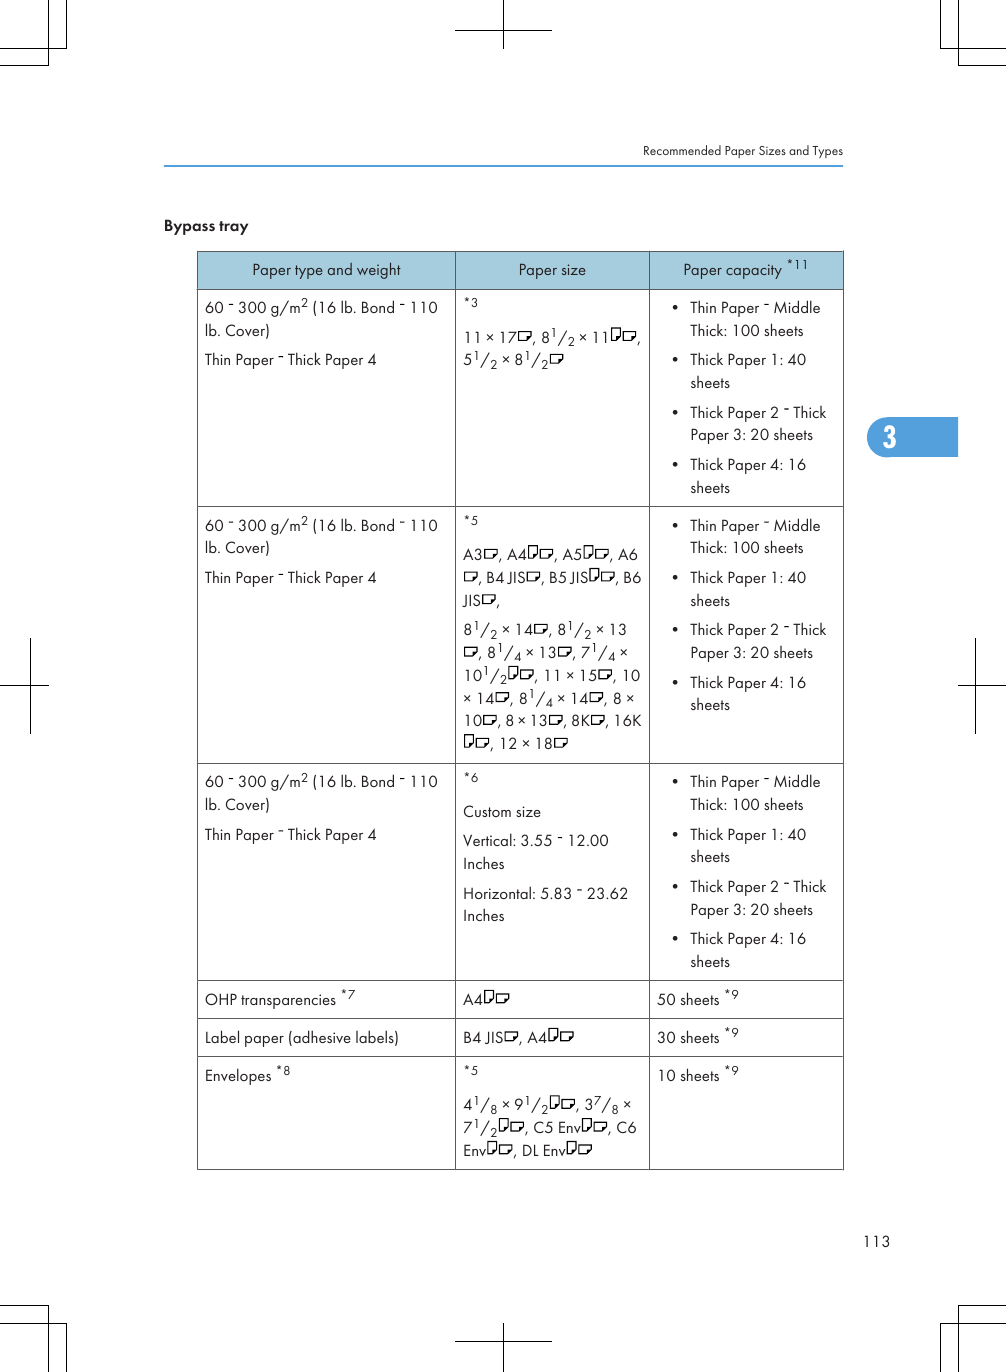
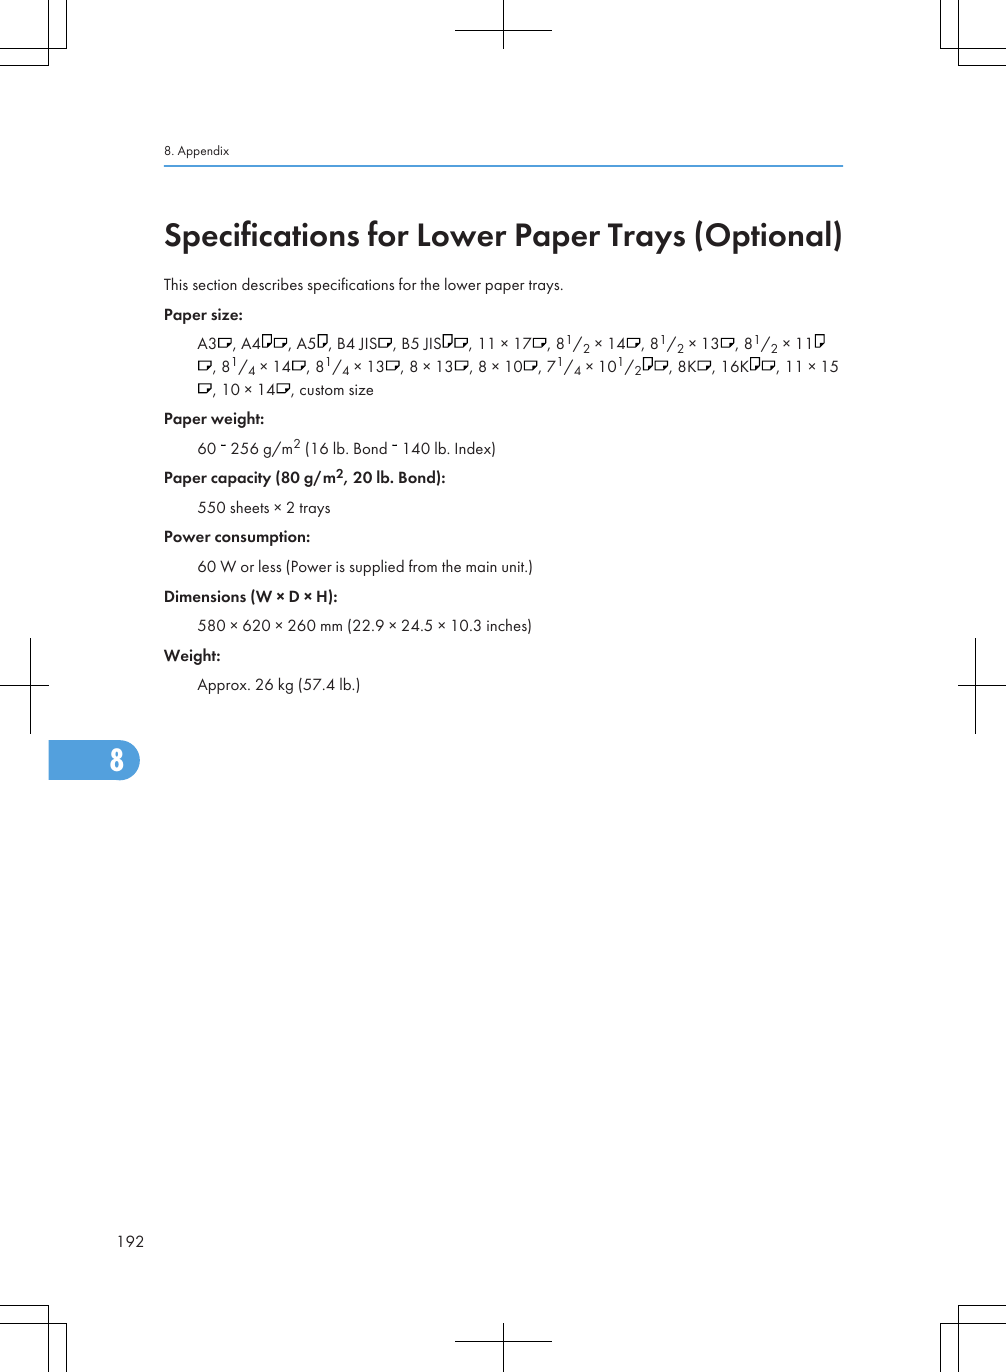
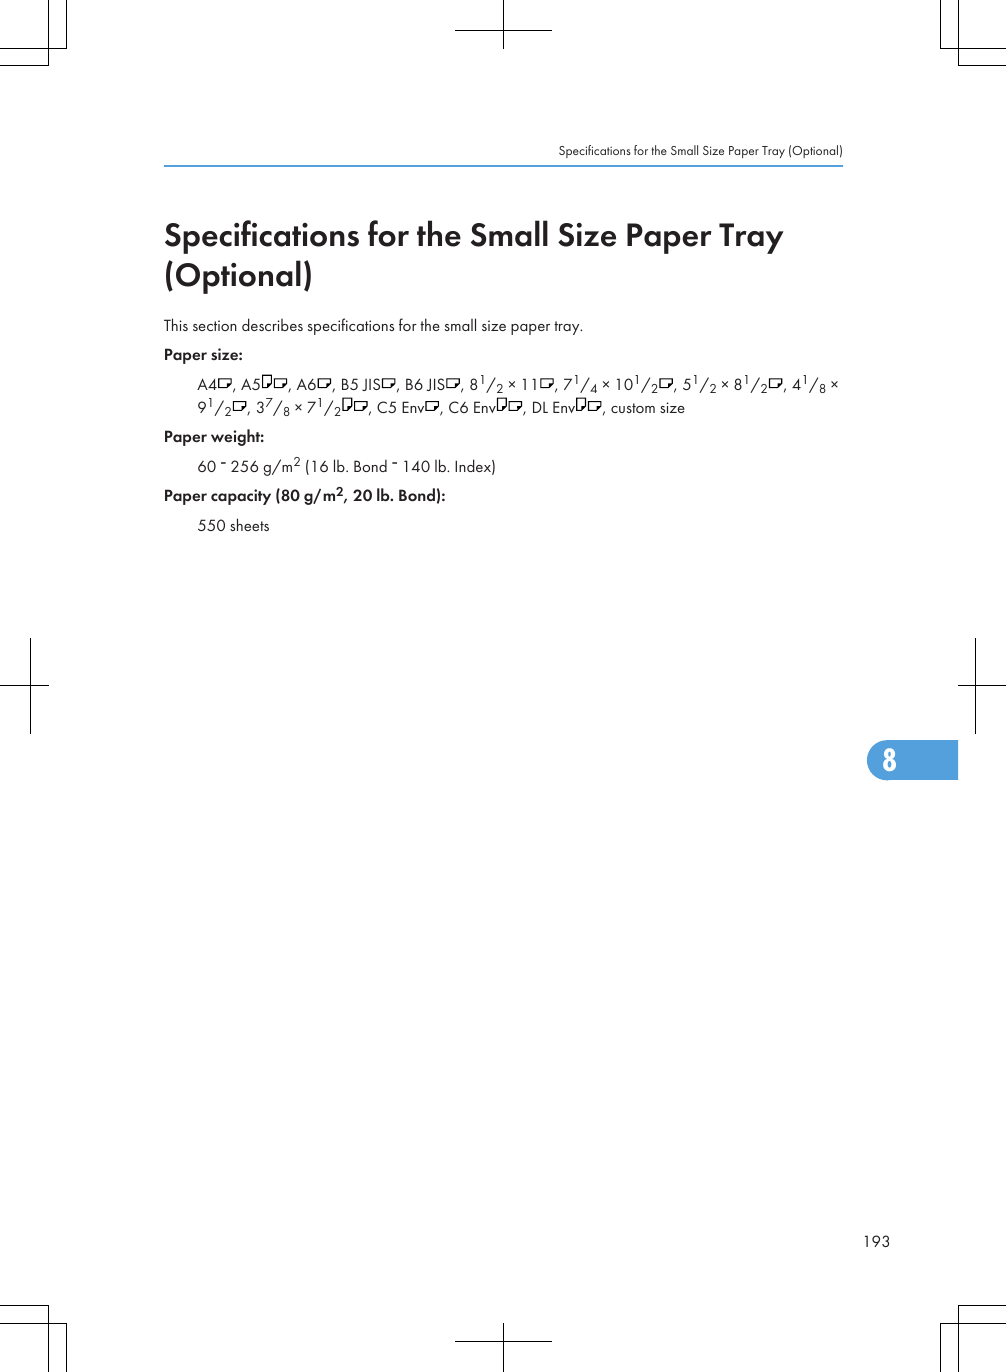
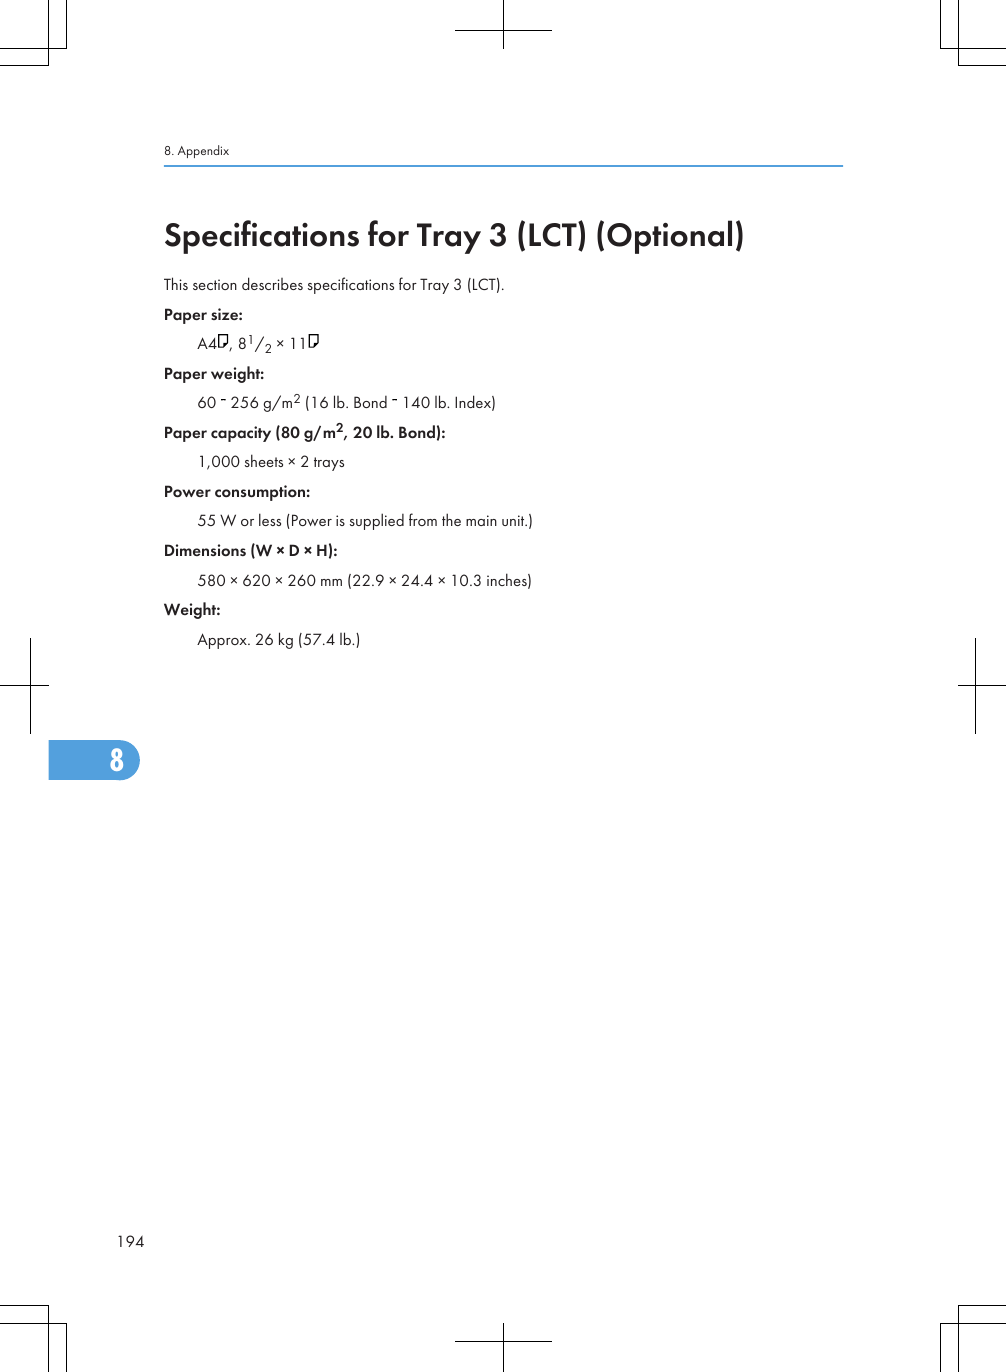
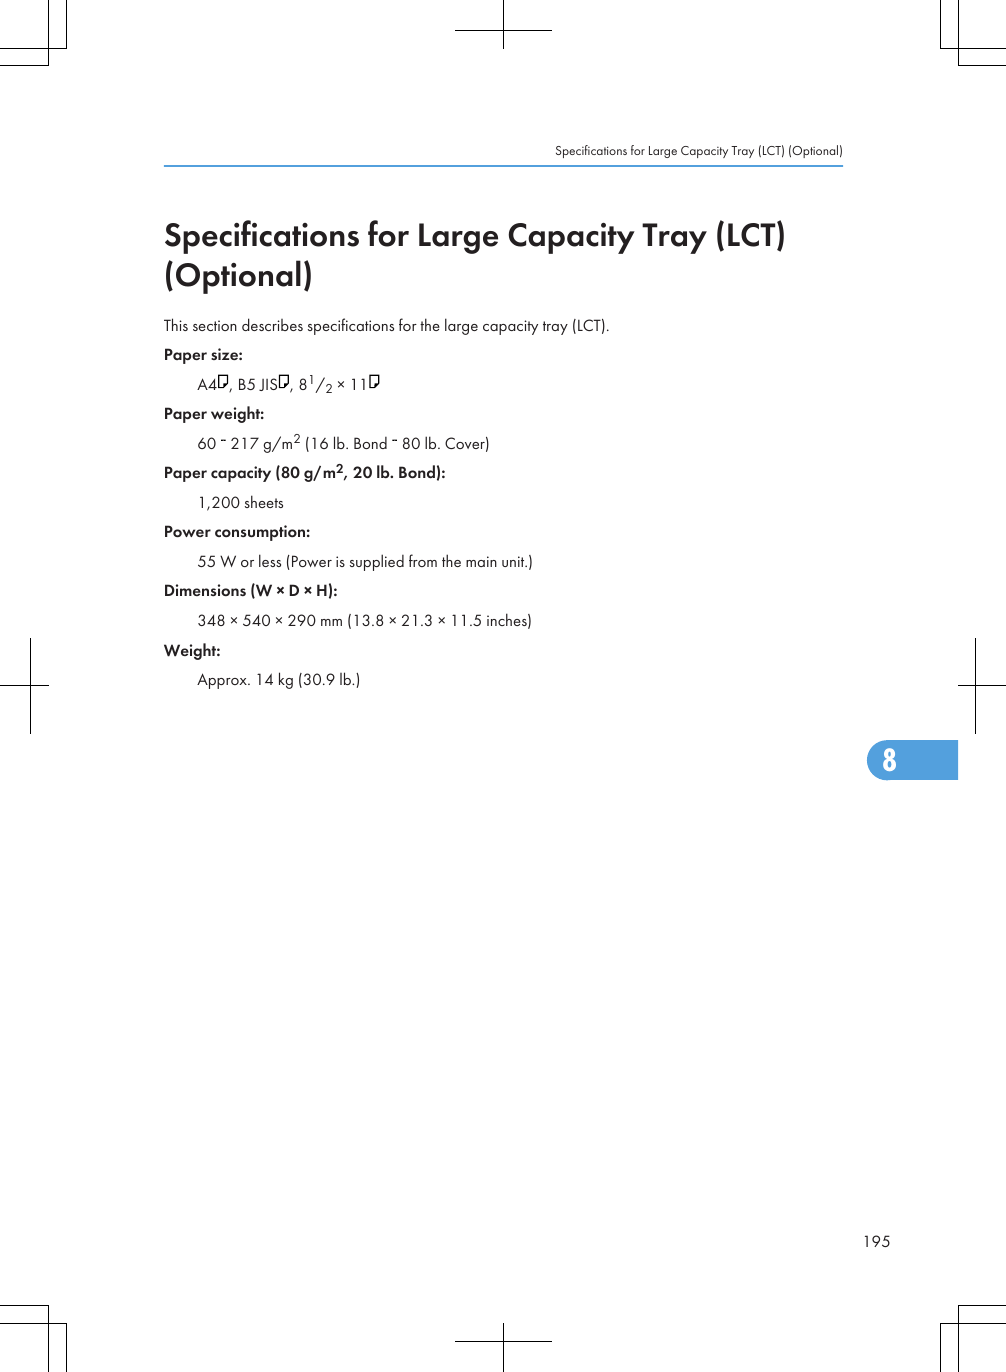
![Tray 3 (LCT) (optional)Paper type and weight Paper size Paper capacity *1260 256 g/m2 (16 lb. Bond 140lb. Index)Plain Paper 1 Thick Paper 381/2 × 11 1,000 sheets × 260 256 g/m2 (16 lb. Bond 140lb. Index)Plain Paper 1 Thick Paper 3*2A41,000 sheets × 2Large capacity tray (LCT) (optional)Paper type and weight Paper size Paper capacity *1260 217 g/m2 (16 lb. Bond 80 lb.Cover)81/2 × 11 1,200 sheets60 217 g/m2 (16 lb. Bond 80 lb.Cover)*2A4 , B5 JIS1,200 sheets*1 When loading paper, make sure the stack height does not exceed the limit mark of the paper tray. The amountof paper that can be set is 55.5 mm/550 sheets approximately. See “Loading Paper”.*2 The paper tray fence is fixed. If you wish to change the size of paper, contact your service representative.*3 The paper size is detected automatically.*4 Select the paper size under Tray Paper Size: Tray 2 4 in System Settings. See “System Settings”, Network andSystem Settings Reference .*5 Press [Bypass], and the [ ] key, and then select the paper size.*6 Press [Bypass], and the [ ] key, and then enter the paper size using the number keys.*7 Press [Bypass], and the [ ] key, and then select [OHP (Transparency)] for [Paper Type].*8 For details about loading envelopes, see “Envelopes”.*9 It is recommended to place one sheet at a time.*10 Open out flaps of envelopes.*11 When loading paper, make sure the stack height does not exceed the limit mark of the paper tray. The amountof paper that can be set is 10 mm/100 sheets approximately. See “Loading Paper”.*12 When loading paper, make sure the stack height does not exceed the limit mark of the paper tray. See “LoadingPaper”.3. Adding Paper1143](https://usermanual.wiki/Ricoh/RFAPL03.User-Manual-2-Short-Confidential/User-Guide-1332453-Page-22.png)

![• To print on coated paper from the bypass tray, trays 2 4, Tray 3 (LCT), or the large capacity tray(LCT): select System Settings, [Tray Paper Settings], and then, for each tray's [Paper Type] be sure toset [Paper Type] to [Coated Paper], and [Paper Thickness] to [Thick Paper 1].• To print on high-gloss coated paper from the bypass tray, paper trays, Tray 3 (LCT), or the largecapacity tray (LCT): select System Settings, [Tray Paper Settings], and then, for each tray's [PaperType], be sure to set [Paper Type] to [Coated Paper: Gloss].• Before loading coated or glossy sheets, be sure to fan them thoroughly. If sheets feed in together,become jammed, or produce strange noises when delivered, load them one by one from the bypasstray.• When copying or printing onto letterhead paper, the paper placing orientation is different dependingon which function you are using. See “Loading Orientation-Fixed Paper or Two-Sided Paper”.• If you load paper of the same size in two or more trays, the machine automatically shifts to the othertray when the first tray in use runs out of paper. This function is called Auto Tray Switching. (However,if the paper type of one tray is recycled or special paper, the settings of the other trays must be thesame for the Auto Tray Switching function to work.) This saves interrupting a copy run to replenishpaper when making a large number of copies. You can set the paper type of the paper trays underPaper Type: Tray 1 4 and Paper Type: LCT. See “System Settings”, Network and System SettingsReference . For the setting procedure of the Auto Tray Switching function, see “Copier andDocument Server Features”, Copy and Document Server Reference .• p.91 "Loading Paper"• p.97 "Loading Orientation-Fixed Paper or Two-Sided Paper"• p.117 "Envelopes"• p.119 "Thick Paper"3. Adding Paper1163](https://usermanual.wiki/Ricoh/RFAPL03.User-Manual-2-Short-Confidential/User-Guide-1332453-Page-24.png)

![• When removing jammed paper or replacing toner, avoid getting toner (new or used) on yourclothing. If toner comes into contact with your clothing, wash the stained area with cold water. Hotwater will set the toner into the fabric and make removing the stain impossible.• When removing jammed paper or replacing toner, avoid getting toner (new or used) on your skin.If toner comes into contact with your skin, wash the affected area thoroughly with soap and water.• Always add toner when the machine instructs you.• Fault may occur if you use toner other than the recommended type.• When adding toner, do not turn off the operation switch. If you do, settings will be lost.• Store toner where it will not be exposed to direct sunlight, temperatures above 35 °C, or high humidity.• Store toner on a flat surface.• If the message " Check toner cartridge replacement(s)." appears, the toner has almost run out. Havea replacement toner cartridge at hand.• If appears when there is still toner in the cartridge, hold the cartridge with the opening upward,shake it well, and then reinstall it.• You can check the name of the required toner and the replacement procedure using the " Add Toner"screen.• Press [System Status] to check contact number where you can order supplies. See “Checking MachineStatus and Settings”, Troubleshooting .• You can add all four color toners in the same way.Replacing TonerThis section describes how to replace toner.• Do not shake the toner cartridge with its mouth down after removing it. Residual toner may scatter.• Do not repeatedly install and remove toner cartridges. This will result in toner leakage.4. Adding Toner and Staples1244](https://usermanual.wiki/Ricoh/RFAPL03.User-Manual-2-Short-Confidential/User-Guide-1332453-Page-32.png)
![CAS062Sending Faxes or Scanned Documents When Toner Has Run OutWhen the machine has run out of toner, the indicator on the display lights. Note that even if there is notoner left, you can still send faxes or scanned documents.• If number of communications executed after the toner has run out and not listed in the automaticallyoutput Journal exceeds 200, communication is not possible.1. Make sure the machine is in facsimile or scanner mode.2. Press [Exit], and then perform transmission operation.The error message disappears.• Any reports are not printed.• If the fax or scanner screen does not appear in step 1, press the [Facsimile] key or the [Scanner] key.Used TonerThis section describes what to do with used toner.Toner cannot be re-used.Adding Toner1254](https://usermanual.wiki/Ricoh/RFAPL03.User-Manual-2-Short-Confidential/User-Guide-1332453-Page-33.png)
![CAS102• When entering uppercase or lowercase letters continuously, use [Shift Lock] to lock the case.How to Enter TextThis section explains text entry more specifically.Entering lettersThis section explains how to enter letters.1. Press [Shift] to switch between uppercase and lowercase.2. Press the letters you want to enter.Entering numbersThis section explains how to enter numbers.1. Press numbers you want to enter.• You can also use the number keys to enter numbers, regardless of mode.5. Entering Text1405](https://usermanual.wiki/Ricoh/RFAPL03.User-Manual-2-Short-Confidential/User-Guide-1332453-Page-48.png)
![Deleting charactersThis section explains how to delete characters.1. Press [Backspace] or [Delete All] to delete characters.Adding user textYou can select and use a User Text that is registered in [Program / Change / Delete User Text].For the registration procedure under Program / Change / Delete User Text, see “System Settings”, Networkand System Settings Reference .1. Press [User Text].2. Select the User Text you want to use.Entering Text1415](https://usermanual.wiki/Ricoh/RFAPL03.User-Manual-2-Short-Confidential/User-Guide-1332453-Page-49.png)
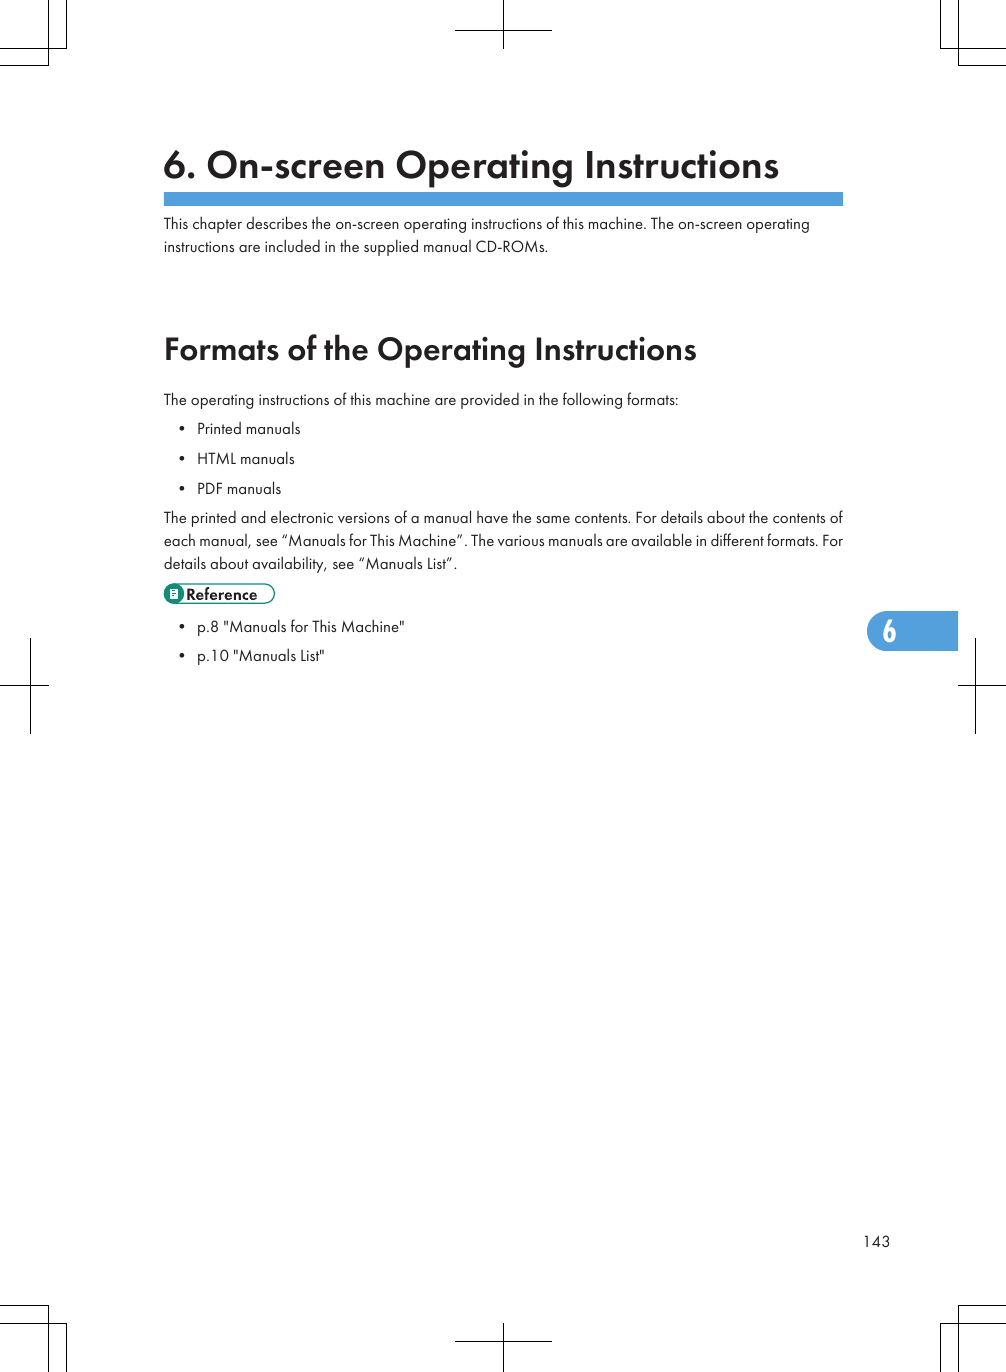
![Reading the HTML Manuals on the CD-ROMsThis section describes how to read the HTML manuals on the supplied manual CD-ROMs.1. Insert the CD-ROM in the CD-ROM drive of your computer.2. Select a language and a product, and then click [OK].3. Click [Read HTML manuals].4. Click the title of manual you want to read.The browser opens, and then the manual appears.• Recommended browser is Microsoft Internet Explorer 4.01 SP2 or later.• Non-recommended browsers can display the simplified manual only.• If you are using an earlier or non-recommended browser and the simplified version of thedocumentation does not appear automatically, open index.htm, which can be found in the followingfolder on the CD-ROM: MANUAL_HTML\LANG\(language)\(manual)\unv• Depending on your computer's operating environment, the HTML manual you select will be one ofthe following:• Standard version• Simplified version• If you want to read the HTML manuals on a Macintosh, insert the CD-ROM in the CD-ROM drive,and then click [Read HTML manuals].• If JavaScript is disabled or unavailable in your browser, you will not be able to search or use certainbuttons in the HTML documentation.6. On-screen Operating Instructions1446](https://usermanual.wiki/Ricoh/RFAPL03.User-Manual-2-Short-Confidential/User-Guide-1332453-Page-52.png)
![Installing and Opening the HTML ManualsThis section describes how to install and open the HTML manuals on your computer.For your convenience, we recommend you install these manuals on your computer.1. Insert the CD-ROM in the CD-ROM drive of your computer.2. Select a language and a product, and then click [OK].3. Click [Install manuals].4. Install the HTML manuals by following the on-screen instructions.5. When the installation is complete, click [Finish].6. Click [Exit].7. Open the HTML manuals that you installed.To open the manuals from an icon, double-click the icon on the desktop. To open the manuals fromthe [Start] menu, point to [All Programs] (Windows 2000: [Programs]), and then [Product Name].8. Click the title of the manual you want to read.• You need administrator permissions to install the manuals. Log in as an Administrators group member.• The system requirements for installing the manuals are as follows:• Operating system: Windows 2000/XP/Vista/7, Windows Server 2003/2003R2/2008/2008 R2• Minimum display resolution: 800 × 600 pixels• Hyperlinks might not work and referenced sections might not appear unless all the HTML manualshave been installed. To display referenced sections, be sure to install all the HTML manuals.• If you cannot install a manual, copy the “MANUAL_HTML” folder to your computer's hard drive, andthen run “Setup.exe”.• To delete an installed manual, on the [Start] menu, click [All Programs] (Windows 2000: [Programs]),then [Product Name], and then uninstall the data.Installing and Opening the HTML Manuals1456](https://usermanual.wiki/Ricoh/RFAPL03.User-Manual-2-Short-Confidential/User-Guide-1332453-Page-53.png)
![Reading the PDF Manuals on the CD-ROMThis section describes how to read the PDF manuals on the supplied manual CD-ROM.File pathThe manuals are included in the following folder on the CD-ROM:MANUAL_PDF\(language)1. Insert the CD-ROM in the CD-ROM drive of your computer.2. Select a language and a product, and then click [OK].3. Click [Read PDF manuals].4. Click the title of the manual you want to read.• To view the PDF manuals, you need to have Adobe Acrobat Reader/Adobe Reader installed on yourcomputer.• If you want to read the HTML manuals on a Macintosh, insert the CD-ROM in the CD-ROM drive,and then click [Read PDF manuals].Reading the PDF Manuals on the CD-ROM1476](https://usermanual.wiki/Ricoh/RFAPL03.User-Manual-2-Short-Confidential/User-Guide-1332453-Page-55.png)


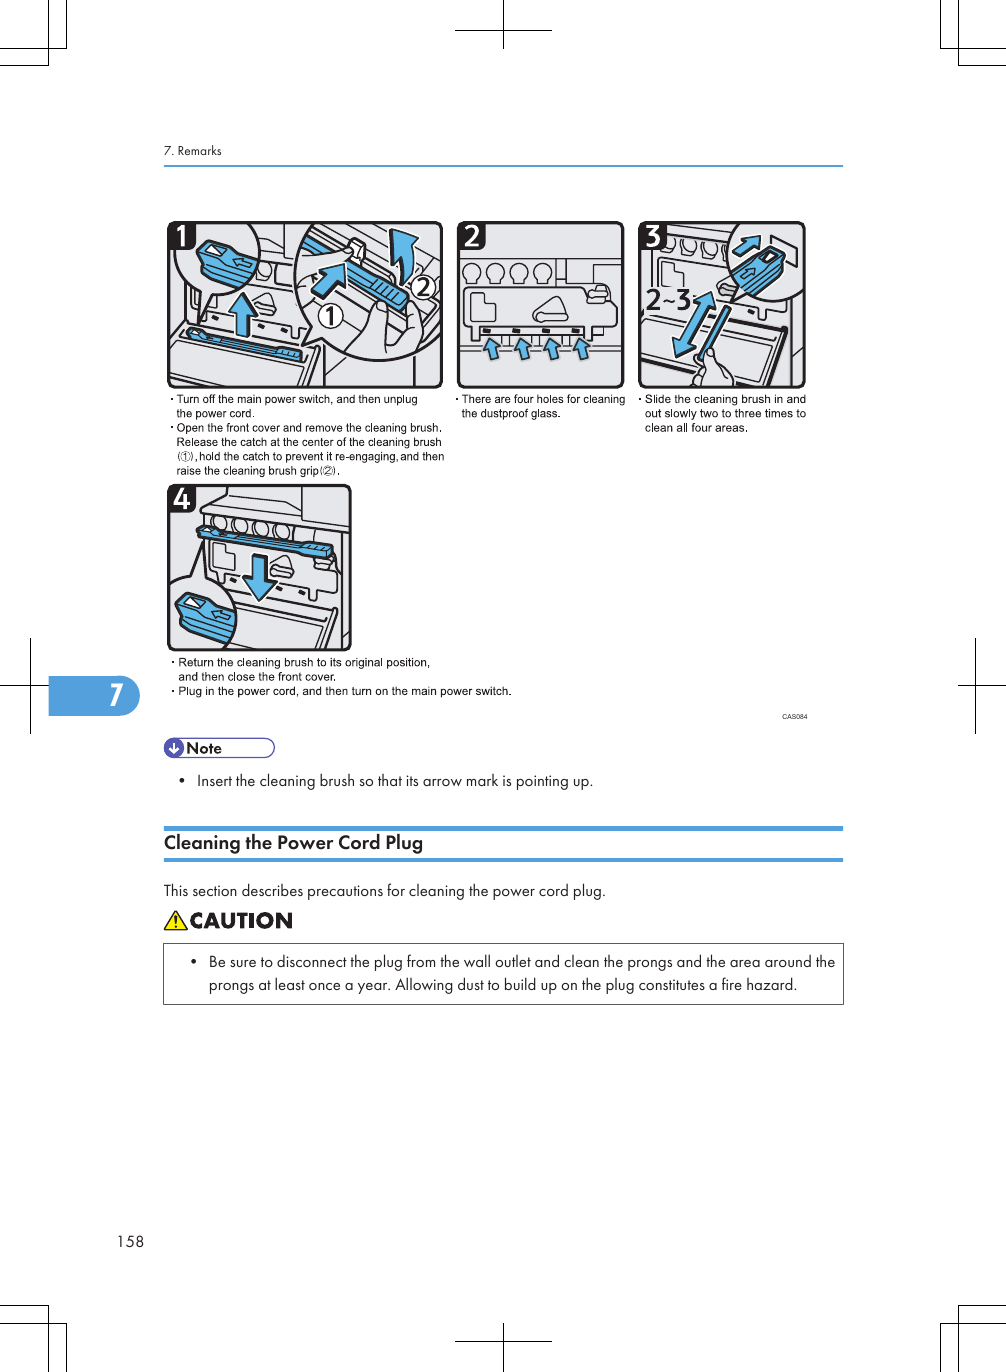
![CounterYou can display the total counter value used for all functions.1. Press the [User Tools/Counter] key.CAS0982. Press [Counter].3. To print a counter list, press [Print Counter List].4. Press the [Start] key.A counter list prints out.5. Press [Exit] twice.7. Remarks1607](https://usermanual.wiki/Ricoh/RFAPL03.User-Manual-2-Short-Confidential/User-Guide-1332453-Page-68.png)
![InquiryThe Inquiry function lets you check the telephone numbers to contact for repairs, or ordering consumablessuch as toner.Be sure to contact your service engineer to verify the following:Consumables• Telephone No. to order• Toner• Staple• Staple (Center)• TX Stamp NameMachine Maintenance/Repair• Telephone No.• Serial No. of MachineSales Representative• Telephone No.1. Press the [User Tools/Counter] key.CAS0982. Press [Inquiry].Inquiry1617](https://usermanual.wiki/Ricoh/RFAPL03.User-Manual-2-Short-Confidential/User-Guide-1332453-Page-69.png)
![Inquiry information appears.3. Press [Print Inquiry List].4. Press the [Start] key.Inquiry information prints out.5. Press [Exit] twice.7. Remarks1627](https://usermanual.wiki/Ricoh/RFAPL03.User-Manual-2-Short-Confidential/User-Guide-1332453-Page-70.png)
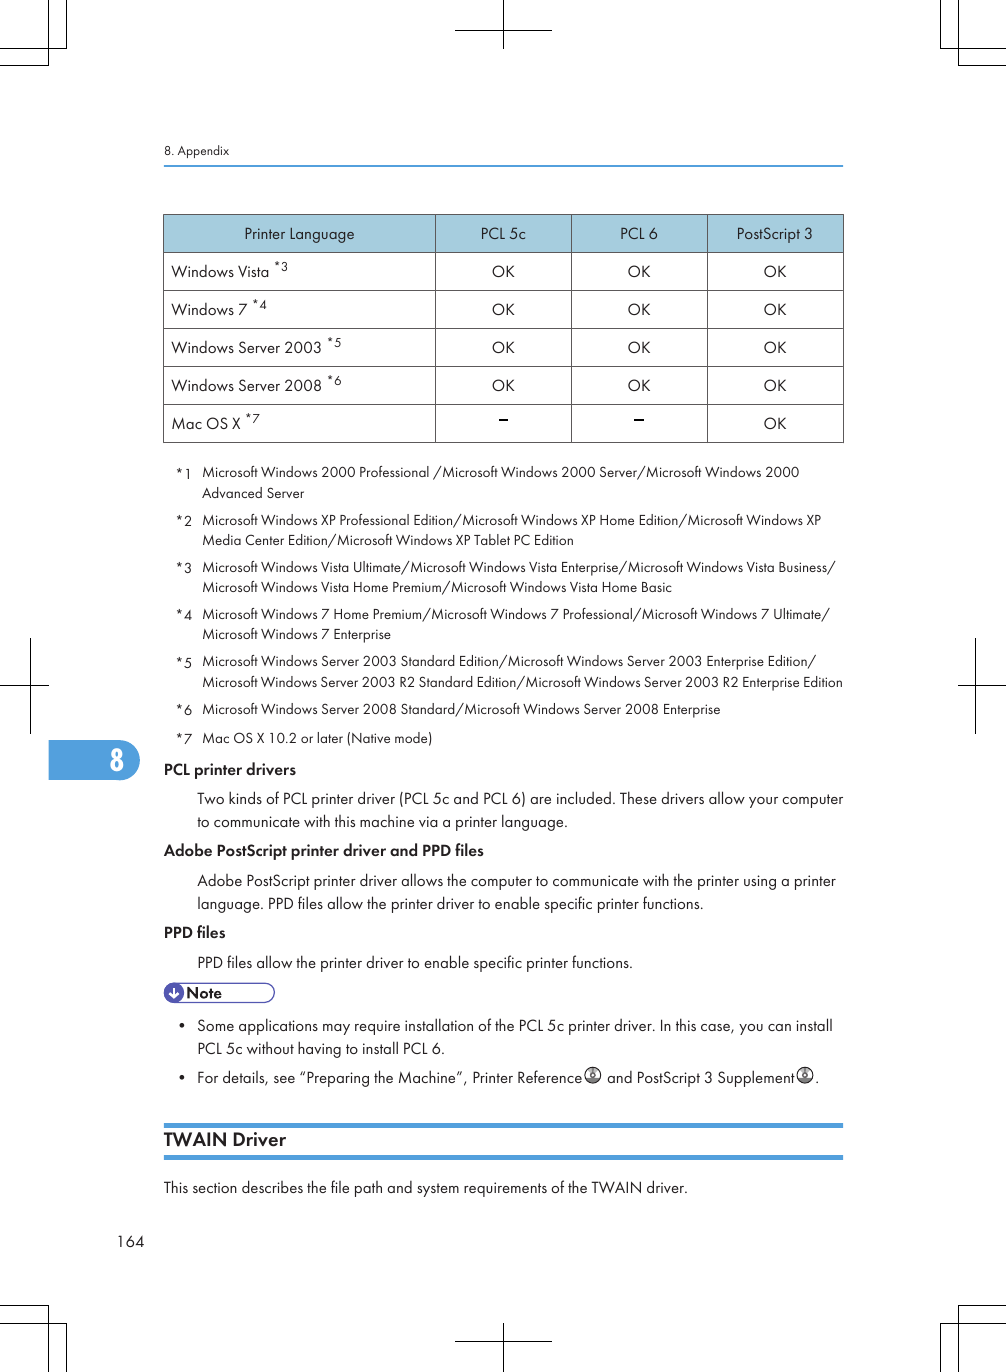
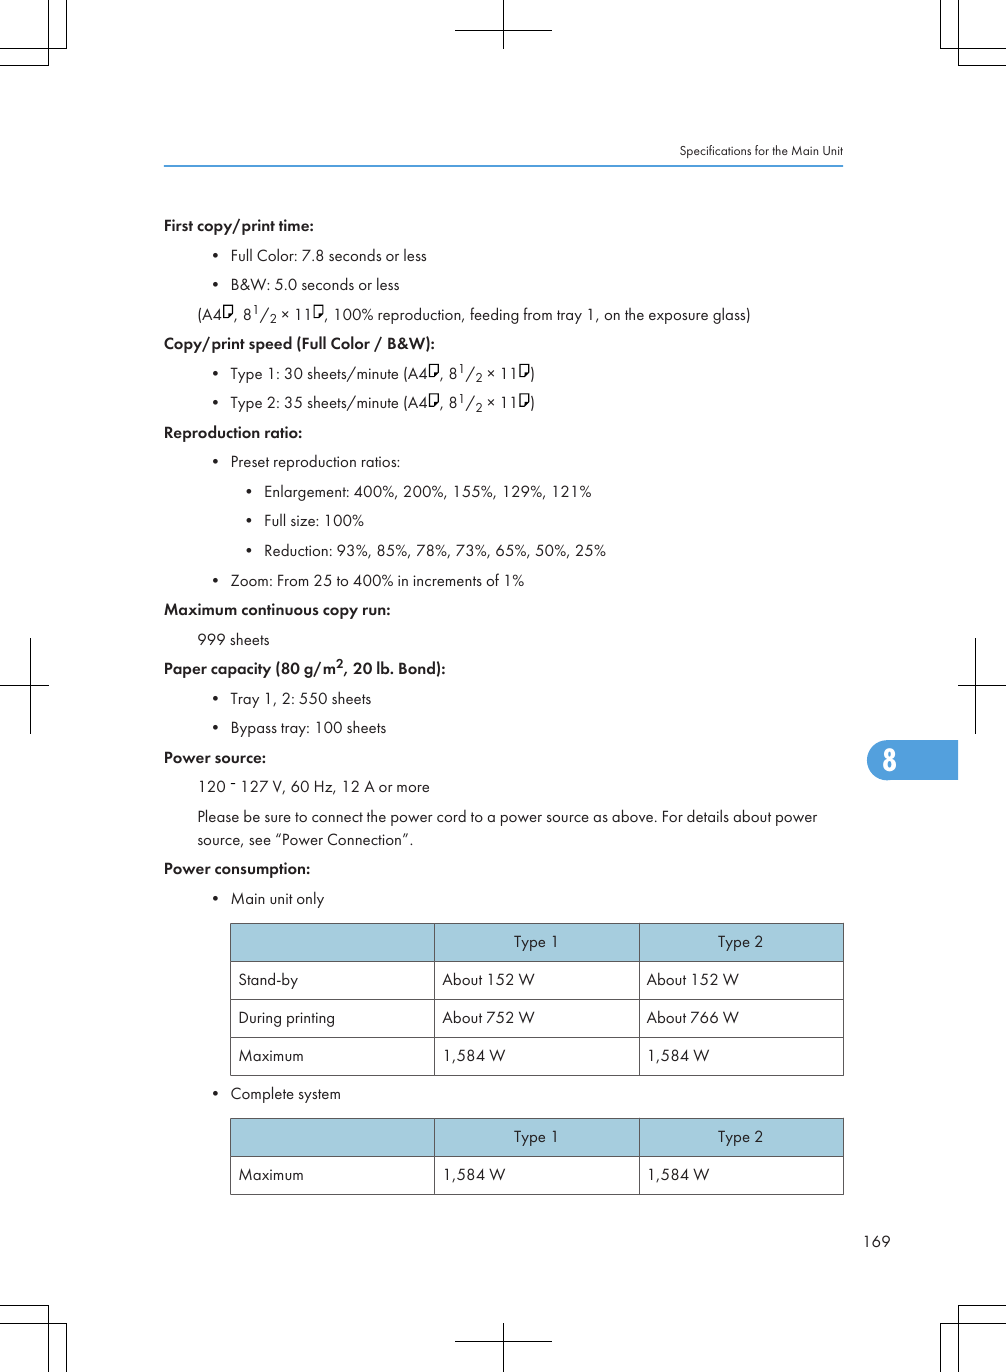
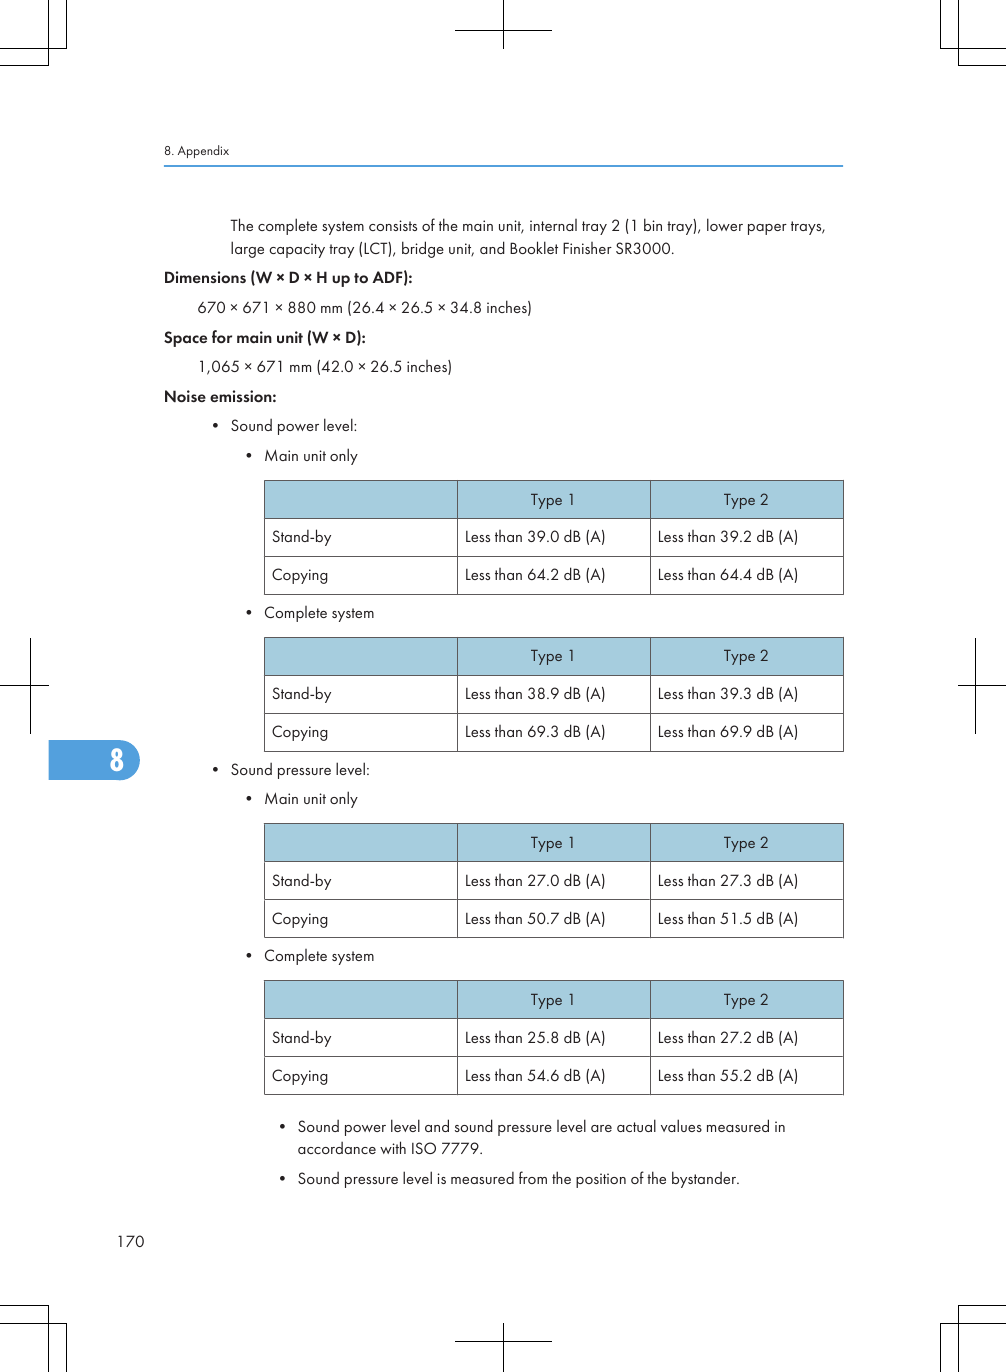
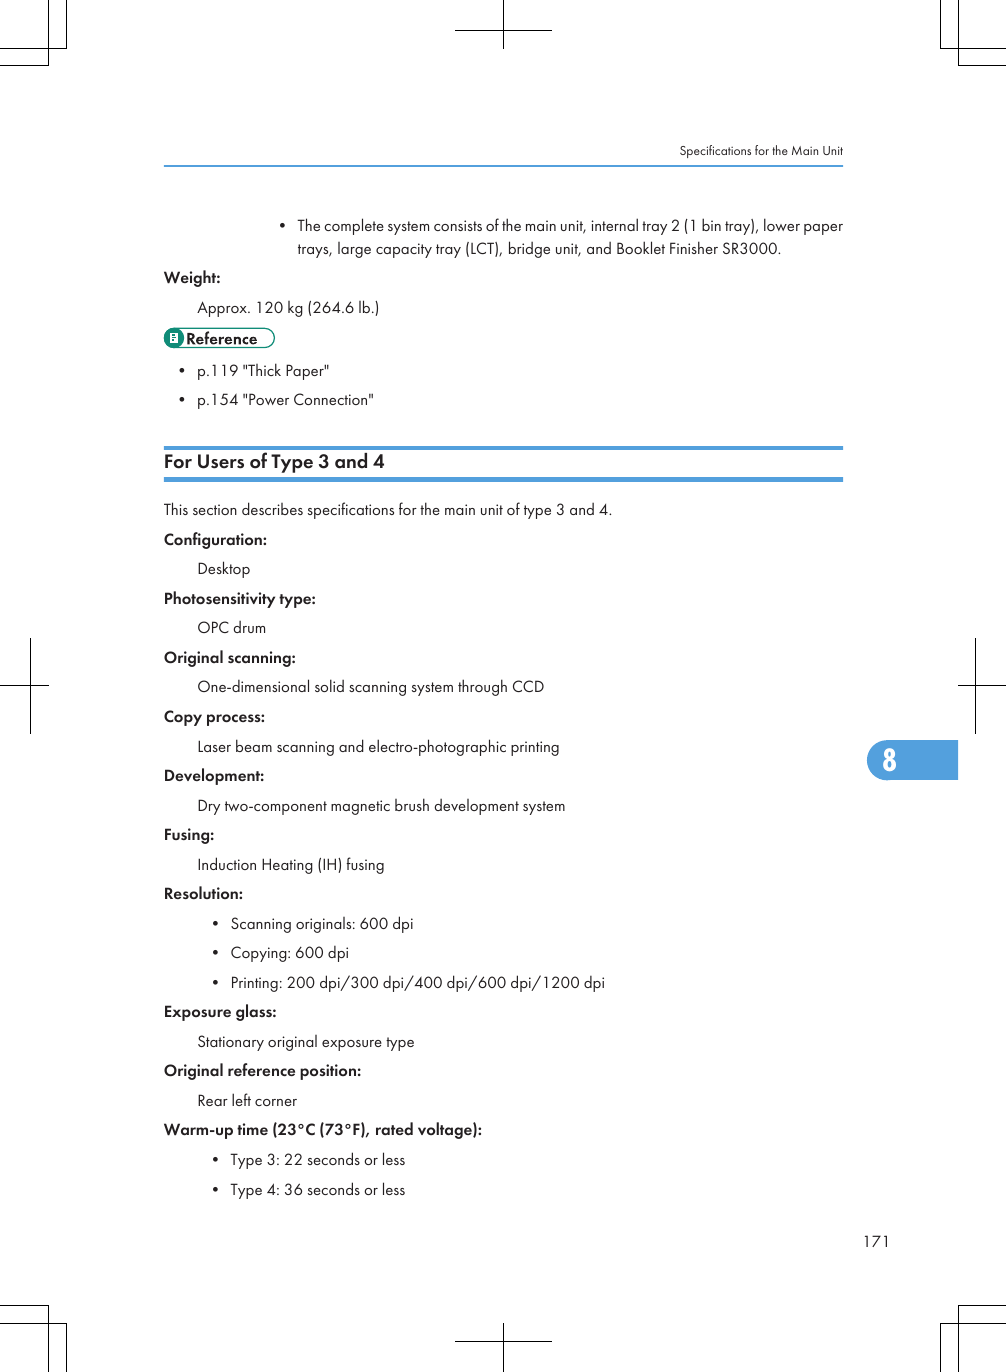
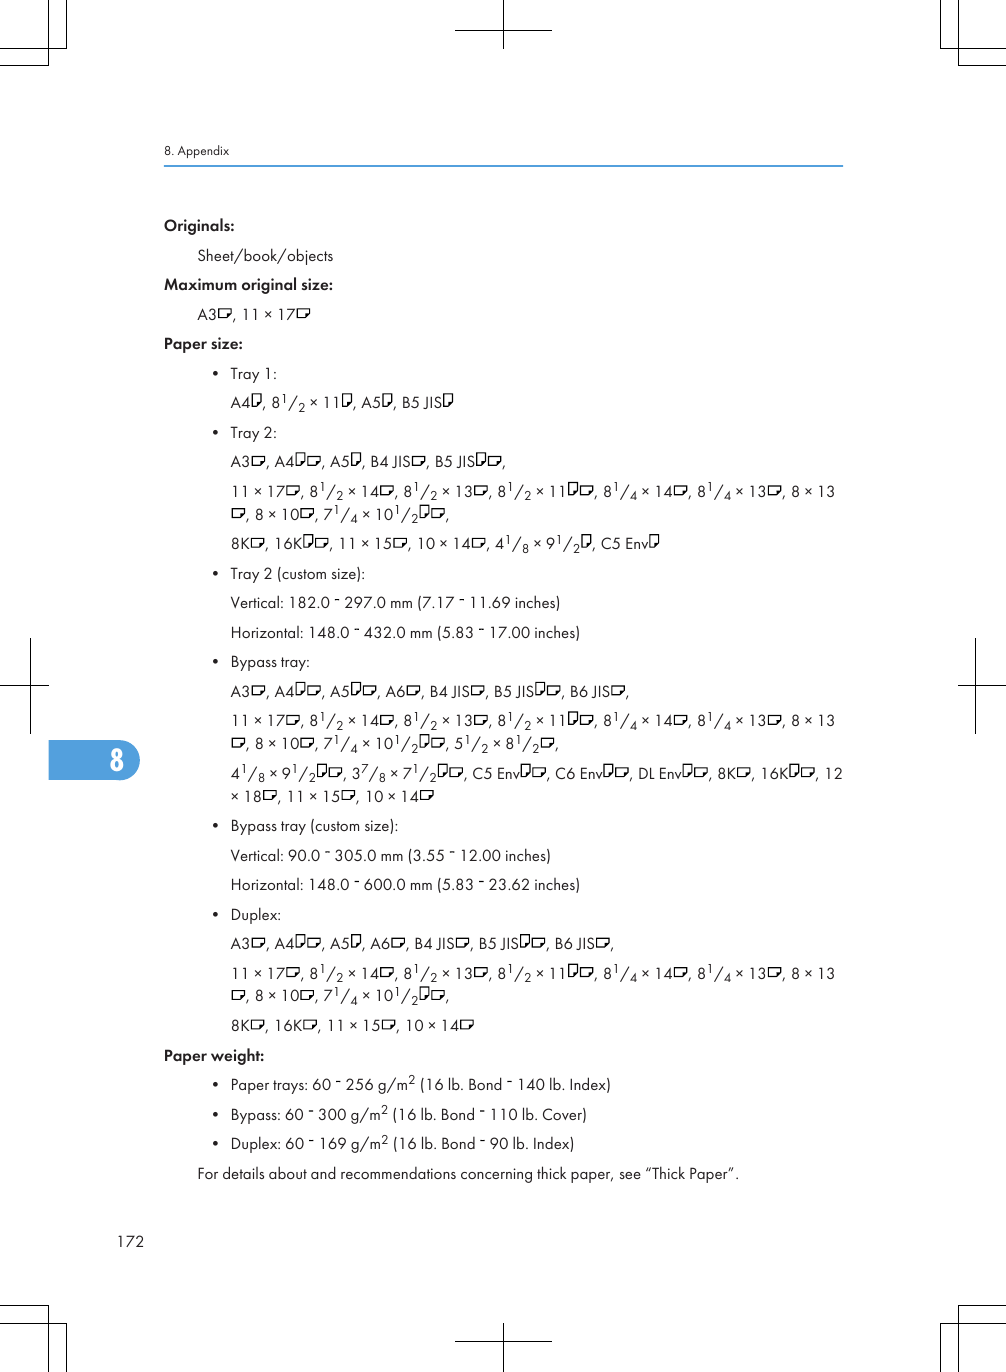
![8. AppendixThis chapter describes the provided software and utilities CD-ROM, and specifications.Software and Utilities Included on the CD-ROMThis section explains the software and utilities CD-ROM provided with this machine.The following is included in the CD-ROM:Font ManagerFor installing new screen fonts, or organizing and managing fonts already in the system. For detailsabout Font Manager, see the manual on the CD-ROM.Viewing the Contents of the CD-ROMThis section explains how to view the contents of the CD-ROM.1. Insert the CD-ROM in the CD-ROM drive of your computer.2. Select a language and a product, and then click [OK].3. Click [Browse This CD-ROM].Explorer starts and displays the contents of the CD-ROM.Printer Drivers for This MachineThis section explains printer drivers for this machine.• You can install the PCL printer drivers (PCL 5c and PCL 6), and the Adobe PostScript printer driverfrom the CD-ROM provided with this machine or download them from the manufacturer's Web site.If your operating system is Windows XP/Vista/7 x64, or Windows Server 2003/2003R2/2008/2008 R2 x64, you must download the printer drivers from the manufacturer's Web site.Select this machine and the operating system you are using, and then download them.Printing requires installation of a printer driver for your operating system. The following drivers are includedon the CD-ROM.Printer Language PCL 5c PCL 6 PostScript 3Windows 2000 *1 OK OK OKWindows XP *2 OK OK OK1638](https://usermanual.wiki/Ricoh/RFAPL03.User-Manual-2-Short-Confidential/User-Guide-1332453-Page-71.png)