Ricoh WLRWL542 Option for Radiocommunications User Manual 2
Ricoh Company Ltd Option(s) for Radiocommunications 2
Ricoh >
Contents
- 1. User Manual 1
- 2. User Manual 2
- 3. User Manual 3
- 4. User Manual 4
User Manual 2
• Use a screwdriver to tighten the knob-screws. Do not tighten manually, because this can
disconnect the board.
4. Reattach the application cover ( x1).
• If the 500-Sheet Finisher is installed, remove it before you attach the parallel cable. Install the
finisher again after you connect the parallel cable.
IEEE 802.11a/g (D377)
Accessories
Check the accessories and their quantities against the following list:
No Description Quantity
1 IEEE 802.11a/g Interface Board 1
2 Antenna Cables 2
3 Antenna Clamps 8
Installation
• Turn off the main power switch and disconnect the power supply cord.
2. Installation
110
2
R-WL54M1N/ R-WL54M1GN
Setting Manual for end product
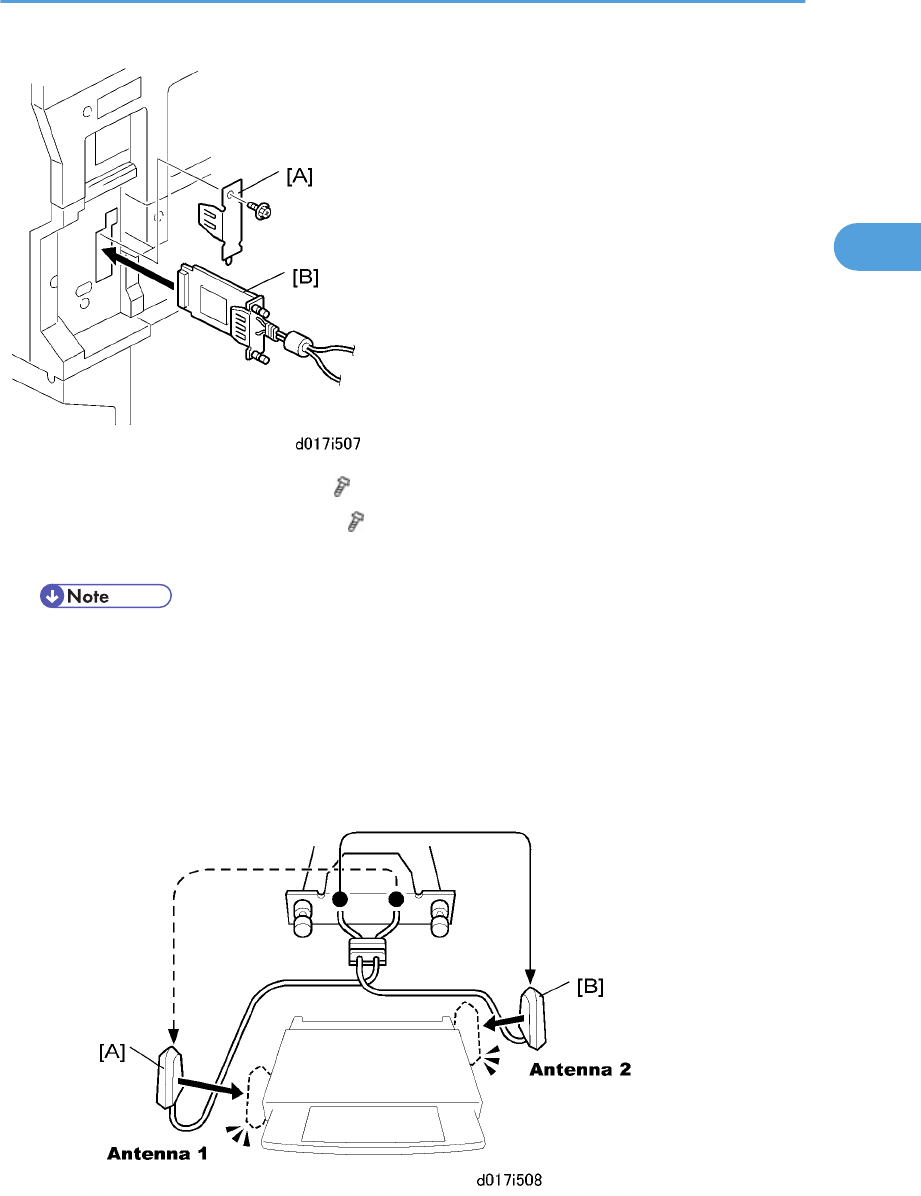
1. Remove the plastic application cover ( x1).
2. Remove the cover [A] of the board slot ( x1).
3. Insert the interface card [B] as shown above.
• Use a screwdriver to tighten the knob-screws. Do not tighten manually, because this can
disconnect the board.
4. Look at the markings on the antenna bracket.
•ANT1. Antenna 1 transmits and receives. It must be installed on the front left corner of the main
machine. (The core on the Antenna 1 cable is black.)
•ANT2. Antenna 2 only receives. It is installed on the rear right corner of the machine.
Controller Options
111
2
• To assure reliable data sending and receiving, Antenna 1 must be installed on the front left corner
of the machine.
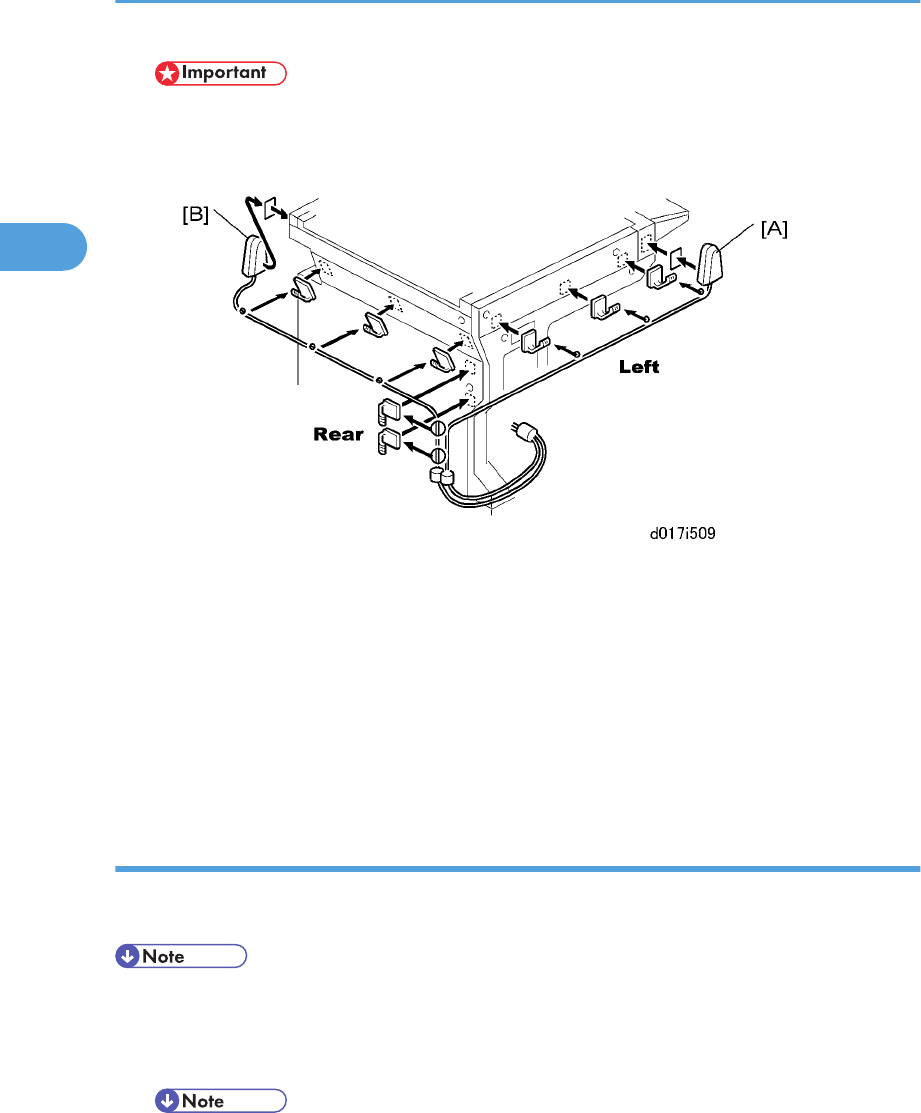
5. Remove the seals from of the cable clamps and attach them to the left side of the machine as shown
above.
6. Attach Antenna 1 [A] to the left front corner of the machine. (The core on the Antenna 1 cable is black.)
7. Set the cable of Antenna 1 in the clamps and close them.
8. Remove the seals from the cable clamps and attach them to the rear of the machine as shown above.
9. Attach Antenna 2 [B] to the right rear corner of the machine.
10. Set the cable of Antenna 2 in the clamps and close them.
User Tool Settings for IEEE 802.11a/g
Go into the User Tools mode and do the procedure below. These settings take effect every time the machine
is powered on.
• You cannot use IEEE 802.11a/g if you use Ethernet.
1. Press the "User Tools" key.
2. On the touch panel, touch "System Settings".
• The Network I/F (default: Ethernet) must be set for either Ethernet or wireless LAN.
3. Select "Interface Settings"> "Network"> "Network I/F Setting"
4. Press "IEEE 802.11". Only the wireless LAN options show.
2. Installation
112
2