Ringway Tech ALLEGROIII DIGITAL PIANO User Manual
Ringway Tech(Jiangsu) Co.,Ltd. DIGITAL PIANO
UserManual.wiki
>
Ringway Tech
>
ALLEGROIII User Manual
User Manual
Navigation menu
Upload a User Manual
Namespaces
Wiki Guide
HTML
PDF
Info
Views
User Manual
Discussion / Help
Navigation


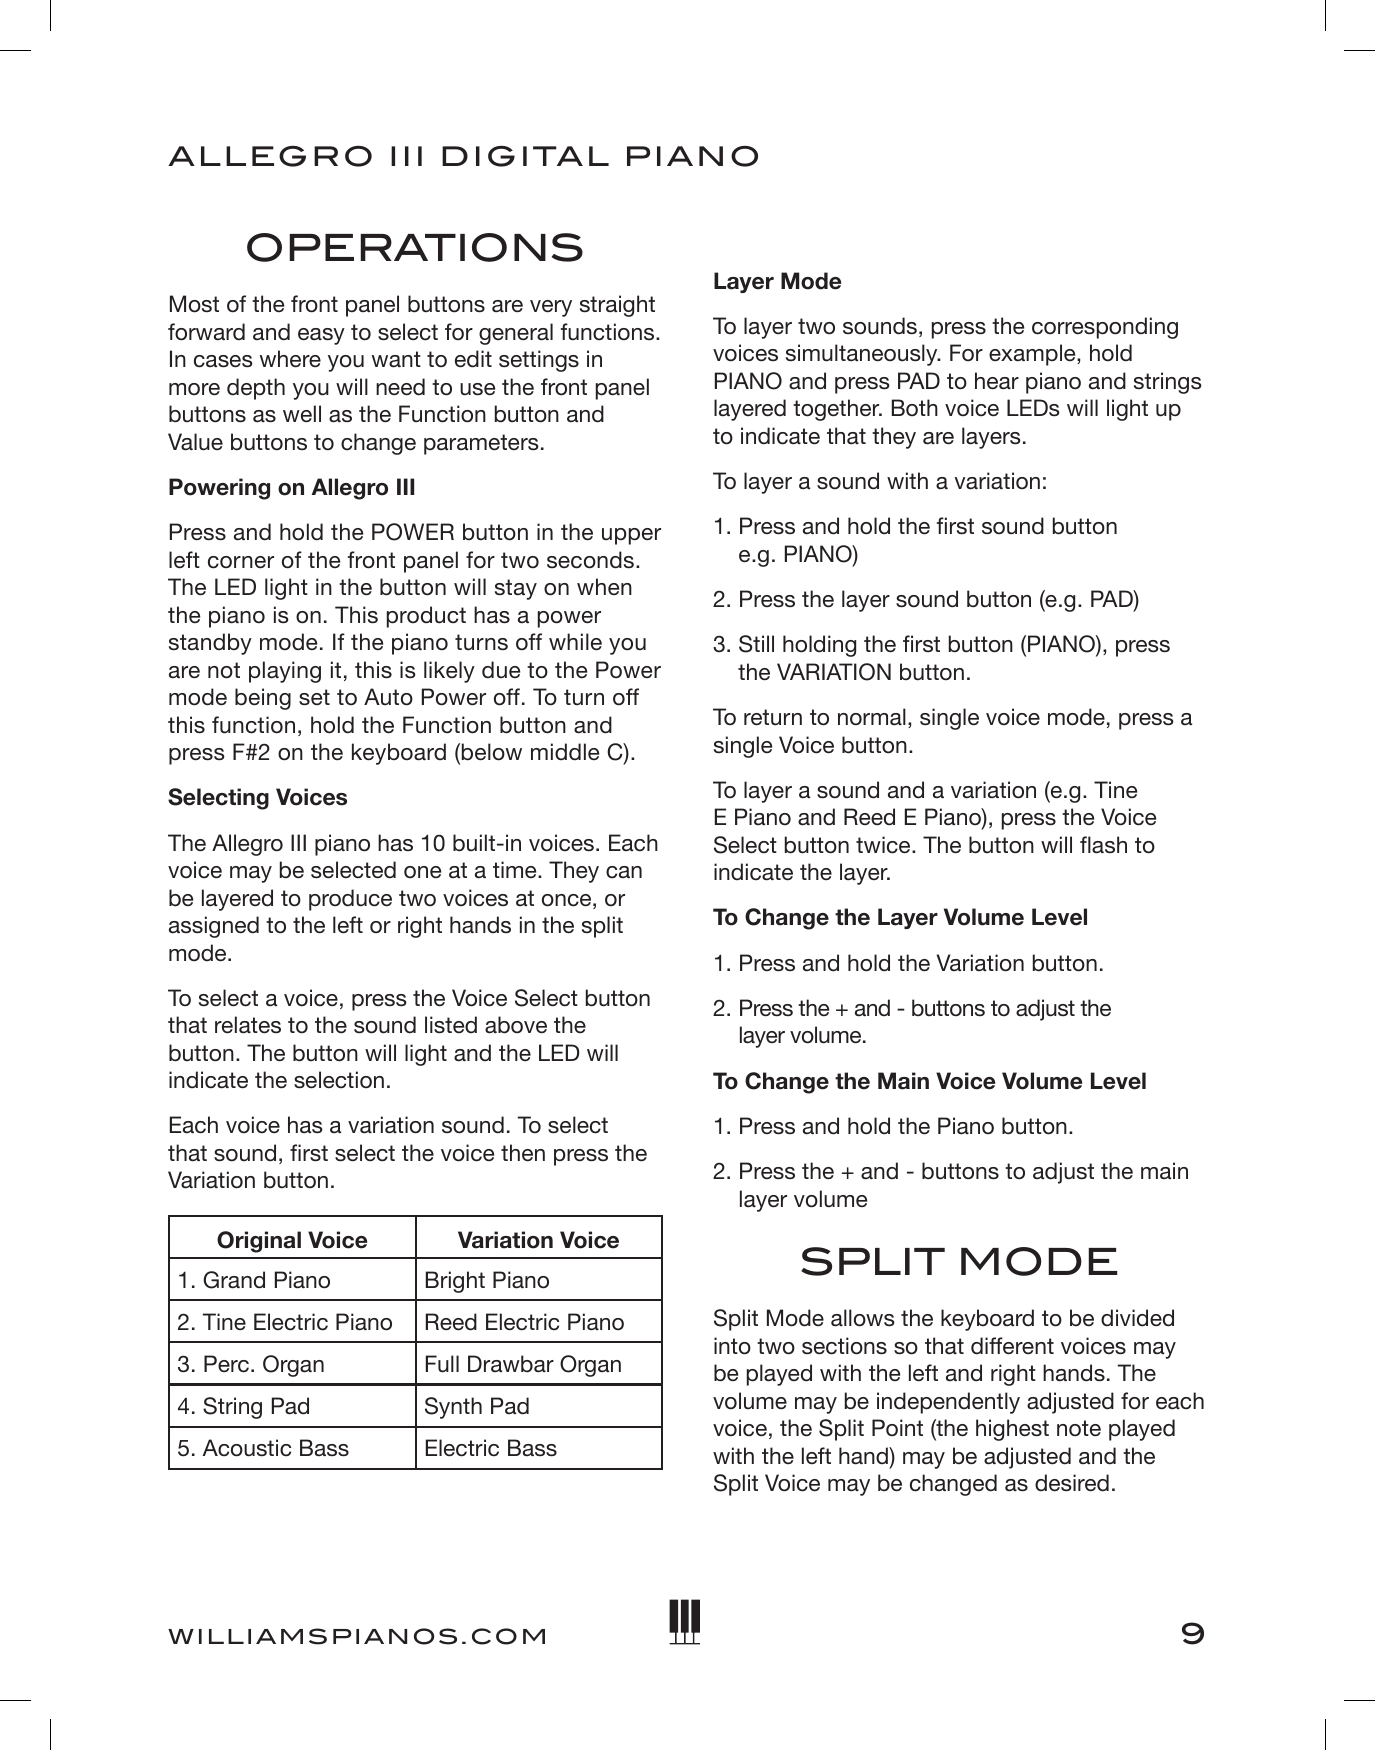
![10OWNER'S MANUALTo Enter Split ModePress the [SPLIT] button. The Split (left hand) voice will be the last Split Voice used and the Split Point will be B2 (an octave below middle C.)To Change The Lower Split Volume To adjust the lower split volume, press and hold the Split button and press the Value + and Value – buttons. Change The Split (Left Hand) VoicePress and hold the Split button while depressing the desired Voice Select button.Change The Main (Right Hand) VoiceSimply press another Voice Select button.To Change the Split PointHold the Split button and then press a key on the keyboard to determine the split point. This key will be the top key of the lower split.To Change the Split (Left Hand) OctaveWhen Split mode is on, changing the octave adjusts the lower split. Press and hold the Octave button then press the Value + or Value – button. To Turn Off Split ModePress the Split button. The Split Button LED will switch off to show that it is disabled.DEMO SONGSThe Allegro III comes with 10 demo songs as well as the ability for you to play and record your own song. When you record your own song the recording will be retained until you either record a new song or tif you reset the Allegro III back to factory settings.To Play A Demo SongPress the Song button and then the corresponding Voice select button. See list below of the demo songs.Metronome FunctionPress the Metronome button to turn on the metronome. The LED will light. You will hear the click in headphones or speakers. Press the Metronome button again to exit metronome function. The LED will turn off.To Change Metronome Time Signature1. Press and hold the Metronome button, then press and hold one of the 10-key buttons on the right side of the panel. For example, for 3/4 meter hold the Metronome and 3 (Organ) buttons for two seconds. See the chart below for details. Press and Hold Result1 None22/4 or 2/833/4 or 3/8 4 4/4 or 4/8 55/4 or 5/866/4 or 6/877/4 or 7/88Quarter (x/4) or Eighth (x/8) meter99/4 or 9/810 None2. For an eighth meter (6/8, 7/8, etc), press and hold the metronome and 8 (Mod FX) buttons. To switch back to quarter meters, press Metronome and 8 again. The default meter is 4/4. The following options are available: 2/4, 3/4, 4/4 (default), 5/4, 6/4, 7/4, 9/4, 2/8, 3/8, 4/8, 5/8, 6/8, 7/8, 9/8To Change the Metronome VolumeTo adjust the volume of the metronome in balance with the piano sound, press and hold Metronome and press the Value + or Value – button.](https://usermanual.wiki/Ringway-Tech/ALLEGROIII/User-Guide-4128804-Page-10.png)