Roche Diagnostics Diabetes Care U8 Blood Glucose Meter with RFID User Manual man 0xxxxxxx001 01 EnCan indd
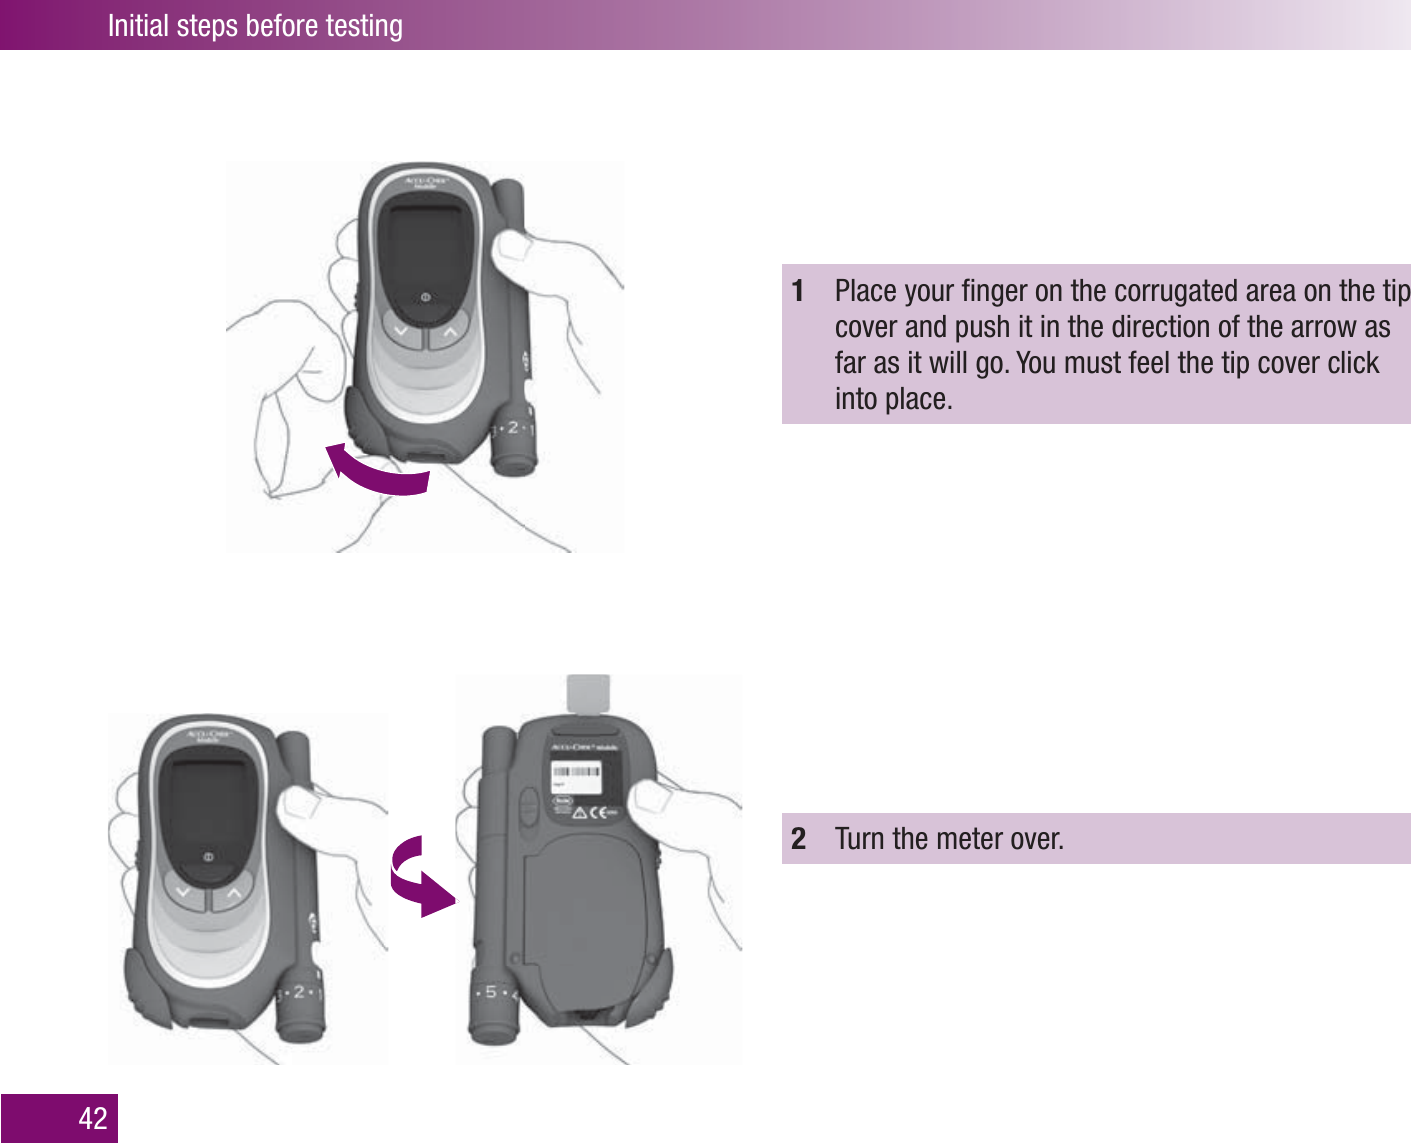
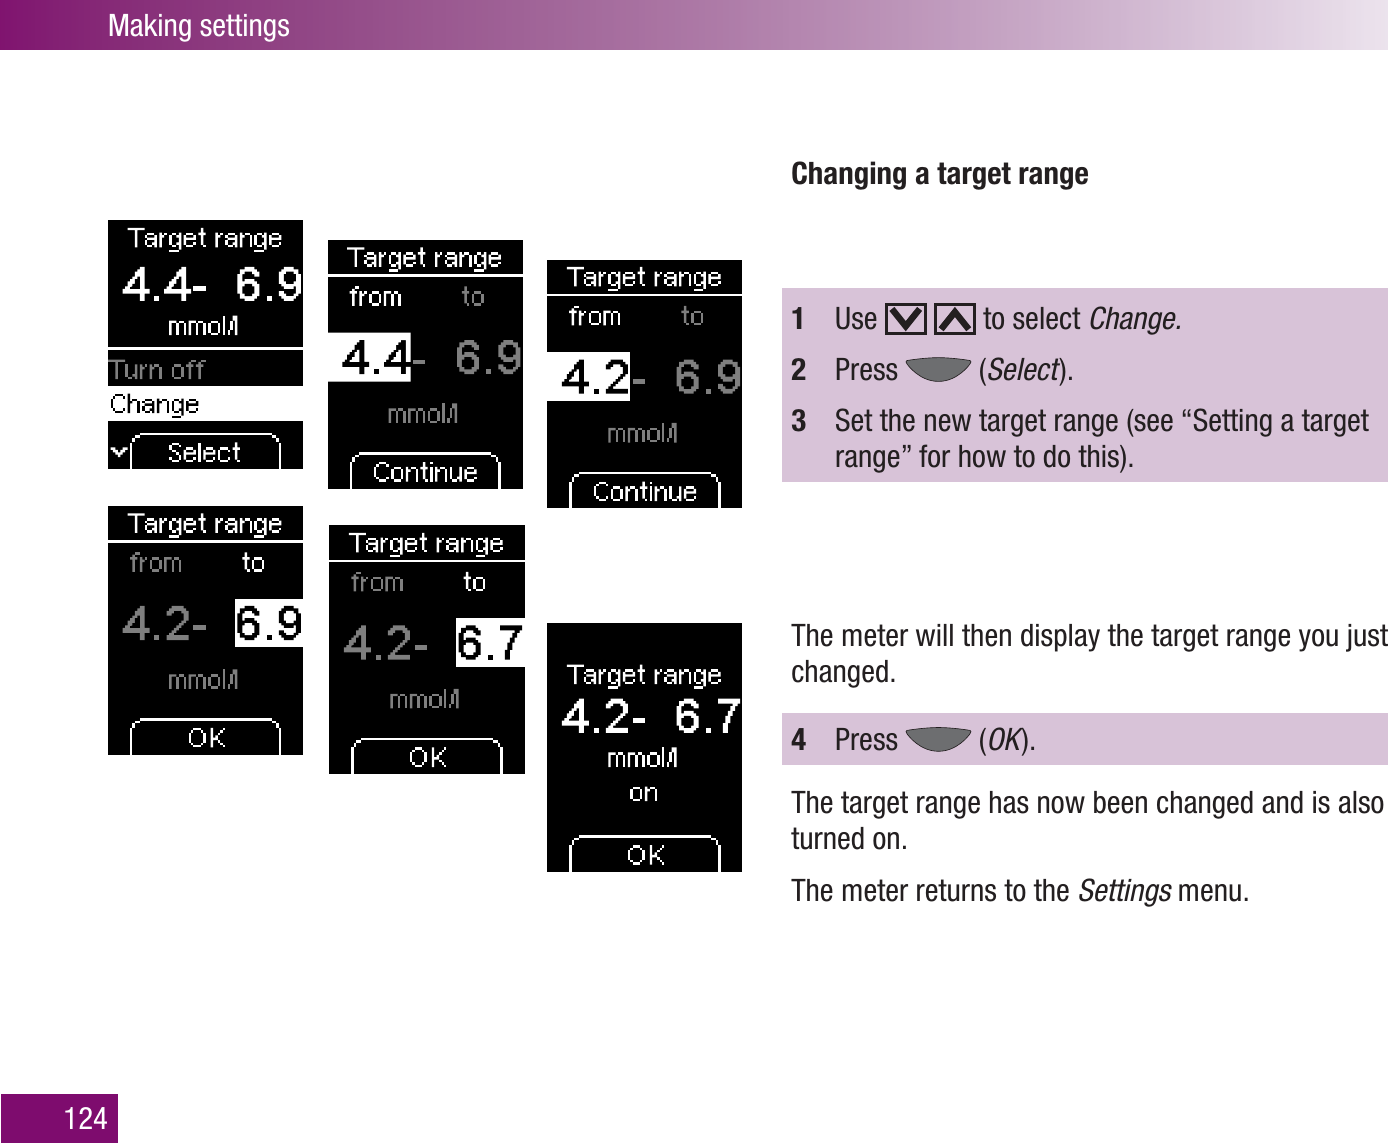
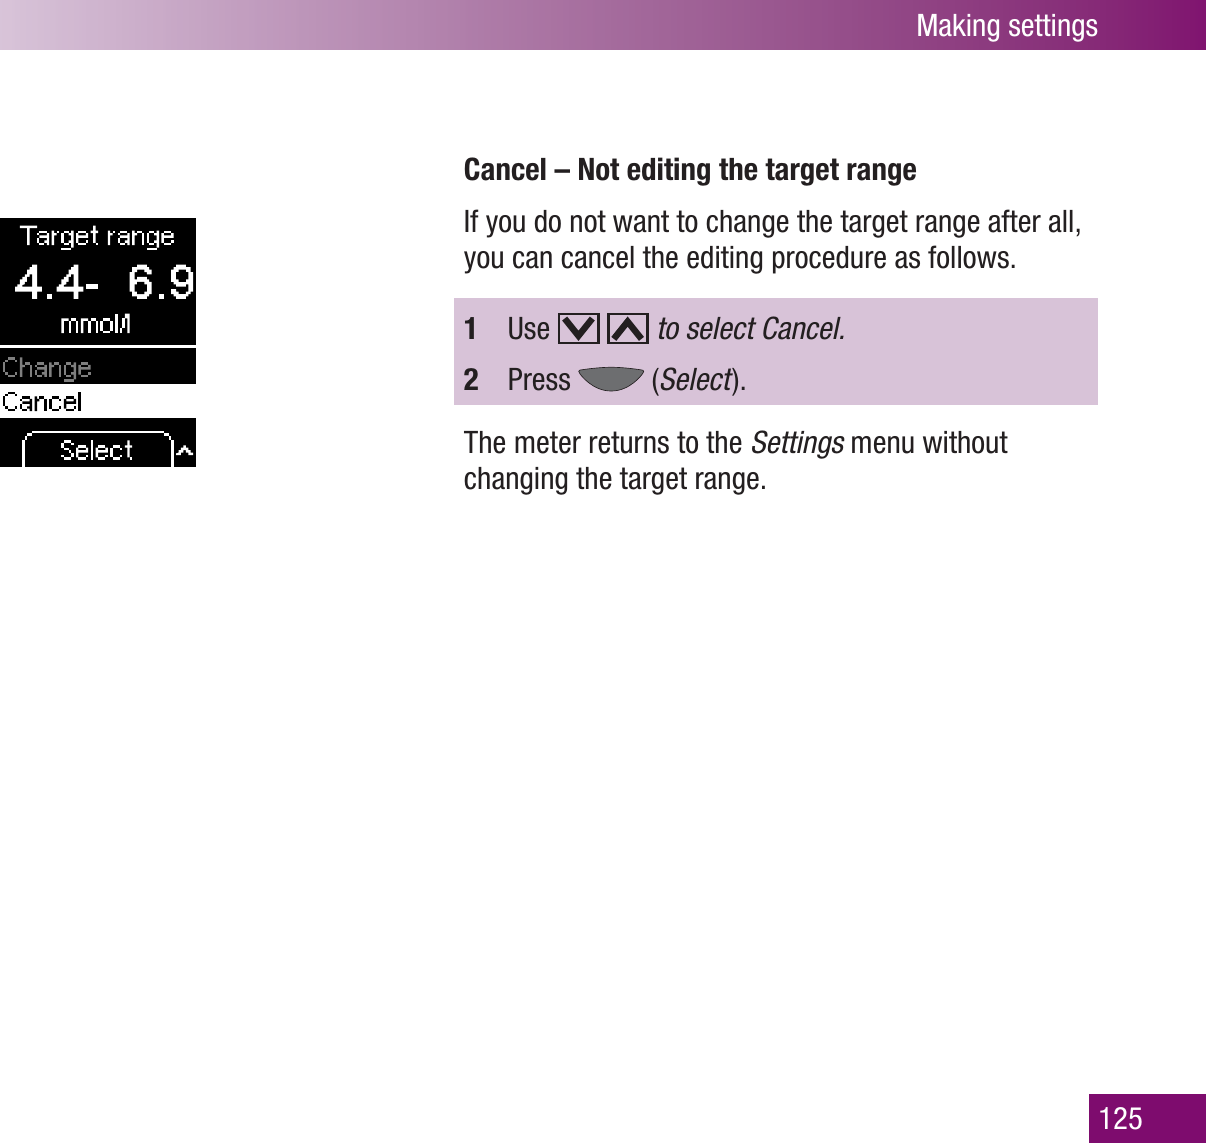
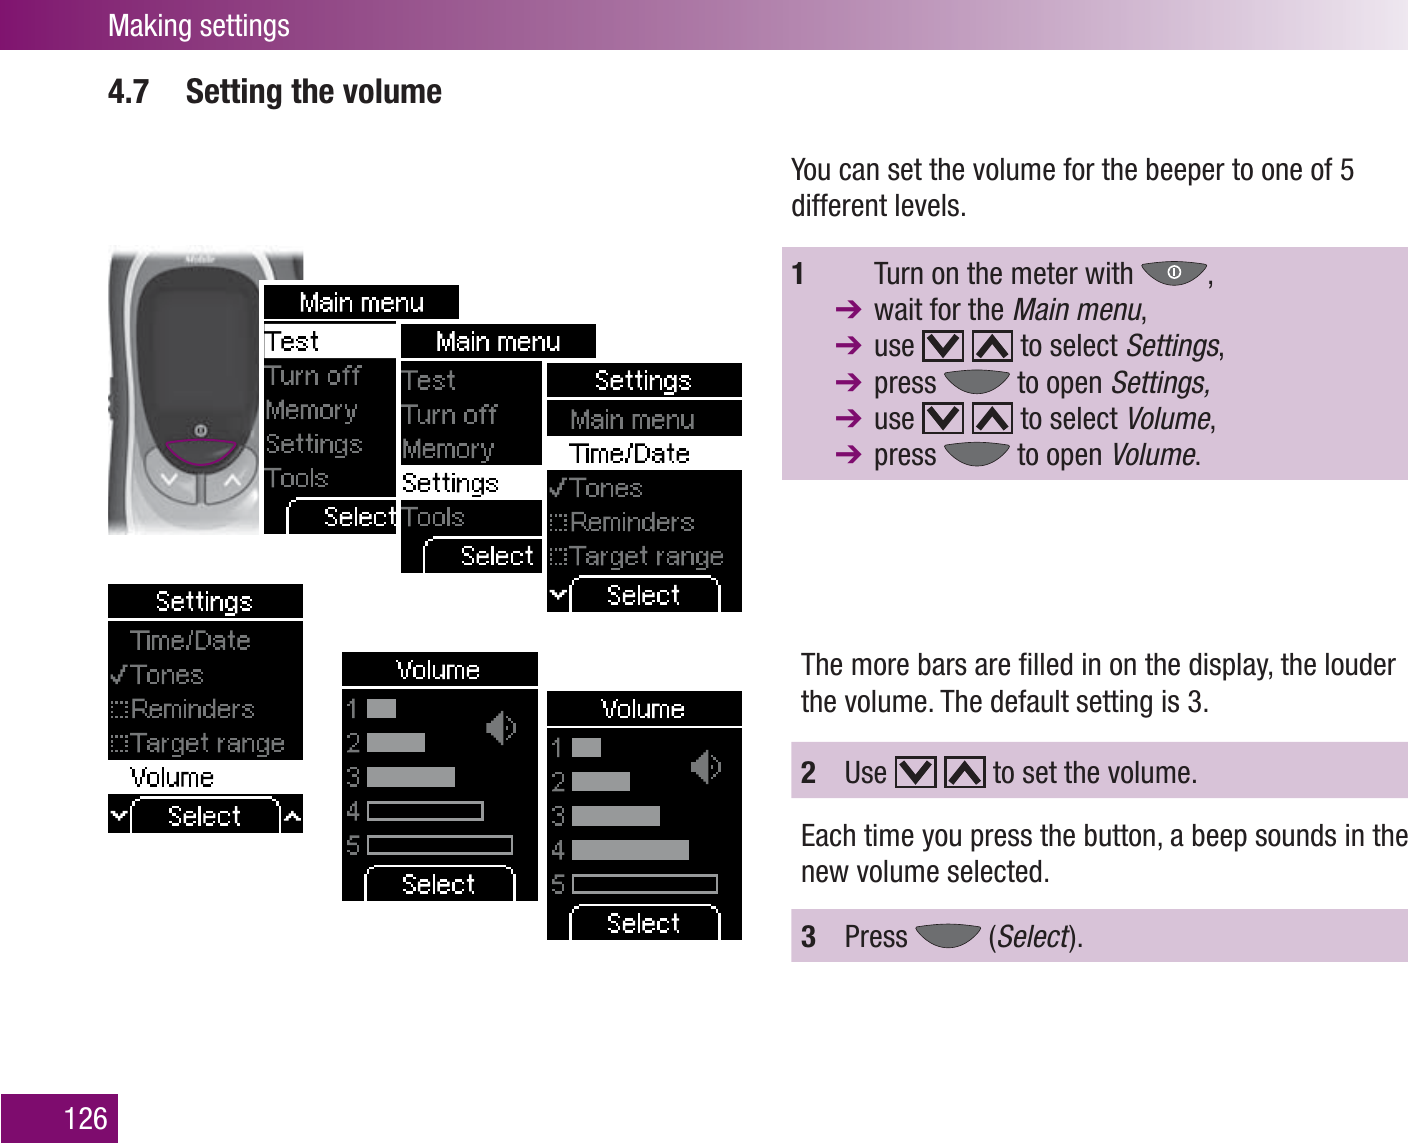
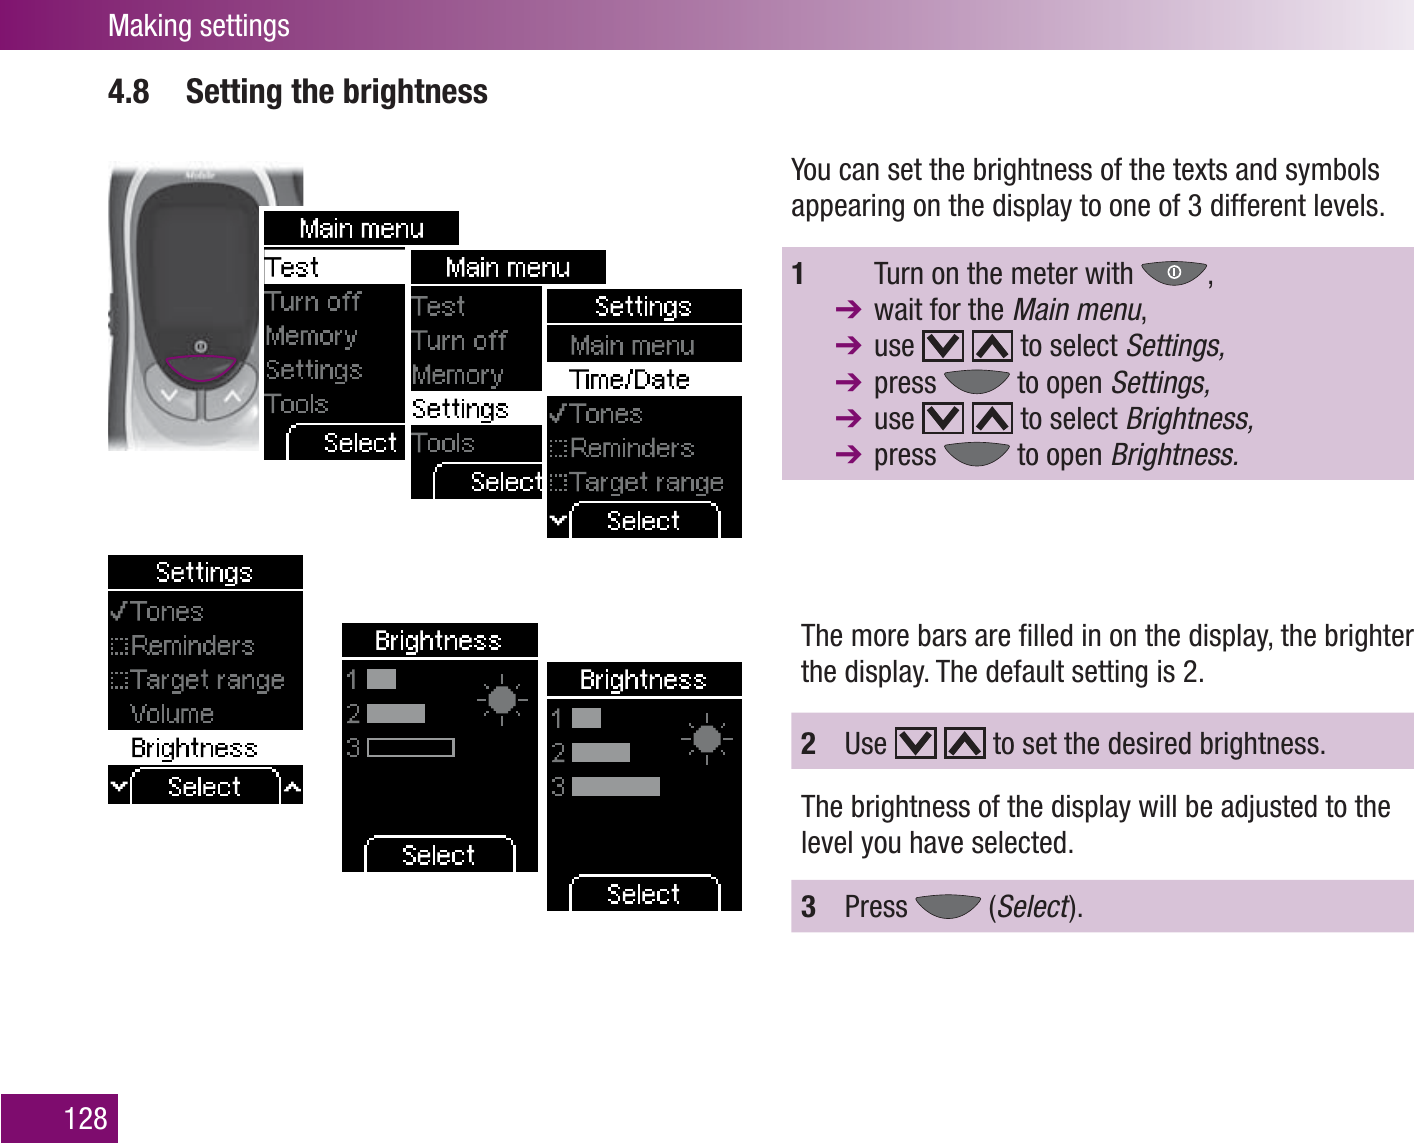
Roche Diagnostics GmbH Diabetes Care Blood Glucose Meter with RFID man 0xxxxxxx001 01 EnCan indd
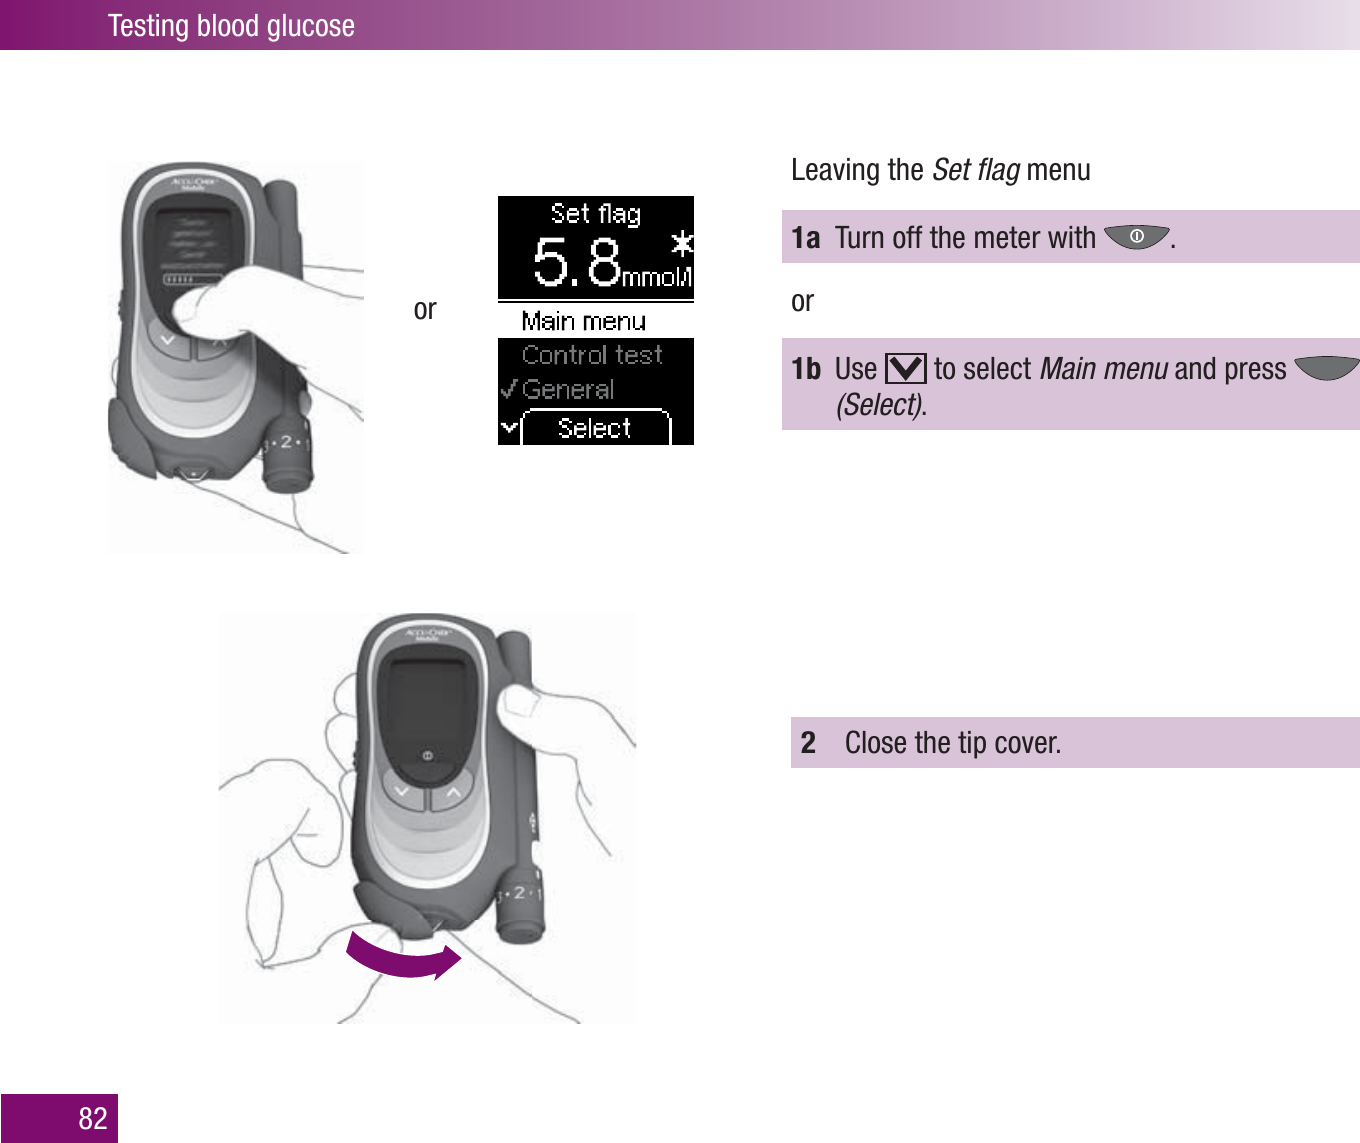
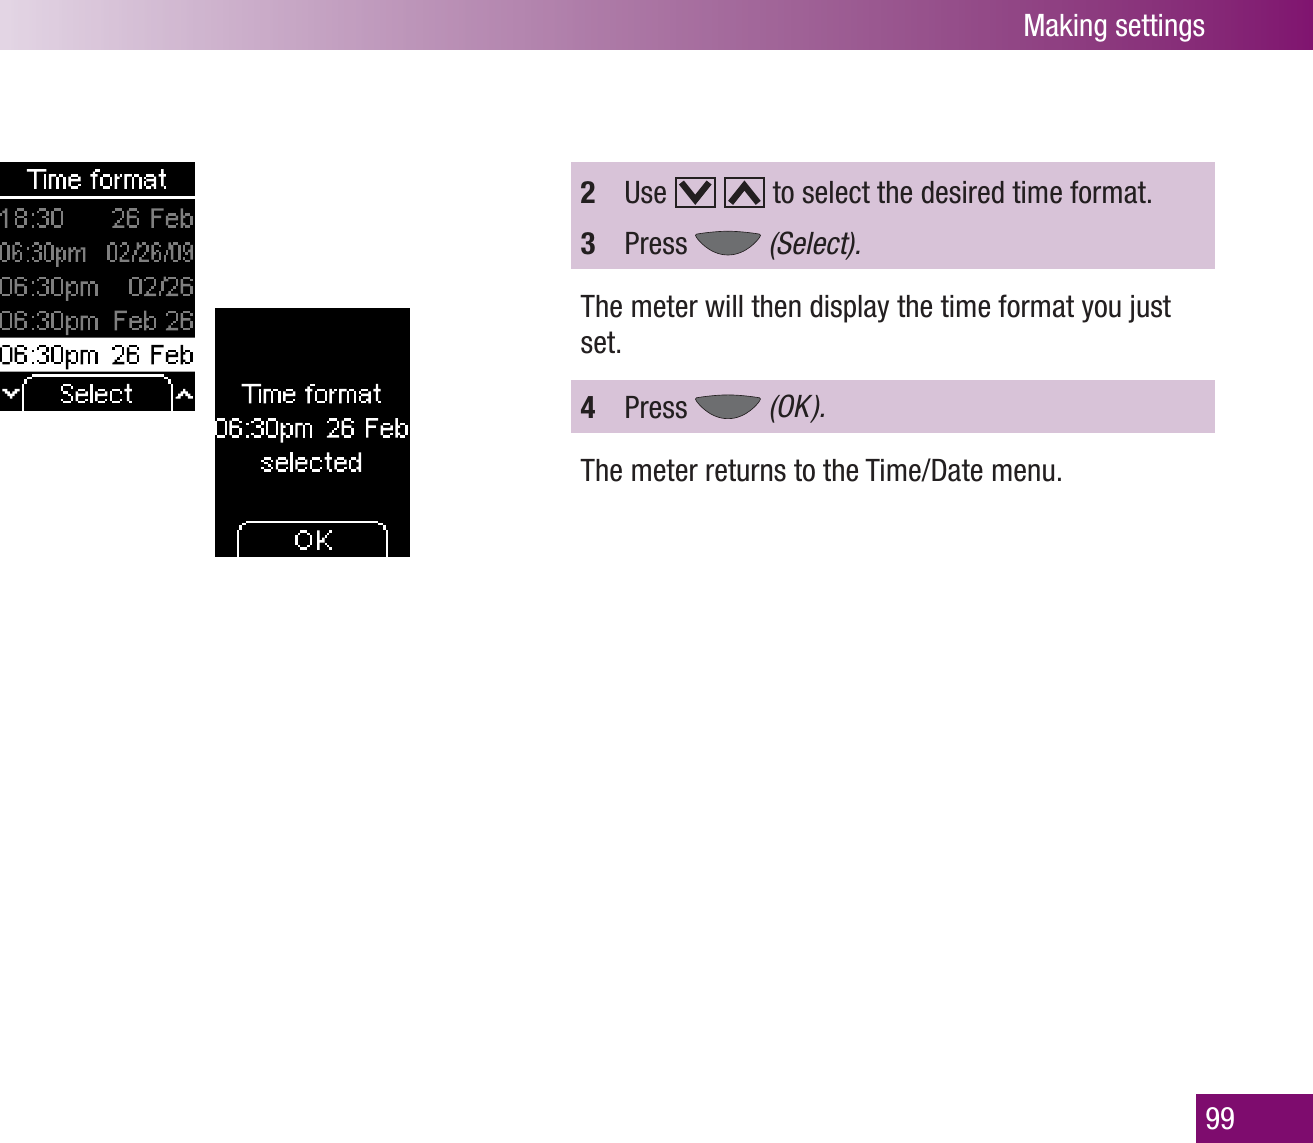
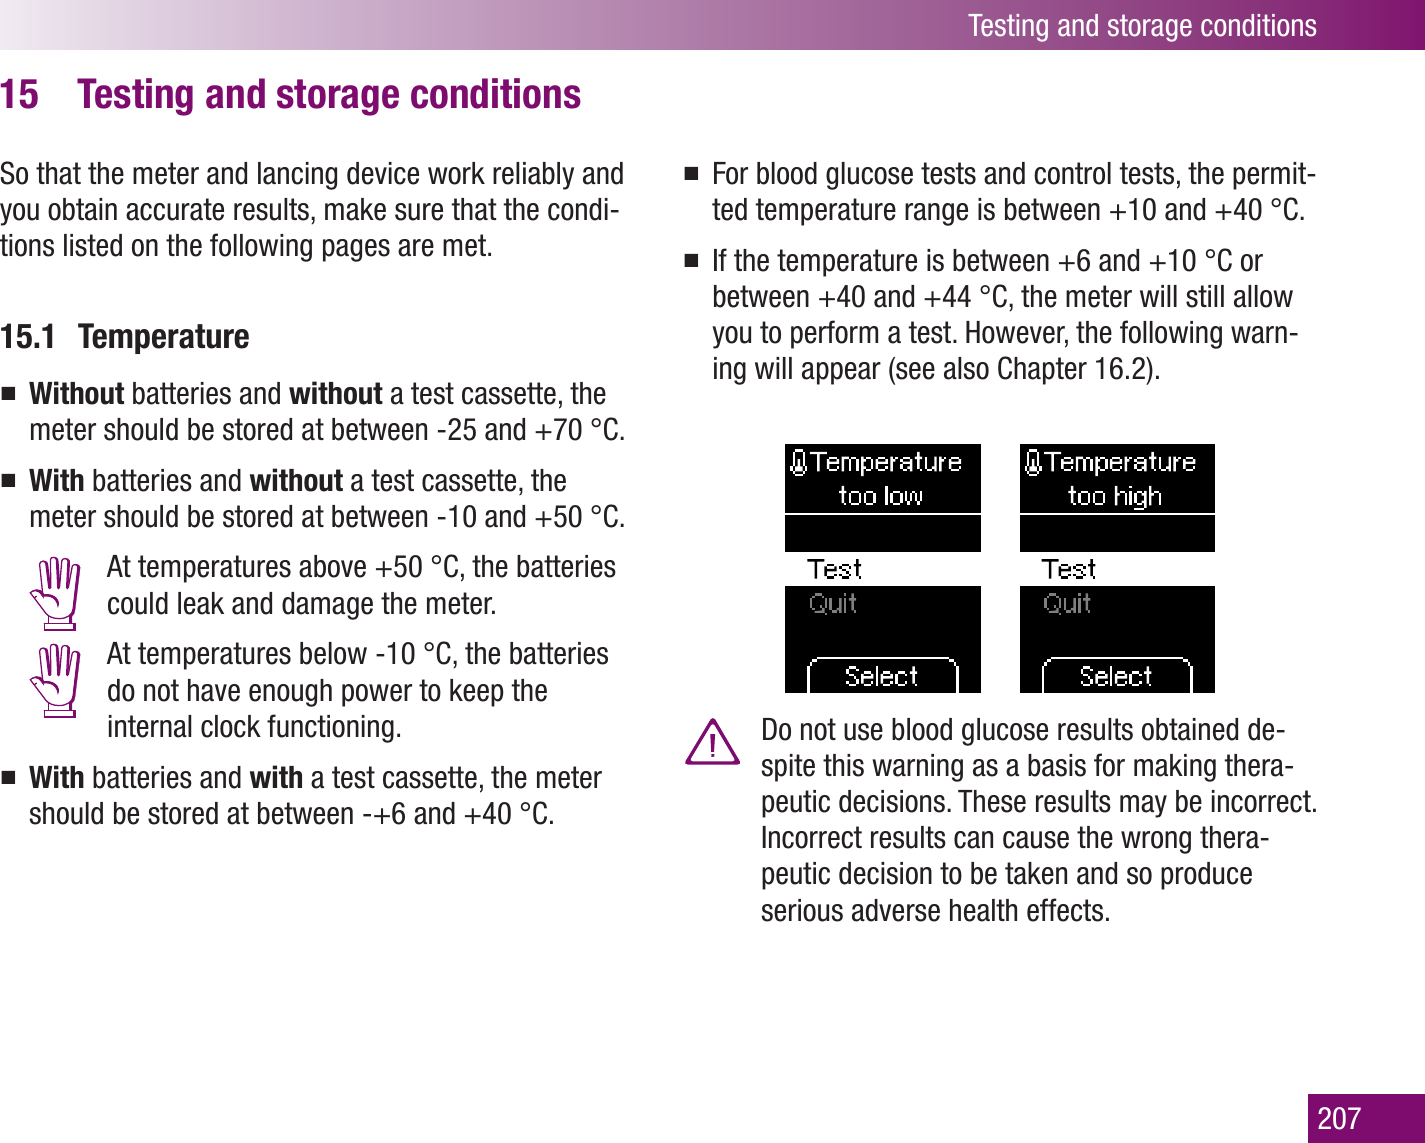
UserManual.wiki
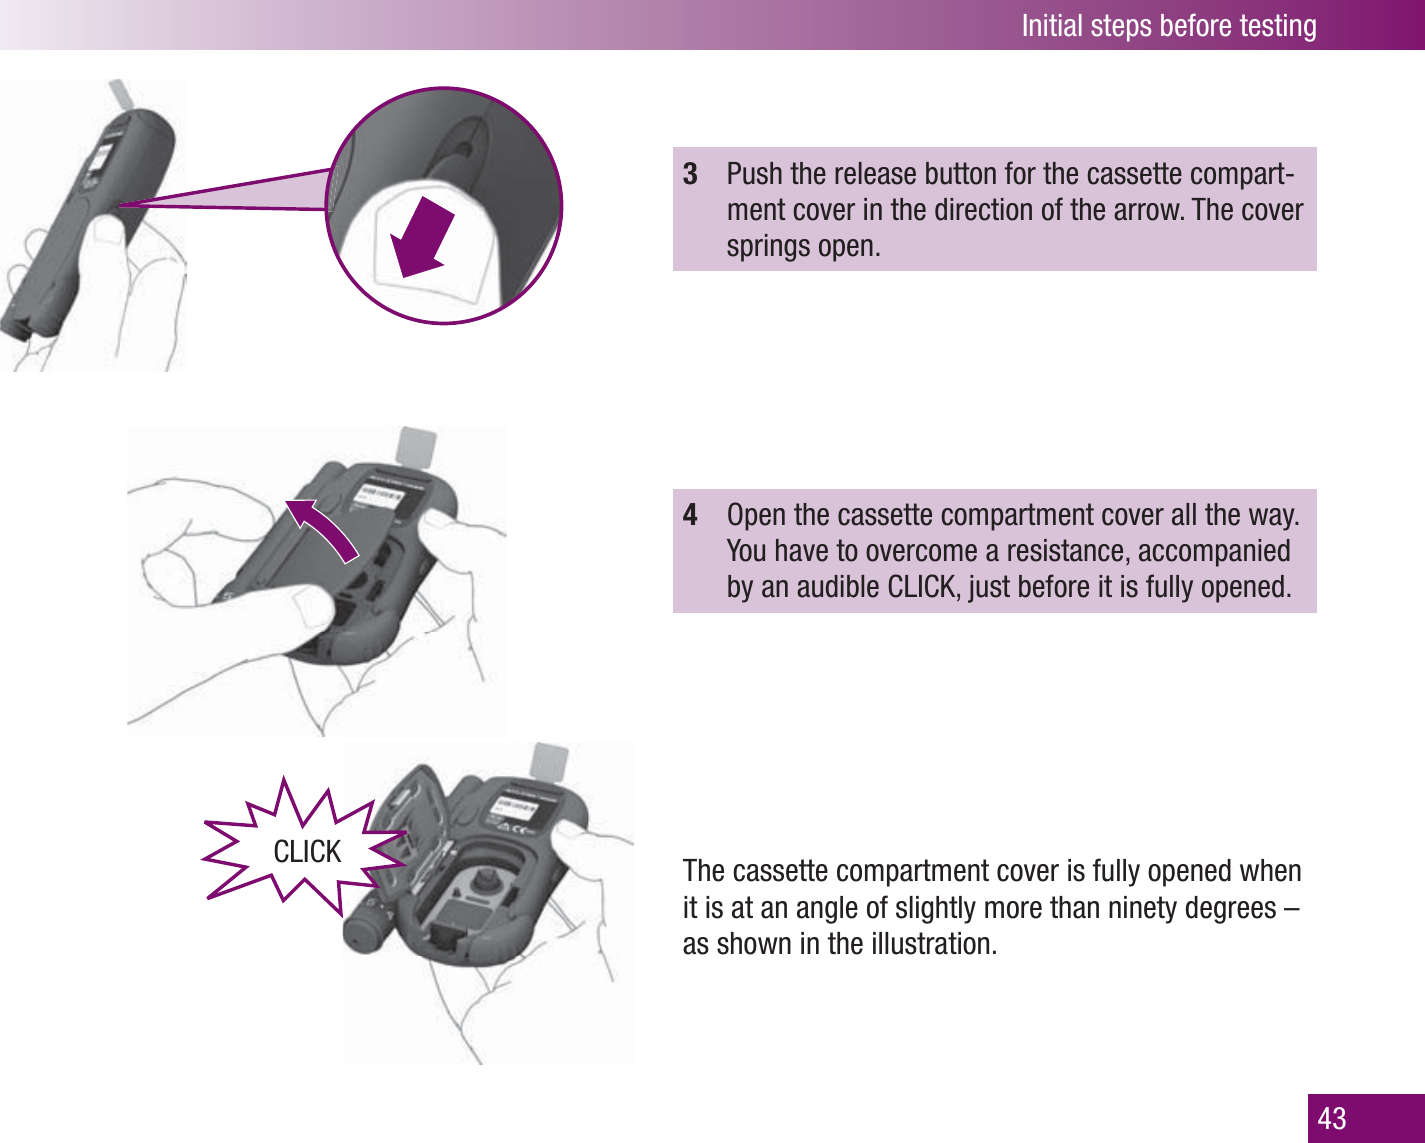
>
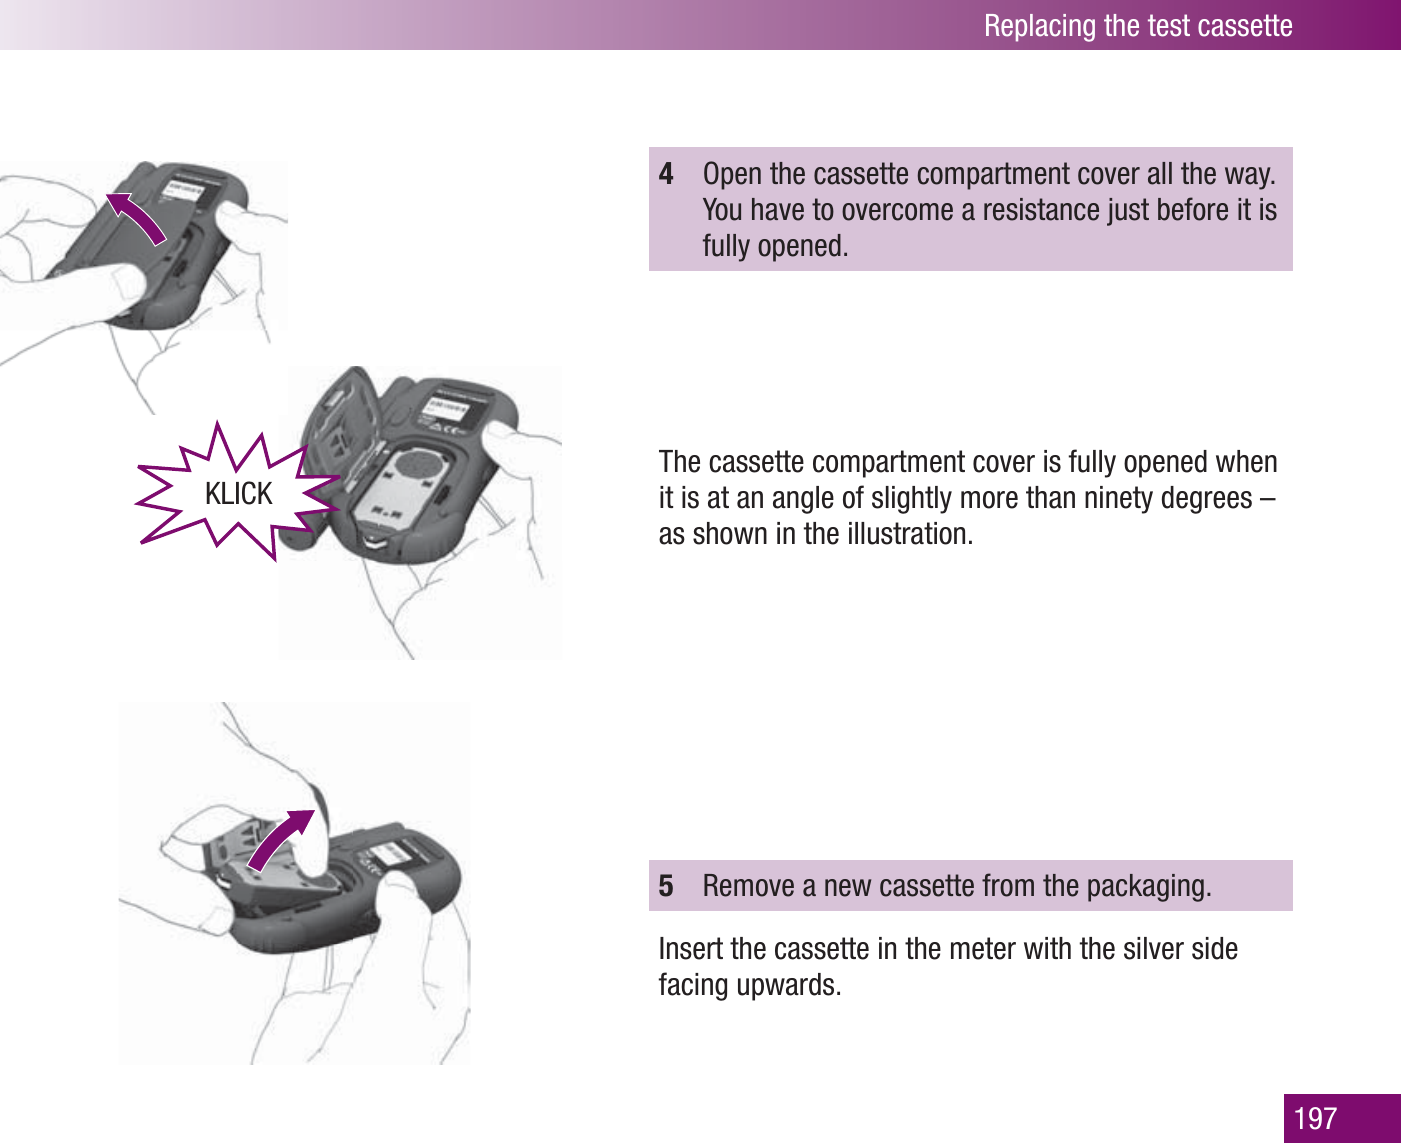
Roche Diagnostics Diabetes Care
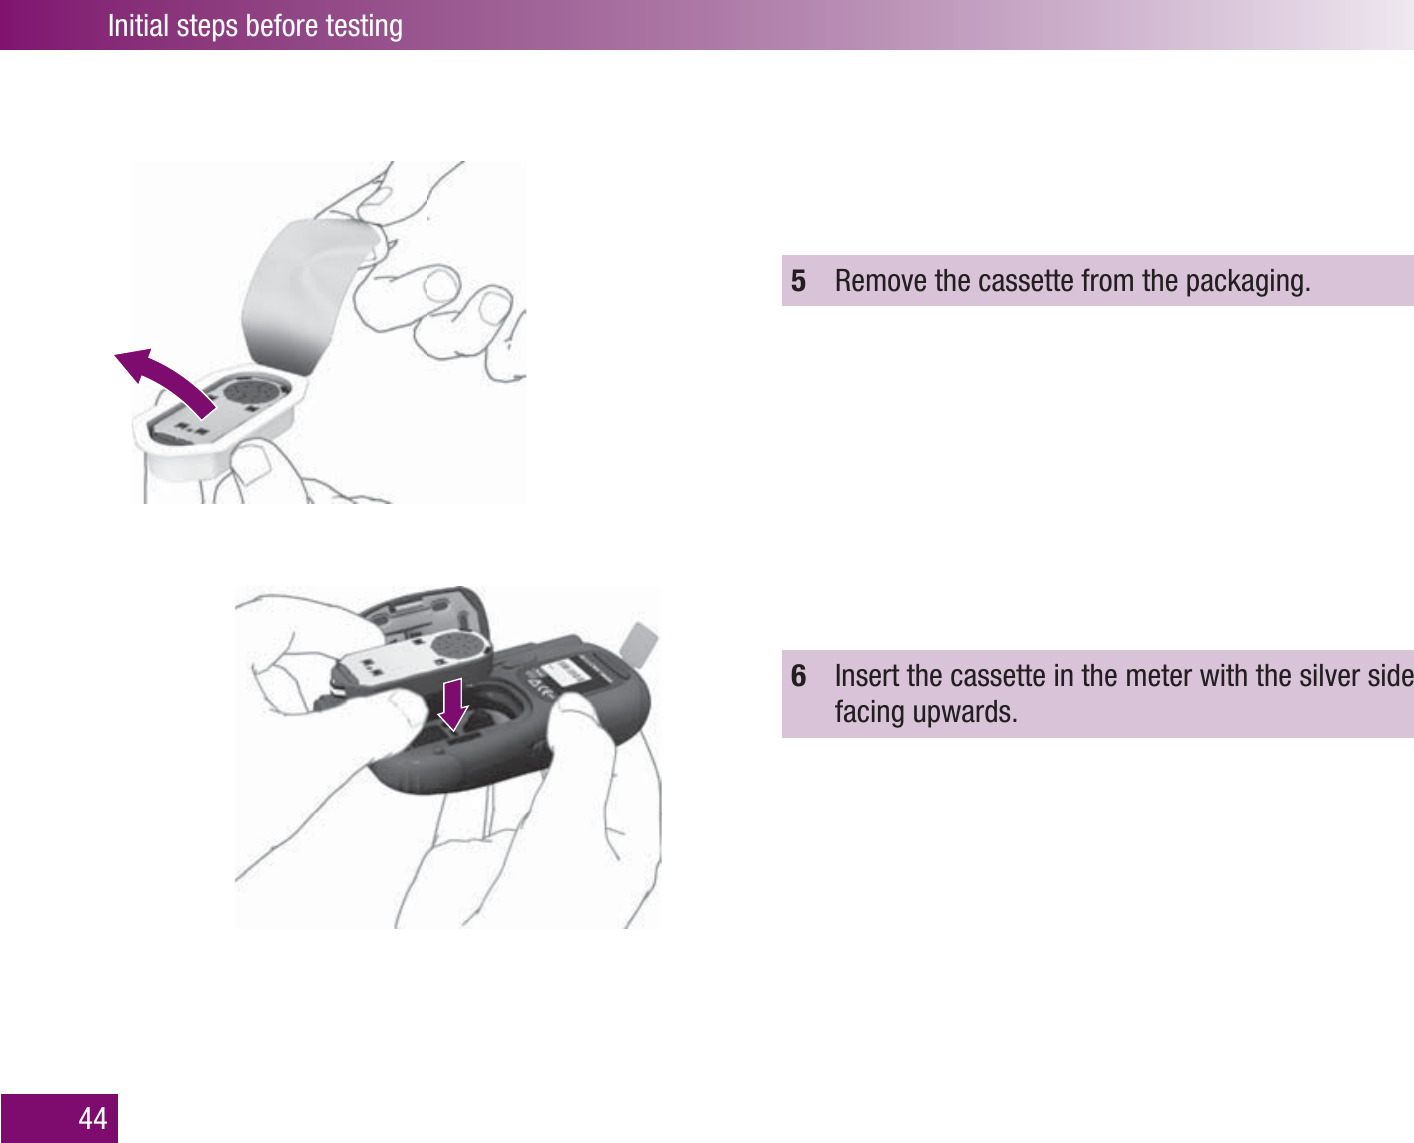
>
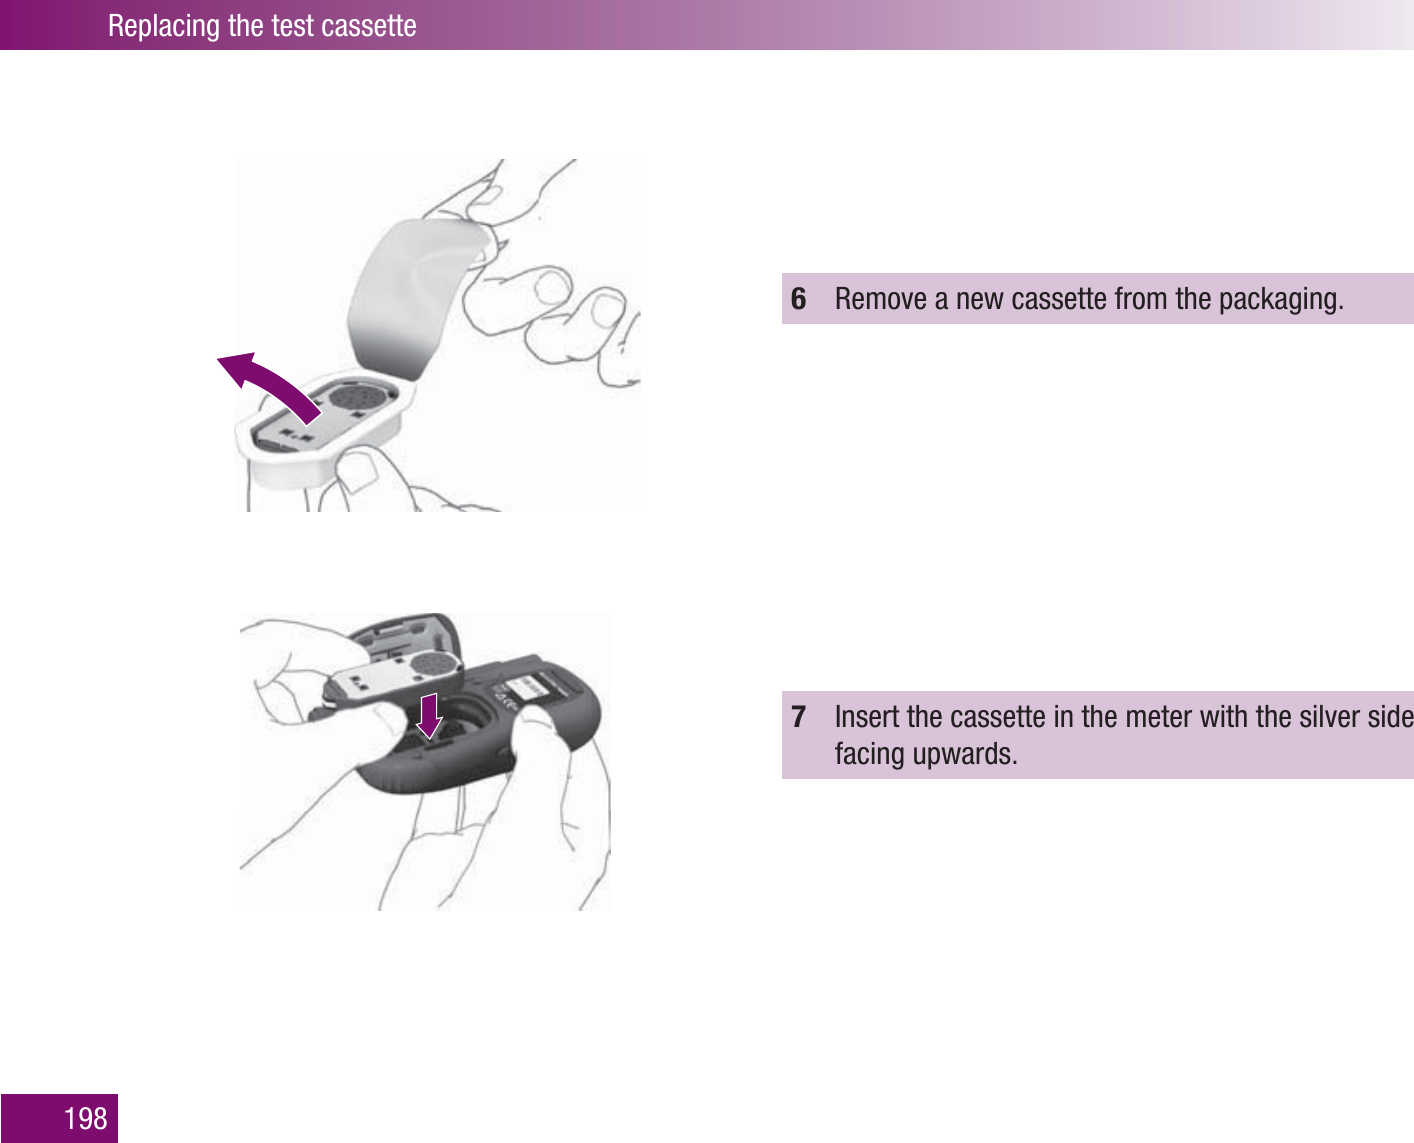
U8 User Manual
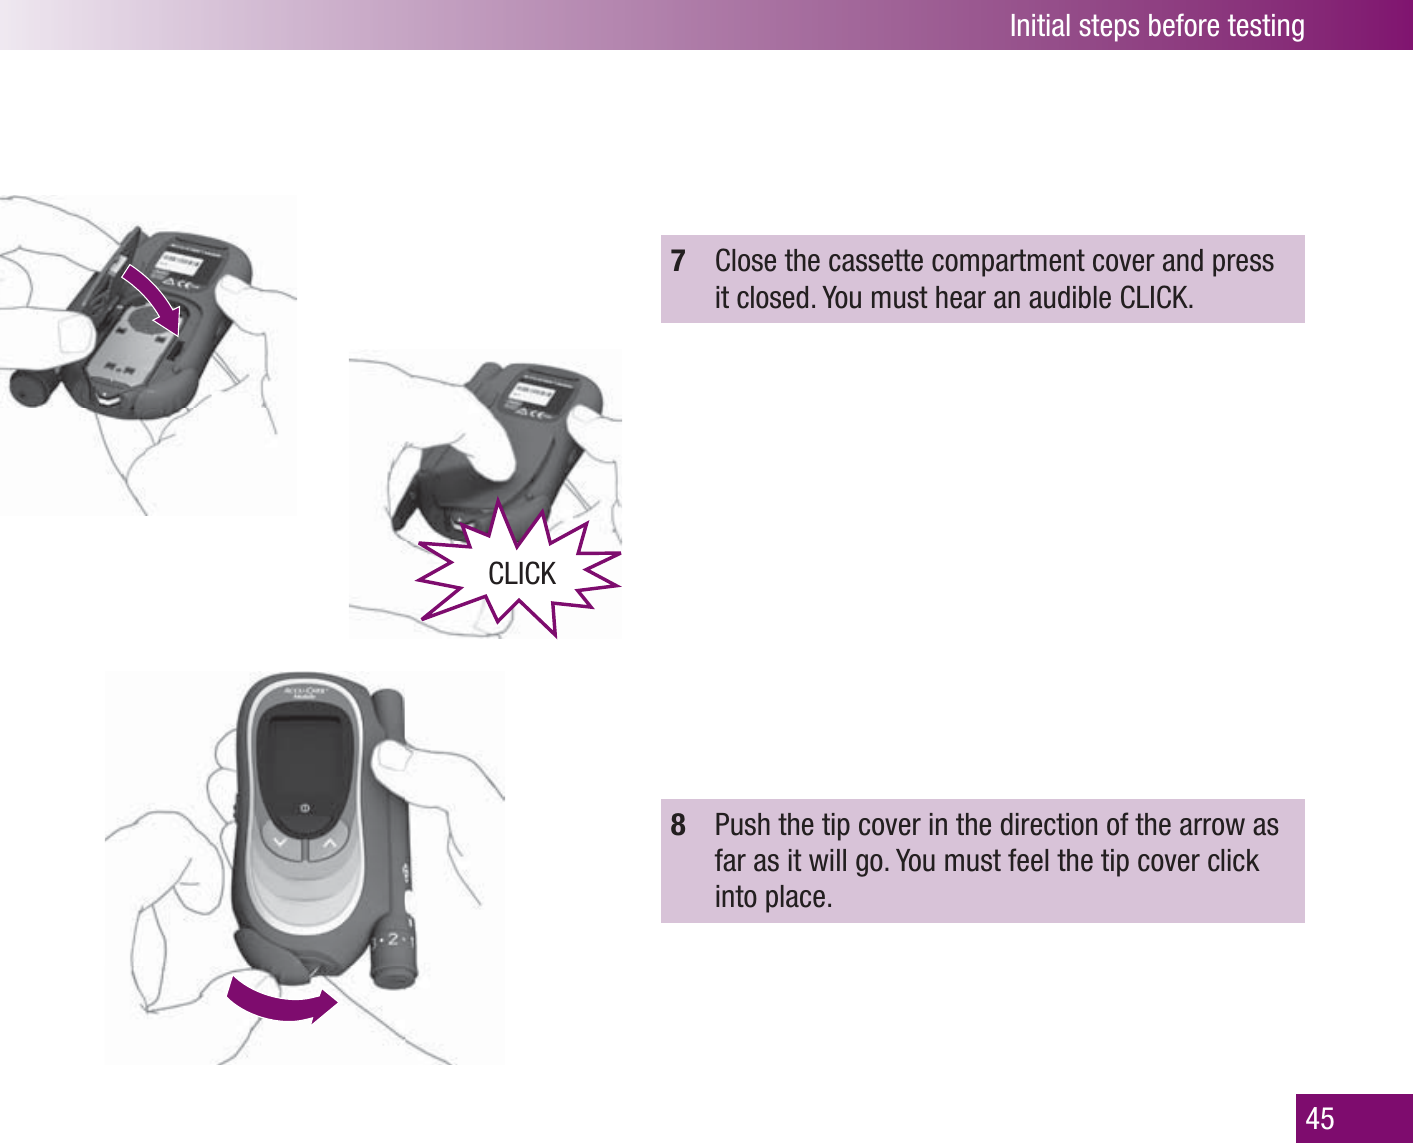
User Manual
Navigation menu
Upload a User Manual
Namespaces
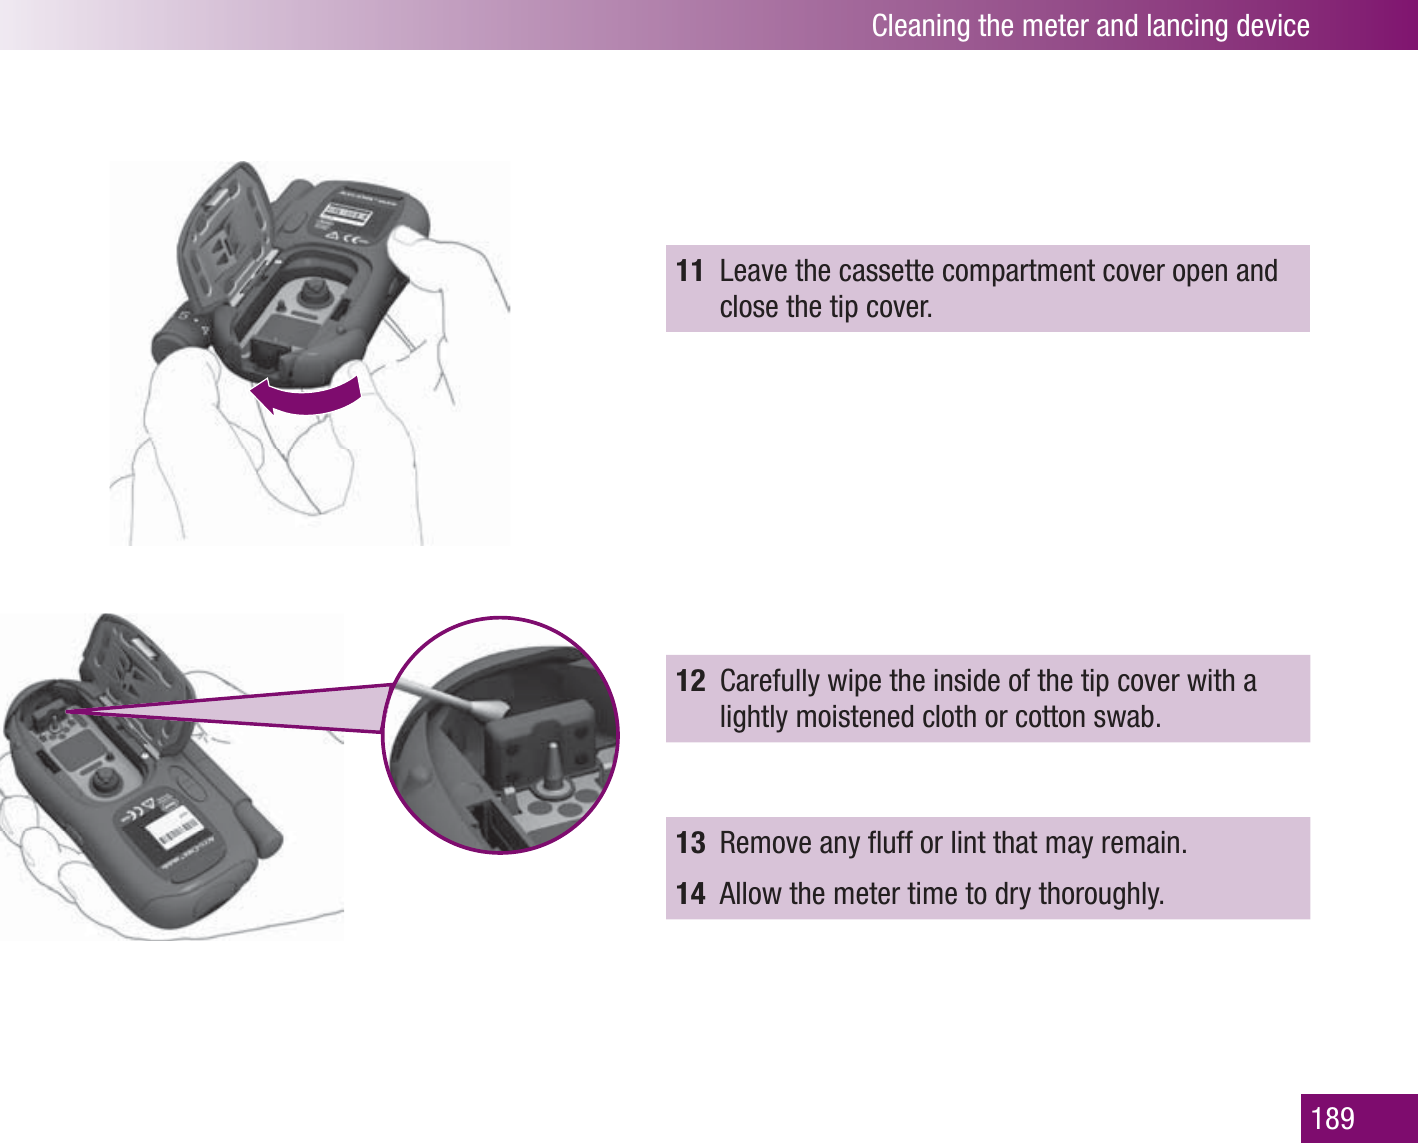
Wiki Guide
HTML
PDF
Info
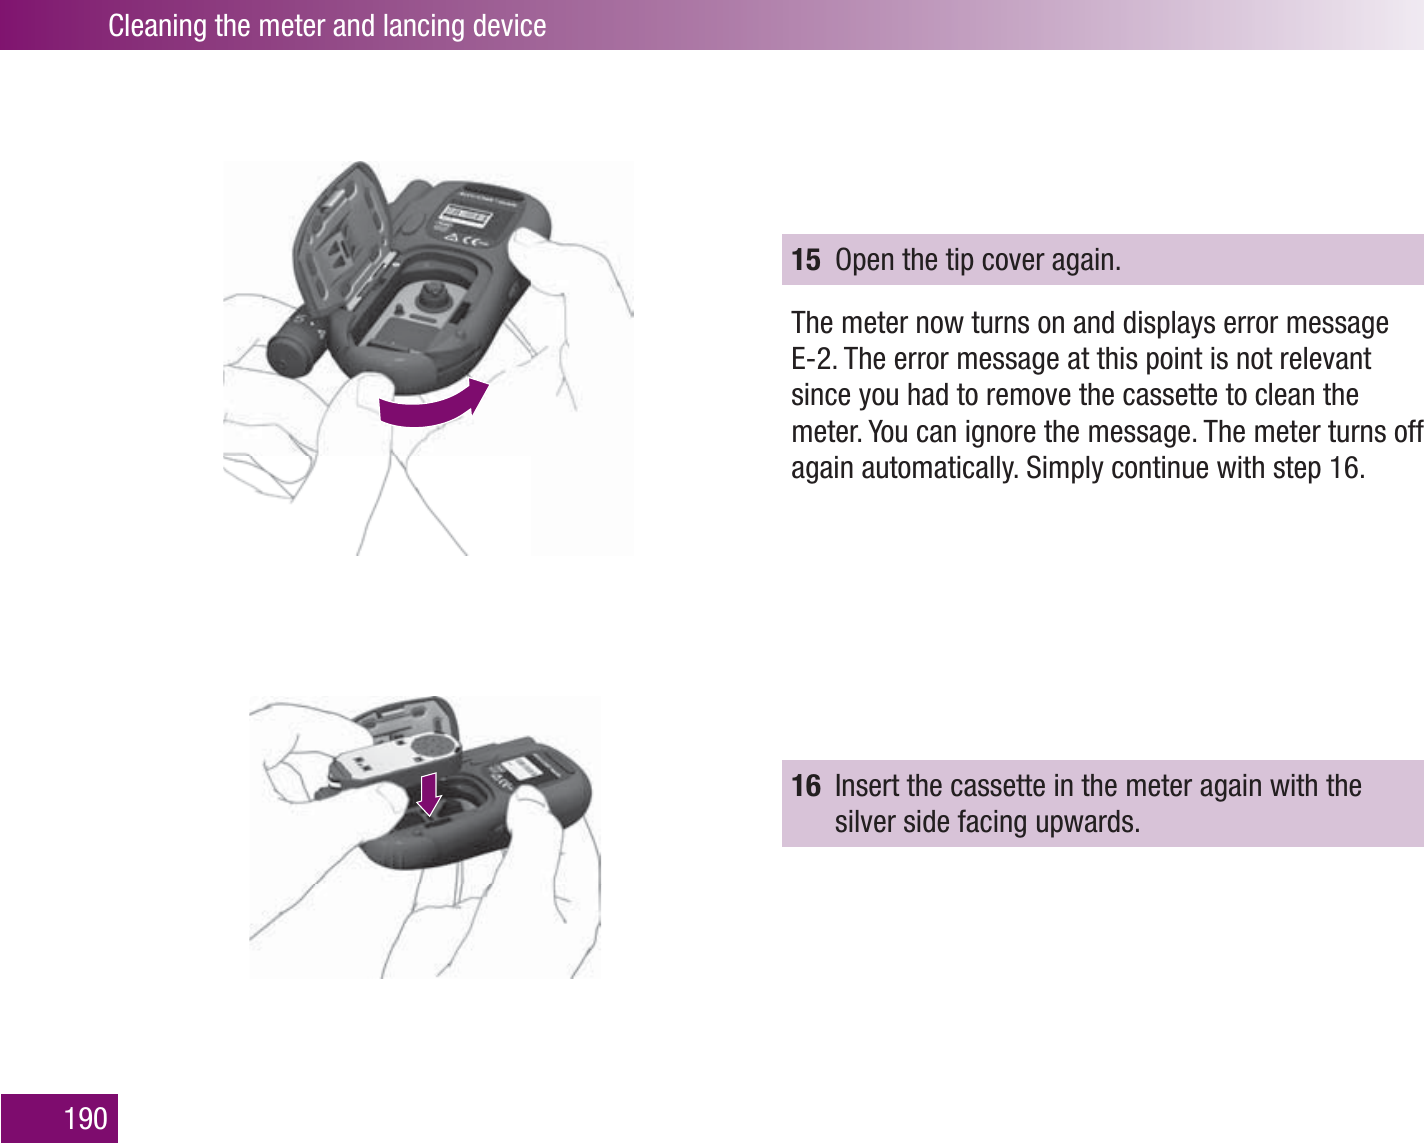
Views
User Manual
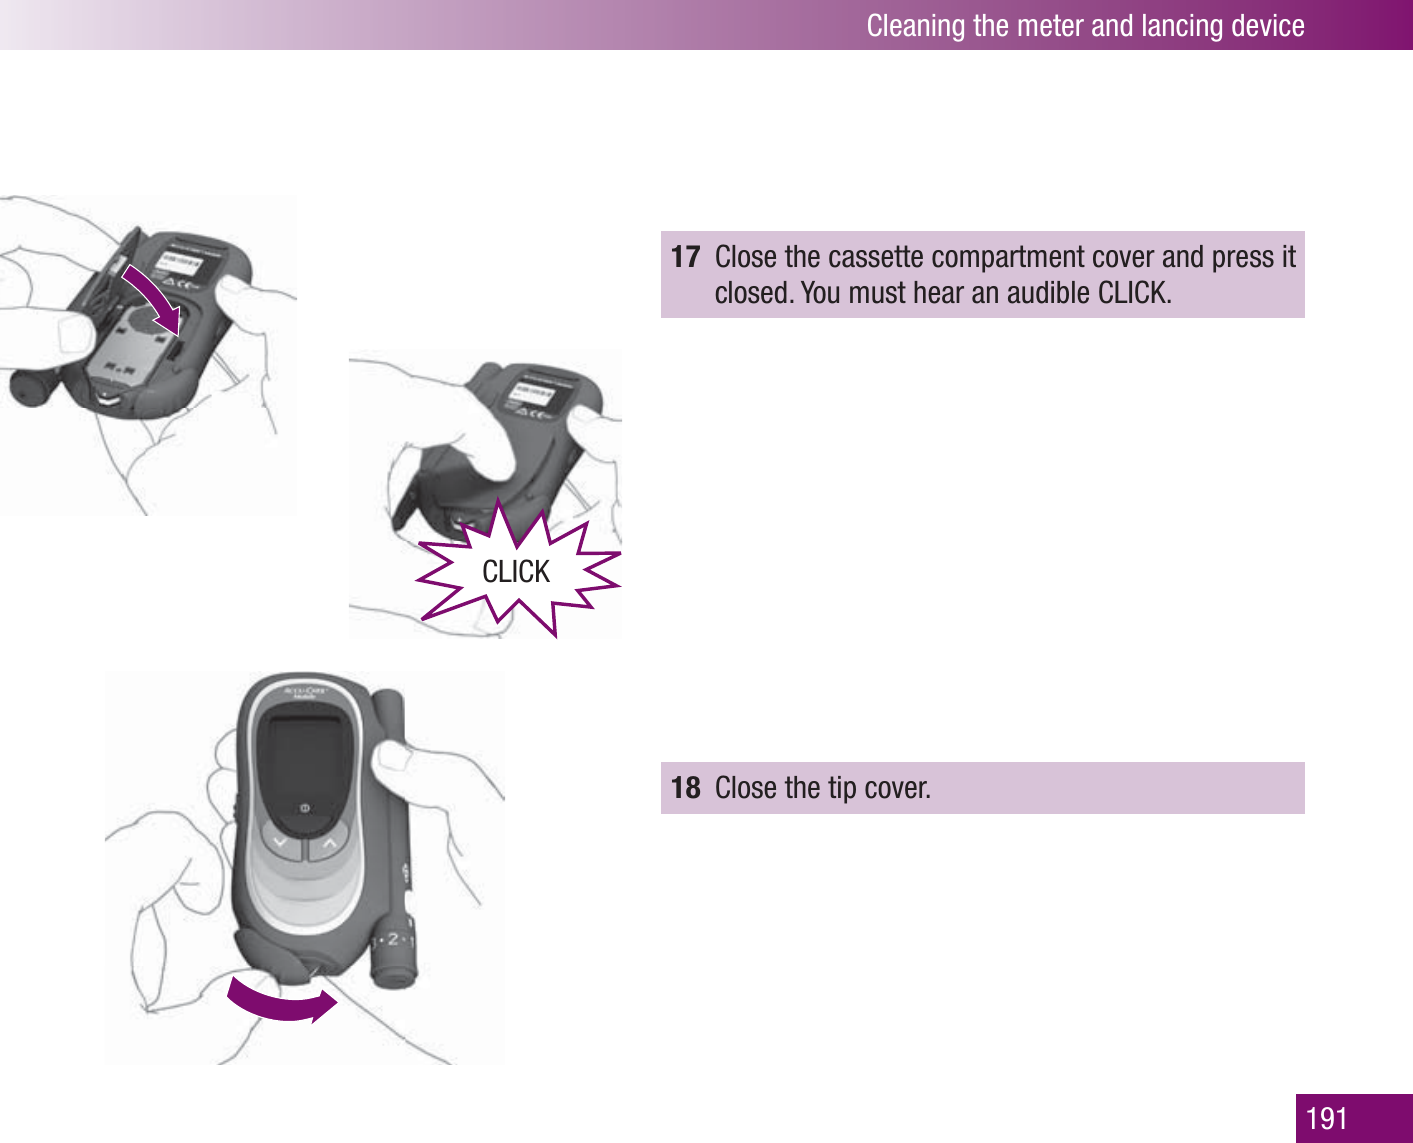
Discussion / Help
Navigation


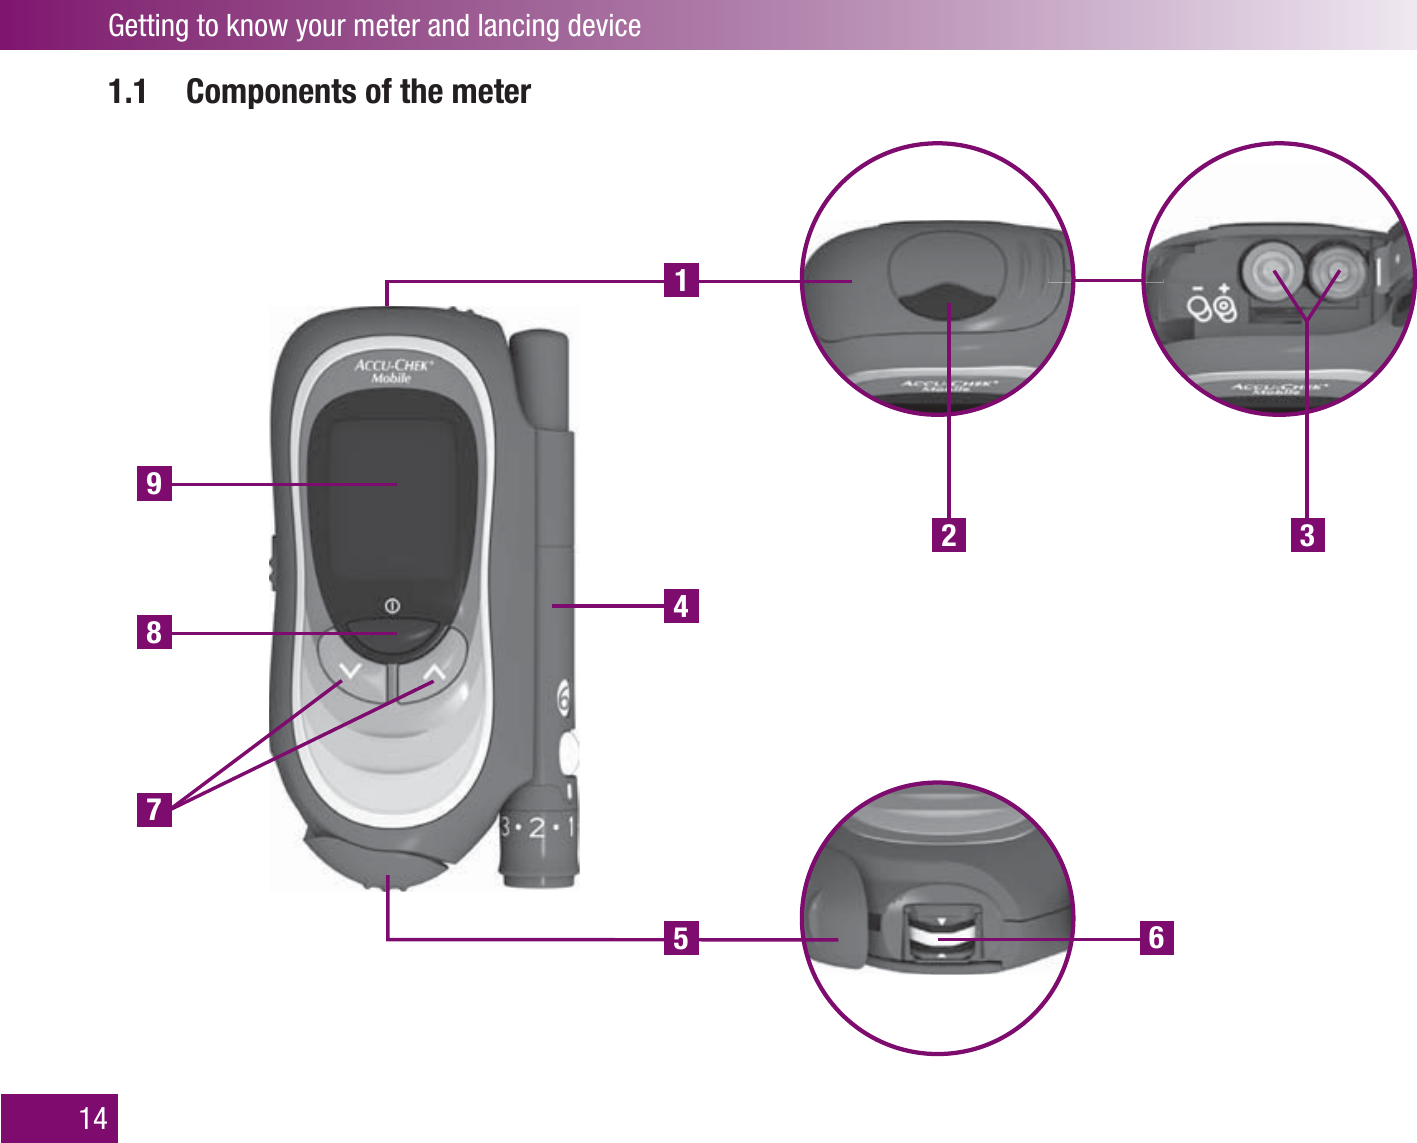
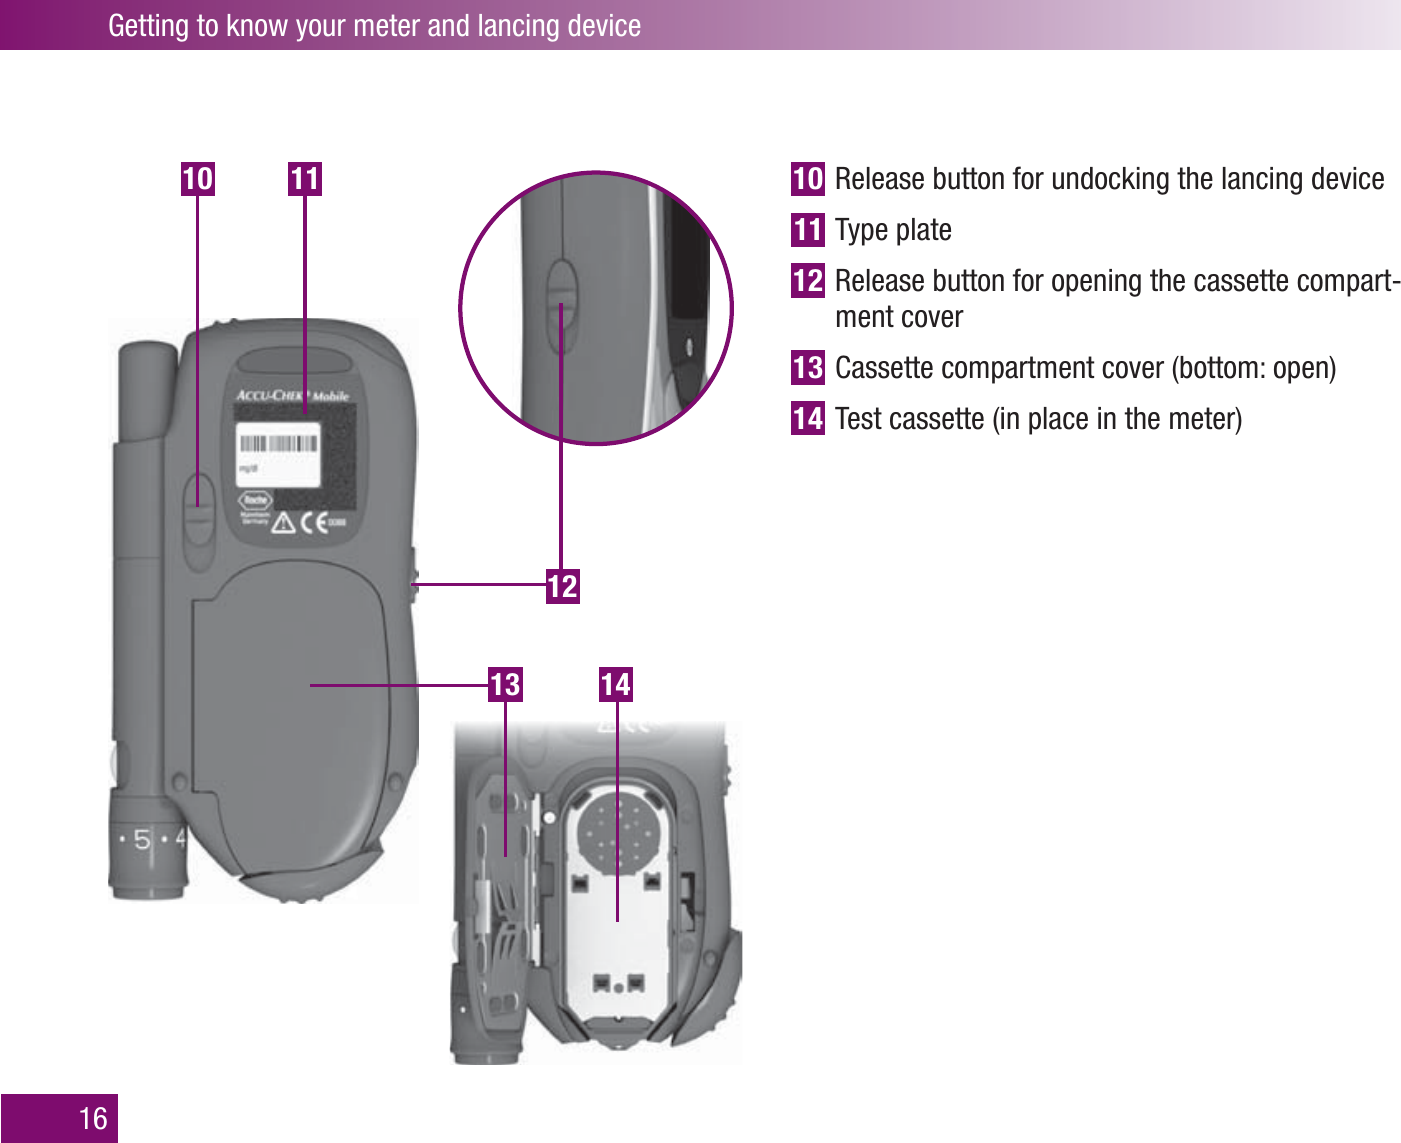
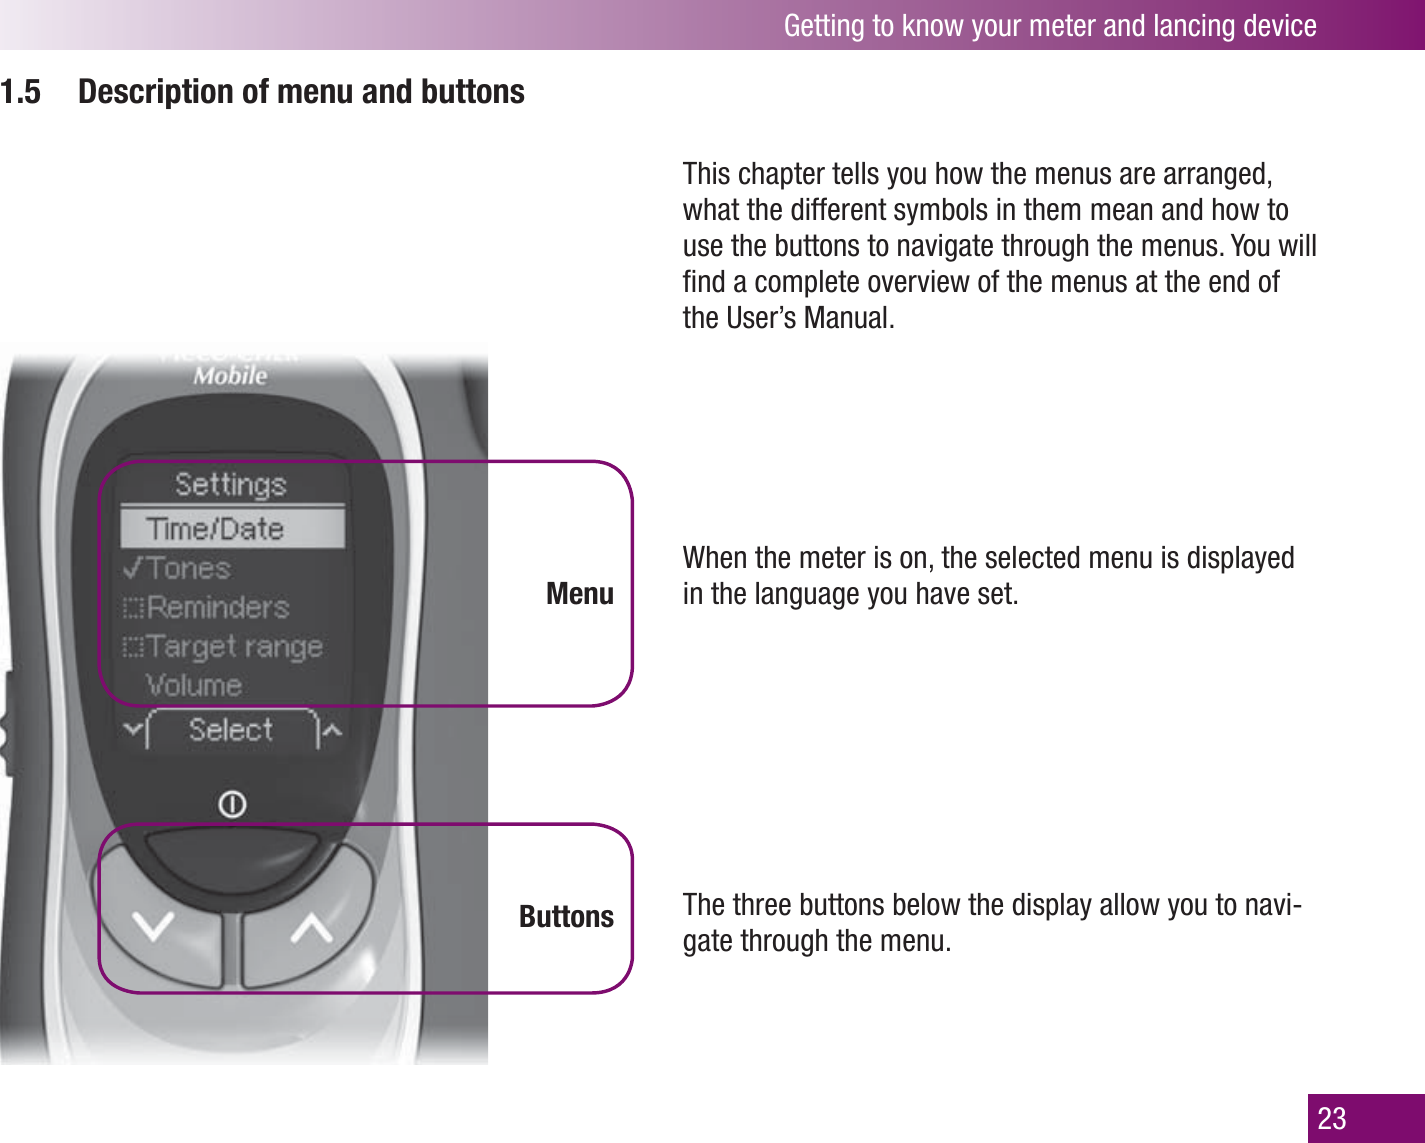
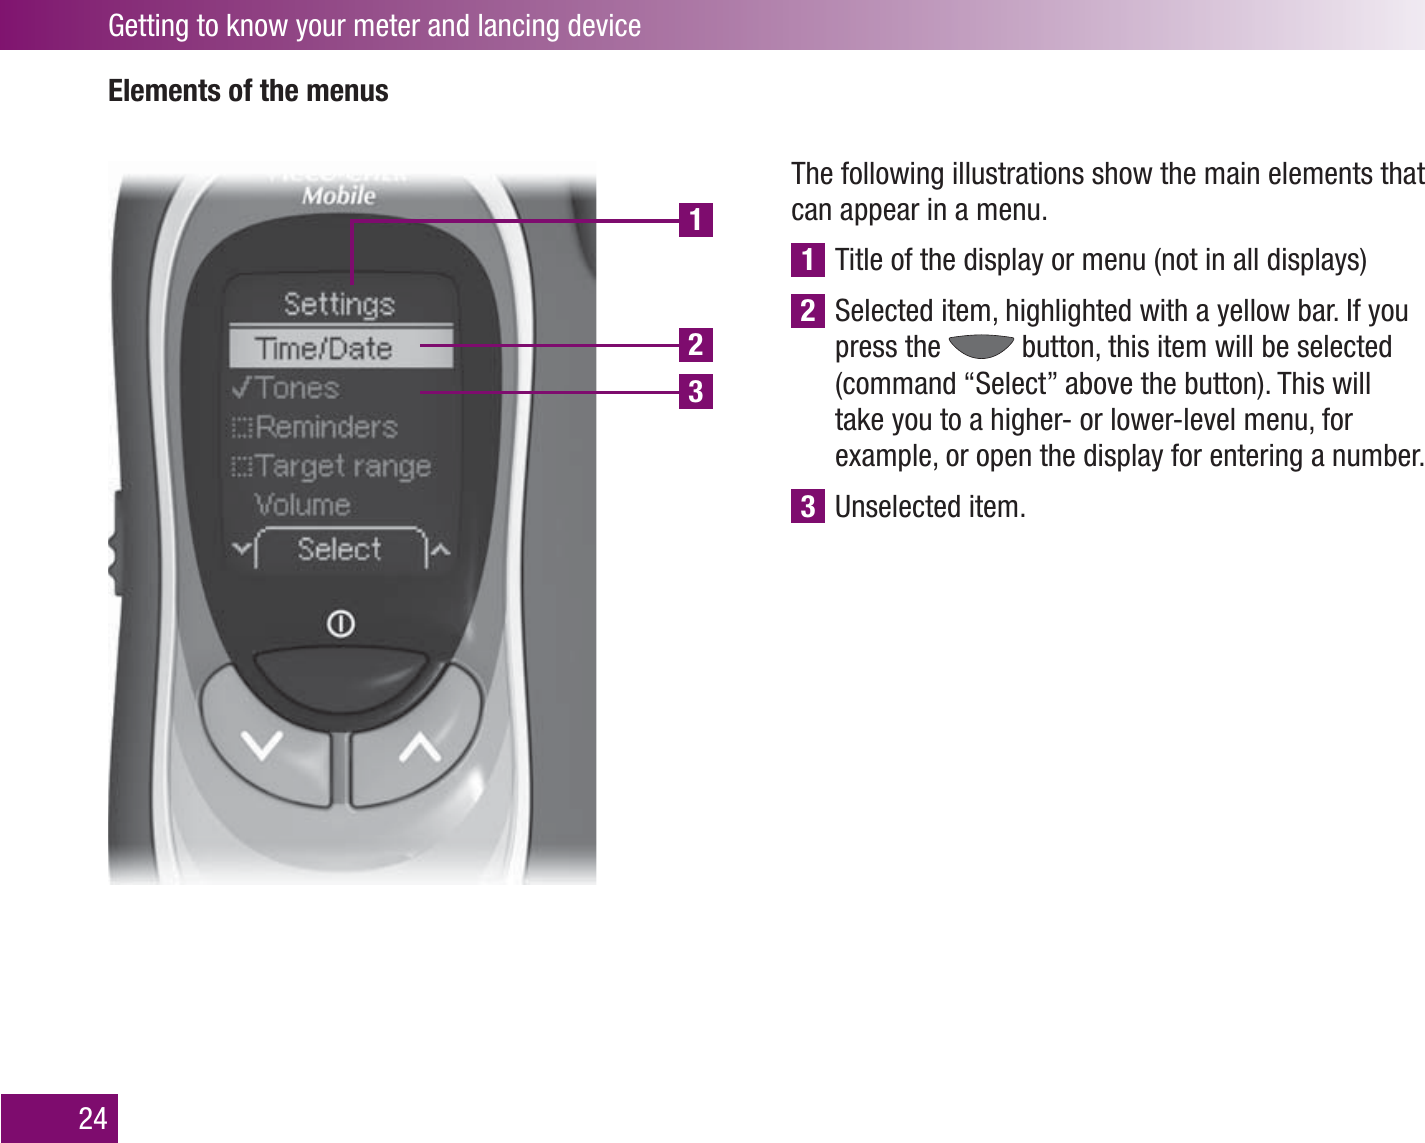
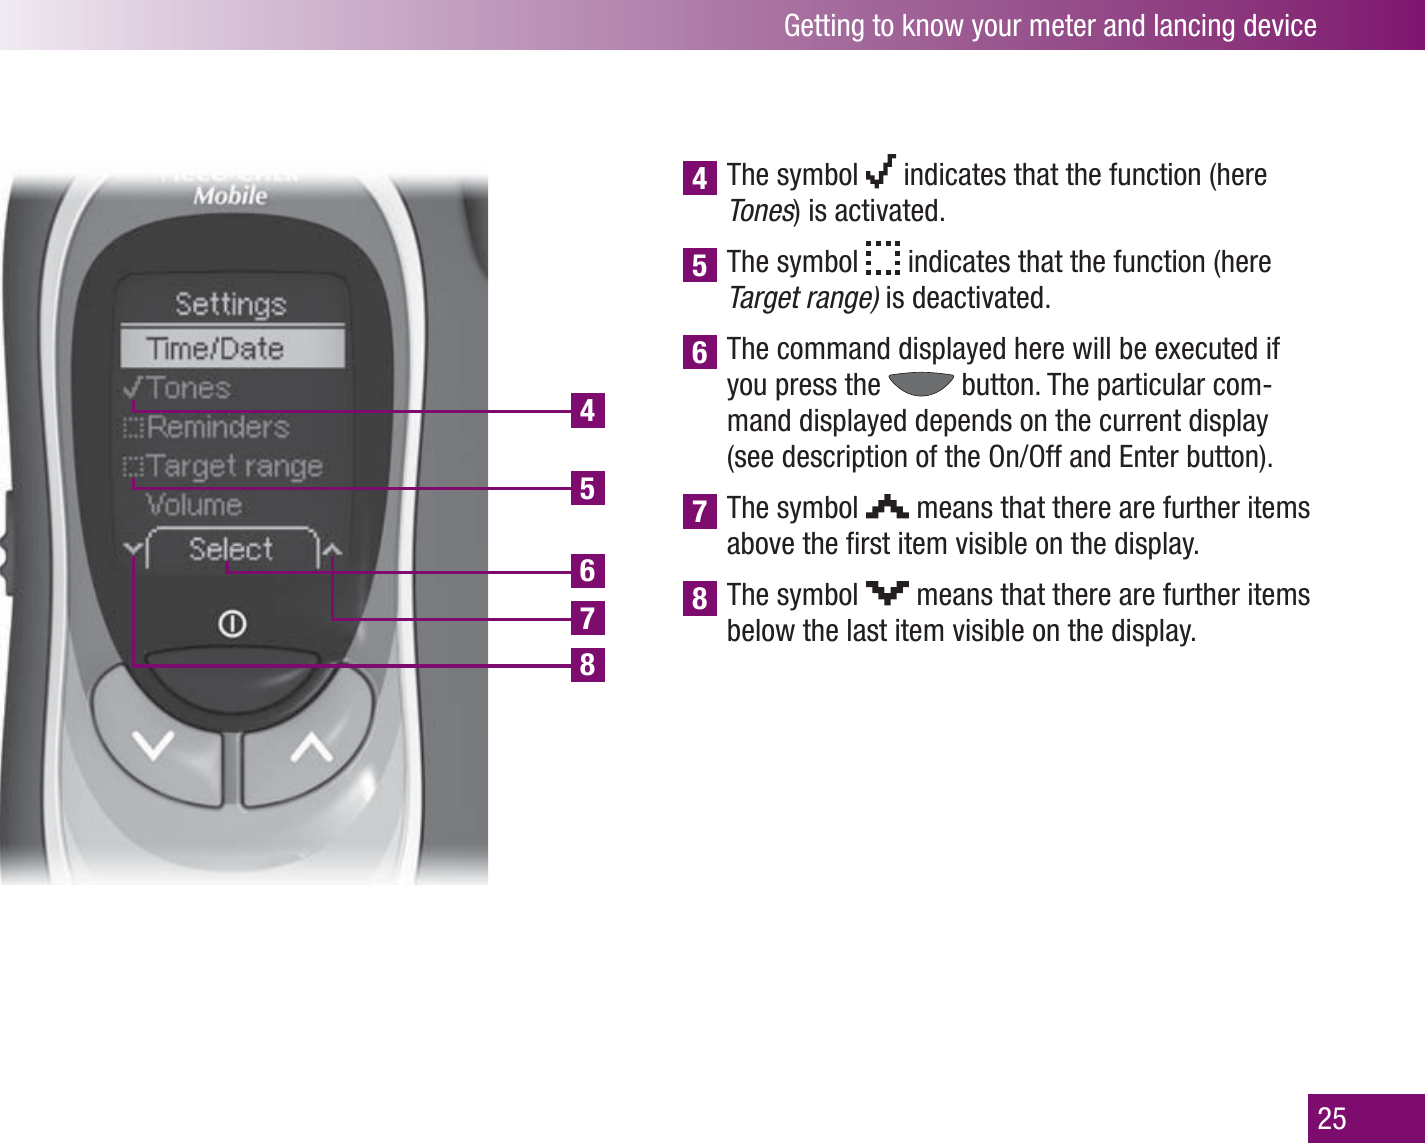
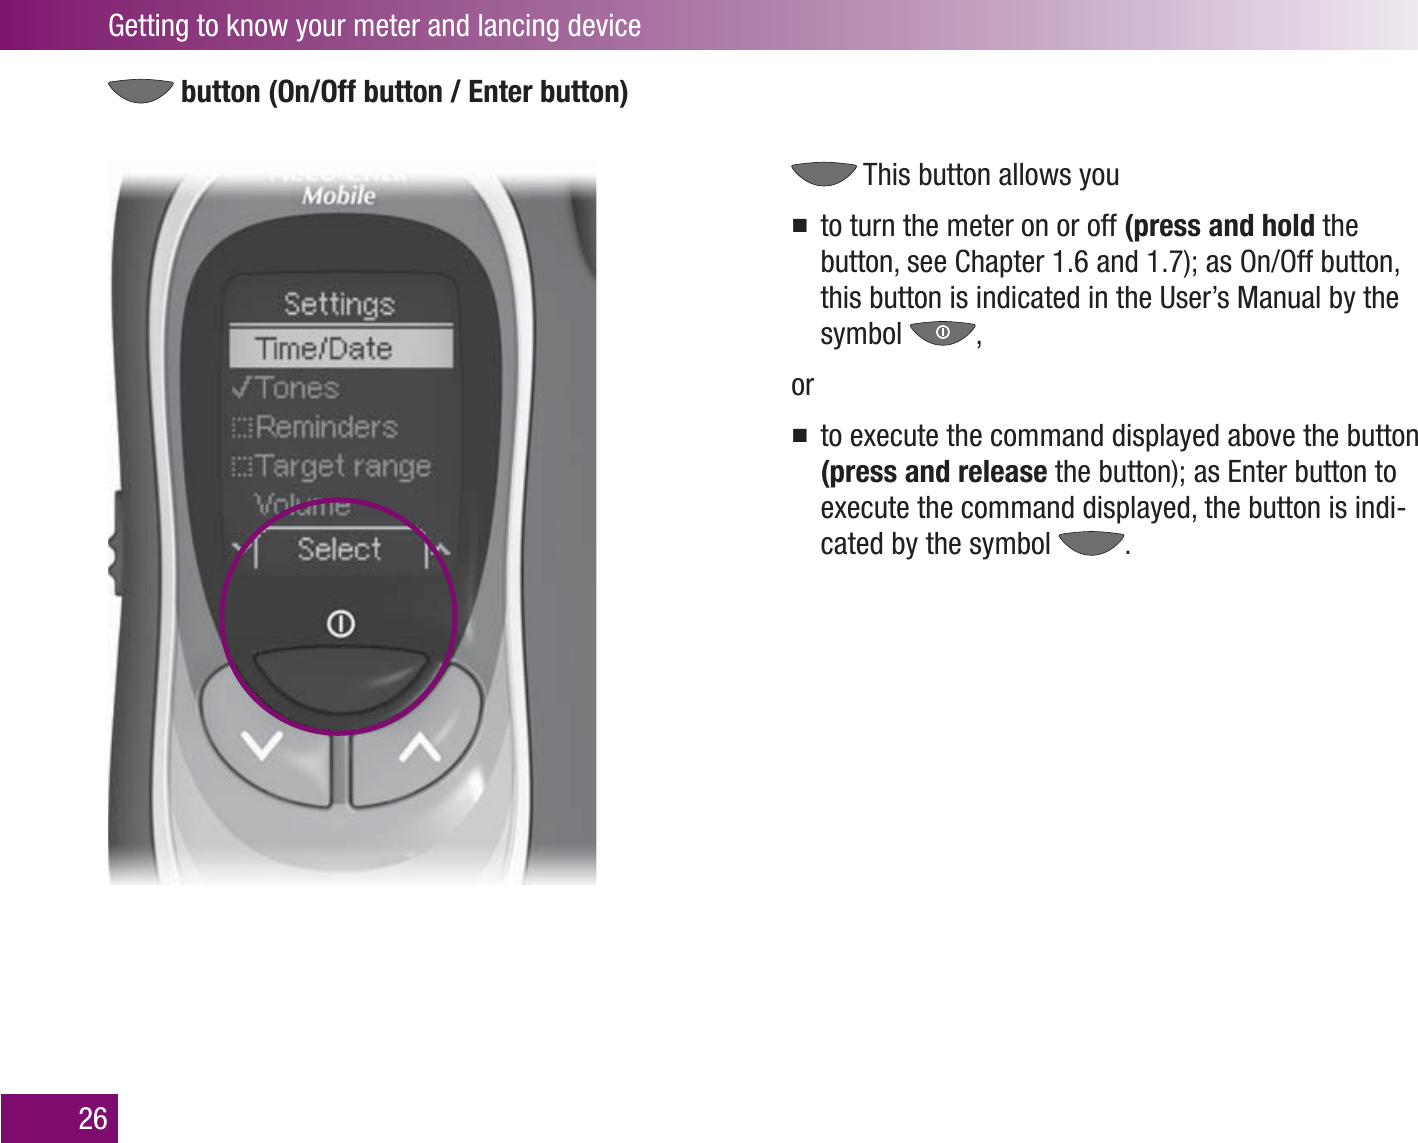
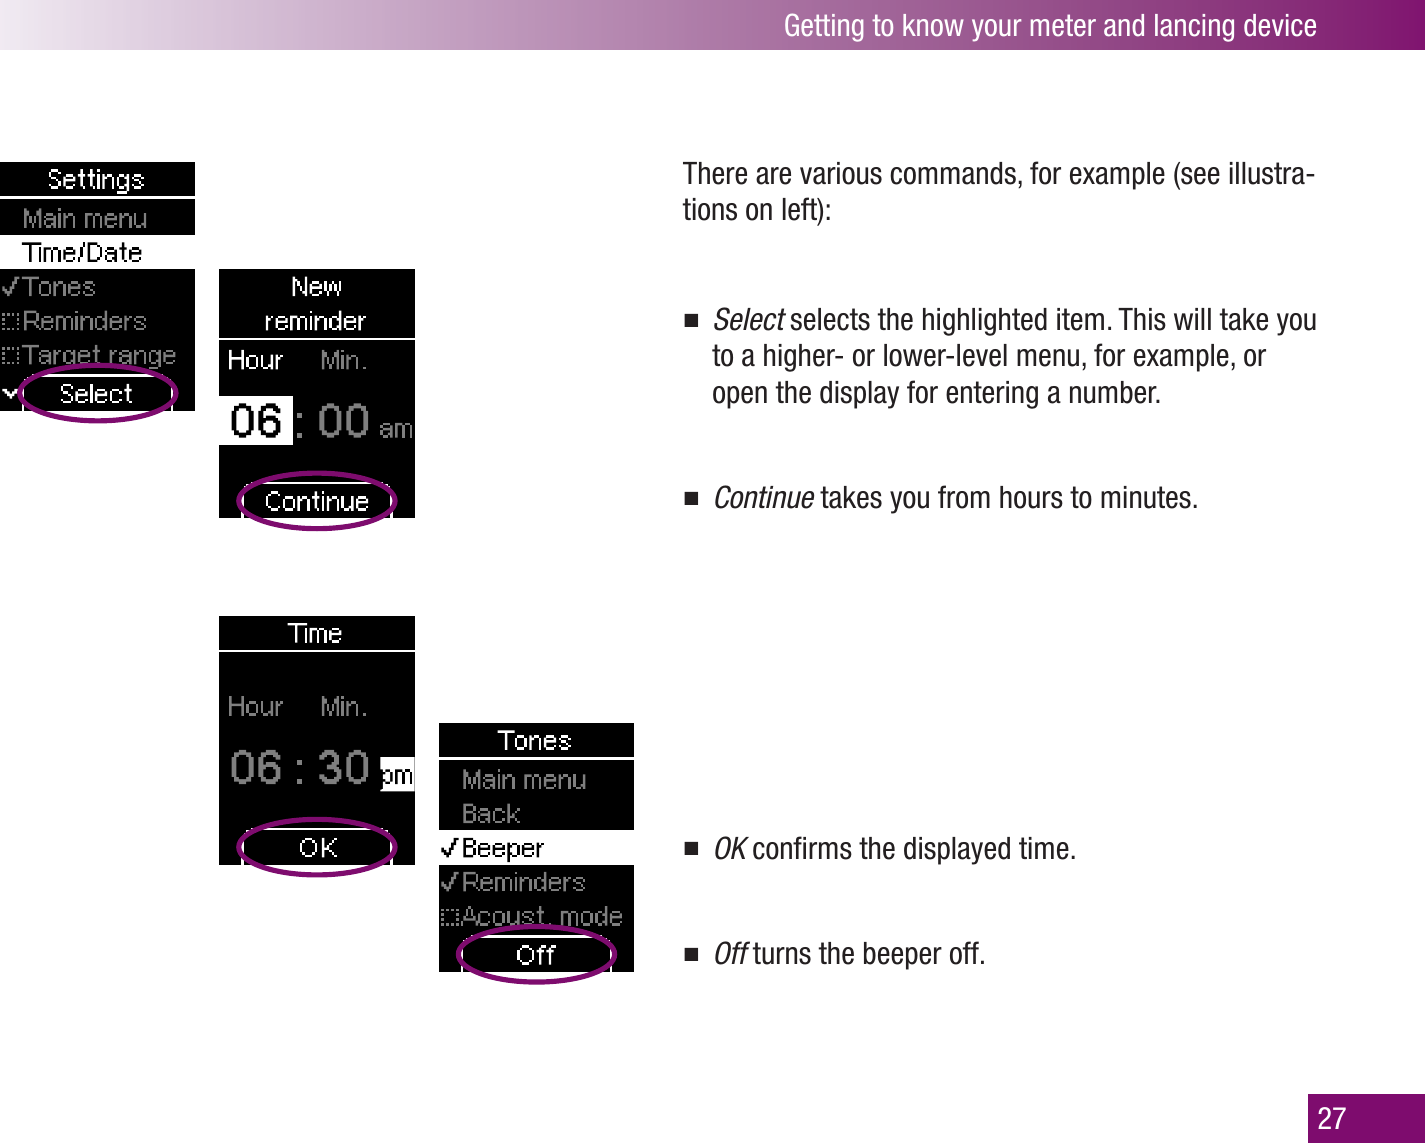
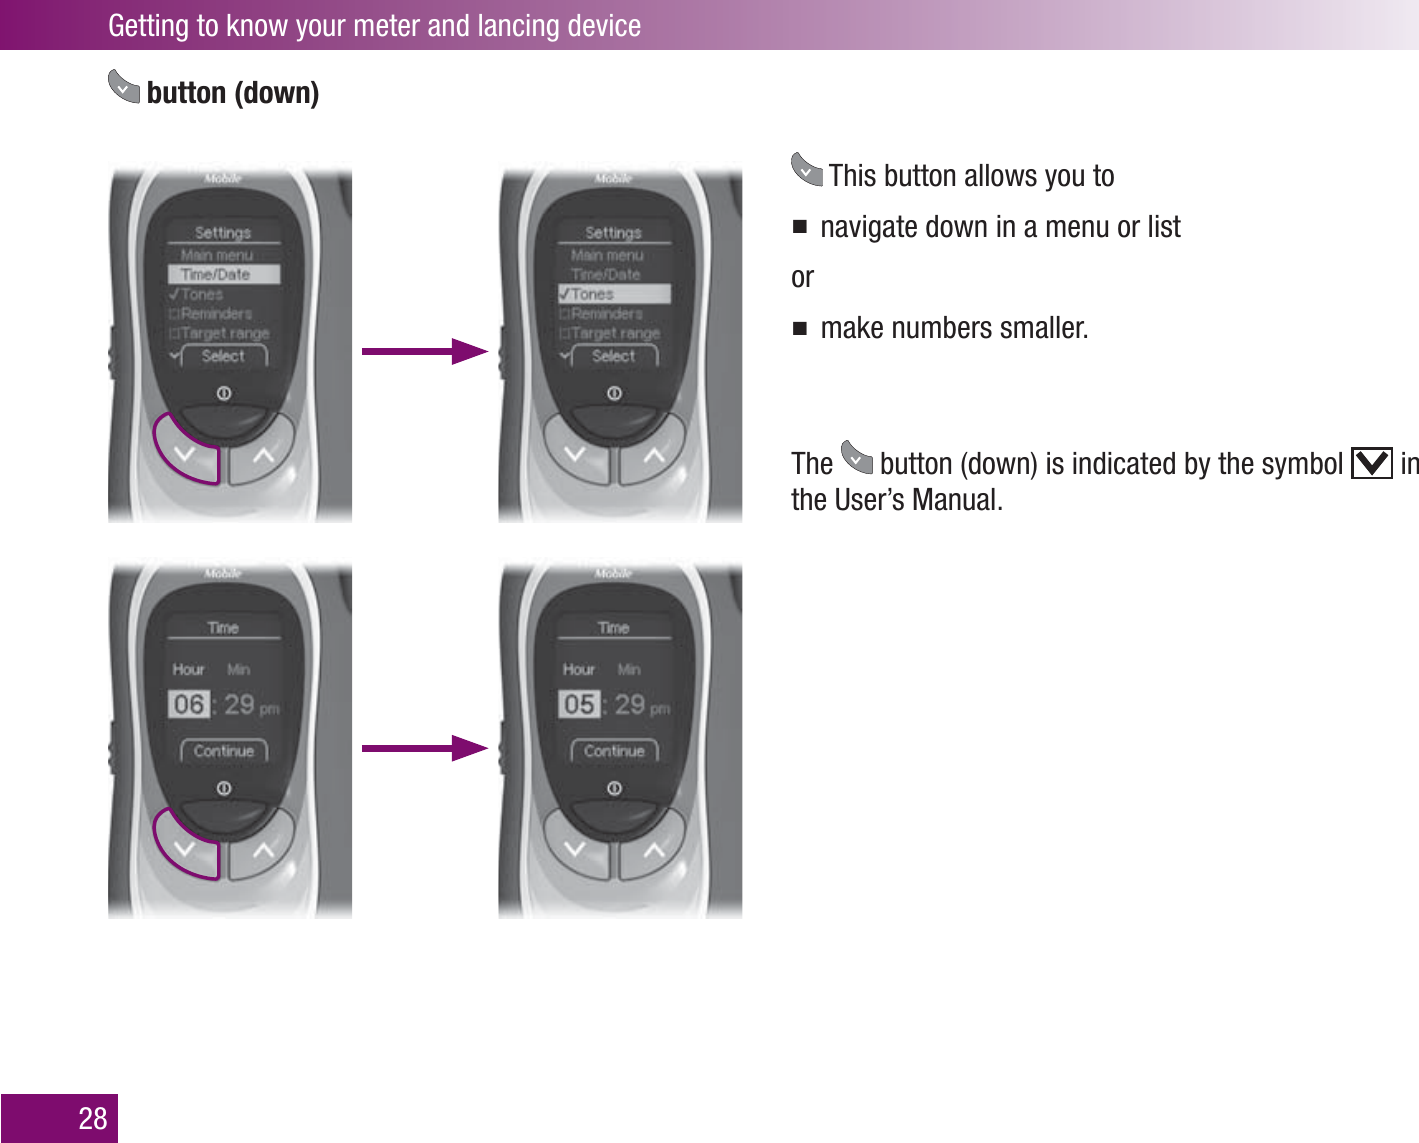
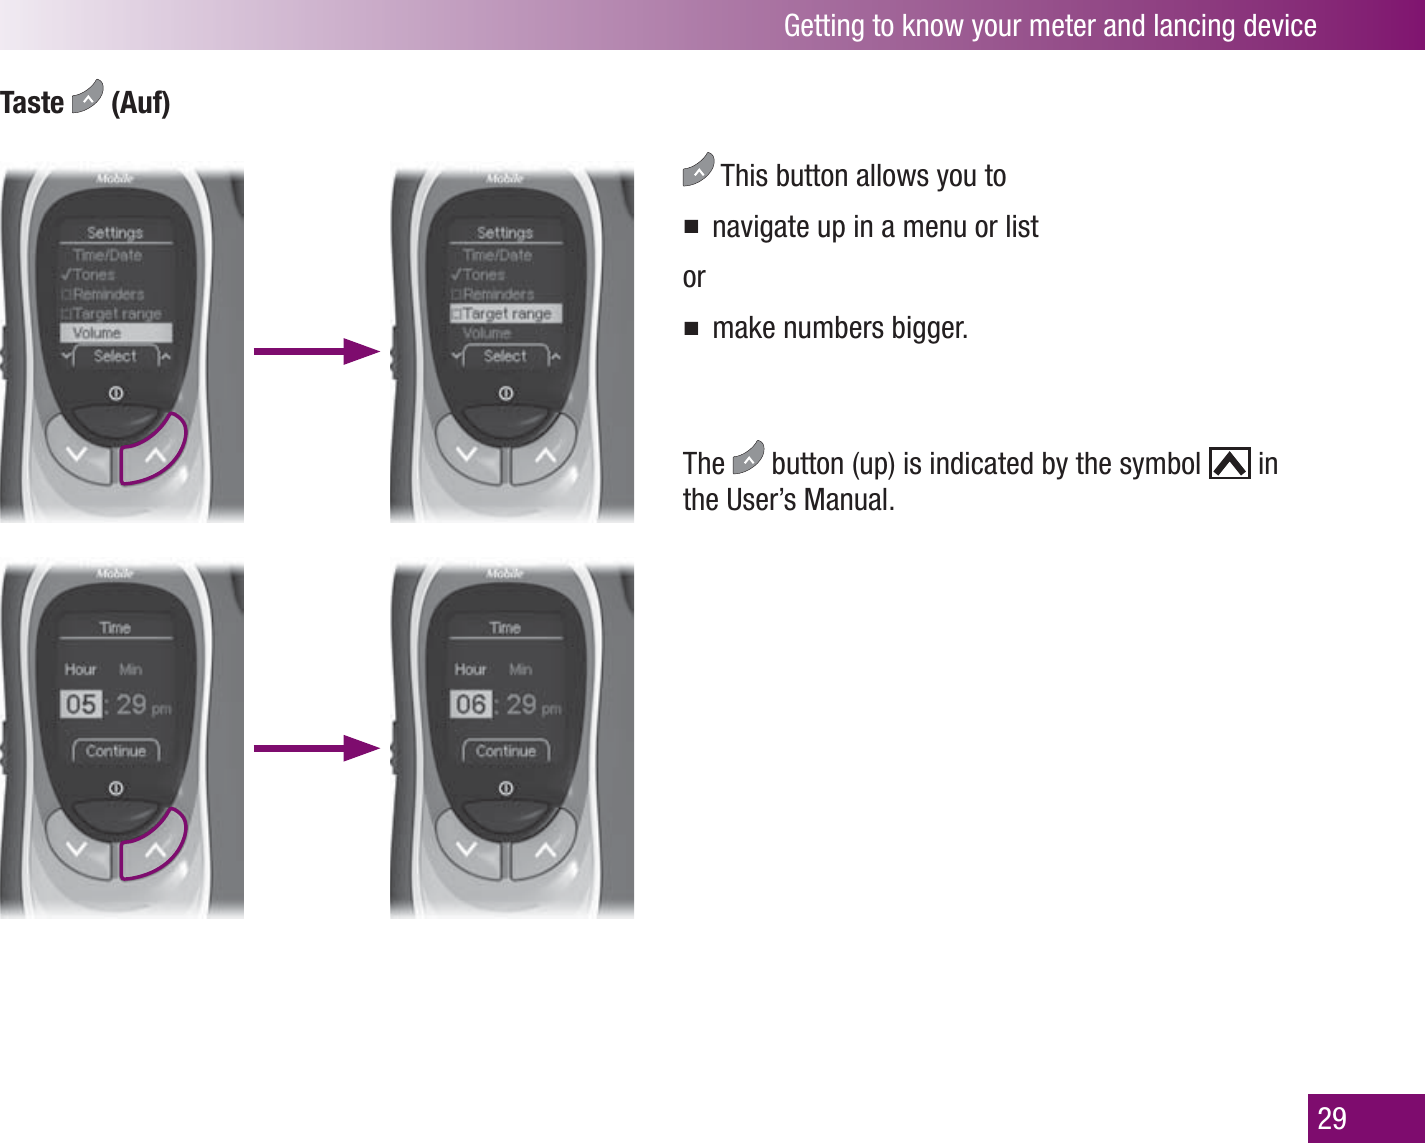
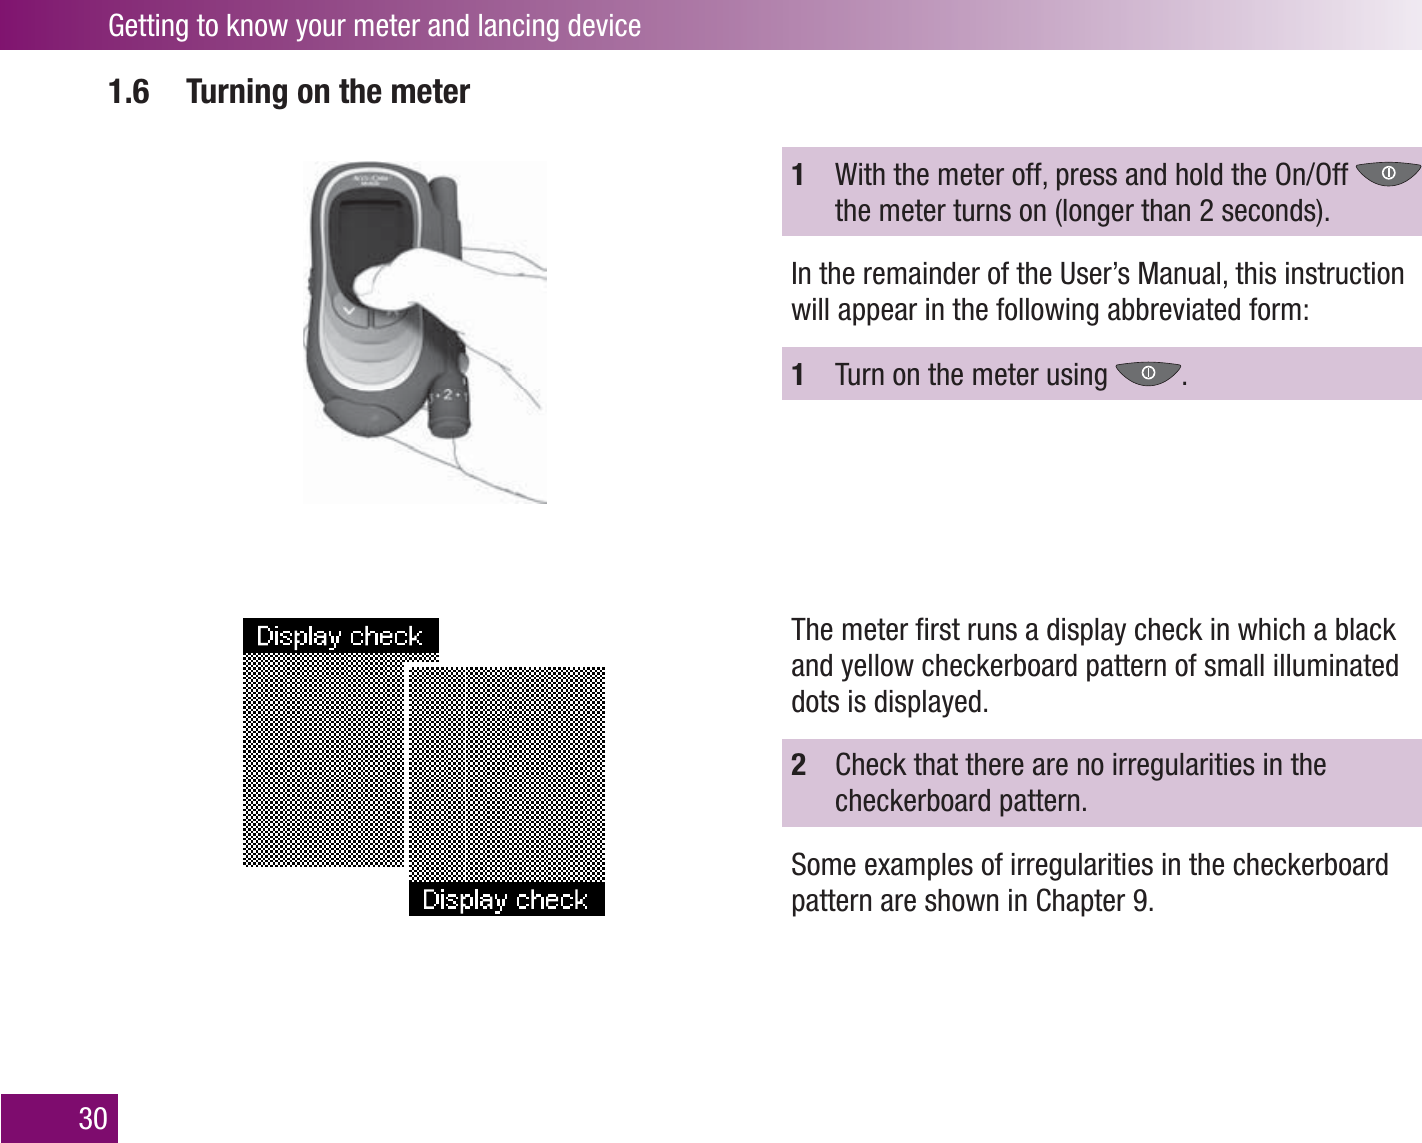
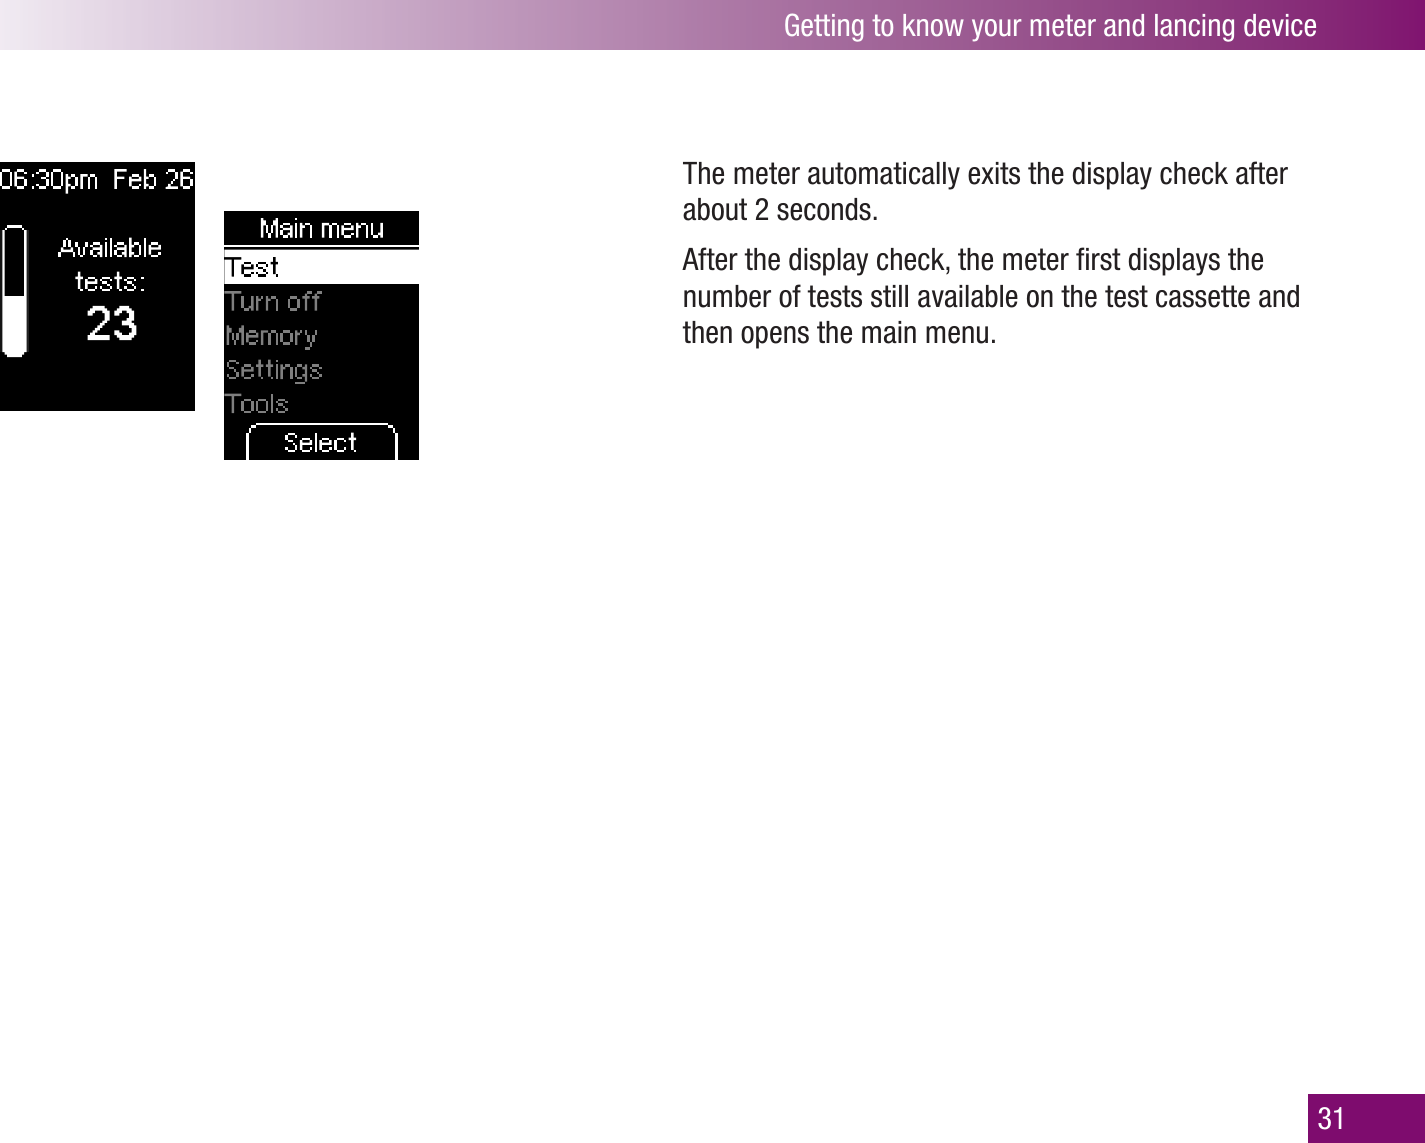
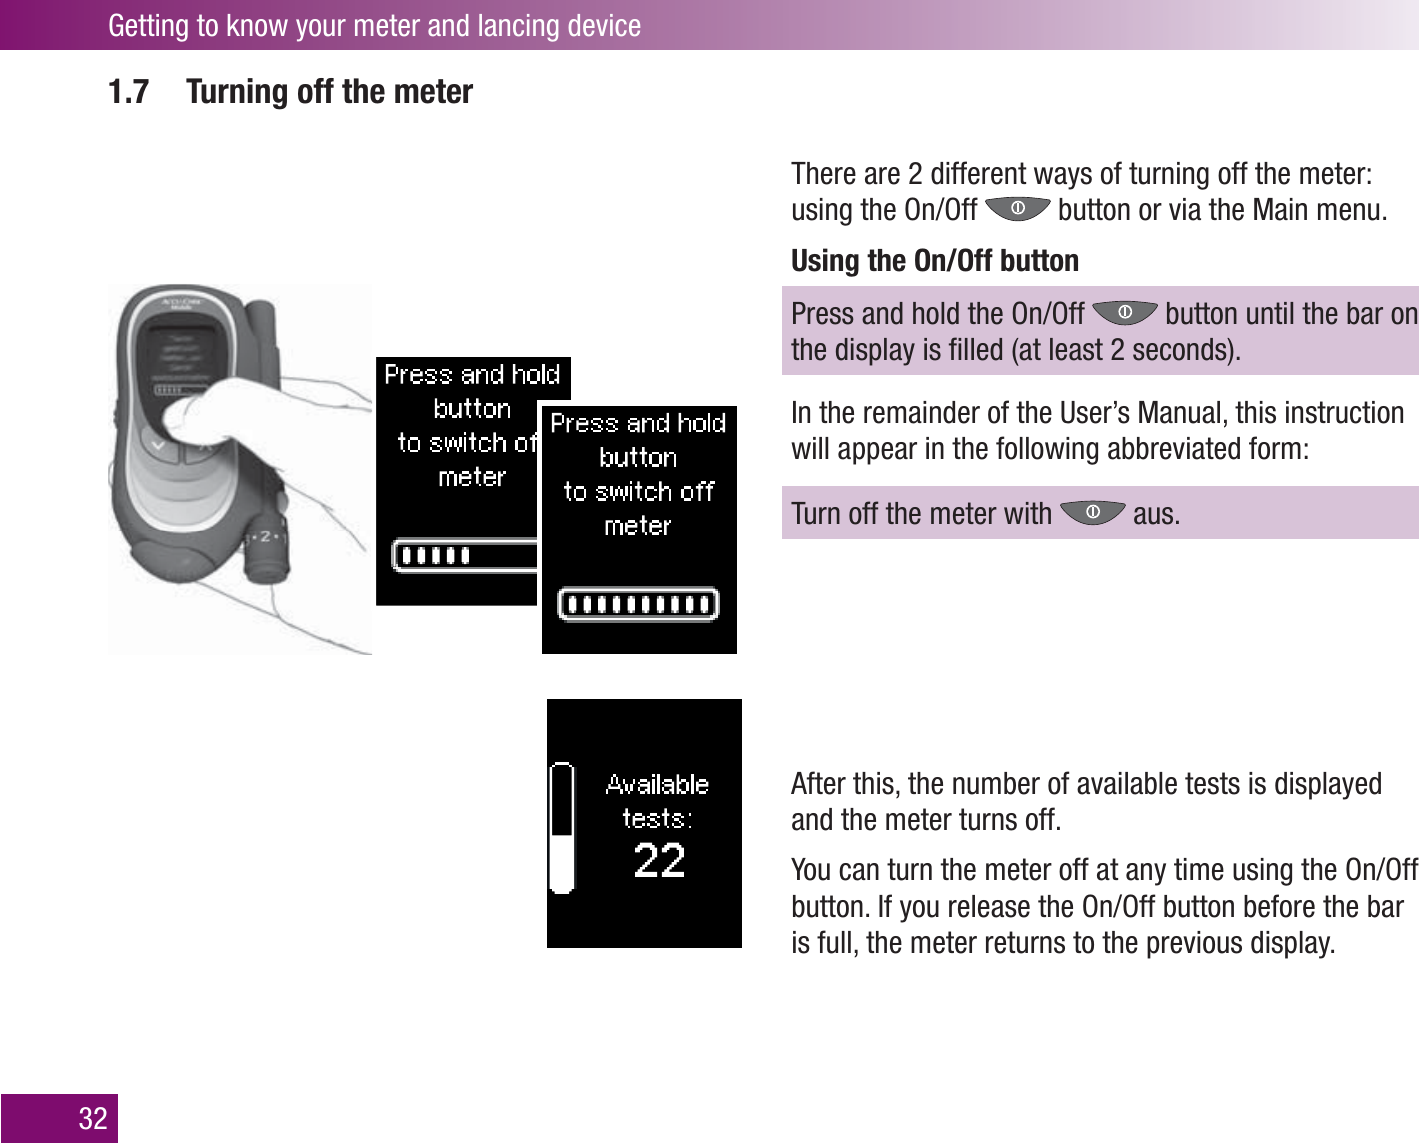
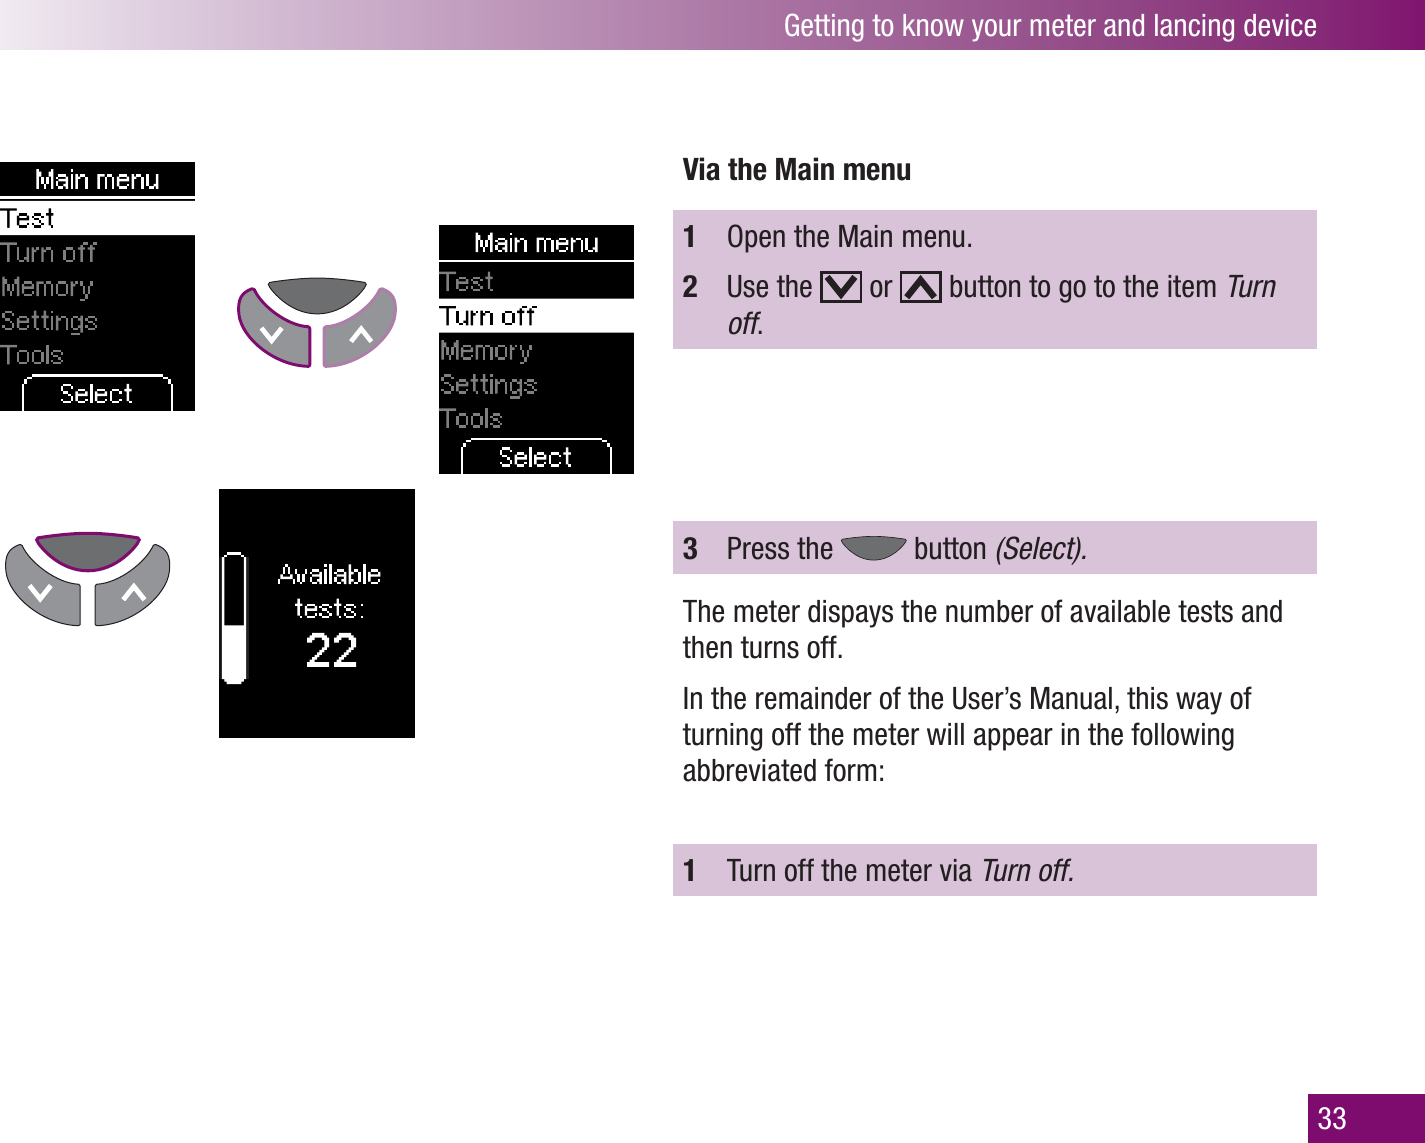
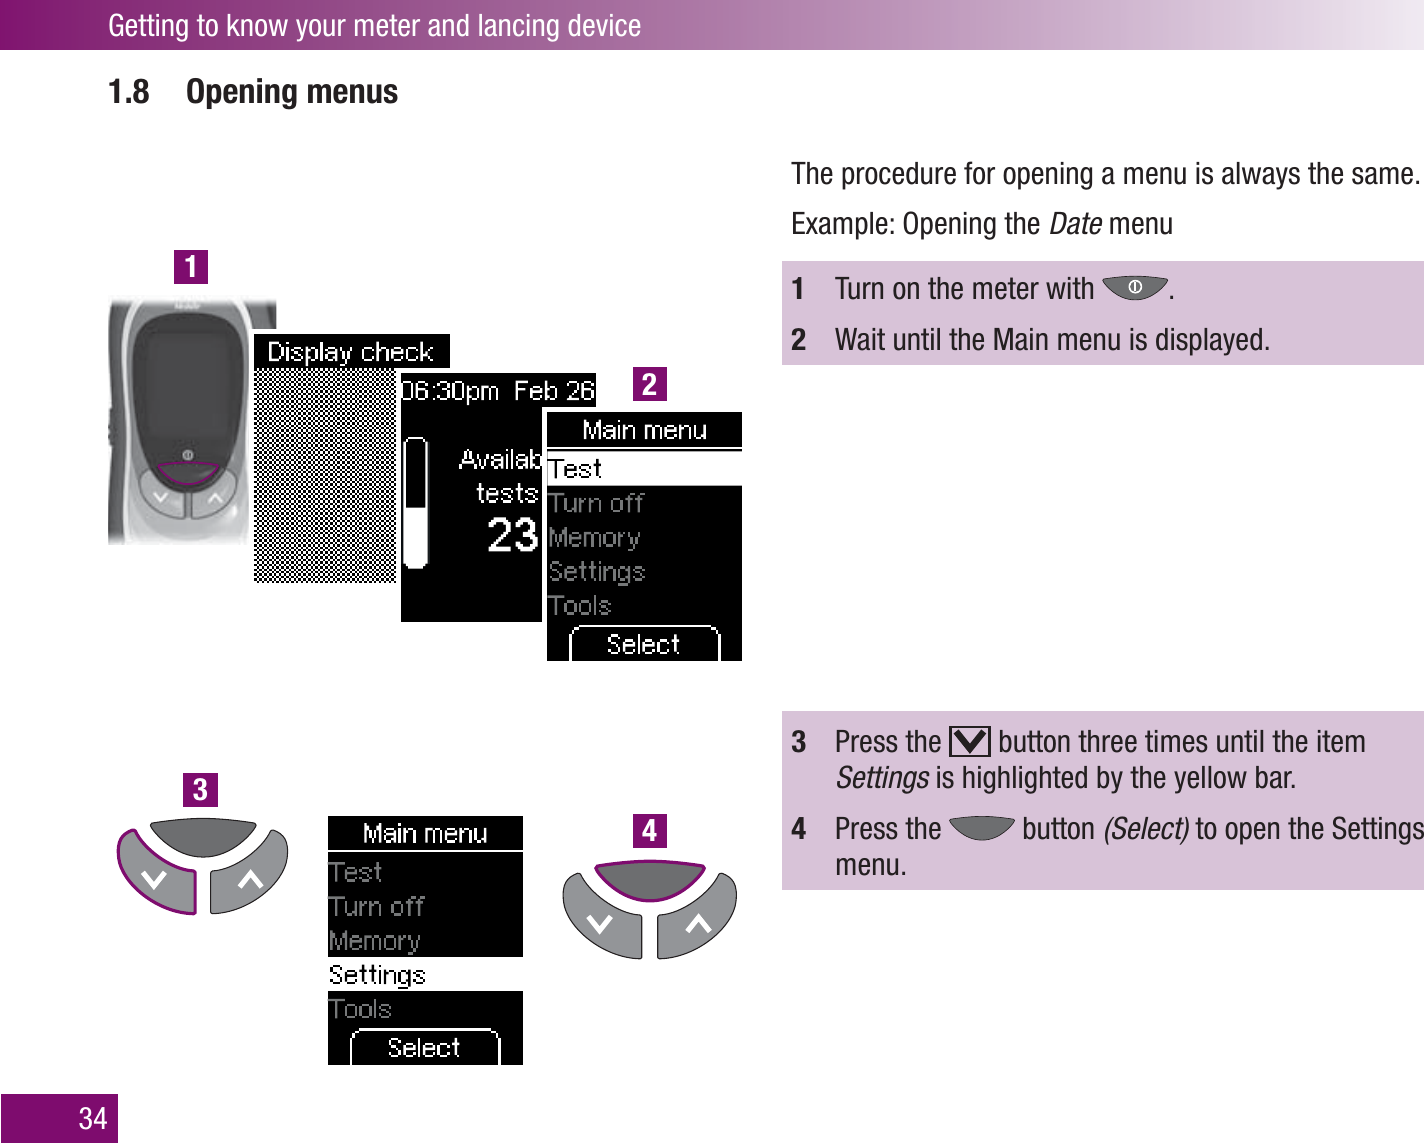
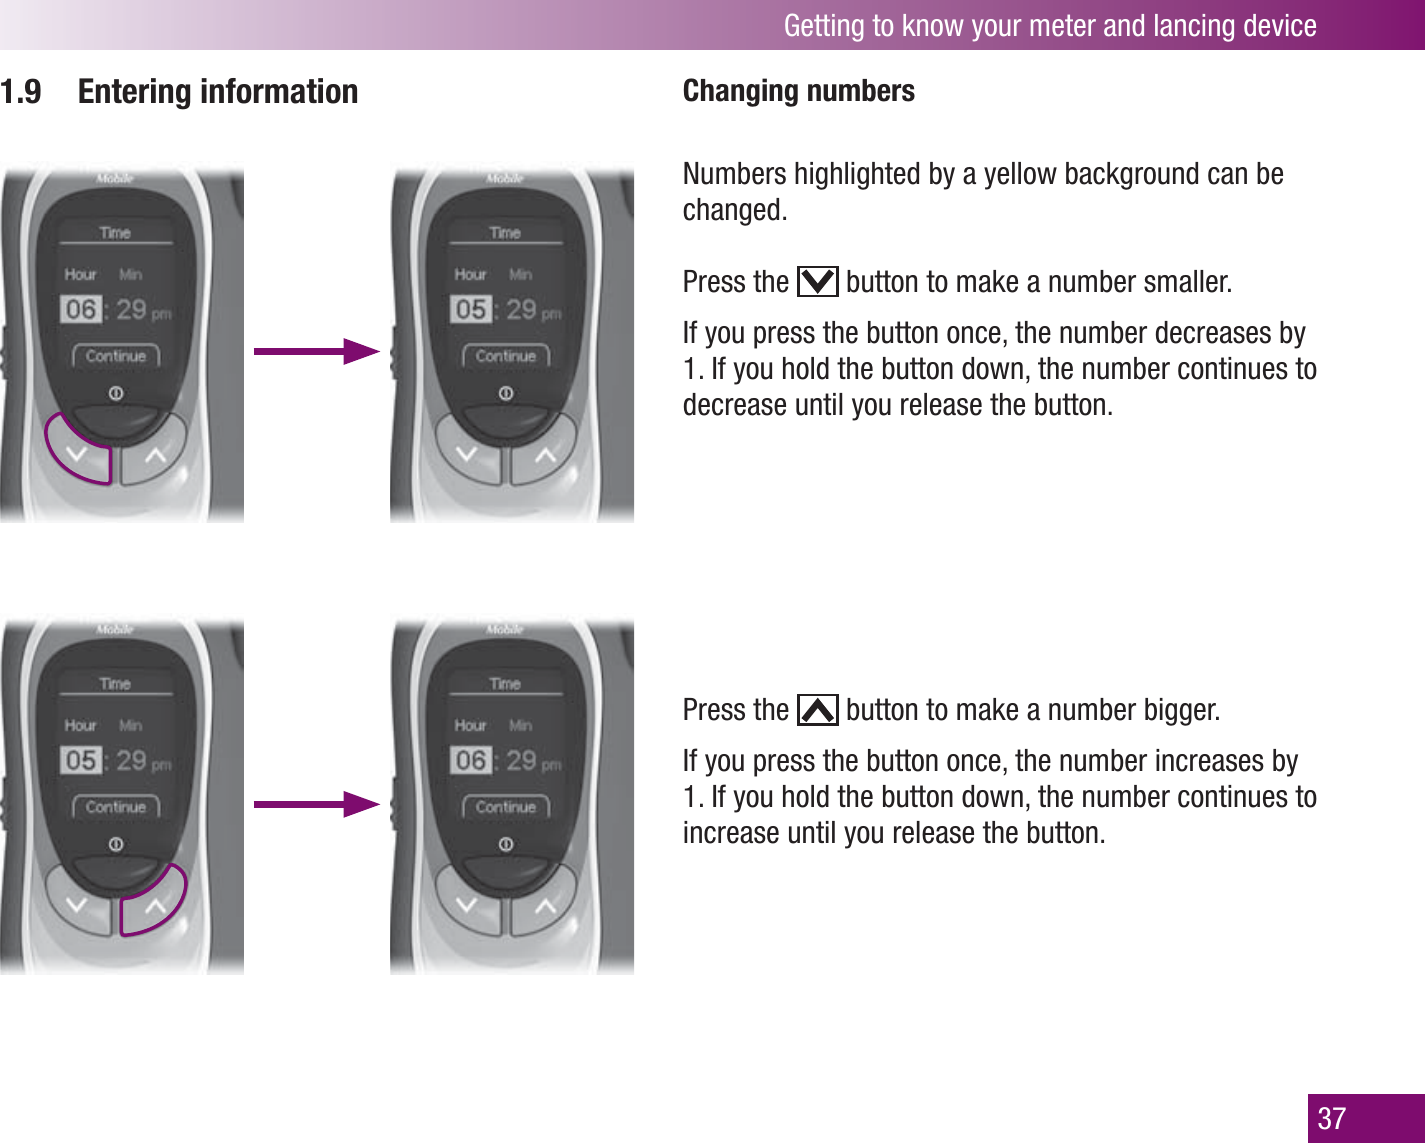
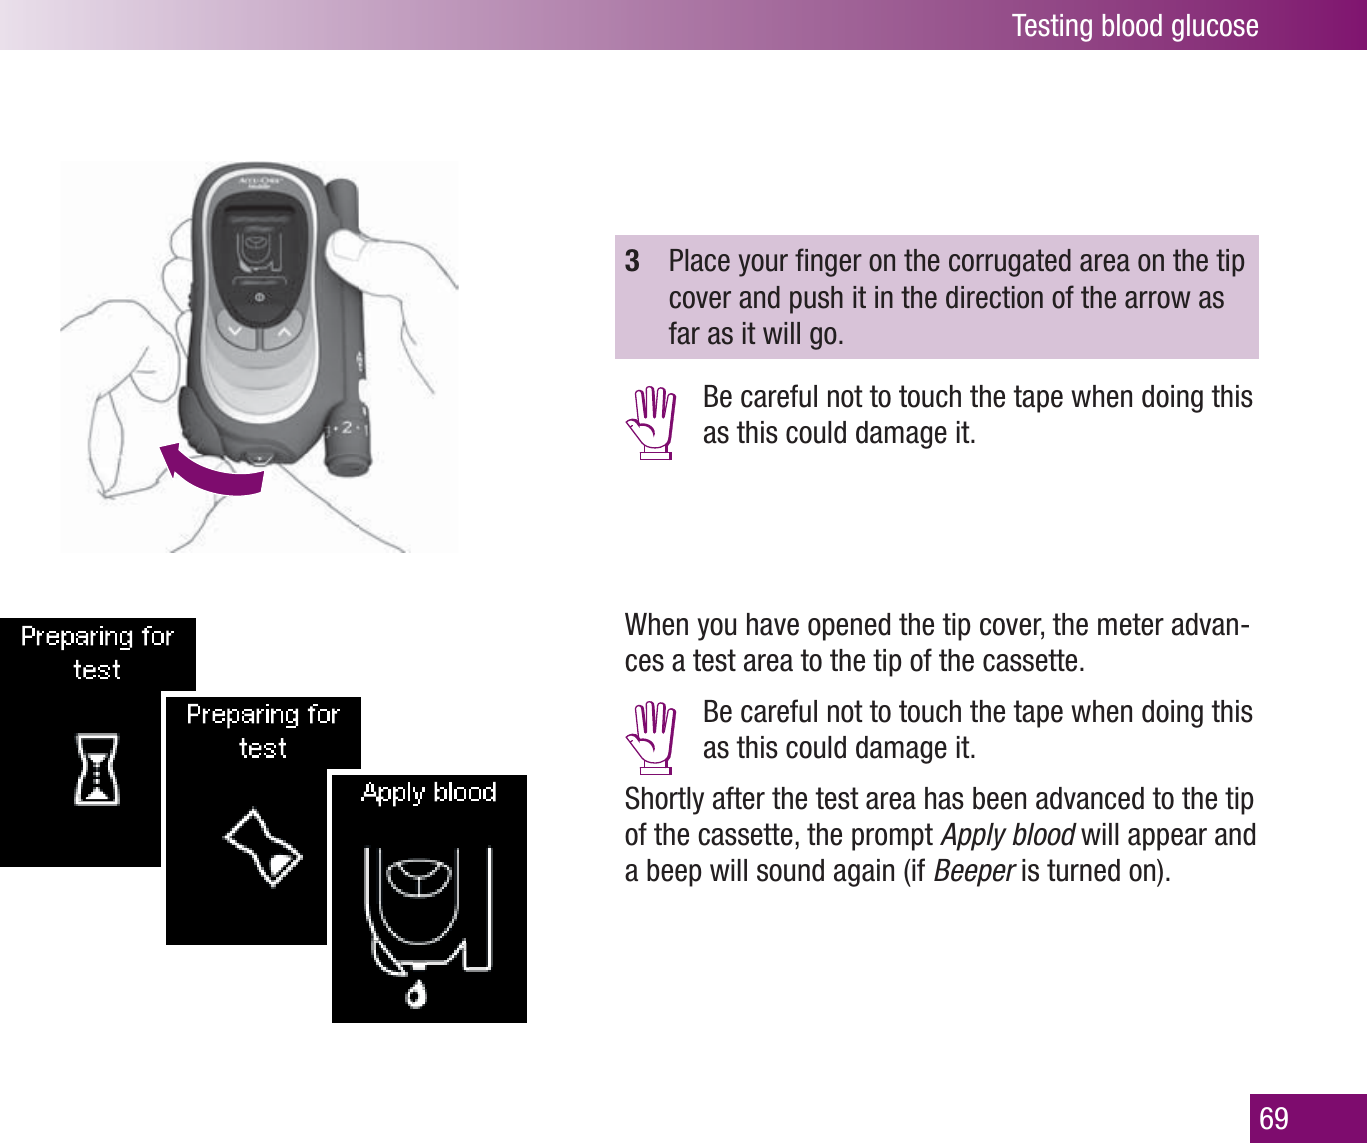
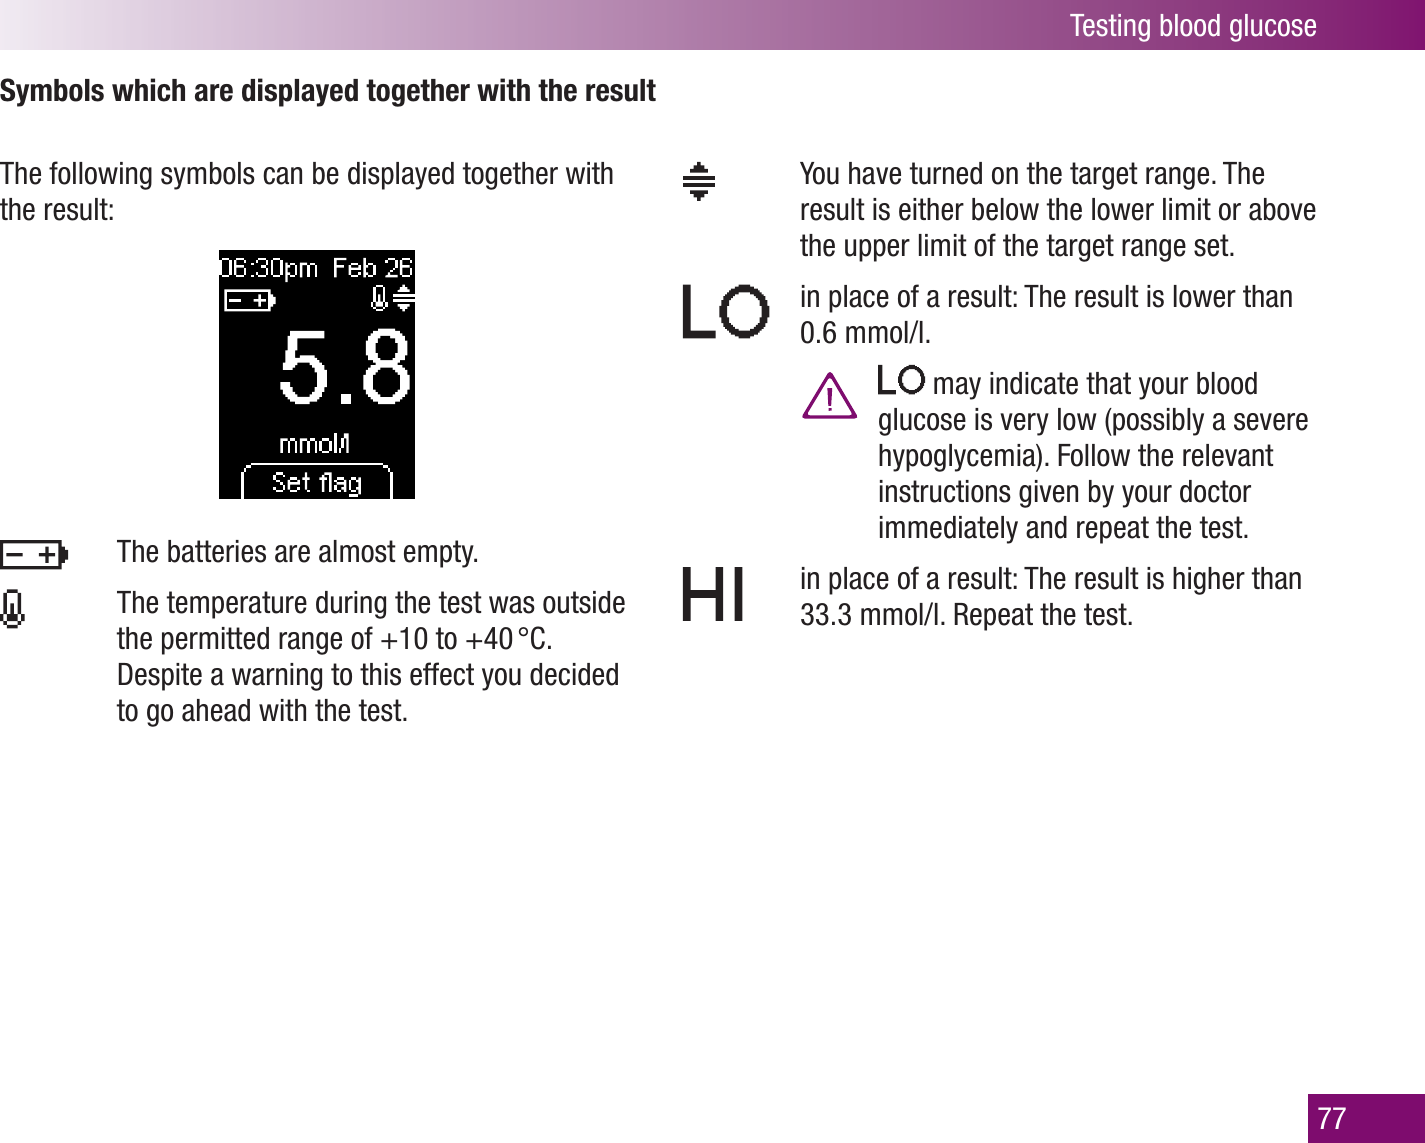
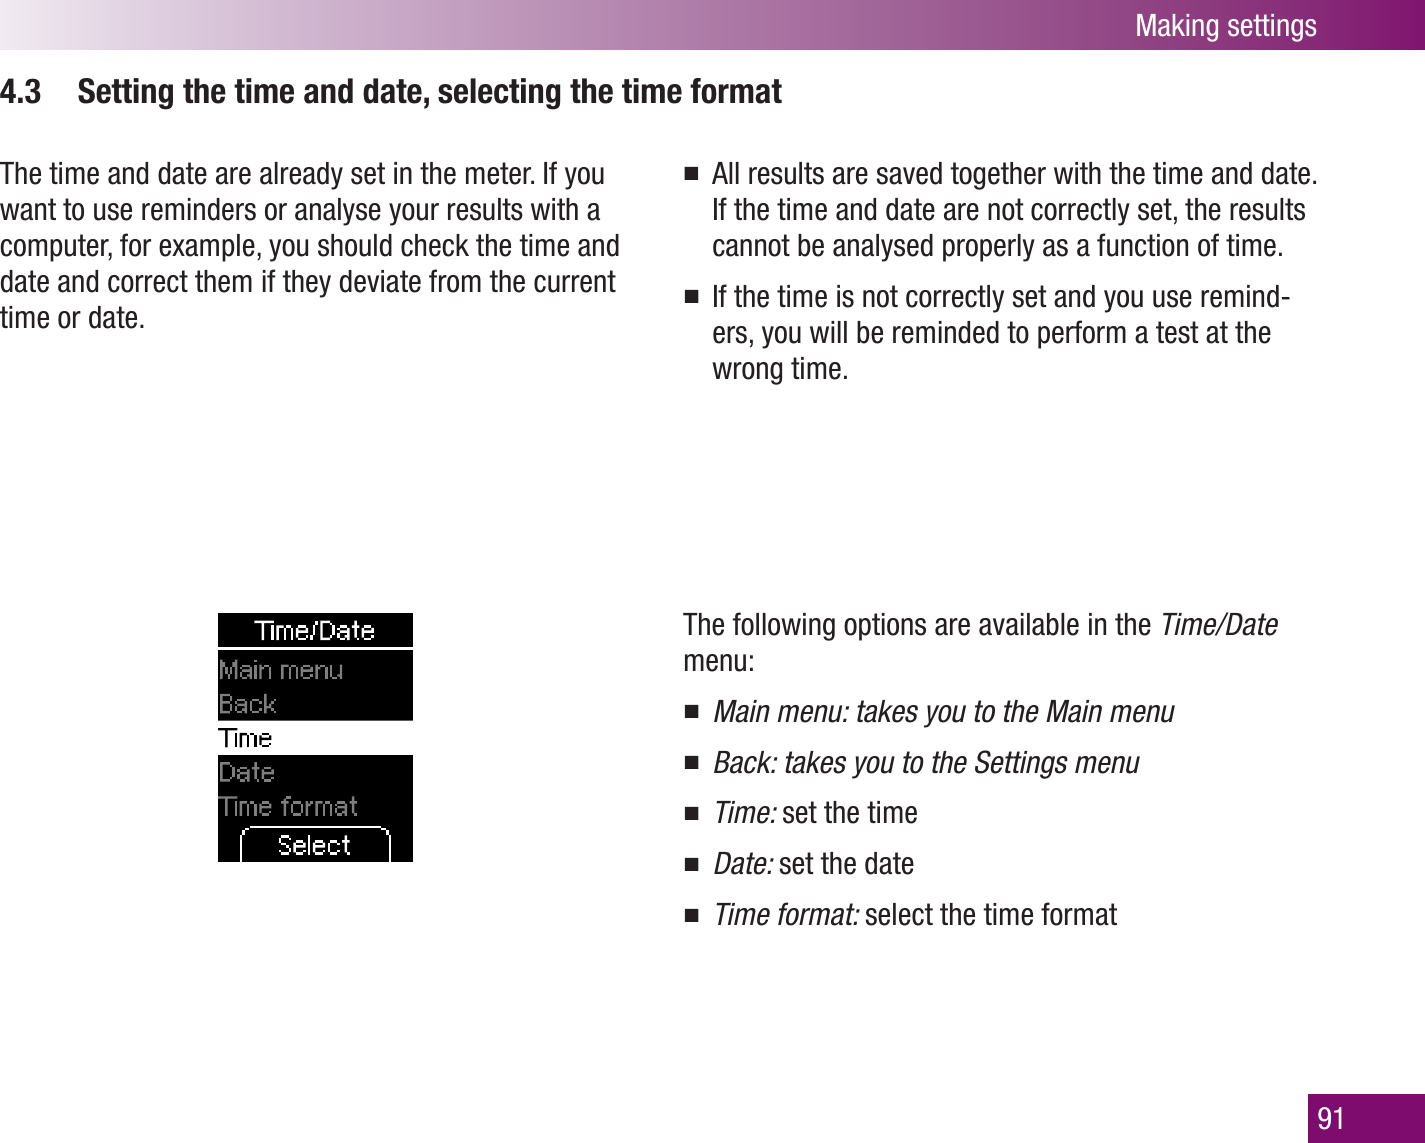
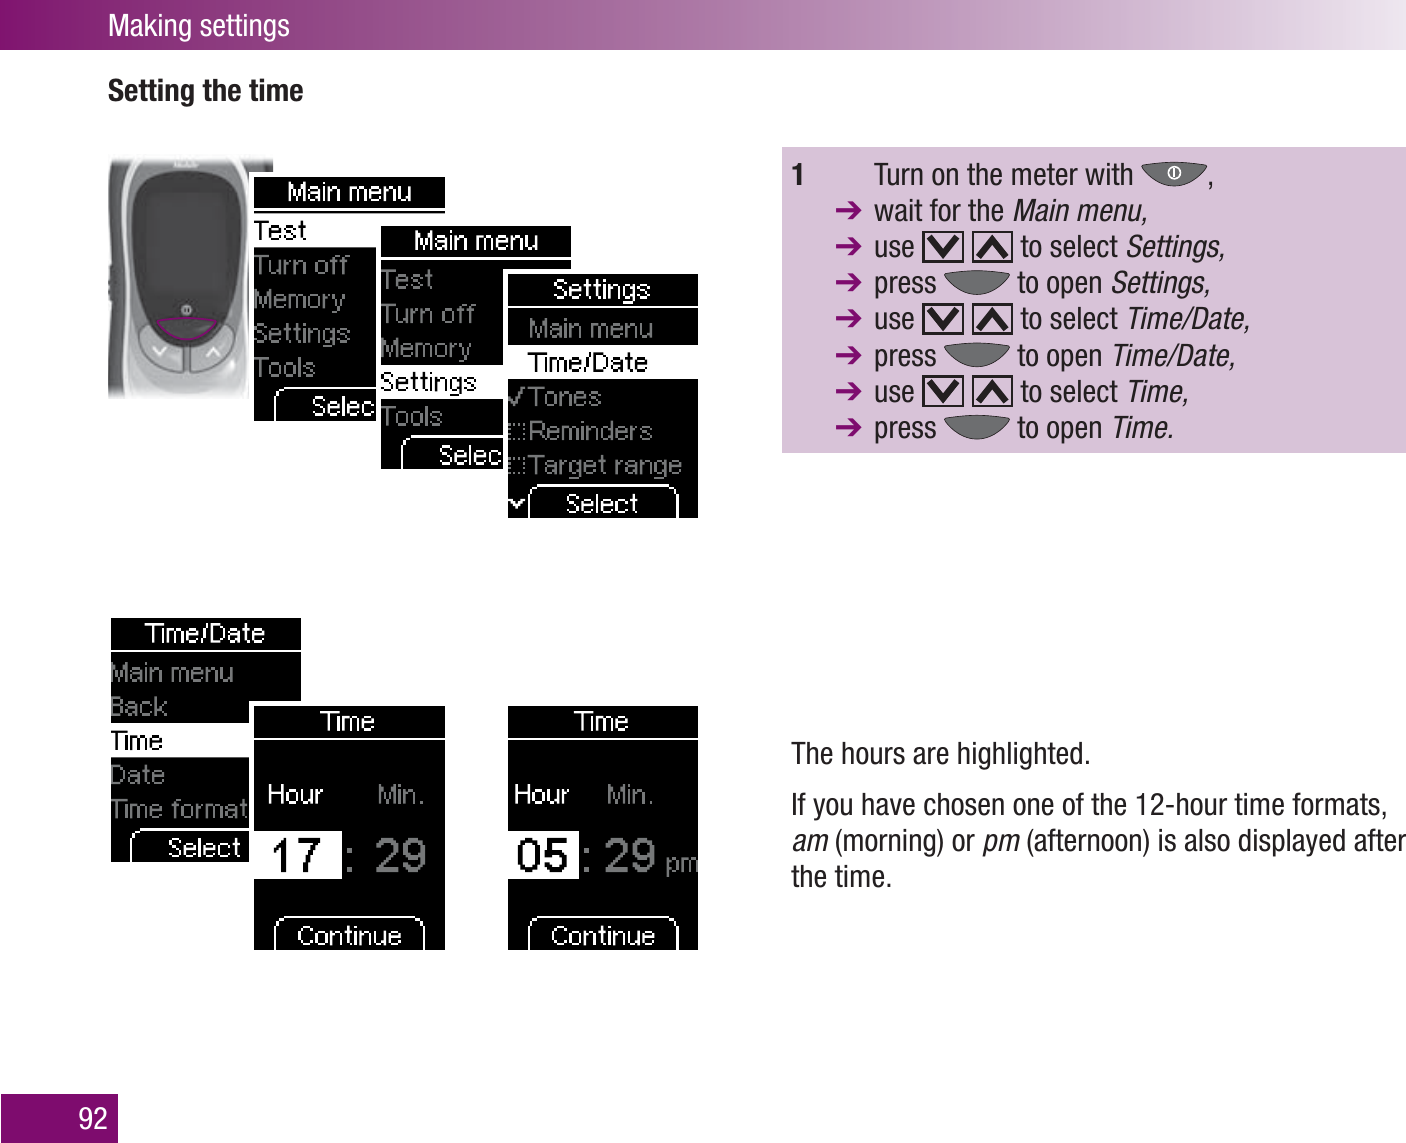
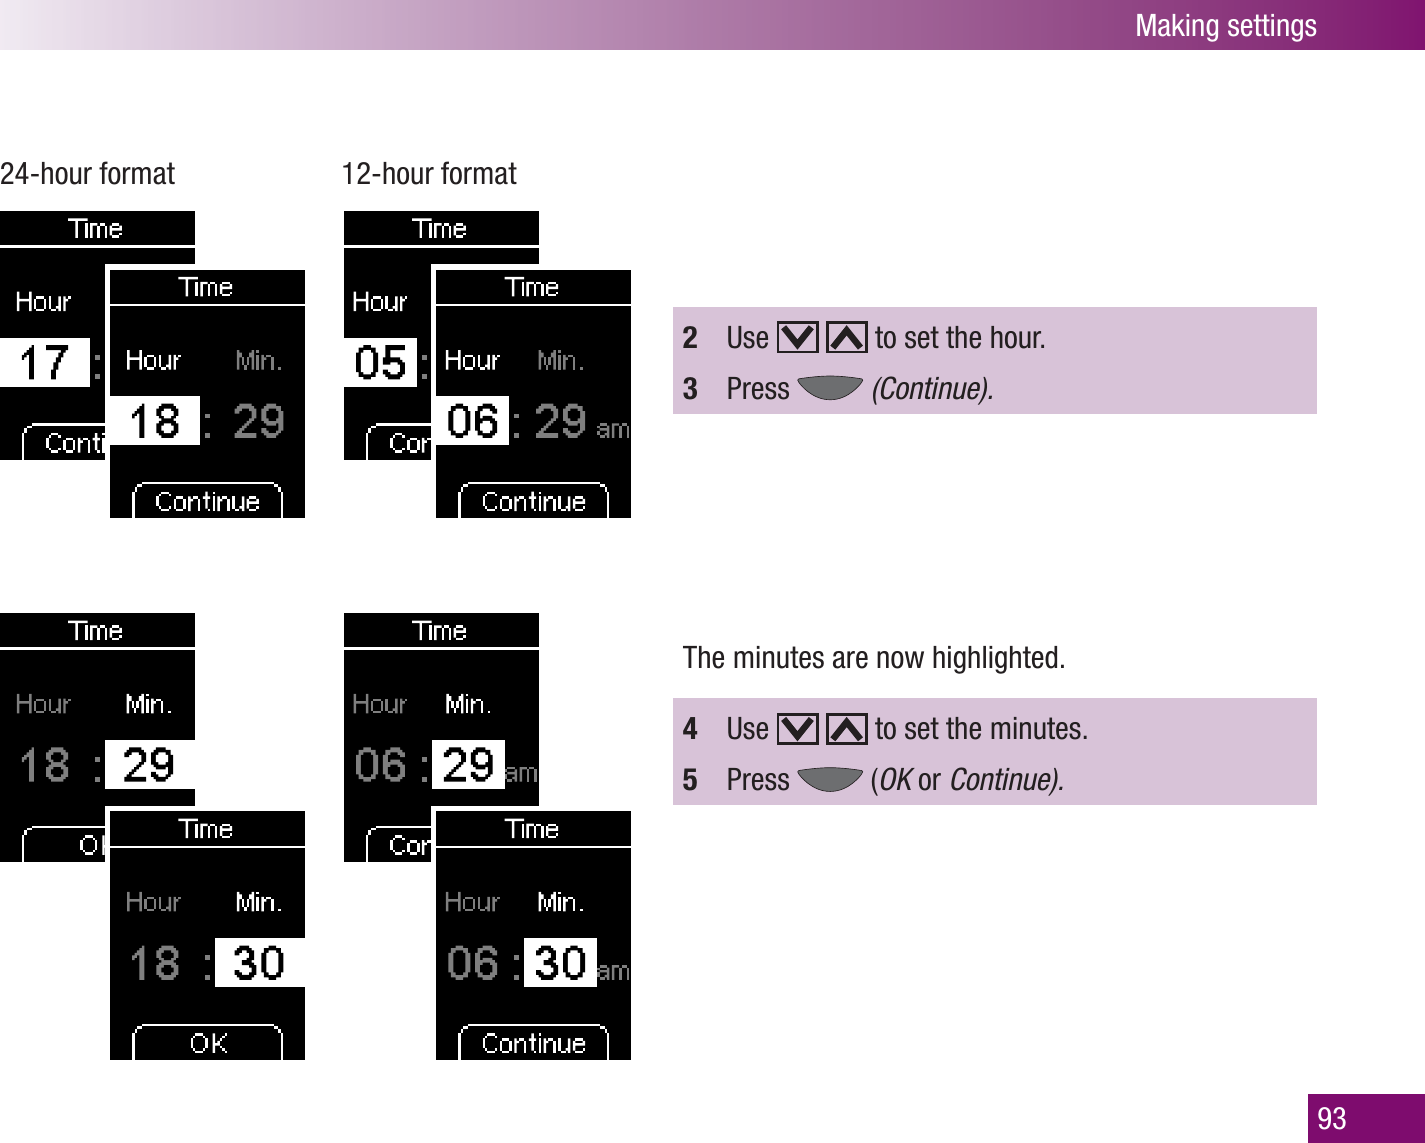
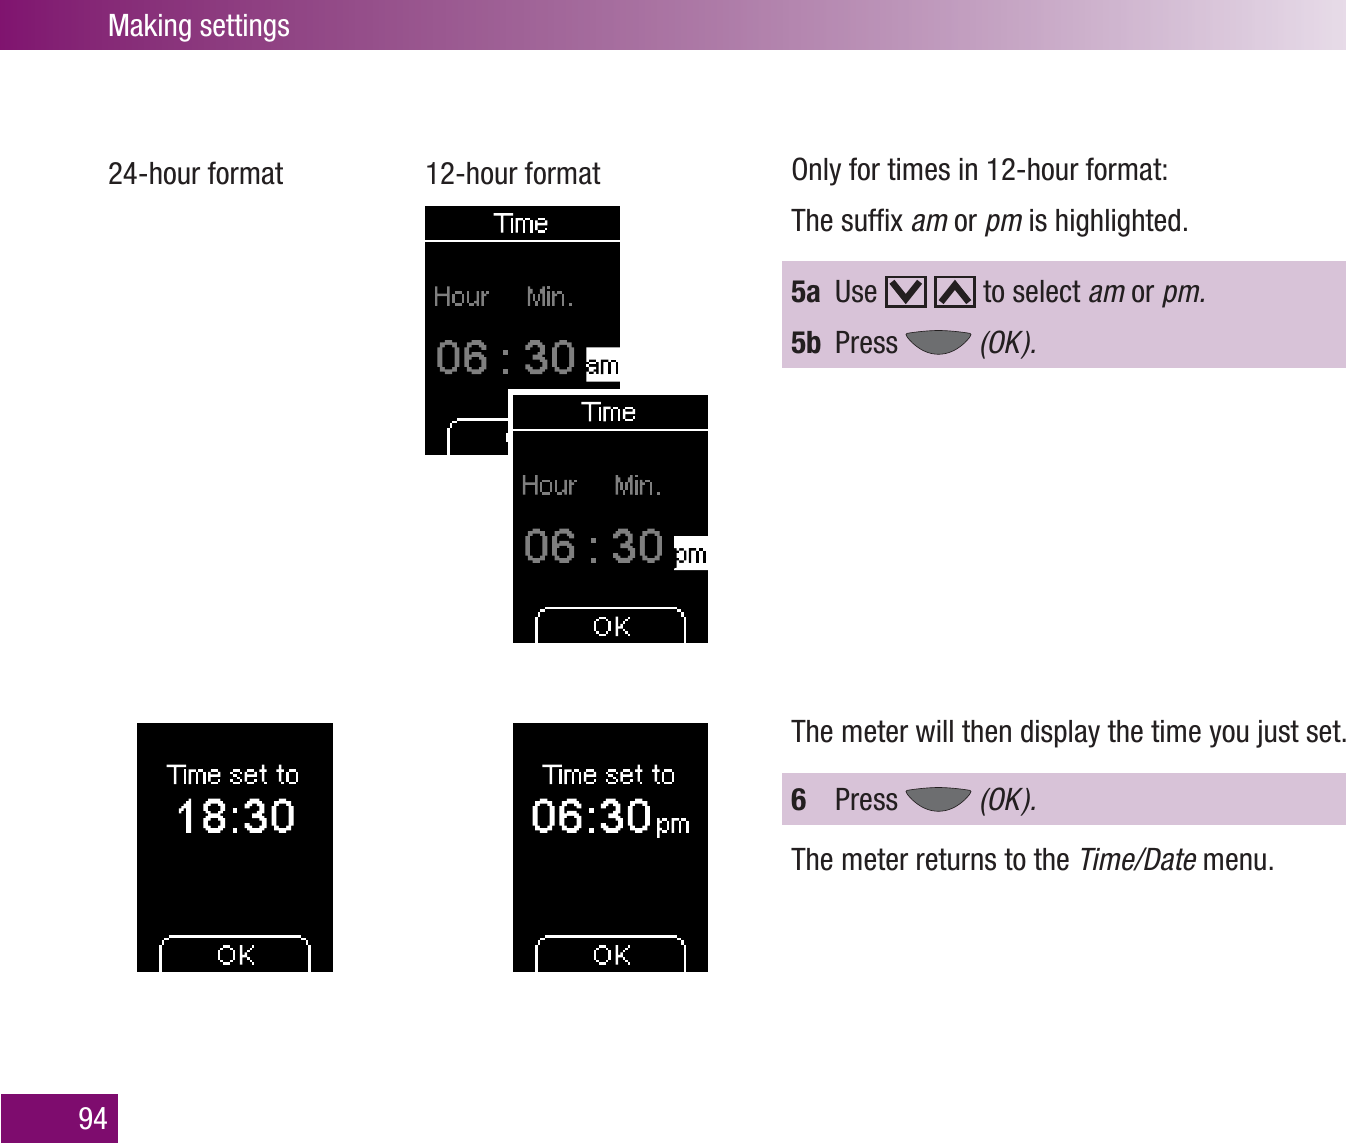
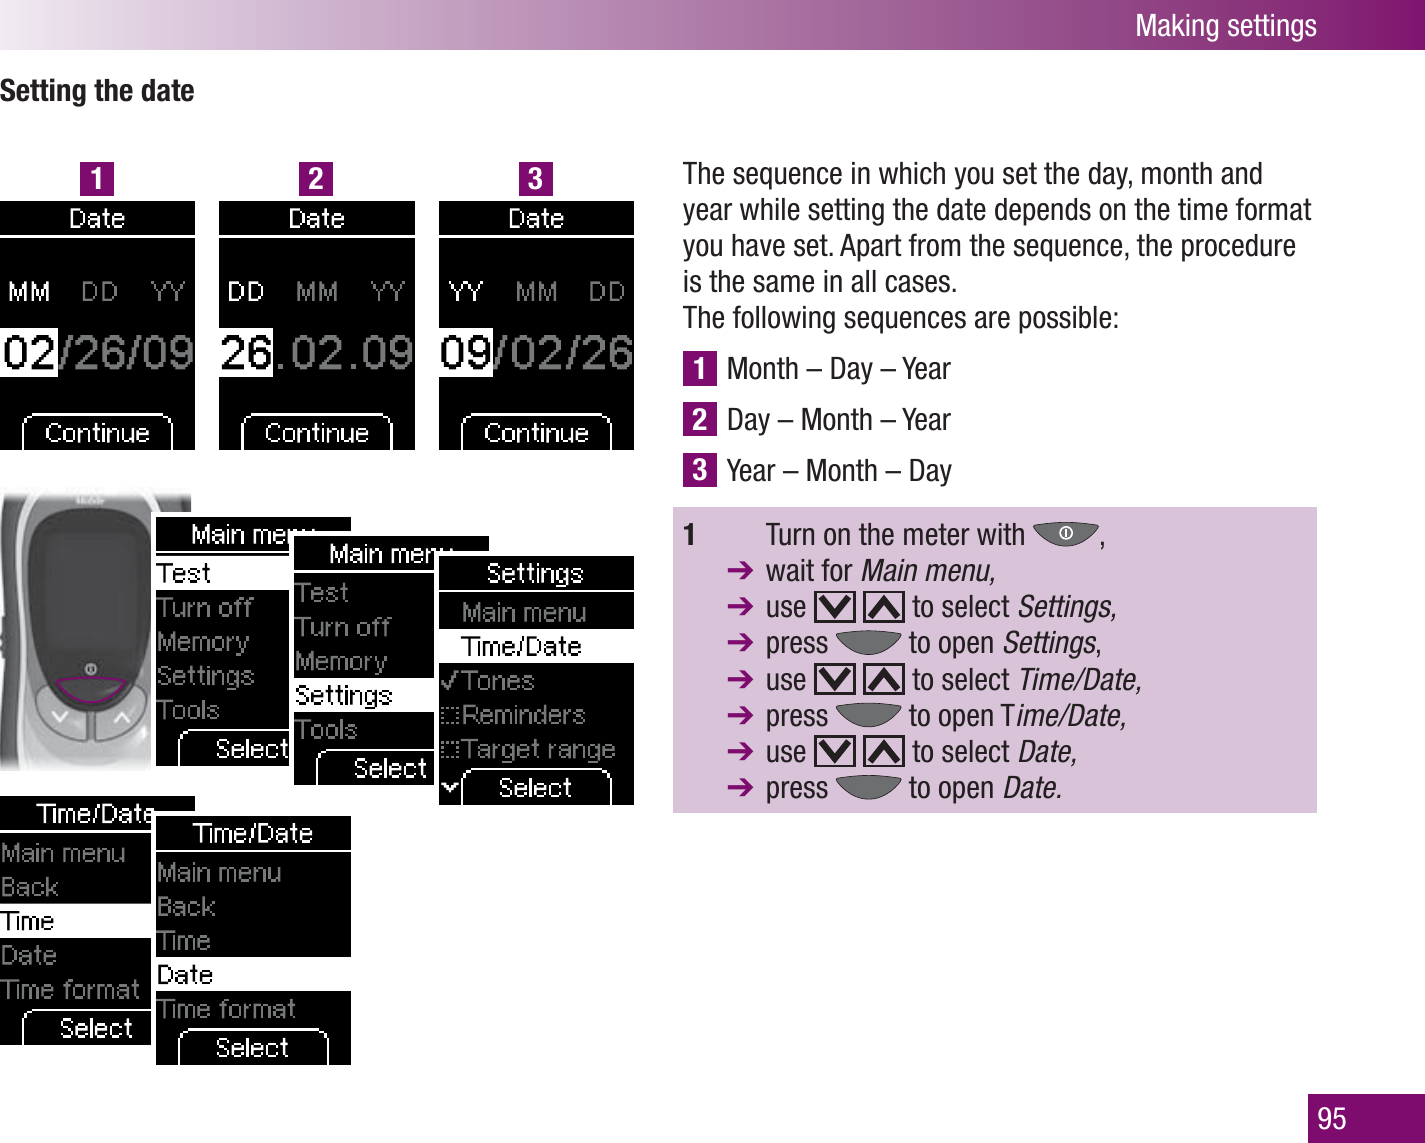
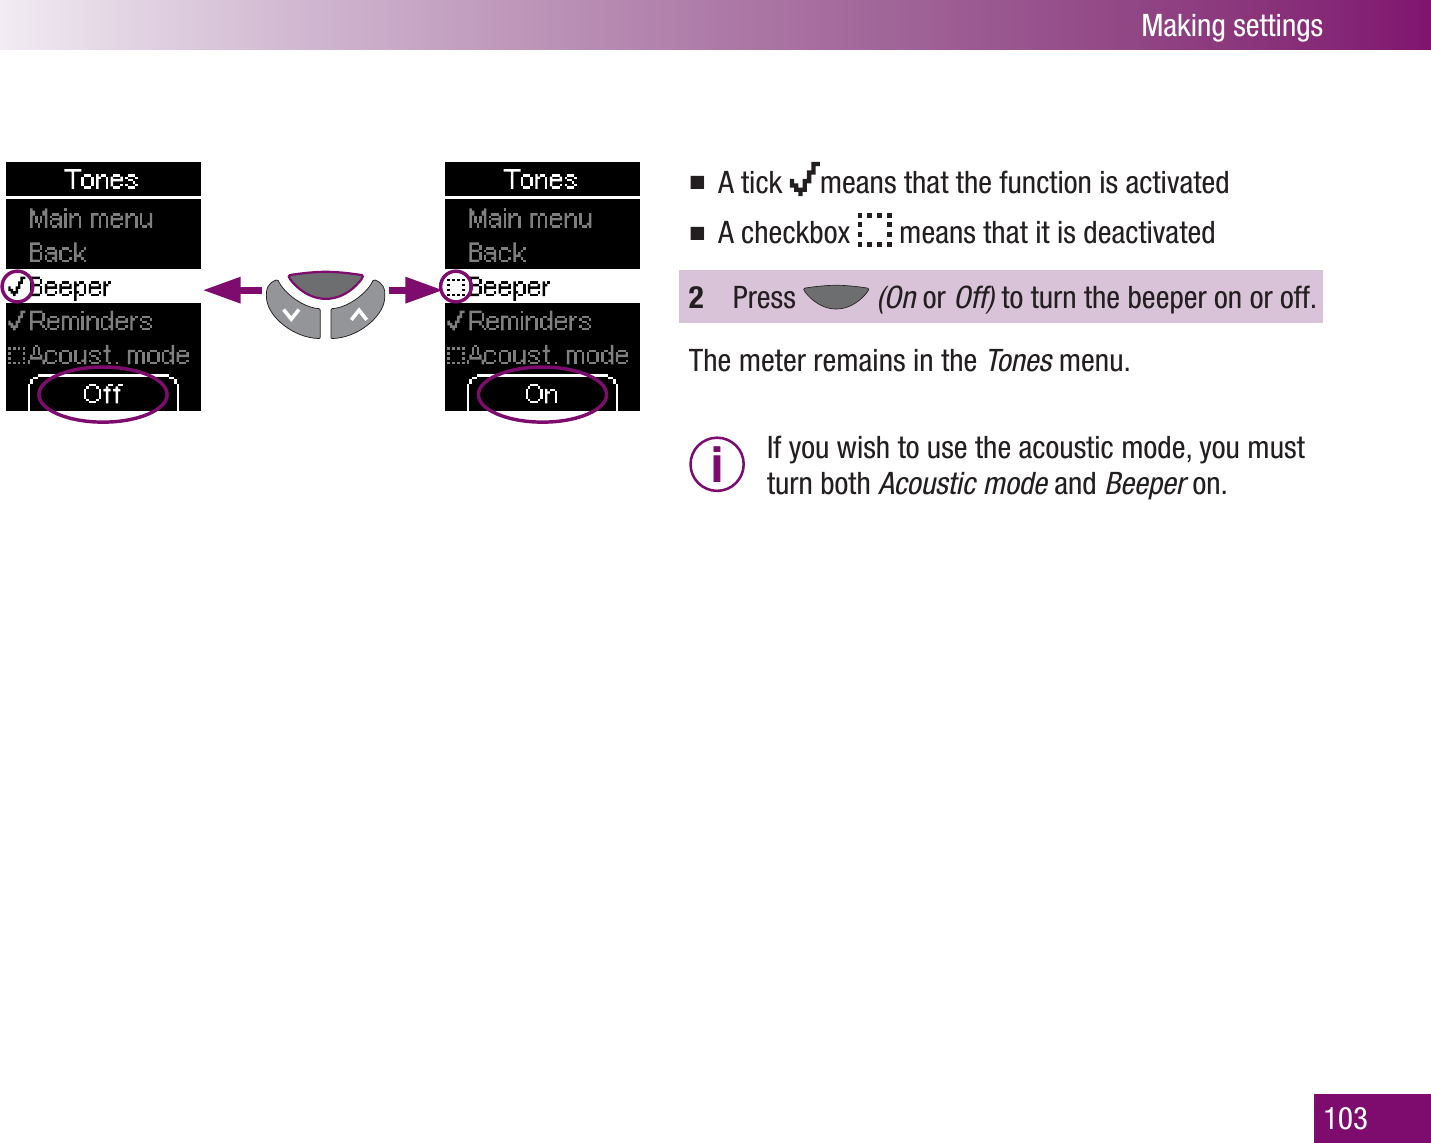
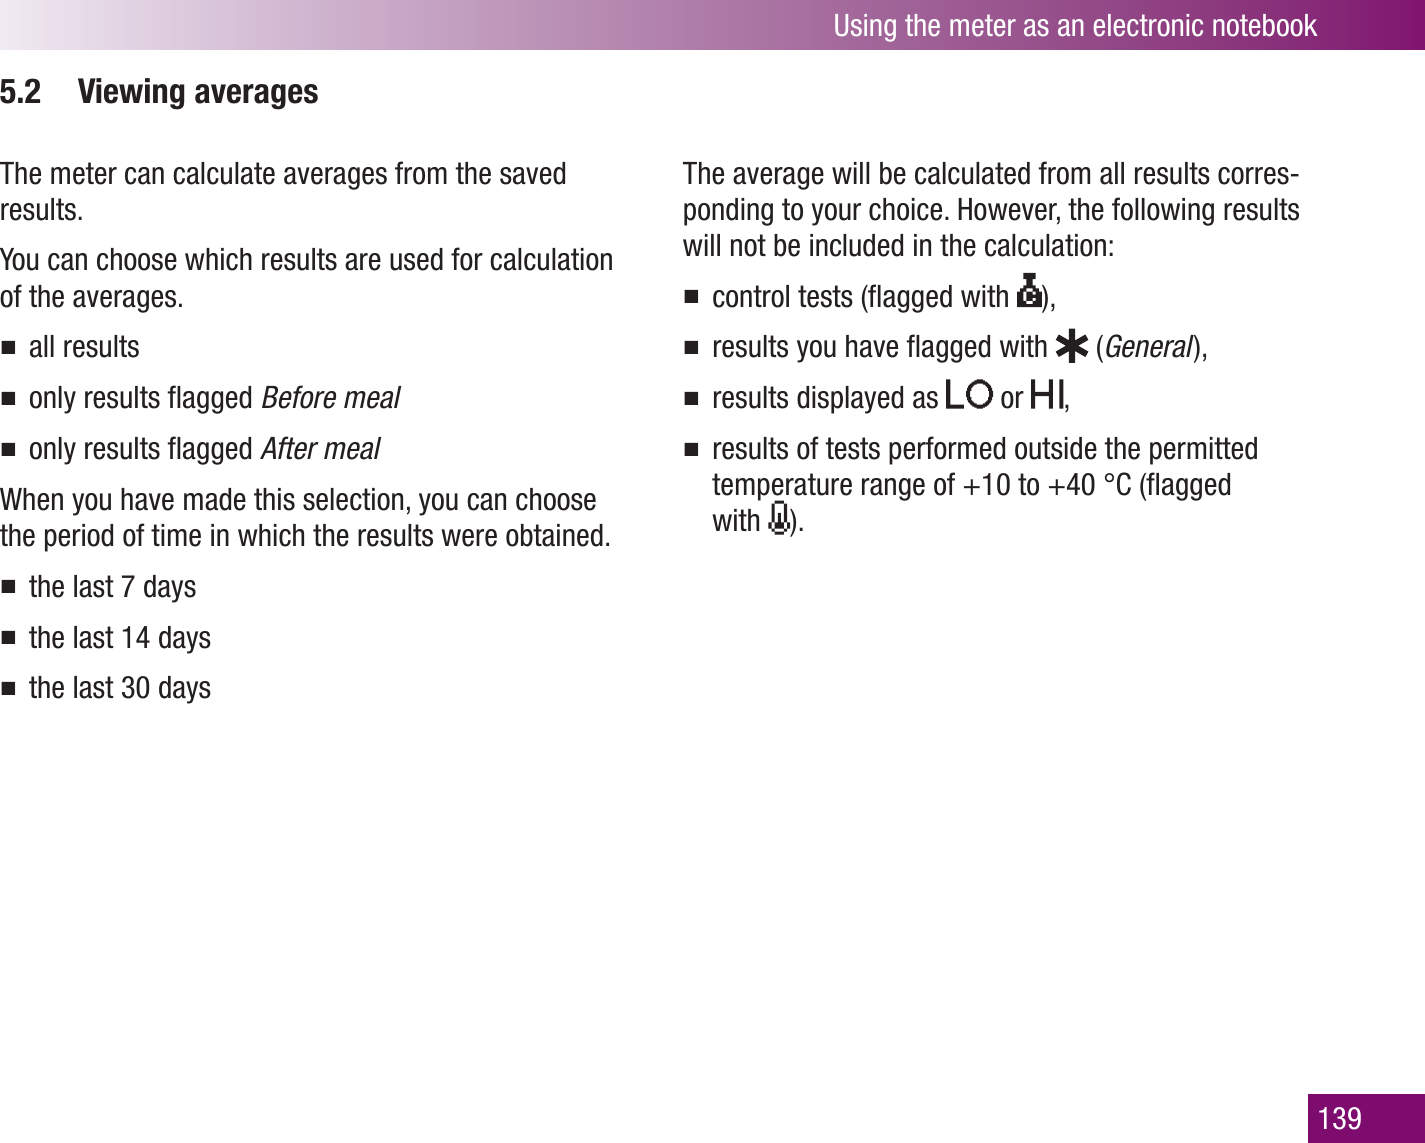
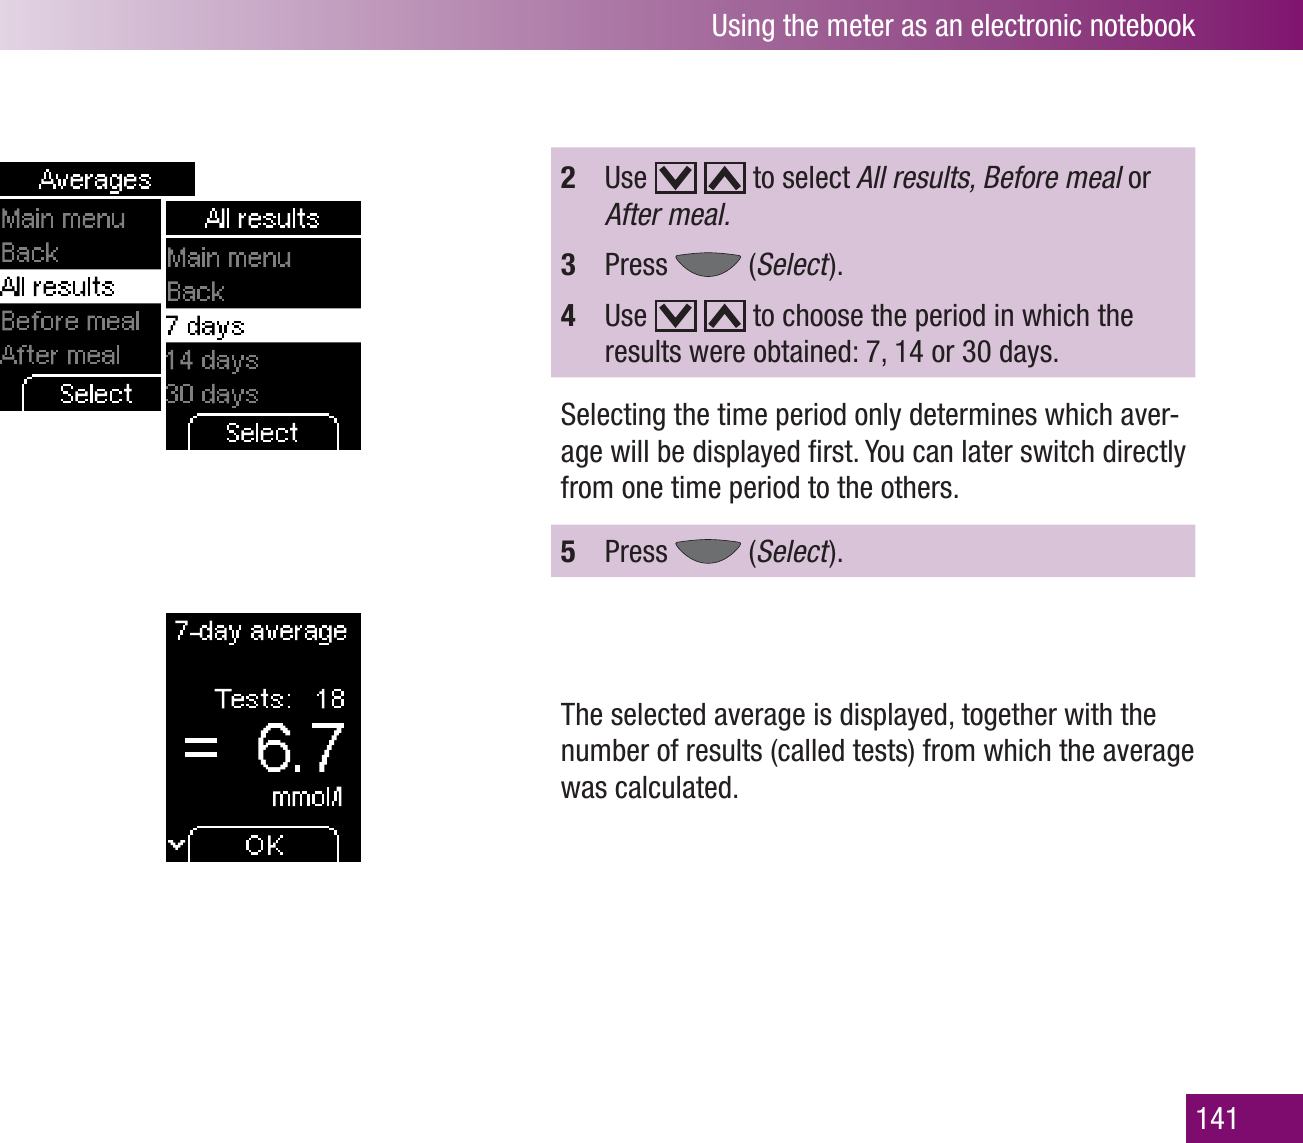
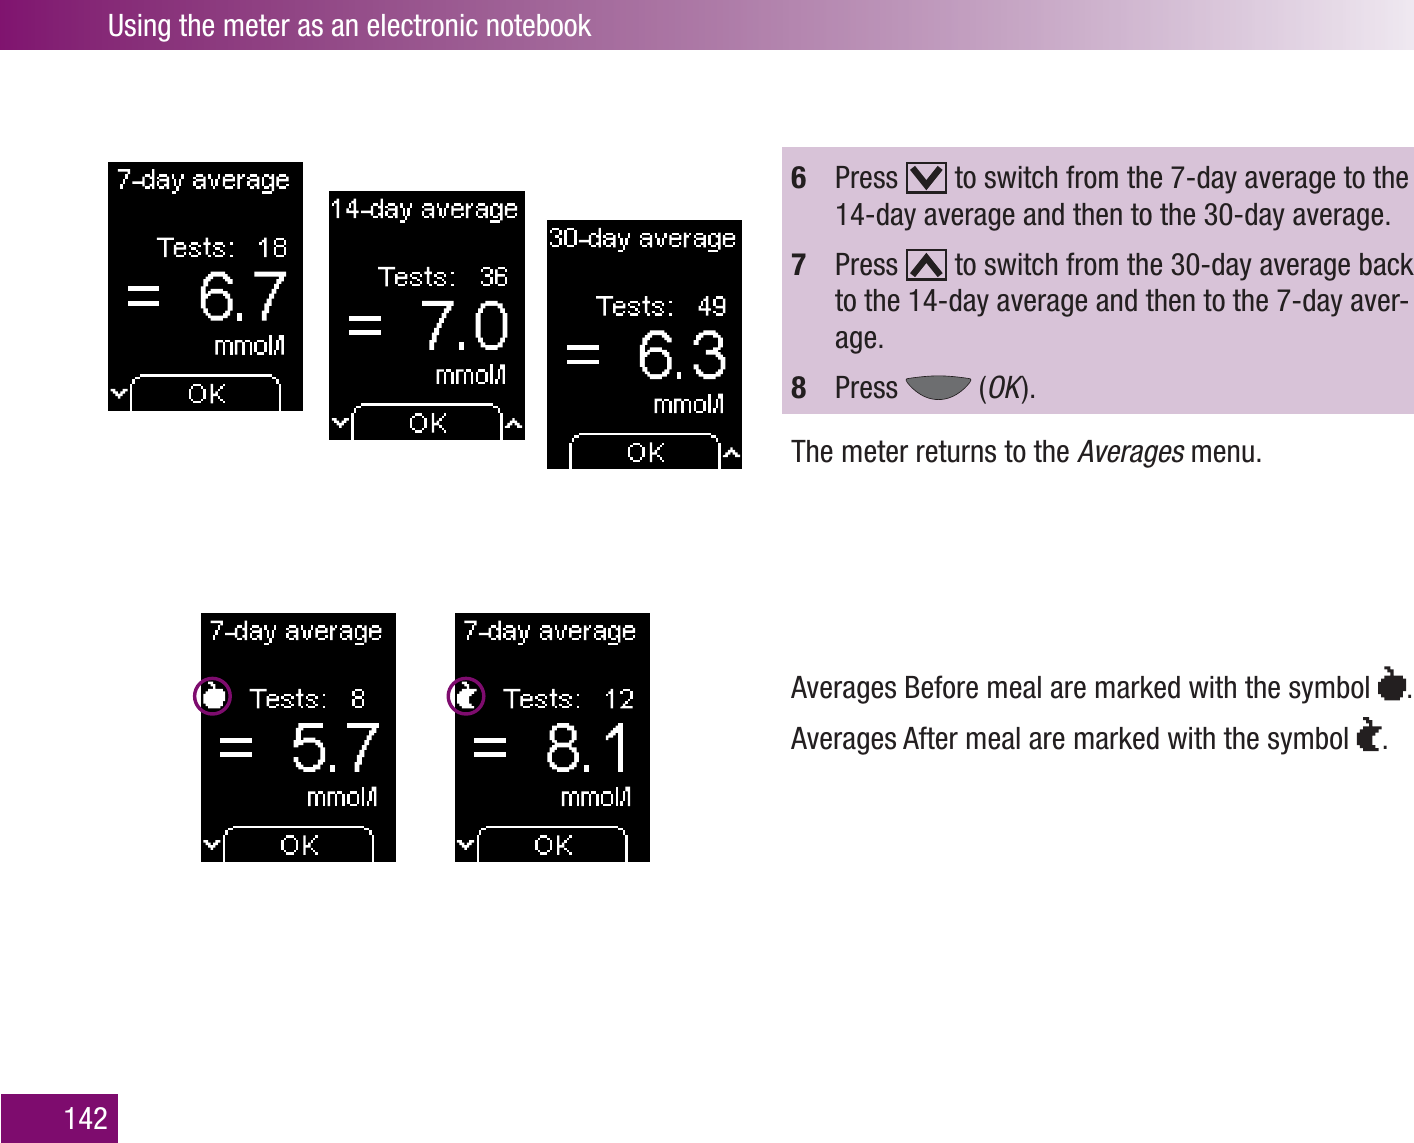
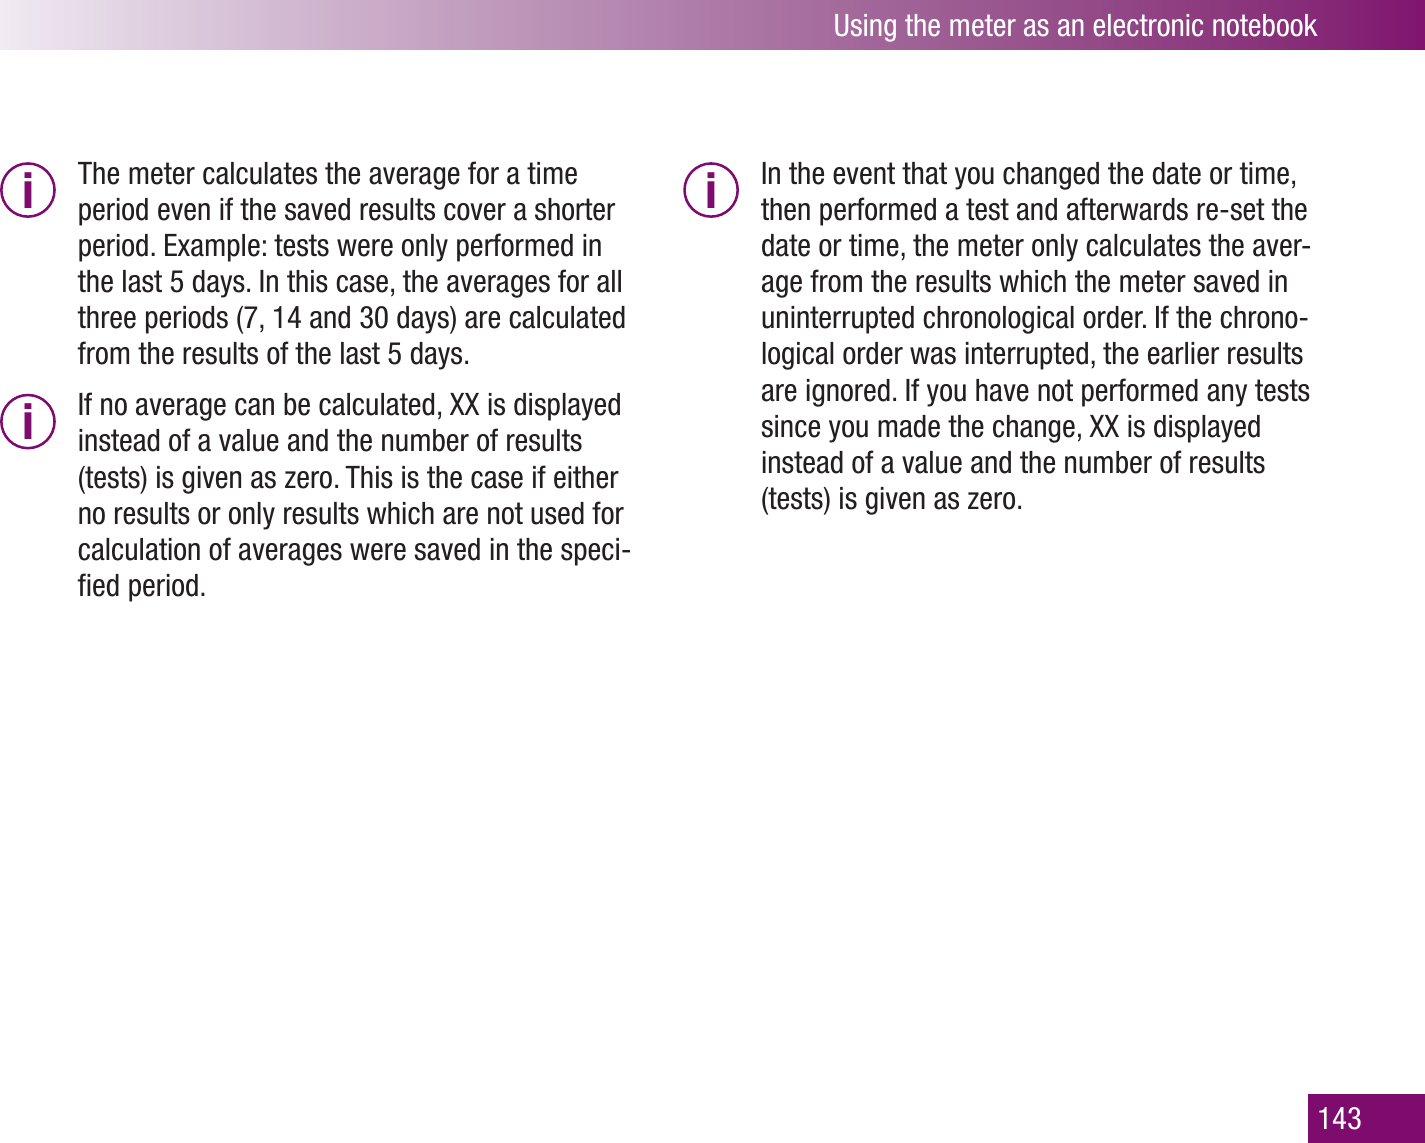
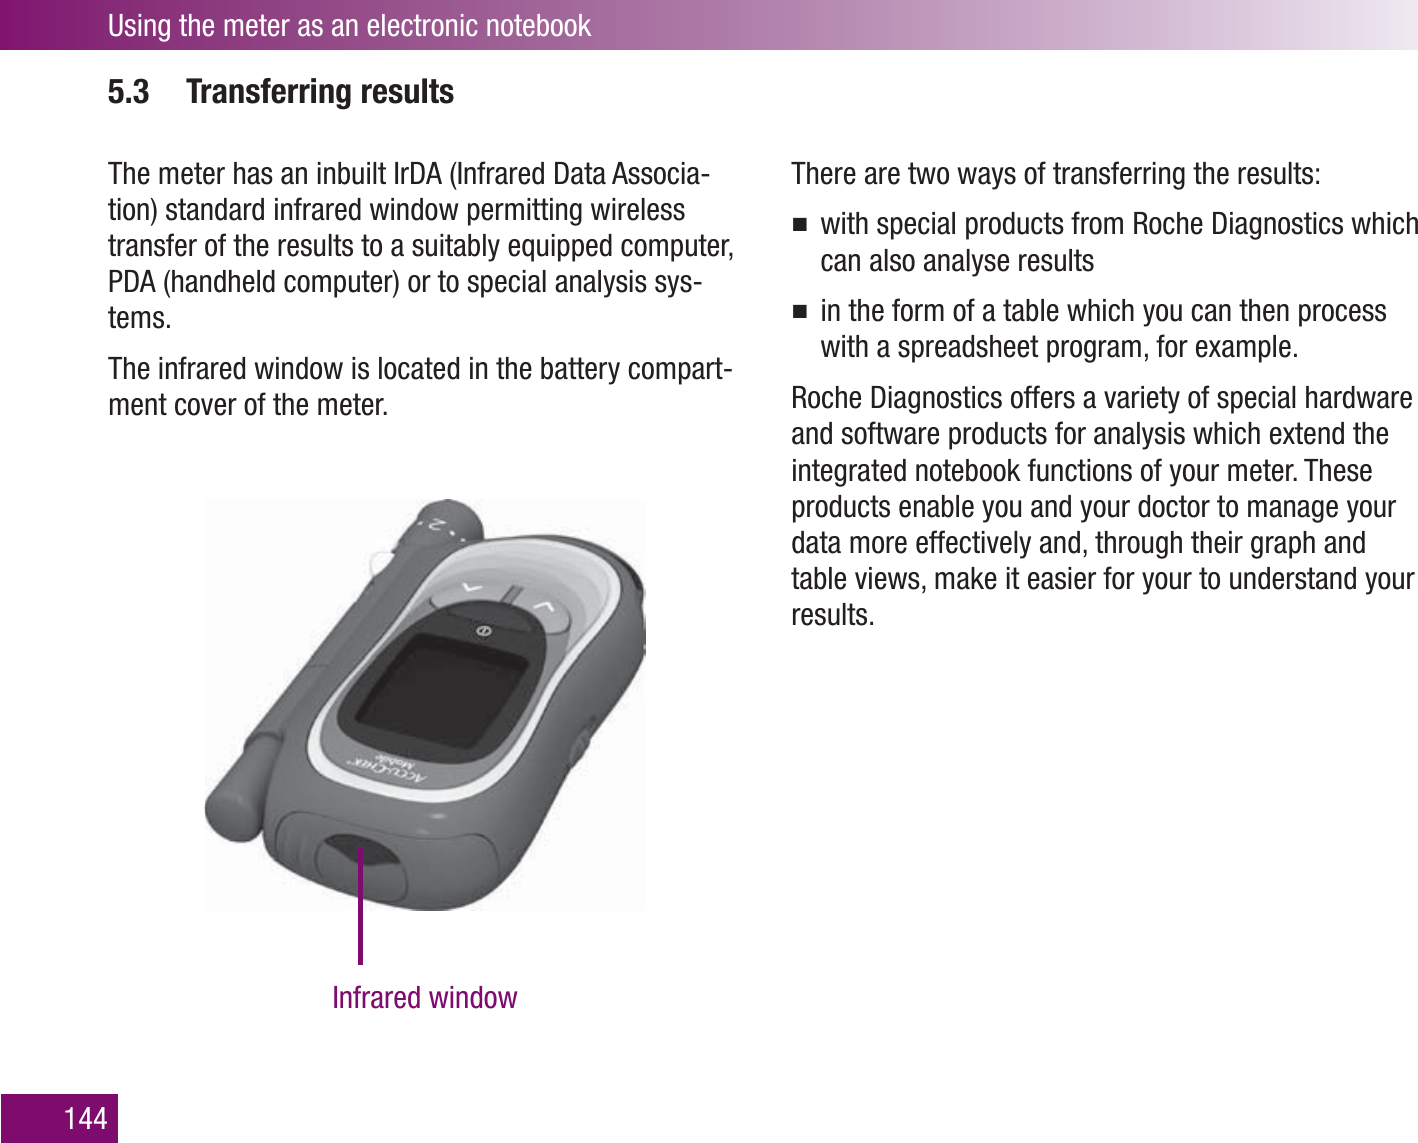
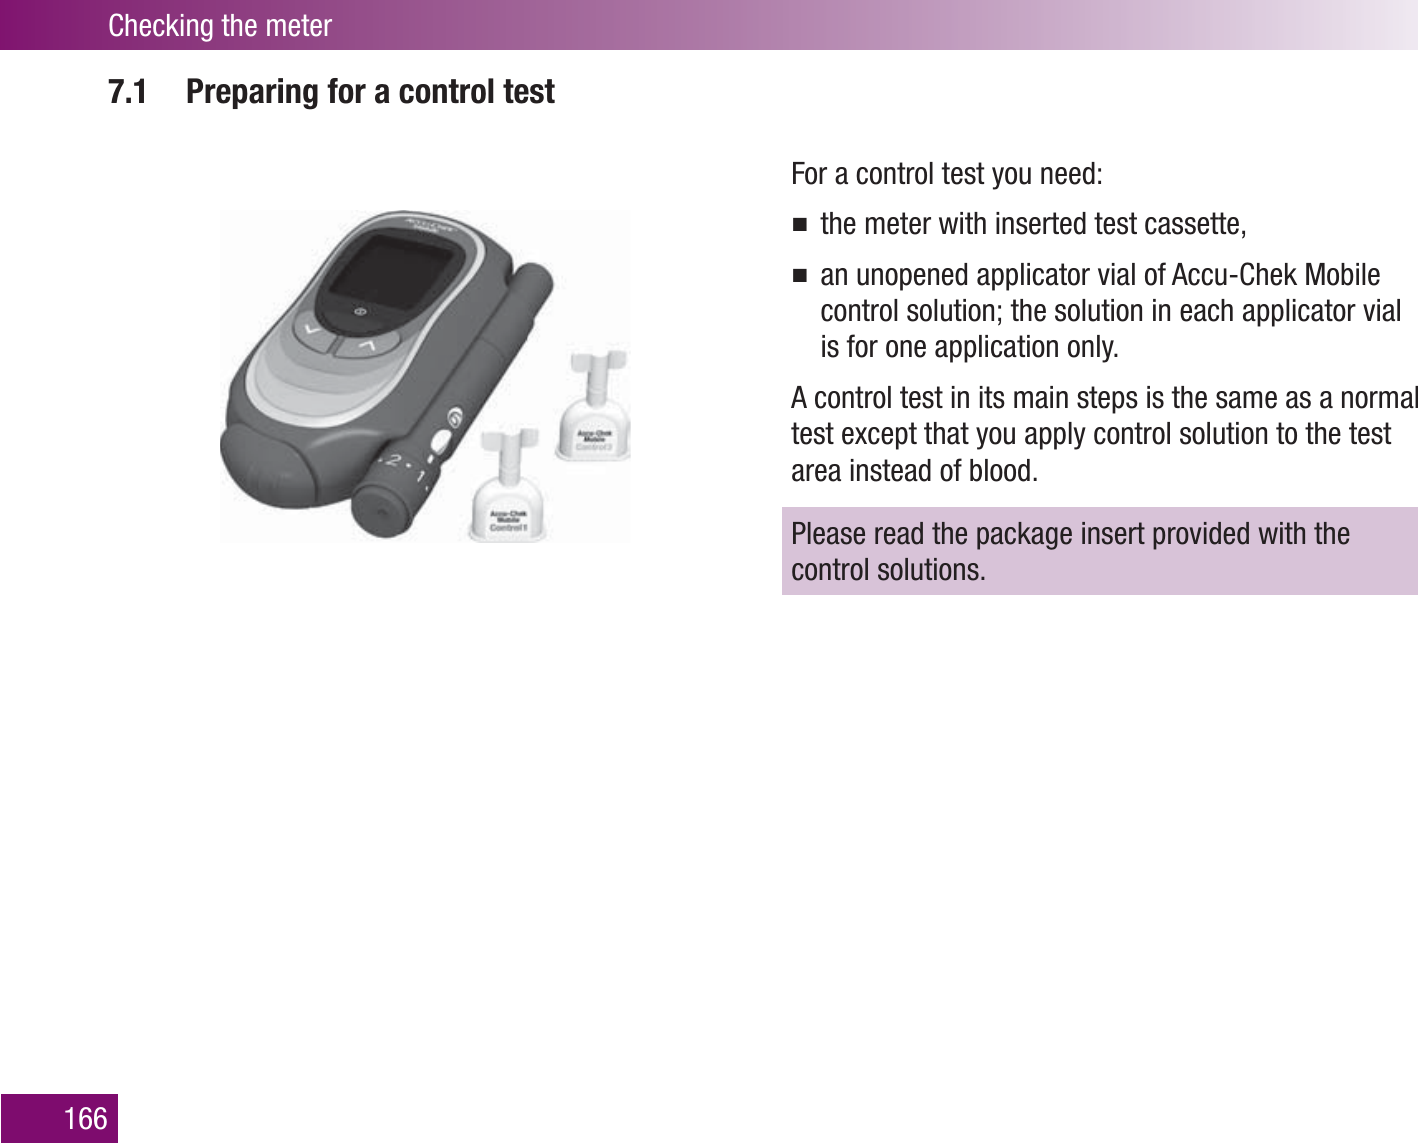
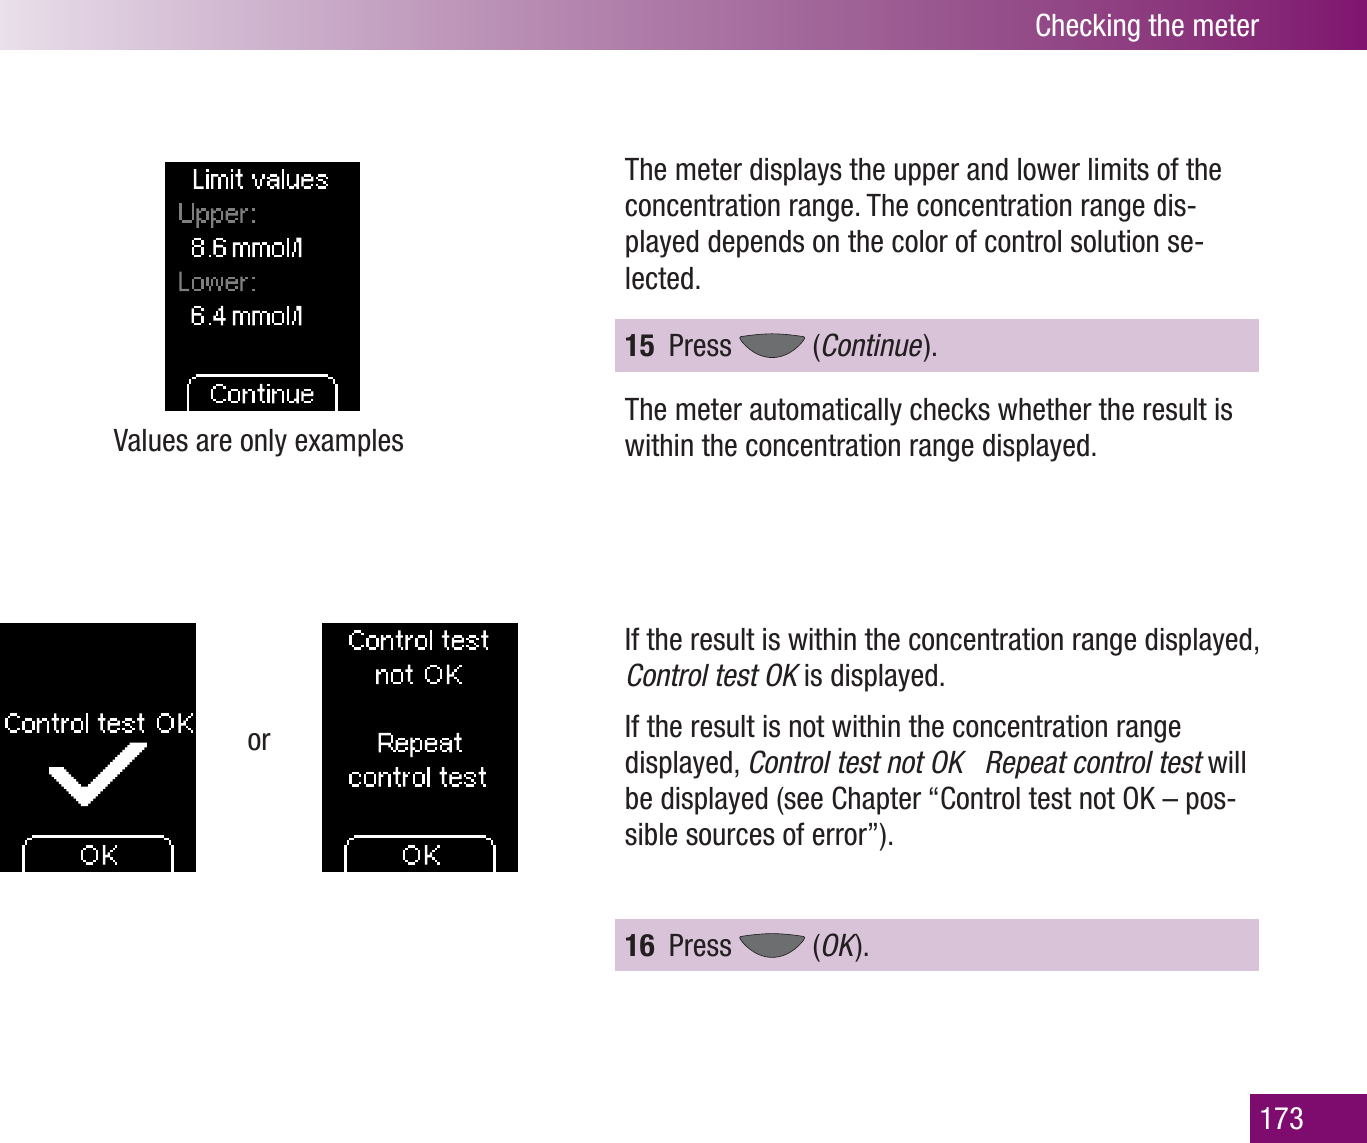
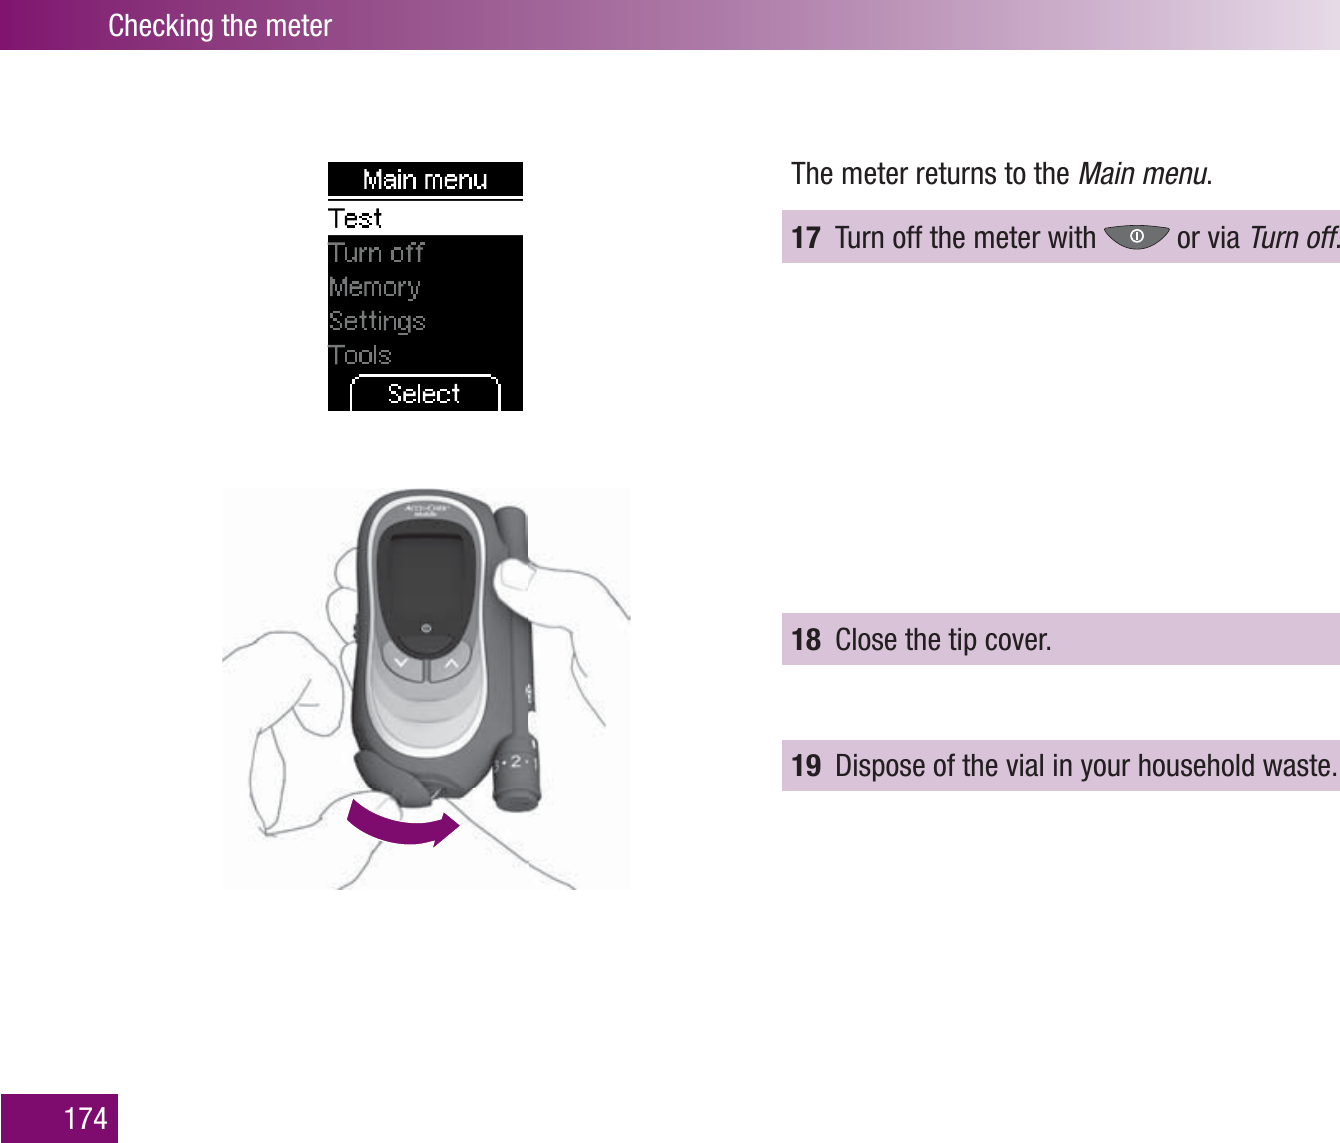
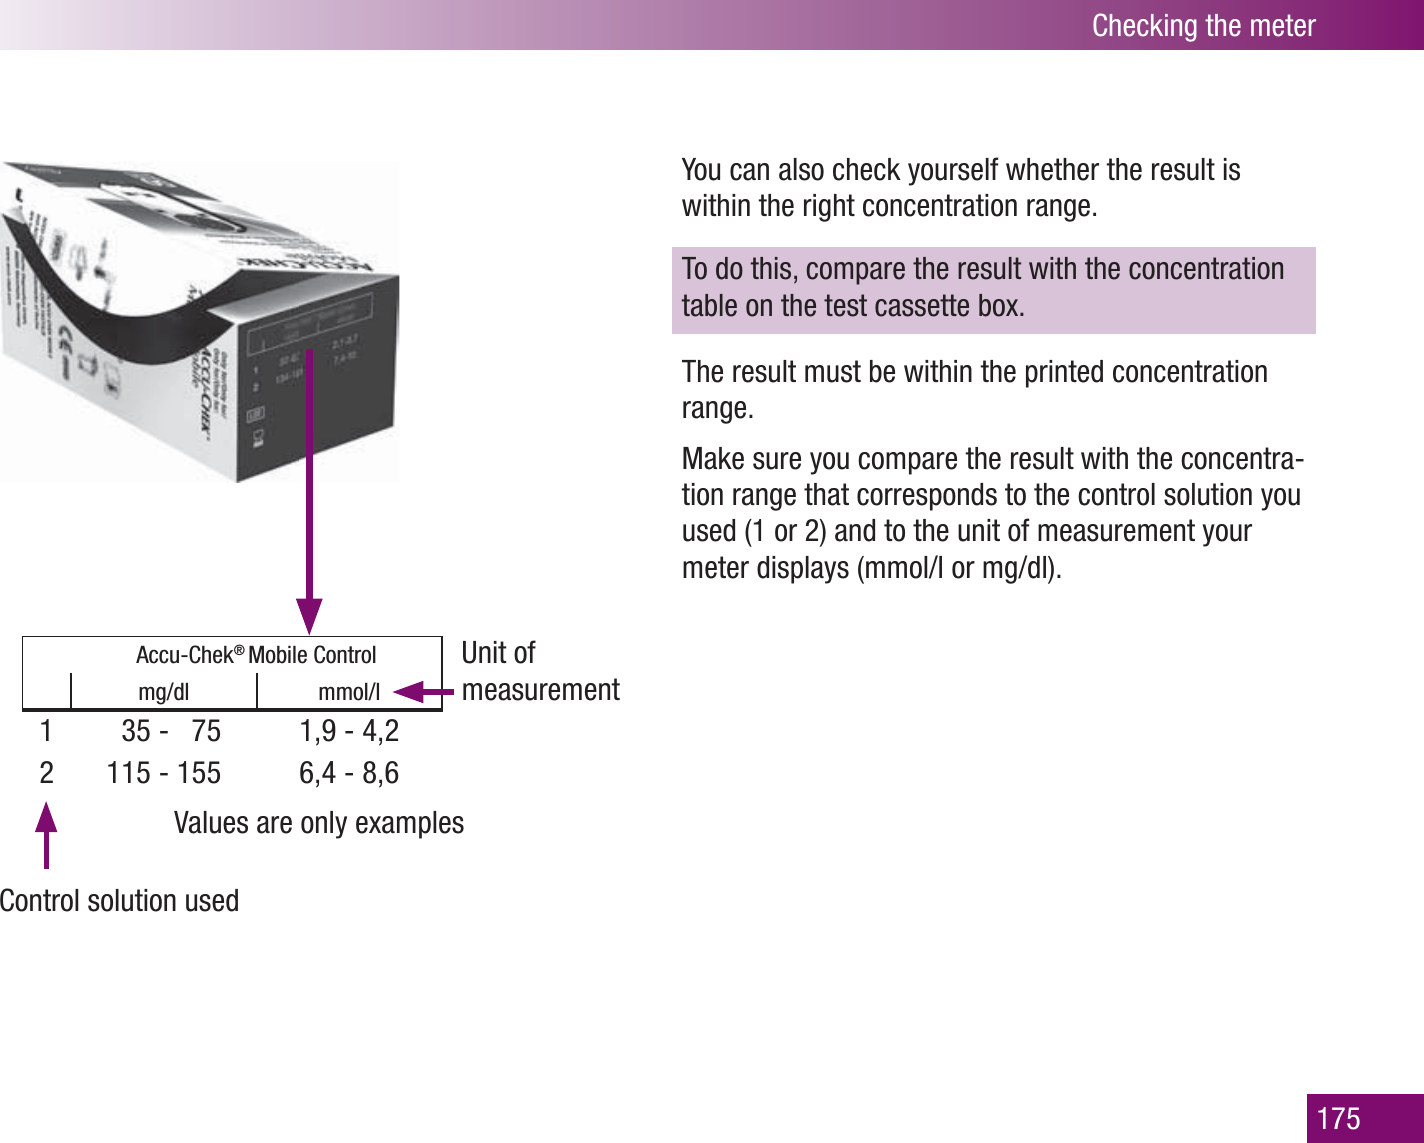
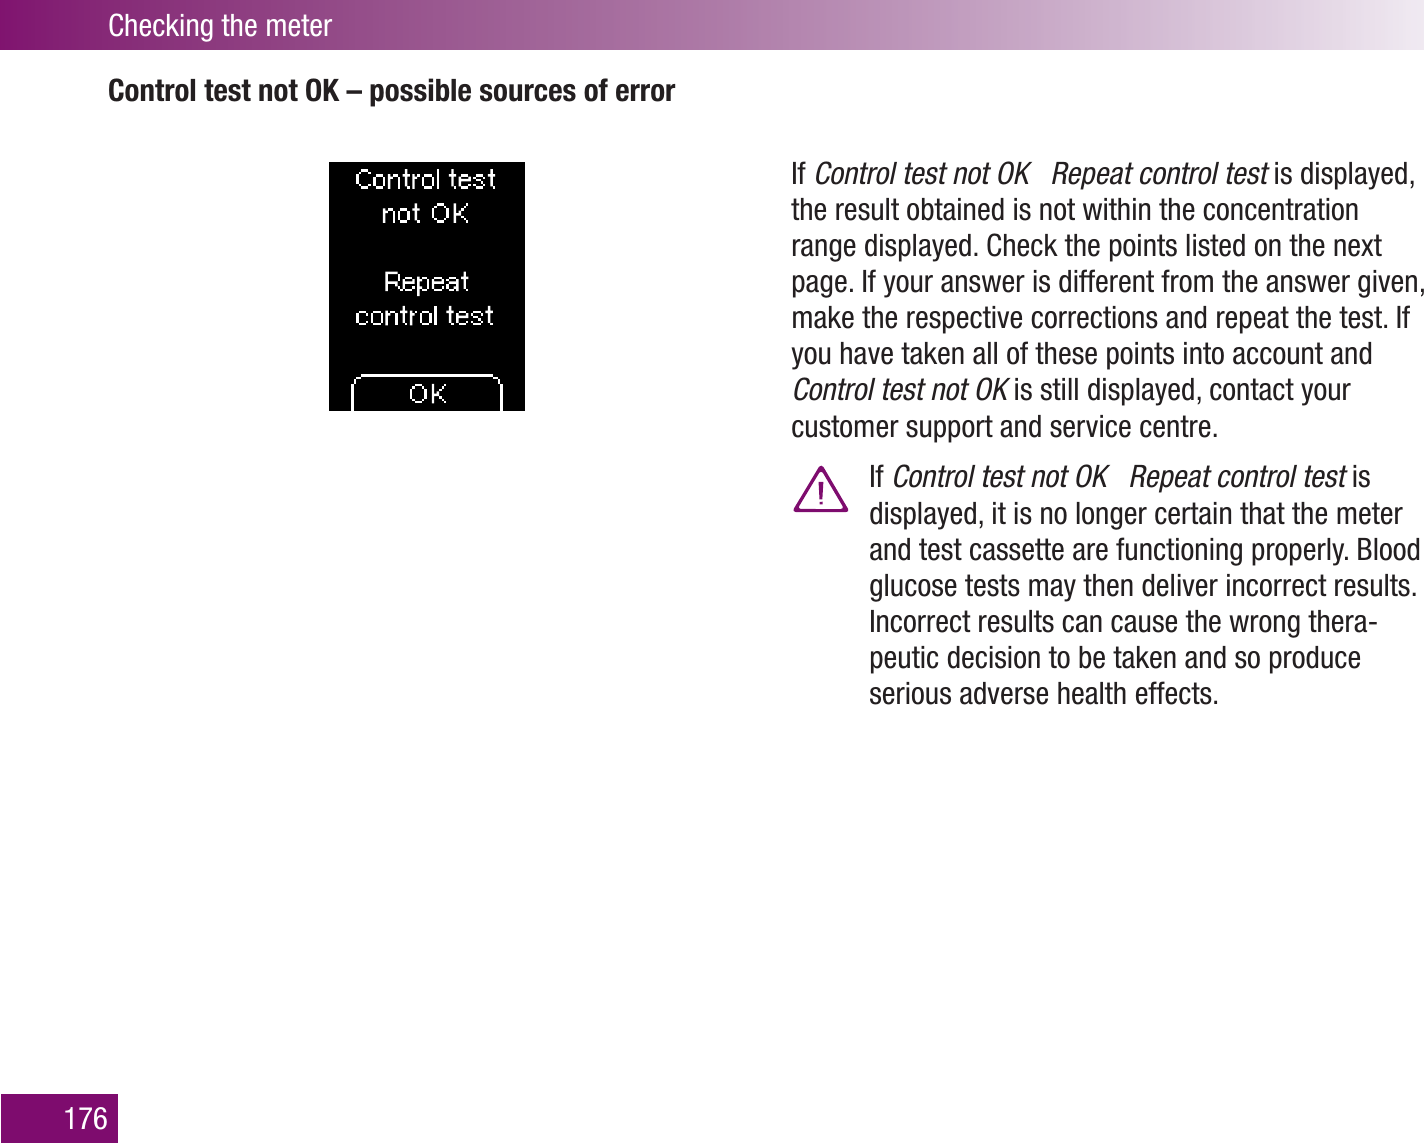
![Getting to know your meter and lancing device151 Battery compartment cover (right: from above; far right: open)2 Infrared window (integrated interface for transfer-ring data to a computer, for example)3 Batteries [1.5 V, type AAA, alkaline-manganese or high energy batteries (2 batteries required)]4 Lancing device (docked)5 Tip cover (bottom right: open)6 Test area (at the tip of the cassette ready for a test) – this is where you apply the blood7 Down/Up buttons8 On/Off and Enter button9 Display](https://usermanual.wiki/Roche-Diagnostics-Diabetes-Care/U8/User-Guide-1065503-Page-15.png)