Roland KR107 ELECTRONIC PIANO WITH USB PORT User Manual KR 107 e
Roland Corporation ELECTRONIC PIANO WITH USB PORT KR 107 e
Roland >
Contents
- 1. USERS MANUAL 1
- 2. USERS MANUAL 2
- 3. USERS MANUAL 3
USERS MANUAL 2
50
Chapter 2 Automatic Accompaniment
Chapter 2
Selecting Music Styles (Music Style Buttons)
You can select a variety of different Music Styles by pressing the Music Style buttons.
Four different preset styles are assigned to the Music Style.
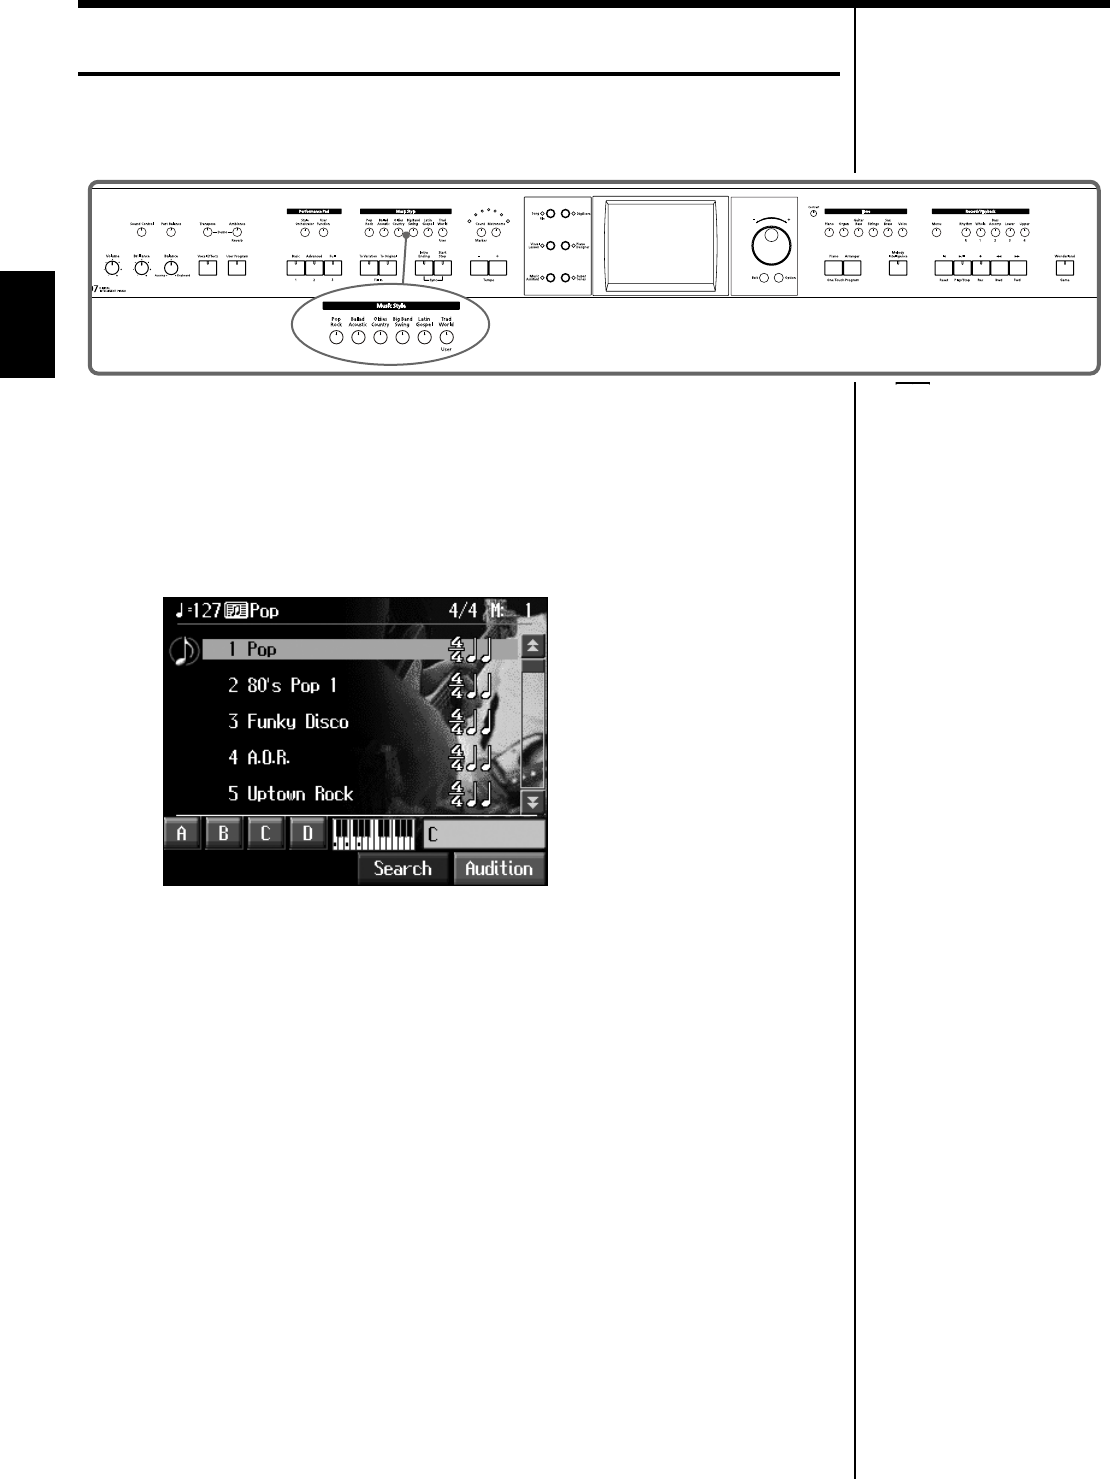
fig.panel2-2
1. Press the One Touch Program [Arranger] button.
2. Press one of the Music Style buttons to select the Music Style group.
Watch the indicator button light up.
Five of the Music Styles included in that group are displayed on the screen.
fig.d-stylesel.eps_60
This screen is called the “Style Selection screen”.
Touch and drag up and down in the scroll bar to scroll through the screen and
display other styles.
Touch the page icons to change pages.
You can listen to the Music Style by touching <Audition>.
You can touch <Search> to find Styles that match the selected criteria (p. 52).
3. Touch a Music Style name to select the Music Style.
You can use the dial to automatically switch pages and select Styles.
4. Touch Preset <A>, <B>, <C>, or <D> in the lower part of the screen.
When the Music Style is selected, Preset A is selected.
When any of the Presets from <A> through <D> are selected, the Music Style tempo,
right-hand Tone, Style Orchestrator settings (p. 58) and other settings change.
For more on the Music Style
names, refer to the “Music
Style List” (p. 177, p. 193).
51
Chapter 2 Automatic Accompaniment
Chapter 2
5. Press the [Exit] button.
The display returns to the Basic screen.
When you play a chord in the left-hand part of the keyboard, the selected Music Style
is automatic.
■Selecting Music Styles on External Memories
You can play other User Styles saved to external memories or User memory (p. 134).
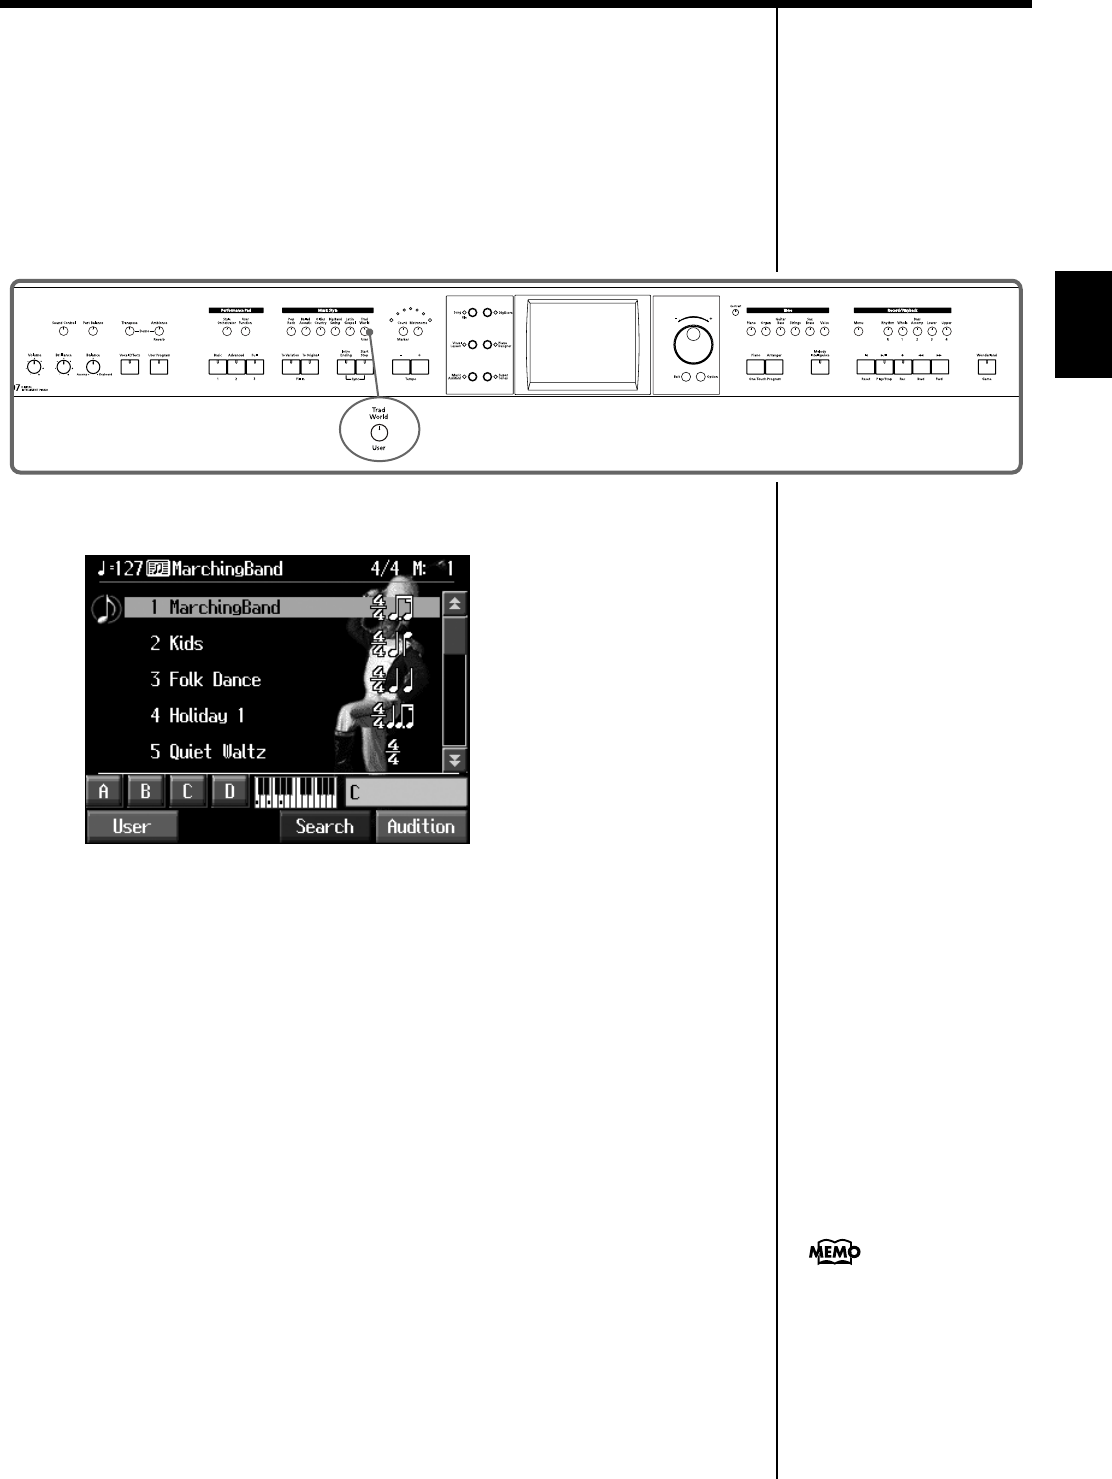
fig.panel2-3
1. Press the Music Style [User] button.
fig.d-styldisk.eps_60
2. Touch <User> in the lower part of the screen.
When you touch <User> on the lower part of the screen, the screen for selecting user
memory or disk Styles appears.
When you touch <Preset>, the screen for selecting “Trad/Kids” Music Styles
appears.
3. Touch < ** > < ** > to select the storage media to which the
accompaniment Style is saved.
The names of the accompaniment styles stored on the selected storage media are
displayed.
4. Select a Music Style, and touch the Music Style name.
5. Press the One Touch Program [Arranger] button.
You can now perform in the selected Music Style.
Music Styles selected from external memories are stored until the power is turned
off. Even after ejecting the external memory, by pressing the Music Style [User]
button, you can perform using the most recently selected Music Style.
You can save multiple user
Styles to user memory. Take a
look at “Saving a User Style”
(p. 134).
52
Chapter 2 Automatic Accompaniment
Chapter 2
■Using Keywords to Search for Music Styles
(Style Search)
You can search for Music Styles that match the tempo of the song, musical genre, or
other criteria you set.
You can also search Music Styles using the first character of the Style names.
1. Press one of the Music Style buttons.
2. Touch <Search>.
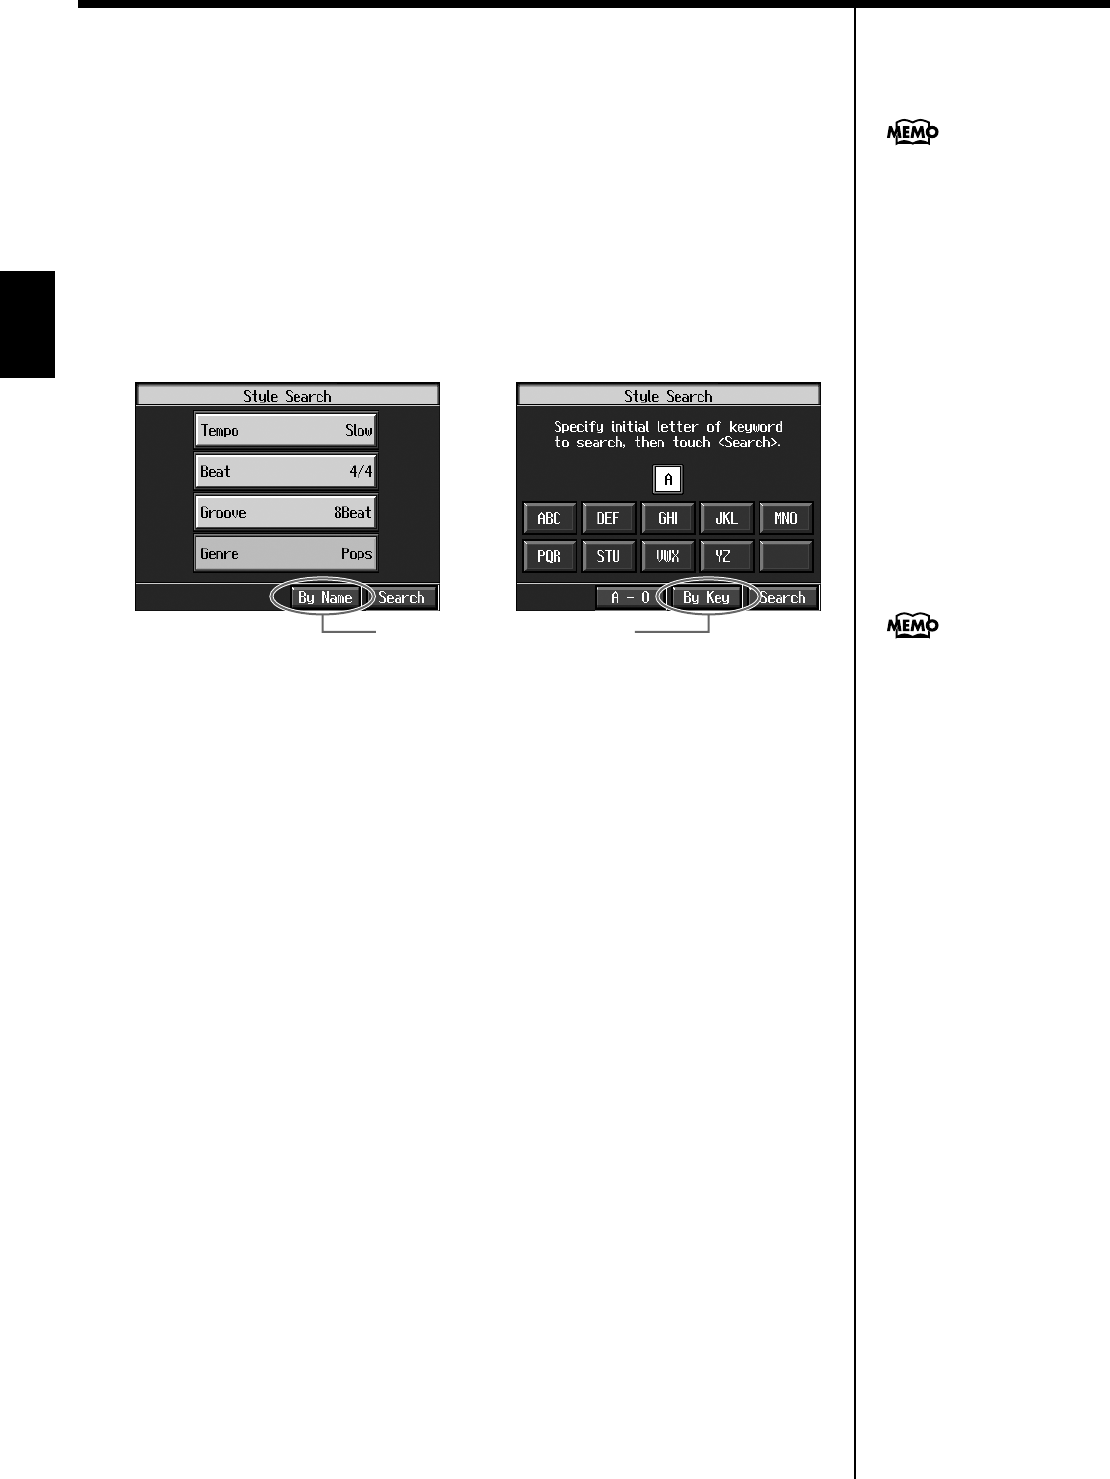
The following “Style Search screen” appears.
fig.d-stylsrch1.eps_60
❍Searching by Conditions
3. Touch the parameter you want to set, then use the [-] [+] buttons and the
dial to select the search conditions.
4. Touch <Search>.
The search results appear in the display.
Touch a Music Style name to select a Music Style.
Press the [Exit] button to return to the Style Search screen.
❍Searching by Music Style name
3. Touch <By Name>.
Touch <By Key> to return to the Condition Search screen.
4. Decide which character you’ll use for the search.
The selected character appears in the middle of the screen.
Enter the character you are searching for. For example, touching <ABC> in
succession cycles you through the available choices in that character group
(“A”→”B”→”C”...).
Touch <A-0> to toggle between alphabets and numerals.
5. Touch <Search>.
The search results appear on the display.
Touch a Music Style name to select a Music Style.
Press the [Exit] button several times to return to the Basic screen or the previous
screen.
Only the KR’s internal Music
Styles are searchable.
Condition Search screen Name Search screen
Touch here to switch these screens.
In a condition search, the KR
looks for Music Styles
satisfying all of the selected
search criteria.
53
Chapter 2 Automatic Accompaniment
Chapter 2
Playing Only Music Style Rhythm Patterns
You can also play only the rhythm patterns of Music Styles.
fig.panel2-4
1. Select a Music Style (p. 50).
2. Press the One Touch Program [Piano] button.
The performance is set so that only the rhythm patterns are played.
3. Press the [Intro/Ending] button.
The Rhythm part of accompaniment begins, starting from the Intro.
Just as with regular Automatic Accompaniment, you can add intros and endings by
pressing the [Intro/Ending] button, and make changes to the rhythm patterns with
the Fill In button (p. 57).
Adjusting the Accompaniment Tempo
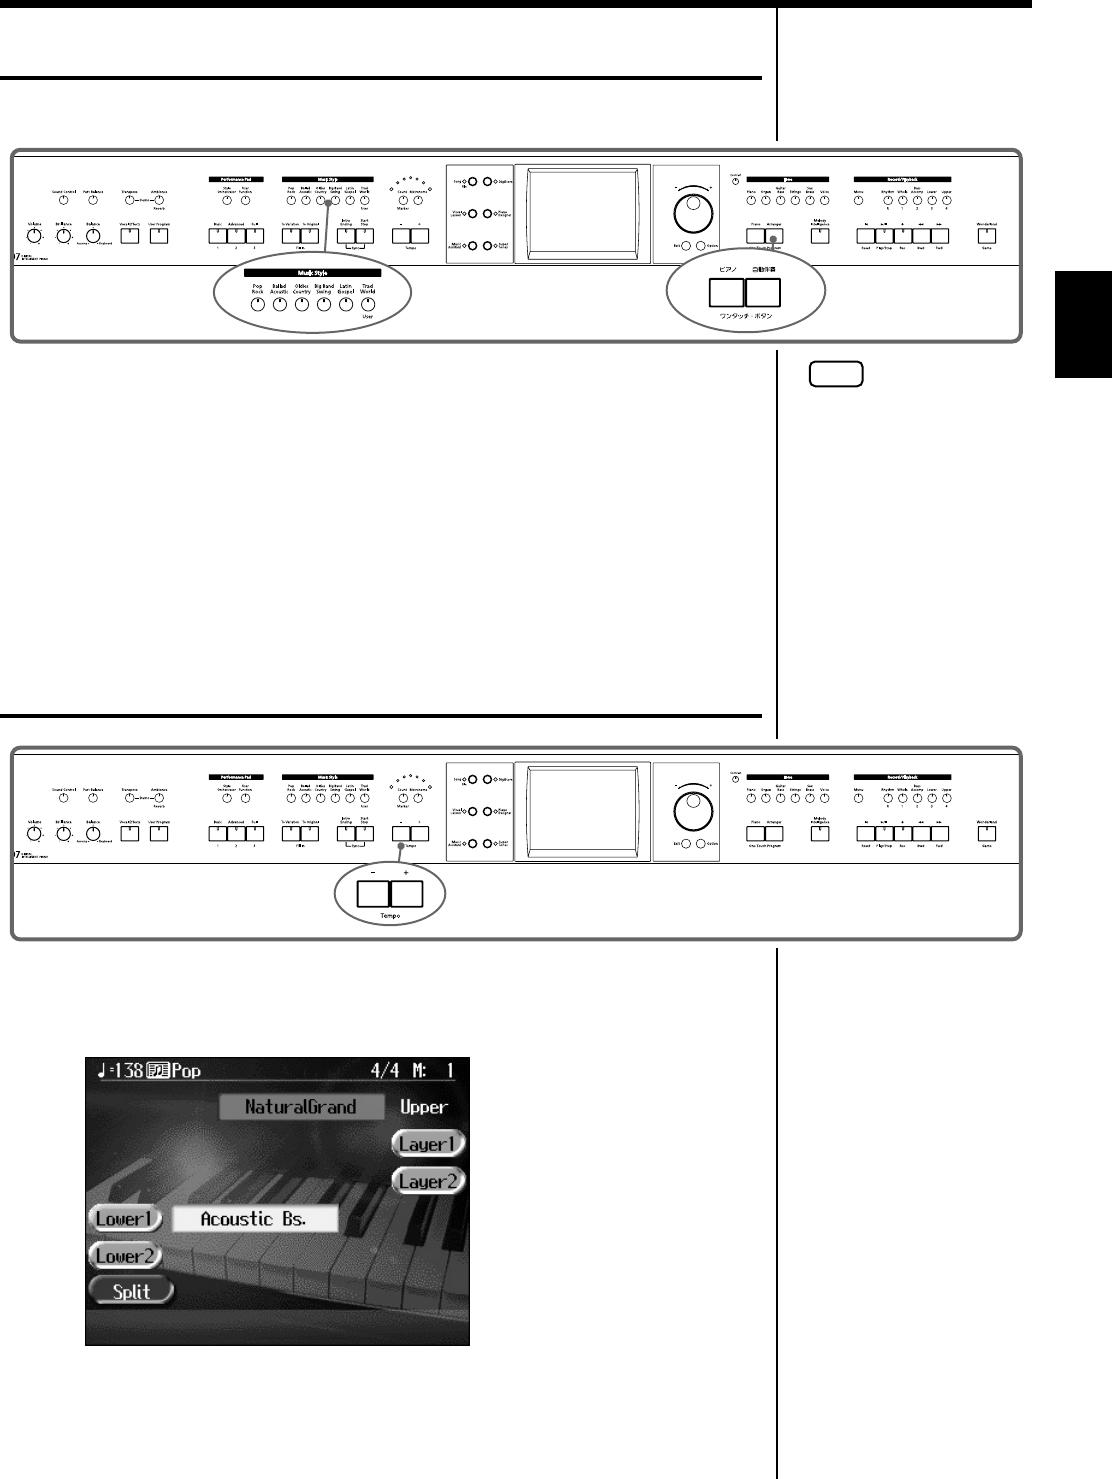
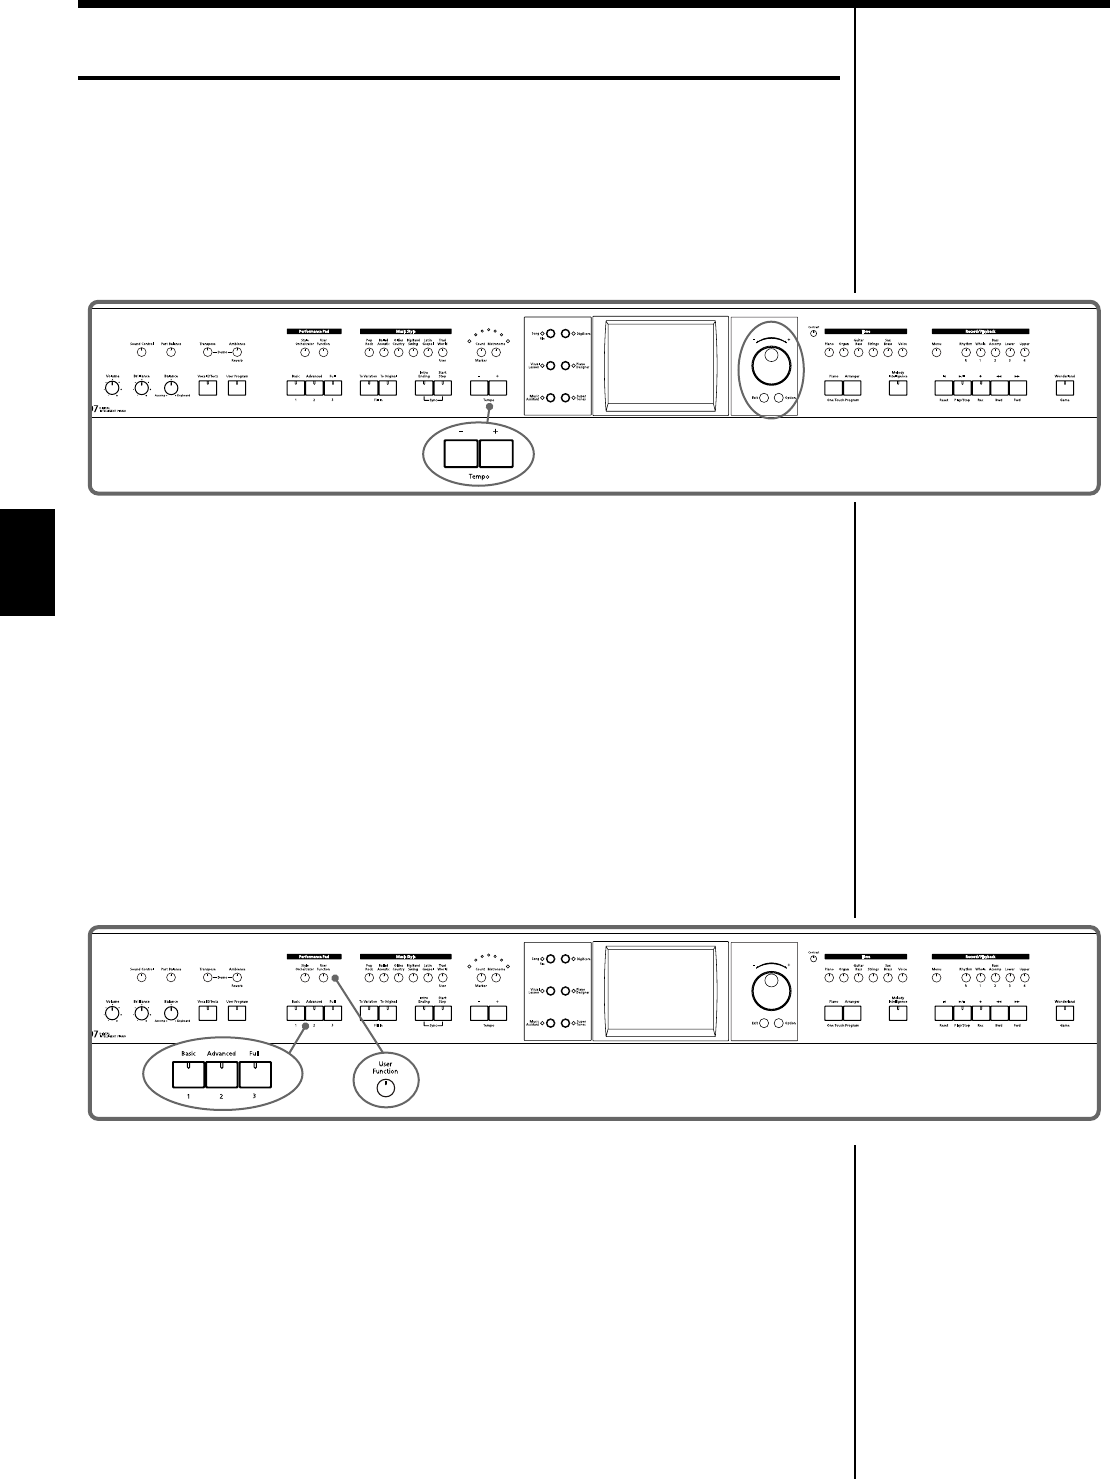
fig.panel2-5
When the Basic screen is displayed, you can use the Tempo [-] [+] buttons or the dial
to change the tempo.
The tempo is indicated on the upper left of the screen.
fig.d-arrbasic.eps_60
Pressing the Tempo [-] [+] buttons simultaneously returns the selected Music Style
or song to the basic tempo.
You can change the tempo of Automatic Accompaniment even while the
accompaniment is playing.
NOTE
Some Music Styles do not
include rhythm patterns.
When you select these Style
patterns, no rhythm patterns
are played, even when you
play on the left side of the
keyboard.
54
Chapter 2 Automatic Accompaniment
Chapter 2
Starting and Stopping the Accompaniment
Pressing the One Touch Program [Arranger] button activates Sync Start for the
accompaniment (which starts the accompaniment simultaneously when you play on
the lower section of the keyboard), and automatically sets an appropriate intro for
the accompaniment. You can also change the way the accompaniment starts and
stops.
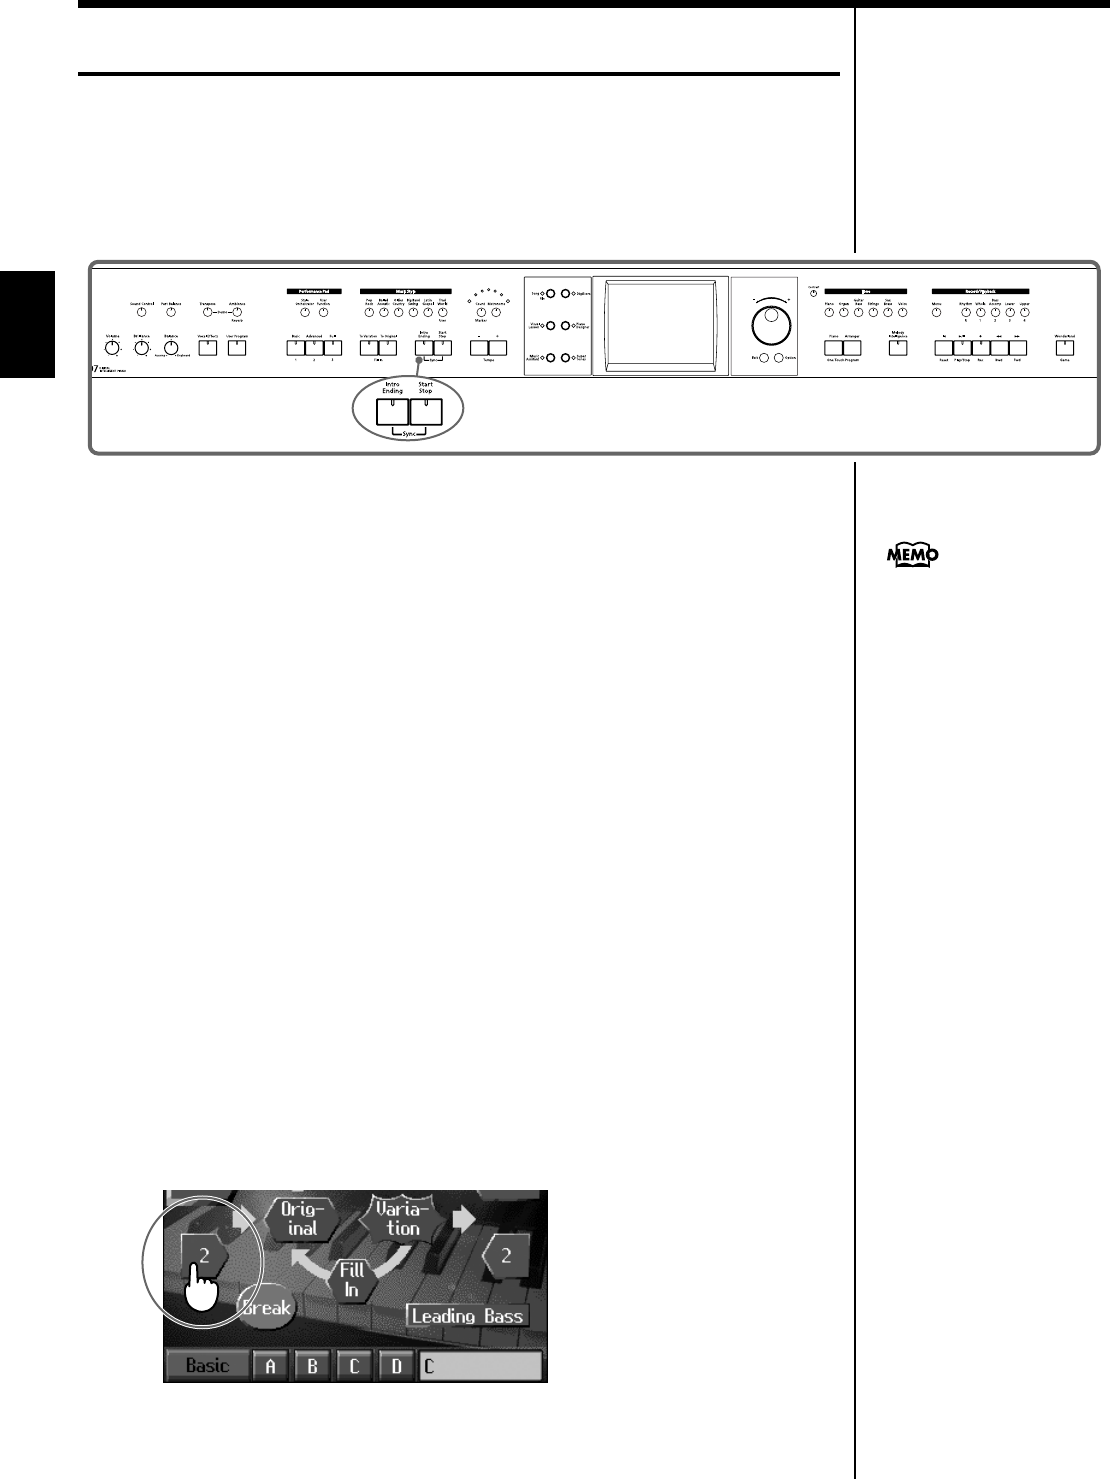
fig.panel2-6
■Having the Accompaniment Start Simultaneously
When You Play the Keyboard (Sync)
1. Press the [Intro/Ending] button and [Start/Stop] button simultaneously,
causing the indicators of both buttons to flash.
The Sync Start settings go into effect.
2. Play a chord on the lower-part of keyboard.
As you play the keys, the intro and accompaniment begins simultaneously.
❍Changing the intro
When set for Sync Start (the indicators of both the [Intro/Ending] button and [Start/
Stop] button are flashing), you can use the following procedure to change the intro,
or prevent the intro from playing.
Starting without an intro
Press the [Intro/Ending] button and watch the indicator go out.
Now when you play a chord with the keyboard, the accompaniment starts without
the intro.
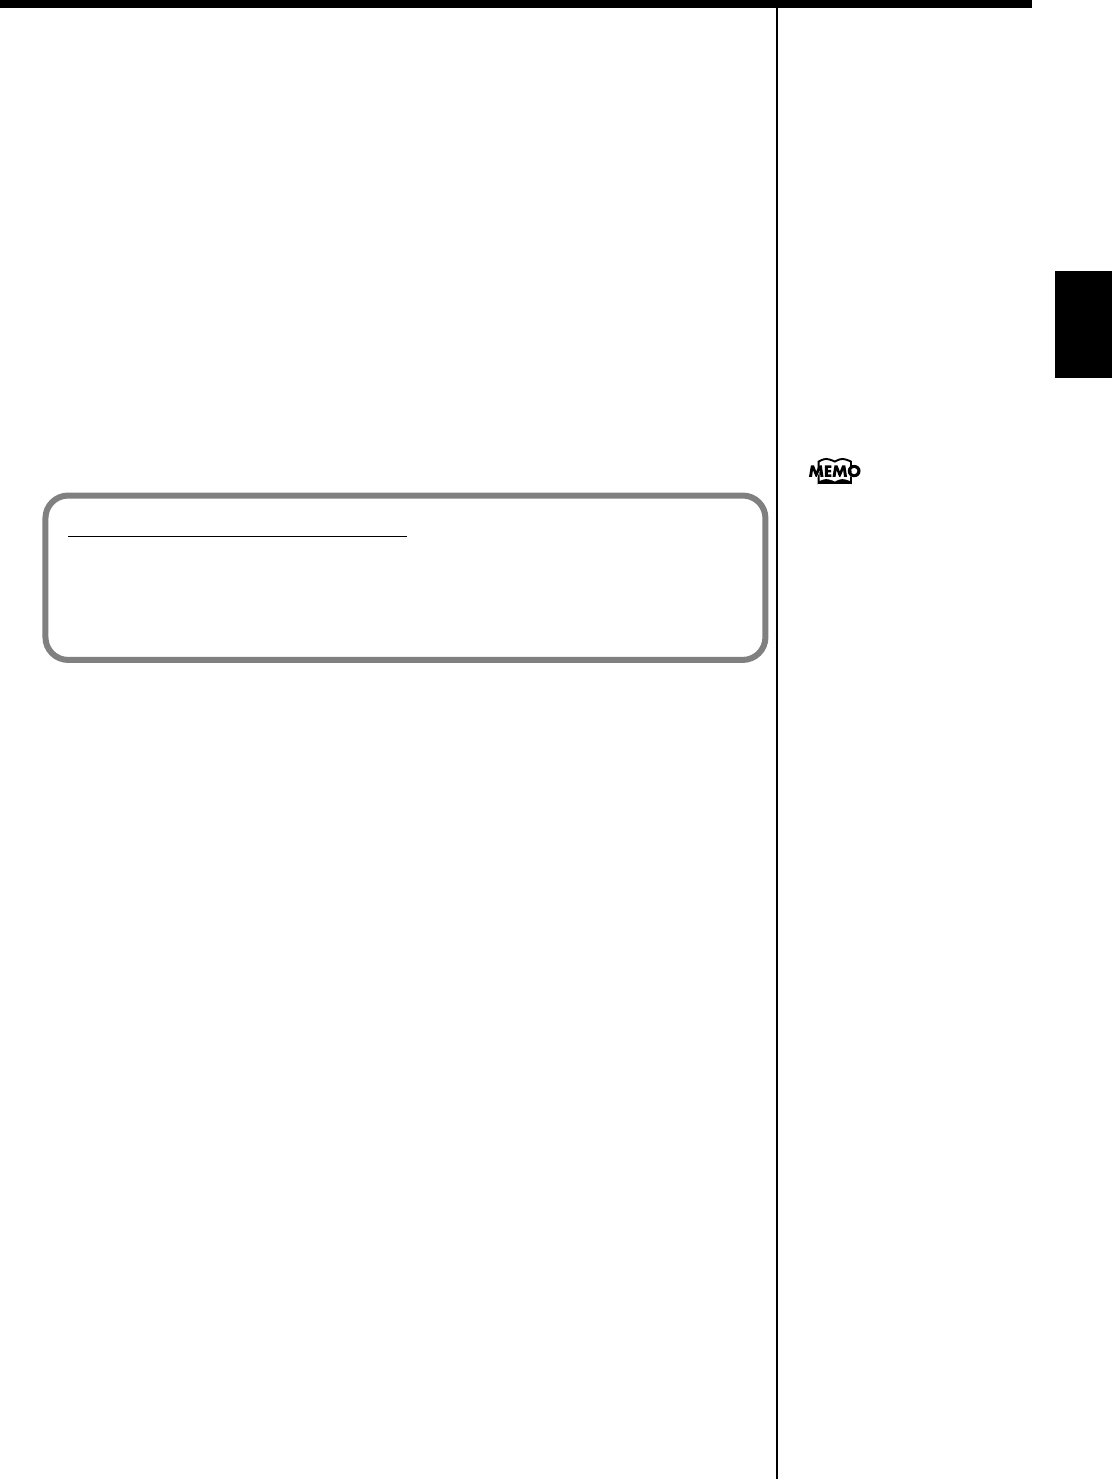
To start with a short intro added
Touch <Arranger> in the Basic screen to open the arranger screen.
Touch the Intro <2>.
fig.d-intro2.eps_60
Now when you specify a chord with the keyboard, a short intro is played, and the
accompaniment starts.
Sync Start is set immediately
after the One Touch Program
[Arranger] button is pressed.
55
Chapter 2 Automatic Accompaniment
Chapter 2
❍Starting at the press of a button
1. Press the [Intro/Ending] button and [Start/Stop] button simultaneously,
and the indicators lights go out.
The Sync Start function is cancelled.
2. Play a chord on the lower part of keyboard.
Choose the chord to be played when the accompaniment begins playing.
3. Press the [Intro/Ending] button or the [Start/Stop] button.
When you press the [Intro/Ending] button, the intro plays, and the accompaniment
starts. When you press the [Start/Stop] button, the accompaniment starts without
the intro.
When you touch Intro <2> on the Basic screen, a short intro plays.
■Stopping Automatic Accompaniment
❍Stopping with an added ending
1. Press the [Intro/Ending] button.
An ending plays and the Automatic Accompaniment stops.
❍Stopping at the same time the button is pressed
1. Press the [Start/Stop] button.
The Automatic Accompaniment stops as soon as you press the button.
Chord Tones and Bass Tones
When you play the keys in the left-hand side of the keyboard while the [Start/Stop]
button’s indicator is not lit, chords play. This note is called the “Chord Tone,” and
the root of the chord being played at the same time is called the “Bass Tone.”
You can change the sound of
the chord tone and bass tone.
Take a look at “Changing How
Chords Are Played and
Specified (Arranger Config)”
(p. 138).
56
Chapter 2 Automatic Accompaniment
Chapter 2
■Having a Count Sound Play at the End of the
Intro (Countdown)
If an intro plays before your performance, you can have a count-in sound played to
the end of the intro, helping you hear when to start playing.
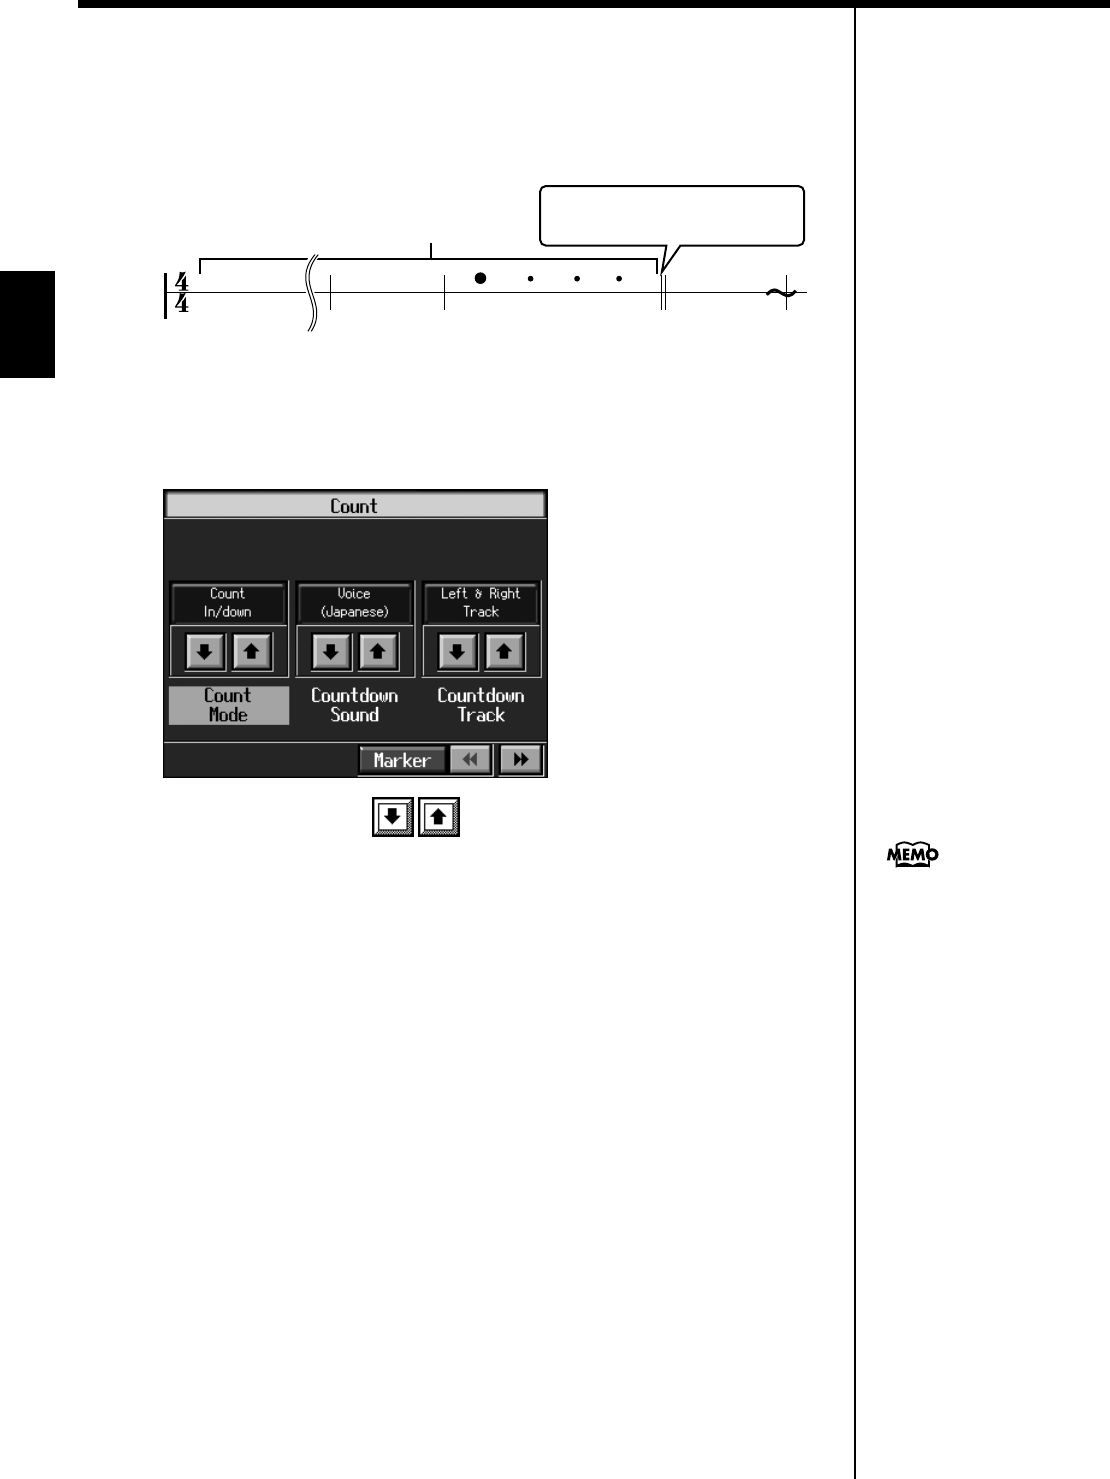
fig.countdown.e
1. Press the [Count/Marker] button and watch the indicator light up.
The following “Countdown settings screen” appears.
fig.d-cntdwn.eps_60
2. Touch <Count Mode> to set this to “Count Down.”
When you press the One Touch Program [Arranger] button, the performance starts,
and the countdown sound plays at the end of the intro.
❍Cancelling the countdown
3. Press the [Count/Marker] button and the indicator light goes out.
Count Sound
1234
When the Intro has finished playing,
the accompaniment plays.
Ex: 4/4
Intro
For more about settings on the
Countdown screen, refer to
“Settings for the Countdown”
(p. 161).
57
Chapter 2 Automatic Accompaniment
Chapter 2
Modifying an Accompaniment
When you use Automatic Accompaniment, you can easily add Fill Ins to the
accompaniment patterns, change arrangements, and make other changes.
■Changing the Accompaniment Pattern
(Fill In Buttons)
There are two accompaniment patterns: the Original, and a Variation. In addition, a
fill-in (or short phrase) is added at the points where the accompaniment patterns
change, which adds more interest to the song. It can be effective to use the simpler
original pattern for the first half of the song, and the variation pattern for the second
half.
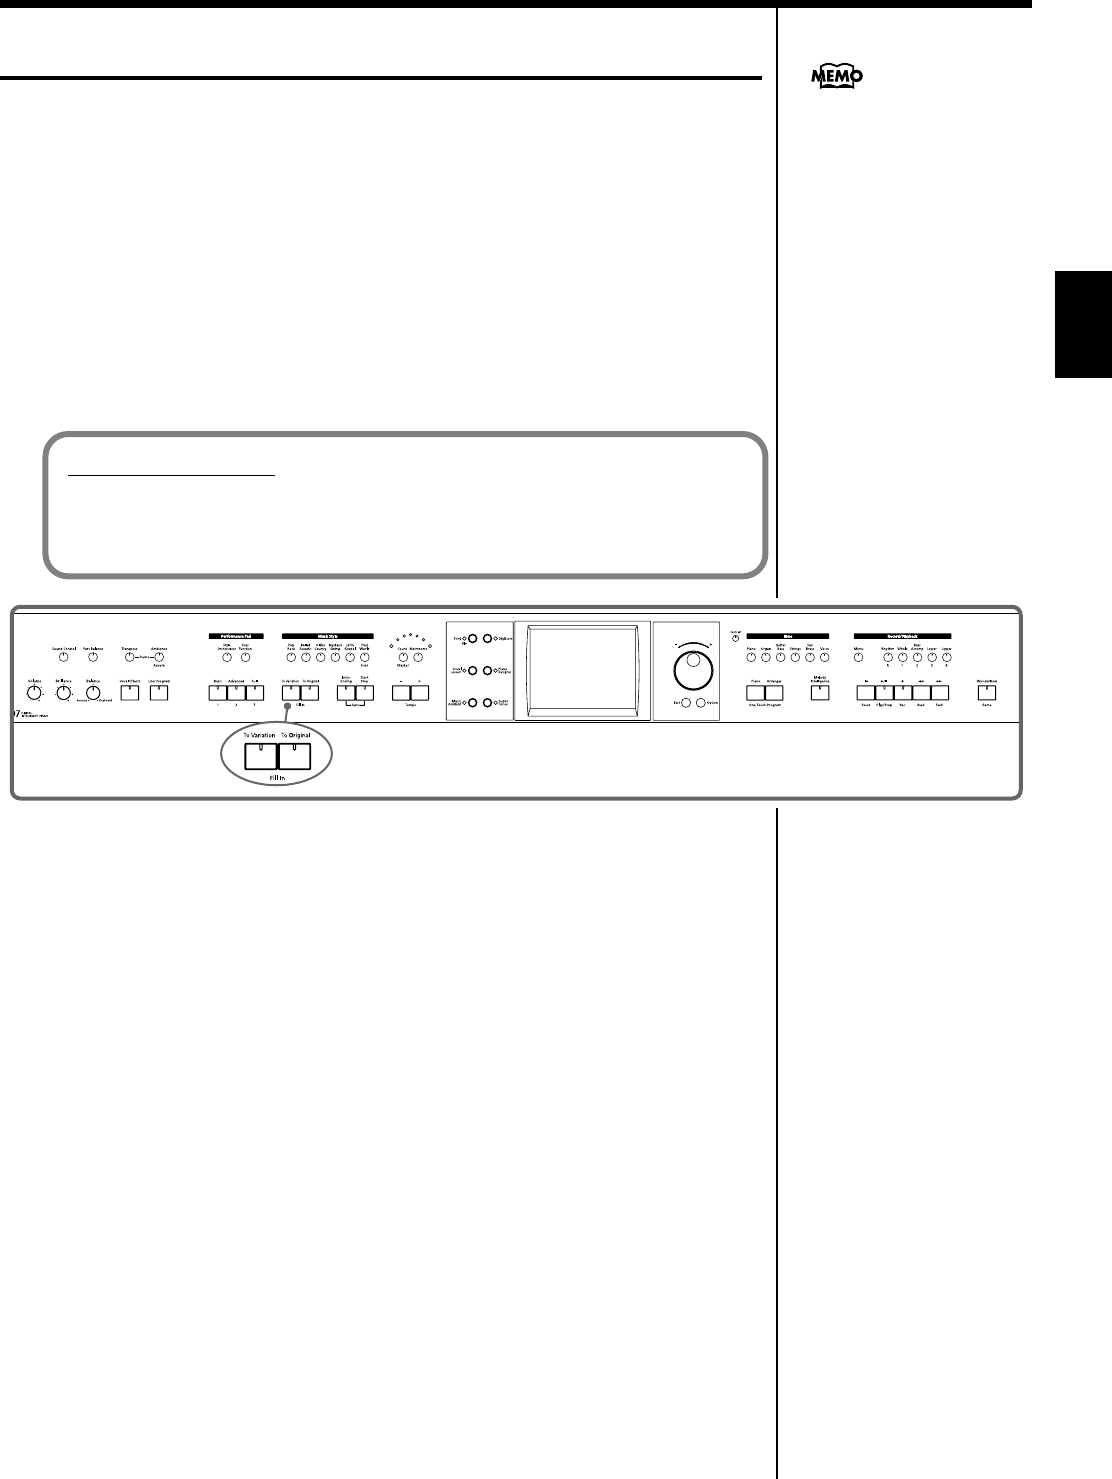
fig.panel2-7
Press the Fill In [Variation] button and watch the indicator light up.
The instrument is set so that the variation performance pattern is played.
Press the Fill In [Original] button and watch the indicator light up.
The instrument is set so that the original performance pattern is played.
Pressing these buttons during a performance inserts a one-bar fill-in at the
appropriate place and time.
Adding a fill-in without changing the accompaniment pattern
You can play only the fill-in, without changing the accompaniment pattern.
Press the lit [Original] or [Variation] Fill In button during the performance.
You can add variation to the
Automatic Accompaniment by
assigning different functions to
the Performance Pads and
pedals. For more information,
see “Assigning Functions to
Pedals and Performance Pads
(Pedal Setting/User
Functions)” (p. 142).
What’s a “Fill In”?
A short improvisational phrase inserted at the bar line is called a “Fill In.”
The KR automatically plays the appropriate phrase for the selected Music Style.
58
Chapter 2 Automatic Accompaniment
Chapter 2
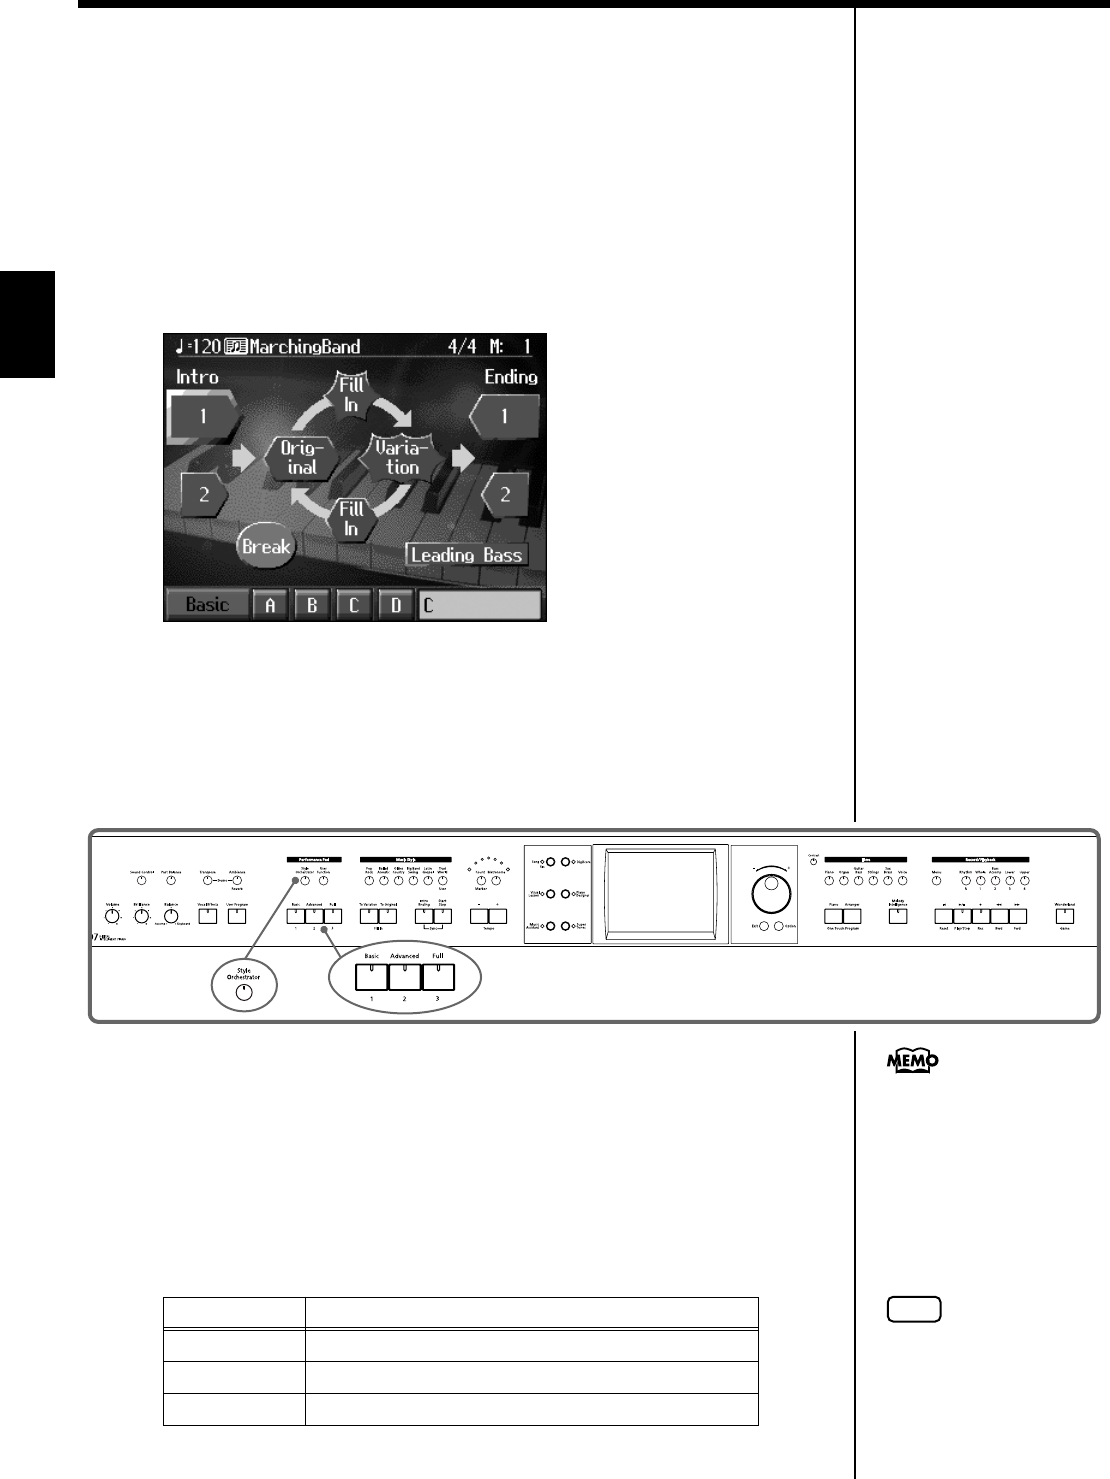
■Changing Accompaniment Patterns in the Screen
You can change accompaniment patterns in intros, fill-ins, endings, and so on by
touching the screen. This lets you enjoy even more advanced performances.
1. Press the One Touch [Automatic Accompaniment] button.
The Automatic Accompaniment basic screen is displayed.
2. Touch <Arranger>.
The following screen appears.
fig.d-cntdwn.eps_60
Touch the screen to change the accompaniment pattern.
■Changing the Instrumental Makeup of Music Styles
(Style Orchestrator)
You can change the arrangement of an accompaniment. This function is called “Style
Orchestrator.” Each Music Style has four different accompaniment arrangements.
fig.panel2-8
1. Press the [Style Orchestrator] button and watch the indicator light up.
The instrument is set to allow you to change the arrangement with the Performance Pads.
2. Press Performance Pad [1]–[3] to change the arrangement for the
accompaniment.
Watch the indicator of the button you pressed light up.
.
Display Explanation
1This is the simplest arrangement.
2This is a more involved arrangement.
3This is the most elavorate arrangement.
When you press the [Phrase]
b
utton or [User Function]
b
uttons, the [Style
Orchestrator] button’s
indicator goes out, and the
function of the Performance
Pads changes. For details refer
to p. 72 and p. 142.
NOTE
When simple Music Styles are
selected, there may be no
change in the arrangement
even when you use the Style
Orchestrator function.
59
Chapter 2 Automatic Accompaniment
Chapter 2
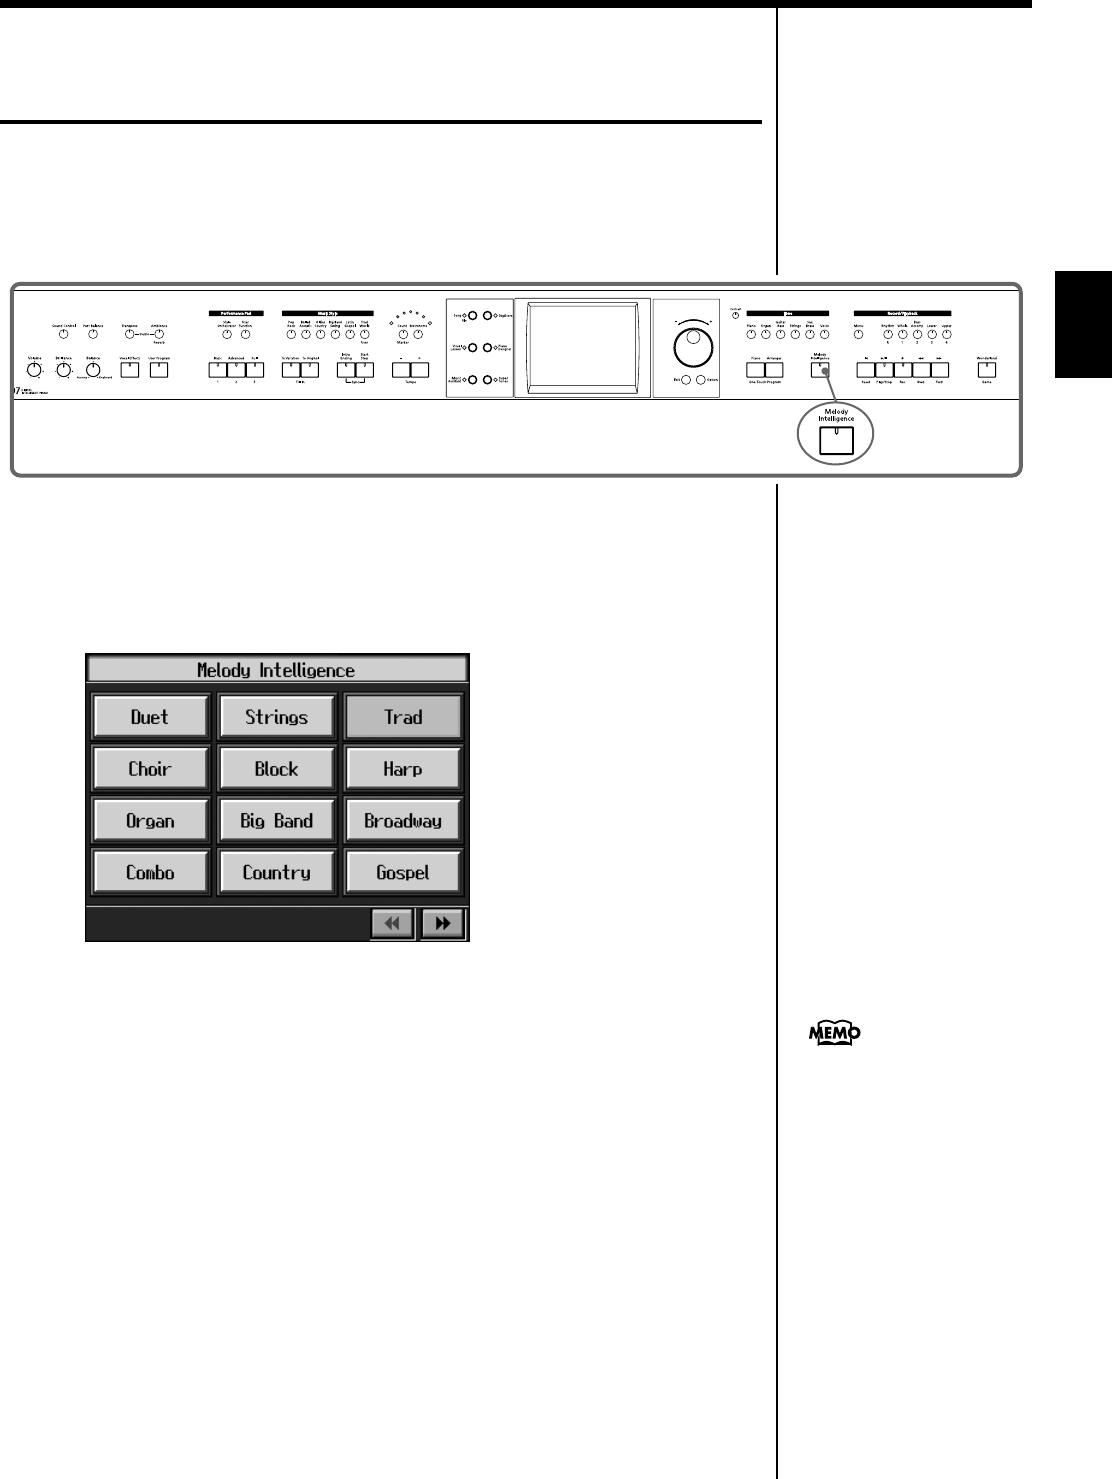
Adding Harmony to the Right-Hand
Part (Melody Intelligence)
You can add harmony to the notes you play on the keyboard.
While an Automatic Accompaniment is playing, the matching harmony is
automatically added to the notes you are playing with the right hand. This function
is called “Melody Intelligence.”
fig.panel2-10
1. Press the [Melody Intelligence] button and watch the indicator light up.
When you play something on the right-hand section of the keyboard, harmony is
added.
The following “Melody Intelligence screen” appears.
fig.d-melointel.eps_60
2. Select and touch a harmony type.
Then when you play a melody on the keyboard, a harmony style is automatically
added.
When you press the [Exit] button, you’re returned to the previous screen, while the
Melody Intelligence function remains selected.
3. Press the [Melody Intelligence] button once more and the indicator light
goes out.
The Melody Intelligence function is cancelled.
With some harmonies, Tones
may change automatically.
Also, when you play several
keys at the same time, in some
cases harmony may be added
to one note.
60
Chapter 2 Automatic Accompaniment
Chapter 2
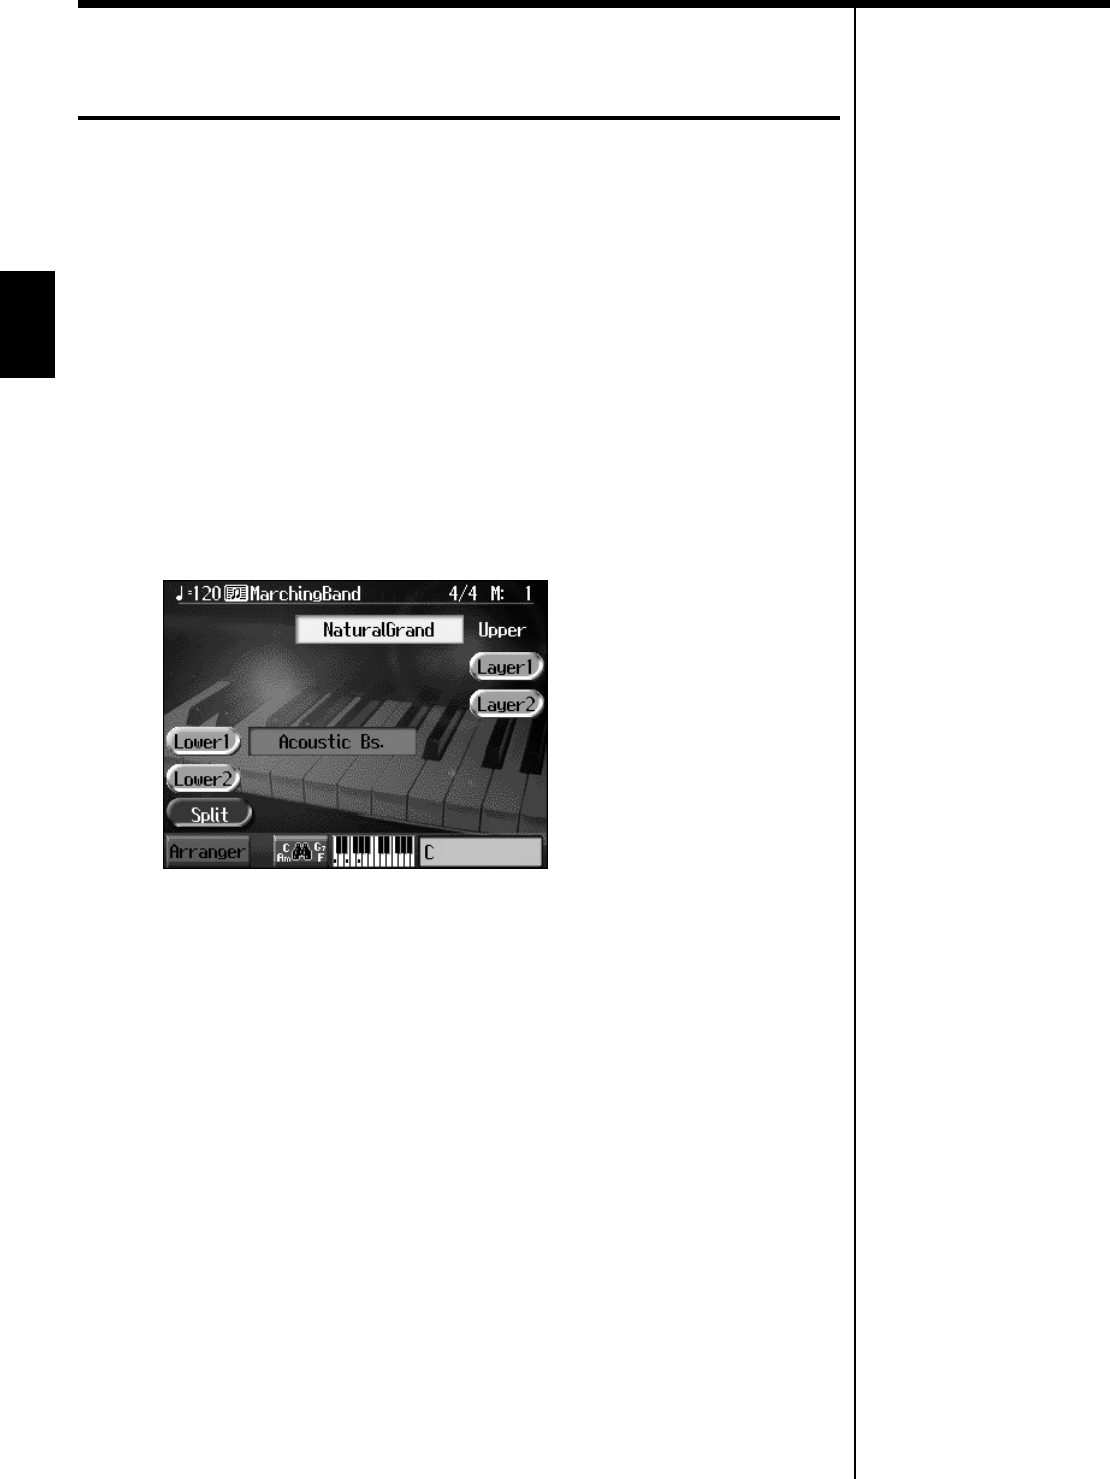
Playing Sounds in the Left Hand During a
Performance (Lower Tone)
Normally, when using Automatic Accompaniment in a performance, sounds are not
produced by playing the left-hand part of the keyboard. When you touch the
<Lower 1> or <Lower 2> icon, you can have Tones from the left side of the keyboard
play simultaneously with the Automatic Accompaniment.
1. Press the One Touch Program [Arranger] button.
This sets the Automatic Accompaniment.
2. On the Basic screen, touch <Lower 1>.
Now when you play a chord in the left-hand keyboard area, the notes you play will
sound, and the accompaniment chord changes.
In the same manner, you can play the left-hand tone by touching <Lower 2>.
By touching both <Lower 1> and <Lower 2>, you can get a Layer performance for
the left-hand.
fig.d-lower.eps_60
Stopping the sound in the left-hand
3. Touch <Lower 1>.
The <Lower> icon returns to the original color.
To have <Left 2> play as well, also touch <Left 2>.
The left-hand Tones stop playing.
61
Chapter 2 Automatic Accompaniment
Chapter 2
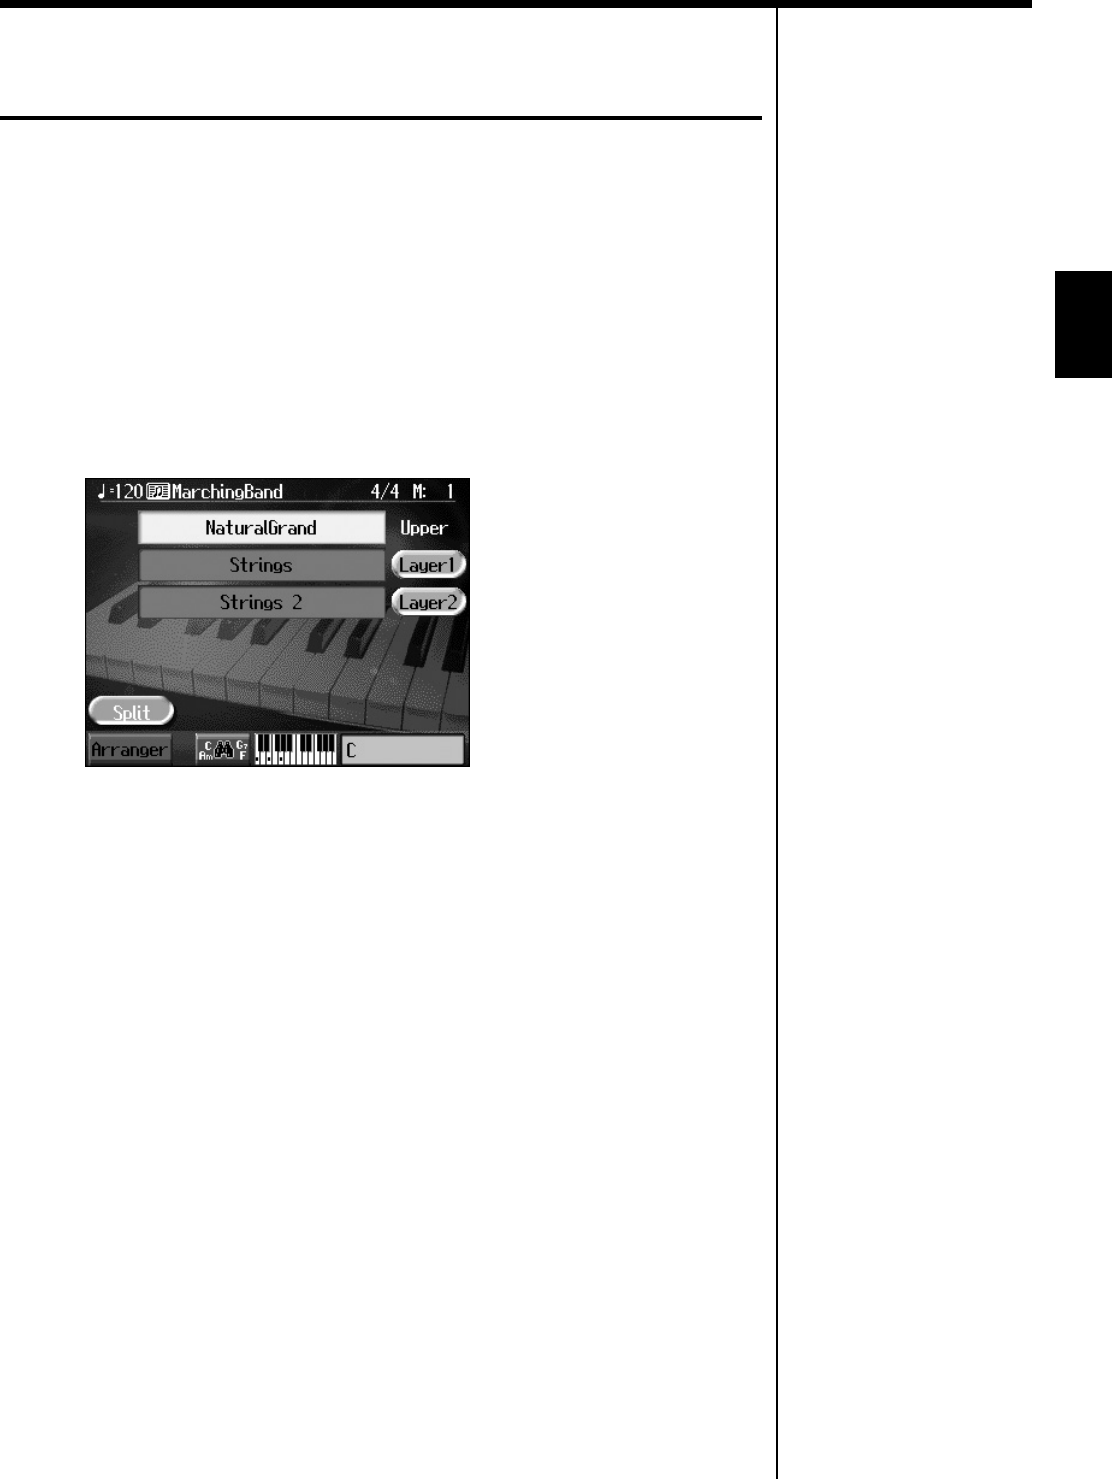
Playing the Piano with Accompaniment Added
(Piano Style Arranger)
Usually with Automatic Accompaniment, you play chords on the left-hand side of
the keyboard and the melody on the right-hand side. Chords can also be recognized
over the entire keyboard, allowing you to perform using Automatic Accompaniment
without splitting the keyboard. This function is called “Piano Style Arranger.”
This makes it possible to add an accompaniment automatically as you play a song
by playing chords in the ordinary way, without giving any thought to the location
of a keyboard split.
1. Press the One Touch Program [Arranger] button.
2. Touch <Split> to turn the Split function off.
fig.d-pianist.eps_60
3. Select a Music Style (p. 50).
4. Play the keyboard.
The accompaniment starts when you play a chord anywhere on the keyboard.
62
Chapter 2 Automatic Accompaniment
Chapter 2
Adjusting the Volume Balance for Each
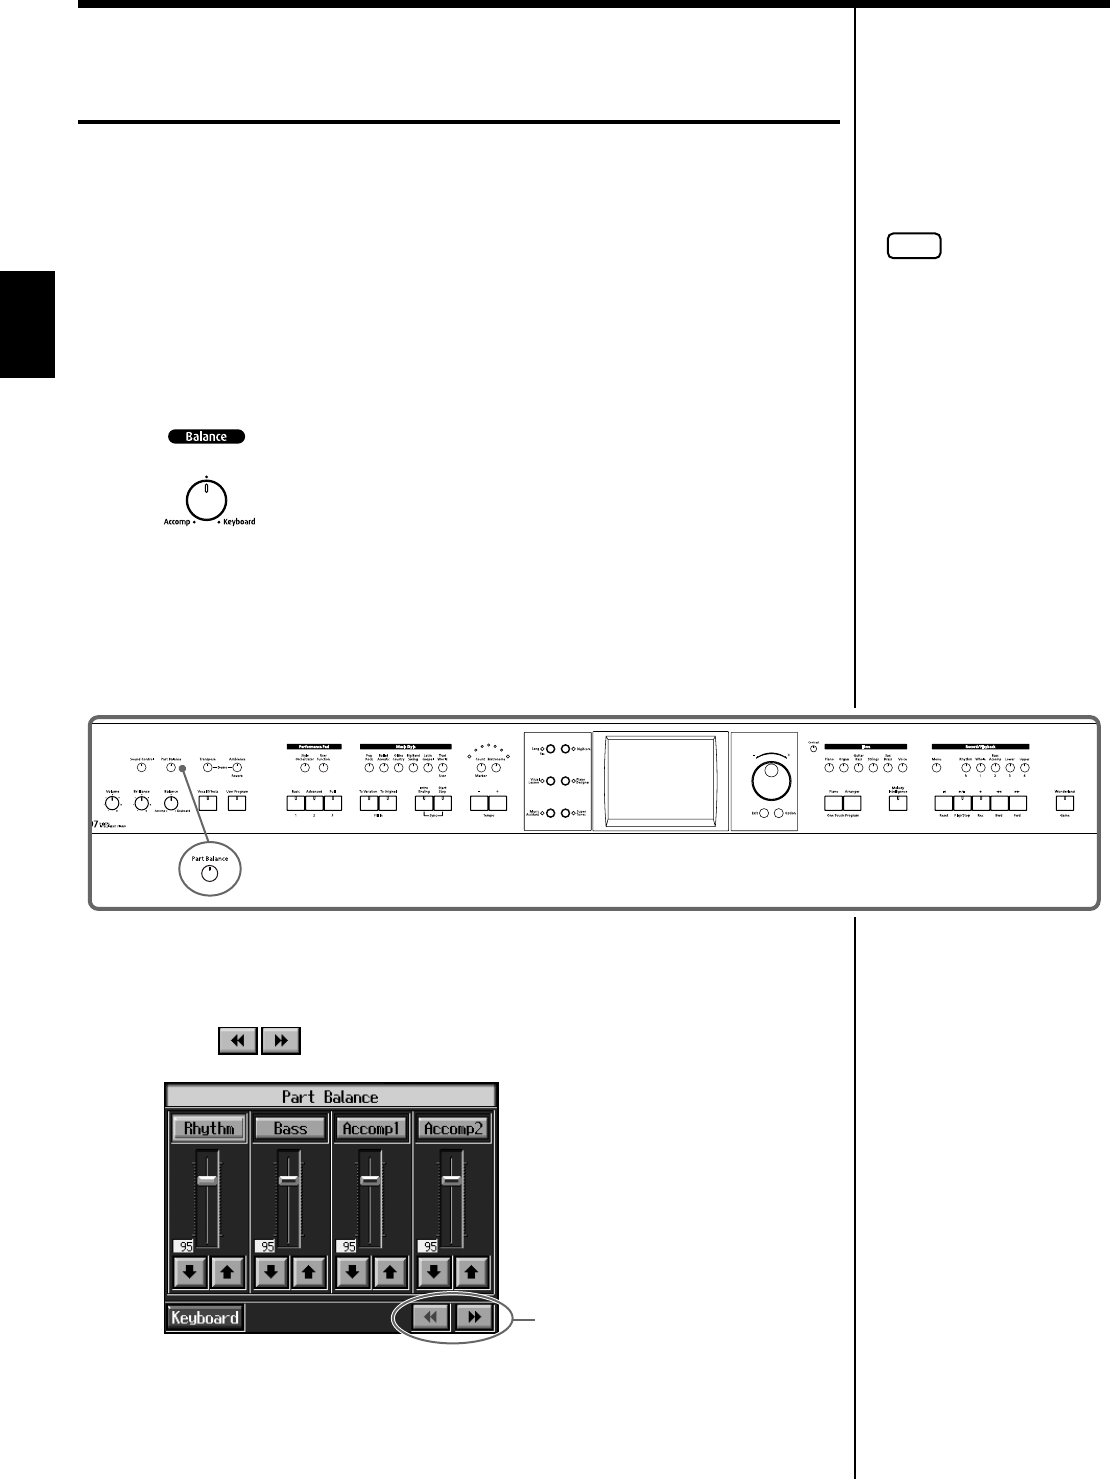
Part (Balance)
You can adjust the volume balance between the accompaniment and the keyboard,
and the volume balance for each of the parts in a Music Style.
■Changing the Volume Balance between the
Accompaniment and the Keyboard (Balance Knob)
You can change the volume balance between a song and accompaniment and the
notes you play on the keyboard.
1. Adjust the volume balance with the Balance knob.
fig.volbal.e
■Adjusting the Volume Balance for Each
Performance Part (Part Balance)
You can adjust the volume of each performance part in a Music Style, and the
balance between parts when playing multiple Tones on the keyboard.
fig.panel2-11
1. Press the [Part Balance] button and watch the indicator light up.
The following “Part Balance screen” appears.
Touch to switch the screens.
fig.d-partbal2.eps_60
NOTE
When this knob is turned
completely to the
Accompaniment side, no
sounds from the keyboard are
audible, even when the keys
are pressed. You can usually
leave the knob at the center
position.
Switch the screens
63
Chapter 2 Automatic Accompaniment
Chapter 2
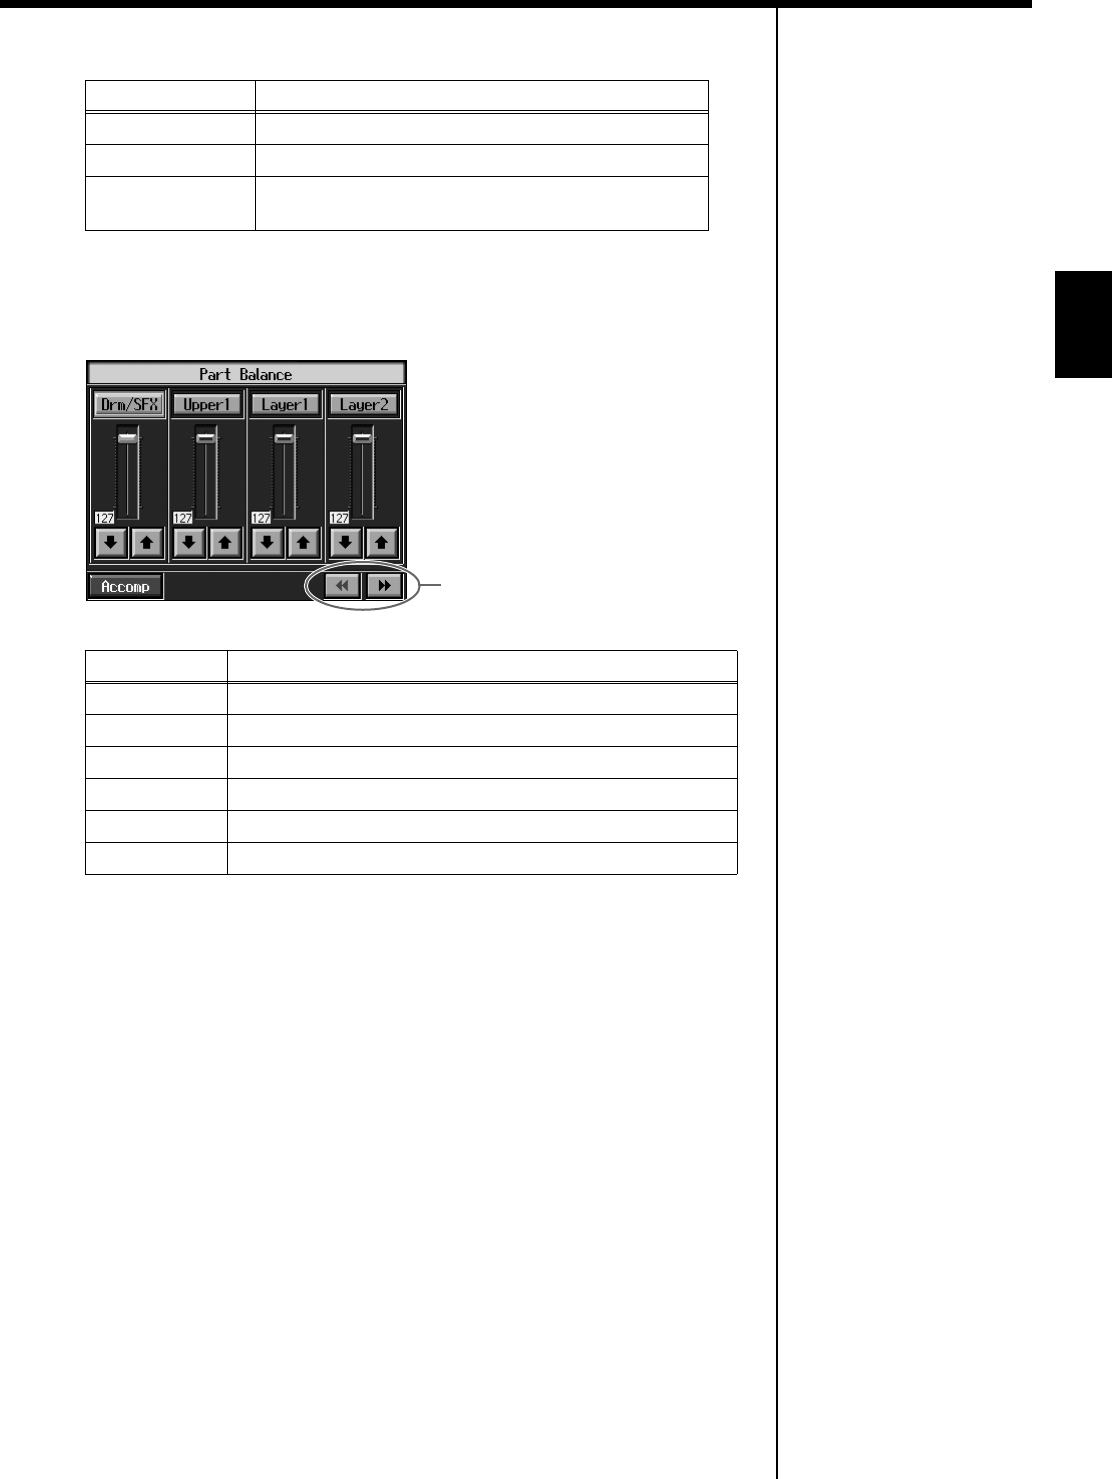
The volume balance between the performance parts in the Music Style is indicated.
This shows the volume balance between the keyboard’s Tones when either layer
performance (p. 25) or split performance (p. 26) are used, or the volume balance
when using the keyboard to play percussion instruments or sound effects (p. 23).
fig.d-partbal1.eps_60
Display Performance part
Rhythm Music Style Rhythm Part
Bass Bass Tone (p. 55)
Accomp Accompaniment 1, Accompaniment 2,
Accompaniment 3, Chord Tone (p. 55)
Displayed Tone Part
Drums Percussion instruments or sound effects played with the keys
Lower 1 Left-hand Tone 1
Lower 2 Left-hand Tone 2
Layer 1 Layer Tone 1
Layer 2 Layer Tone 2
Upper Right-hand Tone
Switch the screens
64
Chapter 3
Chapter 3 Song Playback
Playing a Song
Now, let’s try practicing while playing back internal songs, commercial music files,
and songs saved to floppy disks.
You can use rewind or fast-forward to go to any desired measure, and play back
from that point.
You can also play audio files.
fig.panel3-1
Selecting the song
When playing back songs on optional external memory, first connect the external
memory to the external memory port.
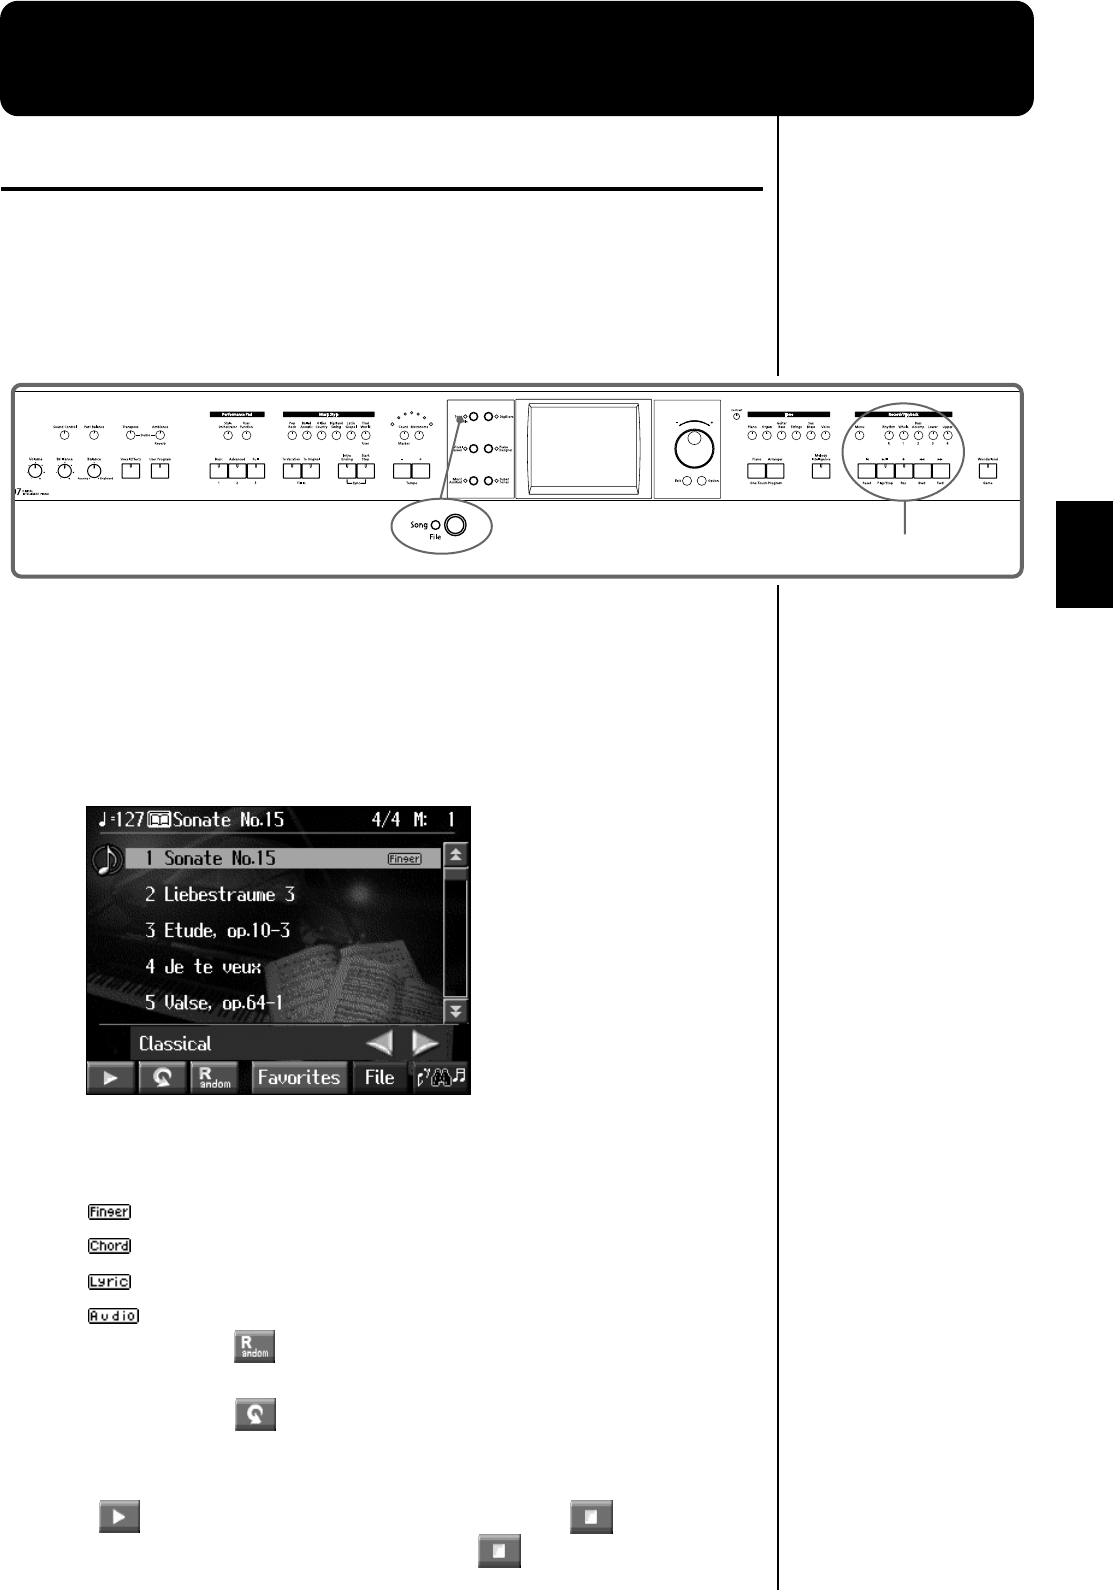
1. Press the [Song] button.
The following “Song Selection screen” appears.
fig.d-songsel.eps_60
Touch and drag up and down in the scroll bar to scroll through the screen and
display other songs.
Touch the page icons to change pages.
: The fingering is included in the score.
: The chords are indicated in the score.
: You can display song lyrics.
: For audio files.
When you touch < >, songs selected from all of the internal songs are played in
random order.
When you touch < >, all of the songs in the genre you have selected are played
in order, starting from the selected song. When the last song is finished, playback
resumes from the initial song.
< >: The selected song is played back. This changes to < > while the song
is played back; playback stops when you touch < >.
Record/Playback buttons
65
Chapter 3 Song Playback
Chapter 3
By touching the [Setting] button, you can then view information about the song (p.
153) and save songs to external memory (p. 101).
< >< >: The song genre changes.
2. Touch the name of the song to be played back.
You use and the dial to select songs.
Playing back
3. Press the [ (Play/Stop)] button.
The button indicator lights up, and playback of the song begins.
Stopping the Song
4. Press the [ (Play/Stop)] button once again.
The button indicator light goes out, and the song stops.
When the song is finished, playback stops automatically.
Press the [ (Reset)] button to return to the beginning of the song.
If there is recorded song data,
the “Delete song” screen
appears.
If it’s okay to delete the song,
touch <OK>. If you do not
want to delete the song, touch
<Cancel>, and either save the
song to a floppy disk (p. 101)
or register the song to the
Favorites (p. 68).
NOTE
When you start playback of
songs, the measure number on
the Basic screen appears in
reverse video. The
performance data is being
loaded while the indication is
highlighted; please wait a few
moments for this to be
completed.
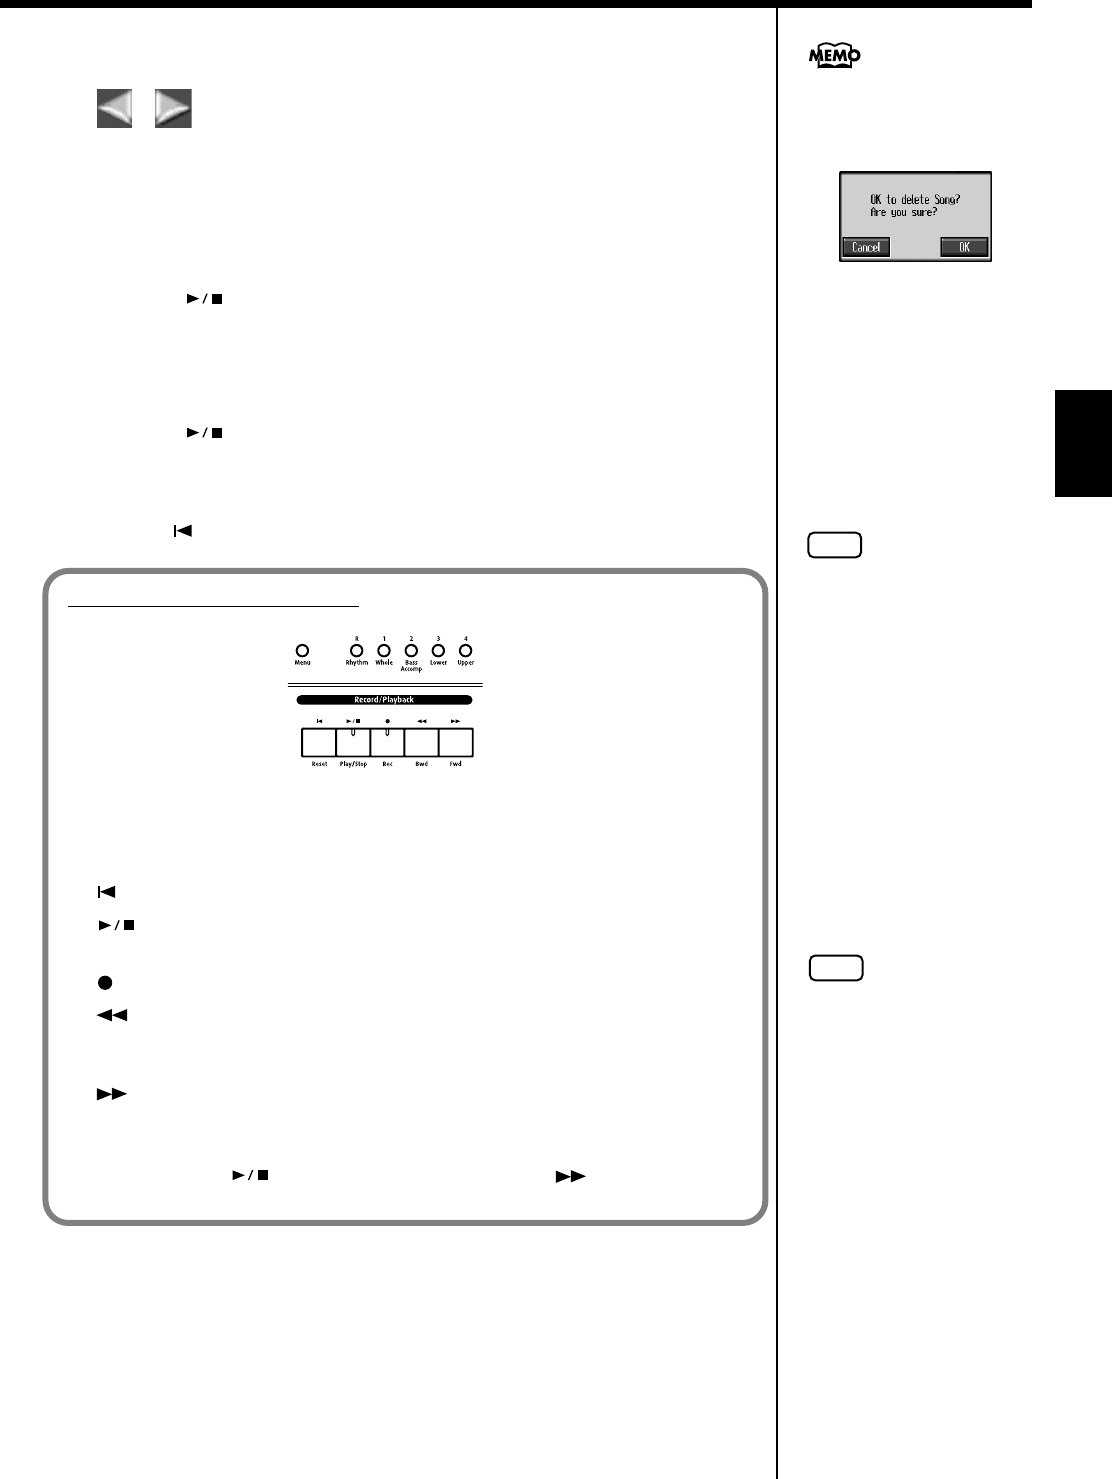
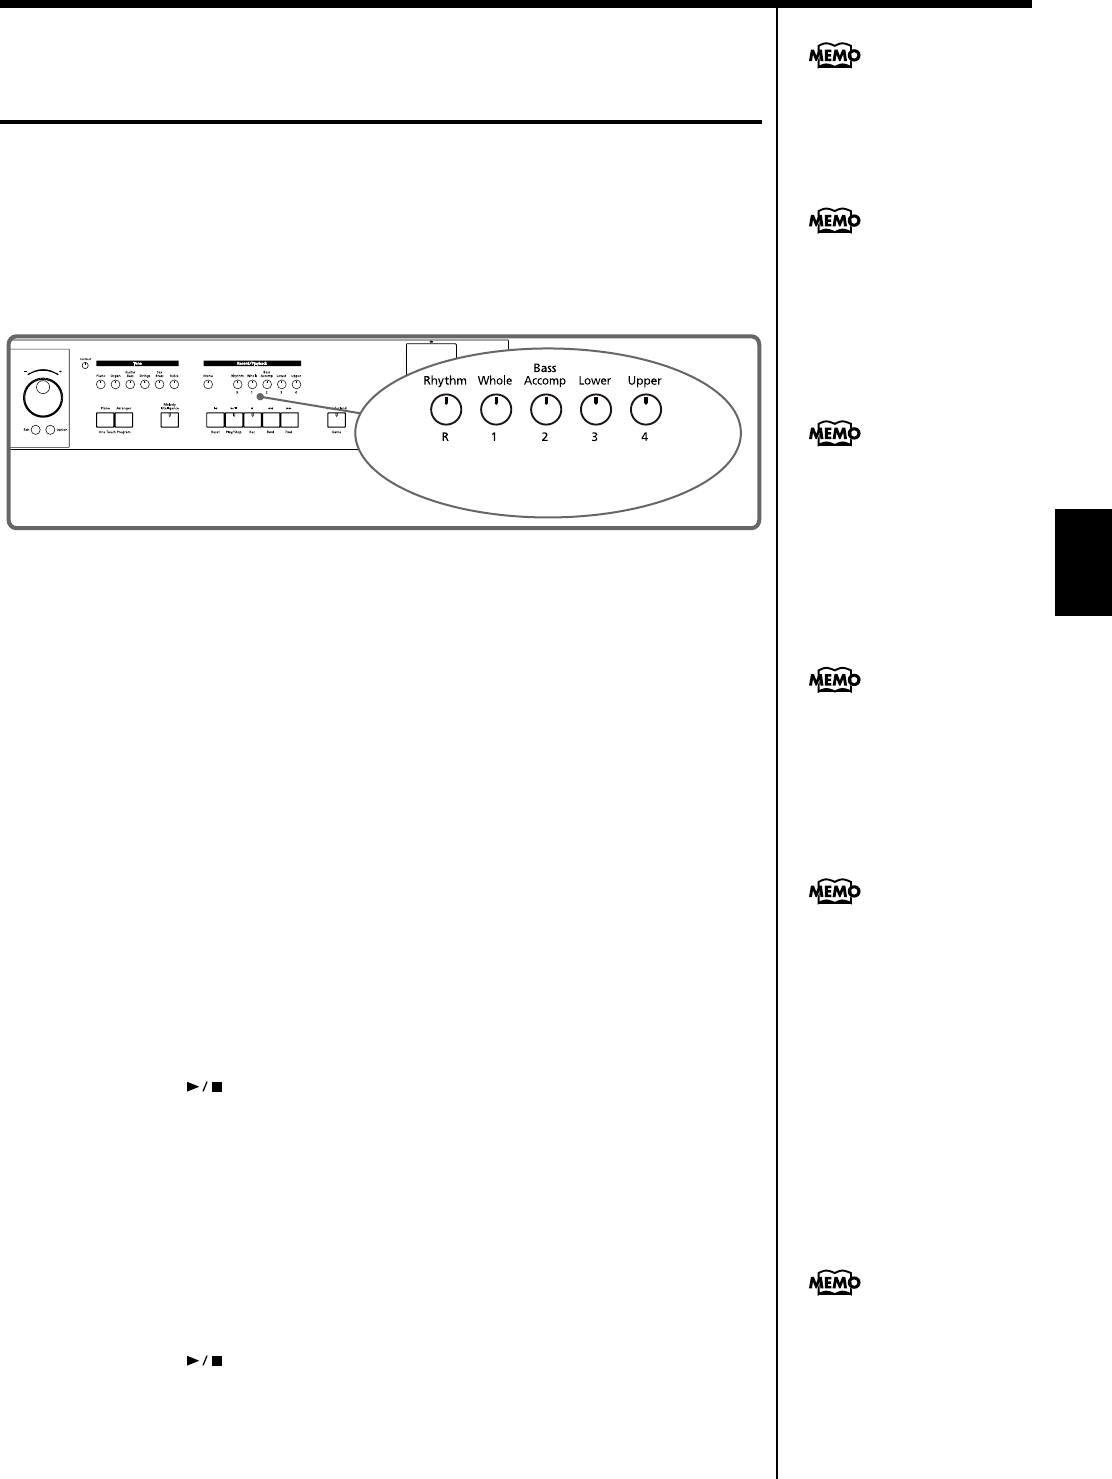
Record/Playback Buttons
fig.composer.e
Track buttons:
Each performance part of the song being played back is assigned to a track button. Use these
buttons to select the performance parts that are muted or played. For more detailed
information, refer to p. 83.
[ (Reset)] button: Returns to the beginning of the song.
[ (Play/Stop)] button:
Plays back the song, or if the song is currently being played, it stops the song.
[ (Rec)] button: Records the performance. For more detailed information, refer to p. 89.
[ (Bwd)] button: Moves back the playback position of the song one measure each time
the button is pressed. Moves back the playback position of the song one second each when an
audio file is being played back. When held down, the song “rewinds” continuously.
[ (Fwd)] button: Advances the playback position of the song one measure each time the
button is pressed. Advances the playback position of the song one second each when an audio
file is being played back. When held down, the song is forwarded continuously.
Holding down the [ (Play/Stop)] button and pressing the [ (Fwd)] button moves
you to the end of the song.
NOTE
When using markers to specify
a section to be repeated (p. 86),
you can rewind and fast
forward only within the range
b
etween Marker A and
Marker B.
66
Chapter 3 Song Playback
Chapter 3
When Selecting Songs in Folders
1. Touch the folder name.
2. Touch < > at the bottom left of the screen.
After a moment, a list of songs in the folder is displayed.
You can also use the remote control’s [ (Bwd)] [ (Fwd)] buttons and
dial to select songs, then press [ (PLAY)] button to open the folder.
3. Touch a song from the list that appears to select the song you want to
play back.
* Depending on the number of songs contained in a folder, this may take some time.
About Audio Files
Audio files in the following format can be played back:
• “.WAV” extension
• 16bit linear
• Sampling rate of “44.2 kHz”
• Stereo
You cannot use the following functions in playing back audio files.
• Marker (p.**)
• Displaying lyrics (p.**)
• Registering “Favorites” (p.**)
• Transposing (p.**)
• Changing tempos (p.**)
• Track Mute (p. **)
• Recording (p.**)
• Search (p.**)
* Saving or performing other procedures during playback of audio files
may cause the song to stop while it is playing.
67
Chapter 3 Song Playback
Chapter 3
■Using Keywords to Search for Songs (Song Search)
You can search for songs that match the conditions you set regarding the song tempo
or genre.
You can also search the songs using the first character of the song name.
1. Press the [Song] button.
2. Touch <Search>.
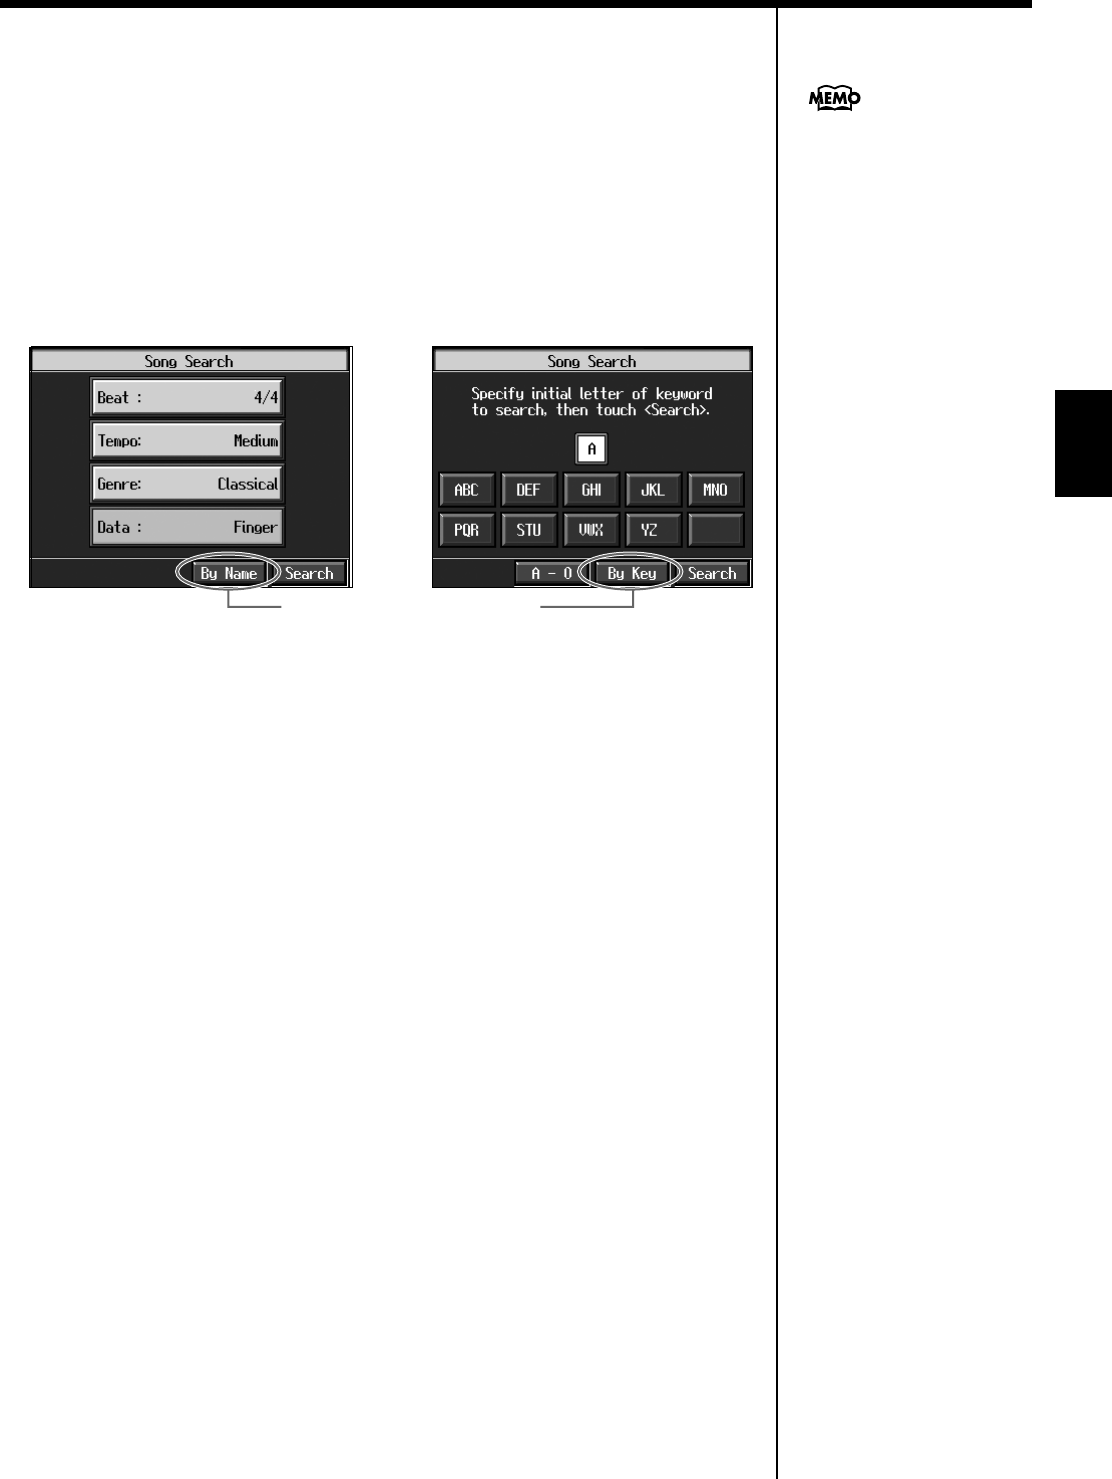
The following “Song Search screen” appears.
fig.d-songsrch1.eps_60
❍Searching by conditions
3. Touch the parameter you want to set, then use the [-] [+] buttons and the
dial to select the search conditions.
With <Data>, songs are searched according to data included in the internal songs.
You can use four different criteria in searches: “Chords,” “Lyrics,” “Fingering”
(fingering numbers), and “Any.” By selecting a song containing any of this data, then
displaying it in the KR’s notation, you can display information about the selected data.
4. Touch <Search>.
The search results appear in the display.
Touch the song name to select the song.
Press the [Exit] button to return to the Song Selection screen.
❍Searching by song name
3. Touch <By Name>.
Touch <By Key> to return to the Condition Search screen.
4. Decide which character you will use for the search.
The selected character appears in the middle of the screen.
Enter the character you are searching for. For example, touching <ABC> in
succession cycles you through the available choices in that character group
(“A”→”B”→”C”...).
Touch <A-0> to toggle between alphabets and numerals.
5. Touch <Search>.
The search results appear in the display.
Touch the song name to select the song.
Press the [Exit] button several times to return to the previous screen.
Only the KR’s internal songs
are searchable.
Condition Search screen Name Search screen
Touch here to switch these screens.
68
Chapter 3 Song Playback
Chapter 3
Registering the Songs You Like (Favorites)
You can register songs you are currently practicing or enjoy playing to “Favorites,”
allowing you to select these songs easily.
Selecting the Song
1. Press the [Select/Listen to a Song] button.
The Song Selection screen appears (p. 64).
2. Touch the song name to select the song to be registered.
Registering to Favorites
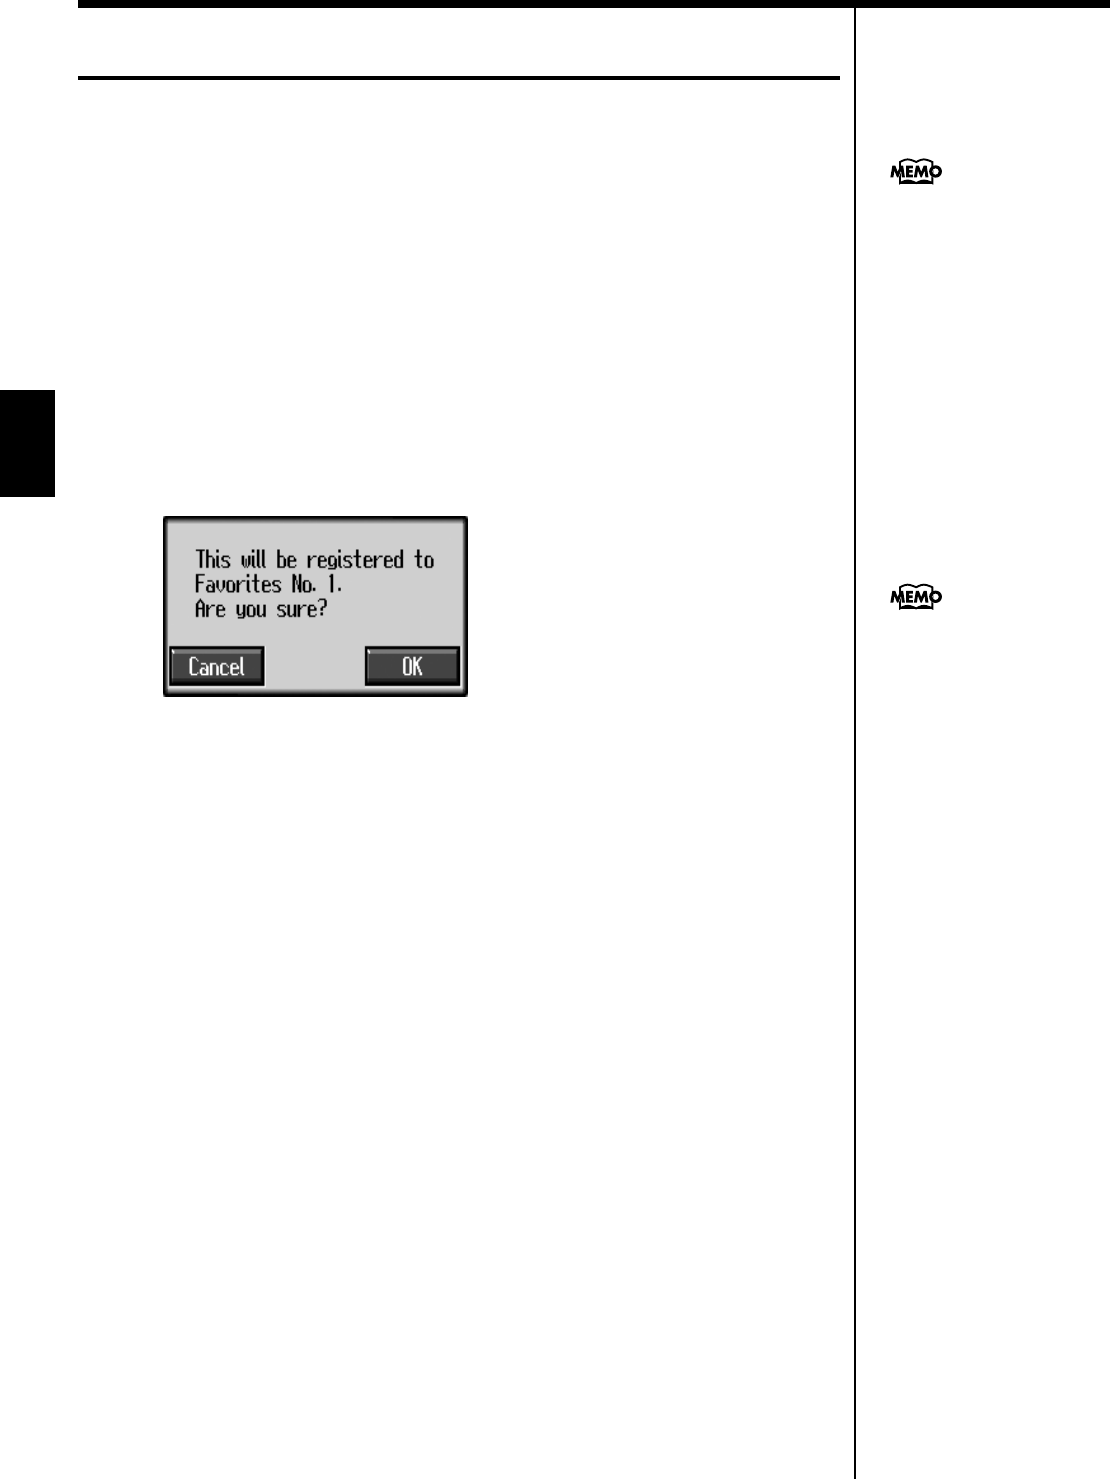
3. Touch <Add>.
A screen like the one shown below appears.
fig.m-fvrtadd.eps_60
4. Touch <OK>.
The selected song is registered to Favorites.
Now you can select the registered song by selecting Favorites for the genre in the
Song Selection screen.
You can also register songs on
external memory to the
Favorites. For details, refer to
“Copying Songs on External
Memories to Favorites” (p.
105).
You cannot register audio files
to the Favorites.
69
Chapter 3 Song Playback
Chapter 3
■Removing Songs from Favorites
This deletes registered songs for Favorites.
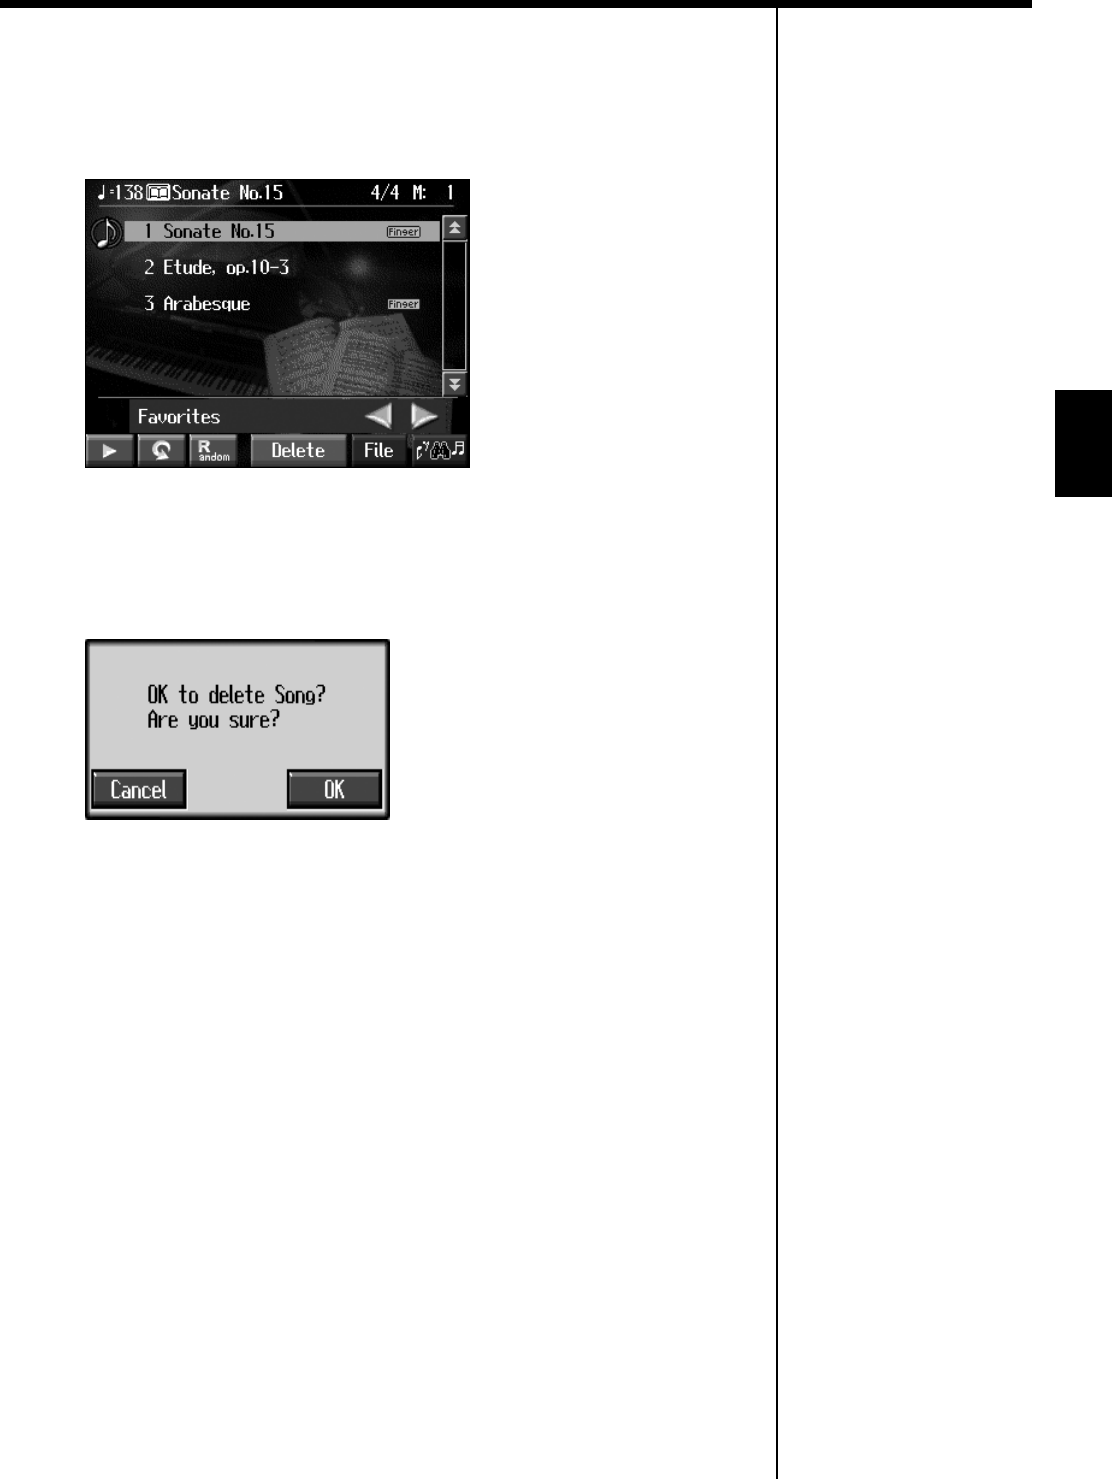
1. In the Song Selection screen, select Favorites for the genre.
fig.d-song-fvrt.eps_60
2. Touch the name of the song to be deleted.
3. Touch <Del>.
A screen like the one shown below appears.
fig.m-fvrtdel.eps_60
4. Touch <OK>.
The song is deleted.
70
Chapter 3 Song Playback
Chapter 3
Using the Remote Control
You can use the included remote control to easily start and stop performances and
switch songs.
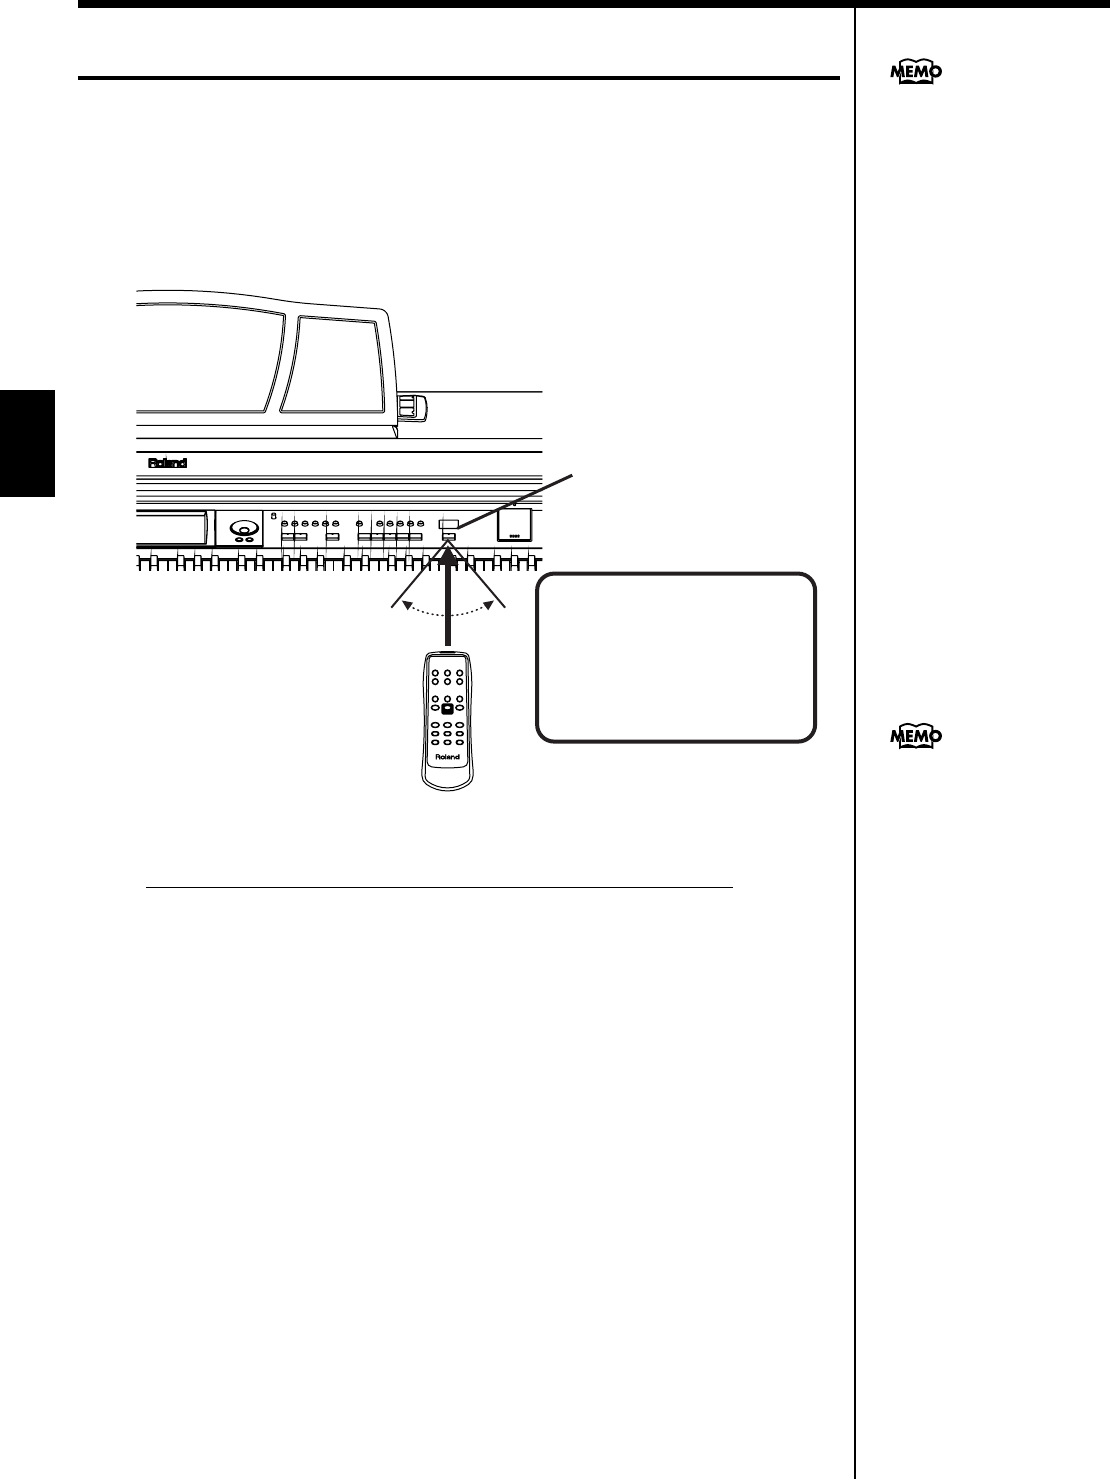
■How to Use the Remote Control
When using the remote control, aim the remote control at the infrared receiver,
keeping in mind the range of operation (below).
Precautions Concerning Use of the Remote Control
• The remote control is able to transmit only one operation at a time.
• The remote control may not operate even within the range of operation if there
is an obstacle between it and the main unit.
• Using the remote control near other equipment that uses remote control systems
may result in operational errors.
• The life of the battery depends on the amount and conditions of use. If the
operational range of the remote control decreases, change the batteries.
• If you will not be using the remote control for a long period of time, remove the
batteries.
• The remote's response may suffer if the remote's sensor is situated under
spotlights or exposed to other such strong lighting.
+++.
Remote Control
Infrared Receiver
Range of operation
Distance:
4 m (approximately 13 feet)
Angle:
30 degrees to the left and right
of the receiver.
Information from the remote is
not received when Remote
Sensor setting is switched off.
Refer to p. 152.
71
Chapter 3 Song Playback
Chapter 3
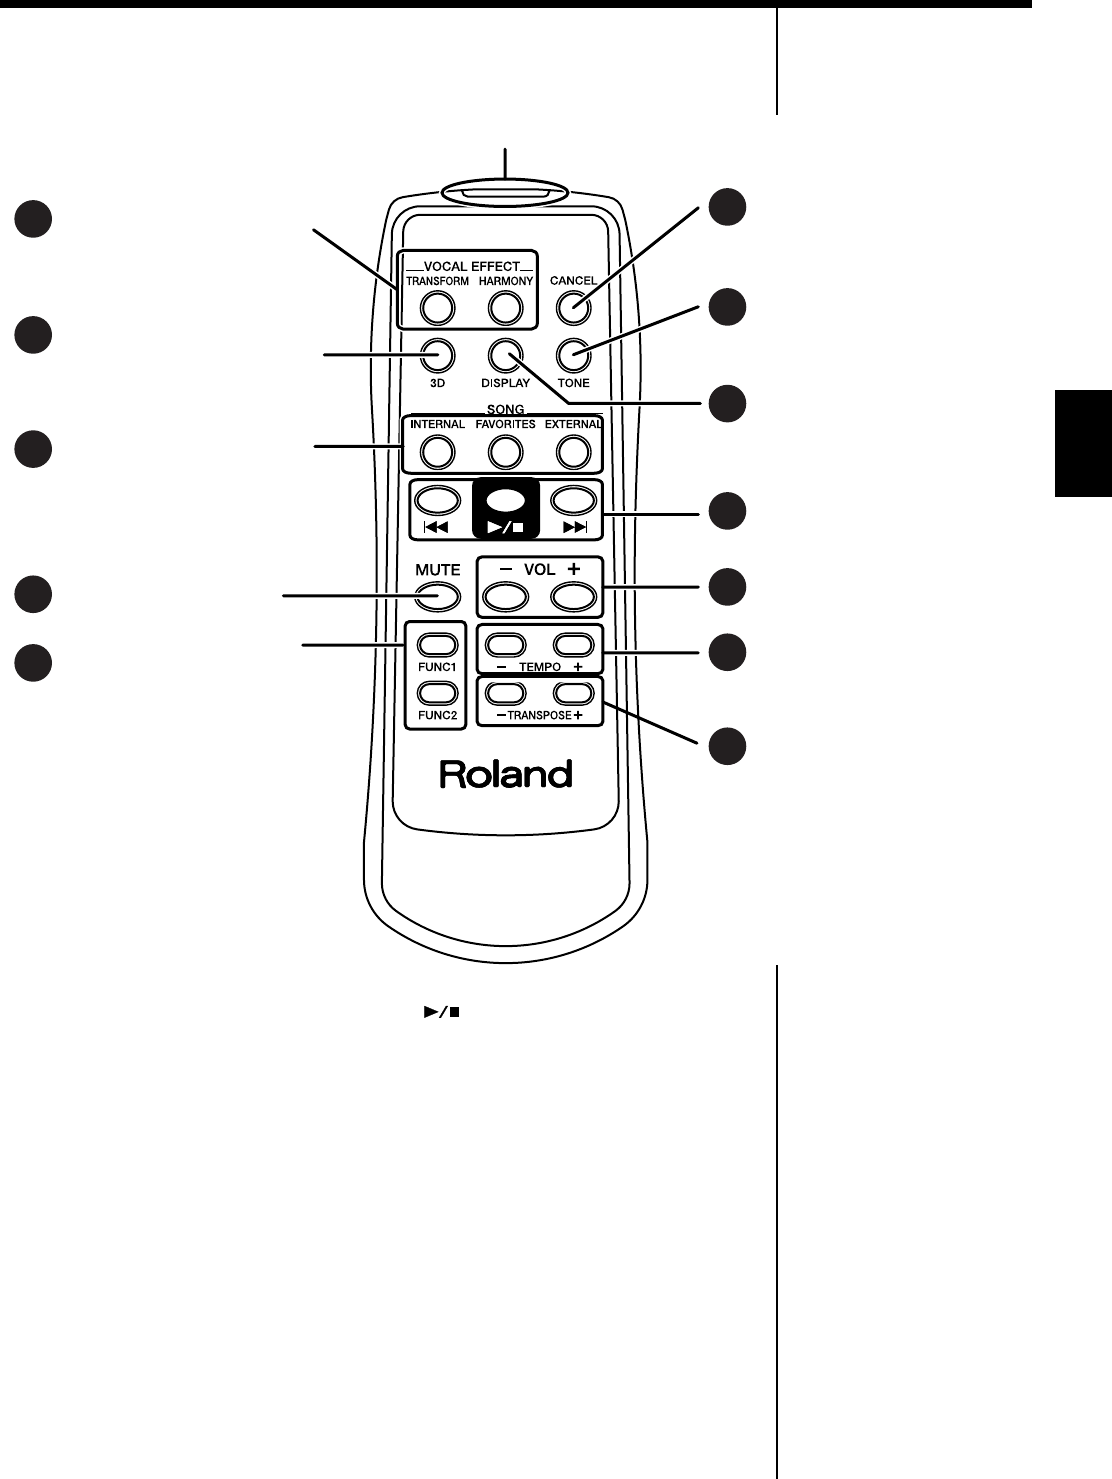
■About the Remote Control
You can also switch the functions for the [ ] (Play/Stop) button, the [FUNC 1]
[FUNC 2] button, the TEMPO [-] [+] button, and the TRANSPOSE [-] [+] button.
Please refer to “Changing the Functions of the Remote Control’s Buttons” (p. 148).
Selecting the Song Genre
Changing the Tempo of
the Song and Automatic
Accompaniment
Transposing Sounds
from the Keyboard and
Songs Being Played
Back
Using the Function
Assigned to the [FUNC]
Button
Turning the Advanced
3D Function or Surround
Function On and Off
Adding Effects to Mic
Vocals
Changing the Volume
Muting the Sound
Starting and Stopping
Songs, Selecting
Previous and
Following Songs
Selecting the Tone for
the Left-Hand and
Right-Hand Tracks
Restoring the Original
“TONE,” “HARMONY,”
and “TRANSFORM”
Settings
Switching the Screen of
the External Display
5
2
16
7
8
9
10
11
12
3
4
Infrared Emitter
72
Chapter 3 Song Playback
Chapter 3
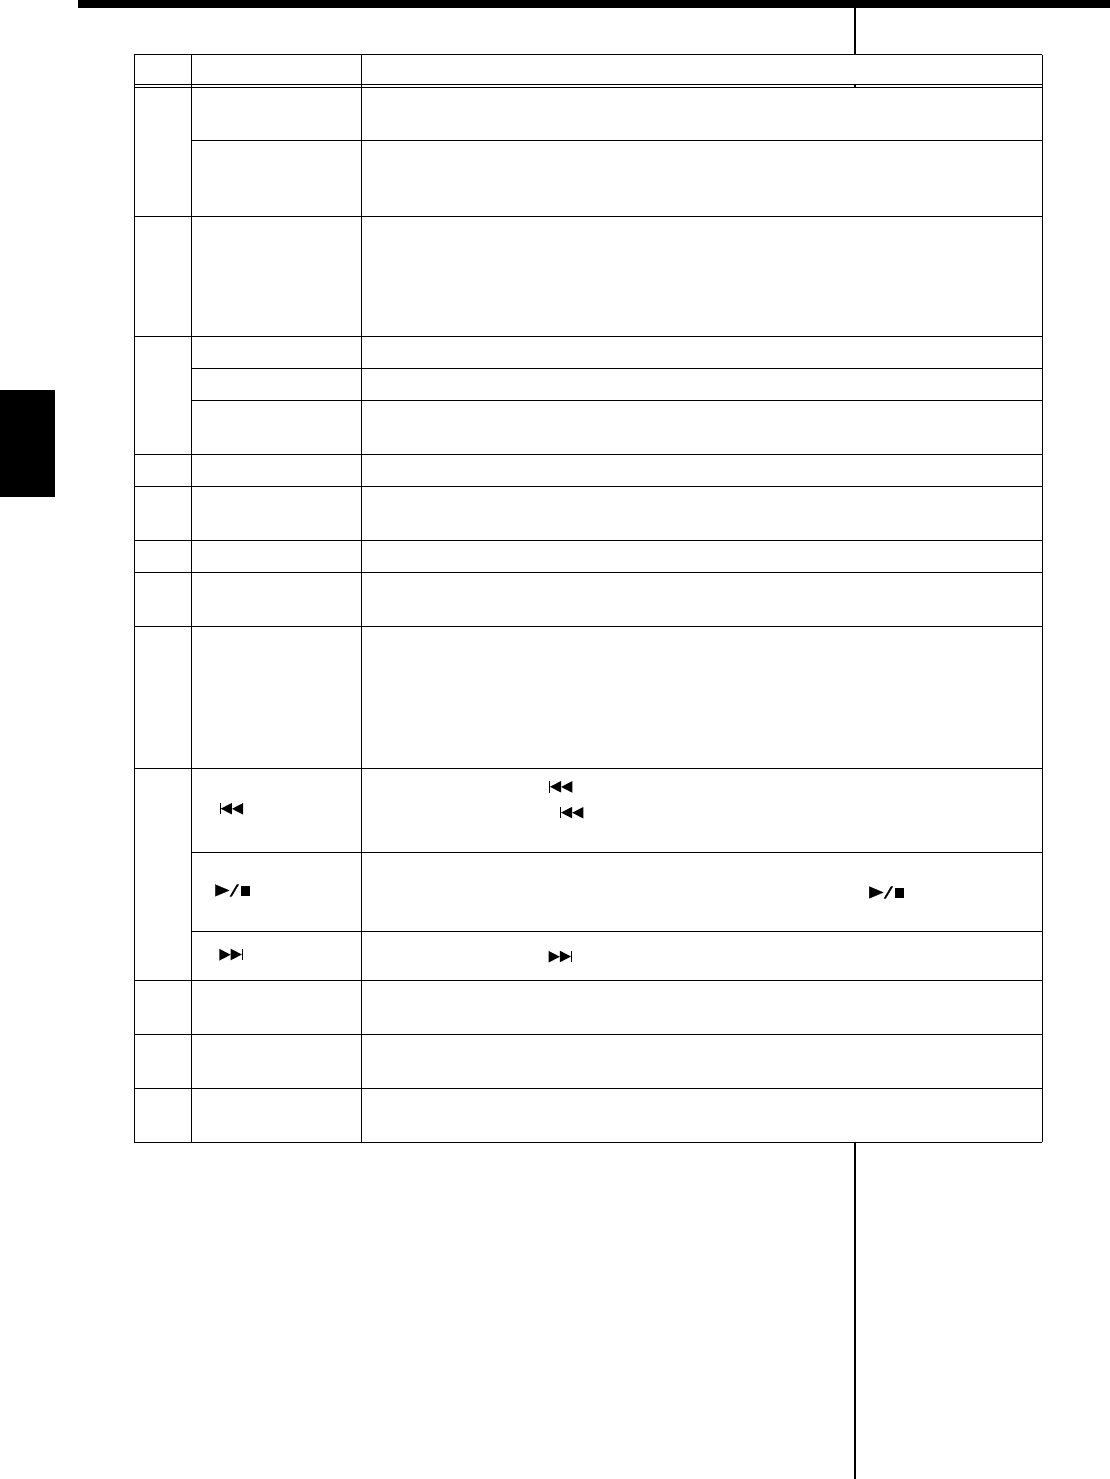
Button Explanation
1
TRANSFORM This changes the vocals from the mic. The setting switches each time you press the
button, cycling through male, female, child, and normal voice settings.
HARMONY
This adds harmonies to the mic vocals.
The harmony setting switches each time you press the button, cycling through
Music Files (p. 41), Oct-Up (p. 38), Oct-Down (p. 38), and normal voice settings.
2 3D
This adds greater breadth to the sound. When the [Ambience/Reverb] button is set
to “Advanced 3D,” pressing this button toggles the Advanced 3D effect on and off.
When the [Ambience/Reverb] button is set to “Surround,” each press of this button
takes you to the next choice among the available selections, which are: Surround
Effect off, Surround Accompaniment, and Surround Reverb.
3
INTERNAL This switches the genres of the internal songs.
FAVORITES Selects songs in the “Favorites.”
EXTERNAL When you press the button with external memory or a disk connected, the
connected storage media is selected.
4 MUTE This mutes all of the sounds.
5 FUNC1, FUNC2 You can use the function assigned to this button. You can also change the function
assigned to the button (p. 148).
6 CANCEL The left and right tracks switch to a piano tone.
7 TONE Pressing the button toggles you between the Tones for the left-hand track and the
right-hand track.
8 DISPLAY
Each press of the button takes you to the next selection among the available choices,
which are, in order: song list, lyrics, notation, notation + keyboard, display, and
user screen image.
You can press the [DISPLAY] button while the Tempo screen or Volume screen is
displayed to clear the Tempo screen or Volume screen.
* Some songs may not feature screens with lyrics or notations.
9
When you press the [ ] button while the song is stopped, the previous song is
selected. Pressing the [ ] button while a song is playing returns you to the
beginning of that song.
This starts and stops playback of the song.
Playback alternately starts and stops each time you press the [ ] button.
You can also assign functions to the button (p. 148).
When you press the [ ] button, the next song is selected.
10 VOL - +
(Volume) You can adjust the volume.
11 TEMPO - + This adjusts the tempo.
You can also assign functions to the button (p. 148).
12 TRANSPOSE - + This adjusts the tempo.
You can also assign functions to the button (p. 148).
73
Chapter 4
Chapter 4 Practice Functions
With the KR-107, you can enjoy practice using a variety of functions.
Displaying the Notation
The KR can display notations not only for the internal songs, but for music files and
performances recorded with the KR. This is very convenient for performing while
reading the music and for checking songs that have been recorded. When you play
back a music file with lyrics, the lyrics appear on screen.
Selecting the song
When playing back songs on external memories, first connect the external memory
to the external memory port.
1. Press the [Song] button to select a song.
For details refer to “Playing a Song” (p. 64).
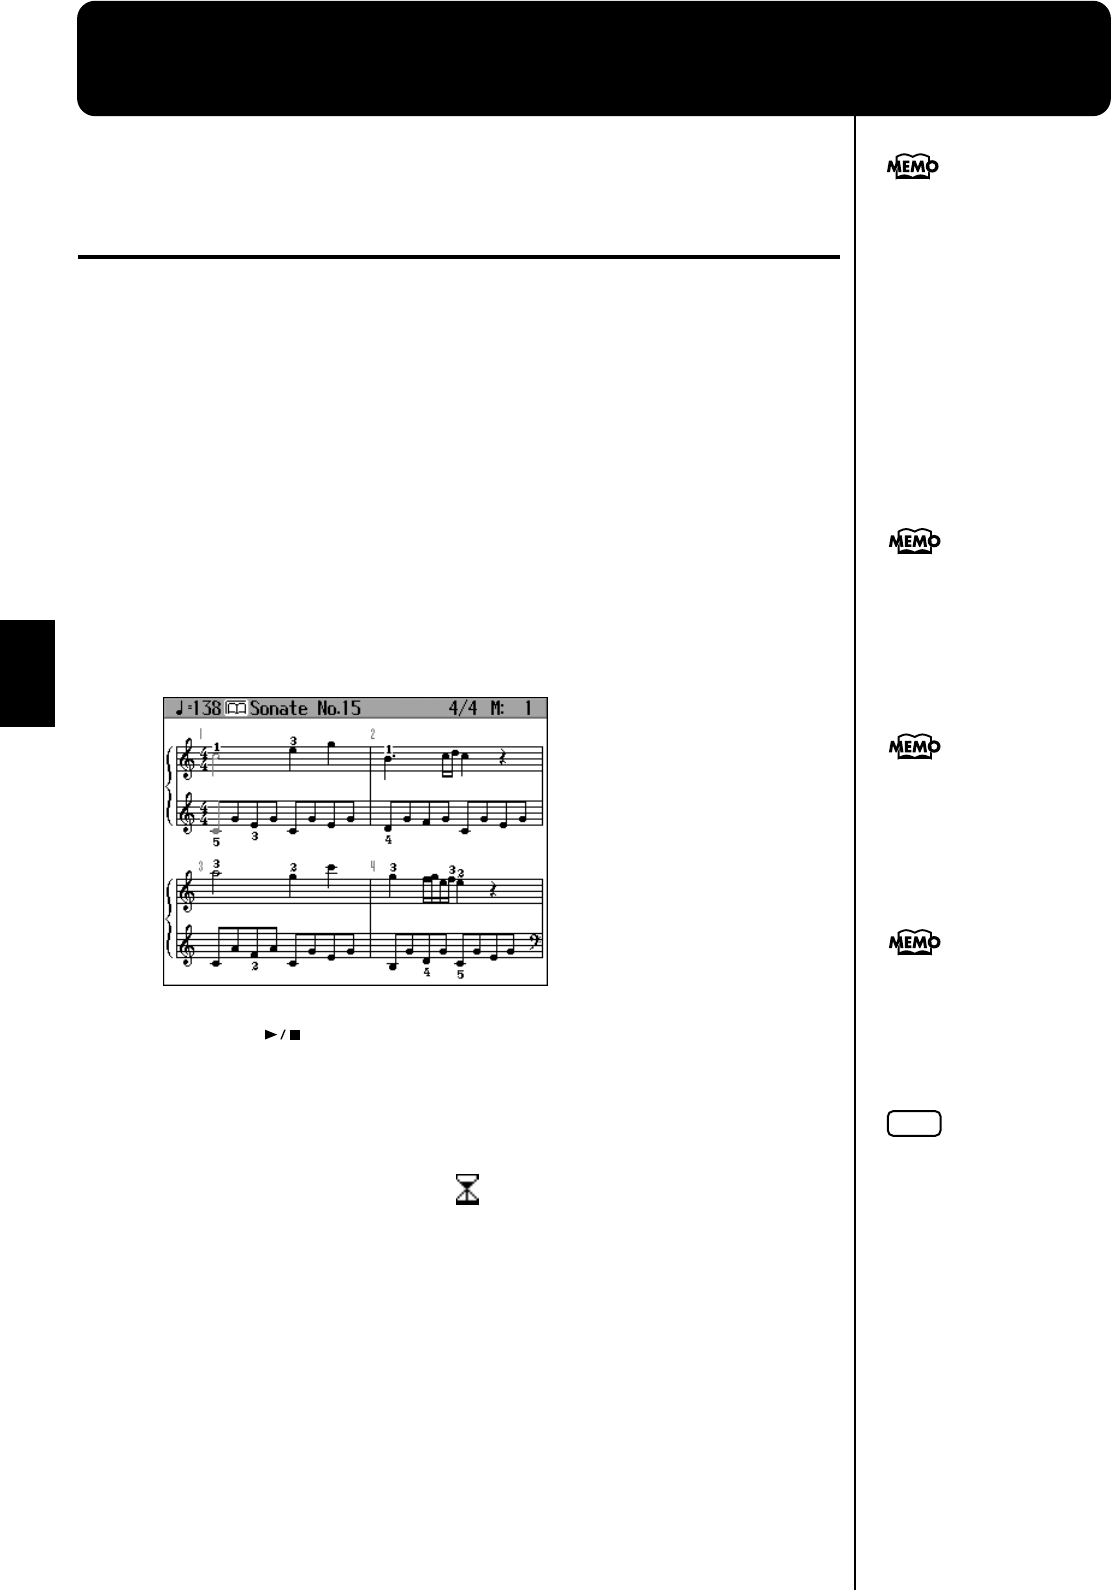
2. Press the [DigiScore] button.
The “Notation screen” appears.
fig.d-notation.eps_60
3. Press the [ (Play/Stop)] button.
Playback of the song begins, and the notation advances along with the progression
of the performance.
Notes Regarding the Notation Display
• When playback of a song begins, appears in the Notation screen. While this
symbol is displayed, performance data is being loaded from external memory or
internal memory. It may take thirty seconds to a minute or more to read the
data. Please wait.
• The displayed notations are based on music files. Priority is placed on the
readability of the displayed music, not on the accurate rendition of difficult,
high-level performances. Thus, there may be discrepancies seen when compared
with commercially available printed music. The display is not intended for
viewing advanced songs requiring precisely detailed notations, or complex
songs.
• On the notation display screen, lyrics and notes may extend beyond the range
displayed on the screen and may not be visible.
• Playback may start over from the beginning if you display the notation or
change the displayed part during playback of the song.
Using “Visual Lesson,” you
can select practice songs suited
to your skill level.
Additionally, you can have
the results your
performance indicated in
points and check the
content in the score. Refer
to the Quick Start.
In some internal songs, the
fingering is displayed.
The fingering numbers shown
in the screen indicate one
possible fingering.
Chord names can be displayed
in some of the internal songs
and recorded performances
using the KR’s Chord
Sequencer (p. 120).
You can make more advanced
settings for the score by
pressing the [Setting] button.
NOTE
No notes are shown in the
notation if the selected part
contains no data. To change
the part being displayed, refer
to “Making Detailed Settings
for the Notation Display” (p.
75).
74
Chapter 4 Practice Functions
Chapter 4
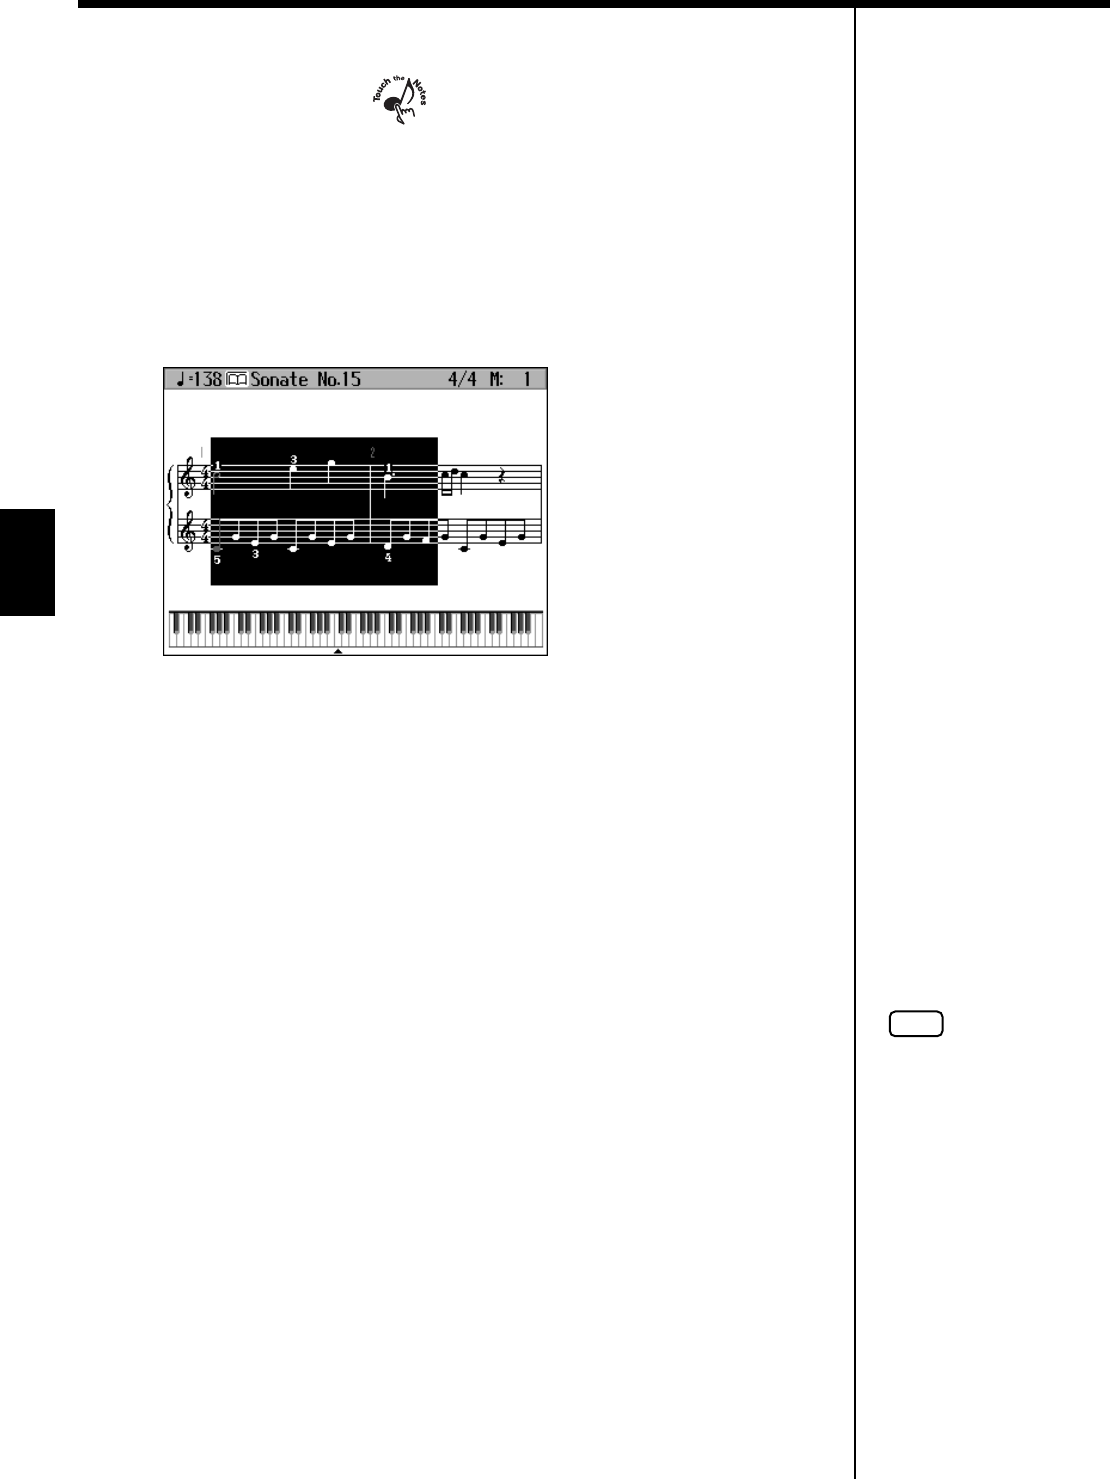
■Touching Notes to Confirm the Sounds
(Touch the Notes)
In the Notation screen, you can have notes played by touching the notes on the
screen.
When you display the keyboard in the screen (p. **), the keys on the keyboard for the
notes you touch are then shown in the display. This allows you confirm notes by
sight, sound, and touch.
In addition, when you trace part of the notation with your finger, the traced segment
is played back. This allows you to easily play back phrases you like.
fig.d-notation-key.eps_60
■Scrolling the Notation Along with the
Performances (Auto Sync DigiScore)
You can have the notation displayed in the screen scroll automatically as you play,
even when the song is not being played back. No more frantically trying to turn to
the next page in the notation while you are performing.
This also lets you play difficult passages more slowly and otherwise practice at your
own pace.
* Auto Sync DigiScore is linked to the performance of the part shown in the screen.
The notation does not scroll if you are playing a part that is not currently displayed.
When the bouncing ball is blue
Start playing at the point where the ball is bouncing.
The bouncing ball follows along and the notation scrolls as you play.
When the bouncing ball is red.
If nothing is played for a short while, the bouncing ball turns red. At this time, if you
play a phrase near the position of the bouncing ball, the ball automatically moves to
the point in the notation where you are playing.
NOTE
You can change the automatic
scrolling settings. Refer to p.
75.
75
Chapter 4 Practice Functions
Chapter 4
■Making Detailed Settings for the Notation
Display
You can change the part appearing on the notation display and change the manner
in which the notation is displayed.
1. Press the [DigiScore] button to display the Notation screen.
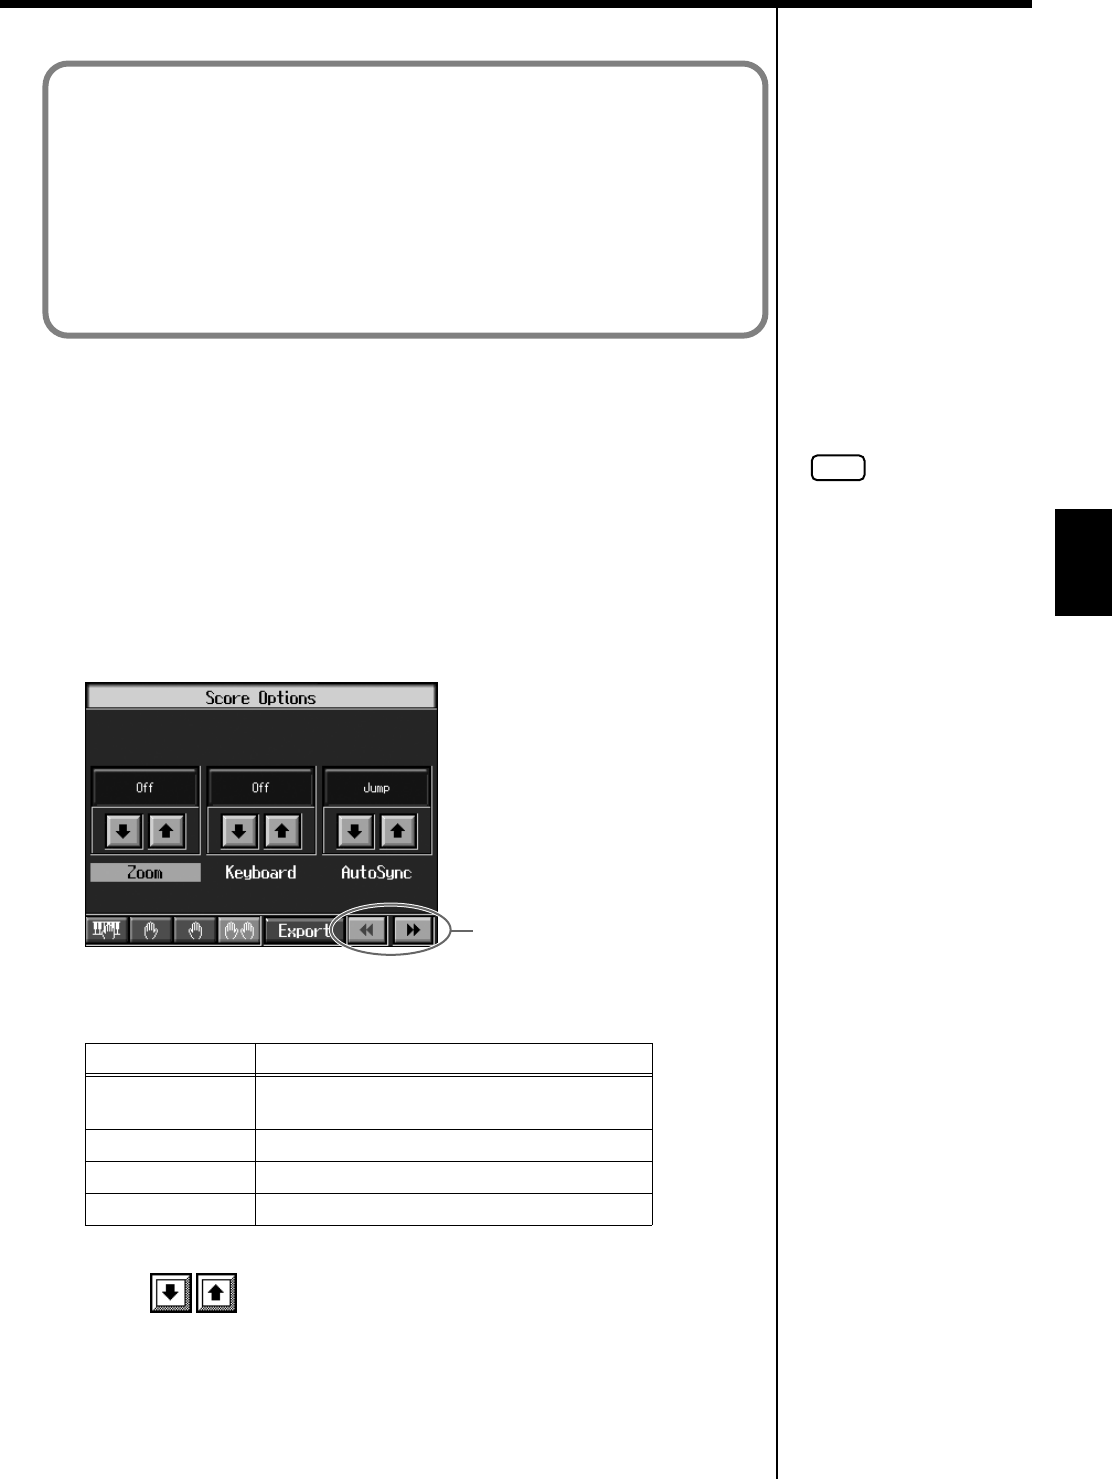
2. Press the [Option] button.
A screen like the one shown below appears.
fig.d-notationopt.eps_60
You can select the parts to be displayed in the notation by touching the four icons at
the lower left of the screen.
You can also touch <BMP> to save the score as an image file (p. 77).
3. Touch for the parameter being set to select the value.
Press the [Exit] button to return to the Notation screen.
The right-hand part and left-hand part are
displayed.
The right-hand part is displayed.
The left-hand part is displayed.
The User part is displayed.
When you play four or more notes while the bouncing ball is red, the ball moves to
the point where you are playing.
When you play fewer than four notes, the bouncing ball does not jump to the new
position, and the notation does not scroll.
The bouncing ball will move within the range of the notation displayed on the
external display or television. If you start playing at a point that is not currently
shown in the external display or television, the bouncing ball does not jump to the
new position, and the notation does not scroll.
NOTE
You can change the parts to be
displayed when you touch
each of the icons.
Switch the screens
76
Chapter 4 Practice Functions
Chapter 4
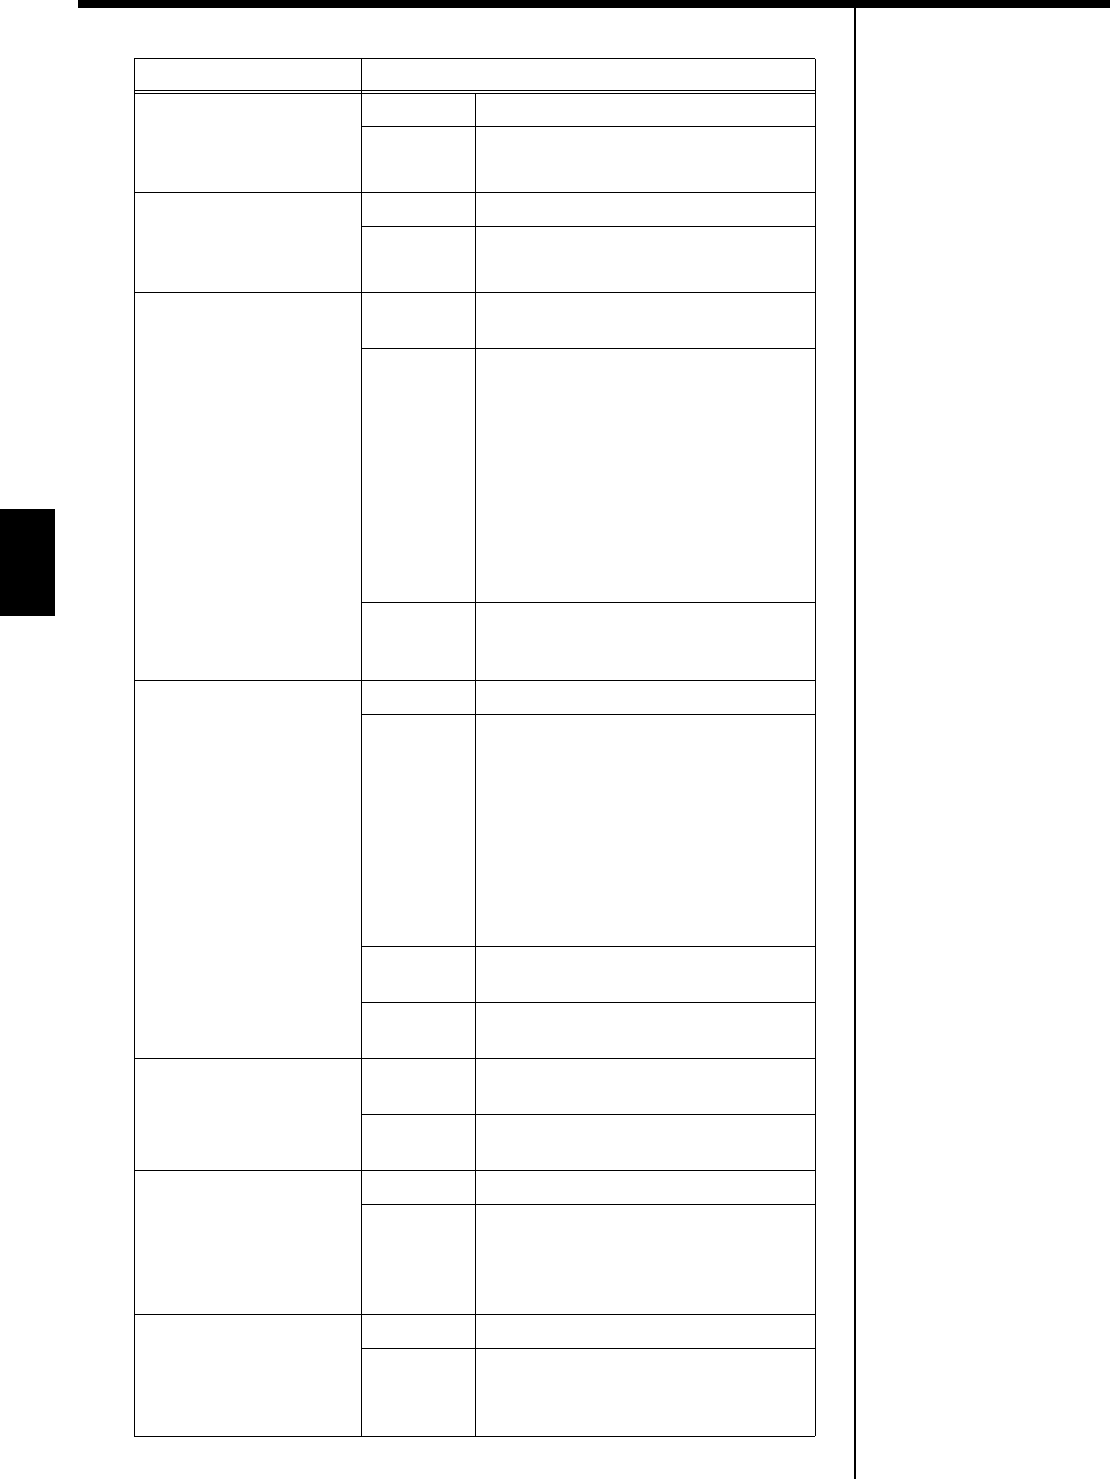
Item Setting
Zoom
Sets whether or not the
enlarged notation is
displayed.
ON Displays an enlarged notation.
OFF Displays the notation at the normal size.
Keyboard
Sets whether the
keyboard is displayed
beneath the notation.
ON Displayed.
OFF Not displayed.
AutoSync DigiScore
Sets the function
whereby the notation
screen scrolls
automatically as you
play, even if the song is
not played back.
OFF The notation screen does not scroll
automatically.
JUMP
The notation screen scrolls
automatically. When the bouncing ball
is blue, playback begins from the point
in the notation where the ball is set.
When the bouncing ball is red, and you
start playing a phrase at a point in the
notation close to where the ball is
located, the ball moves to the point
where you are playing. This position is
determined after you play at least four
notes of the phrase.
NOTE
The notation screen scrolls
automatically from the current position
in the song as you play.
Pedal
Sets the left pedal
function.
BASIC Functions as a soft pedal.
REPLAY
You can start and stop playback of song
data with the pedal. Pressing the pedal
in rapid succession moves you back in
the song the number of measures equal
to the number of times you press the
pedal, after which playback resumes.
This allows you to use the pedal to
rewind quickly, a useful feature when,
for example, you want to repeatedly
listen to a difficult phrase.
PAGE1 Advances the notation screen in the KR-
107's display to the next page.
PAGE2 Advances the notation screen in the
external display to the next page.
Resolution
Sets the minimum note
length indicated in the
notation.
16 Notes down to sixteenth notes are
indicated.
32 Notes down to thirty-second notes are
indicated.
Bouncing Ball
This setting determines
whether or not the
animated ball is shown
bouncing in time with the
song as it is played back.
ON Displayed.
OFF Not displayed.
Color Notation
This settings determines
whether or not the note in
the current position is
colored.
ON The note is displayed in color.
OFF Not displayed.

77
Chapter 4 Practice Functions
Chapter 4
Lyrics
This setting determines
whether or not lyrics in
songs that contain lyrics
data appear in the
notation.
ON The lyrics are displayed.
OFF Not displayed.
Finger Numbers
This setting determines
whether or not the
fingering in songs that
contain fingering data
appears in the notation.
ON The fingering is displayed.
OFF Not displayed.
Chords
This setting determines
whether or not chord
names in songs that
contain chord data
appears in the notation.
ON The chord names are displayed.
OFF Not displayed.
Pitches
Sets whether or not the
note names appear in the
music when the notation
is expanded.
OFF Not displayed.
C, D, E The pitch names (C, D, E) are displayed.
Do, Re, Mi
(Fixed)
The pitch names (fixed Do) are
displayed.
Do, Re, Mi
(Movable)
The syllable names (movable Do) are
displayed.
Clef L
Determines whether a
treble or bass clef is
shown in the notation for
the left-hand part.
Auto Display is switched automatically.
G Clef G (treble) clef is displayed in the
notation.
F Clef F (bass) clef is displayed in the notation.
Clef R
Determines whether
treble or bass clef is
shown in the notation for
the right-hand part.
Auto Display is switched automatically.
G Clef G (treble) clef is displayed in the
notation.
F Clef F (bass) clef is displayed in the notation.
Key
Notation is displayed in
the
specified key.
Auto Key is switched automatically.
b x 5–0–
# x 6
Notation is displayed in the specified
key.
Item Setting
User Part
Selects the part to display when “User” is selected as the
part to be displayed.
User Track,
Parts 1–16
Lower Part
Selects the part to display when “Lower” is selected as the
part to be displayed.
Lower Track,
Parts 1–16
Upper Part
Selects the part to display when “Upper” is selected as the
part to be displayed.
Upper Track,
Part 1–16
Item Setting
In some internal songs, the
fingering is displayed.
The fingering numbers shown
in the screen indicate one
possible fingering.
Chord names can be displayed
in some of the internal songs
and recorded performances
using the KR’s Chord
Sequencer (p. 120).
78
Chapter 4 Practice Functions
Chapter 4
■Saving Notations as Image Data
You can take notations that are displayed on the KR and save them to external
memories. You can also use saved image data to your computer.
1. Insert the external memory onto which you want to save the image data
in the KR’s external memory port.
2. Record the performance (p. 90). Alternatively, press the [Song] button to
select a song.
3. Press the [DigiScore] button.
The Notation screen appears.
4. Press the [Option] button.
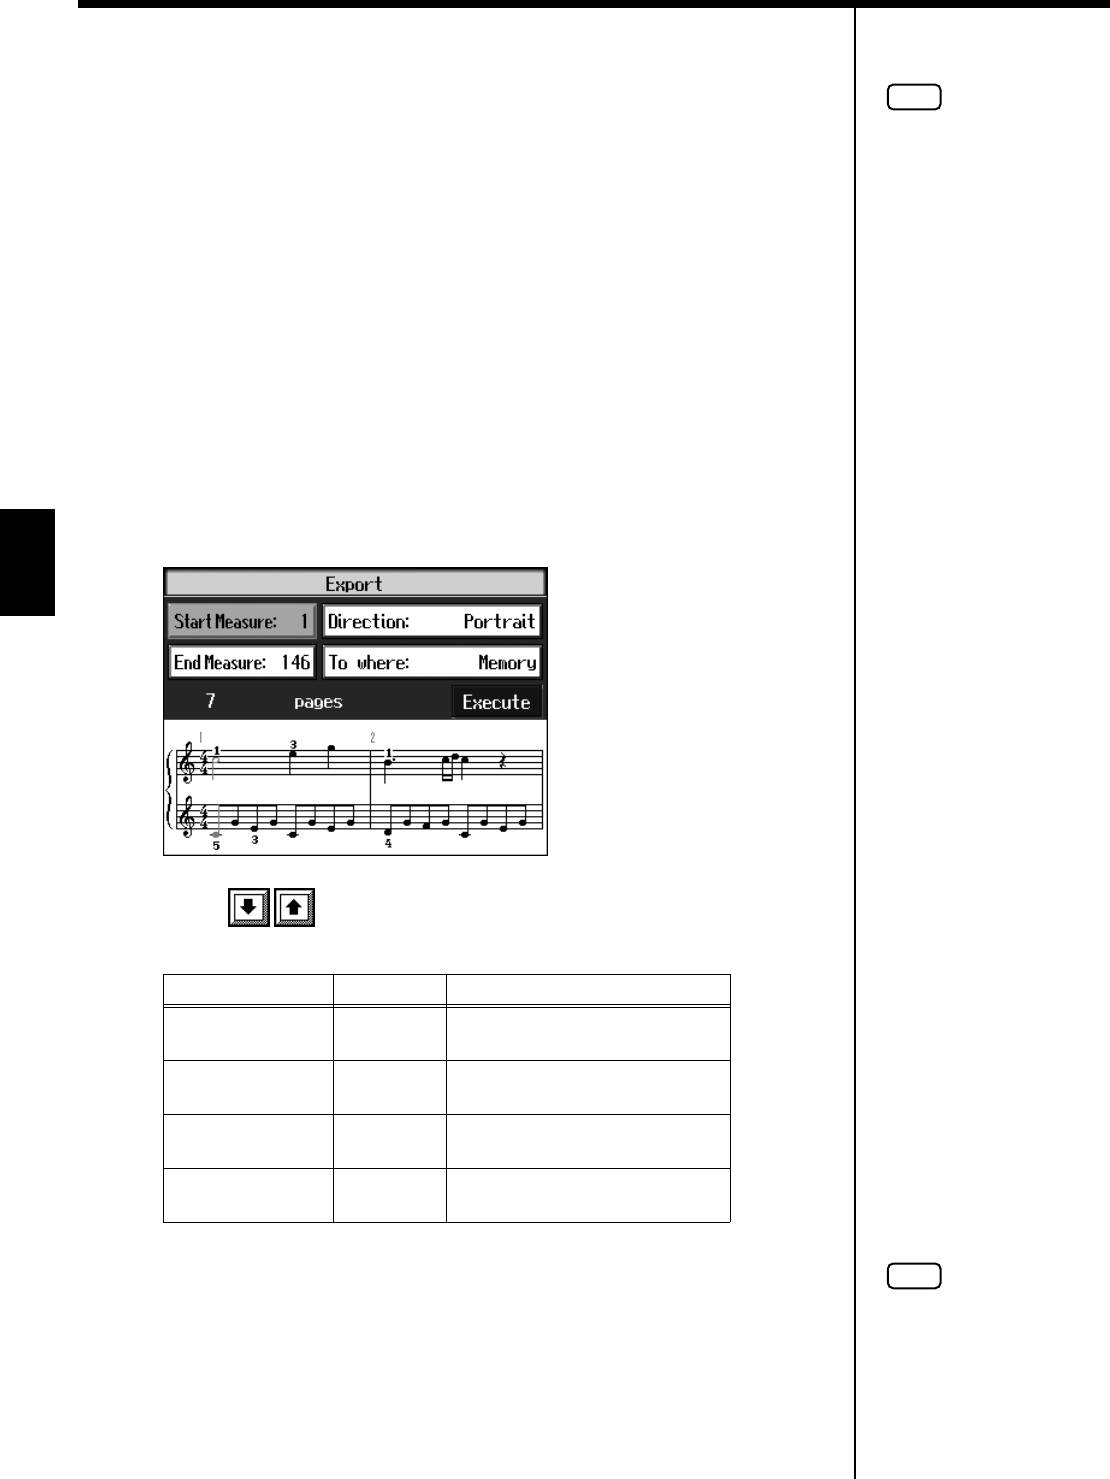
5. Touch <Export>.
A screen like the one shown below appears.
fig.d-notationbmp.eps_60
6. Touch for each parameter to set the range of the image data.
7. Touch <Execute>.
The notation is saved to the external memory as image data in BMP (bitmap) format.
* You cannot save copyrighted song data.
* Other than for your own personal enjoyment, use of the notations that are output
without the permission of the copyright holder is prohibited by law.
Start measure 1, 2– Selects the measure at which
output begins.
End Measure – song end Selects the measure at which
output ends.
Media Selects the media for the save
destination.
Layout Sets the orientation of the score
being output.
NOTE
Other than for your own
personal enjoyment, use of the
notations that are output
without the permission of the
copyright holder is prohibited
b
y law.
NOTE
Do not remove the external
memory while “save” is in
progress.
79
Chapter 4 Practice Functions
Chapter 4
Saving Your Visual Lesson Performance Results
When you practice with Visual Lesson, the notation showing the model performance
appears in the screen above the score for your own performance. You can save these
notation in BMP (bitmap) format.
1. While in the “performance results confirmation screen” in Visual
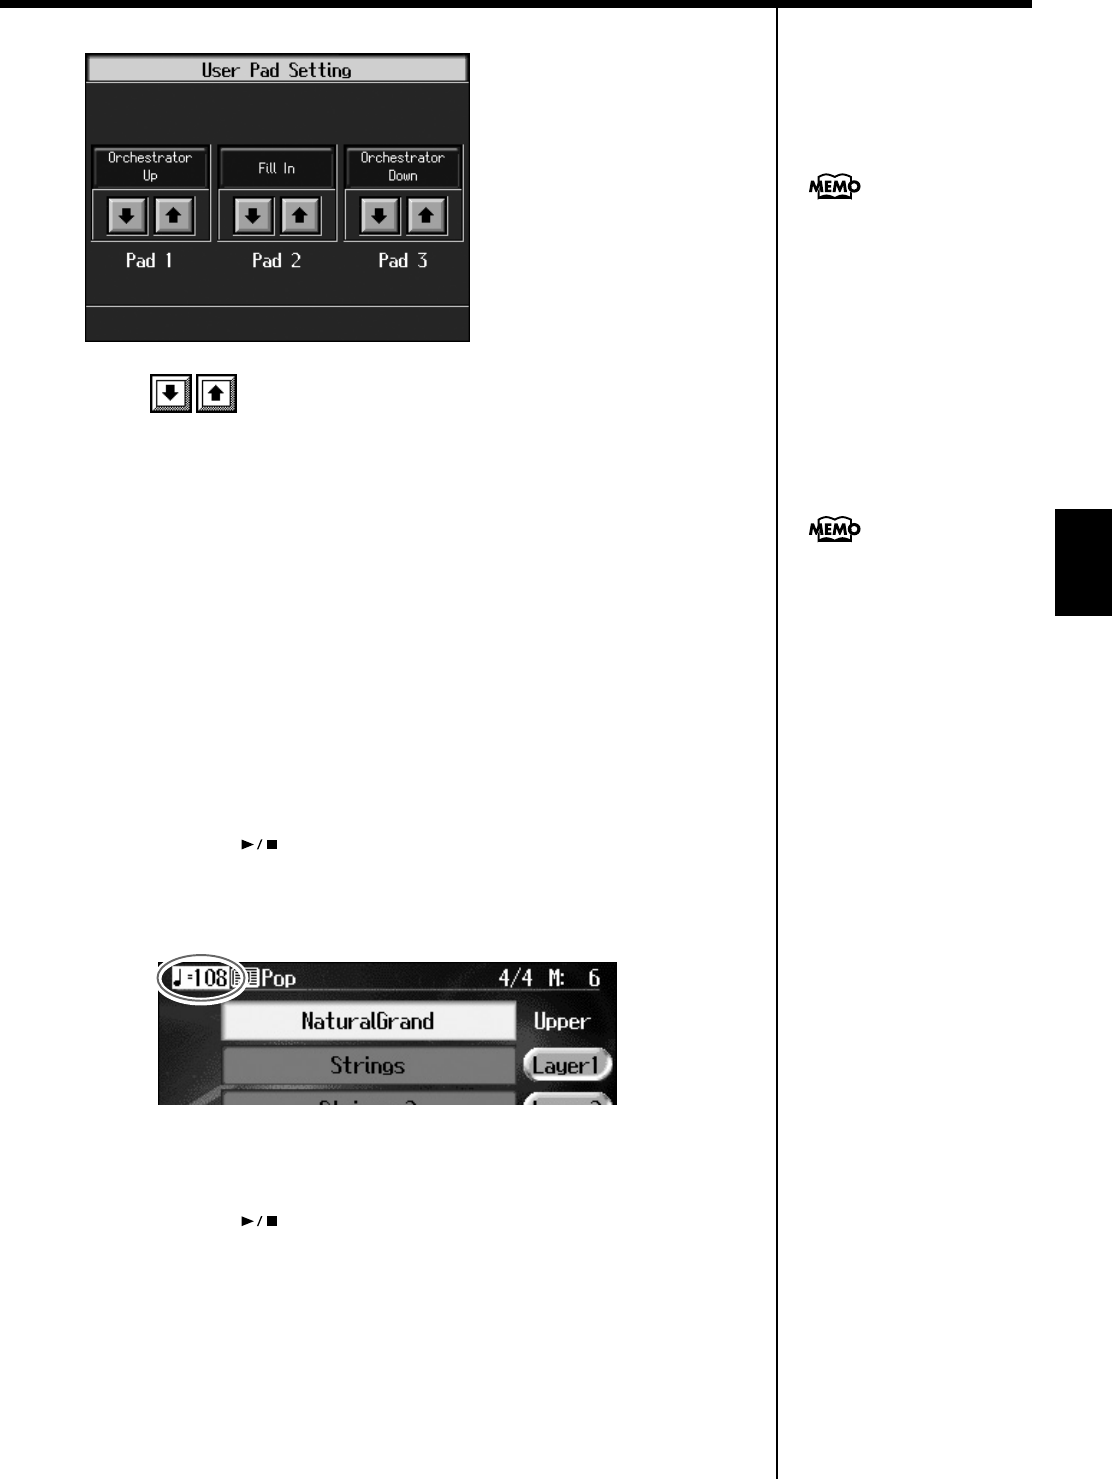
Lesson, press the [Setting] button.
2. Touch the parameter whose setting you want to change.
3. Set the value with the dial.
4. Touch <OK>.
80
Chapter 4 Practice Functions
Chapter 4
Adjusting the Tempo
This changes the song and Music Style tempos.
If songs seem difficult to play at their original speed, you may find it helpful to first
practice with the tempo slowed down. Then, after becoming more familiar with the
song, you can practice it at a gradually faster tempo.
Changing the tempo has no effect on the pitch of the notes. And you can change the
tempo even when the song is in progress.
fig.panel3-2
Adjusting the tempo with the Tempo [-] [+] buttons
Pressing the [+] button once increases the tempo by one unit. Holding down the
button makes the tempo increase continuously.
Pressing the [-] button once decreases the tempo by one unit. Holding down the
button makes the tempo decrease continuously.
Pressing the [-] [+] buttons simultaneously returns the selected Music Style or song
to the basic tempo.
■Setting the Tempo by Pressing the Button in Time
(Tap Tempo)
You can also set the tempo by pressing the Performance Pad. This feature is called
“Tap Tempo.” By using the Tap Tempo function, you can quickly set the tempo you
are thinking of, without specifying the tempo in numerical terms.
fig.panel3-3
Assigning functions to the Performance Pads
1. Press the [User Function] button and watch the indicator light up.
81
Chapter 4 Practice Functions
Chapter 4
fig.d-usrfunc.eps_60
2. Touch for the Performance Pad to which the function is
assigned, then select “Tap Tempo.”
3. Press the [Exit] button; the tempo is indicated in the upper left of the
screen.
Specifying the Tempo
4. Press the Pad to which “Tap Tempo” is assigned at least twice.
The tempo is set to the rhythm you used when tapping the button.
■Playing Back at a Fixed Tempo (Tempo Mute)
If a song has tempo changes, it helps to practice the song first at a steady tempo.
Overriding tempo changes is called “Tempo Muting.”
1. Hold down the [ (Play/Stop)] button and press one of the Tempo [-]
[+] buttons.
When tempo muting is in effect, the tempo display appears in reverse video.
fig.d-tempmute.eps_60
When you play back the song, it will play at a constant tempo.
Cancel the tempo mute setting
1. Hold down the [ (Play/Stop)] button and press one of the Tempo [-]
[+] buttons.
Tempo muting is canceled.
Tempo Mute will also be cancelled when you select a different song.
You can also assign the Tap
Tempo function to the pedal,
and use the pedal to specify
the tempo. For details, refer to
“Assigning Functions to
Pedals and Performance Pads
(Pedal Setting/User
Functions)” (p. 142).
You can start the song by
giving the count through the
microphone. For more detailed
information, refer to “Enabling
the start of songs and
automatic accompaniment
with the sound of your voice
(Vocal Count-In)” (p. 39).
82
Chapter 4 Practice Functions
Chapter 4
Match the Tempo Before You Begin
Playing (Count)
When you’re playing along with a song, you can listen to the tempo before you start
playing by adding a count-in.
This audible count before the song playback is called a “Count-In.”
fig.panel3-3
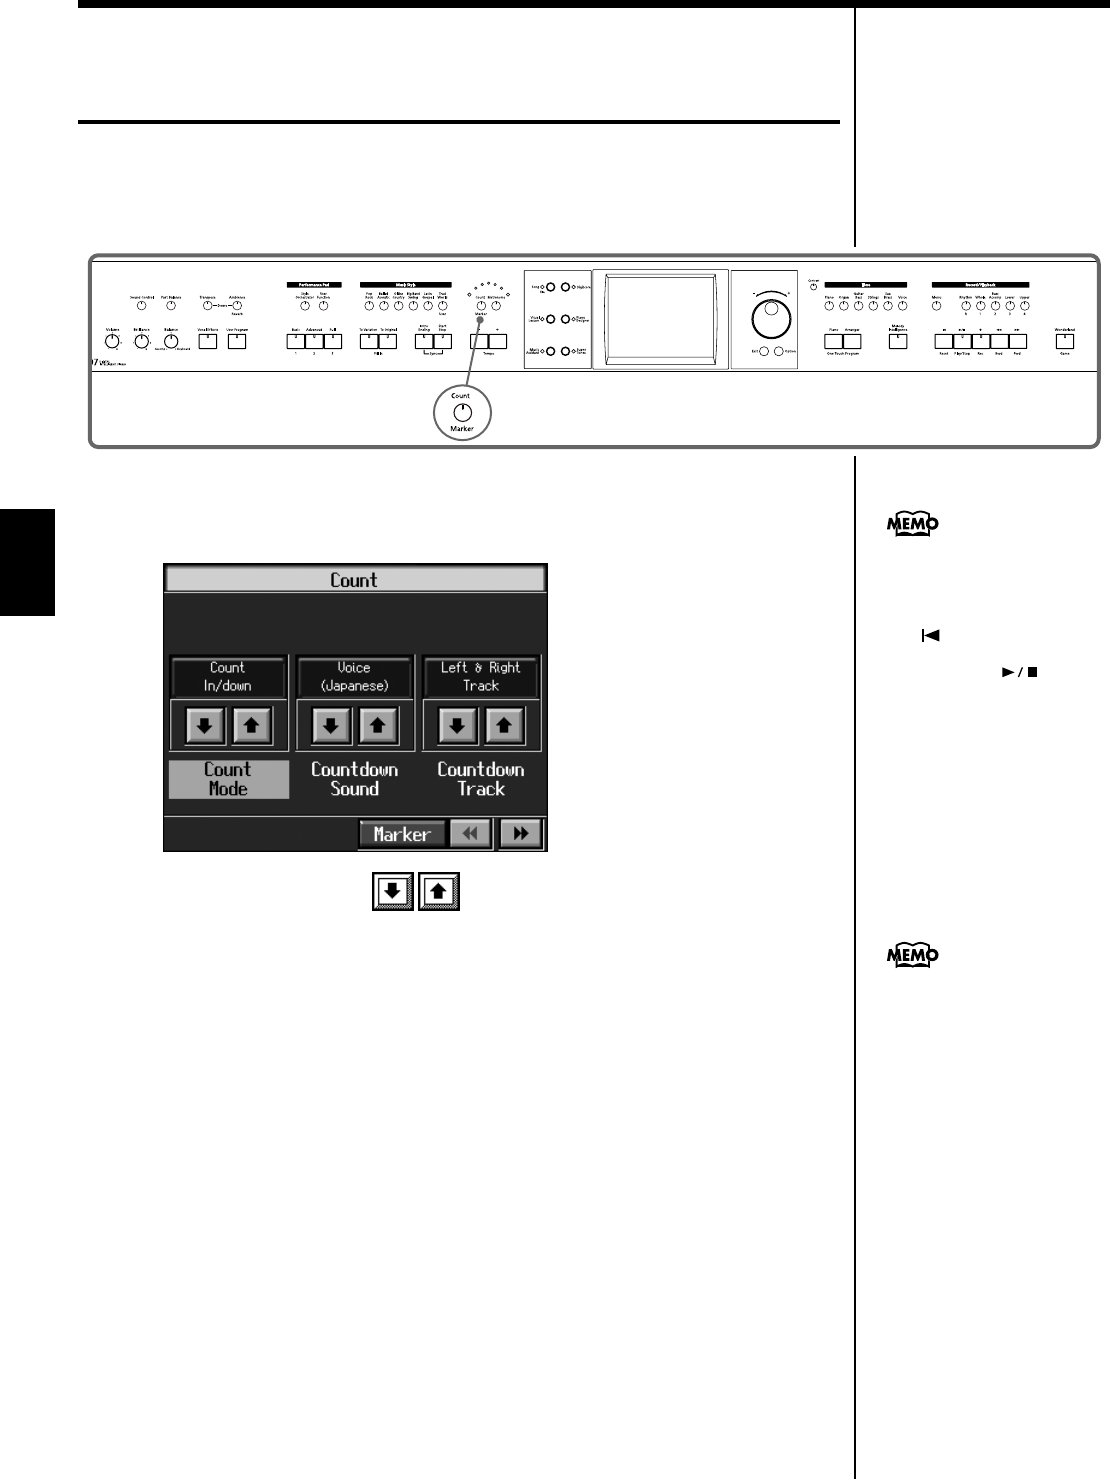
1. Press the [Count/Marker] button and watch the indicator light up.
The following “Count In settings screen” appears.
fig.d-cntin.eps_60
2. Touch <Count Mode> to set this to “Count In.”
With this setting, two measures count down before the song playback starts.
Cancelling the Count In
1. Press the [Count/Marker] button so its indicator is turned off.
By pressing [Back] instead of the [Count/Mark] button, you can close the Count
settings screen without cancelling the count.
You can have a count sound be
played before the song starts
playing back by holding down
the [ (Reset)] button while
you press the [()Play/
Stop] button.The status of the
Count settings won’t be
affected by your use of this
procedure.
For more about other settings
on the Count settings screen,
refer to “Changing the Settings
for the Count” (p. 140).
83
Chapter 4 Practice Functions
Chapter 4
Muting Some Parts Before Playing
(Track Buttons)
With commercially available music files for piano lessons, the part for each hand can
be played back independently. This makes it easy to practice hands separately. For
example, you can follow along with your right hand while you listen to that same
right-hand part be played, or you can practice the left-hand part while the right-hand
part plays.
A music file for piano lessons may be assigned to the five Track buttons as shown below.
fig.trackbuttons.e
By using these Track buttons, you can eliminate the sound of specific parts. This is
referred to as “muting.”
By recording your own performances to the Track Buttons in this fashion, you can
mute parts the same way. For details, refer to “Recording While Selecting the Track
Buttons (Redoing Recordings)” (p. 95).
1. Select the song that you wish to play back (p. 64).
Selecting the part that you’ll be playing
2. Press any one of the Track buttons to make the button’s indicator light go
dark.
The sound for the selected part no longer plays.
For example, when practicing the right hand, press the [4/Upper] button.
When you play back the song, the right-hand performance will not sound. Practice
your right-hand performance along with the left-hand playback.
Playing back a song
3. Press the [ (Play/Stop)] button.
The song will begin playing back.
The part you selected in step 2 will not sound.
Once again press the button you selected in step 2. The button’s indicator will light
up, and the part will be heard once again.
Even while the song is playing, you can press the track buttons to mute or un-mute
the sound.
Stopping the song
4. Press the [ (Play/Stop)] button.
The song will stop.
For more on music files, refer
to “Music Files That the KR
Can Use” (p. 183).
Drums/SFX Accom-
paniment
Left-hand
Part
Right-hand
Part
You cannot mute individual
parts separately in audio files.
If a single Track button
includes more than one
instrument and you want to
mute just one of those
instruments, take a look at
“Modifying the Settings of
Each Part” (p. 114).
When a single Part is not
played, it is called “Minus
One.” Using Minus One, you
can mute out a particular
instrument and play the part
yourself.
When playing back SMF files
for Roland Piano Digital series
instruments, and the [3/
Lower] button and [4/Upper]
b
utton do not correctly control
the left/right-hand
performances, please change
the “Track Assign” settings.
Please refer to “Changing the
Parts Assigned to the Track
Buttons During SMF Playback
(Track Assign)” (p. 153).
You can adjust the balance
b
etween the keyboard and
song volume levels. Check out
“Adjusting the Volume
Balance for Each Performance
Part (Part Balance)” (p. 62).

84
Chapter 4 Practice Functions
Chapter 4
Setting Markers for Repeated Practice
(Marker)
By setting markers at points in a song that you want to practice repeatedly, you can
then easily go to and repeat play back of the selected measures.
■Placing a Marker within a Song
You can place two separate markers (Marker A and Marker B) in one song. These
markers are placed at the beginning of a measure to make the beginning and end of
a section of music. Placing markers is a handy way to start playback at the same
place as many times as you like. You can add markers or move to a marker even
while playback is in progress.
Access the Marker screen
First, select the song in which you’ll set the markers (p. 64).
1. Press the [Count/Marker] button.
2. Touch <Marker>.
The Marker screen appears.
fig.d-marker.eps_60
Placing Markers
3. Go to the measure where you want to set a marker using the [ (Bwd)]
and [ (Fwd)] buttons.
4. Touch <- - -> for Marker A.
Marker A is placed at the beginning of the measure you selected.
“- - -” on the screen will change to the number of the measure where you placed the
marker.
5. In the same way, touch the Marker B <- - -> to set Marker B.
It is not possible to assign marker B to the same location or a measure before marker A.
You cannot place markers in
audio files.
Markers can also be assigned
in units of beats rather than
measures. Refer to “Placing a
Marker in the Middle of a
Measure” (p. 140).
85
Chapter 4 Practice Functions
Chapter 4
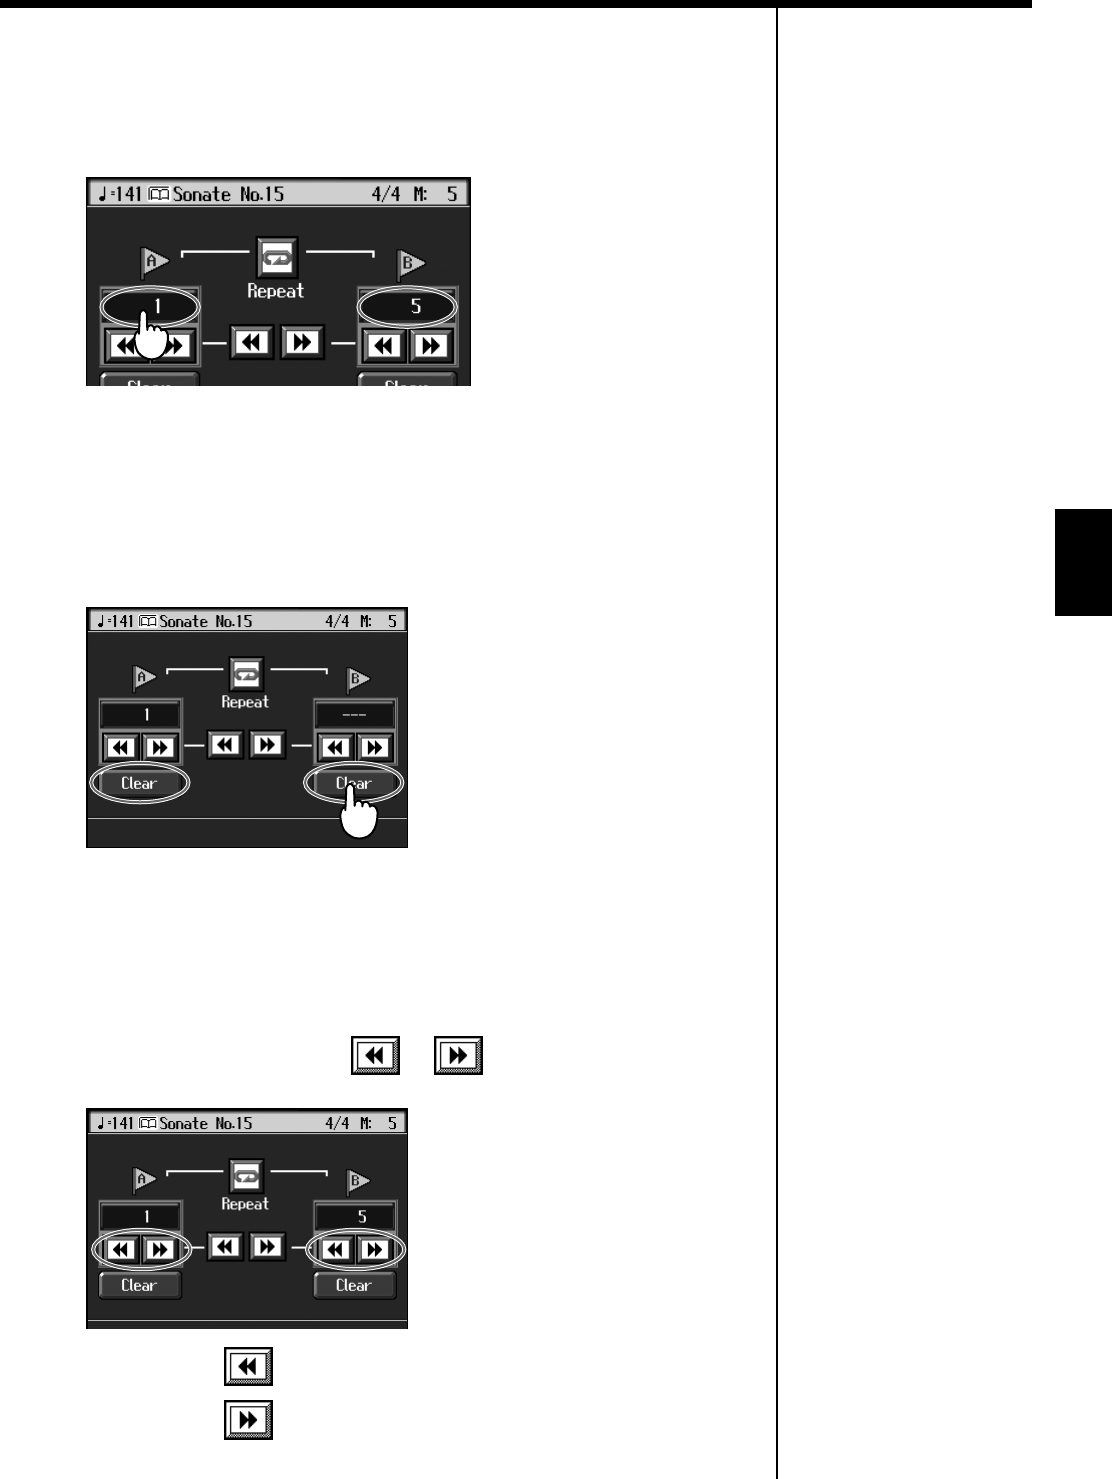
■Playback from a Marker Location
1. At the marker screen, touch the measure number of the marker you want
to go to.
fig.d-mark1-5.eps_60
Playback will start from wherever Marker A or Marker B are set.
With the song playing back, playback will continue if you touch Marker A or Marker
B on the Marker screen.
■Erasing a Marker
1. Touch <Clear> for the marker you want to erase.
fig.d-markclear.eps_60
The marker disappears and the on-screen display changes to <- - ->.
■Moving a Marker
You can move a marker that has been placed in a song. You can also move the section
of music defined by Markers A and B forward or back, without changing the number
of measures of marked.
1. On the Marker screen, touch or for the marker to be moved.
fig.d-mark1-5.eps_60
When you touch , the marker is moved to a previous part of the song.
When you touch , the marker is moved to a later part of the song.
86
Chapter 4 Practice Functions
Chapter 4
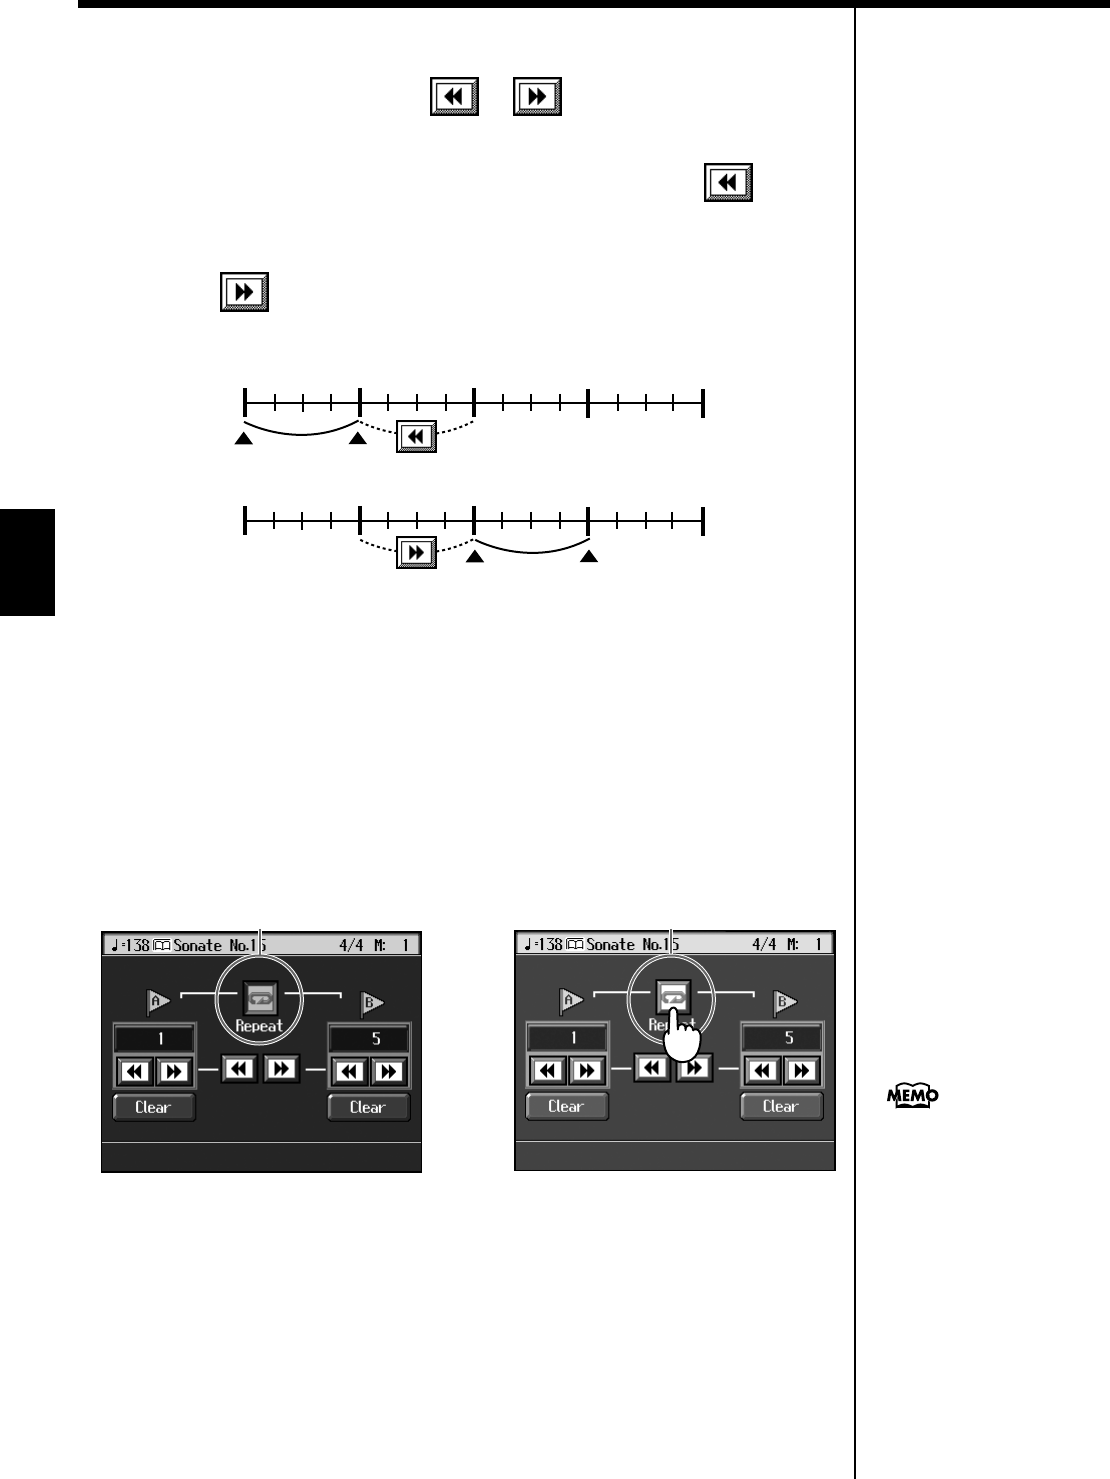
Moving Markers A and B without changing the interval between them
1. On the Marker screen, touch or in the middle of the screen.
For example, if you have Marker A set at the beginning of the fifth measure, and
Marker B set at the beginning of the ninth measure, when you touch , Marker
A is moved to the beginning of the first measure, and Marker B is moved to the
beginning of the fifth measure.
Touch to shift Marker A to the beginning of the ninth measure and Marker B
to the beginning of the thirteenth measure.
fig.markerA-B.e
■Playing Back the Same Passage Over and Over
You can play back a particular passage over and over. This is convenient when you
want to focus on a passage.
1. First, set Marker A and Marker B to define the measures you want to
repeat.
For instance, suppose you want to play back the passage from the fifth through
eighth measures over and over. You should place Marker A at the beginning of the
fifth bar and Marker B at the beginning of the ninth bar.
fig.d-markrpt.eps_60
2. Touch <Repeat> in the Marker screen.
The setting is made for repeated playback of the passage from marker A to marker B.
When you play the song, the marked section of music plays back repeatedly.
Cancelling repeat playback
3. Touch <Repeat> in the Marker screen, and the icon returns to the
original color.
Repeat playback is cancelled.
15913
23
4678 101112 141516
Marker A Marker B
15913
23
4678 101112 141516
Measure
Measure
Marker A Marker B
OFF ON
When <Repeat> is On
• If neither Marker A nor
Marker B is set, the song is
played back from the
b
eginning to the end.
• If you only place marker A,
playback repeats from marker
A to the end of the song.
• If you only place marker B,
playback repeats from the
b
eginning of the song to
marker B.
87
Chapter 4 Practice Functions
Chapter 4
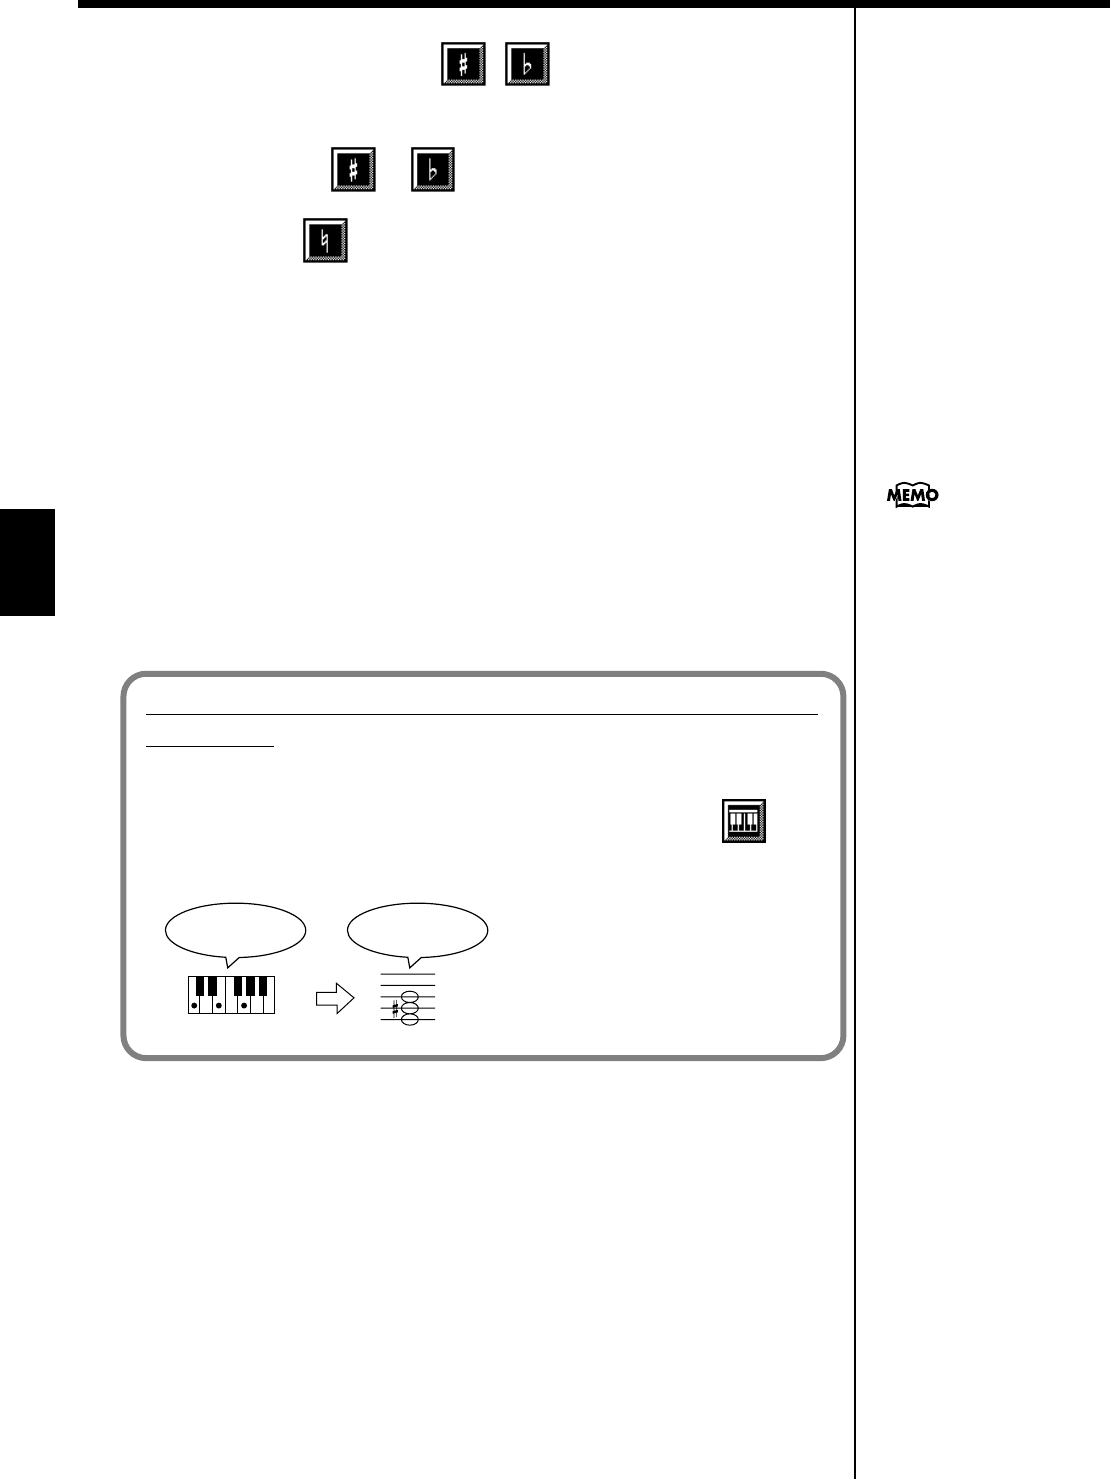
Transposing Keyboard Sounds and
Songs Played Back (Transpose)
By using the “Transpose function,” you can transpose your performance without
changing the notes you play. For example, even if the song is in a difficult key with
many sharps ( ) or flats ( ), you can transpose it to a key that is easier for you to
read and play.
You can also use this function to play back a song in a different key.
When accompanying a vocalist, you can easily transpose the pitch to a range that is
comfortable for the singer, while still playing the notes as written (i.e., with the same
fingering positions).
fig.panel3-4
First make sure you have selected the song to be transposed (p. 64).
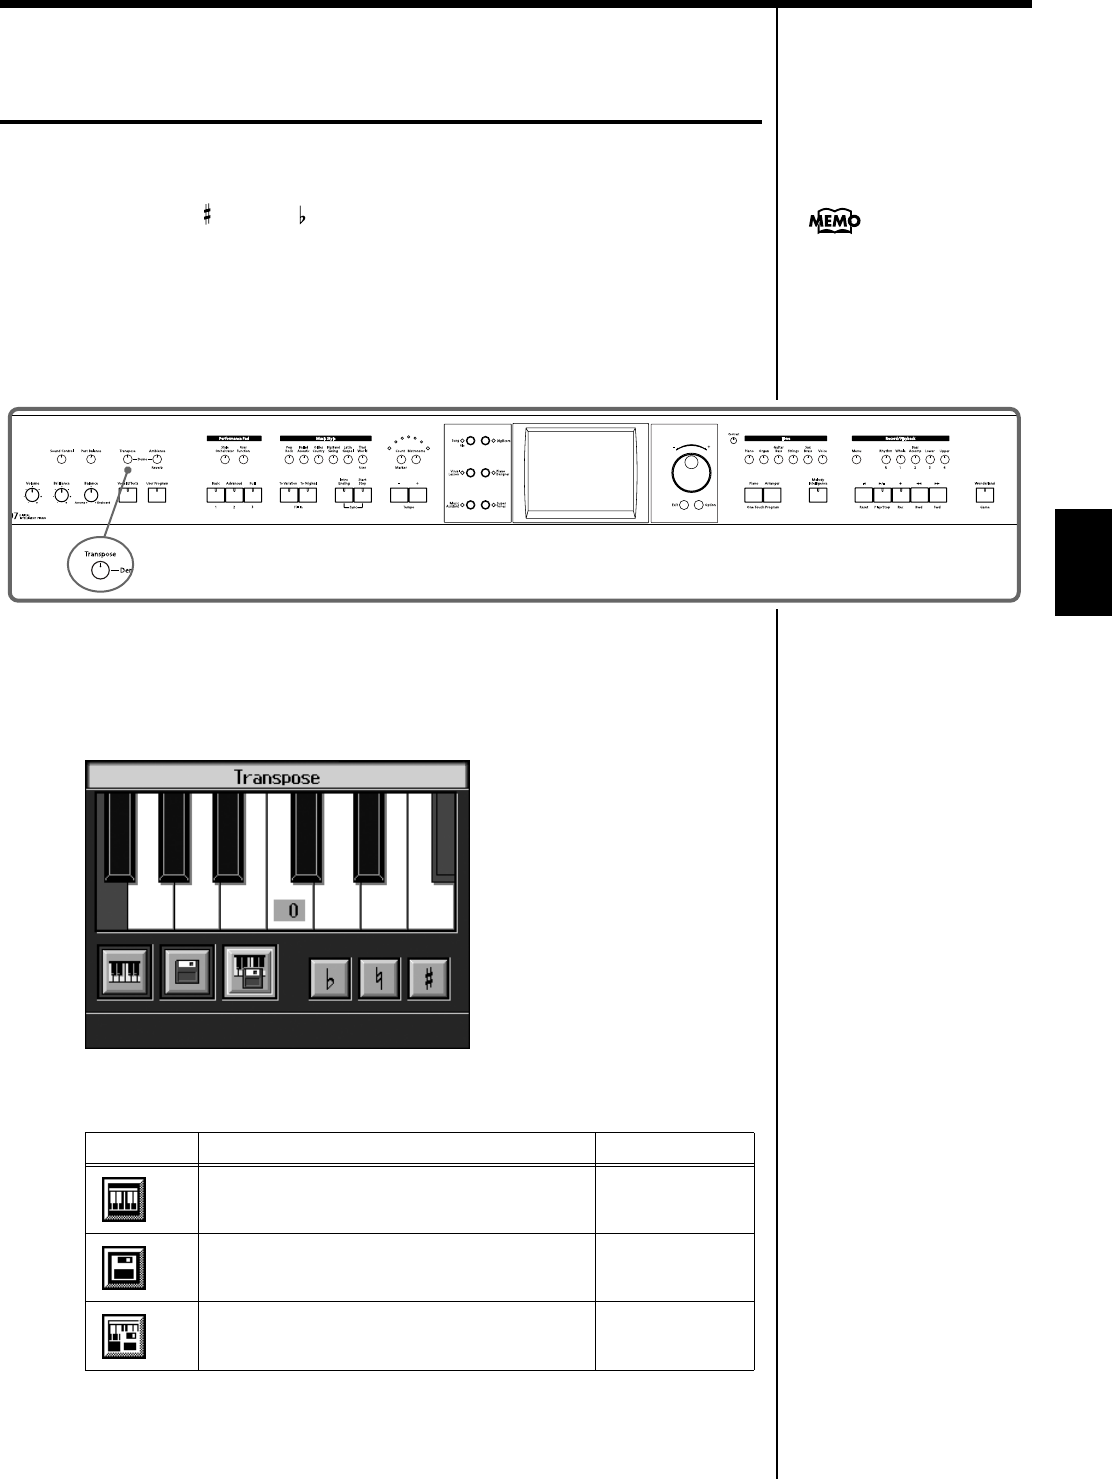
1. Press the [Transpose] button.
A “Transpose screen” like the one below appears.
fig.d-transpose.eps_60
2. Touch the Transpose icon.
Icon Target Settings Value
Keyboard sound -6–0–5
Song to be played back -24–0–24
Keyboard sounds, songs being played back -6–0–5
You cannot transpose audio
files.
88
Chapter 4 Practice Functions
Chapter 4
3. Touch the screen keyboard or , to select the transposition
value.
Each time you press or , it transposes the key by a semitone.
When you touch , a value of “0” is set.
You can also use the dial to change the transposition value.
When you transpose a song or the keyboard, the [Transpose] button’s indicator
lights up. As you play the keyboard or play back the song, the notes are transposed.
When you press the [Exit] button, the transposition remains in effect, and you’re
returned to the previous screen.
Cancelling Transposition
4. Press the [Transpose] button and the indicator light goes out.
Transposition is cancelled.
The next time you press the [Transpose] button, illuminating the indicator, the music
is transposed by the value set here.
Example: Playing a song in E major while playing the keys
for C major
In this example, C is the root note in the key of C major. E, the root of E major, is the
third in C major. It is up four keys, including the black keys, so touch , then
enter “4” for the setting.
fig.trans.e
If you play C E G It will sound E G
#
B
The transposition value reverts
to “0” when you turn off the
power or select another song.
89
Chapter 5
Chapter 5 Recording and Saving the Performance
You can easily record performances using the five track buttons.
A recorded performance can be played back to listen to your own playing, or to add
additional parts.
You can use the KR to make the following kinds of recordings.
• Recording just your own keyboard performance (→ “Recording a New Song
(New Song)” (p. 90))
• Recording performances using Automatic Accompaniment
(→ “Recording With Accompaniment” (p. 92))
• Recording along with the internal songs and songs on external memories
(→ “Recording Along with a Song” (p. 94))
• Re-recording (→ “Recording While Selecting the Track Buttons (Redoing
Recordings)” (p. 95))
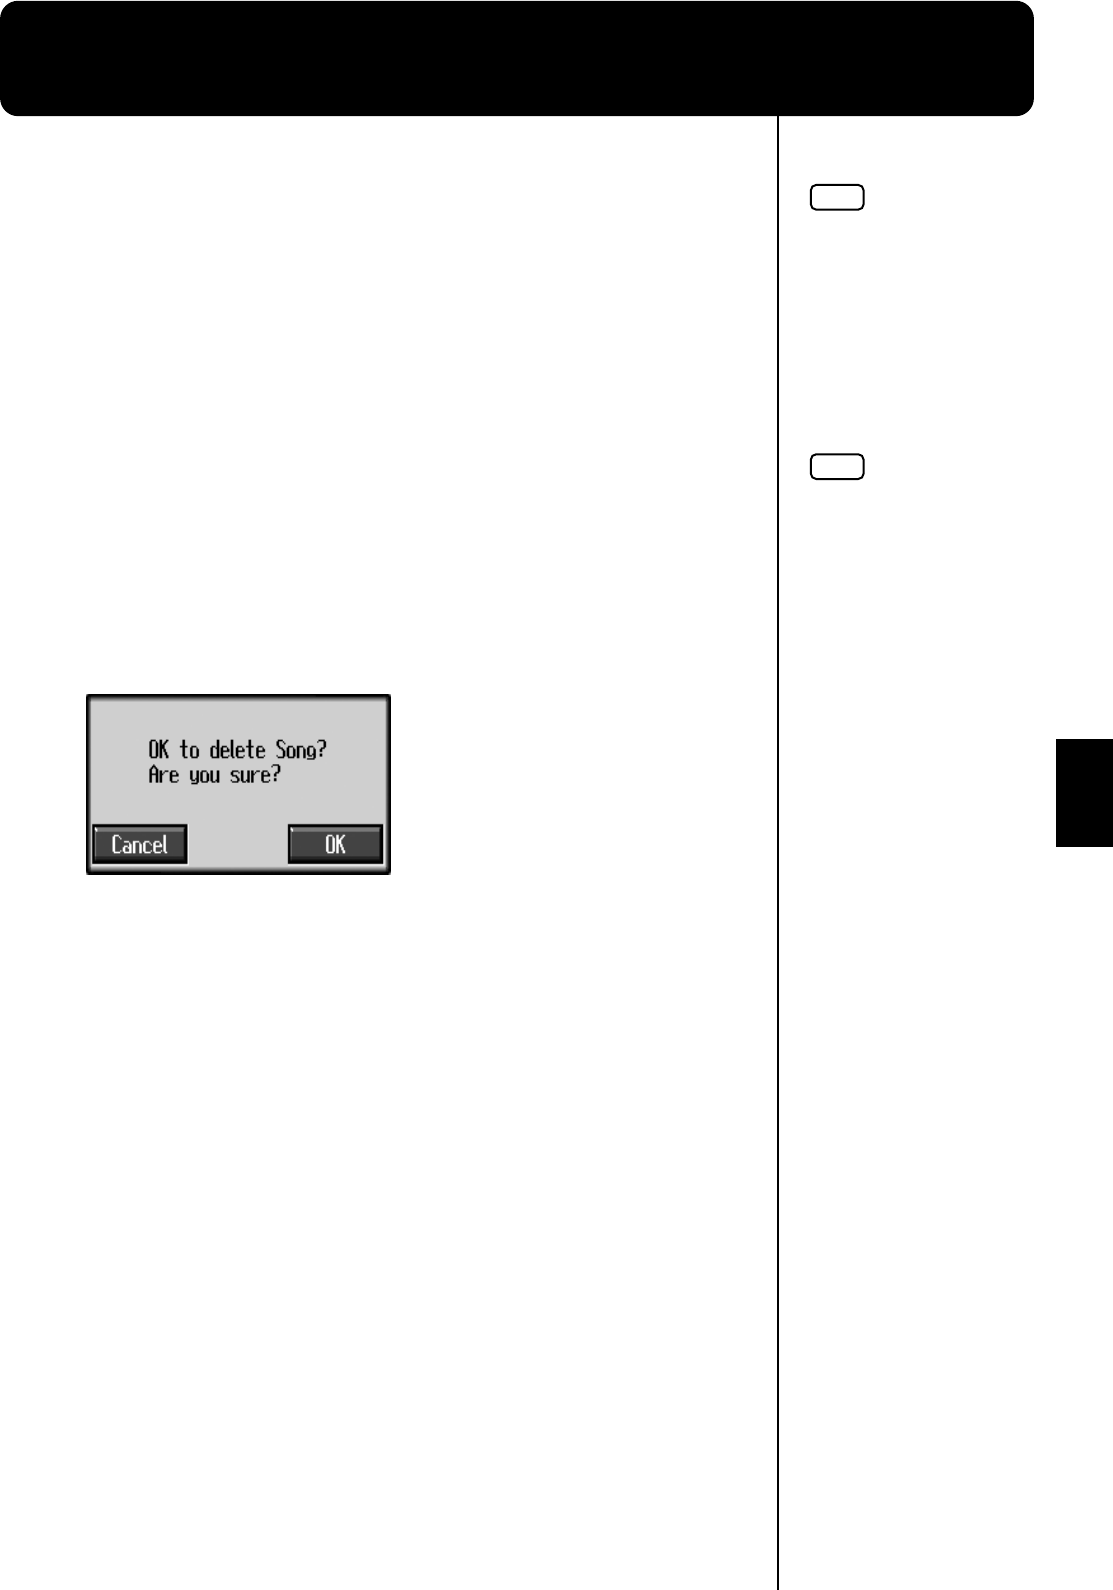
❍If the following screen appears
If you’ve recorded a song or changed a song’s settings (see p. 114), the following
message appears on the screen when you try to choose another song.
If it’s okay to delete the song, touch <OK>.
If you do not want to delete the song, touch <Cancel>, and either save the song to a
external memory (p. 101) or register the song to the Favorites (p. 68).
NOTE
Recorded performances are
discarded when another song
is selected, or when the power
is turned off. Be sure to save
important performances on a
external memory. Take a look
at “Saving Songs” (p. 101).
NOTE
You cannot record while
playing along with audio files.
90
Chapter 5 Recording and Saving the Performance
Chapter 5
Recording a New Song (New Song)
This records keyboard performances without the use of the internal songs or
Automatic Accompaniment.
fig.panel4-1
Settings for recording performances
1. Press One Touch Program [Piano] button.
This sets the KR for performance without the use of Automatic Accompaniment.
2. Decide on the tone of the performance (p. 22).
Use the Tone buttons and the touch screen to select the tone.
When you have finished choosing the settings, press the [Exit] button to display the
Basic screen.
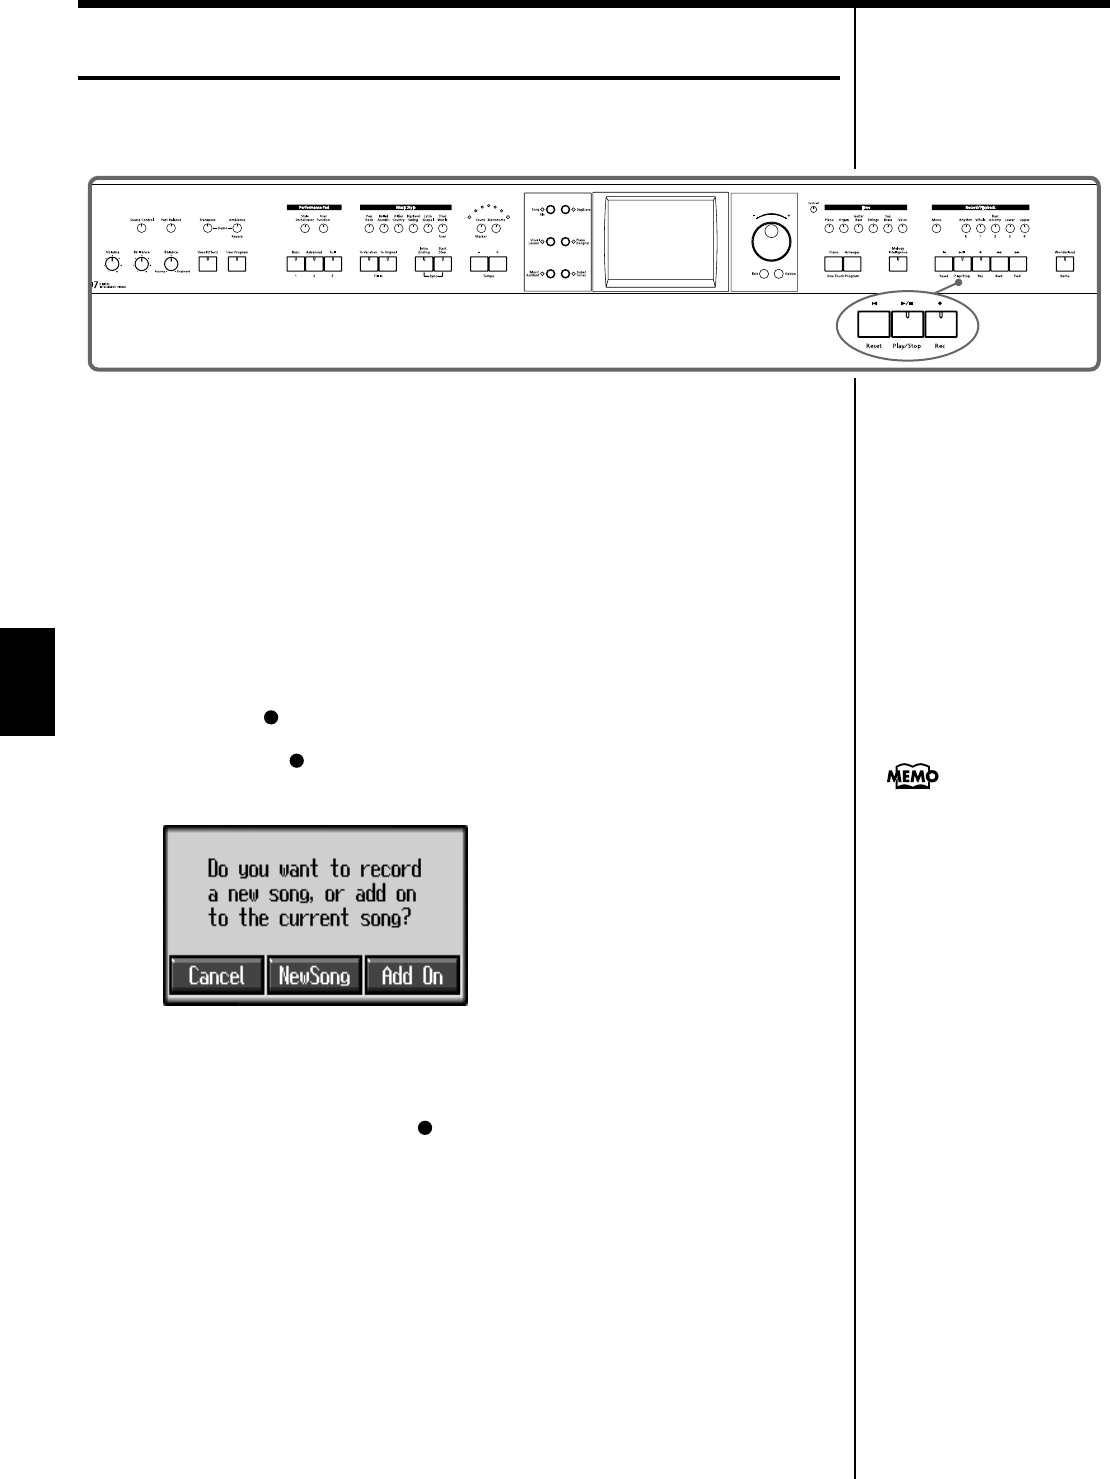
Recording settings
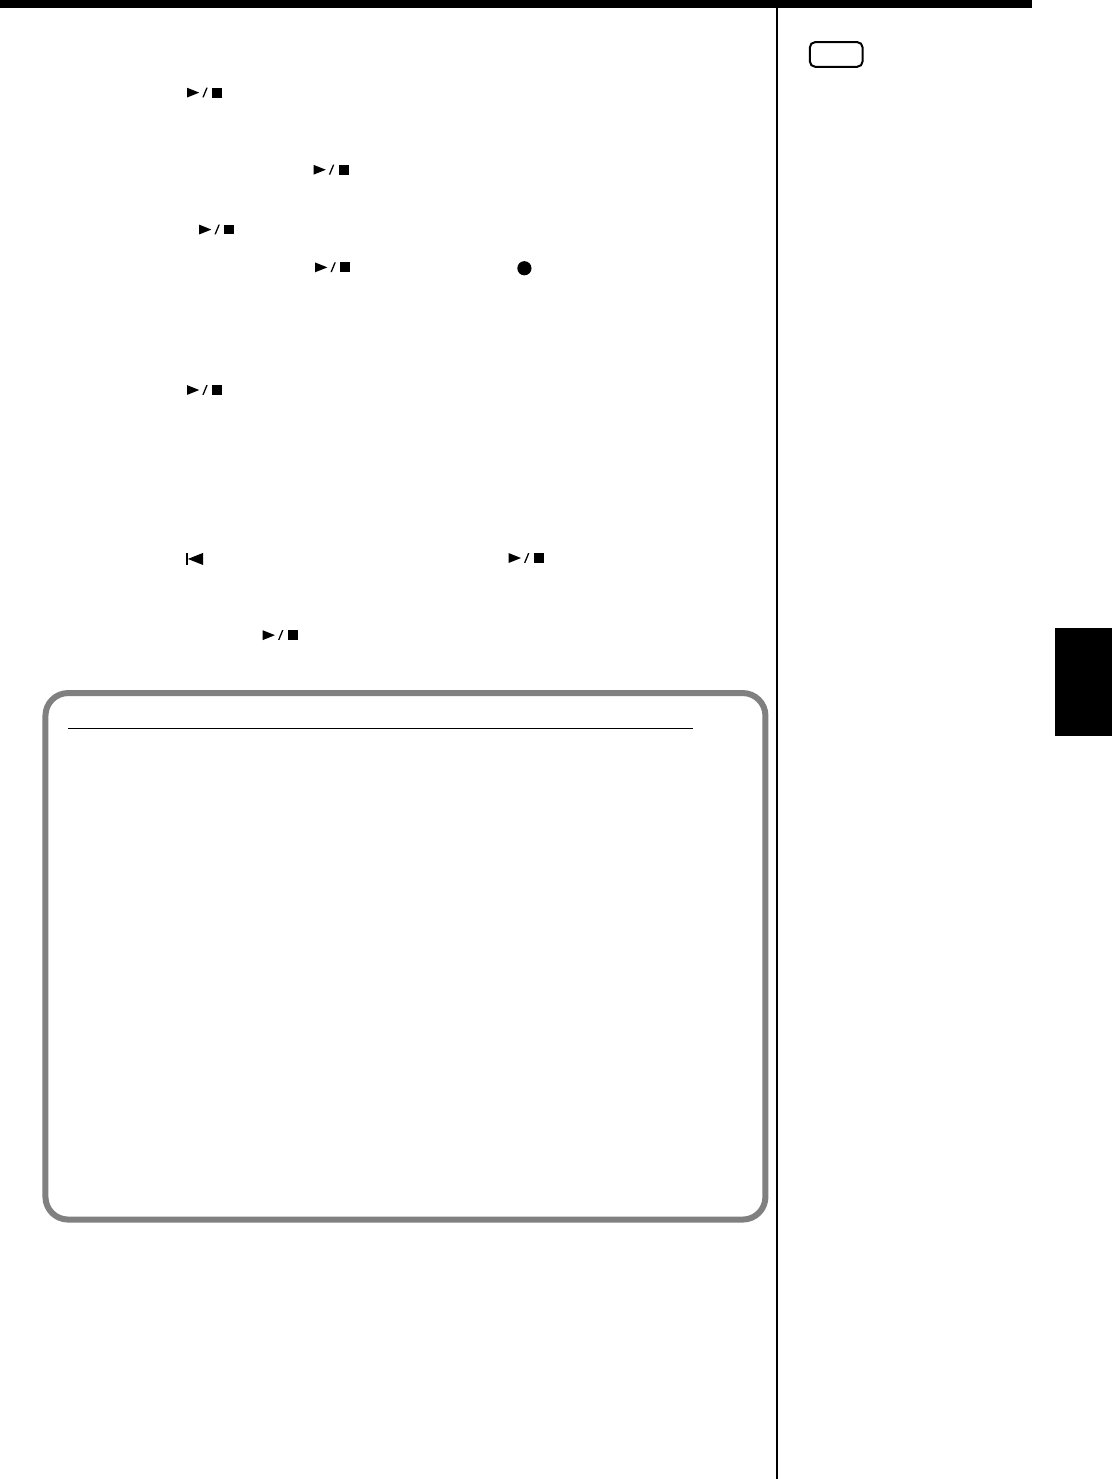
3. Press the [ (Rec)] button.
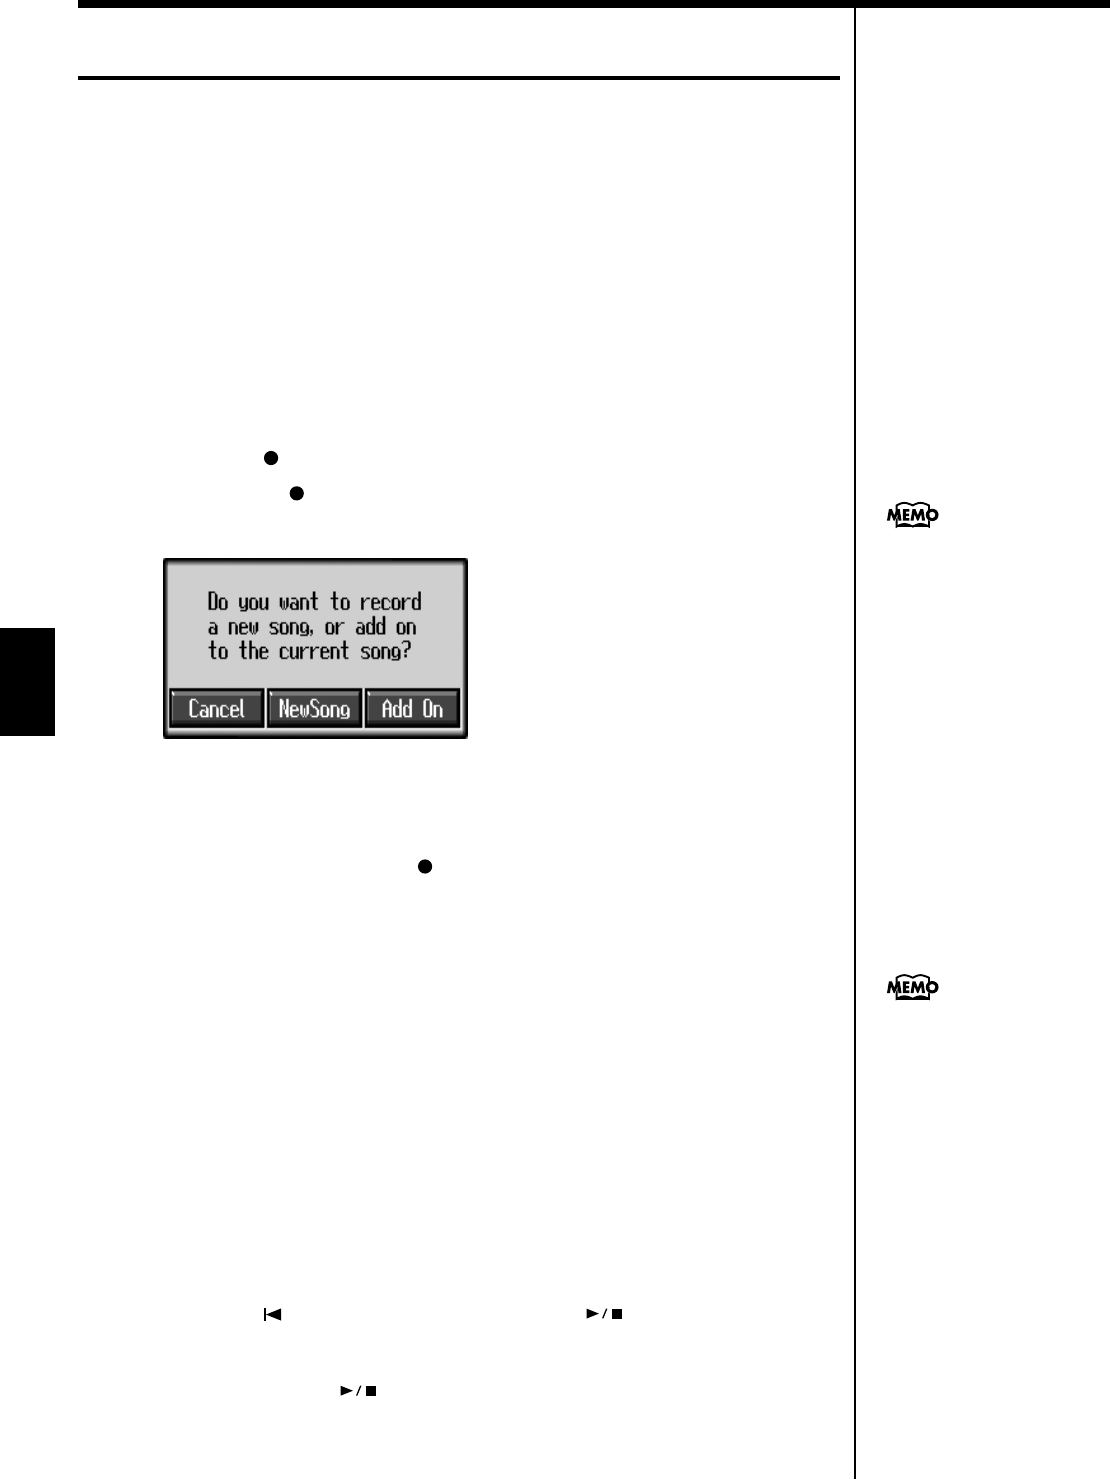
You press the [ (Rec)] button and the following messages will appear, when a
song has already been recorded.
fig.m-rec.eps_60
Touch <New Song>.
This switches the KR to the settings required for recording a new song.
The KR is put in recording standby.
To cancel recording, press the [ (Rec)] button once more.
4. Decide on the tempo and beat.
If necessary, press the [Metronome] button to play the metronome.
When you have finished making the settings, press the [Exit] button to display the
Basic screen.
If you select <New Song>
when a song has already been
recorded, the “OK to delete
song?” prompt appears in the
screen. For more detailed
information, refer to “If the
following screen appears” (p.
89).
91
Chapter 5 Recording and Saving the Performance
Chapter 5
Start recording
5. Press the [ (Play/Stop)] button.
A two-bar count-in plays, then recording starts.
Even without pressing the [ (Play/Stop)] button, recording starts when you
play the keyboard. There is no count-in played when you start by playing rather than
pushing the [ (Play/Stop)] button.
When recording starts, the [ (Play/Stop)] and [ (Rec)] buttons’ indicators
light up.
Stop recording
6. Press the [ (Play/Stop)] button.
Recording stops.
The performance is recorded to the [1/Whole] button.
Listening to the Recorded Performance
7. Press the [ (Reset)] button, then press the [ (Play/Stop)] button.
The recorded performance is played back.
When you press the [ (Play/Stop)] button, playback stops.
Track buttons assignments for recorded performances
When you record only a keyboard performance, the performance will be assigned to
the track buttons as follows.
• Normal performance (playing a single Tone from the entire keyboard)
The performance is recorded to the [1/Whole] button.
• Layer performance
The performance is recorded to the [2/Accomp] button.
• Split performance
The left-hand part of the keyboard is recorded to the [3/Lower] button, and the
right-hand part of the keyboard is recorded to the [4/Upper] button.
• Layer performance and Split performance
The performance played in the left side of the keyboard is recorded to the [3/
Left] button, the performance in the right side to the [4/Right] button, and the
Layer performance to the [2/Accompaniment] button.
• Drum set or sound effect performance
Recorded on the [R/Rhythm] button.
NOTE
Any performance that has
b
een recorded is deleted when
the power to the KR is turned
off. If you do not want a
performance deleted, then
save it to a external memory or
to Favorites. Refer to “Saving
Songs” (p. 101).
92
Chapter 5 Recording and Saving the Performance
Chapter 5
Recording With Accompaniment
Try recording a performance along with the Automatic Accompaniment.
Settings for recording performances
1. Press the One Touch Program [Arranger] button.
This chooses the setting for Automatic Accompaniment.
2. Decide on the Music Style.
When you have finished choosing the settings, press the [Exit] button to display the
Basic screen.
Recording Settings
3. Press the [ (Rec)] button.
You press the [ (Rec)] button and the following messages will appear, when a
song has already been recorded.
fig.m-rec.eps_60
Touch <New Song>.
This switches the KR to the settings required for recording a new song.
The KR is put in recording standby.
To cancel recording, press the [ (Rec)] button once more.
4. Decide on the tempo.
Start recording
5. Play a chord on the left-hand part of the keyboard.
An Automatic Accompaniment intro starts, and recording starts at the same time.
Stop recording
6. Press the [Intro/Ending] button.
An ending plays, then the Automatic Accompaniment, and recording stop at the
same time.
Listening to the recorded performance
7. Press the [ (Reset)] button, then press the [ (Play/Stop)] button.
The recorded performance plays back.
When you press the [ (Play/Stop)] button, playback stops.
If you select <New Song>
when a song has already been
recorded, the “OK to delete
song?” prompt appears in the
screen. For more detailed
information, refer to “If the
following screen appears” (p.
89).
You can change how recording
is stopped when recording a
performance with Automatic
Accompaniment. To learn
how, see “Changing How
Recording Stops” (p. 96).
93
Chapter 5 Recording and Saving the Performance
Chapter 5
Track buttons assignments for recorded performances
Performances that have been recorded using Automatic Accompaniment are
assigned to the track buttons as shown below.
Track button Performance Recorded
[R/Rhythm]
The rhythm part of an Automatic Accompaniment is
recorded here. In addition, drum sets and effect sounds
that are selected with the keys in a performance are
recorded to this track.
[1/Whole] When using Piano Style accompaniment (p. 61), the
performance played on the keyboard is recorded here.
[2/ Bass
Accomp]
The Automatic Accompaniment bass part and
accompaniment part are recorded here.
[3/Lower]
When the KR is set so that sounds from performances on
the left-hand side of the keyboard are played while the
Automatic Accompaniment sounds (p. 60), your own
performance on the left-hand side of the keyboard is
recorded here.
[4/Upper] Your own performance on the right-hand side of the
keyboard is recorded here.
Music Styles are composed of
eight parts. For details, refer to
“Music Styles and Automatic
Accompaniment” (p. 46).

94
Chapter 5 Recording and Saving the Performance
Chapter 5
Recording Along with a Song
Try recording along with internal songs and songs on external memories.
Here, record your right-hand performance along with the song accompaniment.
Settings for recording performances
Select a song before you begin recording.
When you have selected the song, press the [DigiScore] button to display the notation.
For more on how to select songs, refer to p. 64; for instructions on displaying the
notation, refer to p. 73.
1. Decide on the tone and tempo of the performance.
After choosing the settings, press the [Exit] button to display the Basic screen.
Recording settings
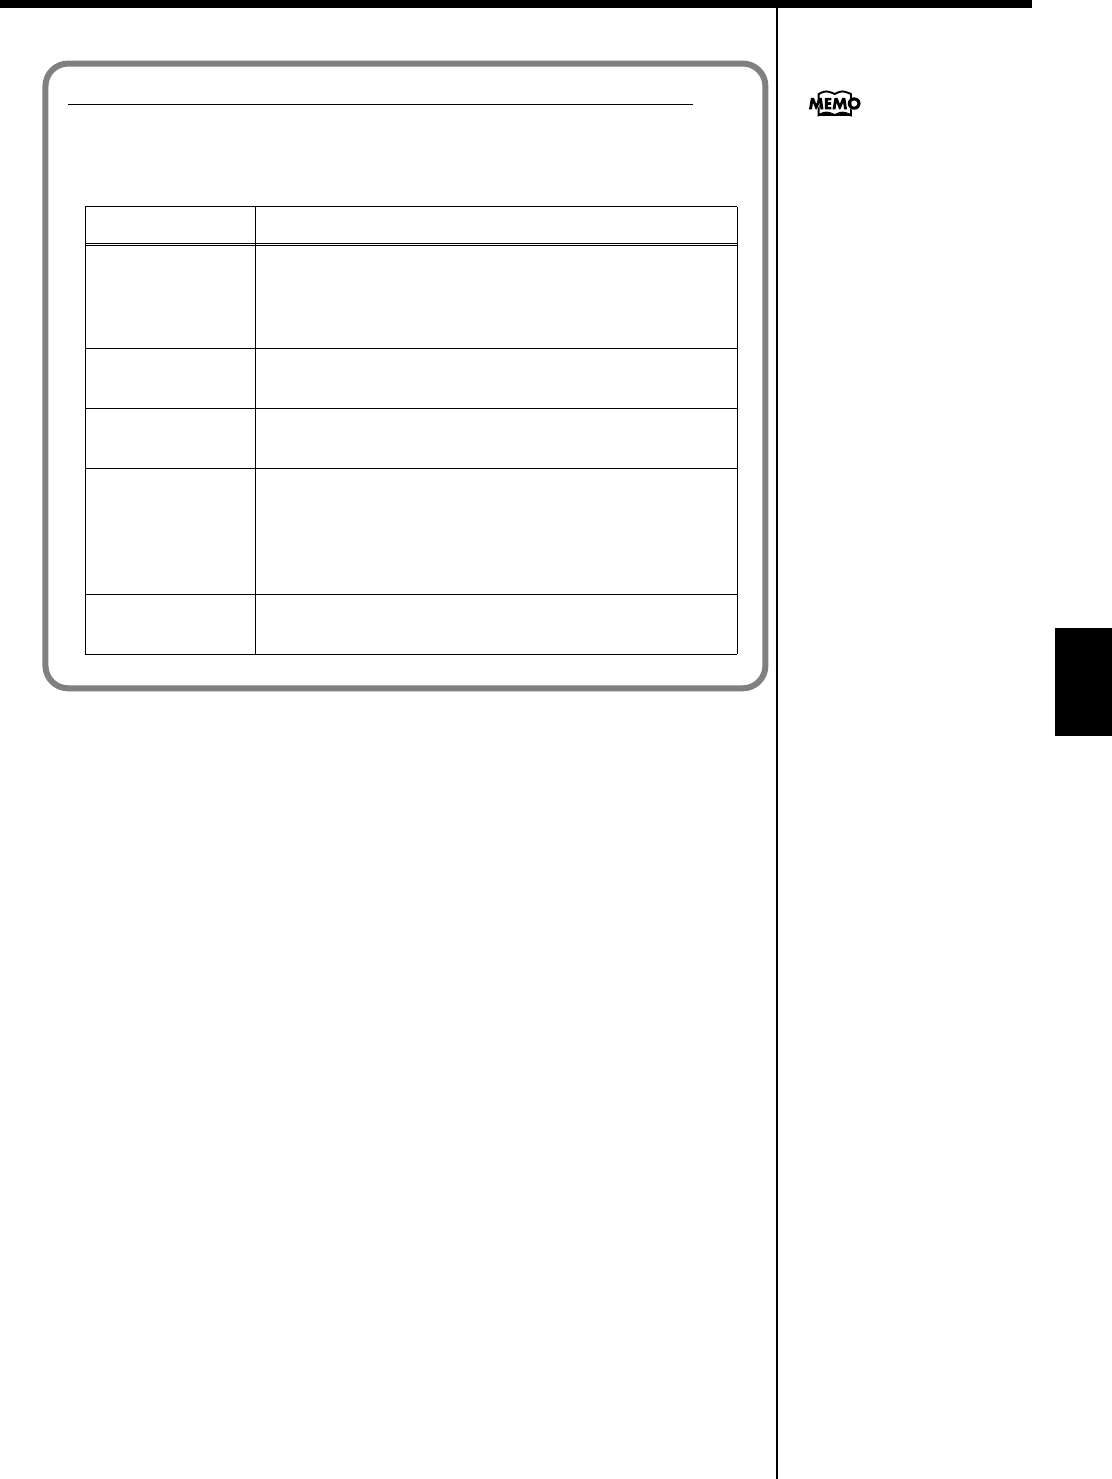
2. Press the [ (Rec)] button.
A screen like the one shown below appears.
fig.m-rec.eps_60
3. Touch <Add On>.
With this setting, you can record while listening to the selected song.
Selecting the track to record
4. Press the track button for the track that you want to record (i.e., the track
that you want to play yourself).
The indicator of the button you pressed will blink, and the KR enters recording-
standby mode.
Since in this example we will record the right-hand performance, press the [4/
Upper] button to make the button’s indicator light blink.
To cancel recording, press the [ (Rec)] button once more.
Start recording
5. Press the [ (Play/Stop)] button.
A two-bar count-in plays, then recording starts.
Even without pressing the [ (Play/Stop)] button, recording starts when you
play the keyboard. There is no count-in played when you start by playing the
keyboard instead of pushing the [ (Play/Stop)] button.
When recording starts, the [ (Play/Stop)] and [ (Rec)] buttons’ indicators light.
Stop recording
6. Press the [ (Play/Stop)] button.
Recording stops.
The song tempo is stored
within the song you selected.
NOTE
Only drum sets or SFX set are
recorded to the [R/Rhythm]
b
utton.
95
Chapter 5 Recording and Saving the Performance
Chapter 5
Listening to the recorded performance
7. Press the [ (Reset)] button, then press the [ (Play/Stop)] button.
The recorded performance is played back.
When you press the [ (Play/Stop)] button, recording stops.
Recording While Selecting the Track
Buttons (Redoing Recordings)
When you want to re-record, specify the Track button for the performance you want
to re-record, and then record again.
When you select a previously recorded Track button and re-record, everything from
the point at which you begin recording up to the point where you stop recording will
be replaced by the newly re-recorded performance.
1. Use the [ (Bwd)] and [ (Fwd)] buttons to go to the measure
where you want to begin recording.
2. Press the [ (Rec)] button.
A screen like the one shown below appears.
fig.m-rec.eps_60
3. Touch <Add on>.
4. Press the Track button for the track you want to re-record.
The indicator for the selected Track button starts blinking.
The [ (Play/Stop)] button’s indicator flashes, and the KR is put in recording
standby.
To cancel recording, press the [ (Rec)] button once more.
5. Press the [ (Play/Stop)] button to begin recording.
Rerecording the accompaniment part of automatic accompaniment
When rerecording an Automatic Accompaniment performance, set Sync Start (p.
54), then specify a chord or press the [Start/Stop] button.
6. Press the [ (Play/Stop)] button to stop recording.
If you also want to rerecord the ending of the Automatic Accompaniment, press the
[Intro/Ending] button.
When you want to record over
again after deleting all of the
previous recording, refer to
“Erasing Recorded
Performances” (p. 96).
The song tempo is stored
within the song you selected. If
you want to change the tempo
of the recorded song, refer to
“Changing the Tempo of
Recorded Songs” (p. 127) and
“Changing the Tempo Within
the Song” (p. 127).
96
Chapter 5 Recording and Saving the Performance
Chapter 5
Erasing Recorded Performances
You can use the following method to delete a recorded performance.
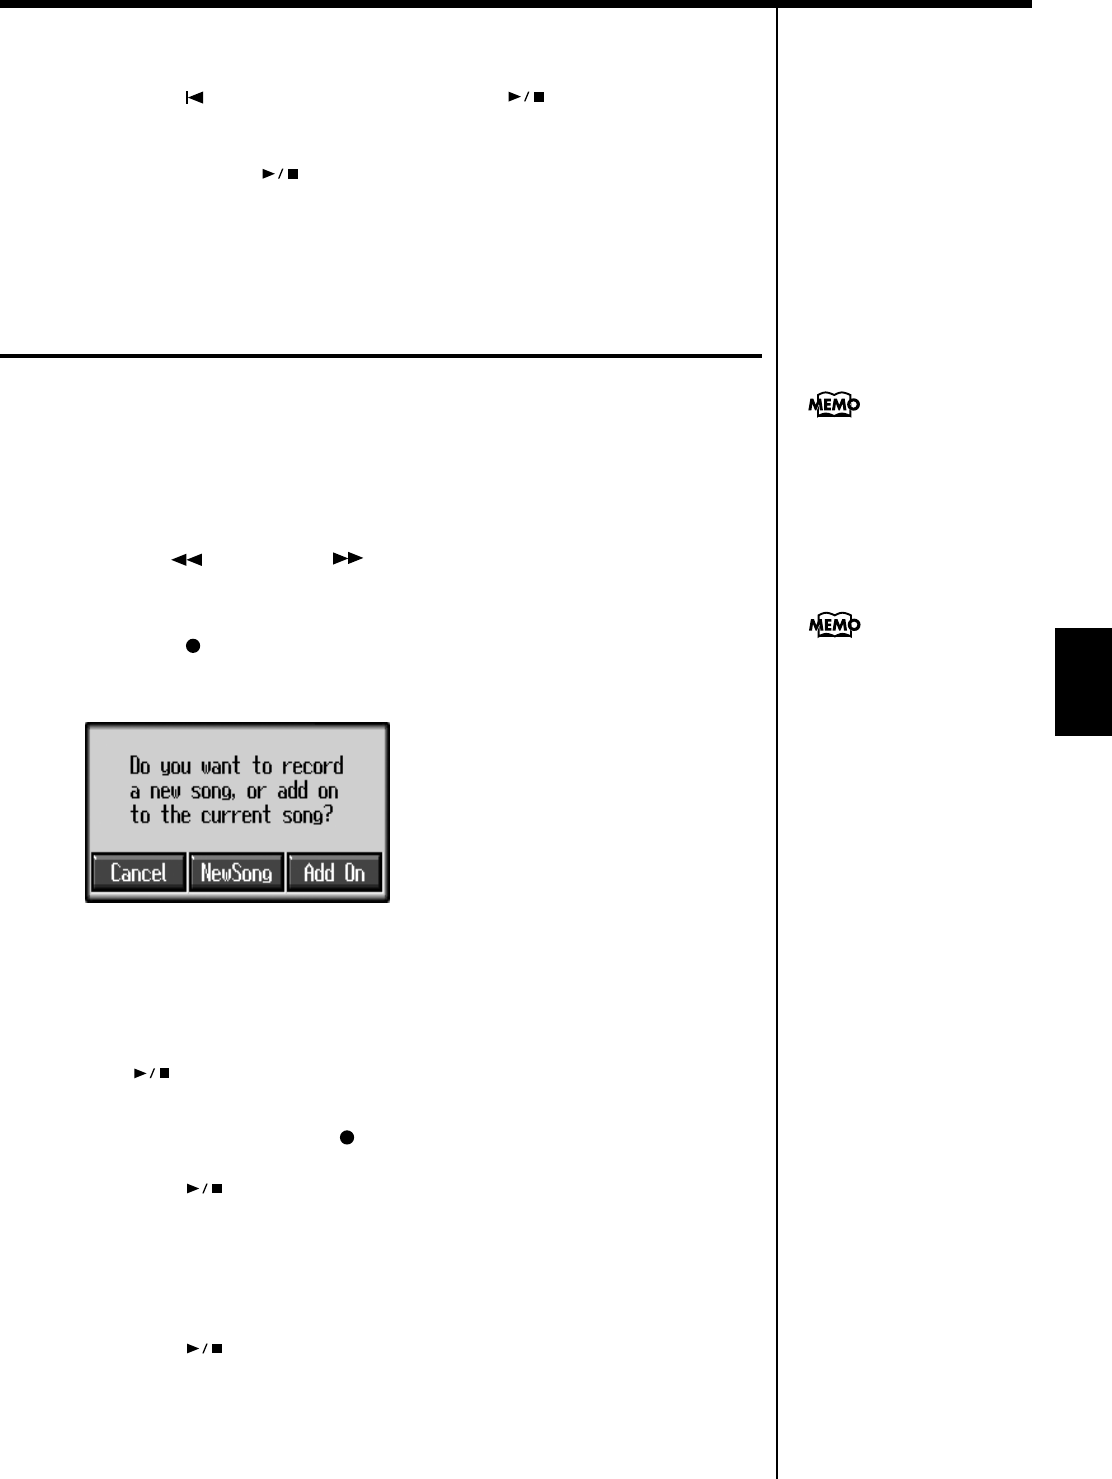
1. Hold down the [Song] button and press the [ (Rec)] button.
A screen like the one shown below appears.
fig.m-songdel.eps_60
2. Touch <OK>.
This deletes the recorded song.
When you touch <Cancel>, the previous screen appears and the recorded song is not
erased.
■Erasing the Performance on Specific Tracks
You can select and erase performances on specific tracks.
1. Hold down the Track button for the track containing the performance
you want to erase, then press the [ (Rec)] button.
The Track button’s light goes dark, and the recorded music is erased.
Changing How Recording Stops
When recording an Automatic Accompaniment performance, you can change the
accompaniment and the way recording mode stops.
1. Press the [Menu] button and watch the indicator light up.
The Menu screen appears.
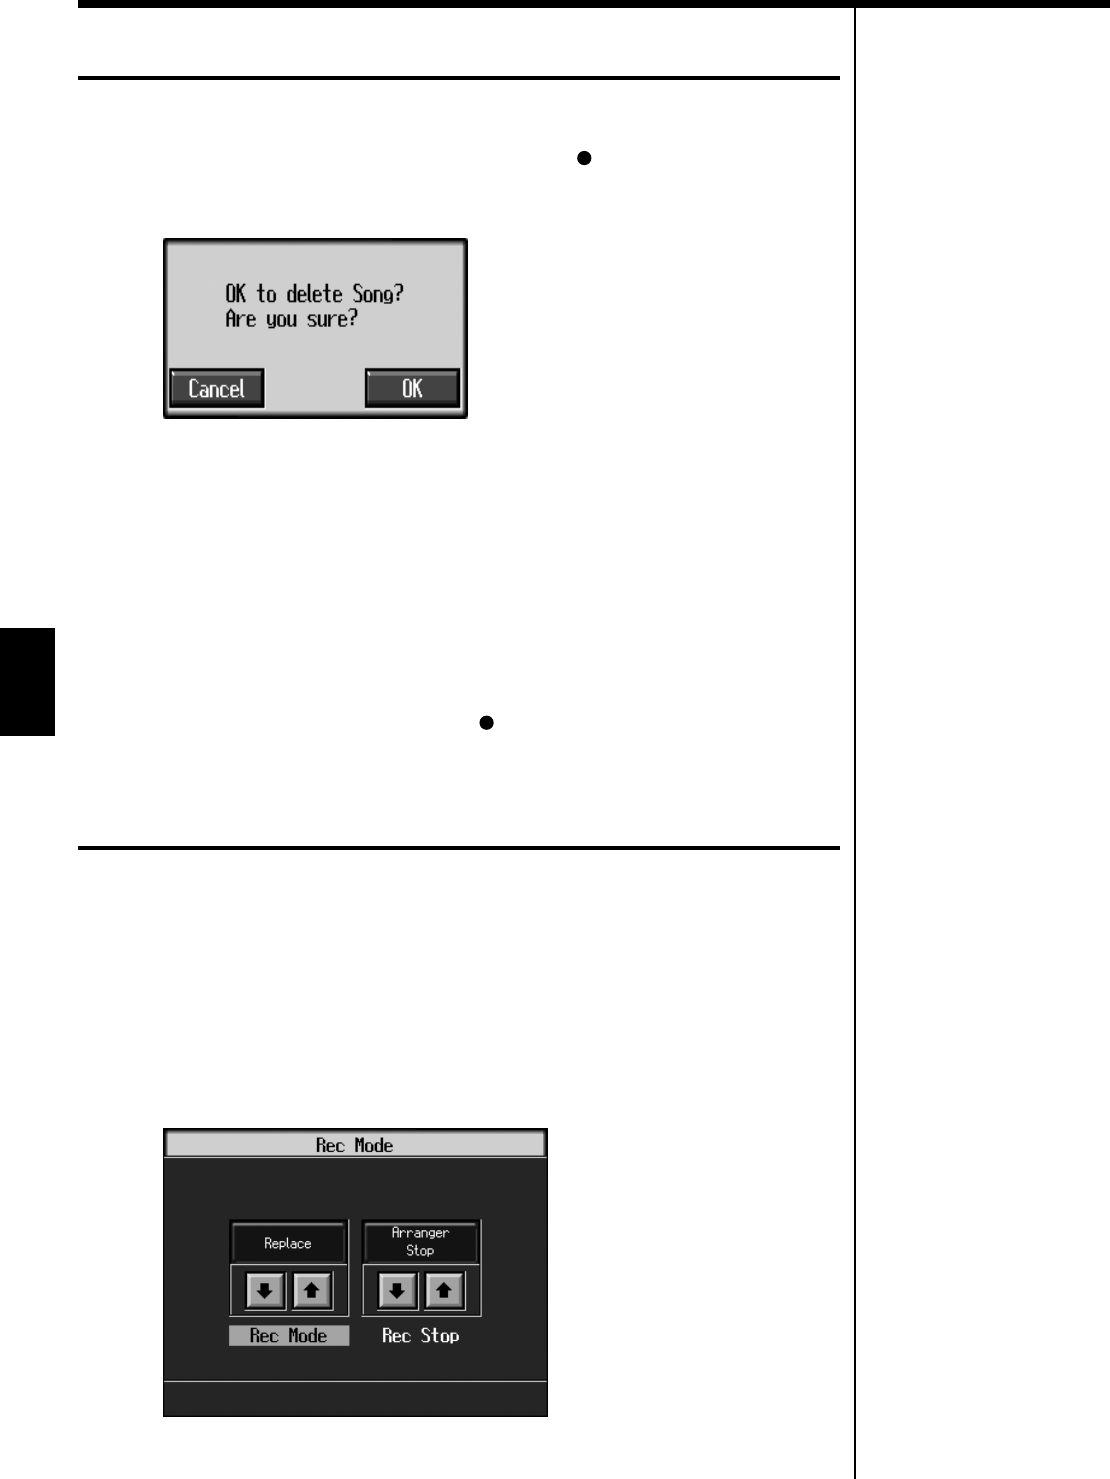
2. Touch <Rec Mode>.
A screen like the one shown below appears.
fig.d-recmode.eps_60
97
Chapter 5 Recording and Saving the Performance
Chapter 5
3. Touch <Rec Stop> to switch between “Arranger Stop” and
“Composer Stop.”
Recording Songs Starting with Pickups
You can record songs that start with pickup beats (songs that start on a beat other
than the measure’s first beat).
fig.PU.e
Carry out Steps 1–4 on p. 90 to prepare for recording.
If the [ (Rec)] button’s indicator is not lit, press the [ (Rec)] button so the
indicator is lit.
The KR is put in recording standby.
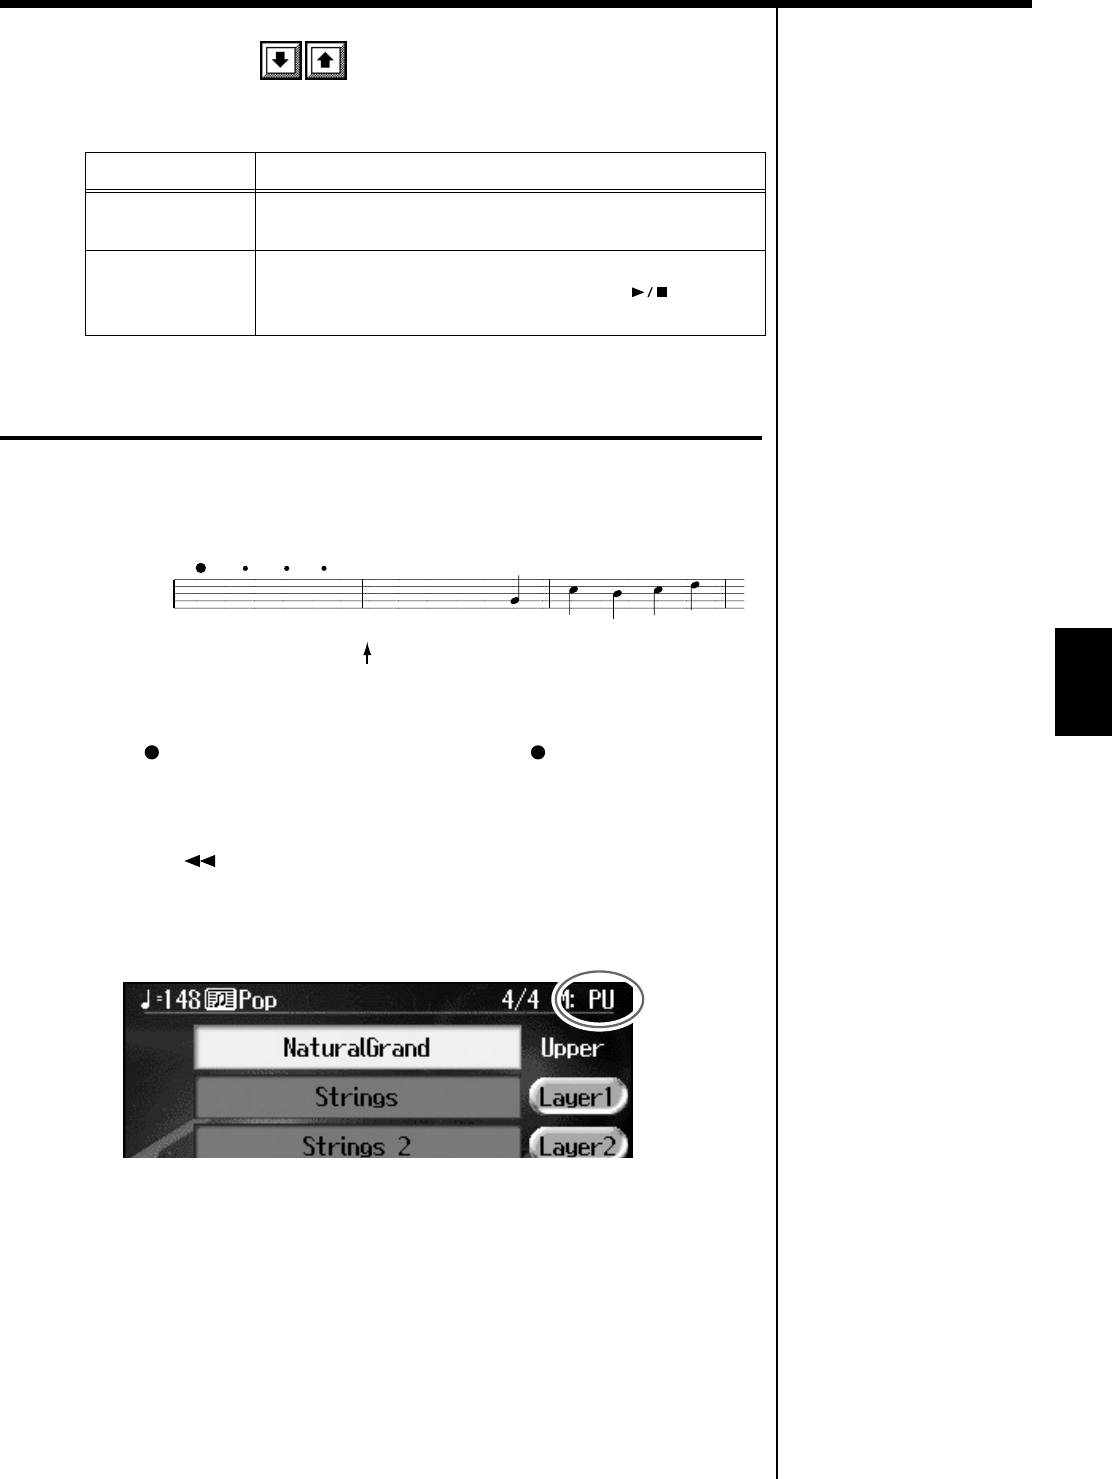
1. Press the [ (Bwd)] button one time.
The measure number in the upper right of the Basic screen changes to “PU,” and the
KR is set to record a song starting with a pickup.
fig.d-pu.eps_60
Start recording. After a one-measure count, recording begins.
Display Explanation
Arranger Stop Recording stops at the same time the Automatic
Accompaniment stops.
Composer Stop
Recording does not stop, even when the Automatic
Accompaniment stops. When you press the [ (Play/
Stop)] button, recording stops.
Measure -2 PU 1
~
Recording begins here
Count Sound