S and O ELECTRONICS CPSW603 ACTIVE SUBWOOFER SYSTEM User Manual HT SB603 SEC EN 181215
S&O; ELECTRONICS (MALAYSIA) SDN. BHD. ACTIVE SUBWOOFER SYSTEM HT SB603 SEC EN 181215
UserManual.wiki
>
S and O ELECTRONICS
>
CPSW603 User Manual
User Manual
Navigation menu
Upload a User Manual
Namespaces
Wiki Guide
HTML
PDF
Info
Views
User Manual
Discussion / Help
Navigation
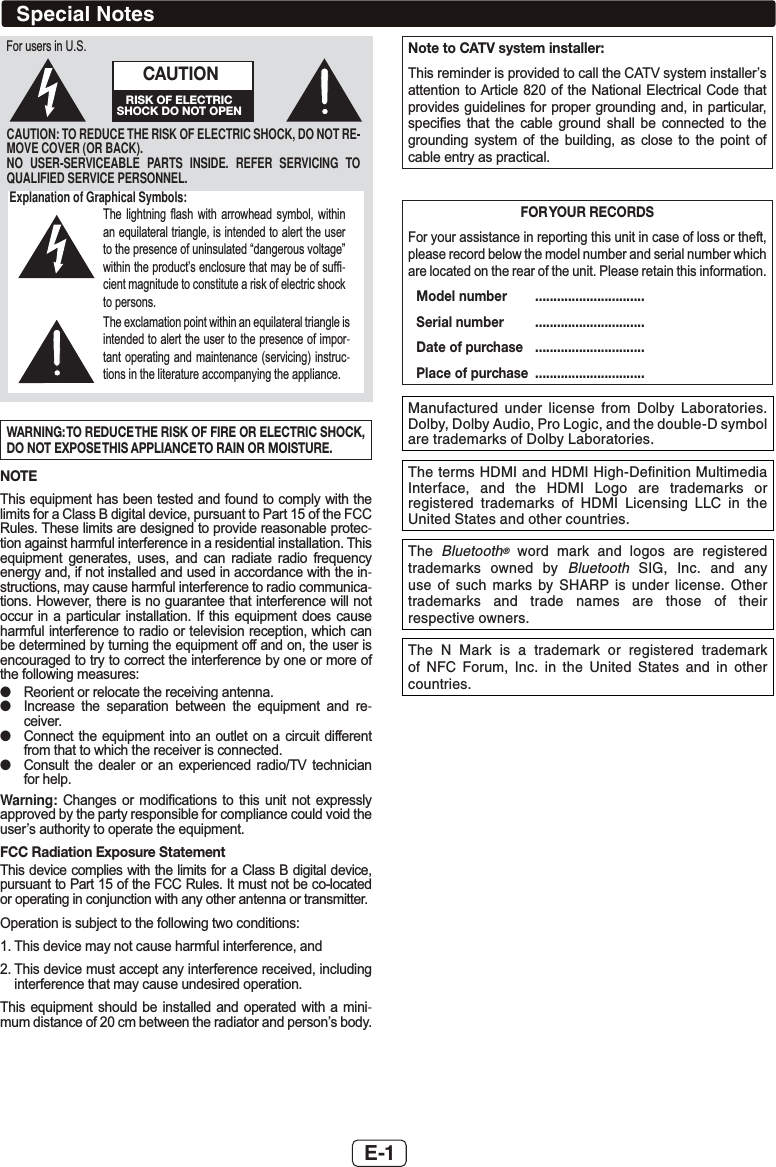
![E-2Important Safety Instructions(OHFWULFLW\LVXVHG WR SHUIRUP PDQ\ XVHIXO IXQFWLRQV EXW LW FDQDOVRFDXVHSHUVRQDOLQMXULHVDQGSURSHUW\GDPDJHLILPSURSHUO\KDQGOHG7KLVSURGXFWKDVEHHQHQJLQHHUHGDQGPDQXIDFWXUHGZLWKWKH KLJKHVW SULRULW\RQVDIHW\+RZHYHU LPSURSHU XVHFDQUHVXOWLQHOHFWULFVKRFNDQGRU¿UH,QRUGHUWRSUHYHQWSRWHQWLDOGDQJHU SOHDVH REVHUYHWKHIROORZLQJLQVWUXFWLRQVZKHQLQVWDOO-LQJRSHUDWLQJDQGFOHDQLQJWKHSURGXFW7RHQVXUH\RXUVDIHW\DQGSURORQJWKHVHUYLFHOLIHRIWKLVSURGXFWSOHDVHUHDGWKHIRO-ORZLQJSUHFDXWLRQVFDUHIXOO\EHIRUHXVH 5HDGWKHVHLQVWUXFWLRQV .HHSWKHVHLQVWUXFWLRQV +HHGDOOZDUQLQJV )ROORZDOOLQVWUXFWLRQV 'RQRWXVHWKLVDSSDUDWXVQHDUZDWHU &OHDQRQO\ZLWKGU\FORWK 'RQRWEORFNDQ\YHQWLODWLRQRSHQLQJV,QVWDOOLQDFFRUGDQFHZLWKWKHPDQXIDFWXUHU¶VLQVWUXFWLRQV 'RQRWLQVWDOOQHDUDQ\KHDWVRXUFHVVXFKDVUDGLDWRUVKHDWUHJLVWHUVVWRYHVRURWKHUDSSDUDWXVLQFOXGLQJDPSOL¿HUVWKDWSURGXFHKHDW 'R QRW GHIHDW WKH VDIHW\ SXUSRVH RI WKH SRODUL]HG RUJURXQGLQJW\SHSOXJ$SRODUL]HGSOXJKDVWZREODGHVZLWKRQH ZLGHU WKDQ WKH RWKHU $ JURXQGLQJ W\SH SOXJ KDV WZREODGHVDQGDWKLUGJURXQGLQJSURQJ7KHZLGHEODGHRUWKHWKLUGSURQJDUHSURYLGHGIRU\RXUVDIHW\,IWKHSURYLGHGSOXJGRHV QRW ¿W LQWR \RXU RXWOHW FRQVXOW DQ HOHFWULFLDQ IRU UH-SODFHPHQWRIWKHREVROHWHRXWOHW 3URWHFWWKH SRZHU FRUG IURP EHLQJ ZDONHG RQRU SLQFKHGSDUWLFXODUO\ DW SOXJV FRQYHQLHQFH UHFHSWDFOHV DQG WKHSRLQWZKHUHWKH\H[LWIURPWKHDSSDUDWXV 2QO\XVHDWWDFKPHQWVDFFHVVRULHVVSHFL¿HGE\WKHPDQX-IDFWXUHU 8VHRQO\ZLWKWKHFDUWVWDQGWULSRGEUDFNHWRUWDEOHVSHFL-¿HGE\WKHPDQXIDFWXUHURUVROGZLWKWKHDSSDUDWXV:KHQDFDUWLVXVHGXVHFDXWLRQZKHQPRYLQJWKHFDUWDSSDUDWXVFRPELQDWLRQWRDYRLGLQMXU\IURPWLSRYHU 8QSOXJWKLVDSSDUDWXVGXULQJOLJKWQLQJVWRUPVRUZKHQXQ-XVHGIRUORQJSHULRGVRIWLPH 5HIHUDOOVHUYLFLQJWRTXDOL¿HGVHUYLFHSHUVRQQHO6HUYLFLQJLVUHTXLUHGZKHQWKHDSSDUDWXVKDVEHHQGDPDJHGLQDQ\ZD\VXFKDVSRZHUVXSSO\FRUGRUSOXJLVGDPDJHGOLTXLGKDVEHHQVSLOOHGRUREMHFWVKDYHIDOOHQLQWRWKHDSSDUDWXVWKHDSSDUDWXVKDVEHHQH[SRVHGWRUDLQRUPRLVWXUHGRHVQRWRSHUDWHQRUPDOO\RUKDVEHHQGURSSHGAdditional Safety Information 3RZHU 6RXUFHV 7KLV SURGXFW VKRXOG EH RSHUDWHG RQO\IURPWKHW\SHRISRZHUVRXUFHLQGLFDWHGRQWKHPDUNLQJOD-EHO,I\RXDUHQRWVXUHRIWKHW\SHRISRZHUVXSSO\WR\RXUKRPHFRQVXOW\RXUSURGXFWGHDOHURUORFDOSRZHUFRPSDQ\)RU SURGXFW LQWHQGHG WR RSHUDWH IURP EDWWHU\ SRZHU RURWKHUVRXUFHVUHIHUWRWKHRSHUDWLQJLQVWUXFWLRQV 2YHUORDGLQJ 'R QRW RYHUORDG ZDOO RXWOHWV H[WHQVLRQFRUGVRULQWHJUDOFRQYHQLHQFHUHFHSWDFOHVDVWKLVFDQUH-VXOWLQDULVNRI¿UHRUHOHFWULFVKRFN 2EMHFWDQG/LTXLG(QWU\1HYHUSXVKREMHFWV RIDQ\NLQGLQWRWKLVSURGXFWWKURXJKRSHQLQJVDVWKH\PD\WRXFKGDQ-JHURXVYROWDJHSRLQWVRUVKRUWRXWSDUWVWKDWFRXOGUHVXOWLQD¿UHRUHOHFWULFVKRFN 7RSUHYHQW¿UHRUVKRFNKD]DUGGRQRWH[SRVHWKLVDSSOL-DQFHWRGULSSLQJRUVSODVKLQJ1RREMHFWV¿OOHGZLWKOLTXLGVVXFKDVYDVHVVKDOOEHSODFHGRQWKHDSSDUDWXV 'DPDJH5HTXLULQJ6HUYLFH8QSOXJWKLVSURGXFWIURPWKHZDOORXWOHWDQGUHIHUVHUYLFLQJWRTXDOL¿HGVHUYLFHSHUVRQQHOXQGHUWKHIROORZLQJFRQGLWLRQV D:KHQWKH$&FRUGRUSOXJLVGDPDJHG E,IOLTXLGKDVEHHQVSLOOHGRUREMHFWVKDYHIDOOHQLQWRWKHSURGXFW F,IWKHSURGXFWKDVEHHQH[SRVHGWRUDLQRUZDWHU G,IWKHSURGXFWGRHVQRWRSHUDWHQRUPDOO\E\IROORZLQJWKHRSHUDWLQJLQVWUXFWLRQV$GMXVWRQO\WKRVHFRQWUROVWKDWDUHFRYHUHGE\WKHRSHUDWLQJLQVWUXFWLRQVDVDQLPSURSHUDG-MXVWPHQWRIRWKHUFRQWUROVPD\UHVXOWLQGDPDJHDQGZLOORIWHQUHTXLUHH[WHQVLYHZRUNE\DTXDOL¿HGWHFKQLFLDQWRUHVWRUHWKHSURGXFWWRLWVQRUPDORSHUDWLRQ H,IWKHSURGXFWKDVEHHQGURSSHGRUGDPDJHGLQDQ\ZD\DQG I:KHQ WKH SURGXFW H[KLELWV D GLVWLQFW FKDQJH LQ SHUIRU-PDQFHWKLVLQGLFDWHVDQHHGIRUVHUYLFH 5HSODFHPHQW3DUWV:KHQUHSODFHPHQWSDUWVDUHUHTXLUHGEHVXUHWKHVHUYLFHWHFKQLFLDQKDVXVHGUHSODFHPHQWSDUWVVSHFL¿HGE\WKHPDQXIDFWXUHURUKDYHWKHVDPHFKDUDFWHU-LVWLFVDV WKH RULJLQDO SDUW8QDXWKRUL]HGVXEVWLWXWLRQVPD\UHVXOWLQ¿UHHOHFWULFVKRFNRURWKHUKD]DUGV 6DIHW\&KHFN8SRQFRPSOHWLRQRIDQ\VHUYLFHRUUHSDLUVWRWKLVSURGXFWDVNWKHVHUYLFHWHFKQLFLDQWRSHUIRUPVDIHW\FKHFNVWRGHWHUPLQHWKDWWKHSURGXFWLVLQSURSHURSHUDWLQJFRQGLWLRQ :DOORUFHLOLQJPRXQWLQJ:KHQPRXQWLQJWKHSURGXFWRQDZDOORUFHLOLQJEHVXUHWRLQVWDOOWKHSURGXFWDFFRUGLQJWRWKHPHWKRGUHFRPPHQGHGE\WKHPDQXIDFWXUHU 3RZHU /LQHV $Q RXWVLGH DQWHQQD V\VWHP VKRXOG QRW EHORFDWHG LQ WKH YLFLQLW\ RI RYHUKHDG SRZHU OLQHV RU RWKHUHOHFWULFOLJKWRUSRZHUFLUFXLWVRUZKHUHLWFDQIDOOLQWRVXFKSRZHUOLQHVRUFLUFXLWV:KHQLQVWDOOLQJDQRXWVLGHDQWHQQDV\VWHPH[WUHPHFDUHVKRXOGEHWDNHQWRNHHSIURPWRXFK-LQJVXFKSRZHUOLQHVRUFLUFXLWVDVFRQWDFWZLWKWKHPPLJKWEHIDWDO 3URWHFWLYH$WWDFKPHQW3OXJ7KHSURGXFWLVHTXLSSHGZLWKDQ DWWDFKPHQW SOXJ KDYLQJ RYHUORDG SURWHFWLRQ 7KLV LV DVDIHW\IHDWXUH 6HH,QVWUXFWLRQ0DQXDO IRUUHSODFHPHQWRUUHVHWWLQJ RI SURWHFWLYH GHYLFH ,I UHSODFHPHQW RI WKH SOXJLVUHTXLUHGEHVXUHWKHVHUYLFHWHFKQLFLDQKDVXVHGDUH-SODFHPHQWSOXJVSHFL¿HGE\WKHPDQXIDFWXUHUWKDWKDVWKHVDPHRYHUORDGSURWHFWLRQDVWKHRULJLQDOSOXJ 6WDQG'RQRWSODFHWKHSURGXFWRQDQXQVWDEOHFDUWVWDQGWULSRG RU WDEOH 3ODFLQJ WKH SURGXFW RQ DQ XQVWDEOH EDVHFDQFDXVH WKHSURGXFWWRIDOOUHVXOWLQJ LQVHULRXVSHUVRQ-DO LQMXULHV DV ZHOO DV GDPDJH WR WKH SURGXFW 8VH RQO\ DFDUW VWDQG WULSRG EUDFNHW RU WDEOH UHFRPPHQGHG E\ WKHPDQXIDFWXUHURUVROGZLWKWKHSURGXFW:KHQPRXQWLQJWKHSURGXFWRQDZDOOEHVXUHWRIROORZWKHPDQXIDFWXUHU¶VLQ-VWUXFWLRQV8VHRQO\WKHPRXQWLQJKDUGZDUHUHFRPPHQGHGE\WKHPDQXIDFWXUHU](https://usermanual.wiki/S-and-O-ELECTRONICS/CPSW603/User-Guide-2904195-Page-3.png)
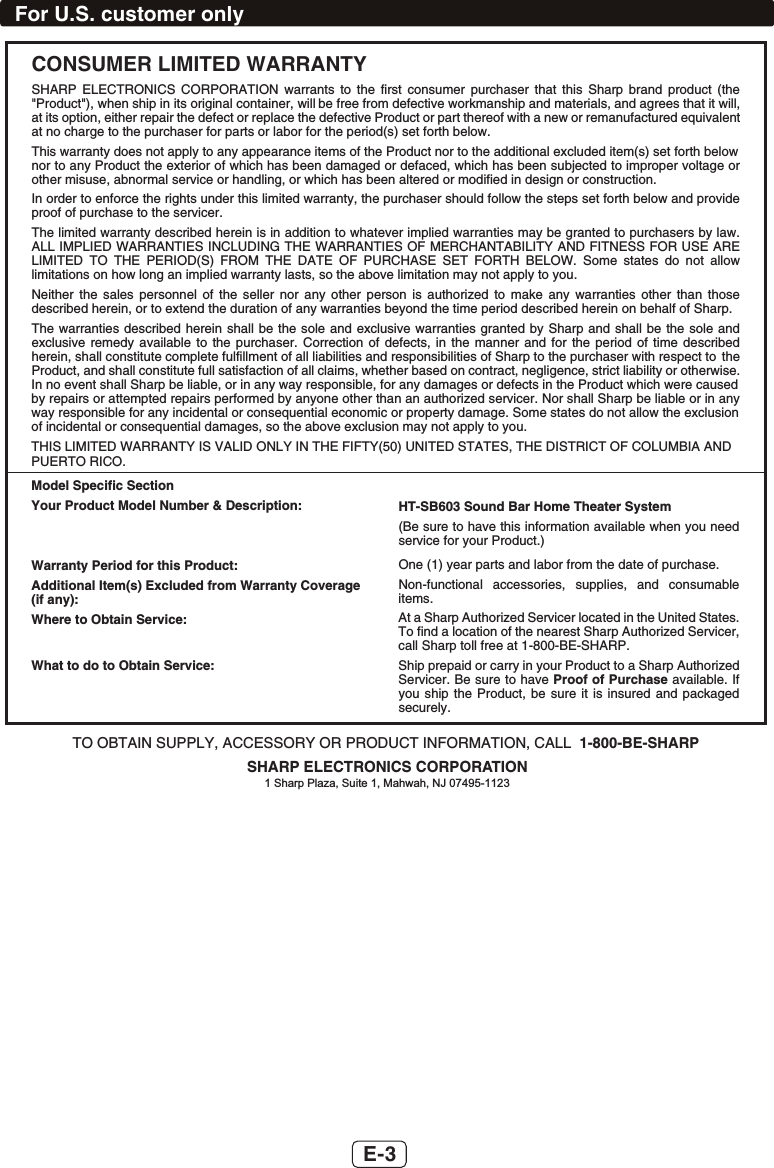
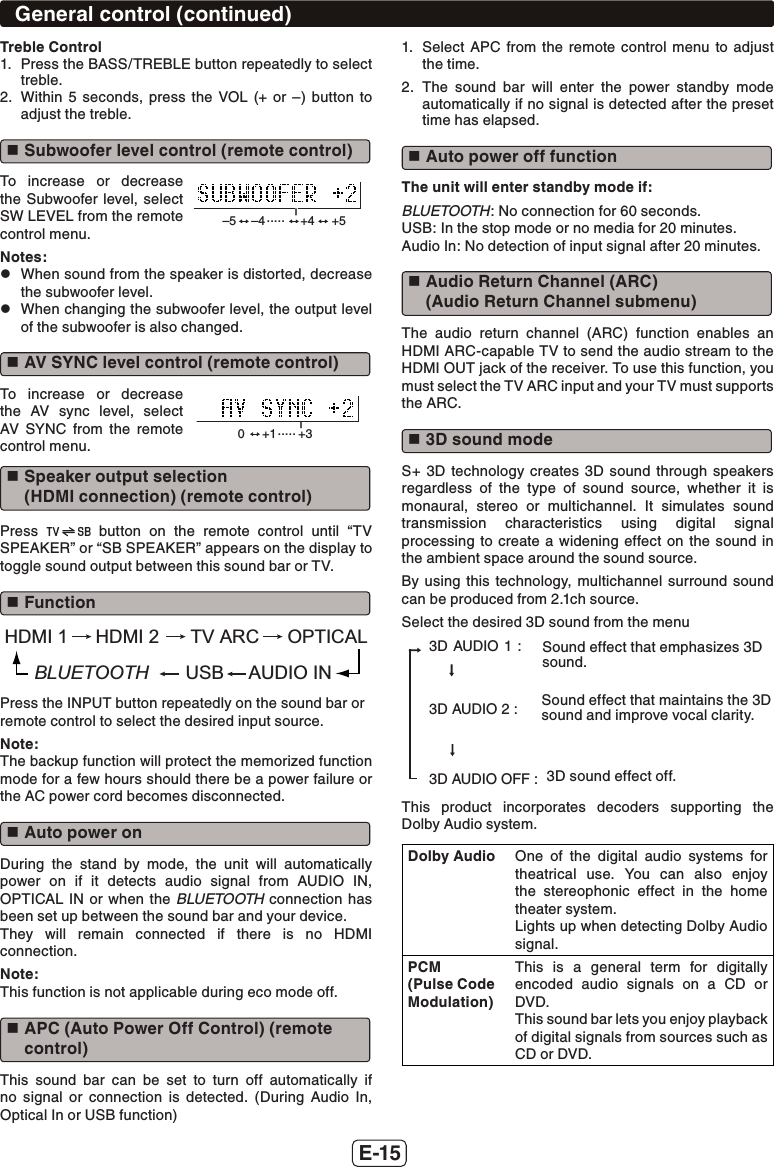
![E-7Sound bar preparationTo mount the sound bar on the wallCaution: zBe very careful to prevent the sound bar [7.9 lbs. (3.7 kg)] from falling when mounting on the wall. zBefore mounting, check the wall strength. (Do not put on the veneer plaster or whitewashed wall. The sound bar may fall.) If unsure, consult a qualified service technician. zMounting screws are not supplied. Use appropriate ones. zCheck all wall mount angle screws for looseness. zSelect a good location. If not, accidents may occur or the sound bar may get damaged. zSHARP is not responsible for accidents resulting from improper installation. Driving screwsSHARP designed the sound bar so you may hang them on the wall. Use proper screws (not supplied). See below for size and type.1/8" (3.2 mm)3/8" (9 mm)7/8" (Min. 22 mm)3/16"(5 mm) Fixing wall mount angle (Horizontal position)1 Fix the pattern paper to the wall in horizontal position as below.Wall surfacePattern paper44 mm44 mm29 mm29 mm926 mm2 Make a hole on the wall following the screw point marks on the pattern paper by using a drill.Wall surface1-1/4" (32 mm)3/8" (8-9 mm)3 Fix a wall mount plug (not supplied) into the hole using a hammer, until it is flush with the wall surface.Wall surface1-1/4" (32 mm)3/8" (8-9 mm)4 Screw the wall mount angle to the wall as shown in the illustration. (Total screw is 8 pieces)Wall mount angleWall mount angle Wall mount angle(screws x 4)(screws x 4)Wall surfaceWall surfaceWall surfaceNote:Make sure all screws are fully tightened. (screws are not supplied) Installing the sound bar1 Align the wall mount slot at the sound bar to the wall mount angle.2 Slot the sound bar into the wall mount angle.3 Fix them securely.Wall surface](https://usermanual.wiki/S-and-O-ELECTRONICS/CPSW603/User-Guide-2904195-Page-8.png)