SAGEMCOM BROANDS FAST3284U Cable Modem User Manual rev
SAGEMCOM SAS Cable Modem rev
UserManual.wiki
>
SAGEMCOM BROANDS
>
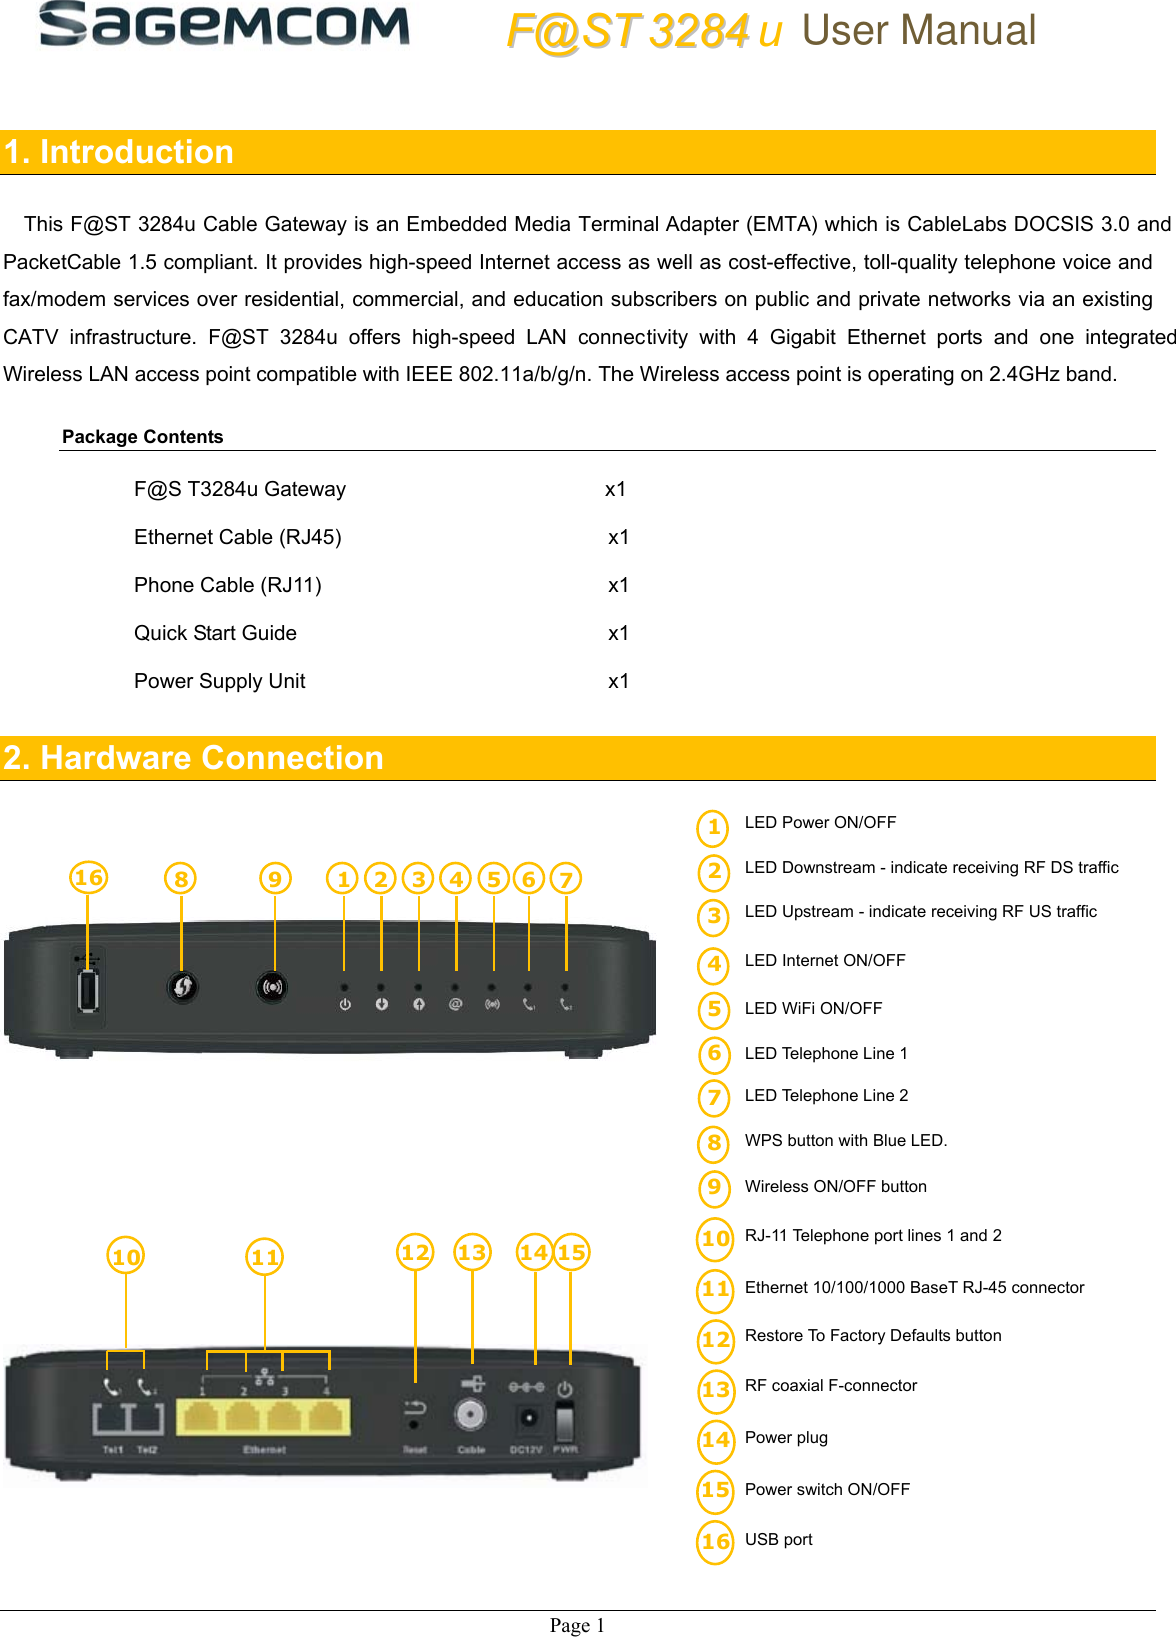
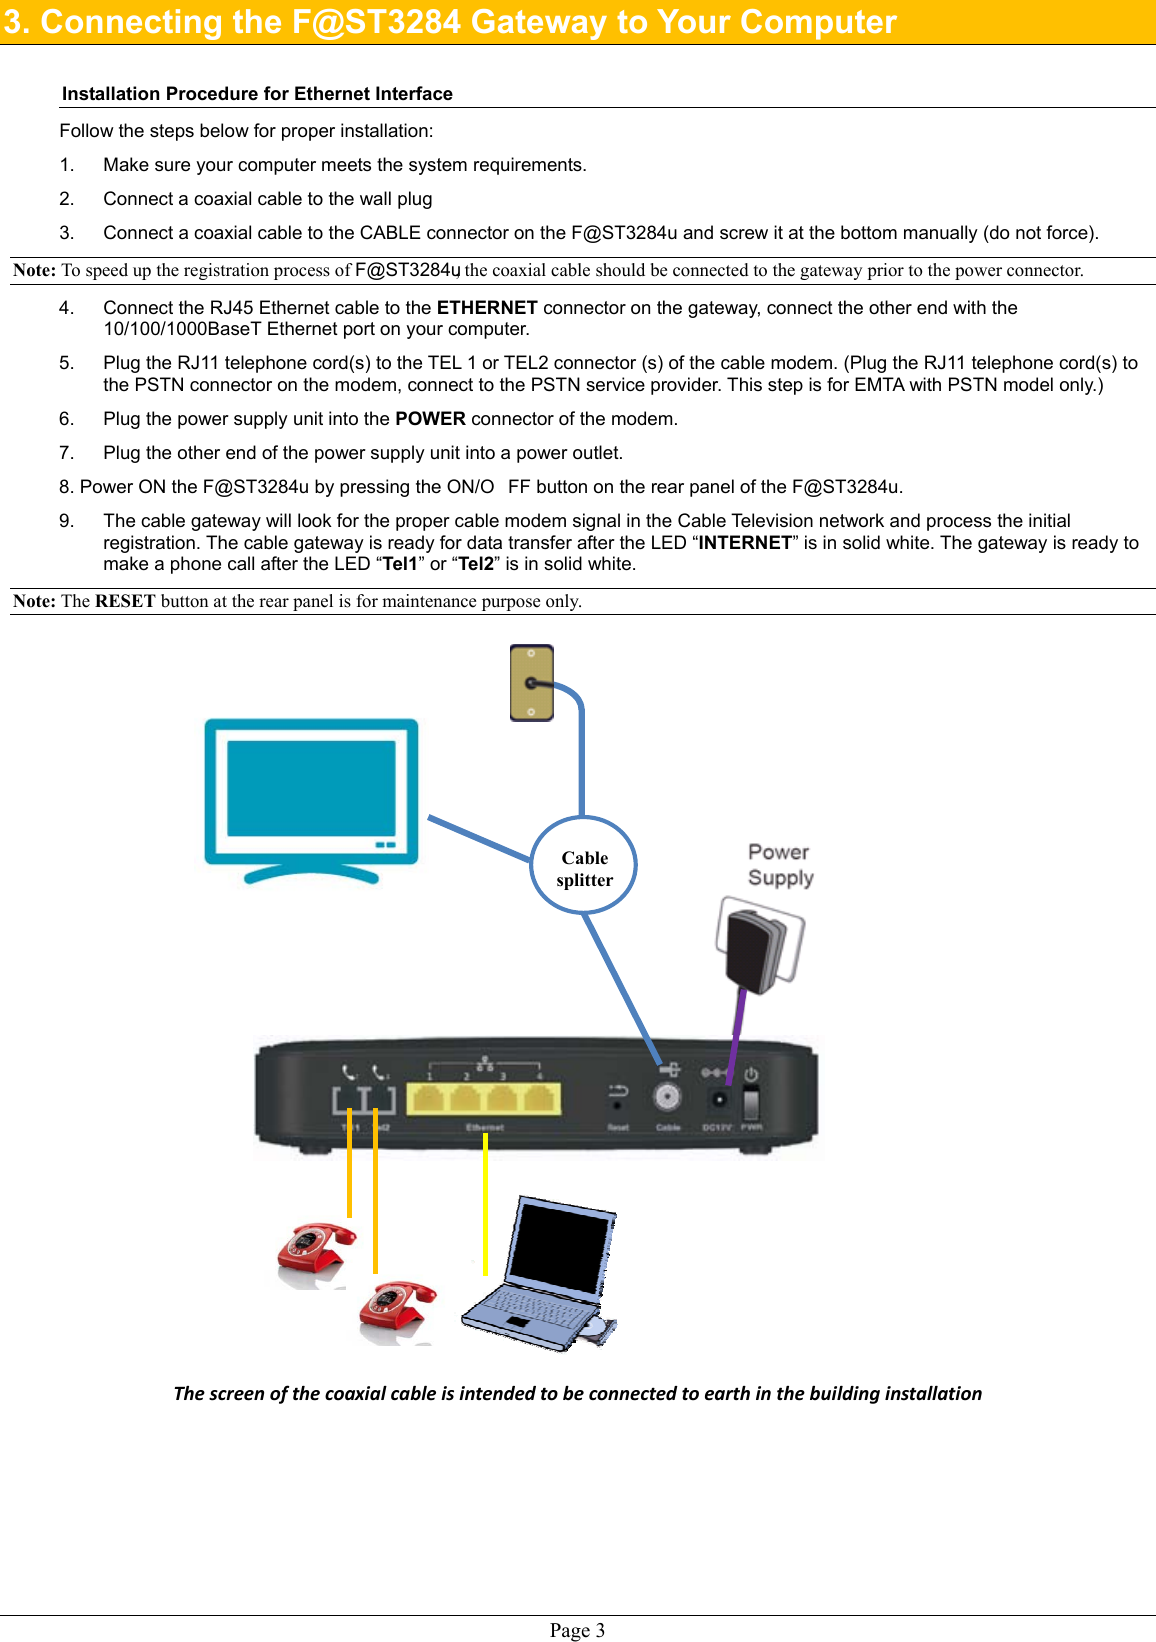
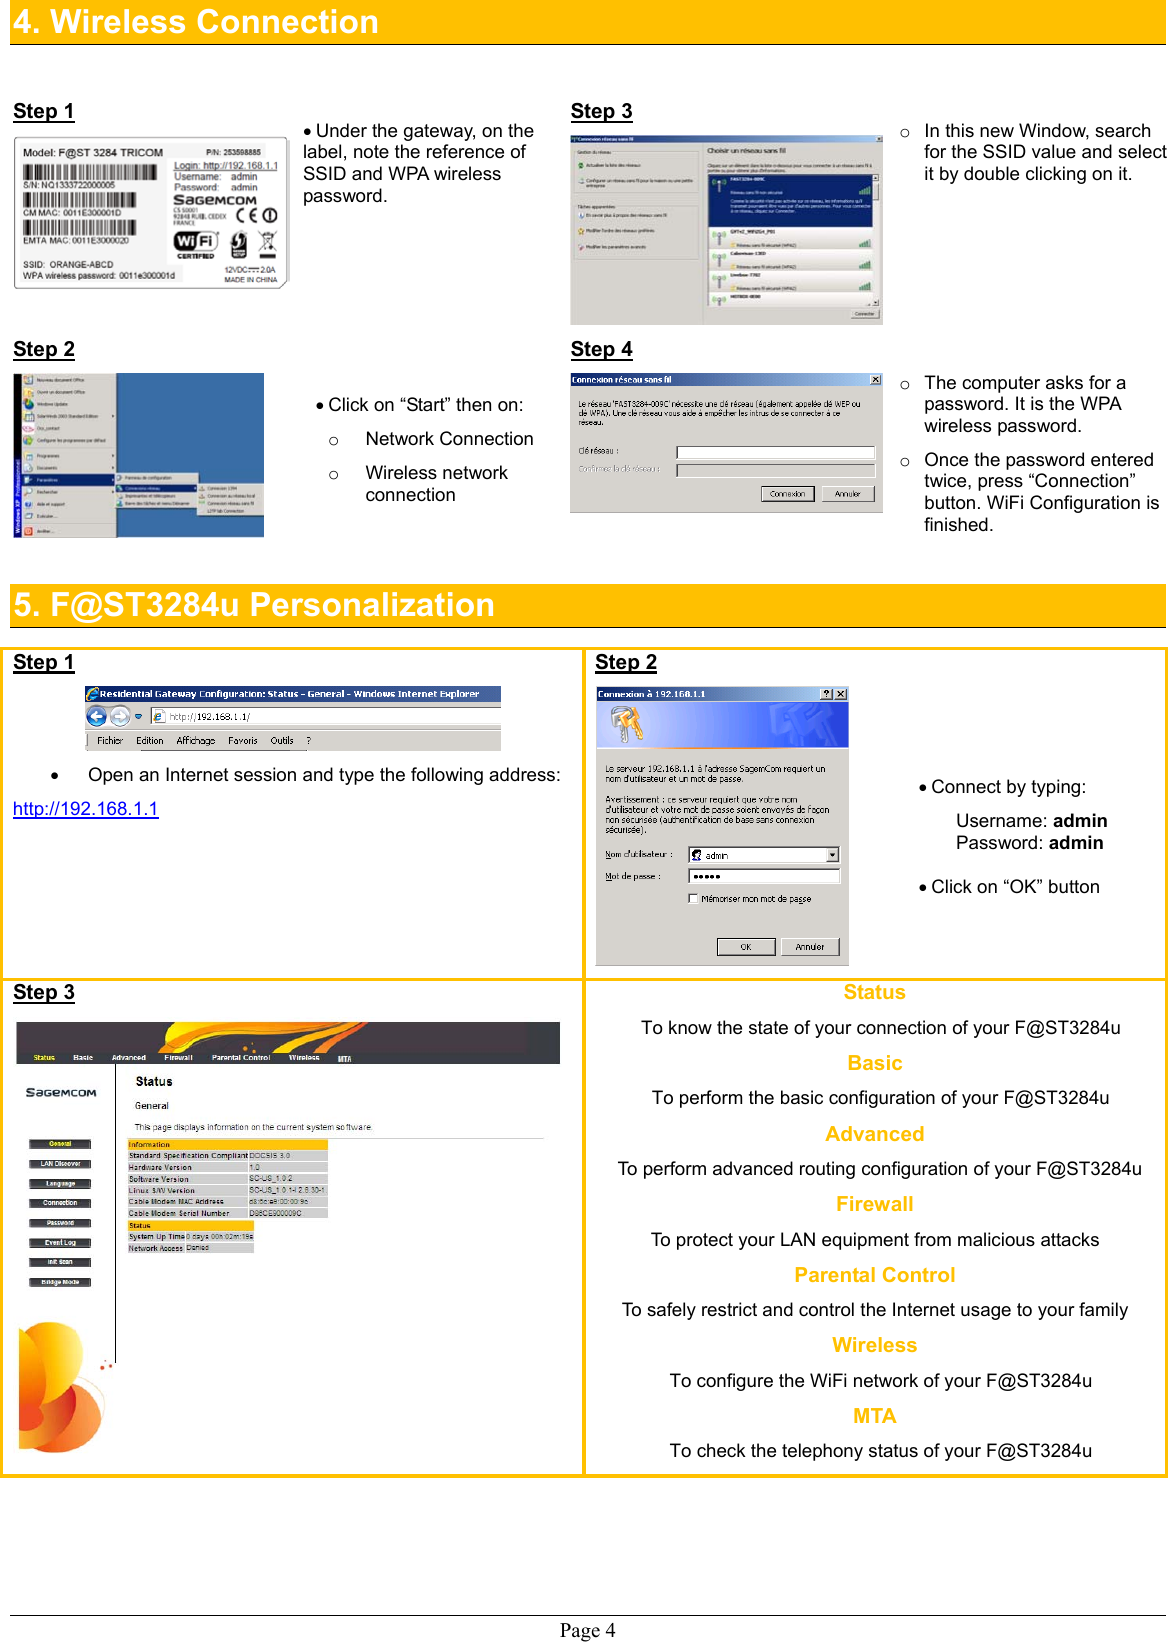
FAST3284U User Manual
User manual rev.pdf
Navigation menu
Upload a User Manual
Namespaces
Wiki Guide
HTML
PDF
Info
Views
User Manual
Discussion / Help
Navigation