SAMSUNG DVD/VCR Combo Manual L0903351
User Manual: SAMSUNG SAMSUNG DVD/VCR Combo Manual SAMSUNG DVD/VCR Combo Owner's Manual, SAMSUNG DVD/VCR Combo installation guides
Open the PDF directly: View PDF ![]() .
.
Page Count: 92
E_3
UI _ _ D1
SAFETY INSTRUCTIONS I
important Safety instructions
1) Readthese instructions.
2) Keepthese instructions.
3) Heedall warnings.
4) Followall instructions.
5) Do not use this apparatusnearwater.
6) Clean only with dry cloth.
7) Do not block any ventilationopenings, Installin accordancewith the manufacturer'sinstructions.
8) Do not install nearany heat sources suchas radiators,heat registers,or other apparatus(including
amplifiers)that produce heat.
9) Do not defeatthe safetypurpose of the polarizedor grounding-type plug.A polarized plughas two blades
with one widerthan the other.A groundingtype plug has two blades and a third groundingprong.
The wide bladeor the third prongare provided for your safety.Ifthe providedplug does not fit into your
outlet, consult an electricianfor replacementof the obsolete outlet.
10)Protectthe power cord from beingwalked on or pinched particularlyat plugs, conveniencereceptacles,
andthe point where they exit fromthe apparatus.
11)Only use attachments/accessoriesspecified by the manufacturer.
12)Use only with cart, stand, tripod,bracket,or table specifiedby the
manufacturer,or sold with the apparatus.
13)Unplugthis apparatus.When a cart is used,use cautionwhen movingthe
cart/apparatuscombinationto avoid injury from tip-over.
14)Referall servicingto qualifiedservice personnel.Servicingis requiredwhen the apparatushas been
damaged inany way,such as power-supplycord or plugis damaged,liquidhas beenspilled or objects
have fallen into the apparatusthe apparatushas been exposedto rainor moisture,does not operate
normally,or has been dropped.
ENG-2
SAFETY INSTRUCTIONS I
Precautions
RISK OF ELECTRIC SHOCK
DO NOT OPEN
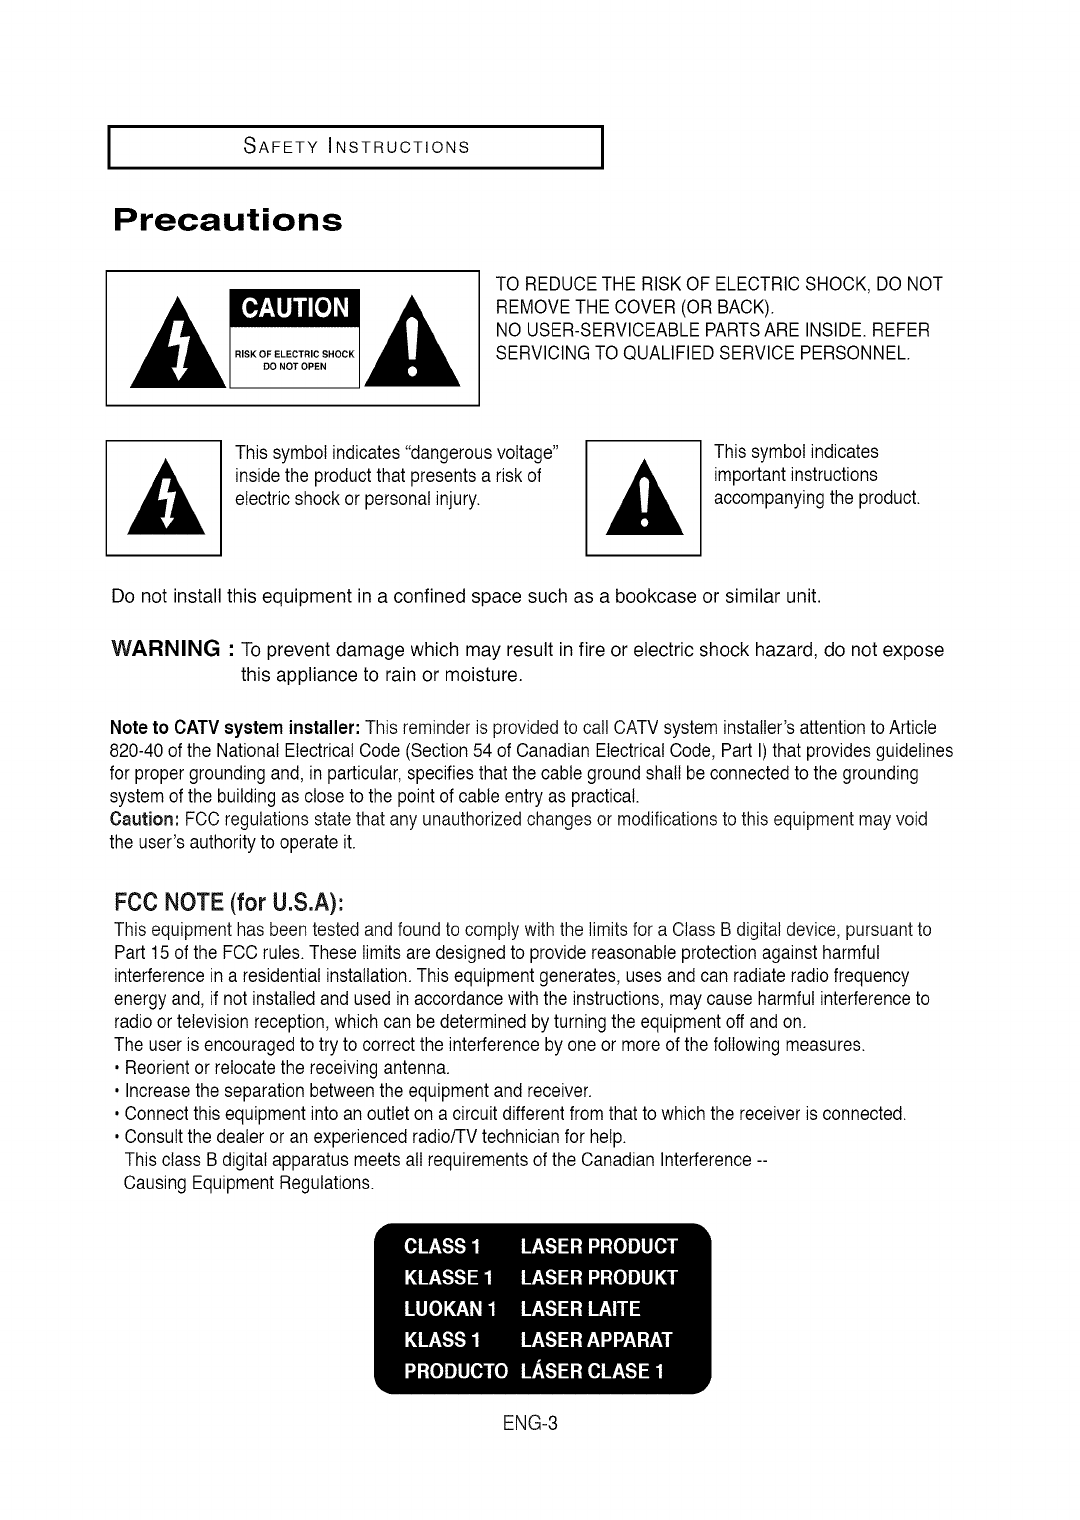
TO REDUCE THE RISK OF ELECTRIC SHOCK, DO NOT
REMOVE THE COVER (OR BACK).
NO USER-SERVICEABLE PARTS ARE INSIDE. REFER
SERVICING TO QUALIFIED SERVICE PERSONNEL.
This symbol indicates"dangerousvoltage"
insidethe productthat presentsa risk of
electric shock or personal injury.
This symbol indicates
important instructions
accompanyingthe product.
Do not install this equipment in a confined space such as a bookcase or similar unit.
WARNING : To prevent damage which may result in fire or electric shock hazard, do not expose
this appliance to rain or moisture.
Note to CATVsysteminstaller:This reminder is provided to call CATVsystem instatIer'sattentionto Article
820-40 of the NationalElectrical Code (Section54 of Canadian ElectricalCode, Part I) that providesguidelines
for propergroundingand, in particular,specifiesthat the cable groundshall be connectedto the grounding
systemof the buildingas closeto the point of cable entry as practical.
Caution: FCC regulationsstate that any unauthorizedchangesor modificationsto this equipmentmayvoid
the user's authorityto operate it.
FCC NOTE (for U.S.A):
Thisequipmenthas beentested and foundto comply with the limits for a Class B digital device, pursuantto
Part 15 of the FCC rules.These limits are designedto provide reasonableprotectionagainstharmful
interferencein a residentialinstallation.This equipmentgenerates,usesand can radiate radiofrequency
energyand, if not installedand used in accordancewiththe instructions,maycause harmfulinterferenceto
radioor television reception,which can be determinedby turning the equipmentoff andon.
The user is encouragedto try to correct the interferenceby oneor more of the followingmeasures.
• Reorientor relocatethe receivingantenna.
• Increasethe separationbetweenthe equipmentand receiver.
• Connectthis equipmentintoan outlet on a circuitdifferentfromthat towhich the receiverisconnected.
• Consultthe dealeror an experiencedradio/TVtechnicianfor help.
This class B digital apparatusmeets atIrequirementsof the CanadianInterference--
CausingEquipmentRegulations.
ENG-3
1SAFETY INSTRUCTIONS ]
CAUTION
THIS PRODUCT UTILIZES A LASER. USE OF CONTROLS OR ADJUSTMENTS OR
PERFORMANCE OF PROCEDURES OTHER THAN THOSE SPECIFIED HEREIN MAY RESULT
IN HAZARDOUS RADIATION EXPOSURE. DO NOT OPEN COVER AND DO NOT REPAIR
YOURSELF. REFER SERVICING TO QUALIFIED PERSONNEL.
Nore:
• This unit can be used only where the power supply is AC 120V, 60Hz. It cannot be used
elsewhere.
• This DVD player is designed and manufactured to respond to the Region Management
Information.
If the Region number of a DVD disc does not correspond to the Region number of this DVD player,
the DVD player cannot play the disc.
• The product unit accompanying this user manual is licensed under certain intellectual property
rights of certain third parties. In particular, this product is licensed under the following US patents:
5,991,715, 5,740,317, 4,972,484, 5,214,678, 5,323,396, 5,539,829, 5,606,618, 5,530,655,
5,777,992, 6,289,308, 5,610,985, 5,481,643, 5,544,247, 5,960,037, 6,023,490, 5,878,080, and
under US Published PatentApplication No. 2001-44713-A1.
This license is limited to private non-commercial use by end-user consumers for licensed contents.
No rights are granted for commercial use. The license does not cover any product unit other than
this product unit and the license does not extend to any unlicensed product unit or process
conforming to ISO/IEC 11172-3or ISO/IEC 13818-3 used or sold in combination with this product
unit.
The license only covers the use of this product unit to encode and/or decode audio files conforming
to the ISO/IEC 11172-3or ISO/IEC 13818-3. No rights are granted under this license for product
features or functions that do not conform to the ISO/IEC 11172-3or ISO/IEC 13818-3.
Handling Cautions
, Beforeconnectingother componentsto this player,be sureto turn them all off.
• Do not movethe playerwhile a disc is beingplayed,or the disc may be scratchedor broken,andthe
player's internal partsmay be damaged.
• Donotput a flowervase filledwith wateror any small metalobjectsonthe player.
• Be carefulnot to put your handinto the disctray.
• Donot placeanything otherthan thedisc in thedisc tray.
• Exteriorinterferencesuchas lightningand staticelectricitycan affectnormal operationof this player.
Ifthis occurs,turn the playeroff and on againwith the POWERbutton, or disconnectand then reconnect
the AC power cord to the AC power outlet. The player will operate normally.
• Be sureto removethe disc andturn offthe player after use.
• Disconnectthe ACpower cord fromthe AC outletwhen you don't intend to use the playerfor long
periodsof time.
• Cleanthe disc bywiping in a straightline fromthe inside to the outsideof the disc.
DiscStorage_
Becareful not to harmthe disc becausethe data on these discs is highlyvulnerableto the environment.
• Do not keep underdirect sunlight.
• Keepin a cool ventilated area.
• Storevertically.
• Keepin a clean protectionjacket.
Maintenance of Cabinet
For safetyreasons, be sureto disconnectthe AC power cord from the AC outlet.
• Do not use benzene,thinner,or other solventsfor cleaning.
•Wipe the cabinetwith a soft cloth. ENG-4
I BEFORE YOU START
Before you start
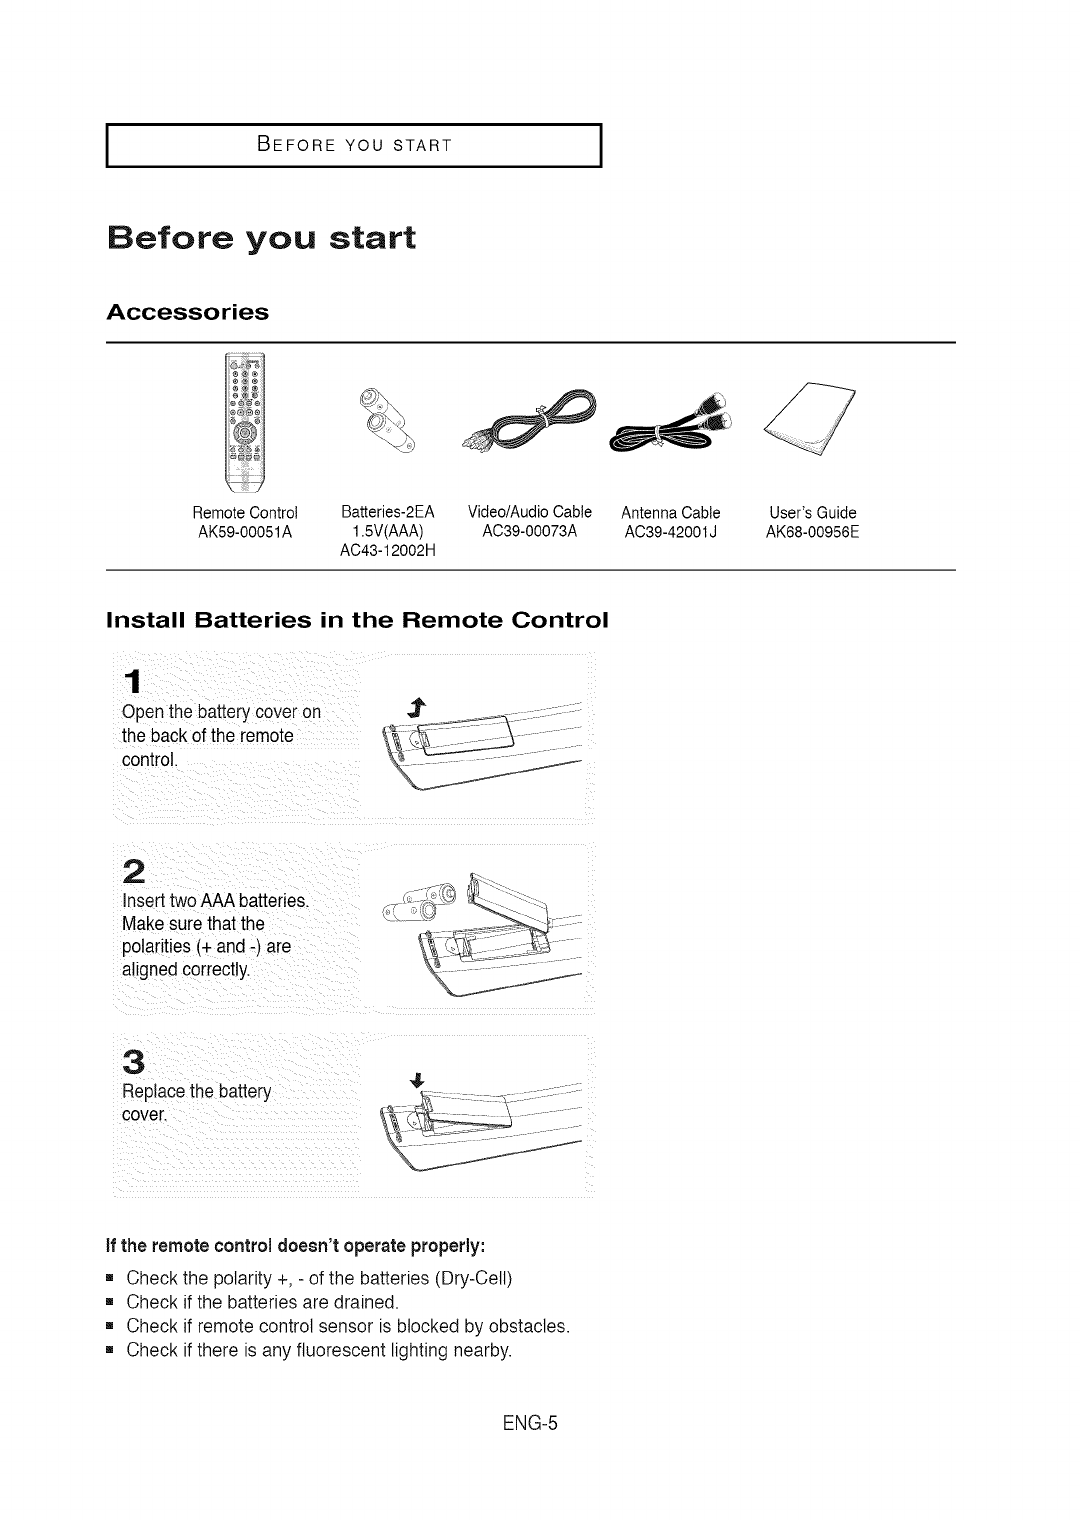
Accessories
Remote Control Batteries-2EA Video/Audio Cable Antenna Cable
AK59-00051A 1.5V(AAA) AC39-00073A AC39-42001J
AC43-12002H
User'sGuide
AK68-00956E
Install Batteries in the Remote Control
1
Openthe batterycover on
the back of the remote
control.
2
Inserttwo AAAbatteries.
Makesure that the
polarities(+ and -) are
alignedcorrectly.
3
Replacethe battery
cover.
41.
if the remote controldoesn't operate properly:
[] Check the polarity +, - of the batteries (Dry-Cell)
[] Check if the batteries are drained.
[] Check if remote control sensor is blocked by obstacles.
[] Check if there is any fluorescent lighting nearby.
ENG-5
TABLE OF CONTENTS l
Table of Contents
Safety Instructions ........................................................................................................................................2
ImportantSafety Instructions ................................................................................................................2
Precautions ..........................................................................................................................................3
Before you start ............................................................................................................................................5
Accessories............................................................................................................................................5
Install Batteriesin the RemoteControl ..................................................................................................5
Chapter 1: Setup
GeneralFeatures............................................................................................................................................8
Disc Typeand Characteristics........................................................................................................................9
Description....................................................................................................................................................10
Tourof the Remote Control..................................................................................................................12
Chapter 2: Connections
Connecting the Antenna Cable .................................................................................................................... 13
Method1: Antenna + DVD-VCR + TV: No Cable box .......................................................................... 13
Method2: Antenna + DVD-VCR + TV: Cable box with many scrambled channels .............................. 14
Method3: Antenna + DVD-VCR + TV: Cable box with a few scrambled channels .............................. 14
Before Connecting the DVD-VCR .............................................................................................................. 15
Connection to a TV ...................................................................................................................................... 15
Connection to a TV (Video) .................................................................................................................. 15
Connection to a TV (S-Video) ............................................................................................................ 16
Connection to a TV (Interlace) ............................................................................................................ 17
Connection to a TV (Progressive) ........................................................................................................ 18
Connection to an Audio System .................................................................................................................. 19
Connection to an Audio System (2 Channel Amplifier) ........................................................................ 19
Connection to an Audio System (Dolby digital, MPEG2 or DTS Amplifier) .......................................... 20
Connecting a Power Cord & Auto Setup ...................................................................................................... 21
Chapter 3: Initial Setup
Selectinga Menu Language ........................................................................................................................22
Settingthe Clock ........................................................................................................................................23
Settingthe ClockAutomatically............................................................................................................23
Settingthe Clock Manually ................................................................................................................24
Memorizingthe Channels............................................................................................................................26
Selectingthe VideoSignal-source ......................................................................................................26
StoringChannelsin Memory(AutomaticMethod) ..............................................................................27
Adding and ErasingChannels(Manual Method) ................................................................................27
Selectingthe RFOutput Channel ................................................................................................................28
Selectingthe FrontPanel Display ..............................................................................................................29
Settingthe PowerOff Automatically ............................................................................................................30
ENG-6

TABLE OF CONTENTS
Chapter 4: DVD Operations
Playinga Disc ..............................................................................................................................................31
Usingthe Searchand Skip Functions ........................................................................................................33
Usingthe Display Function ..........................................................................................................................34
Usingthe Disc andTitle Menu (DVD) ..........................................................................................................36
Usingthe Function Menu (DVD)..................................................................................................................37
RepeatPlay ................................................................................................................................................38
Slow RepeatPlay ........................................................................................................................................40
Adjustingthe Aspect Ratio(EZ View) ..........................................................................................................41
Selectingthe Audio Language ....................................................................................................................43
Selectingthe Subtitle Language ................................................................................................................44
Changingthe CameraAngle ......................................................................................................................45
Usingthe BookmarkFunction (DVD) ..........................................................................................................45
Usingthe Zoom Function (DVD)..................................................................................................................47
Clips Menufor MP3/WMA/JPEG/MPEG4....................................................................................................48
Folder Selection ..........................................................................................................................................48
MP3/WMAPlayback ....................................................................................................................................49
MPEG4 Playback ........................................................................................................................................51
Program Play & RandomPlay......................................................................................................................53
PictureCD Playback ....................................................................................................................................54
Usingthe Setup Menu ................................................................................................................................56
SettingUp the LanguageFeatures ..............................................................................................................57
SettingUp the Audio Options ......................................................................................................................59
SettingUp the Display Options....................................................................................................................61
SettingUp the Parental Control ..................................................................................................................63
Chapter 5: VCR Operations
Insertingand Ejectinga Video CassetteTape ............................................................................................66
Playinga Pre-RecordedVideoCassetteTape ............................................................................................67
SpecialVCR Playback Features ................................................................................................................68
UsingAutomaticTracking ............................................................................................................................69
Selectingthe CassetteType ........................................................................................................................70
Settingthe Auto Play ..................................................................................................................................71
Settingthe Auto Repeat ..............................................................................................................................72
Usingthe Tape Counter ..............................................................................................................................73
Usingthe Assemble Edit Function ..............................................................................................................74
Selectingthe AudioOutput Mode ................................................................................................................75
Searchingfor a Specific Sequence ............................................................................................................76
Basic Recording ..........................................................................................................................................78
Special RecordingFeatures ........................................................................................................................79
UsingOne-TouchRecording ......................................................................................................................80
Selectingthe RecordingSpeed ..................................................................................................................81
Makinga Timer Recording ..........................................................................................................................82
Chapter 6: Reference
Troubleshooting ..........................................................................................................................................84
TechnicalSpecifications ..............................................................................................................................86
ENG-7
SETUP
General Features
DVD-VCR Features
[]Perfect compatibility to play back DVDs, audio
CDs or VHS Tapes.
[] Enjoy a DVD movie while recording a TV show
to the VCR
[] Auto Setup instantly finds the time and runs
channel search.
[] RF input and output.
[] Composite, S-Video, and Component Video
outputs.
[] On-Screen Program (English/French/Spanish).
DVD Featu res
[] 1C-bitvideo digital to analog converter and
54MHz advanced digital filter.
[] Playback of 96KHz/24-bit sources.
[] DTS digital output for DTS-enhanced DVDs.
[] This unit can play MPEG4 formats within an avi
file.
[] Playback MP3-CDs.
Note
This product incorporates copyright protection
technology that is protected by U.S. patents and
other intellectual property rights. Use of this copyright
protection technology must be authorized by
Macrovision, and is intended for home and other
limited viewing uses only unless otherwise authorized
by Macrovision. Reverse engineering or disassembly
is prohibited.
COPY PROTECTION
Many DVDdiscs are encodedwith copy protection.
Becauseof this, you should only connect your DVD-
VCRdirectly to your TV,not to a VCR. Connectingto
a VCR results ina distortedpicturefrom copy-
protectedDVD discs.
This productincorporatescopyright protection
technology that is protected by methods claims of
certainU.S. patents and other intellectualproperty
rightsowned by MacrovisionCorporationand other
rightsowners. Use of this copyright protection
technology must be authorizedby Macrovision
Corporation,and is intendedfor home and other
limitedviewinguses only unlessotherwise
authorizedby MacrovisionCorporation.Reverse
engineeringor disassemblyis prohibited.
VCR Featu res
[] Hi-Fi Stereo VCR
[] Superior stow motion and stop action (with 4
heads).
[] Playback of S-VHS tapes with a better than
standard resolution.
[] INTRO Scan, Zero Return, and END Search.
[] 7-event/1 month timer recording.
[] Time remaining counter, real time counter.
Note
[] Discs which cannot be played with this player.
DVD-ROM/DVD-RAM/VCD
CDI/CDV
Super Audio CD (CD, HD layer)
CDGs play audio only, not graphics.
DVD-RW (VR mode)
Non-finalizing DVD-RW, -R, DVD+RW, and +R
disc.
PROGRESSIVE SCAN
OUTPUTS (525p)
"CONSUMERSSHOULD NOTETHATNOTALL
HIGH DEFINITIONTELEVISIONSETS ARE FULLY
COMPATIBLEWITHTHIS PRODUCTAND MAY
CAUSEARTIFACTSTO BE DISPLAYEDINTHE
PICTURE.IF525 PROGRESSIVESCANPICTURE
PROBLEMSOCCUR, IT IS RECOMMENDEDTHAT
THE USERSWITCHTHE CONNECTIONTO THE
'STANDARDDEFINITION'OUTPUT.IFTHEREARE
QUESTIONSREGARDINGYOURTV SET
COMPATIBILITYWITH THIS DVD-VCR, PLEASE
CONTACTSAMSUNG'SCUSTOMERSERVICE
CENTER."
[] Ability to play back may depend on recording
conditions.
DVD-RW, -R/CD-RW/DVD+RW, +R/CD-ROM
ENG-8

ISETUP
Disc Type and Characteristics
This DVD-VCRis capableof playingthe followingtypes of discs withthe correspondingIogos:
I I
DiscTypes(Loges)
DVD
VIDEO
AUDIO=CD
DIGITAL AUDIO
RecordingTypes
Audio
+
Video
Audio
DiscSize Max,PlayingTime Characteristics
5 _
3 1/2"
5 _
Single-sided240 rain.
Double-sided480 rain.
Single-sided80 rain.
Double-sided160 rain.
74 min.
20 min.3 1/2"
DVD containsexcellent sound
andvideo dueto DolbyDigital
and MPEG-2system.
Variousscreenand audio
functionscan be easily selected
throughthe on-screenmenu.
CD is recordedas a Digital
Signalwith betteraudio quality,
lessdistortion and less
deteriorationof audio quality
over time.
.CD-R,CD-RW and DVD-RW, -R, DVD+RW, +R discs may not be playable in all cases due to the disc
type or condition of the recording.
,, Do not run the player with two discs loaded at the same time.
Disc Markings Region Number
Play Region Number
NTSCbroadcast system in U.S.A,Canada,Korea,
Japan, etc.
DolbyDigitaldisc
Stereodisc
DigitalAudio disc
[_ DTSdisc
MP3disc
Boththe DVD-VCRandthe discs are
coded by region.These regionalcodes
must match in orderfor the disc to play.
Ifthe codesdo not match,the discwilI
not play.
The Region Numberfor this player is
describedon the rear panelof the player.
DivX Certification
You must only insertone DVD disc at a time, Insertingtwo DivX, DivXCertified,and
or more discswil! notallowplayback and maycause ..........
damageto the DVD-VCR, associatedIogosare
trademarksof DivXNetworks,Incand are
used underlicense.
ENG-9
ISETUP I
Description
Front Panel Controls
O
l
Z" C
oo
0O O 0O000000 O0
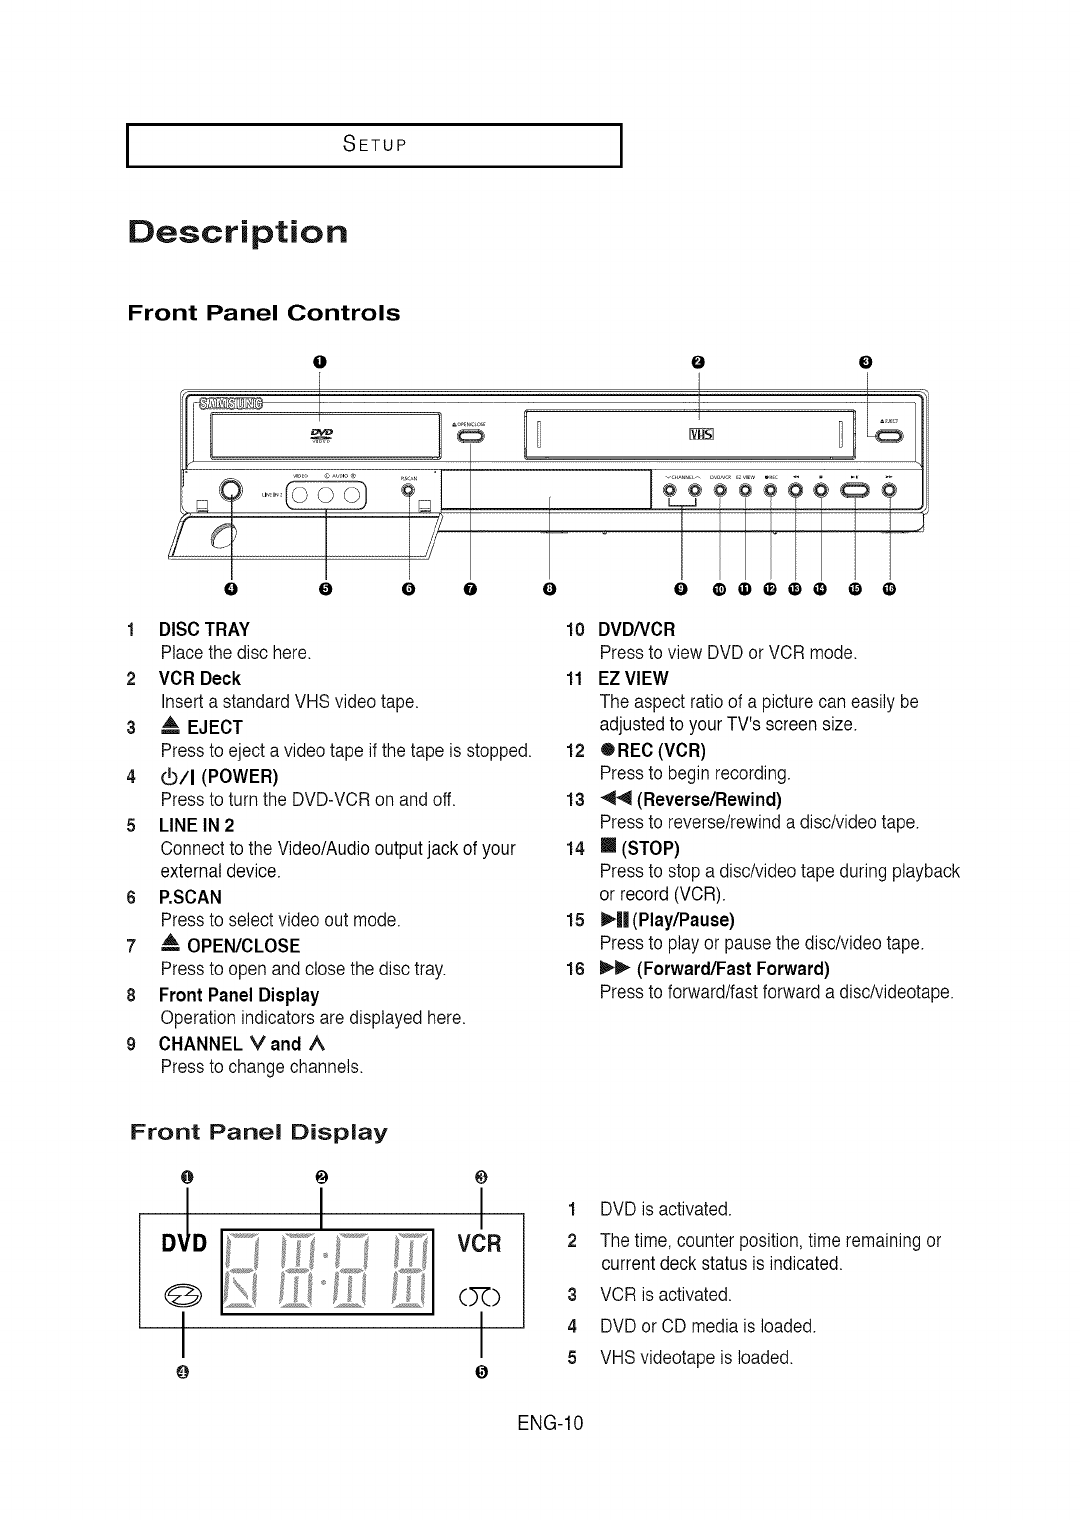
1DISC TRAY
Place the disc here.
2VCR Deck
Inserta standardVHS video tape.
3 A, EJECT
Pressto eject a video tape if the tape is stopped.
4 _/I (POWER)
Pressto turn the DVD-VCRon and off.
5 LINE IN 2
Connectto the Video/Audiooutputjack of your
externaldevice.
6 P.SCAN
Pressto select video out mode.
7 A OPEN/CLOSE
Pressto open andclose the disc tray.
8 Front PanelDisplay
Operationindicators aredisplayed here.
9 CHANNEL rand ^
Pressto change channels.
10 DVD/VCR
Pressto view DVDor VCR mode.
11 EZ VIEW
The aspect ratio of a picturecan easilybe
adjustedto your TV's screensize.
12 ®REC(VCR)
Pressto begin recording.
13 _ (Reverse/Rewind)
Pressto reverse/rewinda disc/videotape.
14 [] (STOP)
Pressto stop a disc/videotape duringplayback
or record (VCR).
15 _-|| (Play/Pause)
Pressto play or pause the disc/videotape.
16 It,._ (Forward/Fast Forward)
Pressto forward/fastforward a disc/videotape.
Front Panel Display
O
O
I I
0
1 DVD is activated.
2 The time, counter position,time remainingor
currentdeck statusis indicated.
3 VCR is activated.
4 DVD or CD media is loaded.
5 VHSvideotape isloaded.
ENG-10
I
Rear Panel
SETUP
0 @ _0 0
::S
,i [ [
¢ O
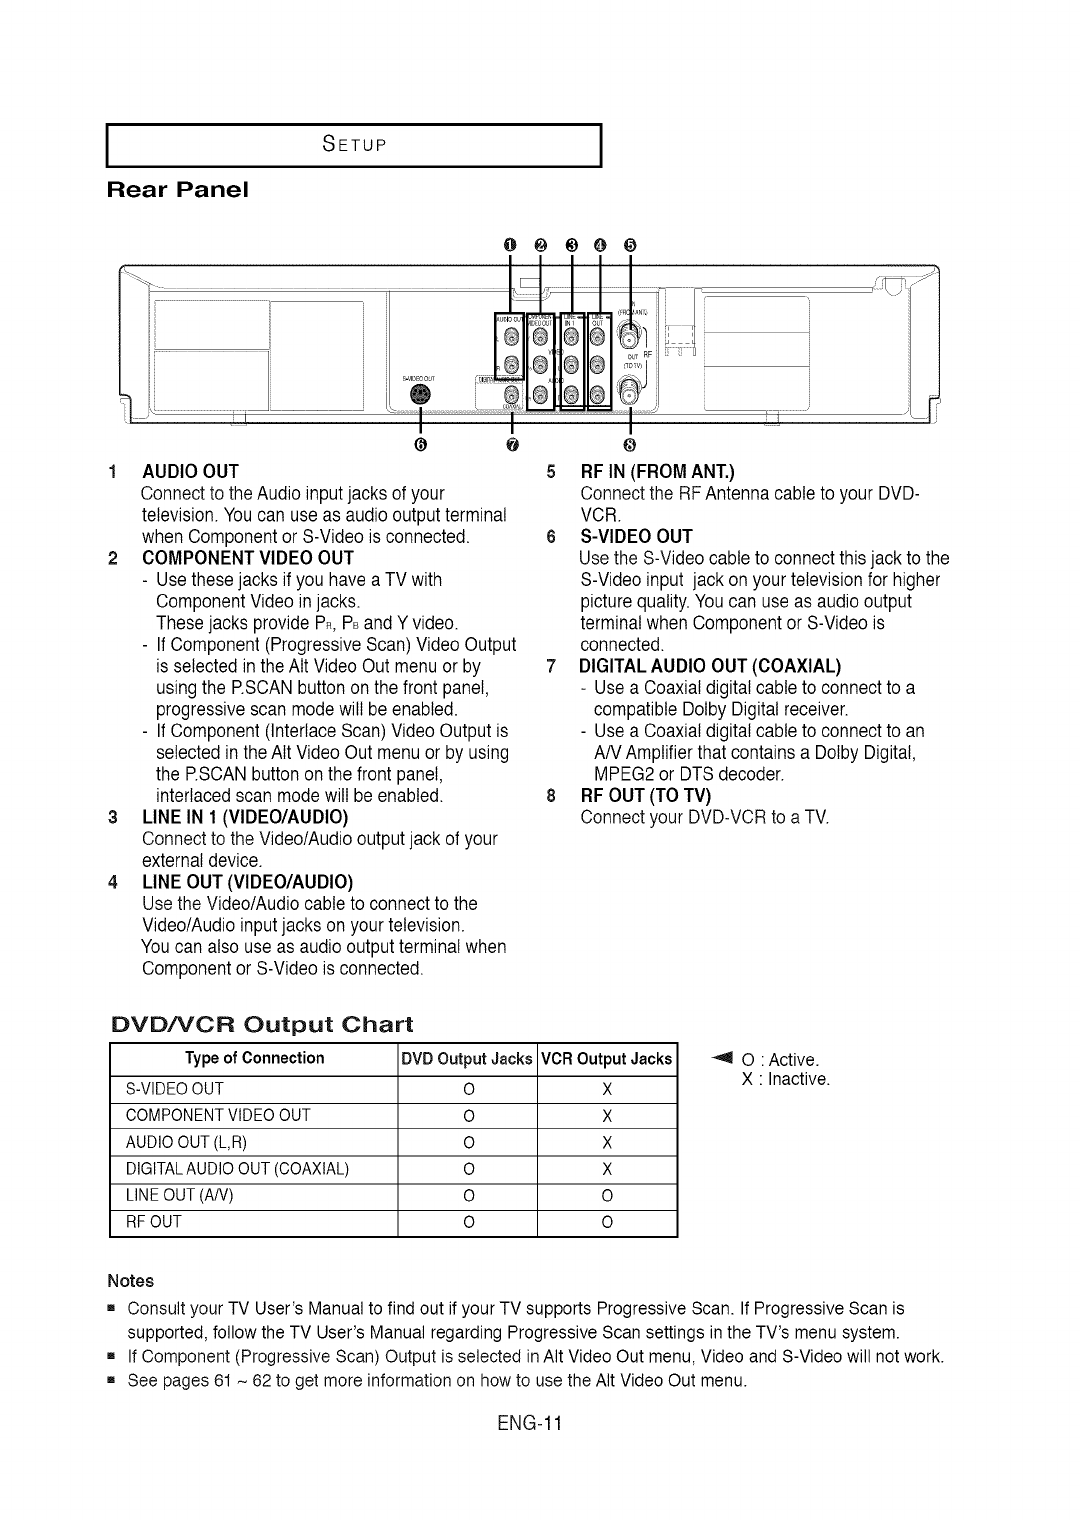
1 AUDIO OUT 5
Connectto the Audio inputjacks of your
television.Youcan use as audiooutputterminal
when Componentor S-Videois connected. 6
2 COMPONENTVIDEO OUT
- Usethese jacks if you have a TV with
ComponentVideoin jacks.
Thesejacks provide PR,PBandY video.
- If Component(ProgressiveScan) VideoOutput
is selected in the AItVideo Out menu or by 7
using the RSCAN buttonon the front panel,
progressivescan modewill be enabled.
- If Component(Interlace Scan)Video Outputis
selected inthe AIt VideoOut menuor by using
the RSCAN buttonon the front panel,
interlacedscanmode will be enabled. 8
3 LINE IN 1 (VIDEO/AUDIO)
Connectto the Video/Audiooutputjack of your
externaldevice.
4 LINE OUT(VIDEO/AUDIO)
Usethe Video/Audiocable to connectto the
Video/Audioinputjacks on your television.
Youcan also use as audiooutputterminal when
Componentor S-Videois connected.
J
@
RFIN (FROMANT,)
Connectthe RFAntennacable to your DVD-
VCR.
S-VIDEOOUT
Usethe S-Videocable to connect thisjack to the
S-Videoinput jack on your television for higher
picturequality.Youcan use as audio output
terminalwhen Componentor S-Videois
connected.
DIGITALAUDIO OUT(COAXIAL)
- Use a Coaxialdigital cable to connectto a
compatible DolbyDigitalreceiver.
- Use a Coaxialdigital cable to connectto an
AN Amplifierthat containsa DolbyDigital,
MPEG2 or DTSdecoder.
RFOUT (TO TV)
Connect your DVD-VCRto a TV.
DVDNCR Output Chart
Type of Connection DVDOutput Jacks VCR Output Jacks
S-VIDEOOUT 0 X
COMPONENTVIDEOOUT 0 X
AUDIO OUT(L,R) O X
DIGITALAUDIOOUT(COAXIAL) O X
LINEOUT (AN) O O
RF OUT O O
O :Active.
X :Inactive.
Notes
[] Consult your TV User's Manual to find out if your TV supports Progressive Scan. If Progressive Scan is
supported, follow the TV User's Manual regarding Progressive Scan settings in the TV's menu system.
[] If Component (Progressive Scan) Output is selected in AIt Video Out menu, Video and S-Video will not work.
[] See pages 61 ~ 62 to get more information on how to use the AIt Video Out menu.
ENG-11
ISETUP I
Tour of the Remote Control
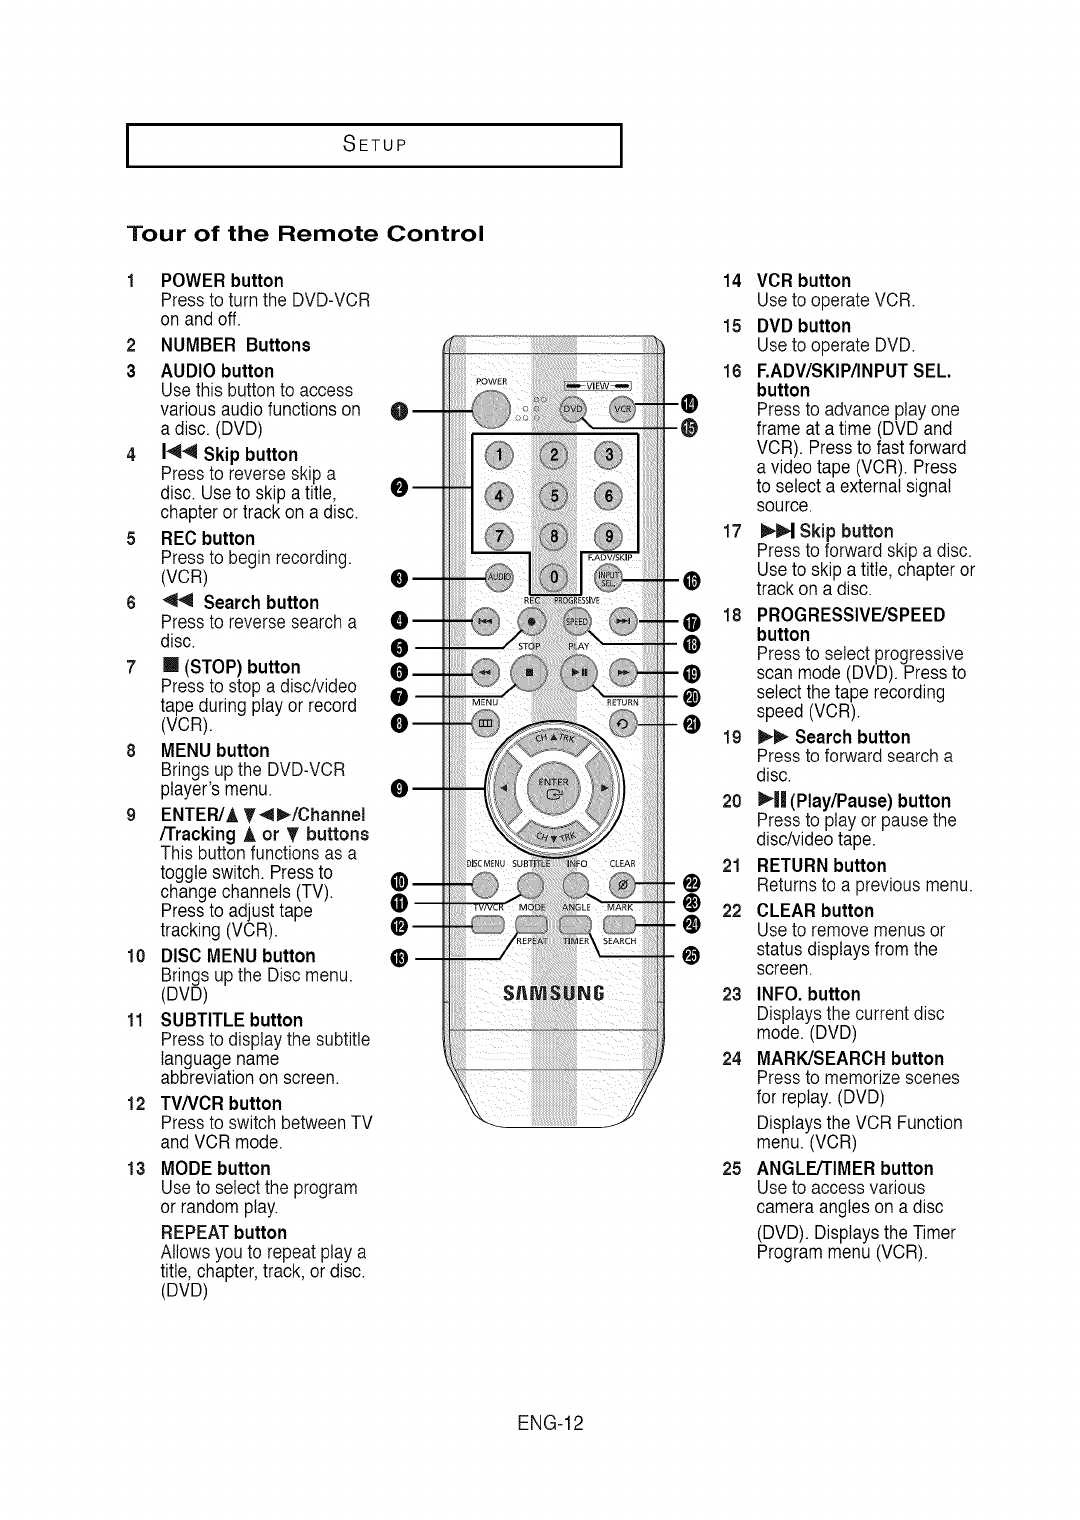
POWER button
Press to turn the DVD-VCR
on and off.
NUMBER Buttons2
3 AUDIObutton
Usethis buttonto access
variousaudio functionson
a disc. (DVD)
4 144 Skip button
Pressto reverseskip a
disc. Useto skipa title,
chapteror track on a disc.
5 REC button
Pressto begin recording.
(VCR)
6 _ Search button
Pressto reversesearch a
disc.
7 m (STOP) button
Pressto stop a disc/video
tape during play or record
(VCR).
8 MENU button
Brings up the DVD-VCR
player'smenu.
9 ENTER/A T-,t_/Channel
/Tracking Aor T buttons
This buttonfunctionsas a
toggle switch. Pressto
change channels(TV).
Pressto adjusttape
tracking (VCR).
10 DISC MENU button
Brings up the Disc menu.
(DVD)
11 SUBTITLE button
Pressto displaythe subtitle
languagename
abbreviationon screen.
12
13
TV/VCR button
Press to switch between TV
and VCR mode.
MODEbutton
Useto selectthe program
or random play.
REPEATbutton
Allowsyou to repeat play a
title, chapter,track, or disc.
(DVD)
m®
14 VCR button
Useto operateVCR
15 DVDbutton
Useto operate DVD
16 F.ADV/SKIP/INPUTSEL.
button
Pressto advance play one
frame at a time (DVDand
VCR). Pressto fast forward
a video tape (VCR). Press
to select a externalsignal
source.
17 _1 Skip button
Pressto forward skipa disc.
Useto skipa title, chapteror
track on a disc.
PROGRESSIVE/SPEED
button
Pressto select progressive
scan mode (DVD). Pressto
select the tape recording
speed (VCR).
_Searchbutton
Pressto forward searcha
disc.
20 _||(Play/Pause) button
Pressto play or pausethe
disc/videotape.
RETURNbutton
Returnsto a previousmenu.
CLEAR button
Useto removemenusor
status displaysfrom the
screen.
23 INFO. button
Displaysthe currentdisc
mode. (DVD)
24 MARK/SEARCHbutton
Pressto memorizescenes
for replay.(DVD)
Displaysthe VCR Function
menu. (VCR)
25 ANGLE/TIMERbutton
Useto accessvarious
cameraangles on a disc
(DVD). Displaysthe Timer
Programmenu (VCR).
ENG-12
CONNECTIONS
Connecting the Antenna Cable
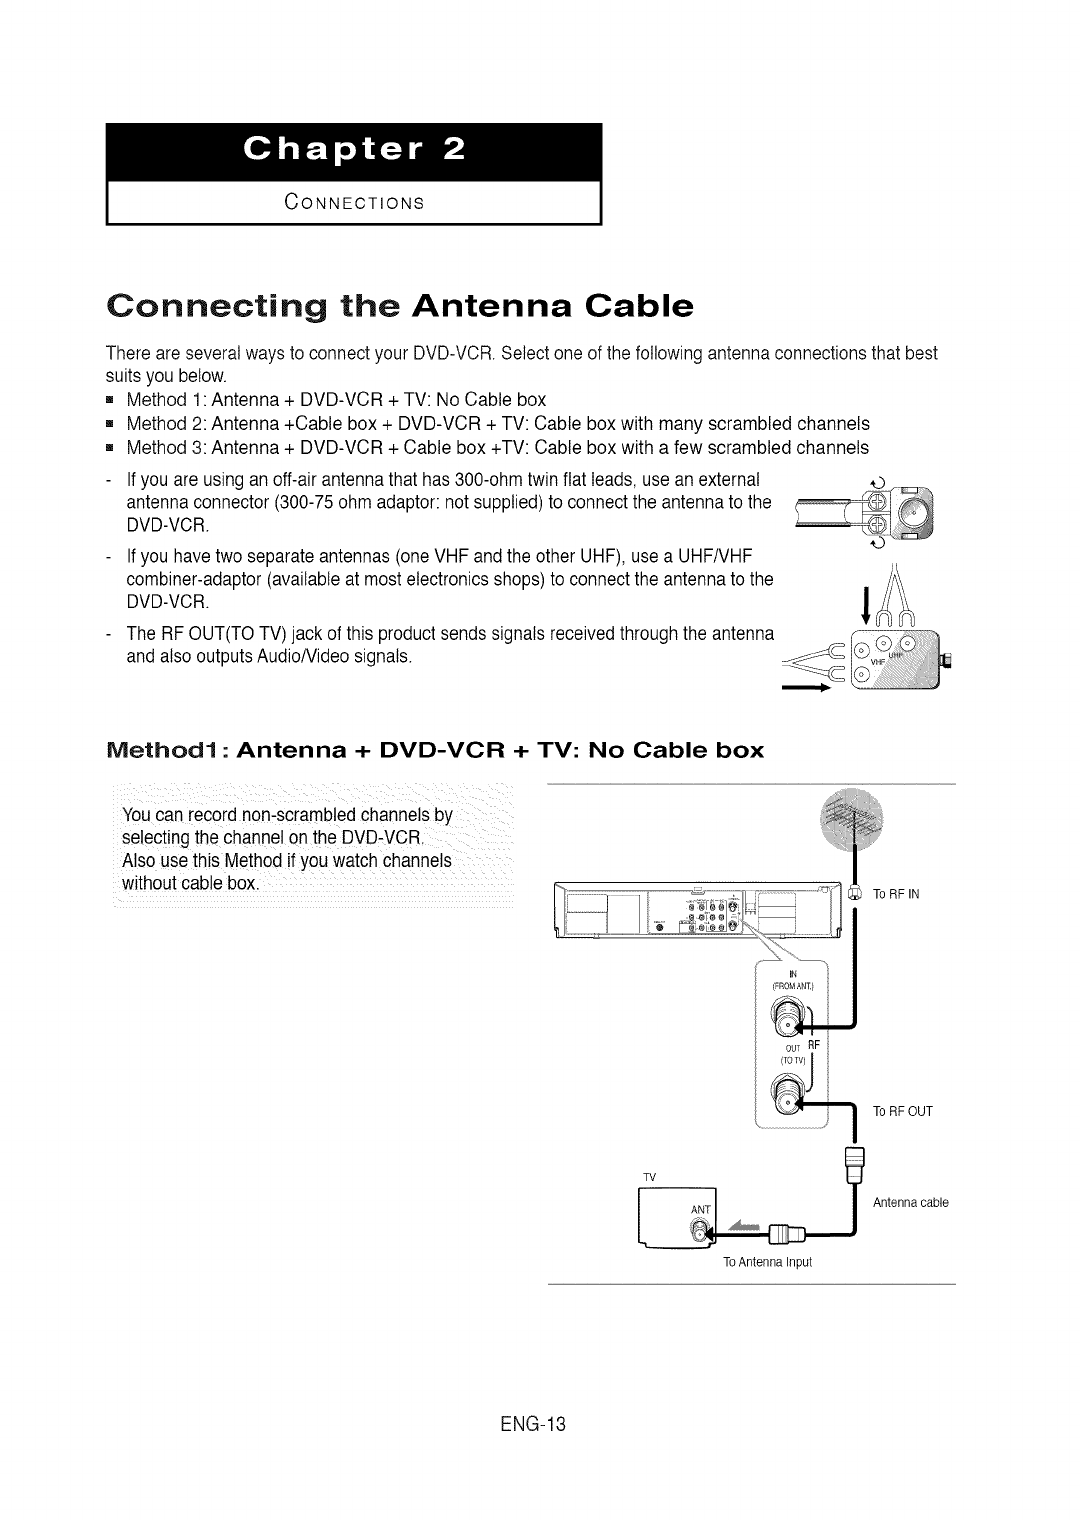
There are severalways to connect your DVD-VCR Selectone of the followingantennaconnectionsthat best
suits you below.
[] Method 1:Antenna + DVD-VCR + TV: No Cable box
[] Method 2: Antenna +Cable box + DVD-VCR + TV: Cable box with many scrambled channels
[] Method 3: Antenna + DVD-VCR + Cable box +TV: Cable box with a few scrambled channels
Ifyou are usingan off-air antennathat has 300-ohm twin flat leads,use an external
antennaconnector (300-75ohm adaptor:not supplied)to connectthe antennato the
DVD-VCR.
Ifyou havetwo separateantennas (oneVHF andthe other UHF), use a UHFNHF
combiner-adaptor(availableat most electronicsshops)to connectthe antennato the
DVD-VCR.
The RFOUT(TOTV) jack of this productsends signalsreceivedthroughthe antenna
and also outputsAudioNideo signals.
Method1 : Antenna +DVD-VCR + TV: No Cable box
You can [ecord non-scramb!edchannelsby
se!ectingthe channelon the DVD-VCR
Also use this Method ifyou watch channe!s
without cable box. .........................................
..................,,1................................I,
IN J
OUTRF
To RF OUT
Antennacable
To Antenna Input
ENG-13
ICONNECTIONS I
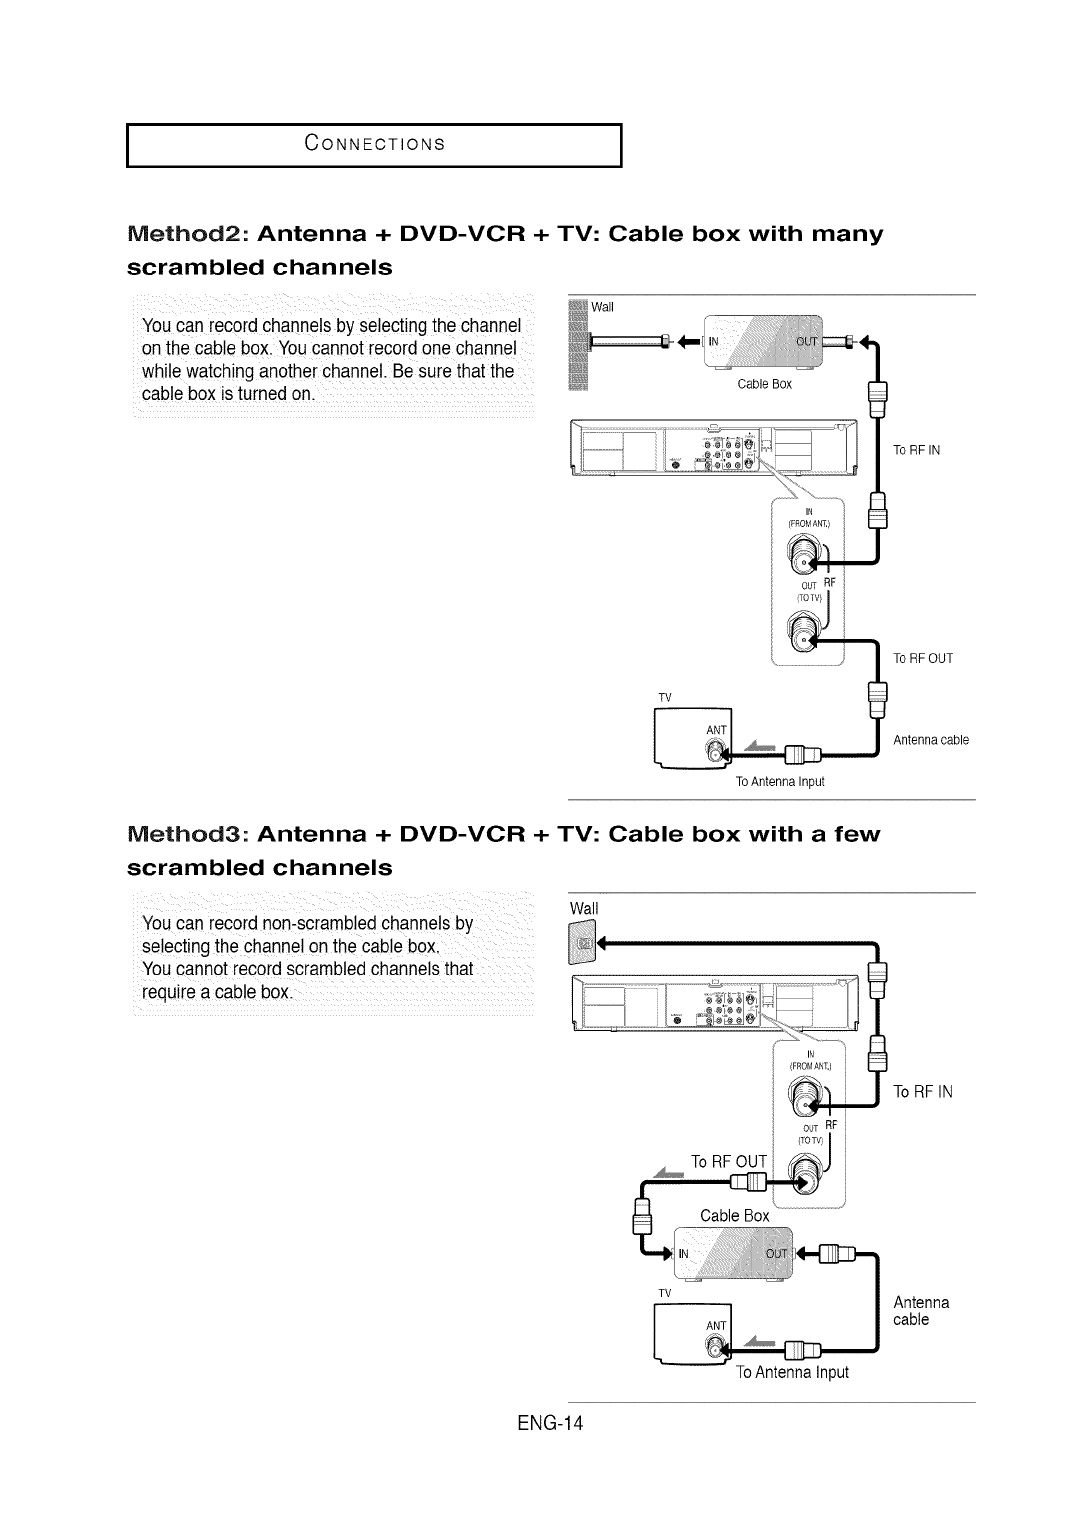
Method2: Antenna +DVD-VCR + TV: Cable box with many
scrambled channels
_wa,
You can record channelsby selecting thechannel _
on thecable box. Youcannotrecord one channel _
while watchinganother channel.Be sure thatthe _
cable box is turned on. .................................... Cable Box
To RF IN
IN
(FROM AN%)
OUTRF
To RF OUT
ToAntenna Input
Antennacable
Method3: Antenna +DVD-VCR + TV: Cable box with a few
scrambled channels
You can record non-sc[amb!edchannels by
selecting the channelon the cable box:
You cannot record scrambledchannelsthat
requi[e a cable box:
Wall
To RF OUT
Cable Box
Nl(FROMANT.)
ToRFIN
OUT RF
(TOTV}
TV Antenna
cable
ENG-14
To Antenna Input
ICONNECTIONS
Before Connecting the BVB-VCB
Always turn off the DVD-VCR, TV, and other components before you connect or disconnect any cables.
Refer to the user's manual of the additional components (such as a TV) you are connecting for more
information on those particular components.
Connection to a TV
The following shows examples of connections commonly used to connect the DVD-VCR with a TV and other
components.
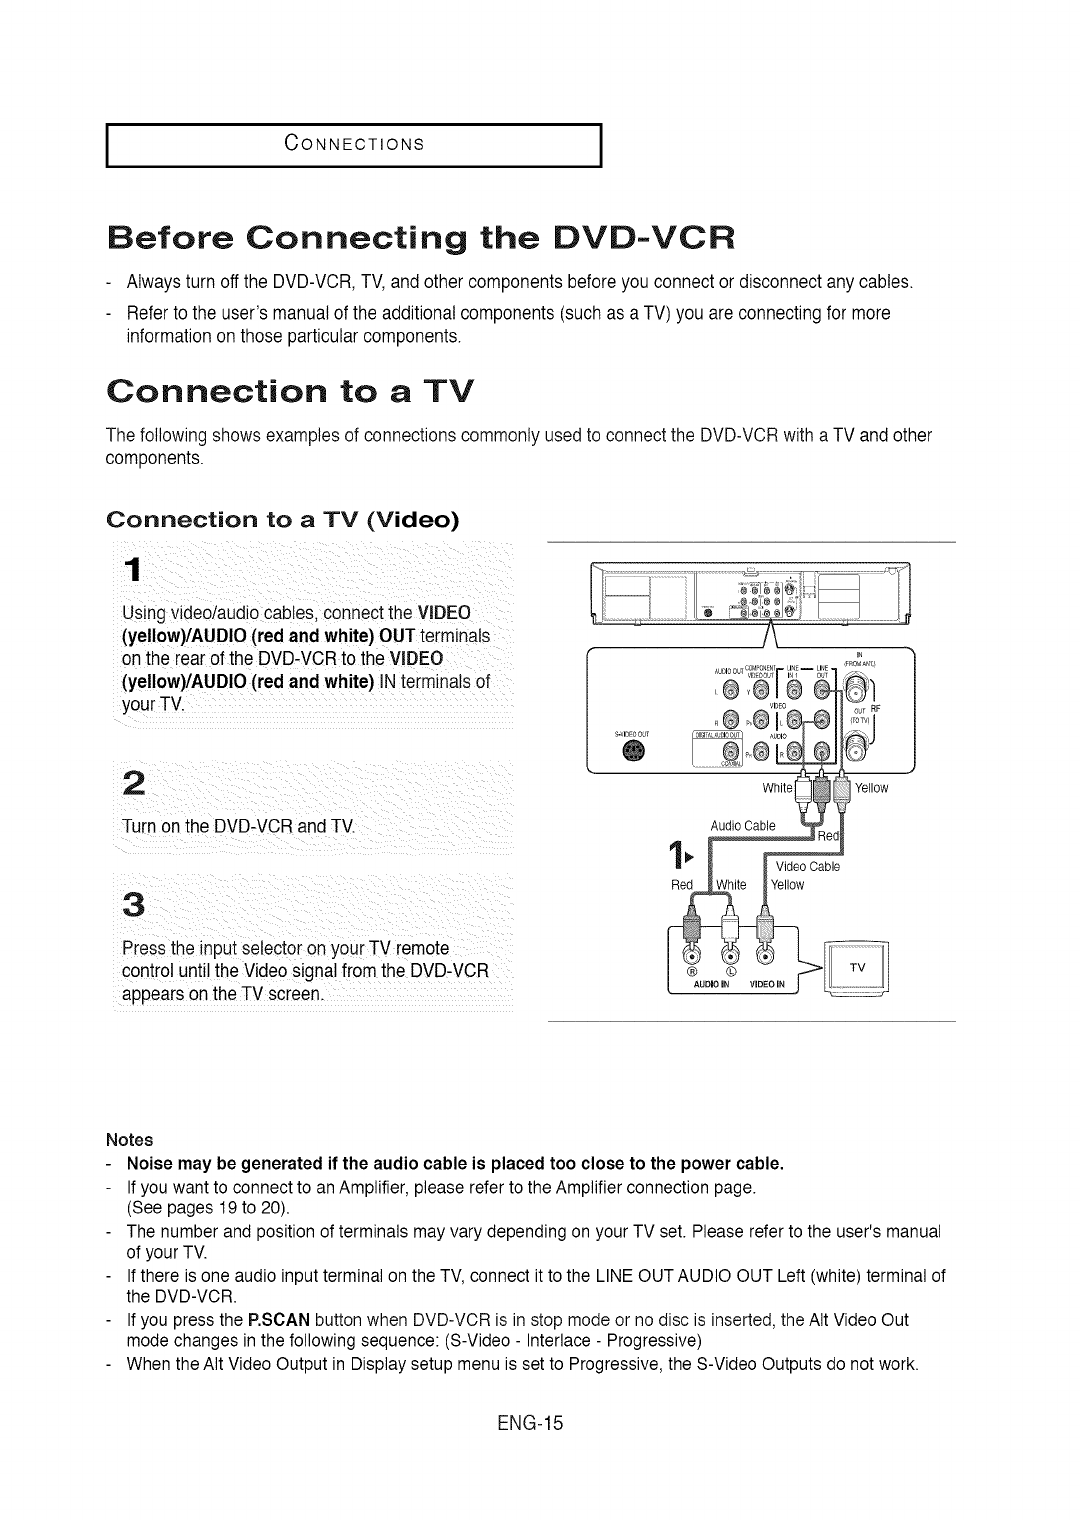
Connection to a TV (Video)
Using video/aud!ocab!es,connect the VIDEO
(yellow)/AUDlO (red and white)OUT terminals
on the rearof the DVD-VCRto the VIDEO
(yellow)/AUD!O (red and white) !N terminals
2
Turn on the DVD-VCR and TV.
3
Pressthe input selectoron your TV remote
controluntil the Videosignal fromthe DVD-VCR
appearson the TV screen
S-VIDEOOUT
®
IFROMANI,}
OT RF
ffOTV1
Yellow
Notes
Noise may be generated if the audio cable is placed too close to the power cable.
If you want to connect to an Amplifier, please refer to the Amplifier connection page.
(See pages 19 to 20).
The number and position of terminals may vary depending on your TV set. Please refer to the user's manual
of your TV.
If there is one audio input terminal on the TV, connect it to the LINE OUT AUDIO OUT Left (white) terminal of
the DVD-VCR.
If you press the RSCAN button when DVD-VCR is in stop mode or no disc is inserted, the AIt Video Out
mode changes in the following sequence: (S-Video - Interlace - Progressive)
When the AIt Video Output in Display setup menu is set to Progressive, the S-Video Outputs do not work.
ENG-15
ICONNECTIONS I
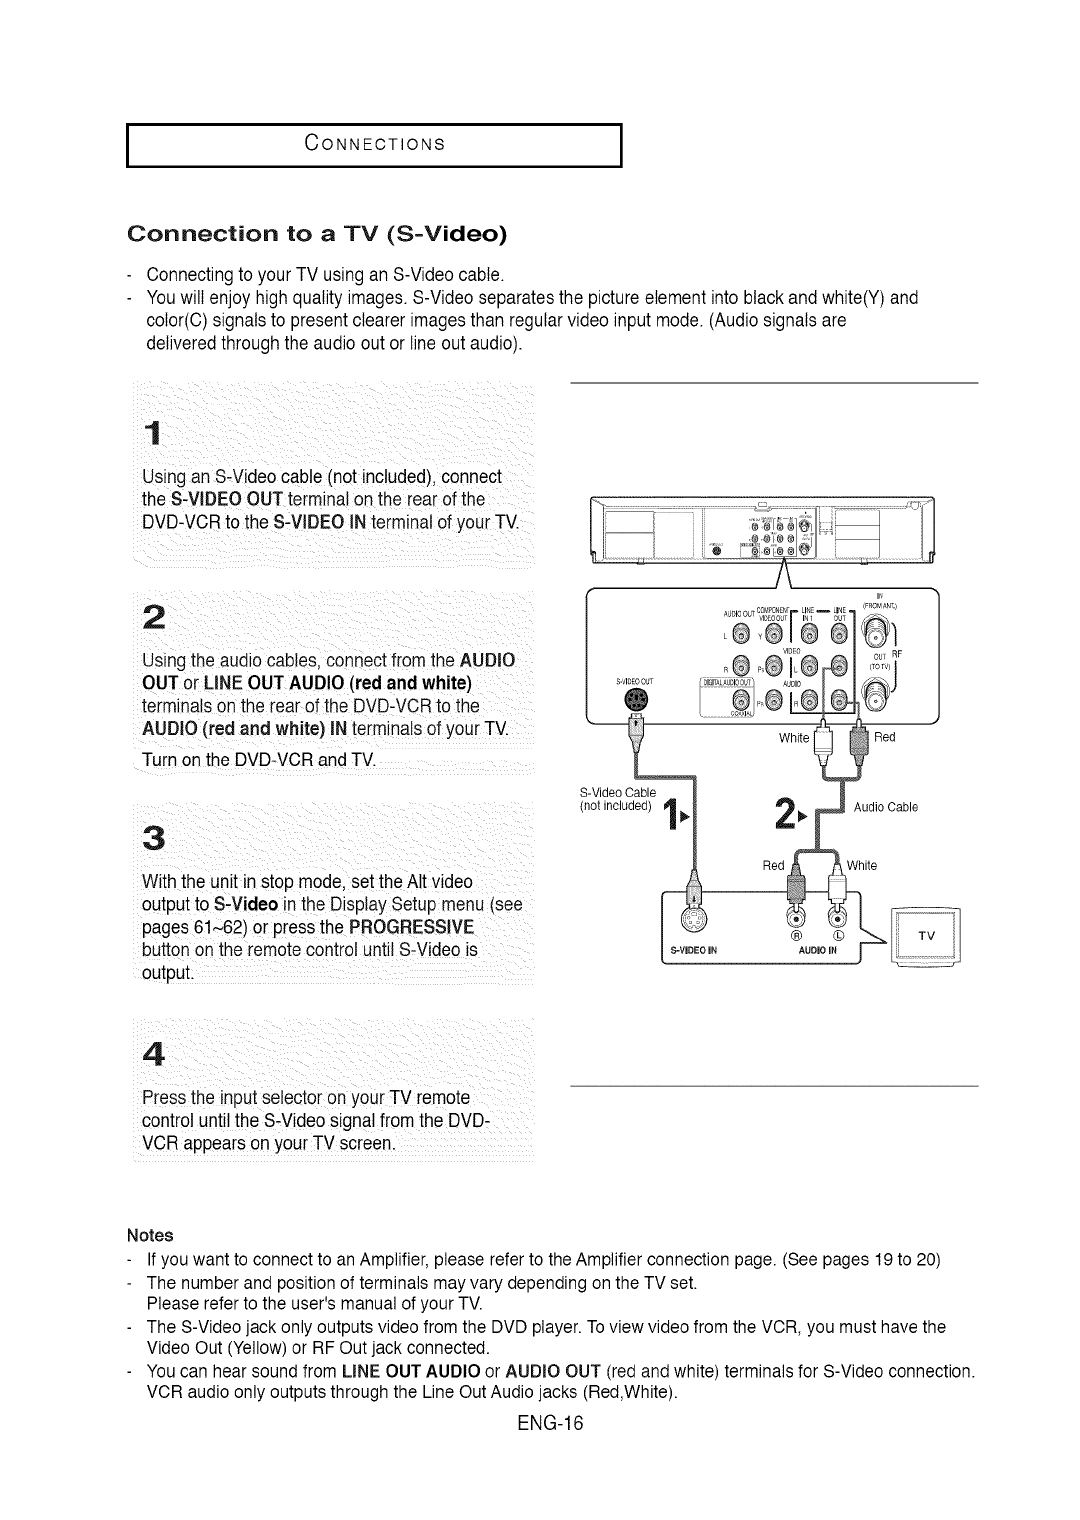
Connection to a TV (S-Video)
Connectingto your TV usingan S-Videocable.
Youwill enjoy highquality images.S-Videoseparatesthe pictureelement into blackand white(Y)and
color(C)signalsto presentclearer imagesthan regularvideo input mode. (Audiosignalsare
deliveredthrough the audio out or line out audio).
1
Using an S-Videocable (not included),connect
the S-VIDEOOUT terminalon the rearof the
DVD-VCRto the S-VIDEOINterminal of your TV.
2
Usingthe audiocables, connectfrom the AUDIO
OUTor LINE OUTAUDIO (red and white)
terminalson the rearof the DVD-VCRto the
AUDIO (red and white) IN terminalsof your TV.
Turn onthe DVD-VCRandTV.
3
Withthe unit in stop mode,set the Alt video
outputto S-Video inthe Display Setup menu (see
pages 61~62) or press the PROGRESSIVE
buttonon the remotecontroluntil S-Video is
output.
S-VideoCable
(not included) I
EO IN
IN
COP,_PONENF LIN£ _ LINE [FROMAN1,)
White Red
Press the input selectoron your TV remote
controluntil the S.Video signal fromthe DVD-
VCR appears on your TV Screen.
Notes
If you want to connect to an Amplifier, please refer to the Amplifier connection page. (See pages 19 to 20)
The number and position of terminals may vary depending on the TV set.
Please refer to the user's manual of your TV.
The S-Video jack only outputs video from the DVD player. To view video from the VCR, you must have the
Video Out (Yellow) or RF Out jack connected.
You can hear sound from LINE OUT AUDIO or AUDIO OUT (red and white) terminals for S-Video connection.
VCR audio only outputs through the Line Out Audio jacks (Red,White).
ENG-16
ICONNECTIONS
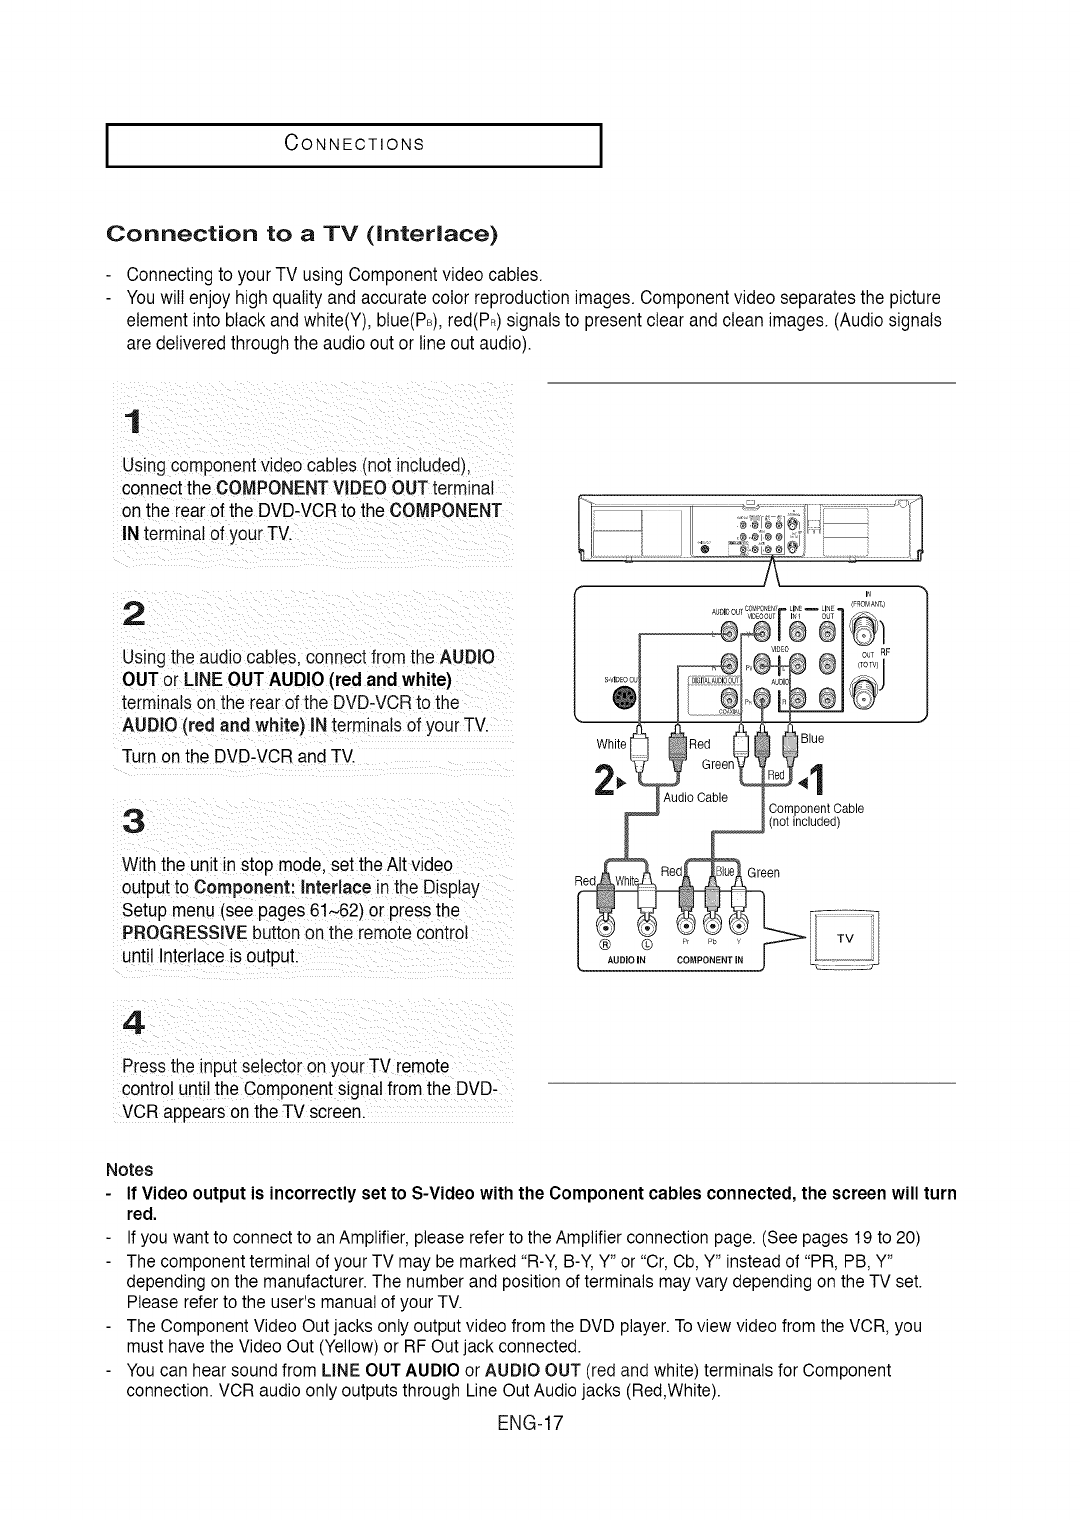
Connection to a TV (Interlace)
Connectingto yourTV using Componentvideo cables.
Youwill enjoy highqualityand accurate color reproductionimages.Componentvideo separatesthe picture
elementinto blackand white(Y),btue(PB),red(PR)signalsto presentclear and clean images. (Audiosignals
are deliveredthrough the audio out or lineout audio).
1
Usingcomponentvideo cables (not inctudedJ.
connectthe COMPONENTVIDEO OUTterminal
onthe rear of the DVD-VCRto the COMPONENT
INterminal of yourTV.
2
Usingthe audiocables, connectfromthe AUDIO
OUTor LINE OUTAUDIO (red and white)
terminals on the rearof the DVD-VCRto the
AUDIO(red and white) INterminals of yourTV.
Turn on the DVD-VCRandTV.
3
With the unit in stop mode.set the AItvideo
outputto Component: Interlace in the Display
Setup menu (see pages 61~62) or pressthe
PROGRESSIVEbuttonon the remotecontrol
until Interlace is output.
® U
Wh'telt@ed O'u°
- 0,ooab,e Ico,nponen,cab,e
A (not included)
4
Pressthe input selectoron your TV remote
controluntil the Componentsignalfrom the DVD-
VCRappears on the TV screen.
Notes
If Video output is incorrectly set to S-Video with the Component cables connected, the screen will turn
red.
If you want to connect to an Amplifier, please refer to the Amplifier connection page. (See pages 19 to 20)
The component terminal of your TV may be marked "R-Y, B-Y, Y" or "Cr, Cb, Y" instead of "PR, PB, Y"
depending on the manufacturer. The number and position of terminals may vary depending on the TV set.
Please refer to the user's manual of your TV.
The Component Video Out jacks only output video from the DVD player. To view video from the VCR, you
must have the Video Out (Yellow) or RF Out jack connected.
You can hear sound from LINE OUT AUDIO or AUDIO OUT (red and white) terminals for Component
connection. VCR audio only outputs through Line Out Audio jacks (Red,White).
ENG-17
ICONNECTIONS I
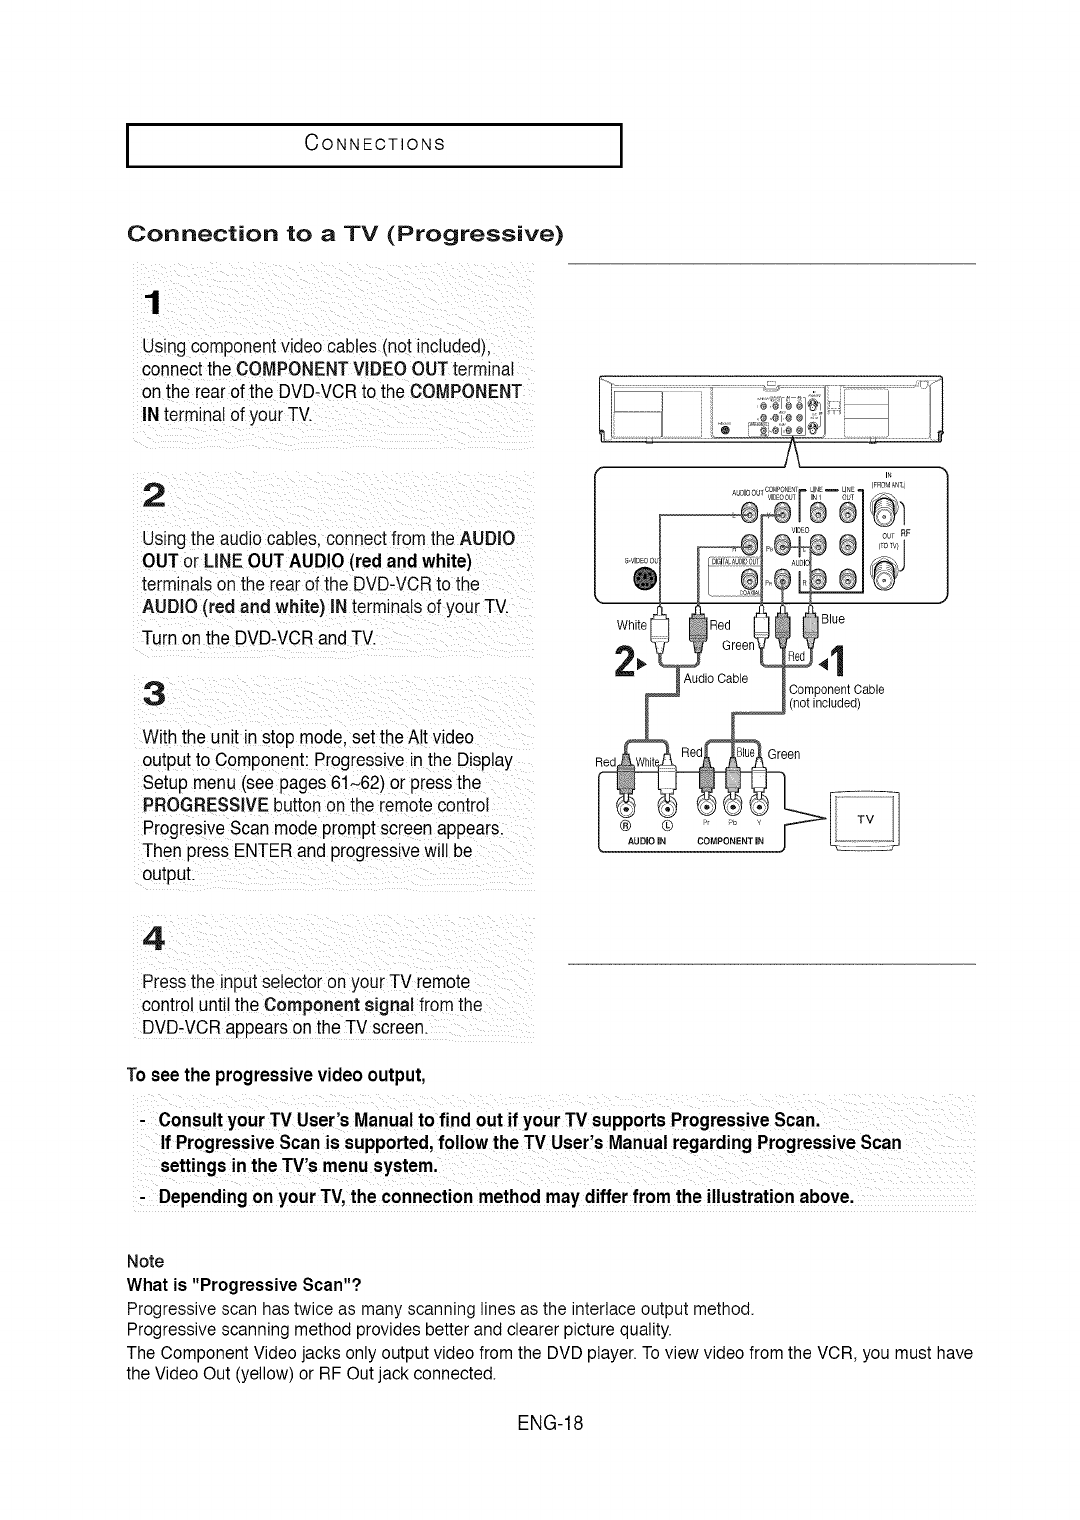
Connection to a TV (Progressive)
1
Usingcomponentvideo cables [notincluded).
connectthe COMPONENTVIDEO OUTterminal
on the rear of the DVD-VCRto the COMPONENT
INterminalof your TV.
2
Usingthe audiocables, connectfrom the AUDIO
OUTor LINE OUTAUDIO (red and white)
terminalson the rearof the DVD-VCRto the
AUDIO (red and white) INterminals of your TV.
Turn onthe DVD-VCRandTV.
3
Withthe unit in stop mode,set theAIt video
outputto Component:Progressivein the Display
Setup menu (see pages61~62) or pressthe
PROGRESSIVEbuttononthe remotecontrol
ProgresiveScan mode promptscreenappears.
Then pressENTERand progressivewill be
output.
J
Whlte 1 _Red _I
reen'CJ4
JA ,ooab,e
ComponentCable
Z (no[ incluaea)
]
4
Press the input selectoron your TV remote
controluntil the Component signal from the
DVD-VCRappearson the TV screen.
To see the progressivevideo output,
-Depending on your TV,the connectionmethod maydiffer fromthe illustrationabove,
Note
What is "Progressive Scan"?
Progressive scan has twice as many scanning lines as the interlace output method.
Progressive scanning method provides better and clearer picture quality.
The Component Video jacks only output video from the DVD player. To view video from the VCR, you must have
the Video Out (yellow) or RF Out jack connected.
ENG-18
ICONNECTIONS
Connection to an Audio System
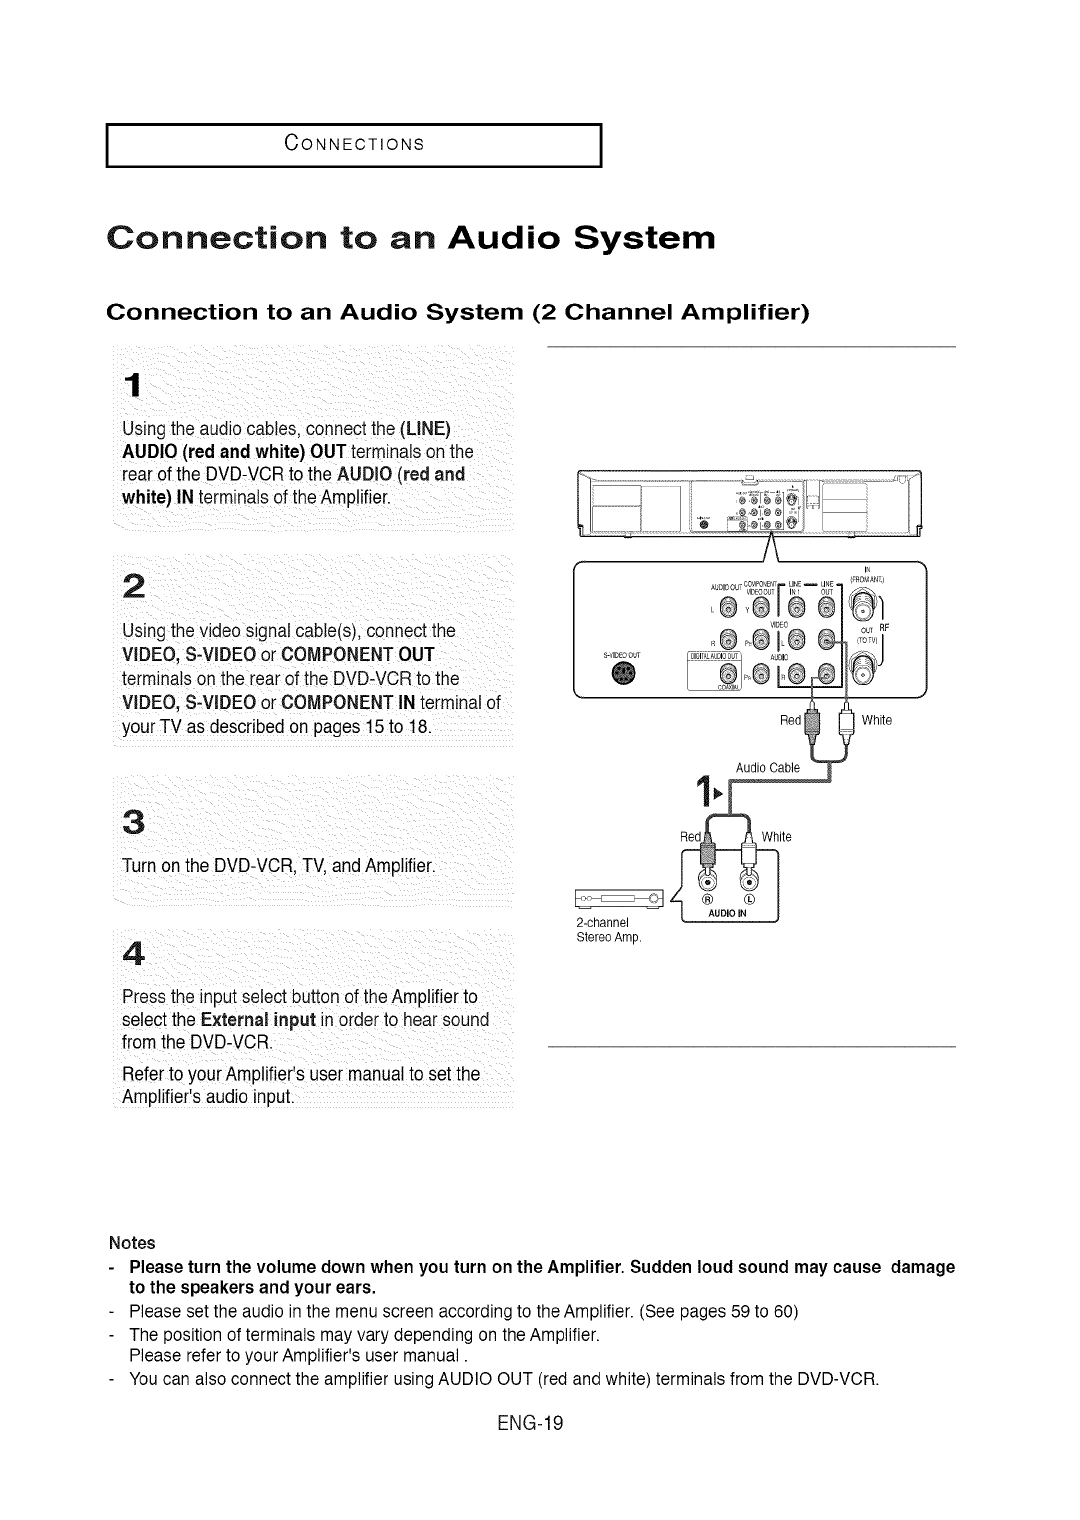
Connection to an Audio System (2 Channel Amplifier)
1
Usingthe audio cables, connectthe (LINE)
AUDIO(red andwhite) OUTterminalson the
rearof the DVD-VCRto the AUDIO (red and
white) IN terminals of the Amplifier.
2
Usingthe video signal cabb(s), connect the
VIDEO,S-VIDEOor COMPONENTOUT
terminals on the rearof the DVD-VCRto the
VIDEO,S-VIDEOor COMPONENTIN terminalof
yourTV as describedon pages15 to 18.
3
Turnon the DVD-VCR,TV,andAmplifier.
4
Pressthe inputselect buttonof the Amplifierto
selectthe E×ternal inputinorder to hearsound
from the DVD-VCR.
Referto yourAmplifier's usermanualto set the
Amplifiers audioinput
[S-VIDEOOUT
®
Red White
Audio Cable
2-channel
Stereo Amp.
Notes
Please turn the volume down when you turn on the Amplifier. Sudden loud sound may cause damage
to the speakers and your ears,
Please set the audio in the menu screen according to the Amplifier. (See pages 59 to 60)
The position of terminals may vary depending on the Amplifier.
Please refer to your Amplifier's user manual.
You can also connect the amplifier using AUDIO OUT (red and white) terminals from the DVD-VCR.
ENG-19
ICONNECTIONS I
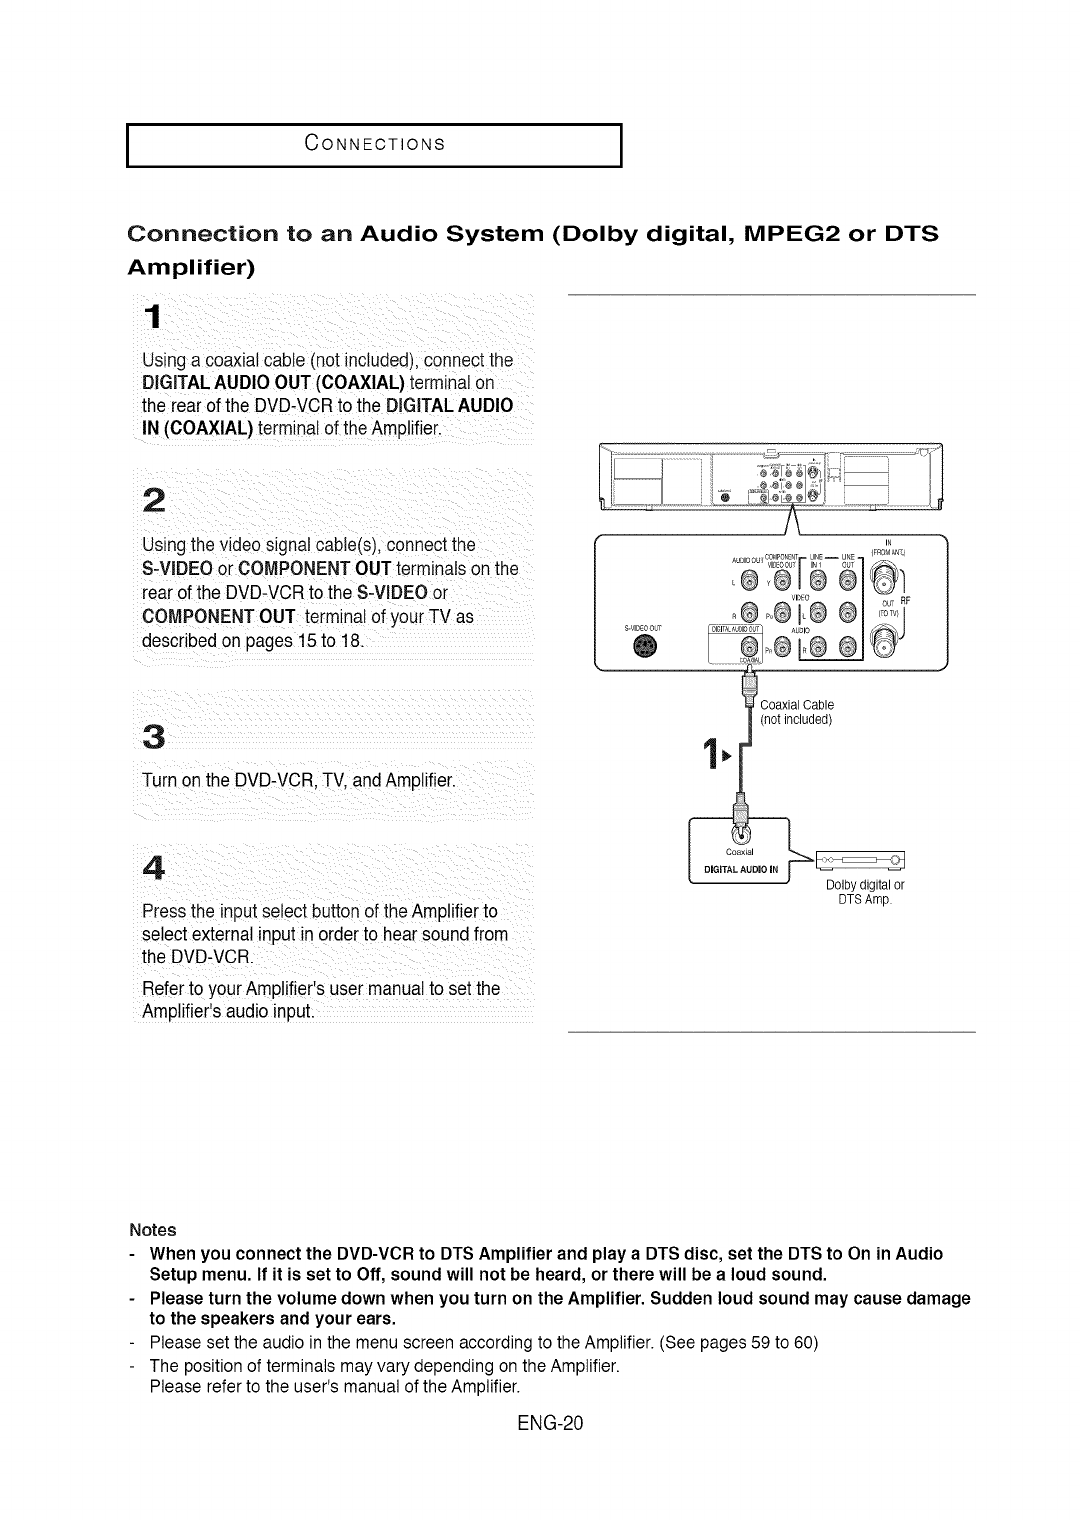
Connection to an Audio System (Dolby digital, MPEG2 or DTS
Amplifier)
1
Using acoaxial cable (not included),connectthe
DIGITALAUDIO OUT (COAXIAL)terminal on
the rearof the DVD-VCRto the DIGITALAUDIO
IN (COAXIAL) terminalof the Amplifier.
2
Usingthe video signal cable(s),connect the
S-VIDEOor COMPONENTOUT terminalson the
rear ofthe DVD-VCRto the S-VIDEOor
COMPONENTOUT terminal of your TV as
describedon pages 15to 18.
3
Turn onthe DVD-VCR.TV.andAmplifier.
4
Pressthe input select buttonof theAmplifierto
select externalinput in orderto hearsound from
the DVD-VCR.
Referto yourAmplifier's usermanualto set the
Amplifiers audio input
S-VIOEOOUT
®
Coaxial Cable
(not included)
o,o,2:'o,o,.
Dolby digital or
DTSAmp.
Notes
When you connect the DVD-VCR to DTS Amplifier and play a DTS disc, set the DTS to On in Audio
Setup menu. If it is set to Off, sound will not be heard, or there will be a loud sound.
Please turn the volume down when you turn on the Amplifier. Sudden loud sound may cause damage
to the speakers and your ears.
Please set the audio in the menu screen according to the Amplifier. (See pages 59 to 60)
The position of terminals may vary depending on the Amplifier.
Please refer to the user's manual of the Amplifier.
ENG-20
ICONNECTIONS
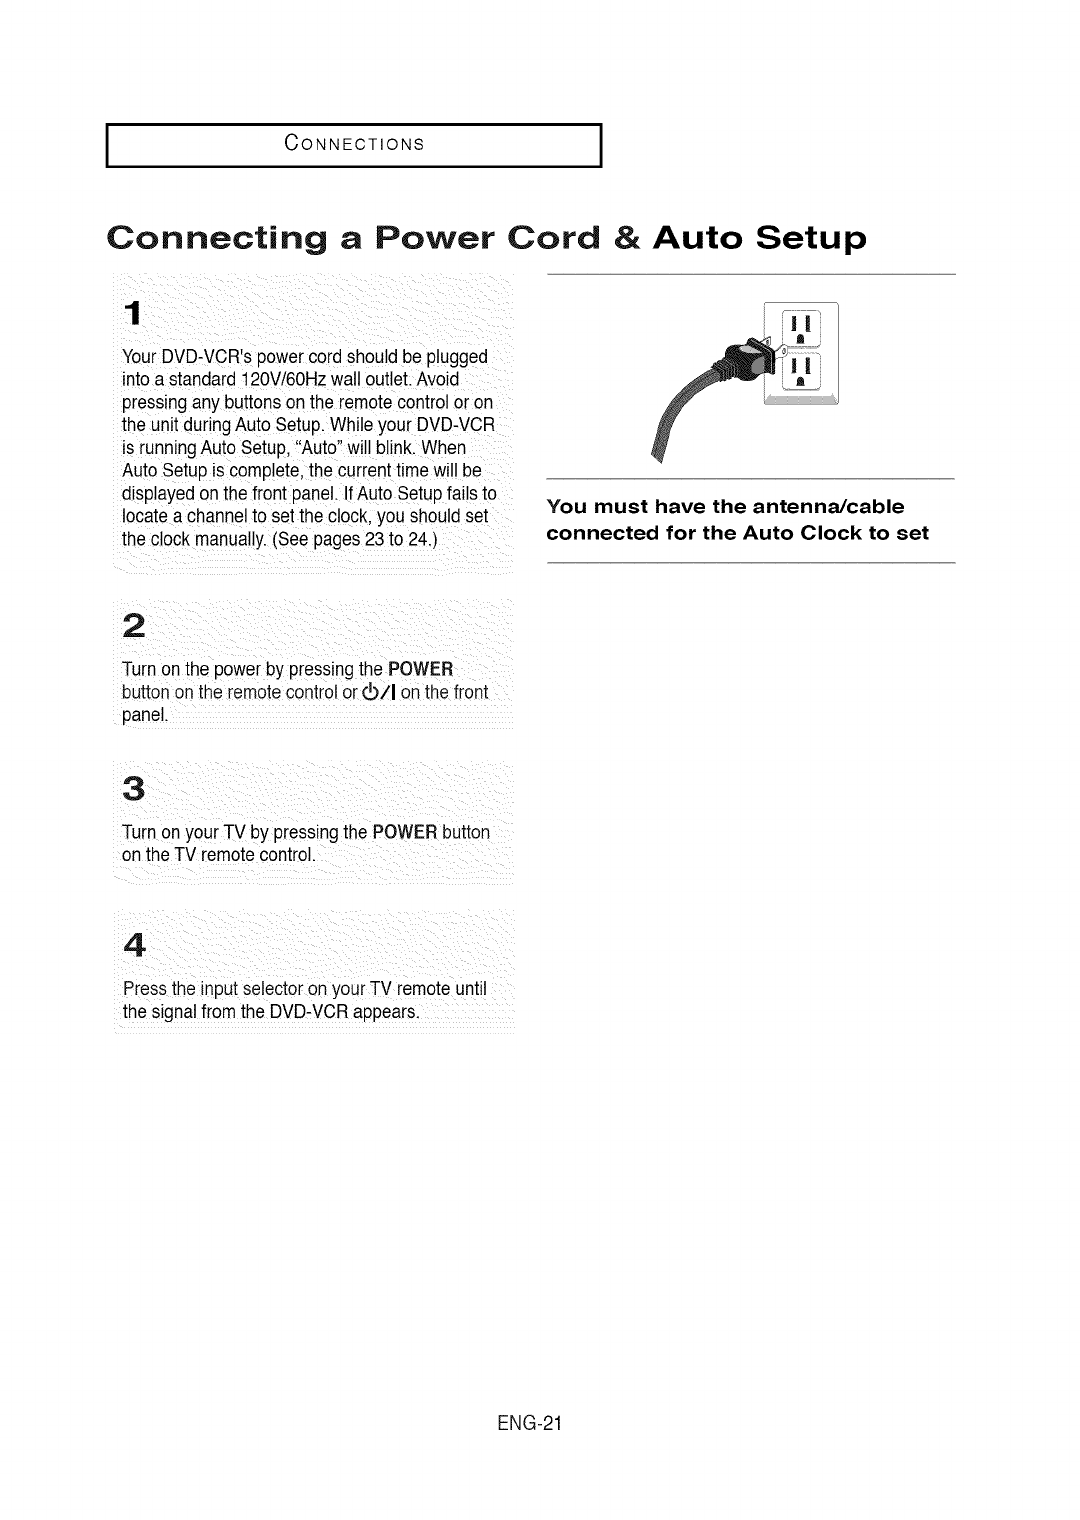
Connecting aPower Cord & Auto Setup
1
YourDVD-VCR'spower cord should be plugged
into a standard120V/60Hzwall outlet. Avoid
pressingany buttonson the remotecontrol or on
the unit duringAuto Setup.While your DVD-VCR
is runningAuto Setup,"Auto"will blink.When
Auto Setup is complete,the currenttimewill be
displayedonthe front panel. IfAuto Setupfails to
locatea channel to setthe clock,you should set
the clock manually.(See pages23 to 24.)
You must have the antenna/cable
connected for the Auto Clock to set
2
Turn on the power by pressingthe POWER
I
buttonon the remotecontrolor40/I on the front
panel.
Turn on your -I-Vby pressingthe POWERbutton
onthe TV remotecontrol.
Pressthe input selectoron your TV remote until
the signalfrom the DVD_VCRappears,
ENG-21
INITIAL SETUP
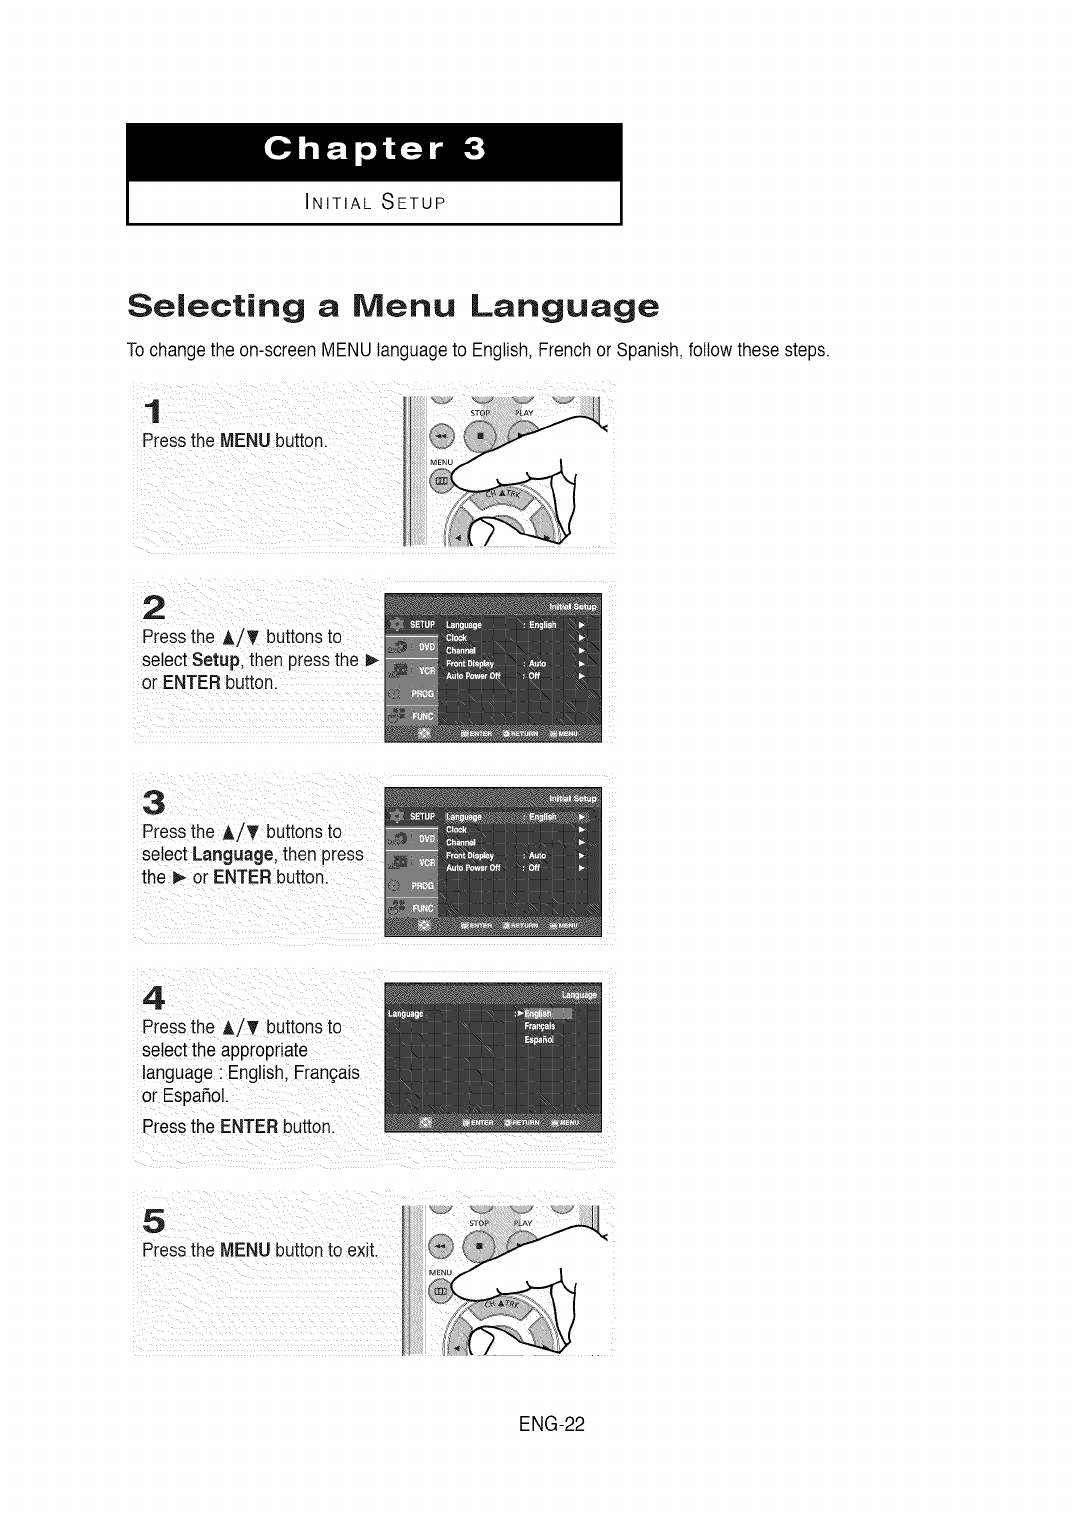
Selecting a Menu Language
Tochange the on-screenMENUlanguageto English,Frenchor Spanish,followthese steps.
1
Pressthe MENU button.
2
Pressthe A/T buttonsto
select Setup, then pressthe P,-
or ENTER button.
3
Pressthe A/T buttonsto
select Language, then press
the _ or ENTERbutton.
4
Pressthe A/T buttonsto
select the appropriate
language: English,Fran(_als
or EspaSol.
Pressthe ENTERbutton.
5
Pressthe MENU buttonto exit.
ENG-22
I INITIAL SETUP
Setting the Clock
This menu is used to set the currenttime. You needto setthe timeto use timer recording.
Setting the Clock Automatically
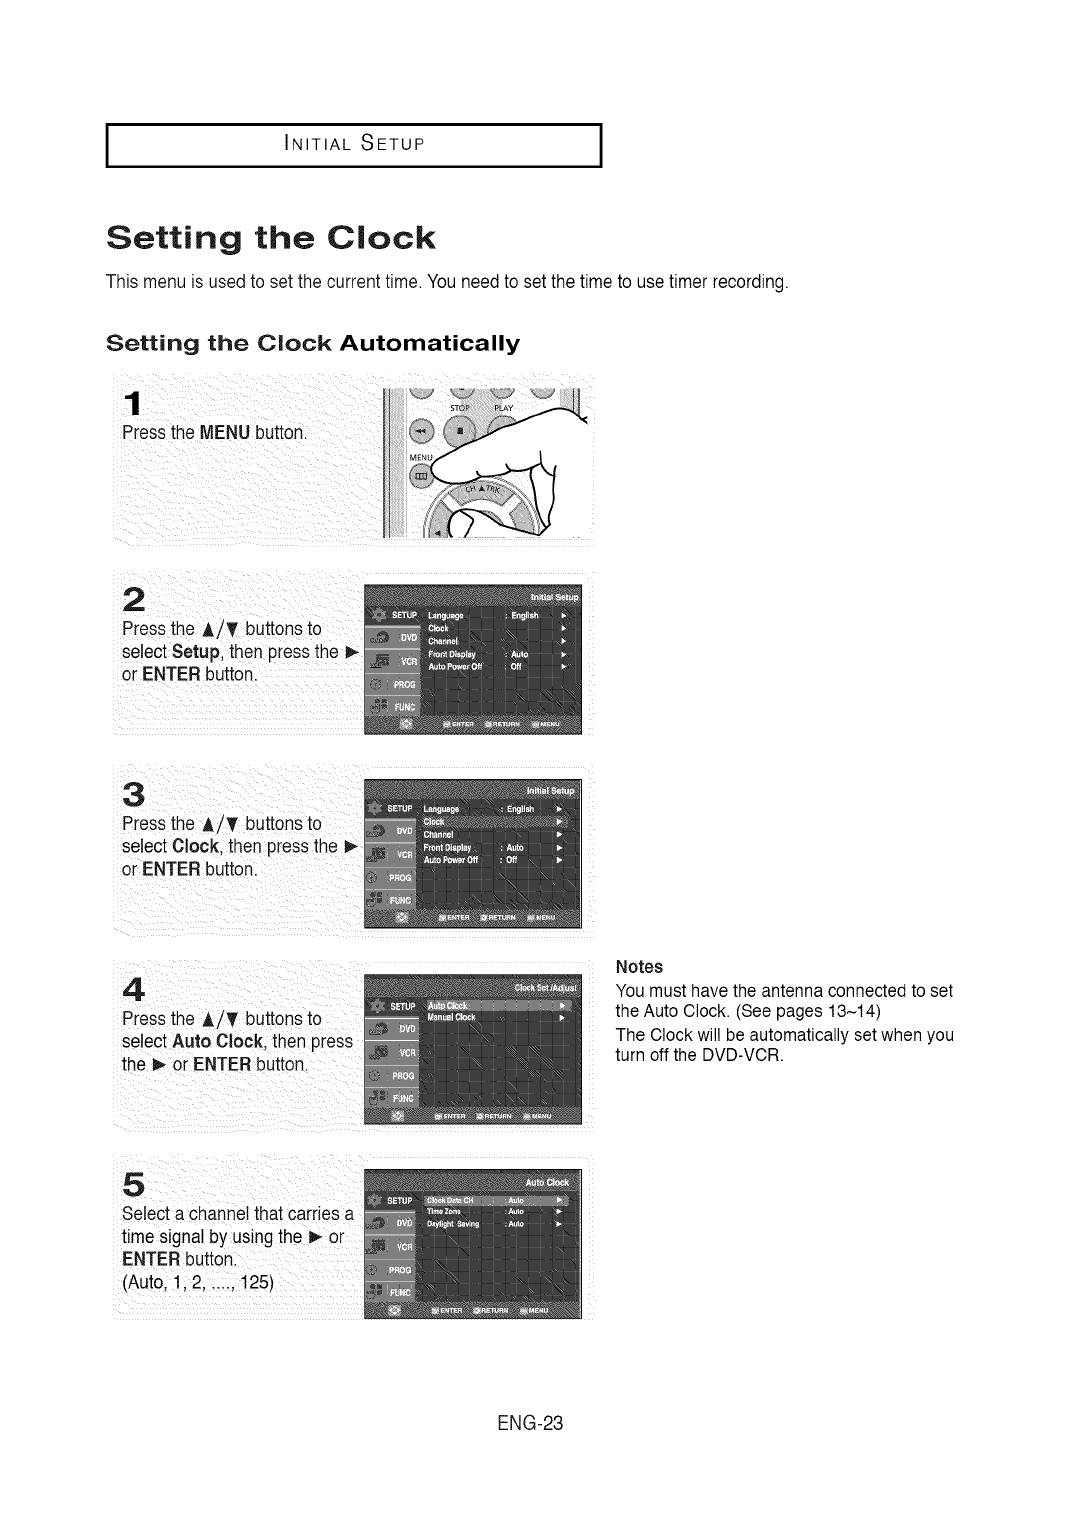
1
Pressthe MENUbutton.
2
Pressthe A/T buttonsto
select Setup, then pressthe
or ENTERbutton.
3
Pressthe A/T buttonsto
select Clock. then pressthe
or ENTERbutton.
4
Pressthe A/T buttonsto
select Auto Clock. then press
the _- or ENTER button.
Notes
You must have the antenna connected to set
the Auto Clock. (See pages 13-14)
The Clock will be automatically set when you
turn off the DVD-VCR.
5
Selecta channel that carriesa
time signal by using the D,-or
ENTERbutton.
(Auto,1,2 ...... 125)
ENG-23
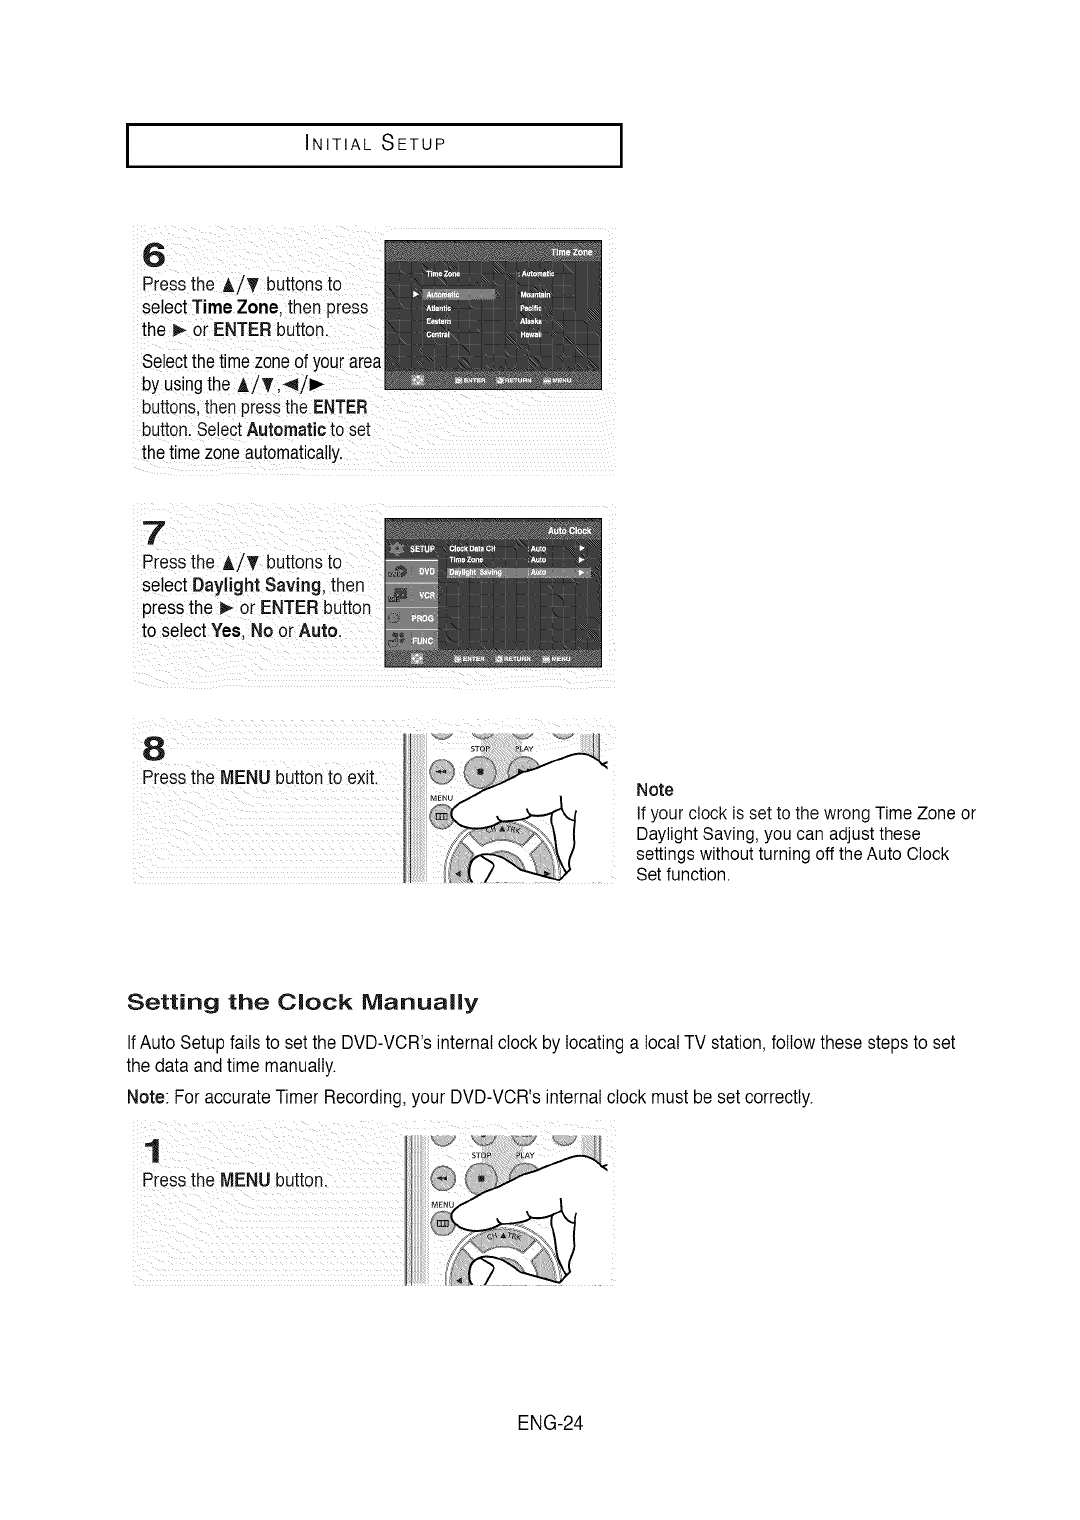
I INITIAL SETUP I
Press the AiT buttonsto
select Time Zone, thenpress
the _ or ENTERbutton.
select the t!mezone of you[area
by usingtheA/Ti41/I_
buttons,thenpressthe ENTER
button. SelectAutomaticto set
the timezoneautomatically,
P[ess the A_T buttonsto
select Daylight Saving, then
pressthe _or
to select Yes,No
Note
If your clock is set to the wrong Time Zone or
Daylight Saving, you can adjust these
settings without turning off the Auto Clock
Set function.
Setting the Clock Manually
IfAuto Setup failsto set the DVD-VCR'sinternal clock by locatinga local TV station,followthese stepsto set
the data and time manually.
Note: For accurateTimer Recording,your DVD-VCR'sinternalclock must be setcorrectly.
ENG-24
I INITIAL SETUP
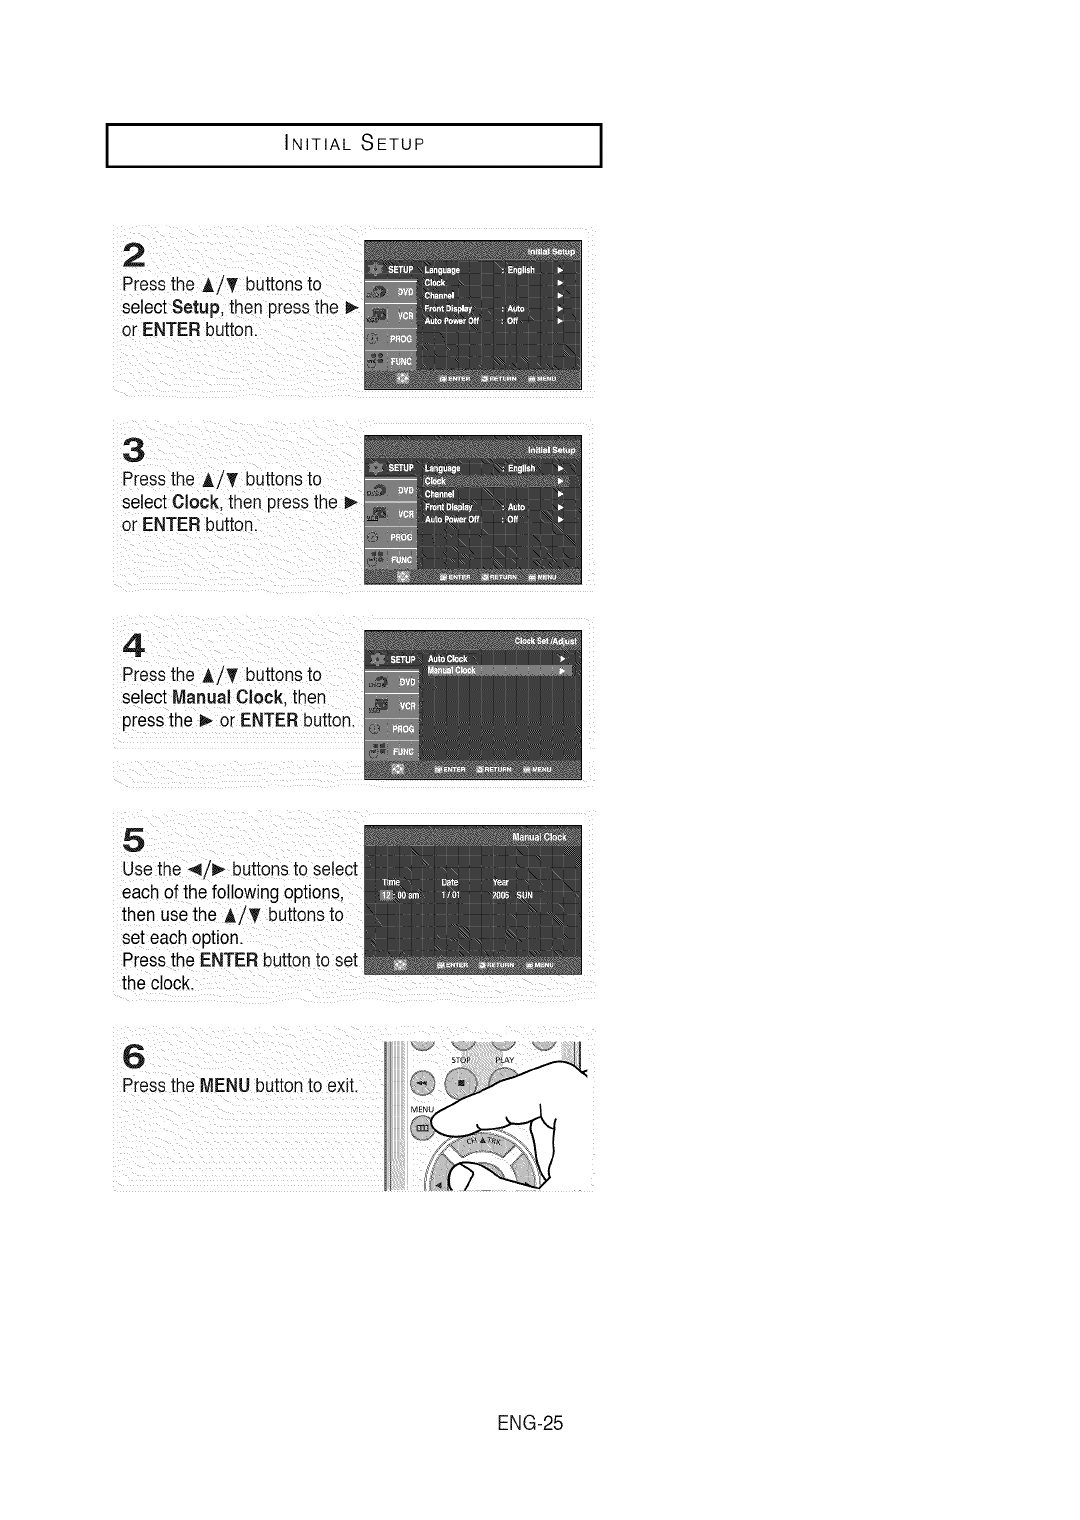
2
Pressthe A/T buttonsto
select Setup, then pressthe I_
or ENTERbutton.
3
Pressthe A/T buttonsto
select Clock, then pressthe
or ENTERbutton.
4
Pressthe A/T buttonsto
select Manual Clock. then
pressthe _ or ENTERbutton.
5
Usethe 4/!1_ buttonsto select
each of the followingoptions,
then use the A/T buttonsto
set each option.
Pressthe ENTERbuttonto set
the clock.
6
Pressthe MENUbutton to exit.
ENG-25
I INITIAL SETUP I
Memorizing the Channels
Selecting the Video Signal-source
This featureallowsyou to manuallyset the DVD-VCR'stuner bandto Antenna or Cable,whicheveryou
connectedto the Antenna Injack duringinitial setup.
Usethis settingonly if Auto Setup detectedthe incorrecttuner band, i.e.channelsare coming in onthe wrong
channel numbers.
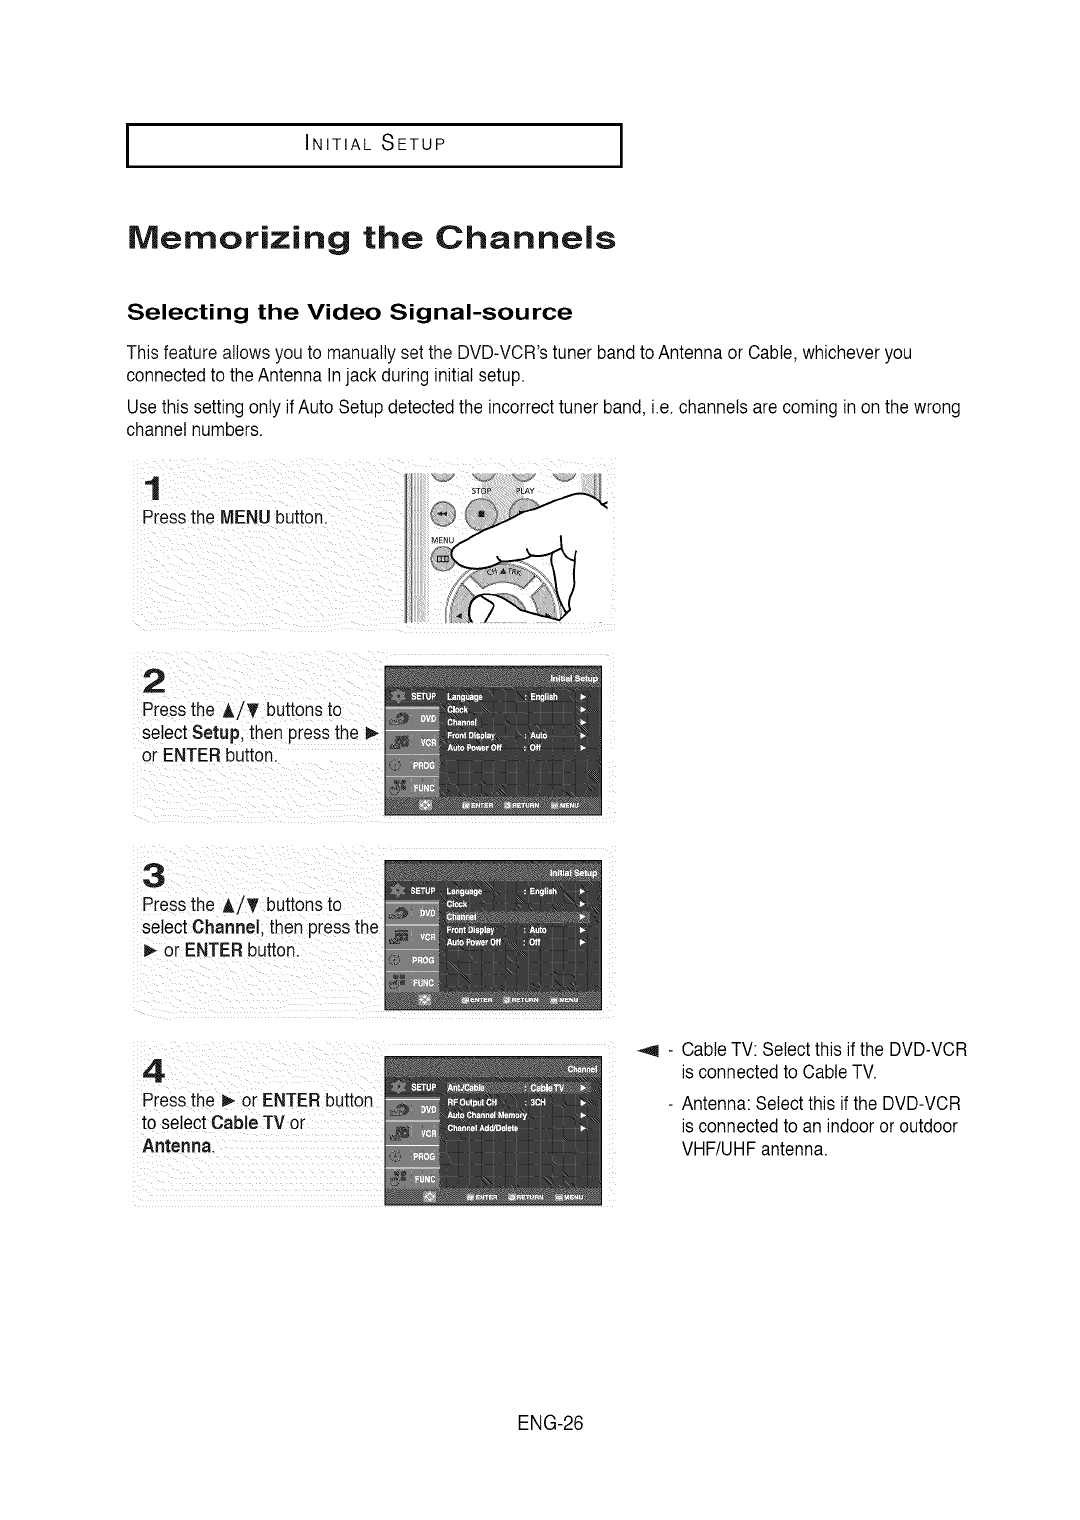
1
Pressthe MENU button.
2
Pressthe A/T buttonsto
select Setup, then pressthe I_-
or ENTER button.
3
Pressthe A,/T buttonsto
select Channel. then pressthe
or ENTER button.
4
Press the _ or ENTERbutton
to select Cable TV or
Antenna.
-Cable TV: Select this if the DVD-VCR
is connected to Cable TV.
- Antenna: Select this if the DVD-VCR
is connected to an indoor or outdoor
VHF/UHF antenna.
ENG-26
I INITIAL SETUP
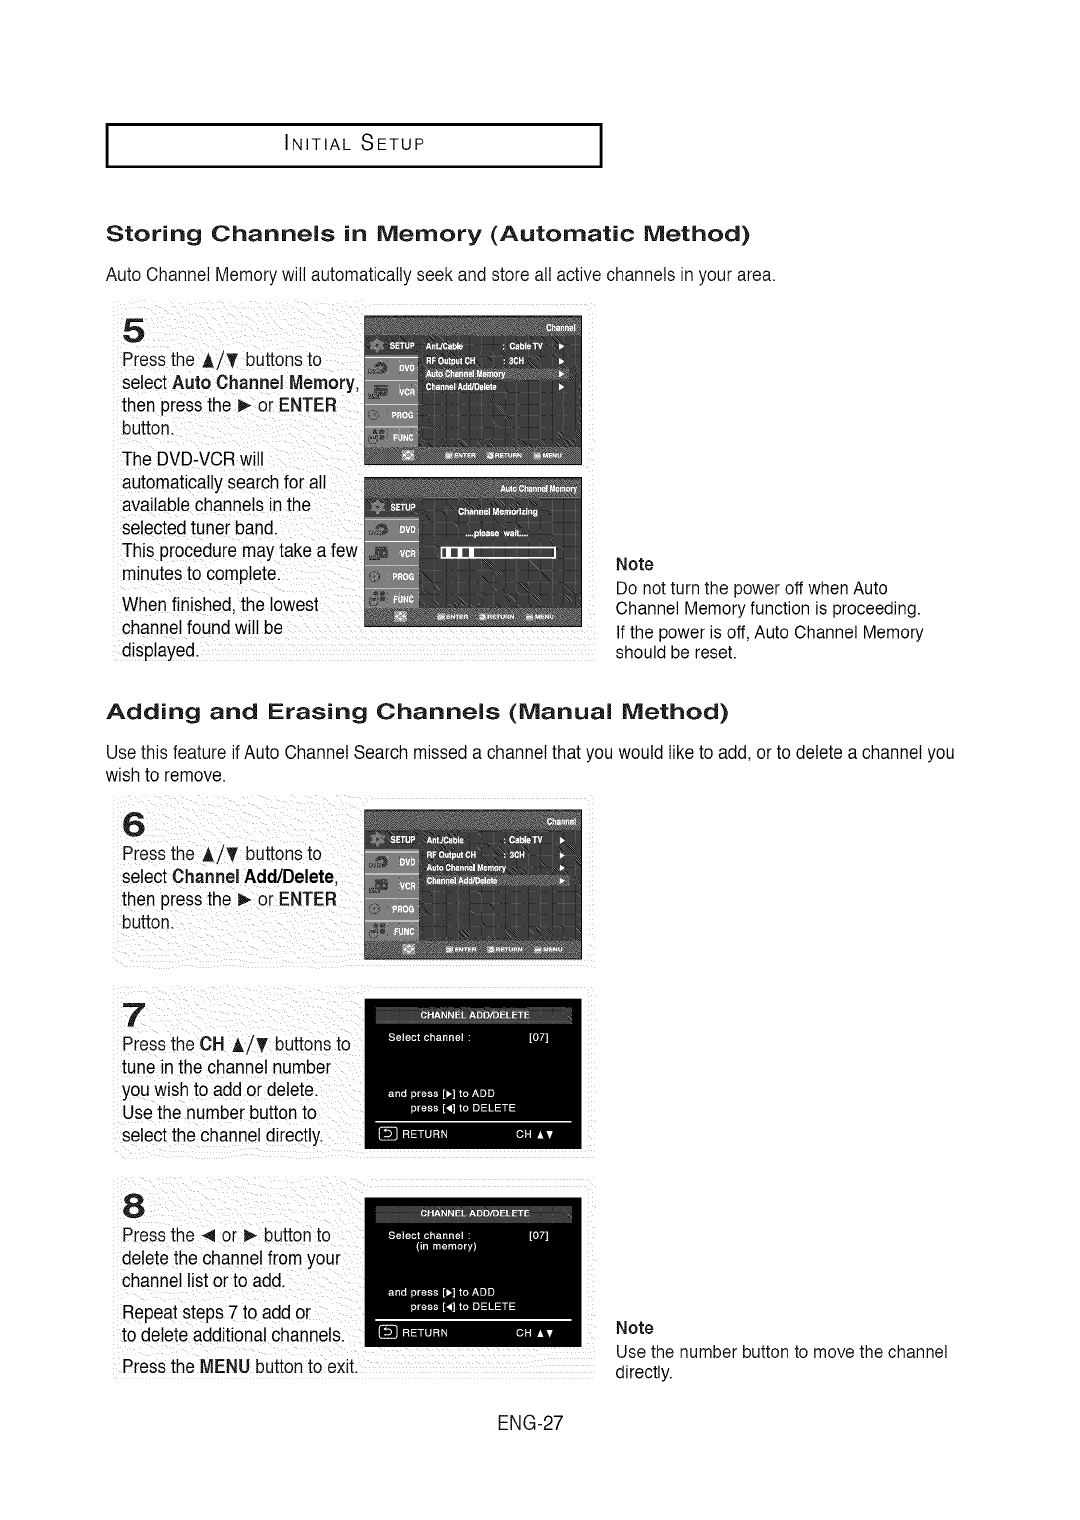
Storing Channels in Memory (Automatic Method)
Auto Channel Memorywill automaticallyseek and storeall active channelsin your area.
selectAuto Chart!
then
button.
The DVD-VCRwill
automaticallysearch for all
available channelsin the
selected tune[band. ....
This PrOcedurem
minutesto comp!ete.
When finished, the !0west
channelfound wil! be .........................................
disp!ayed, should be reset.
Note
Do not turn the power off when Auto
Channel Memory function is proceeding.
If the power is off, Auto Channel Memory
Adding and Erasing Channels (Manual Method)
Usethis feature if Auto Channel Search misseda channel that you would like to add, or to delete a channel you
wishto remove.
6
Pressthe ,_/T buttonsto
select Channel Add/Delete.
then pressthe _ or ENTER
button.
7
Pressthe OH A/T buttons to
tune in the channel number
you wishto add or delete.
Usethe number buttonto
selectthe channel directly.
•
Pressthe _ or _ buttonto
deletethe channelfrom your
channe_listor to add.
Repeatsteps 7 to add or
to deleteadditional channels.
Pressthe MENUbuttonto exit.
Note
Use the number button to move the channel
directly.
ENG-27
I INITIAL SETUP I
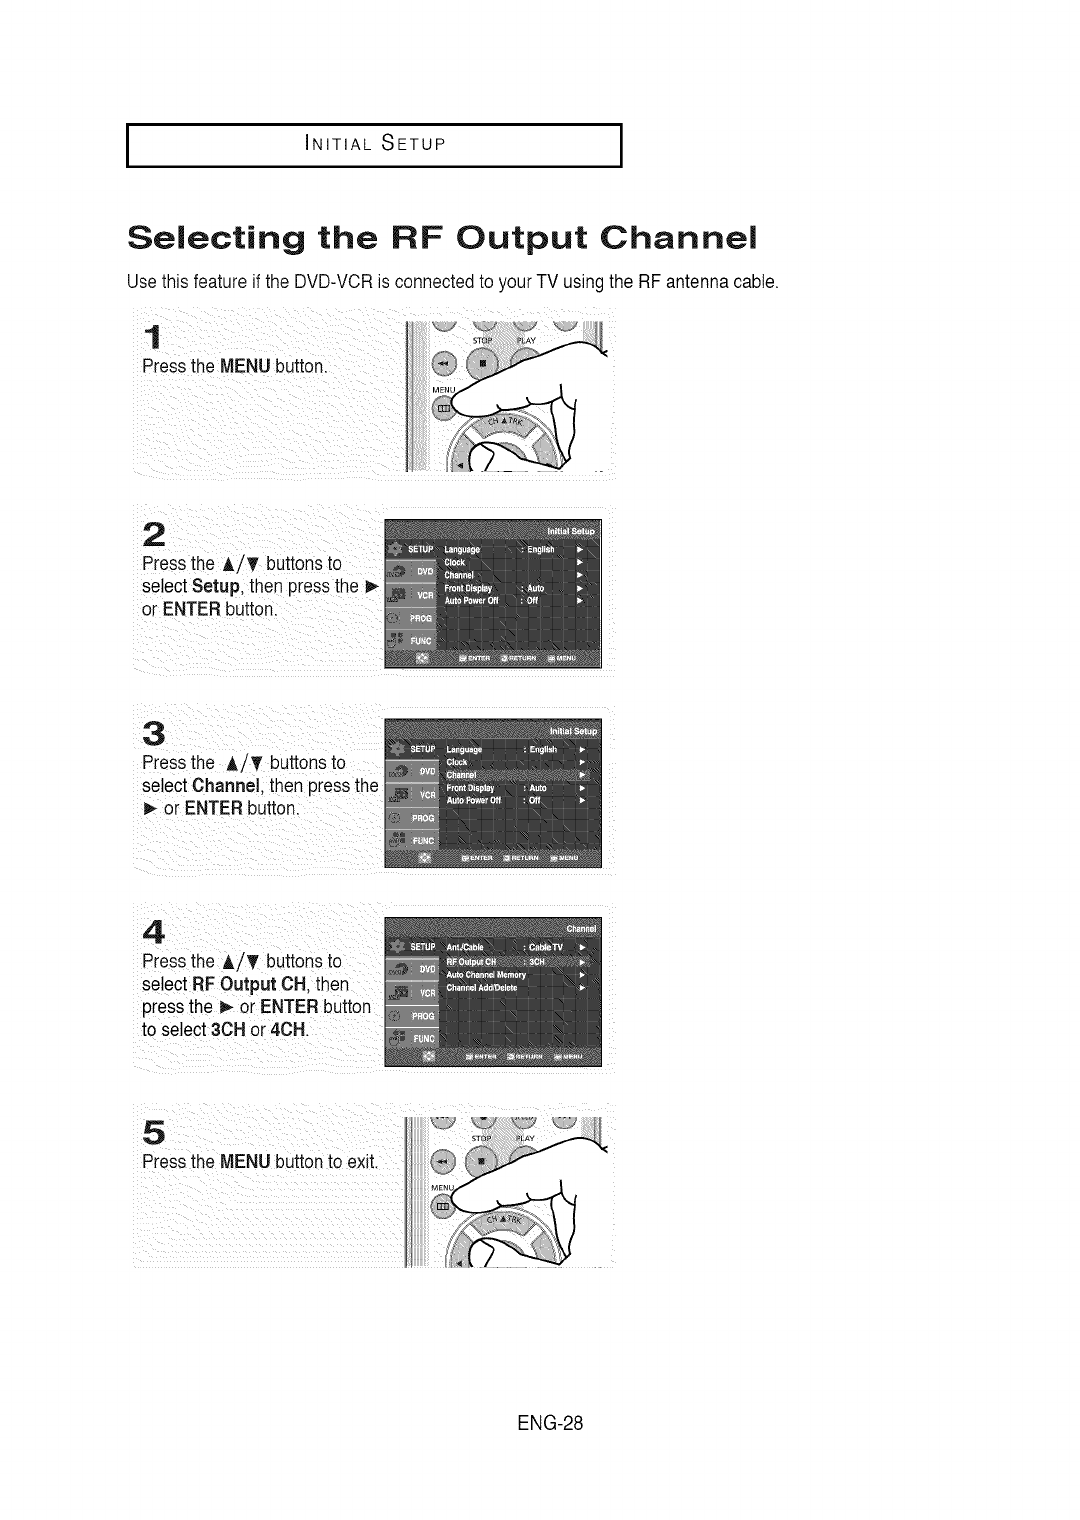
Selecting the RF Output Channel
Usethis feature if the DVD-VCRis connectedto your TV usingthe RF antenna cable.
1
Pressthe MENU button.
2
Pressthe A/_' buttonsto
select Setup, then pressthe
or ENTER button.
3
Pressthe A/_' buttonsto
select Channel, then pressthe
_- or ENTER button.
4.
Pressthe A/T buttonsto
select RF Output OH.then
pressthe _ or ENTER button
to select 3OH or 4OH.
5
Pressthe MENU buttonto exit.
ENG-28
I INITIAL SETUP
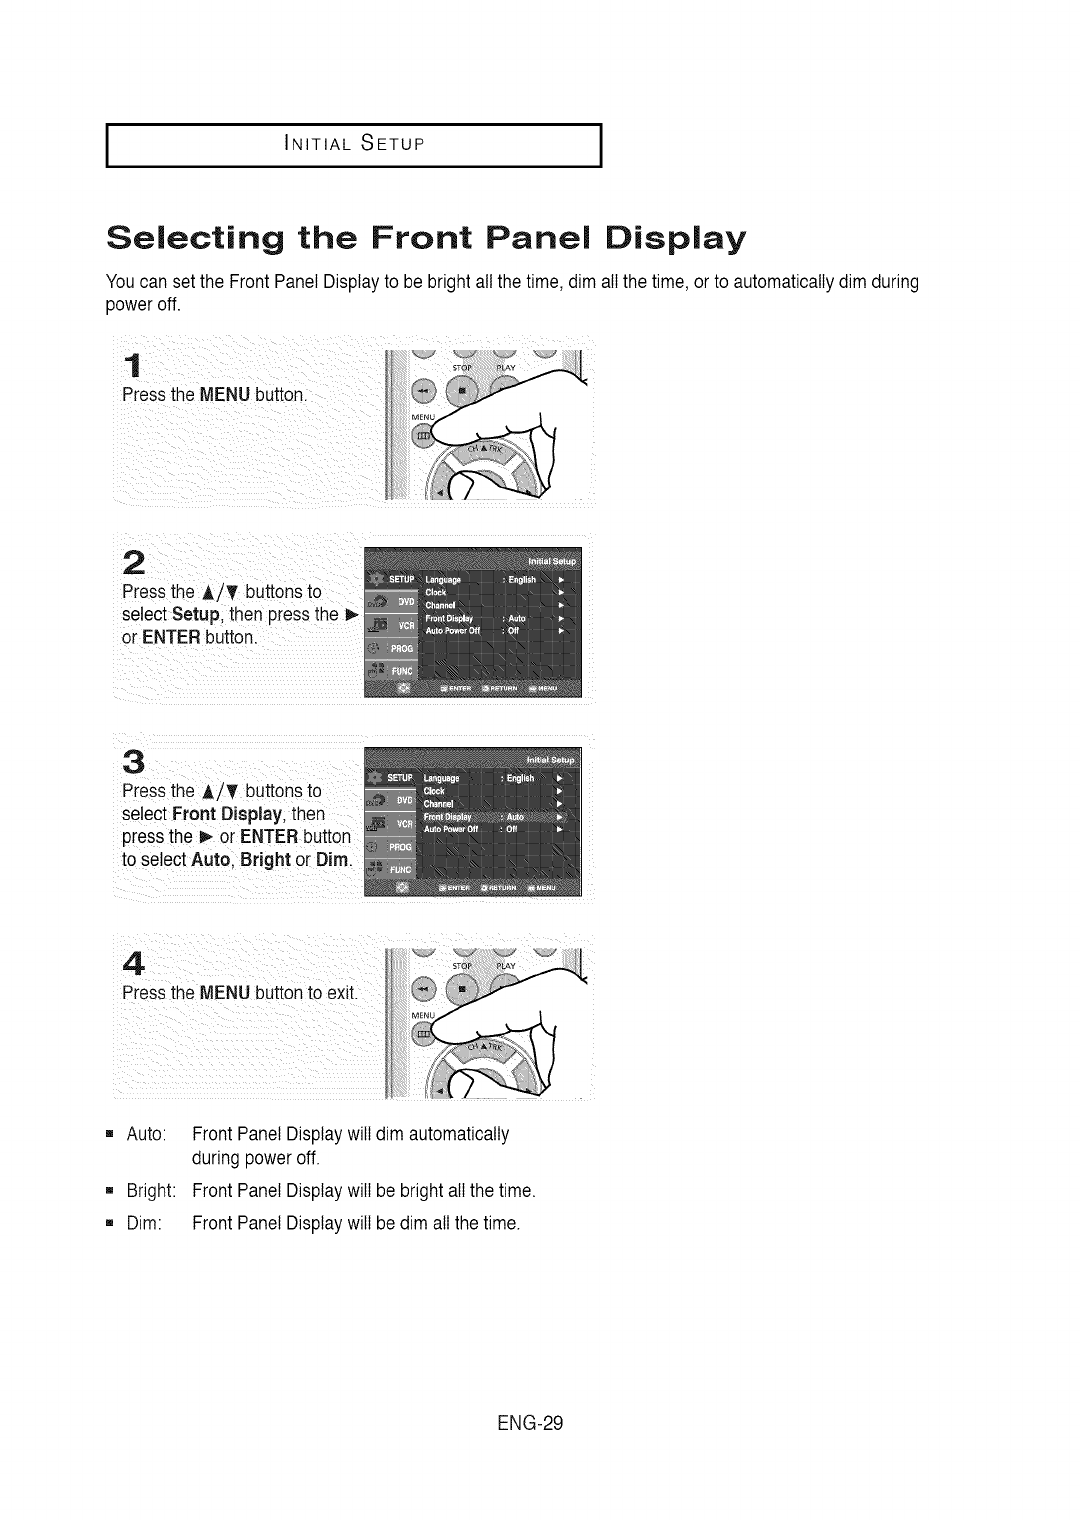
Selecting the Front Panel Display
Youcan set the FrontPanel Displayto be bright allthe time, dim all the time, or to automaticallydim during
poweroff.
1
Pressthe MENUbutton.
2
Pressthe A/T buttonsto
select Setup, then pressthe P-
or ENTERbutton.
3
Pressthe A/T buttonsto
select Front Display, then
pressthe _ or ENTERbutton
to select Auto. Bright or Dim.
4.
Pressthe MENUbutton to exit.
[]
[]
Auto:
Bright:
Dim:
Front PanelDisplay will dim automatically
duringpower off.
Front PanelDisplay will be bright all the time.
Front PanelDisplay will be dim all the time.
ENG-29
I INITIAL SETUP I
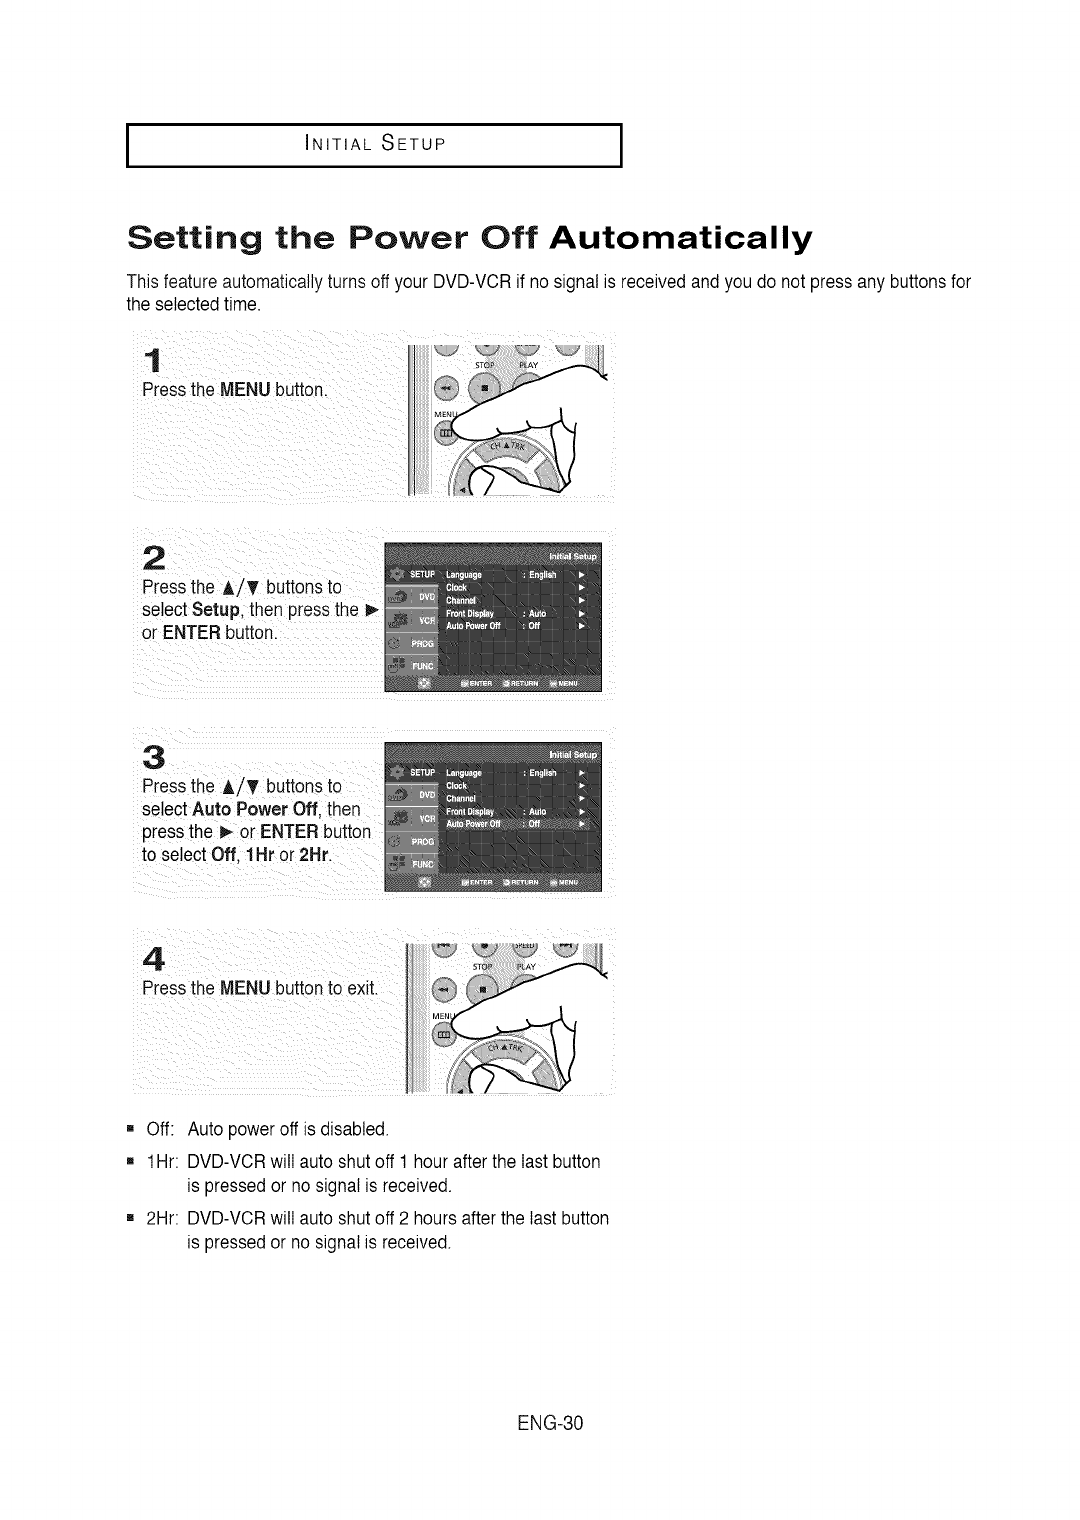
Setting the Power Off Automatically
This featureautomaticallyturns off your DVD-VCRif no signal is receivedand you do not press any buttons for
the selected time.
1
Pressthe MENU button.
2
Pressthe A/T buttonsto
select Setup, then pressthe b-
or ENTER button.
3
Pressthe A/T buttonsto
select Auto Power Off, then
pressthe _ or ENTER button
to select Off, 1Hr or 2Hr.
4
Pressthe MENU buttonto exit.
[] Off: Auto power off is disabled.
[] 1Hr: DVD-VCRwill auto shutoff 1 hourafter the lastbutton
is pressedor no signal is received.
[] 2Hr: DVD-VCRwill auto shutoff 2 hours afterthe last button
is pressedor no signal is received.
ENG-30
DVD OPERATIONS
Playing aDisc
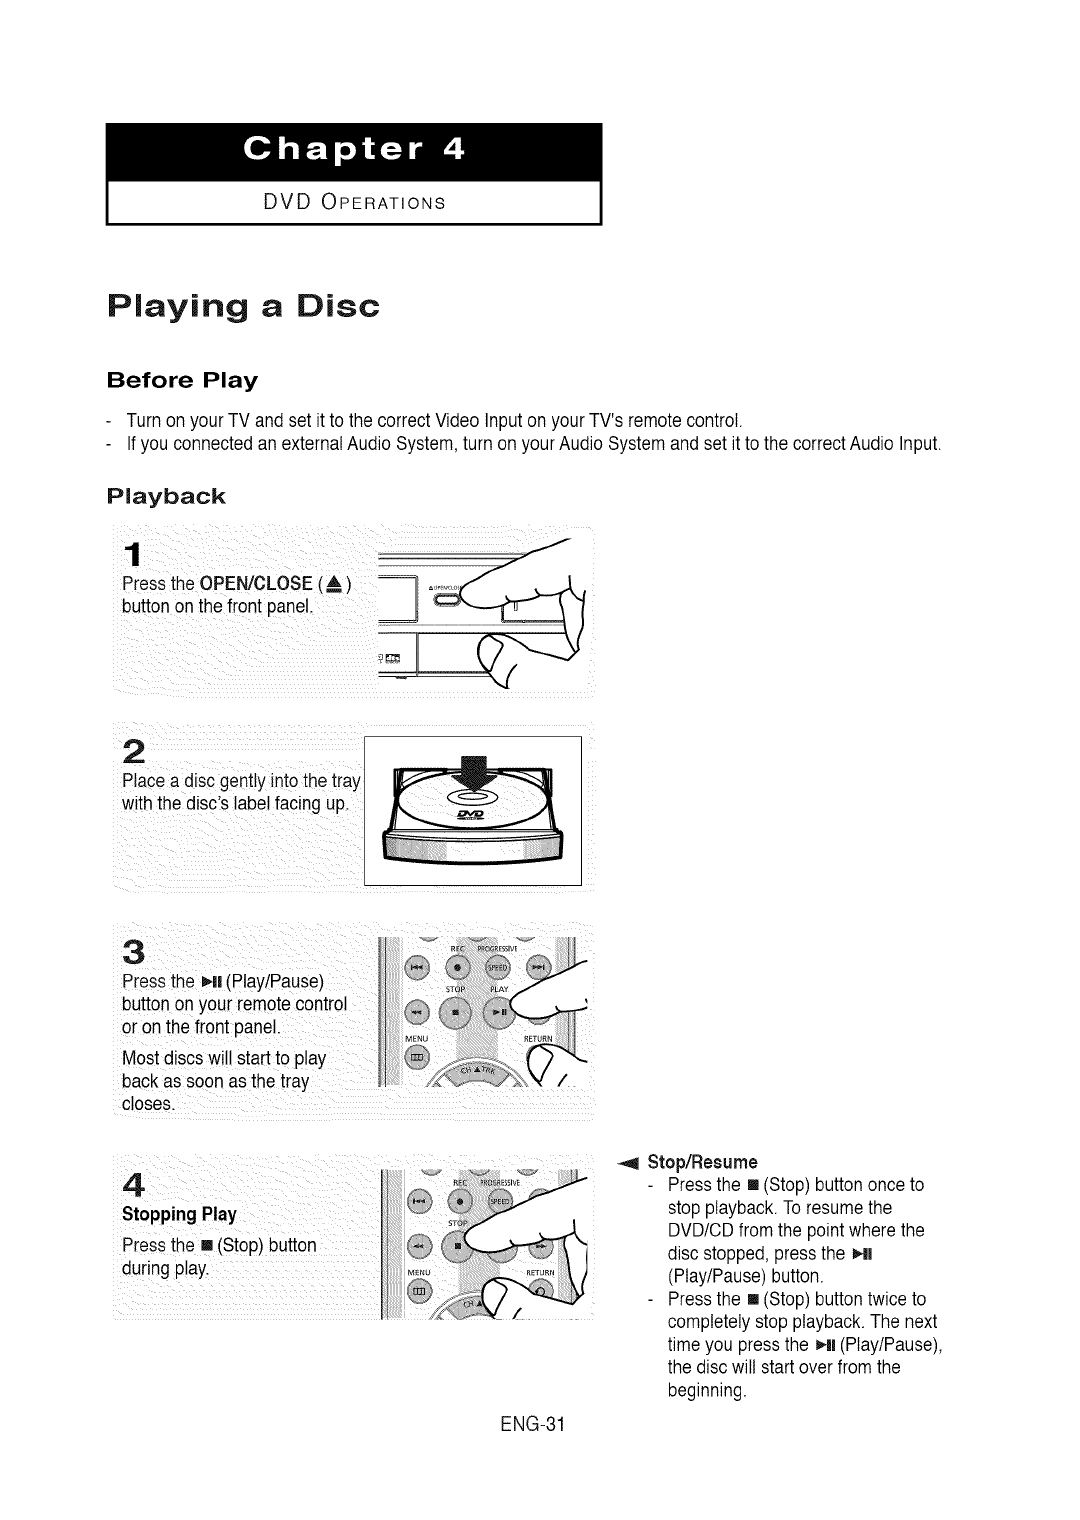
Before Play
Turn on your TV and set it to the correctVideo Input on yourTV's remotecontrol.
Ifyou connected an externalAudio System,turn on yourAudio Systemand set it to the correct Audio Input.
Playback
1
Pressthe OPEN/CLOSE(m,)
buttononthe front panel.
J
fJ
2
Place a disc gentlyinto the tray
with the disc's labelfacing up.
3
Pressthe _ll (Play/Pause)
buttonon your remotecontrol
or on the front panel.
Most discs will start to play
backas soon as the tray
closes.
ENG-31
_1 Stop/Resume
Pressthe [] (Stop) buttononce to
stop playback.To resumethe
DVD/CDfrom the point wherethe
disc stopped,pressthe Hm
(Play/Pause)button.
Pressthe [] (Stop) buttontwice to
completelystopplayback.The next
time you press the Hi (Play/Pause),
the disc will start over fromthe
beginning.

I DVD OPERATIONS I
_ql - Screen stops, no sound.
To resume,press the _11
(Play/Pause) buttononce again.
Note
If the player is left for about 5 minutesin
pause mode,it will stop.
i ¸ : : : Eachtime the buttonis pressed,a
new frame will appear.
No sound is heard duringSTEP
mode.
Pressthe _-N(Play/Pause)buttonto
resume normalplay.
Youcan only performstep motion
play inthe forwarddirection.
No sound is heard duringslow mode.
Pressthe _N(Play/Pause)buttonto
resume normalplay.
Reverseslow motionplay will not
work.
Note
This ( _ ) icon indicates an invalid button
press.
8
Removing Disc
Pressthe OPEN/CLOSE(A)J
butt°n °n the front pane! II _
ENG-32
I DVD OPERATIONS
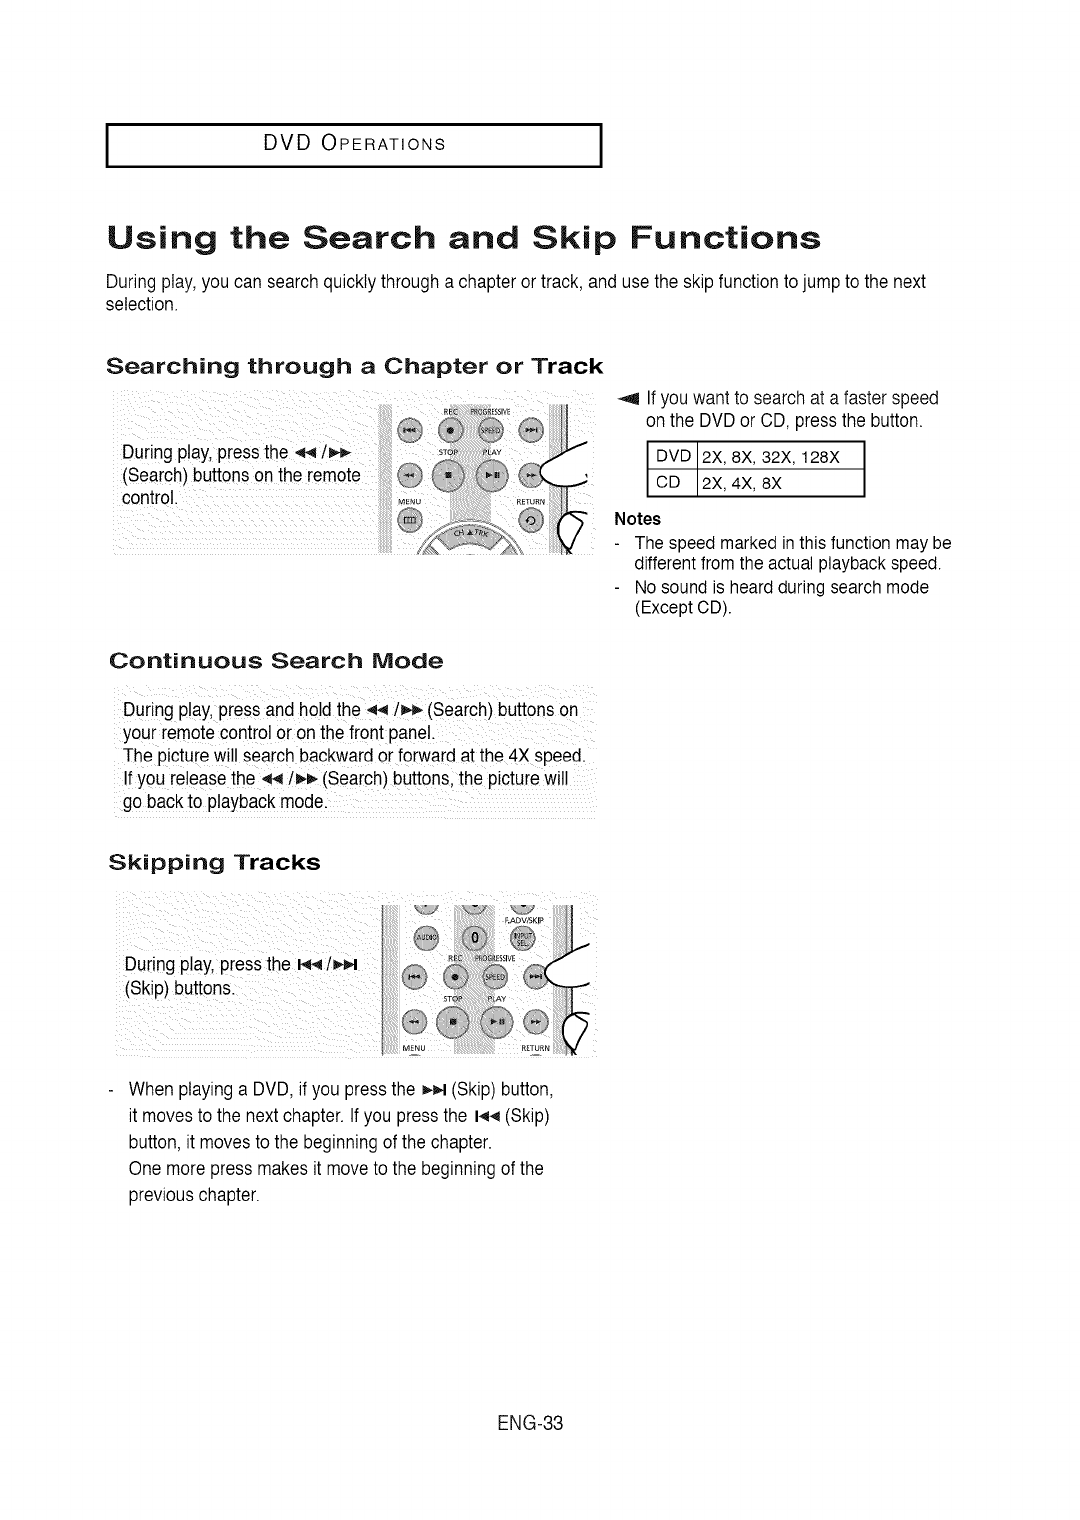
Using the Search and Skip Functions
During play,you can search quicklythrough a chapteror track, and use the skipfunction to jump to the next
selection.
Searching through a Chapter or Track
_,9 Ifyou want to searchat a faster speed
on the DVDor CD, pressthe button.
During play,pressthe _ t_-_ 5T A_
{_ea n) uuttonsontne remote _ _ _ DVD 2X, 8X, 32X, 128X
control. CD 2X, 4X, 8X
@ @ Notes
The speed markedin thisfunction may be
differentfrom the actualplaybackspeed.
Nosound is heardduringsearchmode
(ExceptCD).
Continuous Search Mode
During play,pressand holdthe ,q4/_,€_(Search)buttons on
your remotecont[o!oron the front panel
The picturewil!search backwardor forwardat the 4X speed.
Ifyou releasethe_/_'_ (Search)buttons,the picturewi!!
go backto playbackmodel
Skipping Tracks
When playing a DVD, if you pressthe _ (Skip) button,
it movesto the nextchapter. If you pressthe 144(Skip)
button, it movesto the beginningof the chapter.
One more press makesit moveto the beginningof the
previouschapter.
ENG-33
I DVD OPERATIONS I
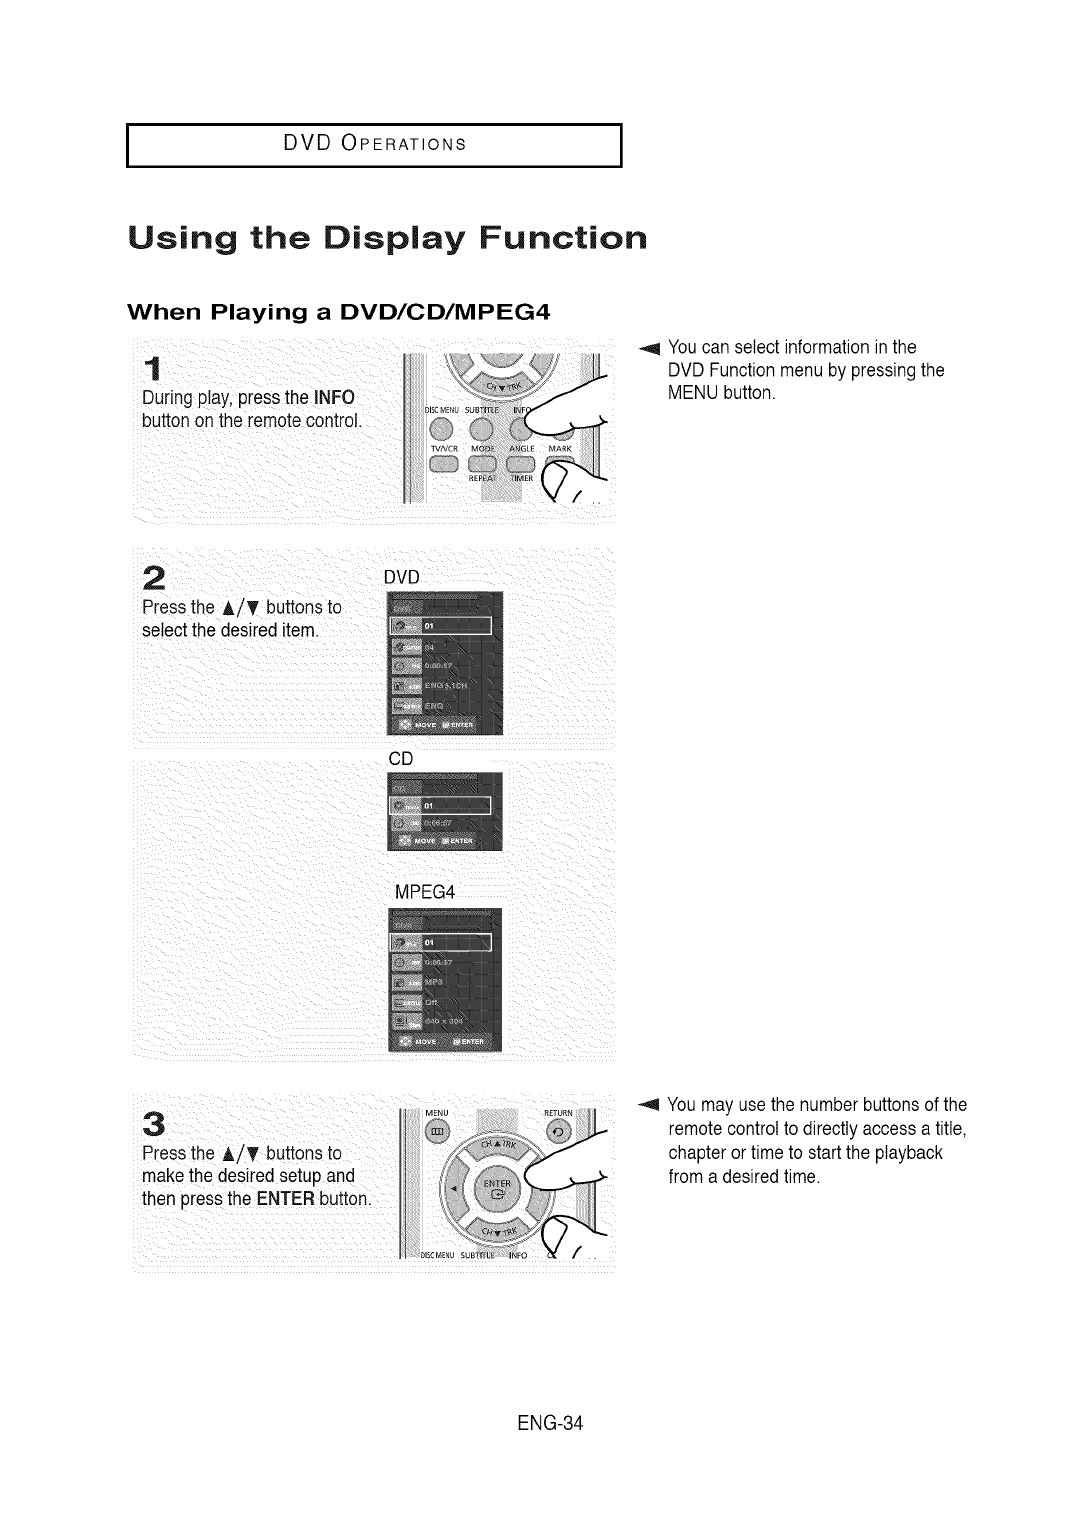
Using the Display Function
When Playing a DVD/CD/MPEG4
1
During play,pressthe INFO
buttonon the remotecontrol.
Youcan select information inthe
DVD Functionmenu by pressingthe
MENU button.
2
Pressthe A/T buttonsto
select the desired item.
DVD
CD
MPEG4
_,9 You mayuse the number buttonsof the
remotecontrolto directlyaccess a title,
chapter ortime to start the playback
from a desired time.
ENG-34
I DVD OPERATIONS
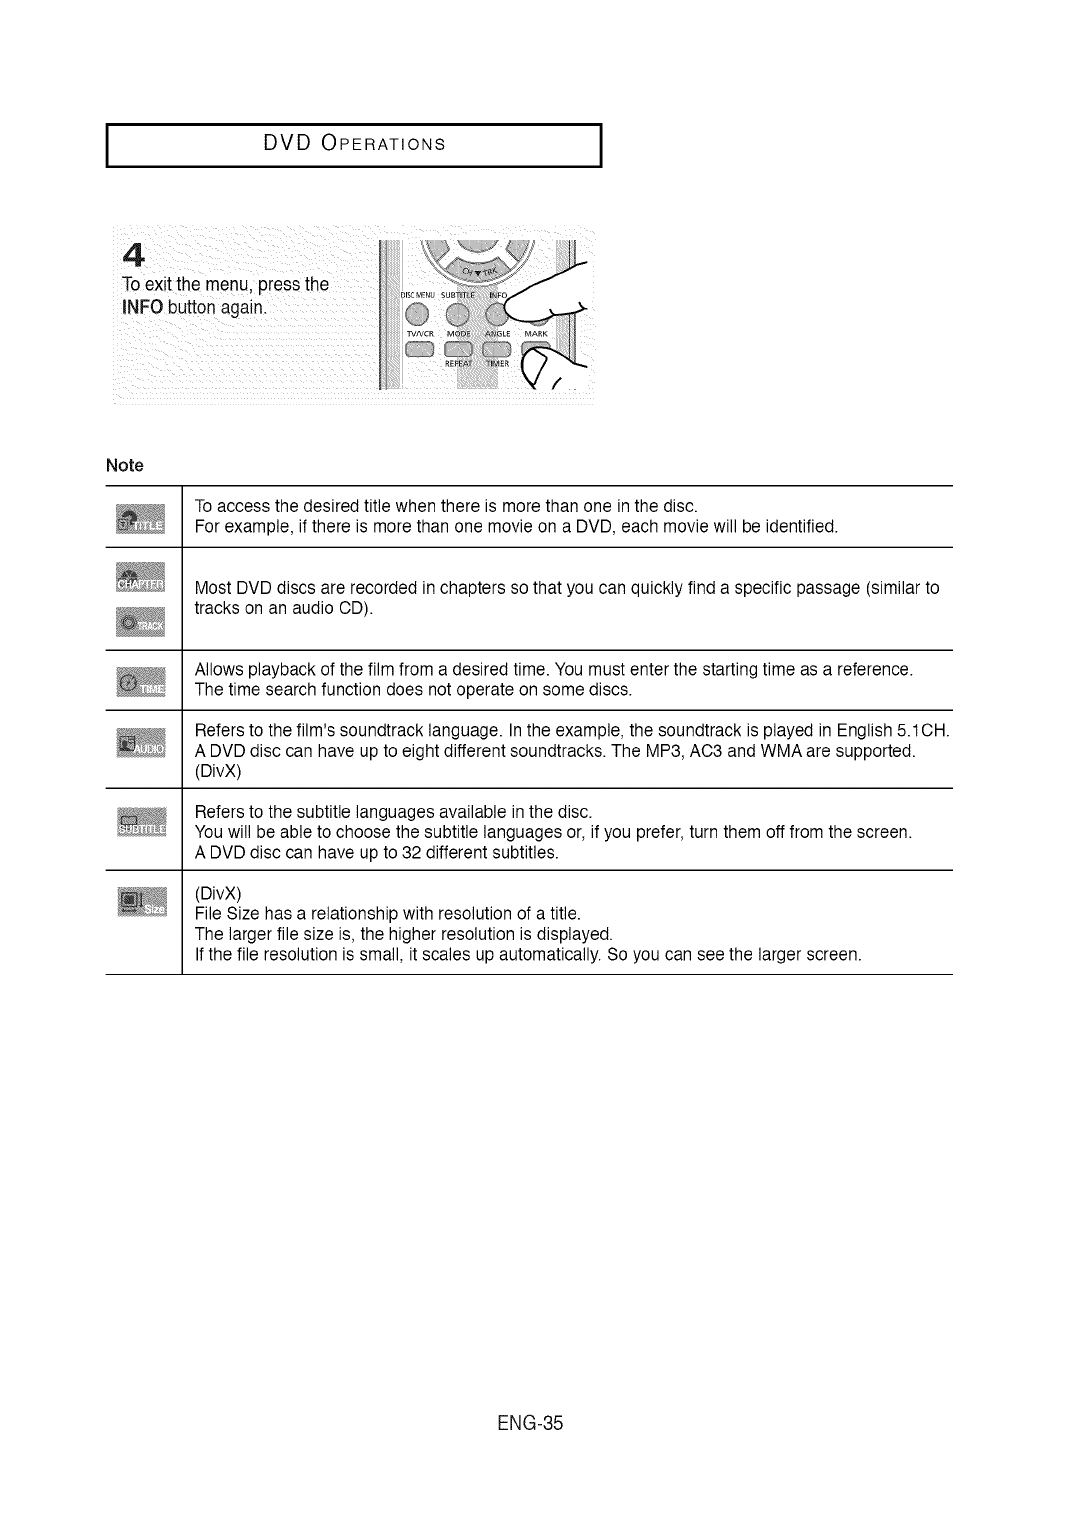
4
To exit the menu, press the
INFO button again.
Note
To access the desired title when there is more than one in the disc.
For example, if there is more than one movie on a DVD, each movie will be identified.
Most DVD discs are recorded in chapters so that you can quickly find a specific passage (similar to
tracks on an audio CD).
Allows playback of the film from a desired time. You must enter the starting time as a reference.
The time search function does not operate on some discs.
Refers to the film's soundtrack language. Inthe example, the soundtrack is played in English 5.1CH.
A DVD disc can have up to eight different soundtracks. The MP3, AC3 and WMA are supported.
(DivX)
Refers to the subtitle languages available in the disc.
You will be able to choose the subtitle languages or, if you prefer, turn them off from the screen.
A DVD disc can have up to 32 different subtitles.
(DivX)
File Size has a relationship with resolution of a title.
The larger file size is, the higher resolution is displayed.
If the file resolution is small, it scales up automatically. So you can see the larger screen.
ENG-35
I DVD OPERATIONS I
Using the Disc and
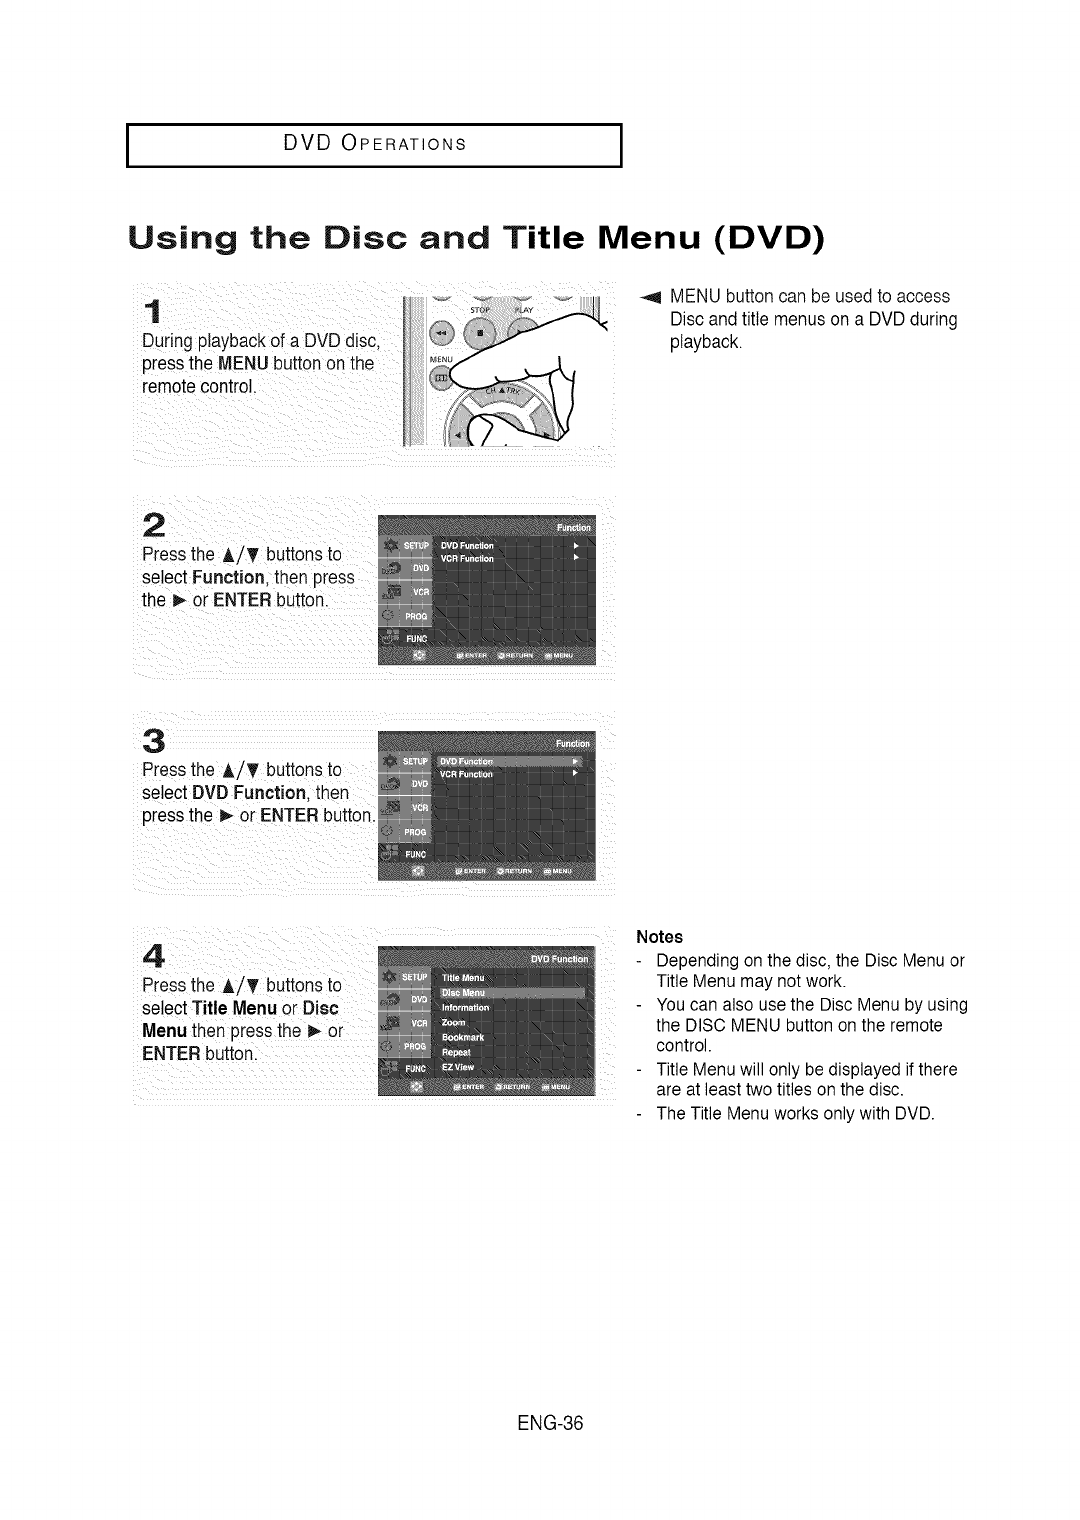
1
During playbackof a DVD disc.
pressthe MENU buttonon the
remotecontrol.
Title Menu (DVD)
_,9 MENUbuttoncan be usedto access
Discand title menuson a DVDduring
playback.
2
Pressthe A/T buttonsto
select Function. then press
the D,-or ENTERbutton.
3
Pressthe A/T buttonsto
select DVD Function. then
pressthe _ or ENTER button.
4
Pressthe A/T buttonsto
select Title Menuor Disc
Menu then pressthe _ or
ENTERbutton.
Notes
Depending on the disc, the Disc Menu or
Title Menu may not work.
You can also use the Disc Menu by using
the DISC MENU button on the remote
control.
Title Menu will only be displayed if there
are at least two titles on the disc.
The Title Menu works only with DVD.
ENG-36
I DVD OPERATIONS
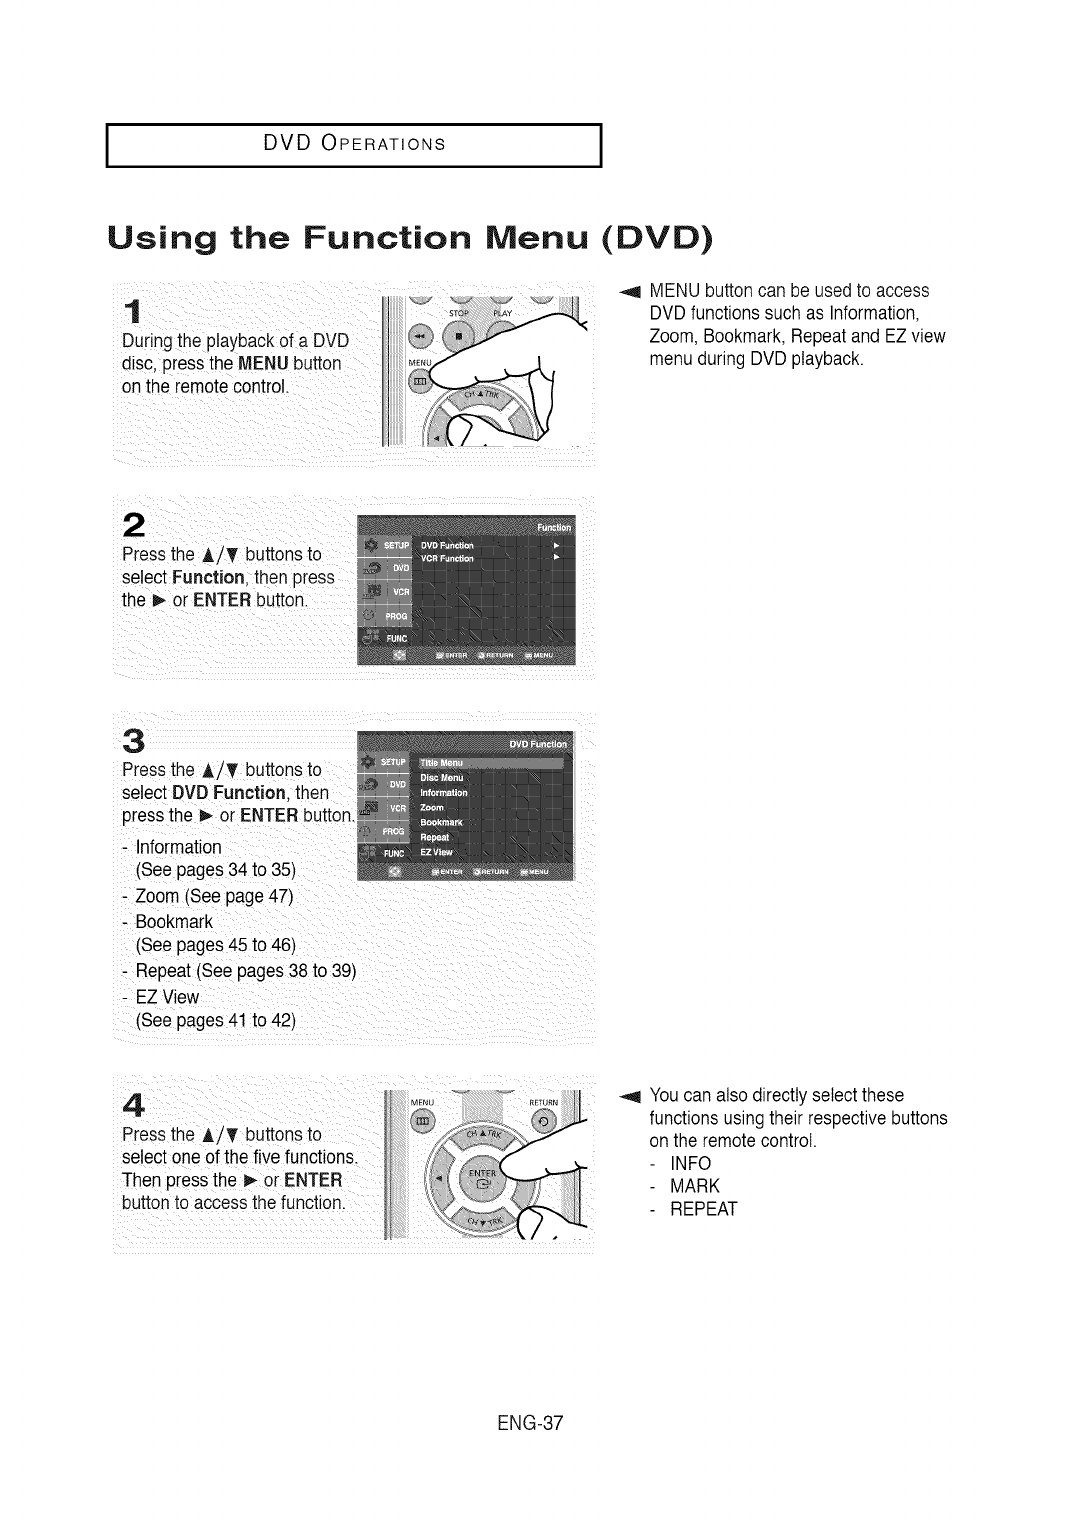
Using the Function Menu (DVD)
_,9 MENU buttoncan be usedto access
DVDfunctions suchas Information,
Zoom, Bookmark,Repeatand EZ view
menu during DVDplayback.
Press tee /_' BUttonsto
se!ectFunction; then press
the _or ENTERbutton.
Pressthe A/T buttonsto
select DVD Function then
pressthe oi ENTERbutt0nl
. Information
(See pages 34 to 35)
Press the i/T t
select oneof the five functions:
Then pressthe 1_or ENTER
buttonto accessthe function.
_,9 Youcan also directly select these
functionsusingtheir respectivebuttons
onthe remotecontrol.
INFO
MARK
REPEAT
ENG-37
I DVD OPERATIONS I
Repeat Play
Repeatthe currenttrack,chapter,title, a chosensection (A-B), or all of the disc.
When playing a DVD/CD
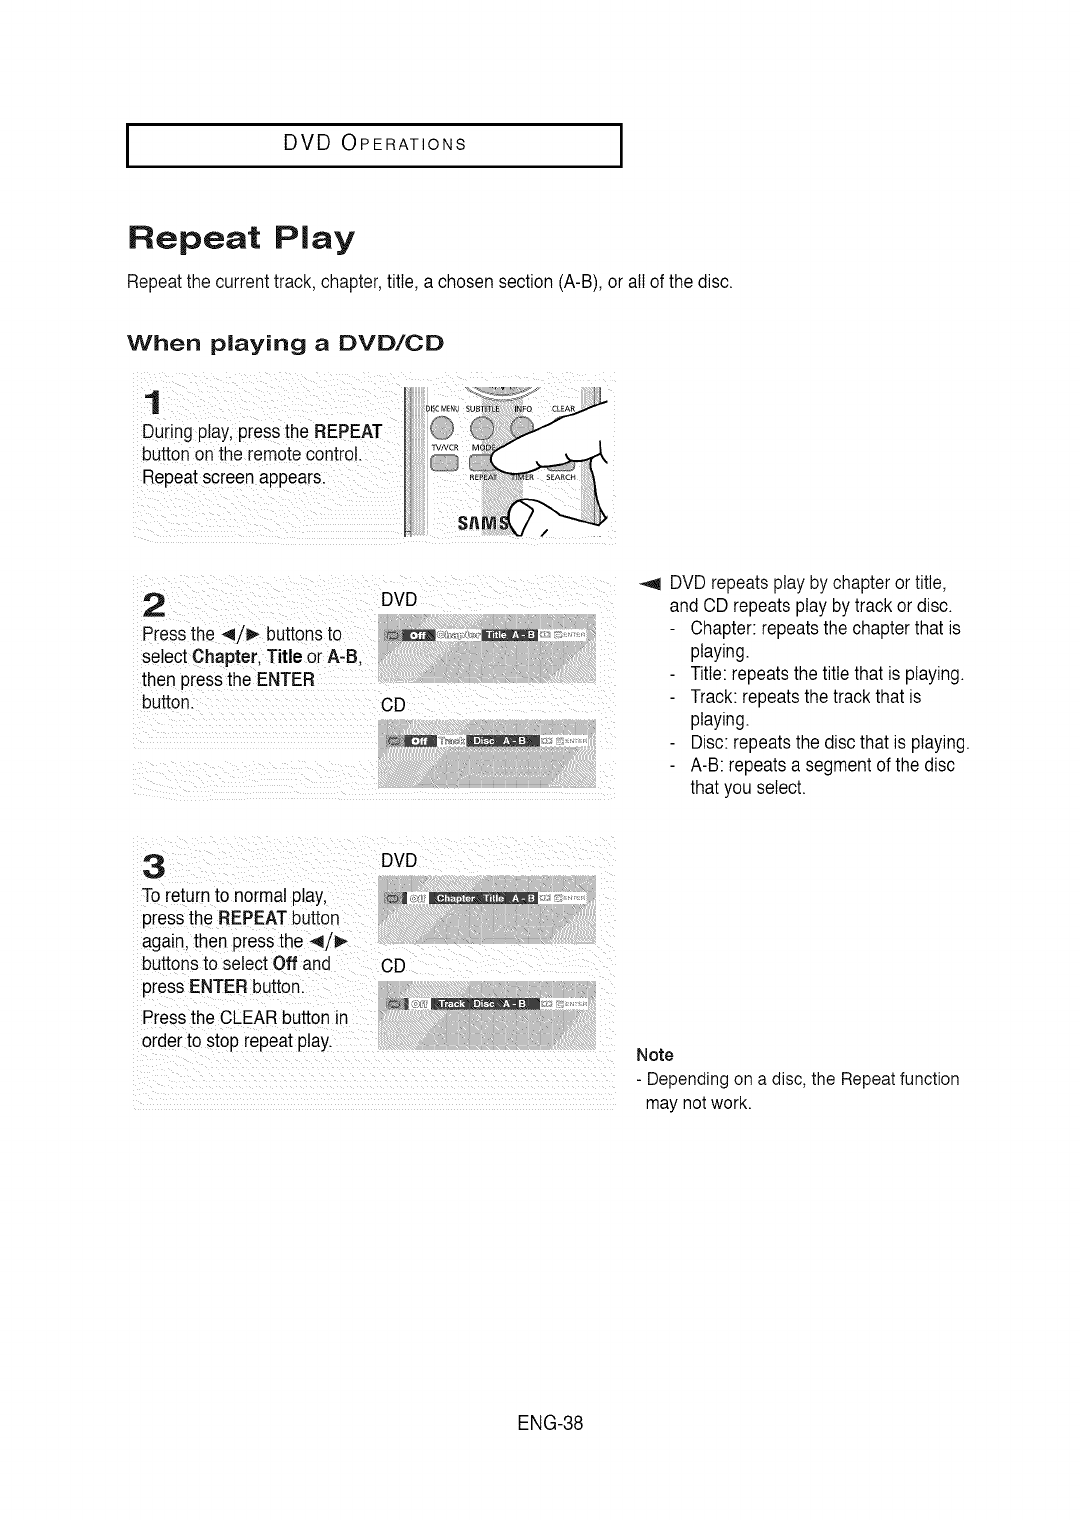
1
During play,pressthe REPEAT
buttonon the remotecontrol.
Repeatscreenappears.
2
Pressthe 4/_ buttonsto
select Chapter. Title or A-B.
then pressthe ENTER
button.
DVD
CD
DVD repeatsplay by chapter ortitle,
and CD repeatsplay by track or disc.
Chapter: repeatsthe chapterthat is
playing.
Title: repeatsthe title that is playing.
Track:repeatsthe track that is
playing.
Disc:repeatsthe disc that is playing.
A-B: repeatsa segmentof the disc
that you select.
To returnto normal play,
press the REPEATbutton
again, then pressthe 4
buttons to select Off and CD
press ENTERbutton
Press the CLEARbutton n
order to stop repeat p!ay. Note
.................................................................................. - Dependingon a disc, the Repeatfunction
may notwork.
ENG-38
I DVD OPERATIONS
Using the A-B Repeat function
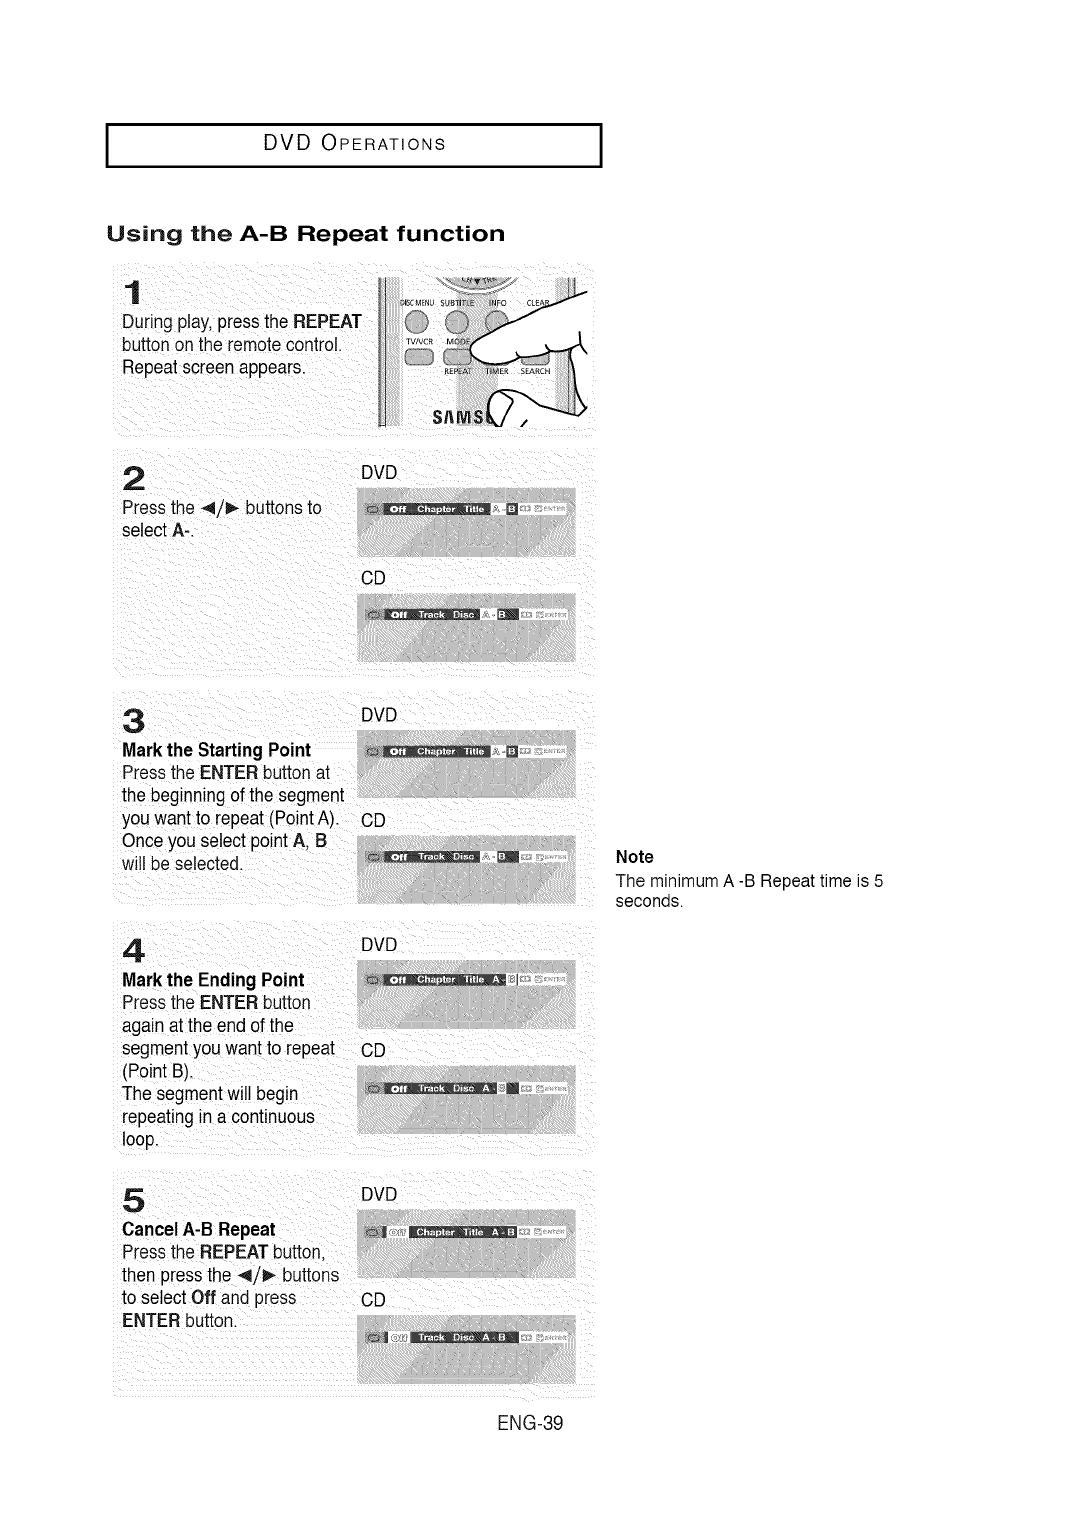
1
During play,Dressthe REPEAT
buttonon the remotecontrol.
Repeatscreenappears.
2 DVD
Pressthe 4/1_ buttonsto ___,,_
selectA-.
CD
3DVD
Markthe StartingPoint ,.-_......... _-.__
Pressthe ENTERbutton at
the beginningof the segment
you wantto repeat(PointA). CD
Onceyou select point A, B
will be selected. __'__
4 DVD
Markthe Ending Point :,1
Pressthe ENTERbutton
againat the end of the
segmentyou want to repeat CD
(Point B).
The segmentwill begin _:_,m
repeatingin a continuous
loop.
5
Cancel A-B Repeat
Pressthe REPEATbutton,
then pressthe _/D,- buttons
to select Off and press
ENTERbutton.
DVD
CD
Note
The minimum A -B Repeat time is 5
seconds.
ENG-39
I DVD OPERATIONS I
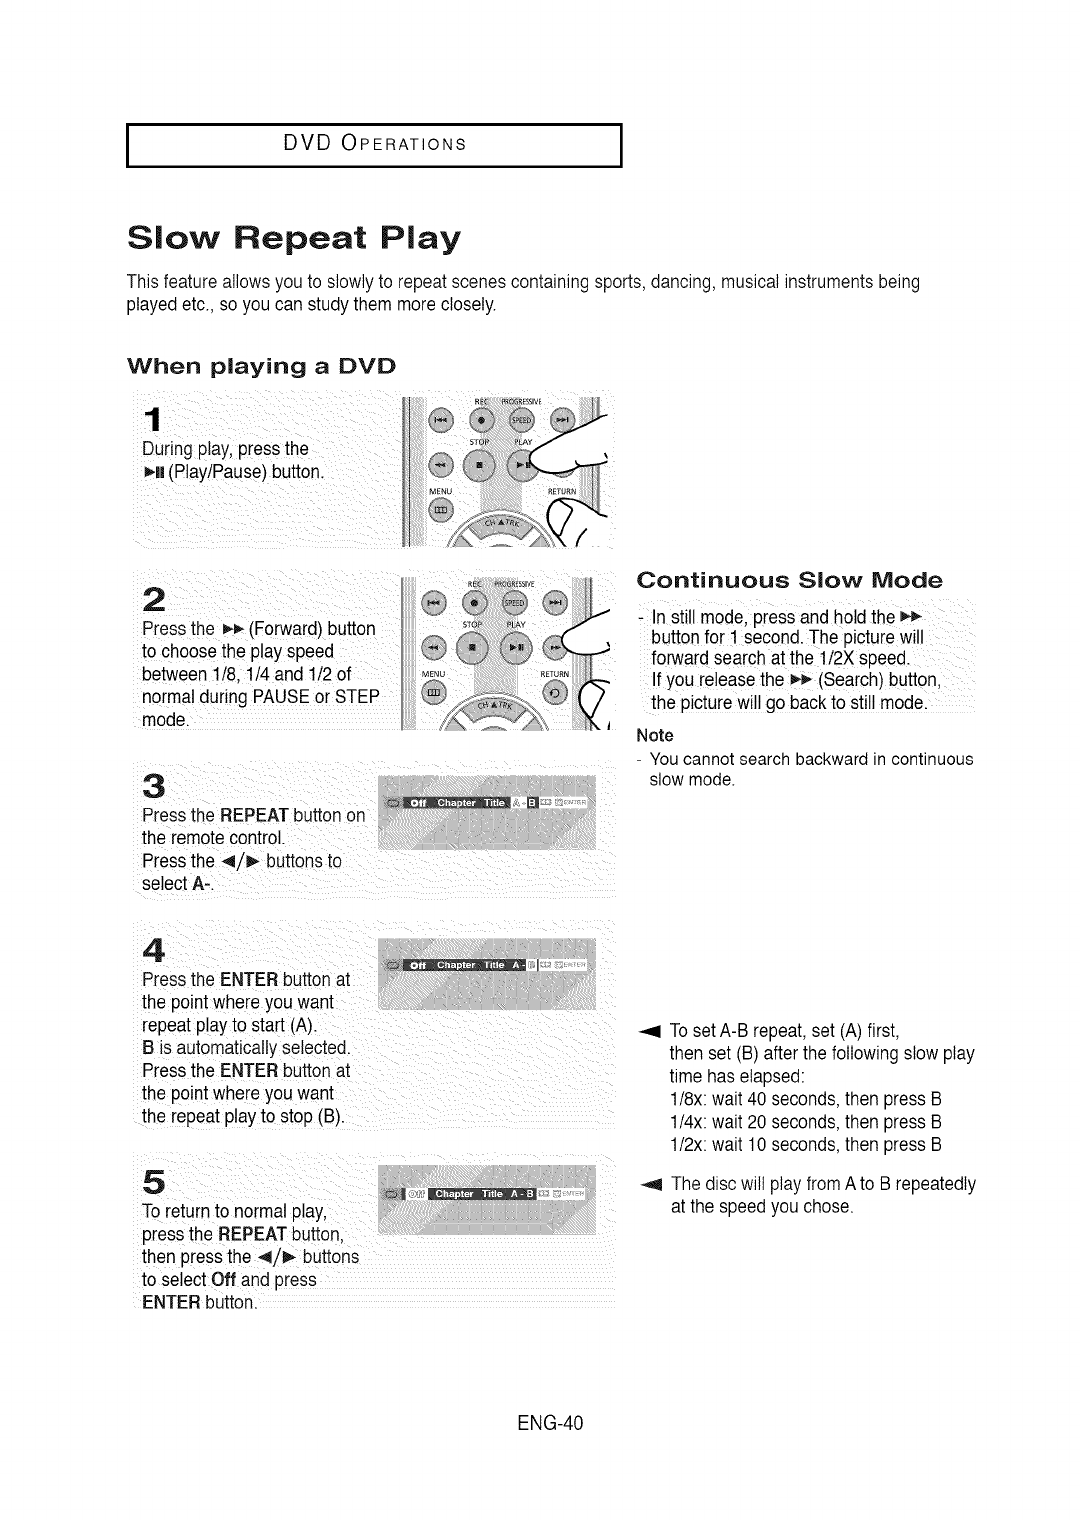
Slow Repeat Play
This featureallowsyou to slowly to repeat scenescontainingsports,dancing, musicalinstrumentsbeing
played etc., so you can studythem more closely.
When playing aOVO
_ __ _s,vE_ Continuous Slow Mode
i2 iiiiiii_i!;,i_,, ......._iiiiiiiiii!i!i!ii!i!ii¸¸_'¸...... i!!!_!i_i:!_!!ii!!¸
"_J _'J -In stillmode pressand hold the _-_
STO_ _LAY
Press the (Forward)button : ........
to choosethe p!ayspeed buttonfor! second.The picture will
forward searchat the 112Xspeed.
between 1/8 t/4 and 1/2 of MEN° IfyOUrelease the_ (search)button,
n0[ma! duringPAUSE or STEP @ the picturewi!! go backto stil! model
model Note
3
Pressthe REPEATbuttonon
the remotecontrol.
Pressthe 4/_ buttonsto
select A-.
- You cannot search backward in continuous
slow mode.
4
Pressthe ENTERbutton at
the pointwhere you want
repeat playto start (A).
B is automaticallyselected.
Pressthe ENTERbutton at
the pointwhere you want
the repeat play to stop (B).
_
To returnto normal p_ay,
pressthe REPEATbutton.
then pressthe _1,/_,.buttons
to select Off and press
ENTERbutton.
_1 To setA-B repeat,set (A) first.
then set (B) afterthe followingslow play
time has elapsed:
1/8x:wait 40 seconds,then press B
1/4x:wait 20 seconds,then press B
1/2x:wait 10 seconds,then press B
_1 The disc will play fromA to B repeatedly
at the speedyou chose.
ENG-40
DVD OPERATIONS
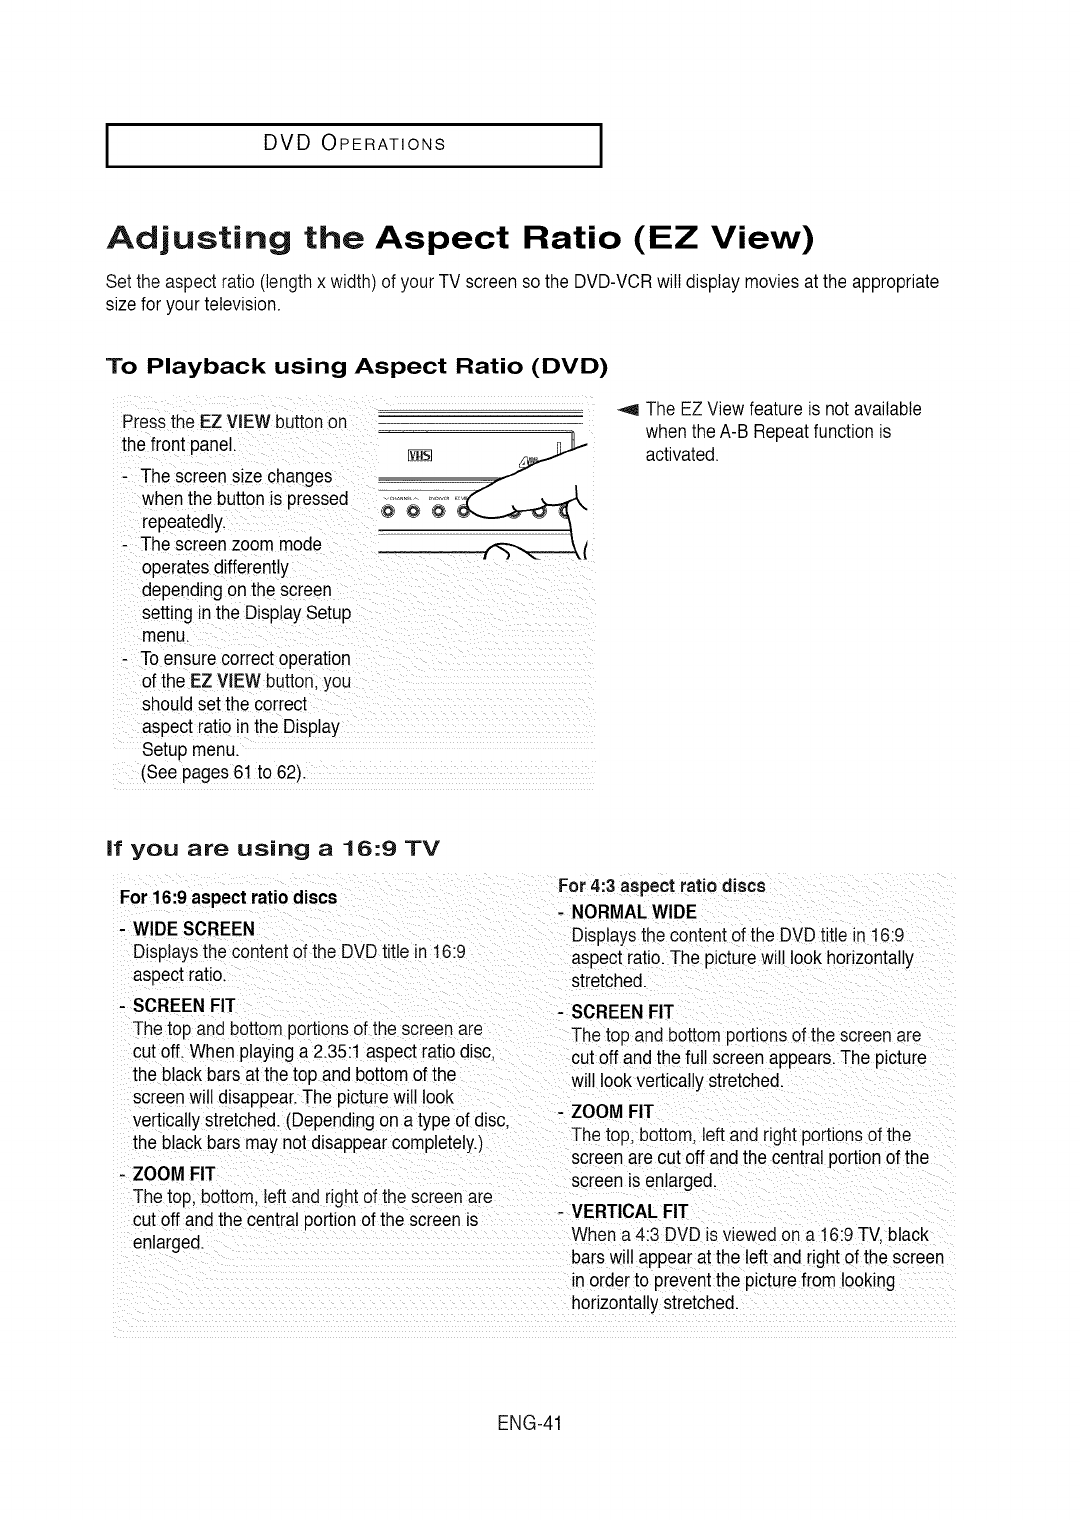
Adjusting the Aspect Ratio (EZ View)
Set the aspect ratio (lengthx width) of your TV screenso the DVD-VCRwill displaymovies at the appropriate
sizefor your television.
To Playback using Aspect Ratio (DVD)
Press the EZ VIEW buttonon
the fr0nt panei.
, The screen sizechanges
when the button is p[essed _,,@ o_ _
repeatedly`_-.----_ _
-The sc[eenzoom mode ,_l
operatesdifferently
dependingonthe screen
setting in the Disp!aySetup ....
menu.
To ensurecorrectoperation
of the EZ VIEW button;yOU
should setthe correct
aspectratio in the Display
Setup menu.
(See pages 61 to 62).
_,9 The EZ View featureis not available
when the A-B Repeatfunction is
activated.
If you are using a 16:9 TV
For 16:9 aspect ratiodiscs
- WIDE SCREEN
Displaysthe contentof the DVDtitle in 16:9
aspectratio.
- SCREEN FIT
The top and bottom portionsof the screenare
cutoff. When playinga 2.35:1 aspect ratio disc,
the blackbars at the top and bottomof the
screenwill disappear.The picturewill look
verticallystretched. (Dependingon a type of disc.
the blackbars maynot disappearcompletely.)
- ZOOM FIT
The top, bottom, leftand right of the screen are
For 4:3 aspect ratio discs
-NORMALWIDE
Displaysthe content of the DVDtitle in 16:9
aspect ratio.The picturewill look horizontally
stretched.
- SCREENFIT
The top and bottom portionsof the screenare
cut off andthe full screenappears.The picture
will look verticallystretched.
- ZOOM FIT
Thetop, bottom,left and right portionsof the
screenare cut off andthe centralportion of the
screenis enlarged.
VERTICAL
cut off and the central portionof the screen is - FIT
enlarged. When a 4:3 DVD is viewed on a 16:9TV.black
bars will appearat the leftand right of the screen
in orderto preventthe picturefrom looking
horizontallystretched.
ENG-41
l DVD OPERATIONS I
If you are using a 4:3 TV
For 16:9 aspect ratio discs
- 4:3 Letter Box
Displays the content of the DVD title in 16:9
aspect ratio. The black bars willappear at the top
and bottom of the screen.
- 4:3 PanScan
The left and right portionsof the screenare cut
offand the centralportionof the 16:9 screenis
displayed.
- SCREENFIT
The top and bottom portionsof the screenare
cutoff and a full screenappears.The picturewill
lookvertically stretched.
For 4:3 aspect ratio discs
- NORMAL SCREEN
Displaysthe content of the DVDtitle in4:3
aspect ratio.
- SCREEN FIT
The top andbottom portionsof the screen are
cut off andthe full screen appears.The picture
will lookverticalJystretched.
- ZOOM FIT
The top, bottom,left and right portionsof the
screenare cut off andthe central portionof the
screenis enlarged.
- ZOOM FIT
The top, bottom,leftand right of the screenare
cutoff and the central portionof the screenis
enlarged.
Note
This function may behave differently depending on the type of disc.
ENG-42

I DVD OPERATIONS
Selecting the Audio Language
Youcan select a desired audio languagequickly and easilywith the AUDIO button.
Using the AUDIO button (DVD/CD/MPEG4)
1
During play,pressthe
AUDIObutton.
Audiolanguageschange
when the button is pressed
repeatedly.
The audio languagesare
representedby
abbreviations.
DVD
Notes
To change the desired audio in the Disc
Menu, press the DISC MENU button.
This function depends on what audio
languages are encoded on the disc and
may not work on all DVDs.
A DVD disc can contain up to 8 audio
languages.
To have the same audio language come
up whenever you play a DVD, see pages
57 to 58.
When playinga CD, you can CD
select among Stereo. Right
or Left. _
MPEG4
Pressthe _/!_ buttonsto
selectthe desiredAudio on
a MPEG4then pressthe
ENTER.
2
To removethe AUDIO icon.
pressthe AUDIO. CLEAR
or RETURNbutton.
ENG-43
I DVD OPERATIONS I
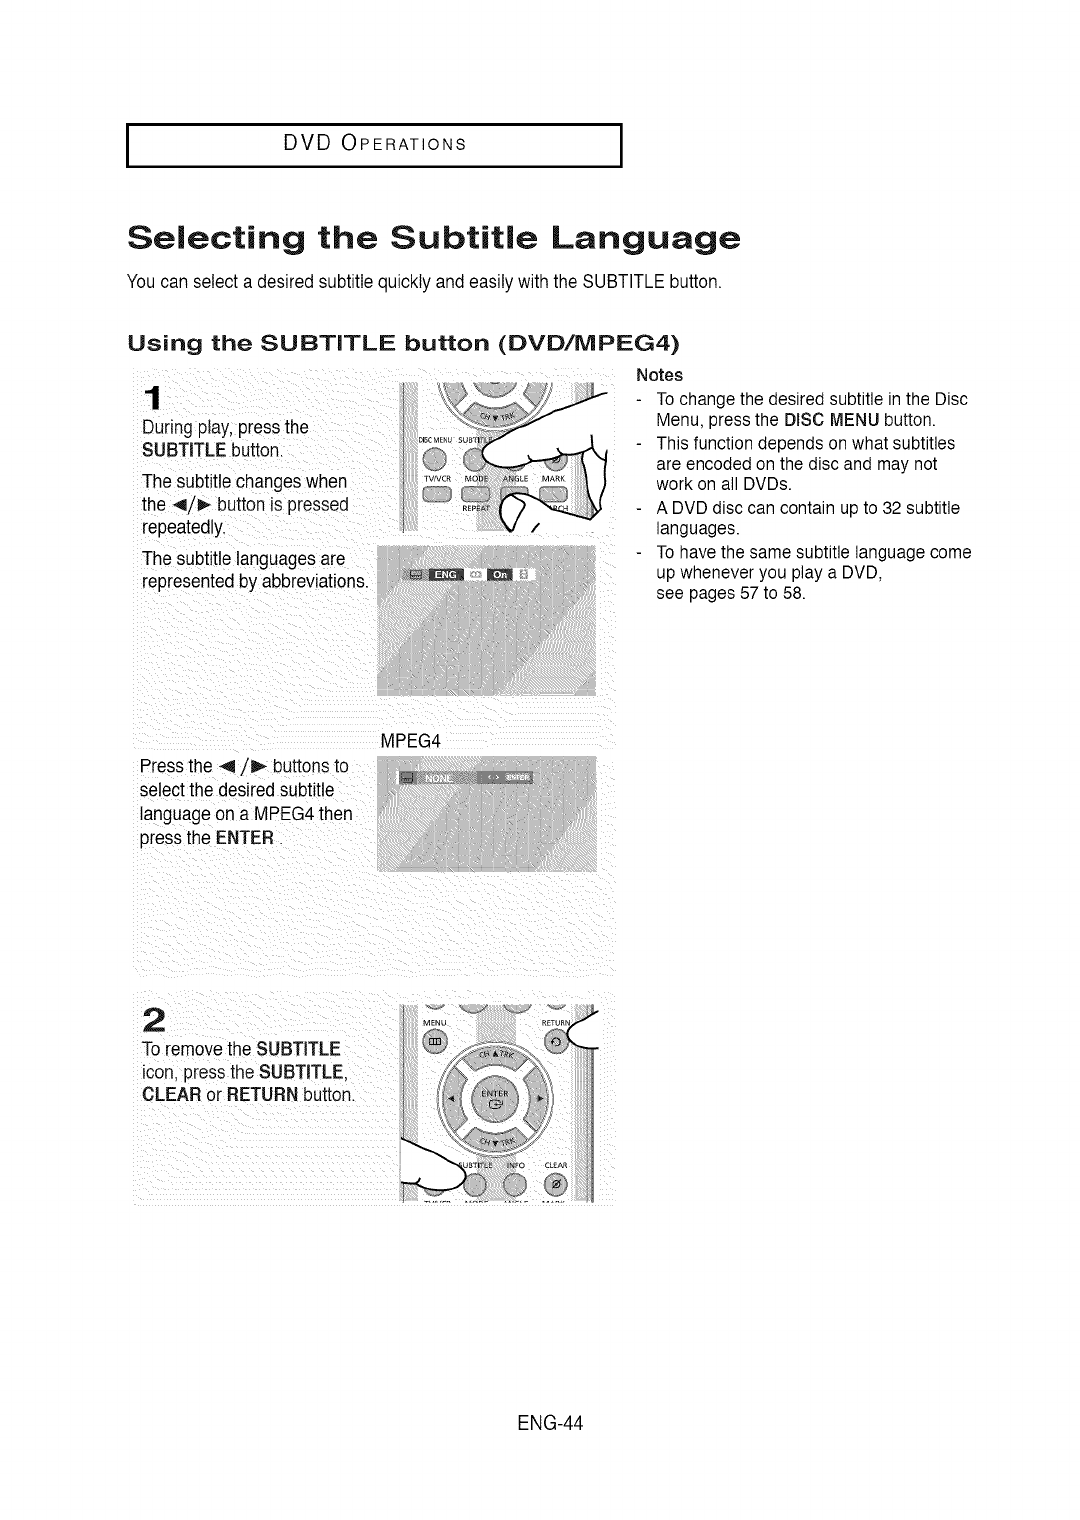
Selecting the Subtitle Language
Youcan select a desired subtitle quickly andeasily withthe SUBTITLEbutton.
Using the SUBTITLE button (DVD/MPEG4)
1
During play,pressthe
SUBTITLEbutton.
The subtitle changeswhen
the 4/_- button is pressed
repeatedly.
The subtitle languagesare
representedby abbreviations.
Notes
To change the desired subtitle in the Disc
Menu, press the DISC MENU button.
This function depends on what subtitles
are encoded on the disc and may not
work on all DVDs.
A DVD disc can contain up to 32 subtitle
languages.
To have the same subtitle language come
up whenever you play a DVD,
see pages 57 to 58.
Pressthe 4/_ buttons to
selectthe desiredsubtitle
languageona MPEG4then
pressthe ENTER.
MPEG4
2
To removethe SUBTITLE
icon. pressthe SUBTITLE.
CLEAR or RETURNbutton.
ENG-44
I DVD OPERATIONS
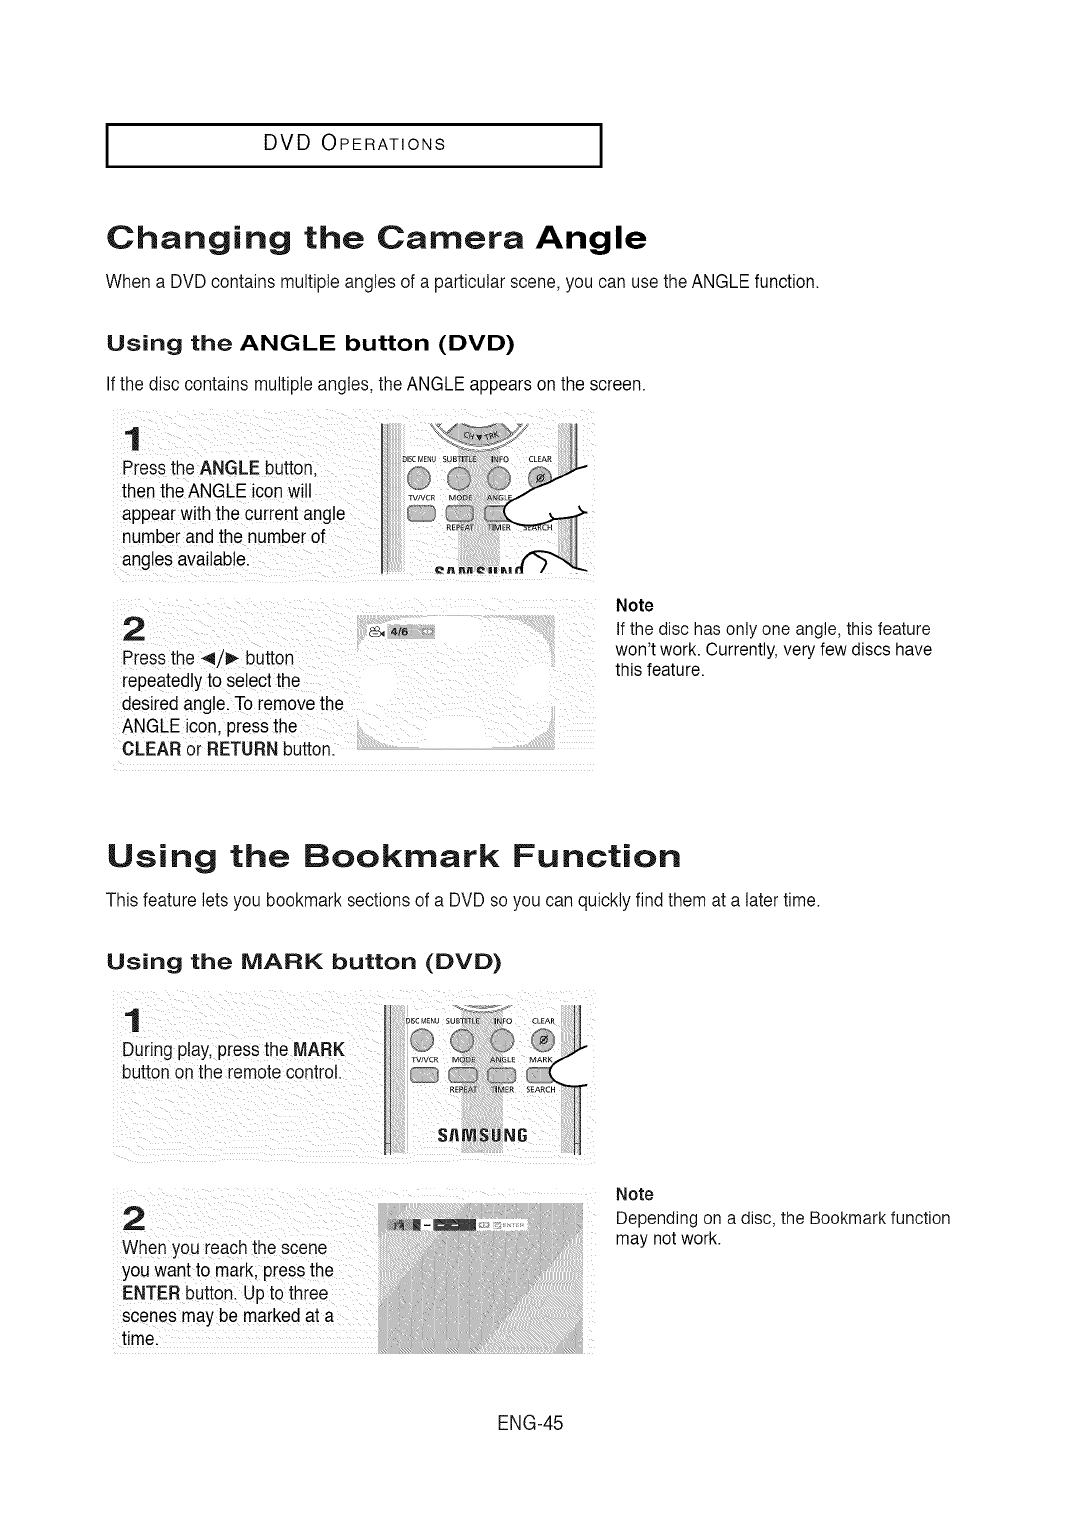
Changing the Camera Angle
When a DVDcontains multipleangles of a particularscene, you can usethe ANGLEfunction.
Using the ANGLE button (DVD)
If the disc contains multipleangles,the ANGLE appearson the screen.
1
Pressthe ANGLE button.
then the ANGLE iconwill
appearwiththe currentangle
numberand the nutuberof
angles available.
2
Pressthe 4/_ button
repeatedlyto select the
desiredangle. To removethe
ANGLE icon.pressthe
CLEAR or RETURNbutton.
4/6
Note
If the disc has only one angle, this feature
won't work. Currently, very few discs have
this feature.
Using the Bookmark Function
Thisfeature letsyou bookmark sectionsof a DVDso you can quickly find them at a latertime.
Using the MARK button (DVD)
During play,pres_
button on the remote control.
Note
Whenyou reach the scene
you wantto mark, pressthe
ENTER button. Upto tl"
scenesmay be markedat a
time.
Depending on a disc, the Bookmark function
may not work.
ENG-45
I DVD OPERATIONS I
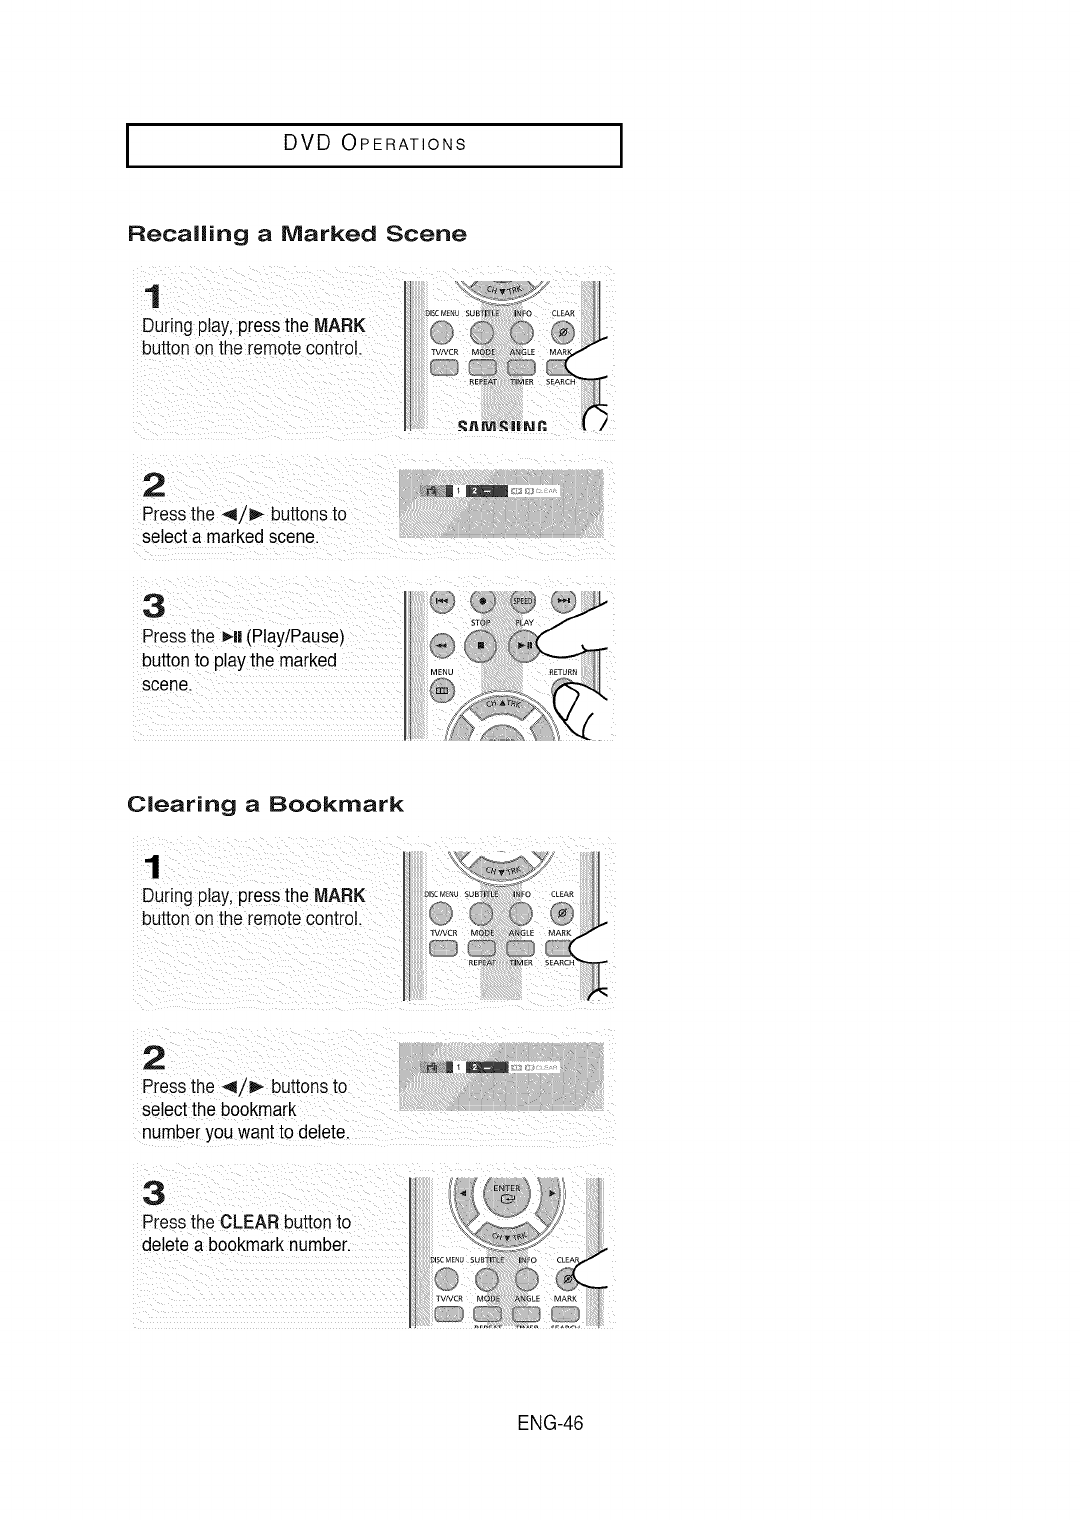
Recalling a Marked Scene
1
During play,pressthe MARK
buttonon the remotecontrol.
2
Pressthe 4/1_ buttons to
select a markedscene.
3
Pressthe _-II(PlaytPause)
buttonto play the marked
scene.
Clearing a Bookmark
During play,pressthe MARK
buttononthe remote control.
ENG-46
I DVD OPERATIONS
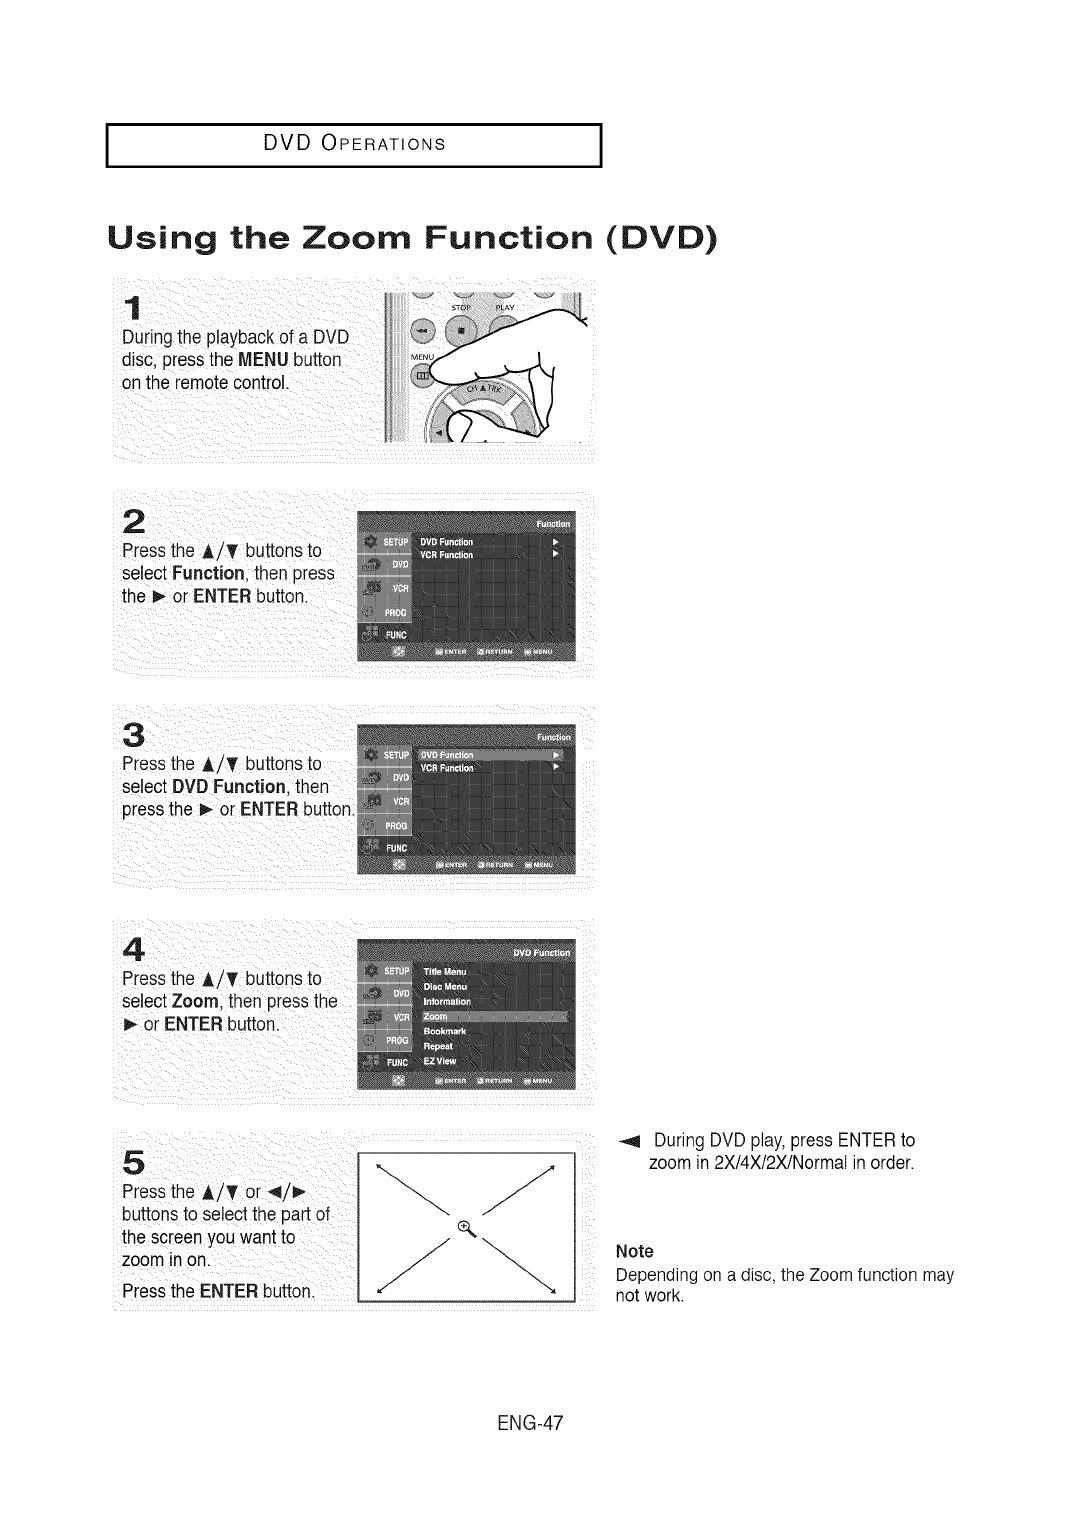
Using the Zoom Function (DVD)
1
Duringthe playbackof a DVD
disc. pressthe MENU button
onthe remotecontrol.
2
Pressthe A/_r buttonsto
select Function. then press
the D,-or ENTER button.
3
Pressthe ,&/T buttonsto
select DVD Function. then
pressthe _ or ENTERbutton.
Press the A/T buttonsto
select Zoom; thenpressthe
i_-or ENTER button. /
Press the A/T or 4/P,-
buttonsto se!ectthe part of
the sc[een yOu wantto /¢" \...
zoominon. _/
Pressthe ENTERbutto_ __
During DVD play,pressENTERto
zoom in 2X/4X/2X/Normatin order.
Note
Depending on a disc, the Zoom function may
not work.
ENG-47
IDVD OPERATIONS I
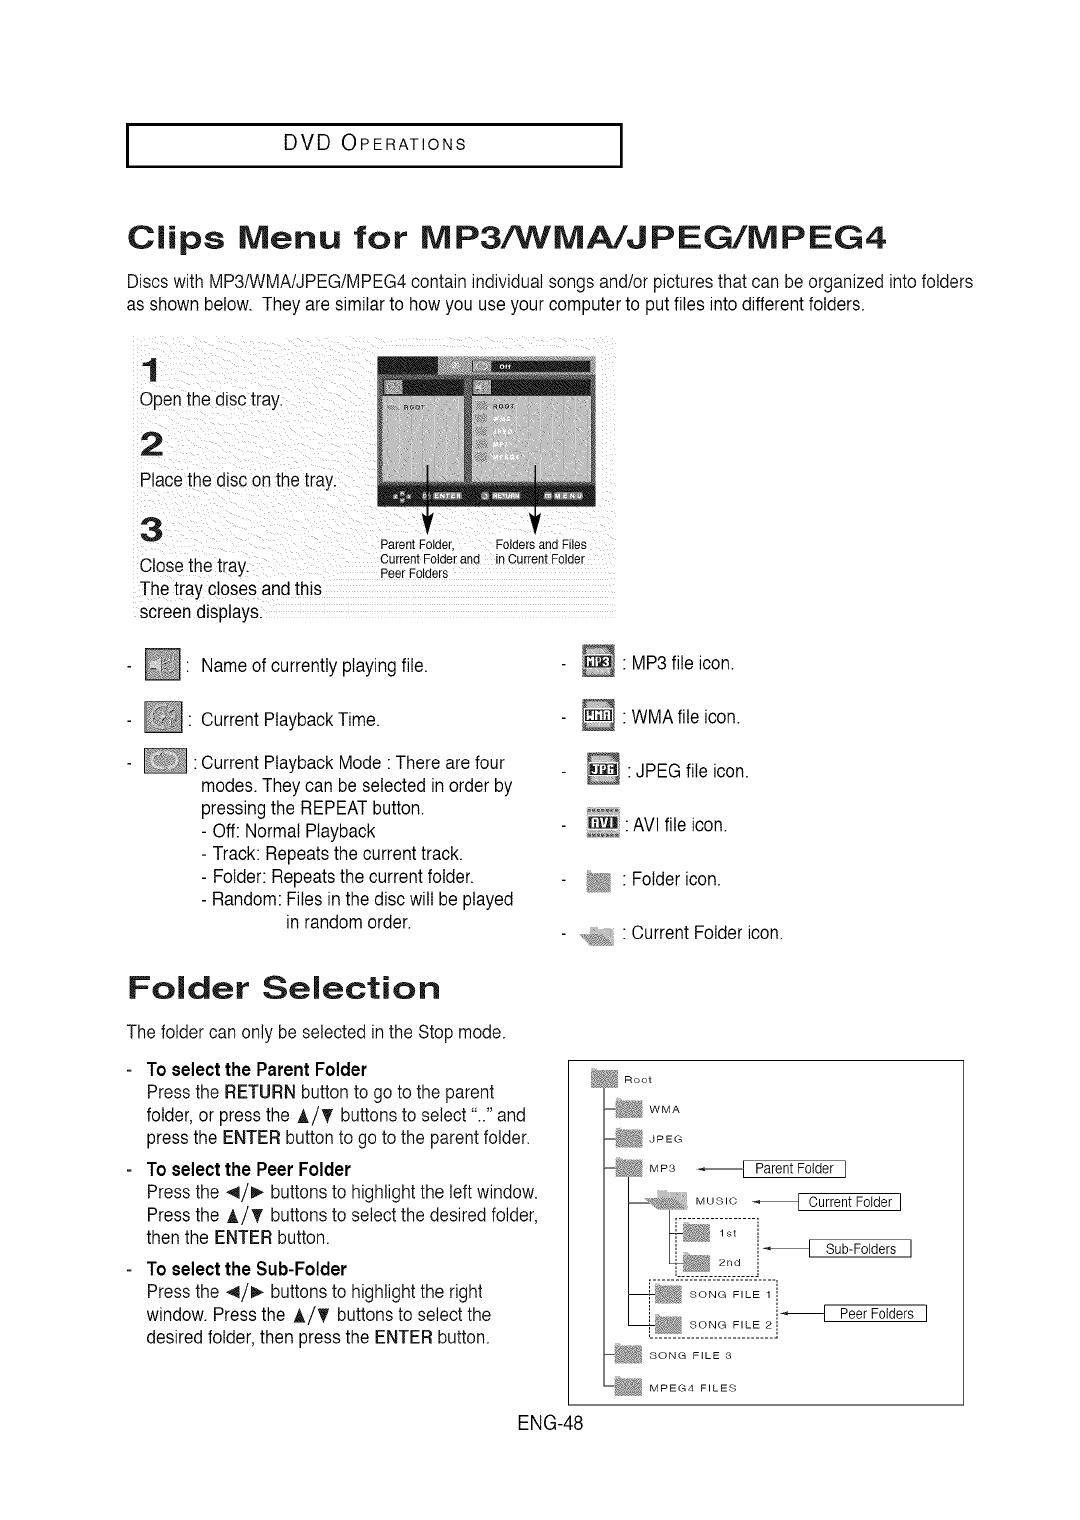
Clips Menu for NIP3/WIVIA/JPEG/NIPEG4
Discswith MP3/WMA/JPEG/MPEG4contain individualsongs and/or picturesthat can be organized into folders
as shown below. Theyare similarto how you use your computerto put files into differentfolders.
1
Openthe disctray.
2
Placethe disc onthe tray.
3Parent Folder Folders and Files
Closethe tray. Current Folder an(] in Current Folder
Peer Folders
The tray closes andthis
screendisplays.
- _ Nameof currently playingfile.
- | CurrentPlaybackTime.
- : CurrentPlaybackMode There are four
modes.Theycan be selected inorder by
pressingthe REPEATbutton.
- Off: NormalPlayback
- Track: Repeatsthe currenttrack.
- Folder:Repeatsthe current folder.
- Random:Files inthe disc will be played
in random order.
Folder Selection
The folder can only be selected in the Stop mode.
To select the ParentFolder
Pressthe RETURNbutton to go to the parent
folder,or pressthe A/¥ buttons to select".." and
pressthe ENTER buttonto go to the parent folder.
To select the Peer Folder
Pressthe 4/1,- buttons to highlightthe leftwindow.
Pressthe A/¥ buttons to selectthe desired folder,
then the ENTER button.
To select the Sub-Folder
Pressthe 4/_ buttons to highlightthe right
window. Pressthe A/_' buttons to selectthe
desired folder,then pressthe ENTER button.
ENG-48
•MP3 file icon.
•WMAfile icon.
_: JPEG file icon.
AVl file icon.
"Folder icon.
•CurrentFolder icon.
Root
WMA
JPEG
MP3 _ Parent Folder I
__.M_U[I!_;_____ Current Fotder I
1st i
i ................ 2rid i_ Sub-Folders ]
i_ I Peer Folders ]
SONG FILE 3
MPEG4 FILES
I DVD OPERATIONS
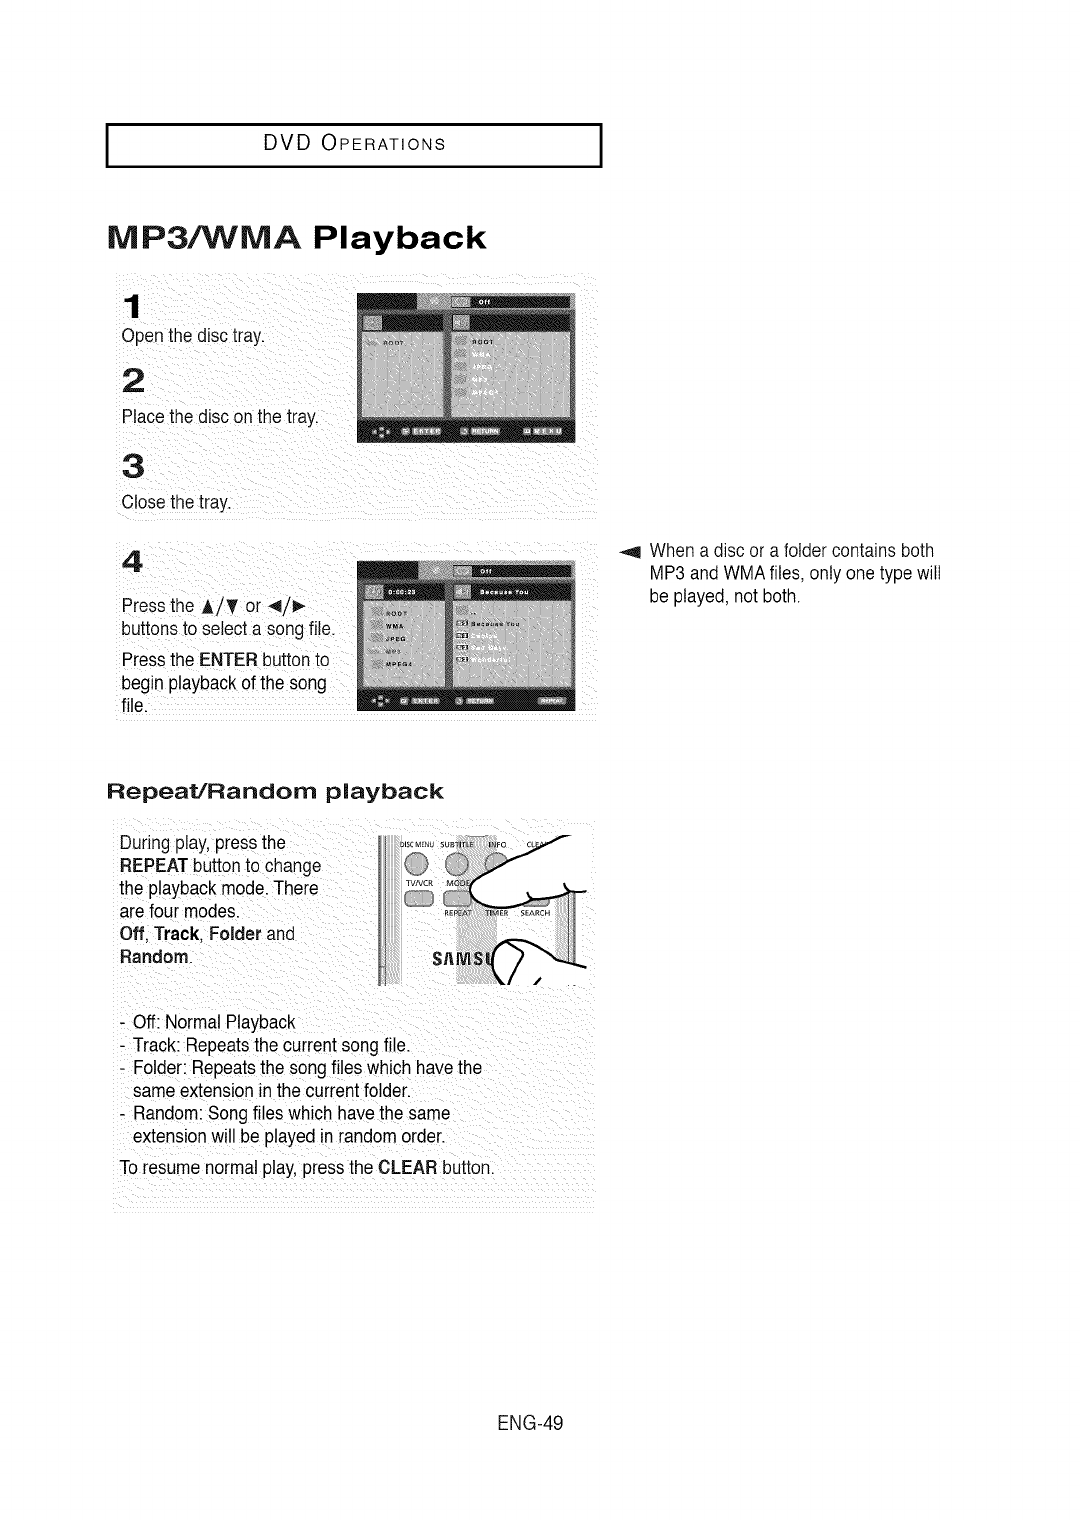
MP3/WMA Playback
OpenthOd sc ray.
butt0ns to selecta s0ng fi!e.
P:g_SplaeyE_T[_ tbiett°onnt;
When a disc or a folder contains both
MP3 and WMAfiles, only one type will
be played,not both.
Repeat/Random playback
Duringplay,press the
REPEATbuttonto change
the playbackmode.There
arefourmodes.
Off. Track. Folderand
Random.
- Off:Normal Playback
- Track: Repeatsthe current songfile.
- Folder:Repeatsthe songflles whichhave the
same extensionin thecurrentfolder.
- Random:Songflleswhich have thesame
extension will be played inrandom order.
To resumenormal play,press the CLEARbutton.
ENG-49
l DVD OPERATIONS I
CD-R lVIP3/VViVlA file
When you recordMP3 orWMA files on CD-R,
pleasereferto the following.
- Your MP3 or WMA files should be ISO 9660 or
JOLIET format.
ISO 9660format and JolietMP3 or WMAfiles are
compatiblewith Microsoft'sDOSand Windows.
and withApple's Mac. Thisformat is the most
widely used.
-When namingyour MP3 or WMAfiles, do not
Use a decompressiontransfer rate of at least
64Kbpswhen recordingWMA files.
Soundqualitywith WMAfiles basically depends
on the rate of cornpresslon/decompressionyou
choose.
GettingCD audio sound requres an
analog/digitalsamplingrate. that is conversionto
WMAformat,of at least64Kbps and upto
192Kbps.
Conversety,files withdecompressionratesbelow
exceed 8 characters,and enter ".mp3, .wma" 64Kbps or over 192Kbpswill not be played
asthe file extension, properly.
Generalname format : Title.mp3.or Title.wma. - Do nottry recordingcopyrightprotectedMP3
When composingyour title, make sure thatyou files.
use 8 charactersor less, have no spaces in the
name.and avoid the use of specialcharacters Certain"secured"files are encryptedand code
including:(.,/,\,=,+). protectedto preventillegal copying.Thesefiles
-Use a decompressiontransfer rate of at least
128 Kbpswhen recordingMP3 files.
Soundqualitywith MP3 files basicallydepends
onthe rate of compression/decompressionyou
choose.Getting CDaudio sound requiresan
analog/digitalsamplingrate,that is conversionto
are of the followingtypes:Windows MediaTM
(registeredtrade markof Microsoft Inc)and
SDMITM (registeredtrade mark of The SDMI
Foundation).Youcannotcopy suchfiles.
-Important:
The above recommendationscannotbe taken as
MP3format, of at least 128 Kbps and upto 160 a guaranteethat the DVD-VCRwill play MP3
Kbps.However,choosing higherrates, like 192 recordings,or as an assuranceof souna quality.
Kbpsor more,only rarelygive better sound Youshould note that certaintechnologiesand
quality.Conversely,files with decompression methodsfor MP3 file recordingon CD-Rs
ratesbelow 128Kbps will not be played properly, preventoptimal playbackof these files onyour
DVD-VCR(degradedsound quality and in some
cases, inabilityof the playerto readthe files).
- This unit can play a maximumof 3000 files and
300folders per disc.
ENG-50
I DVD OPERATIONS
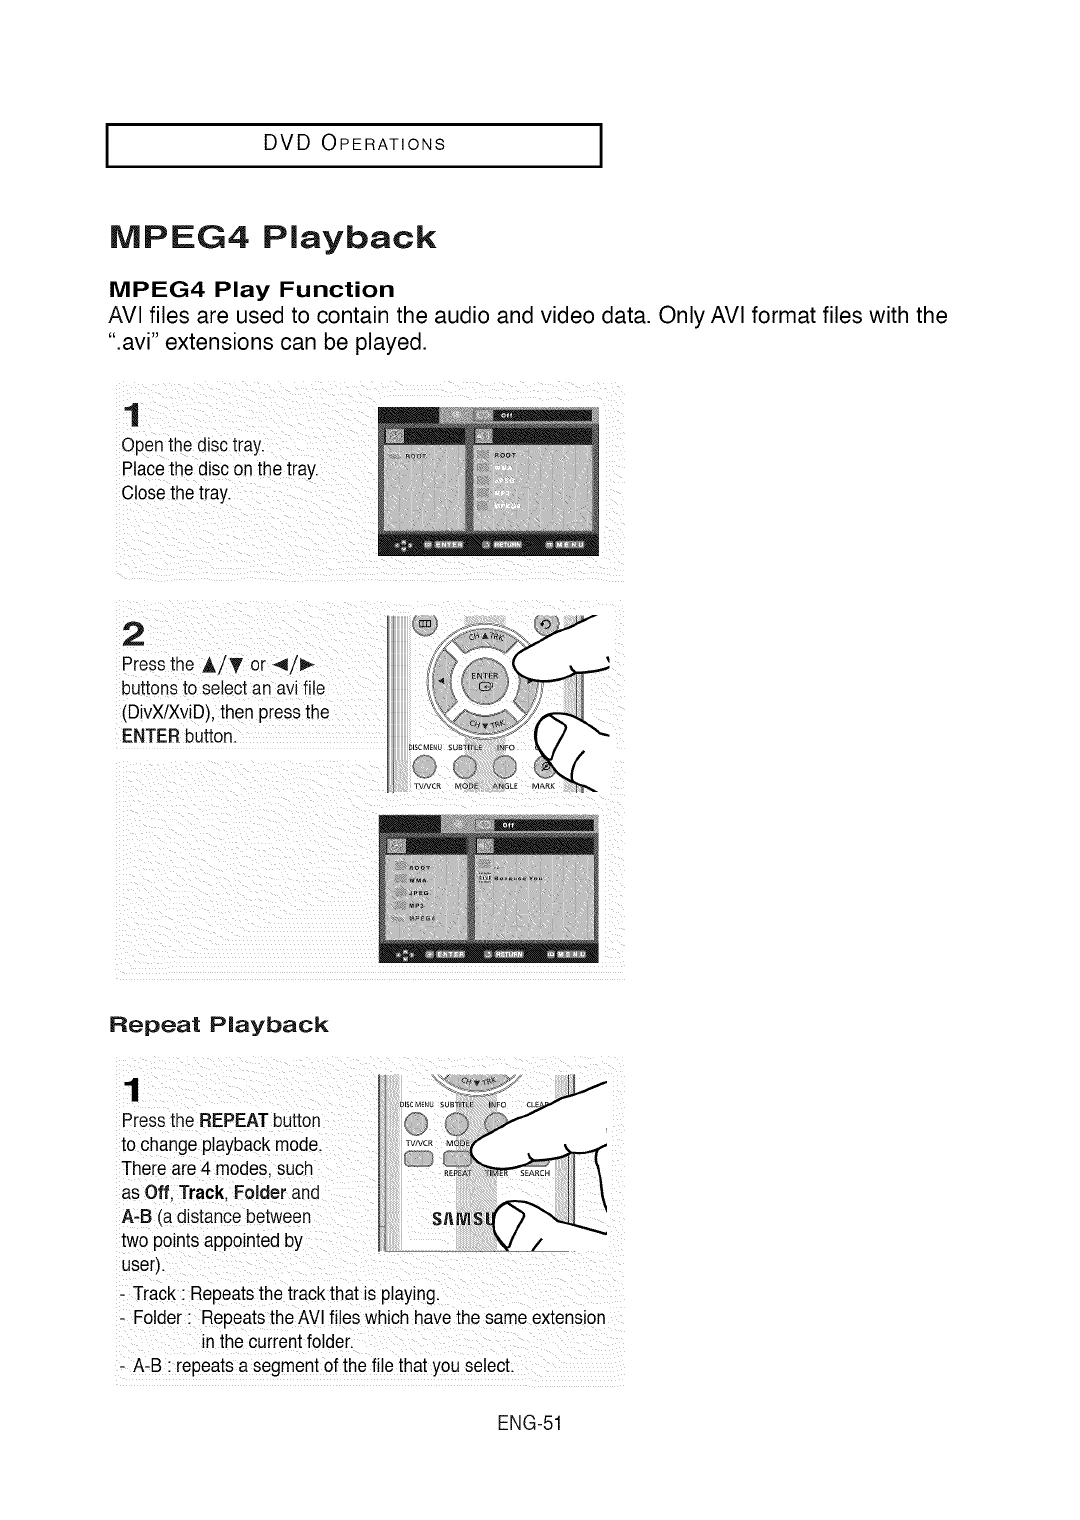
NIPEG4 Playback
MPEG4 Play Function
AVI files are used to contain the audio and video data. Only AVI format files with the
".avi" extensions can be played.
1
Open the disc tray.
Placethe disc onthe tray.
Closethe tray.
2
Pressthe A/T or _/l_
buttonsto select an avi file
(DivX/XviD),then pressthe
ENTERbutton.
Repeat Playback
,Track Repeatsthe track that is p!aying.
- Folder ; Repeats the AVlfiles whichhave the same extension
-A-B ; repeatsa segment of the file that you select,
ENG-51
IDVD OPERATIONS I
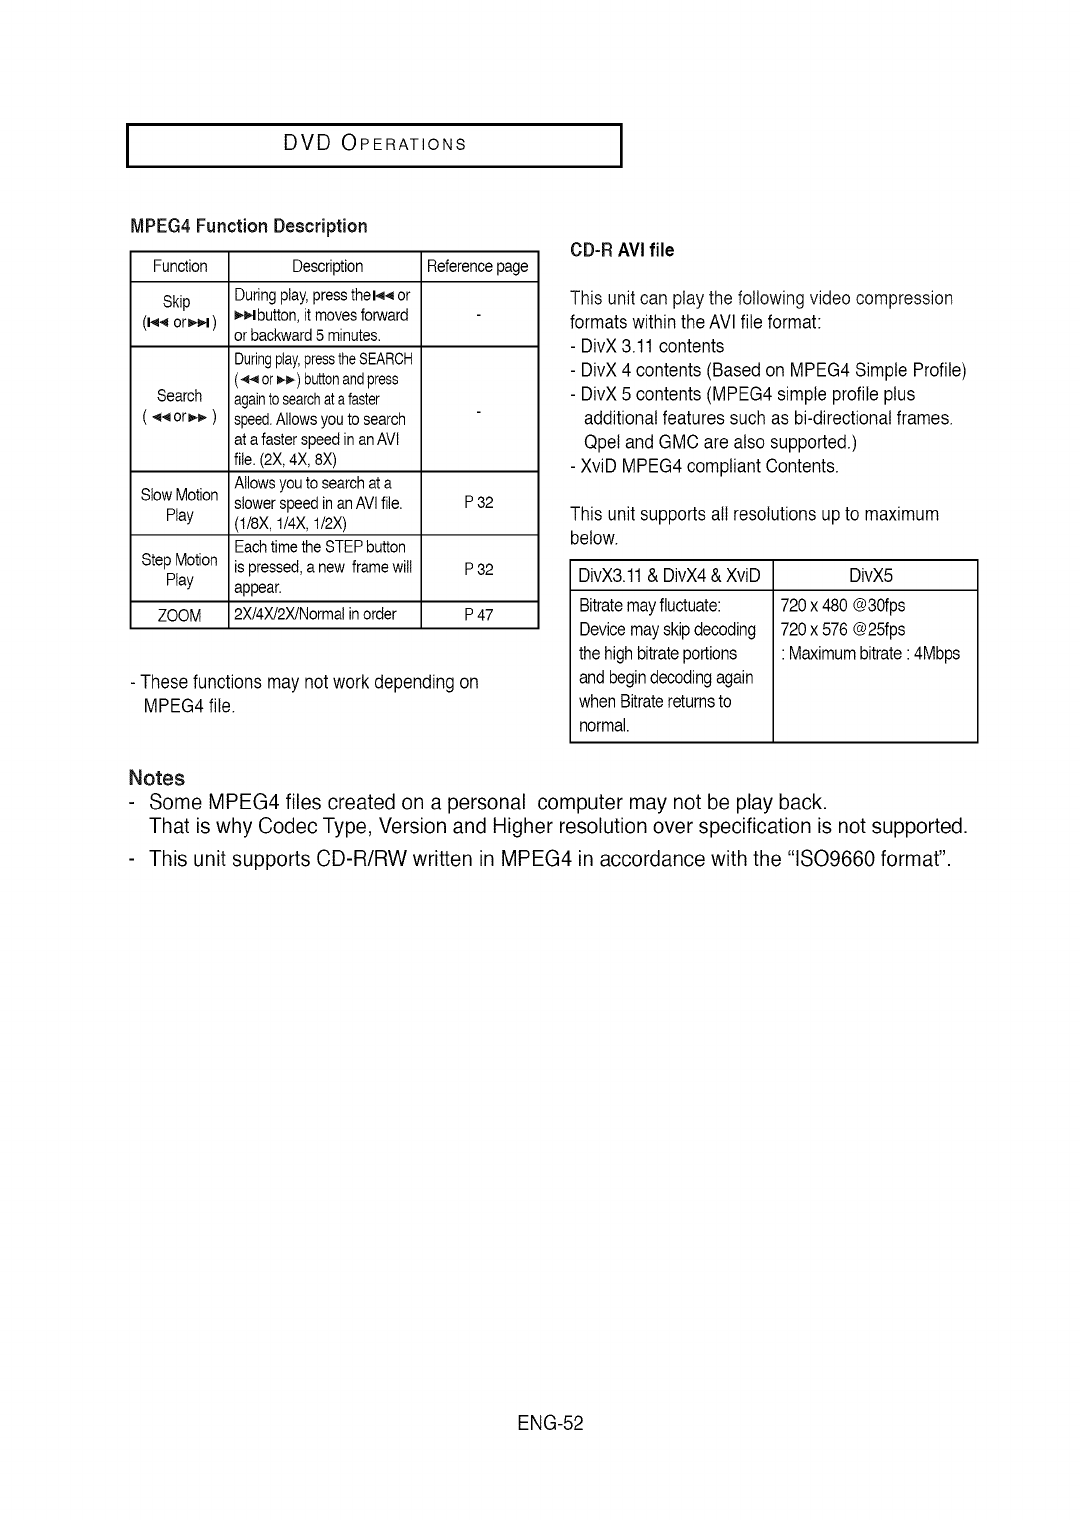
MPEG4 Function Description
Function Referencepage
Skip
(14,_orJ_,l)
S!ow Motion P 32
Play
Step Motion P 32
Play
ZOOM P 47
Description
During play, press thel4_ or
)4_,4button,it moves forward
or backward 5 minutes.
Duringplay,presstheSEARCH
(_ or_) buttonandpress
againto searchat a faster
speed.Allows you to search
at a faster speed in an AVl
file. (2X, 4X, 8X)
Allows you to search at a
slower speed in an AVl file.
(1/8X, 1/4X, 1/2X)
Each time the STEP button
is pressed, a new frame wi!!
appear.
2X/4X/2X/Normal in order
-Thesefunctionsmay not work dependingon
MPEG4file.
CD-R AVIfile
This unit can play the followingvideo compression
formatswithinthe AVl file format:
- DivX3.11 contents
- DivX4 contents (Basedon MPEG4 Simple Profile)
- DivX5 contents(MPEG4 simpleprofile plus
additionalfeatures suchas bi-directionatframes.
Qpeland GMCare also supported.)
- XviD MPEG4compliant Contents.
This unit supportsall resolutionsupto maximum
below.
DivX3.11 & DivX4 & XviD DivX5
Bitratemay fluctuate:
Devicemayskip decoding
the highbitrate portions
and begindecodingagain
when Bitratereturnsto
normal.
720 x 480 @30fps
720 x 576 @25fps
: Maximumbitrate :4Mbps
Notes
Some MPEG4 files created on a personal computer may not be play back.
That is why Codec Type, Version and Higher resolution over specification is not supported.
This unit supports CD-R/RW written in MPEG4 in accordance with the "1SO9660 format".
ENG-52
I DVD OPERATIONS
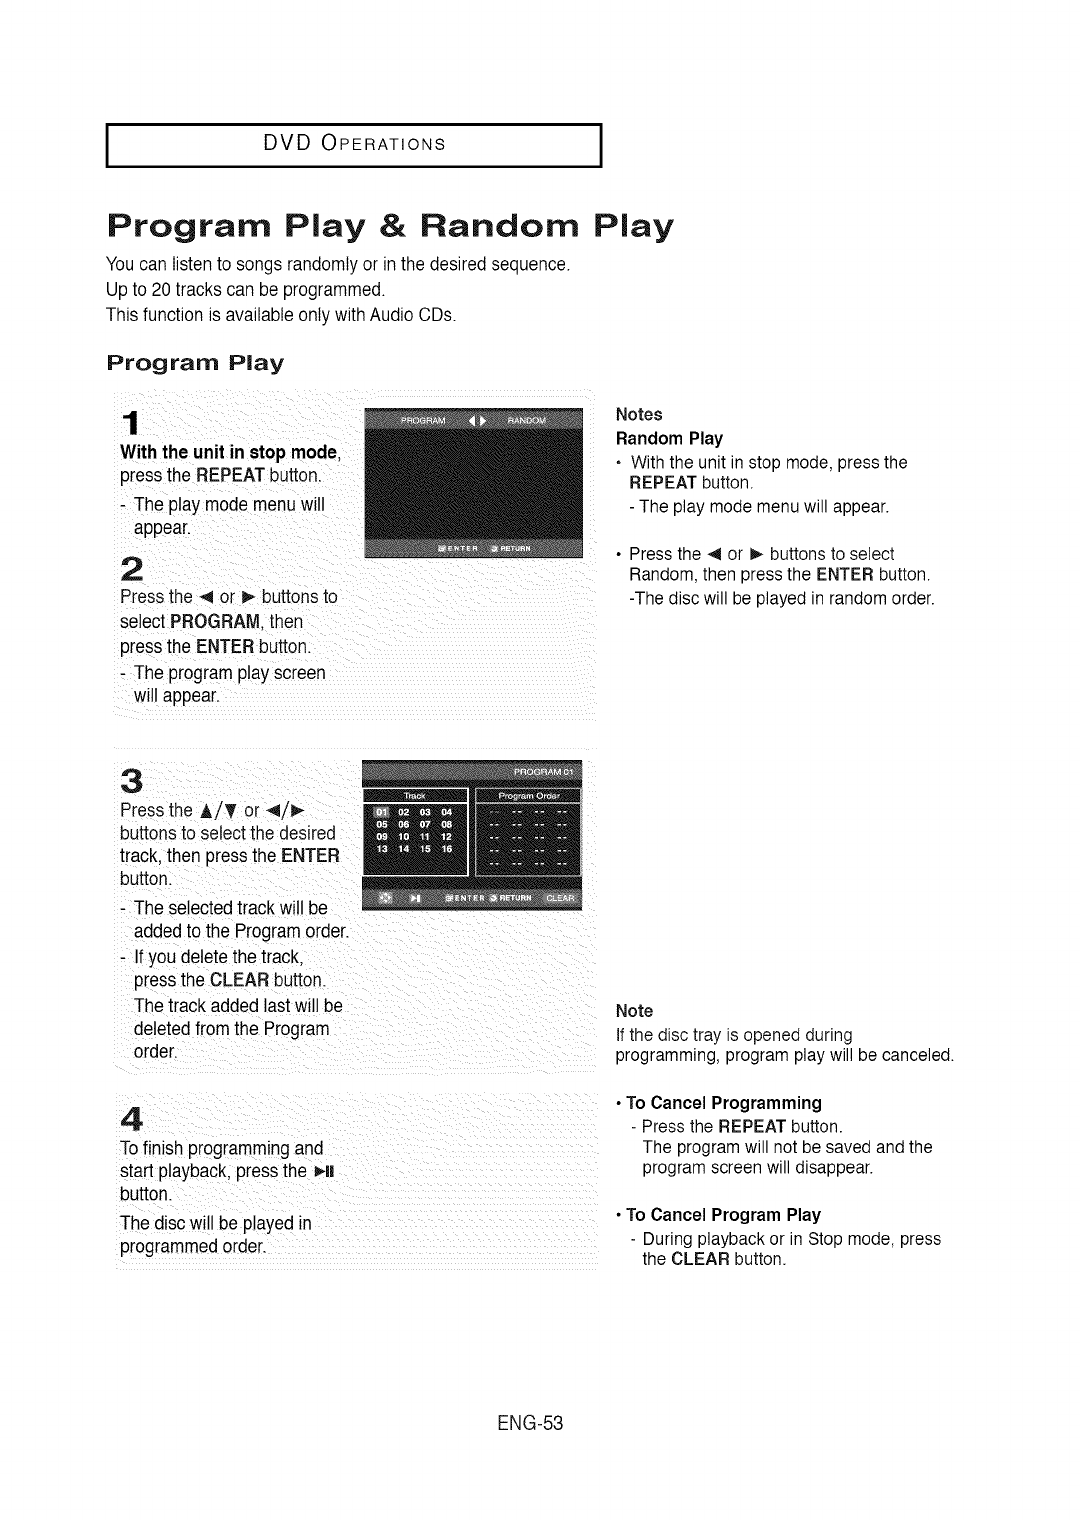
Program Play & Random
Youcan listento songs randomlyor inthe desired sequence.
Up to 20tracks can be programmed.
Thisfunction is availableonly with AudioCDs.
Program Ray
1
With the unit in stopmode.
pressthe REPEATbutton.
- The play mode menu will
appear.
2
Pressthe 4 or _ buttonsto
select PROGRAM.then
pressthe ENTERbutton.
- The program play screen
will appear.
Play
Notes
Random Play
• With the unit in stop mode, press the
REPEAT button.
- The play mode menu will appear.
•Press the _ or P,-buttons to select
Random, then press the ENTER button.
-The disc will be played in random order.
3
Pressthe A/T or 4/_
buttonsto select the desired
track,then pressthe ENTER
button.
- The selectedtrack will be
addedto the Programorder.
- Ifyou delete the track.
pressthe CLEAR button.
The track added lastwill be
deletedfrom the Program
order.
4
Tofinish programmingand
start playback, pressthe Hi
button.
The disc will be played in
programmedorder.
Note
if the disc tray is opened during
programming, program play will be canceled.
• To Cancel Programming
- Press the REPEAT button.
The program will not be saved and the
program screen will disappear.
•To Cancel Program Play
- During playback or in Stop mode, press
the CLEAR button.
ENG-53
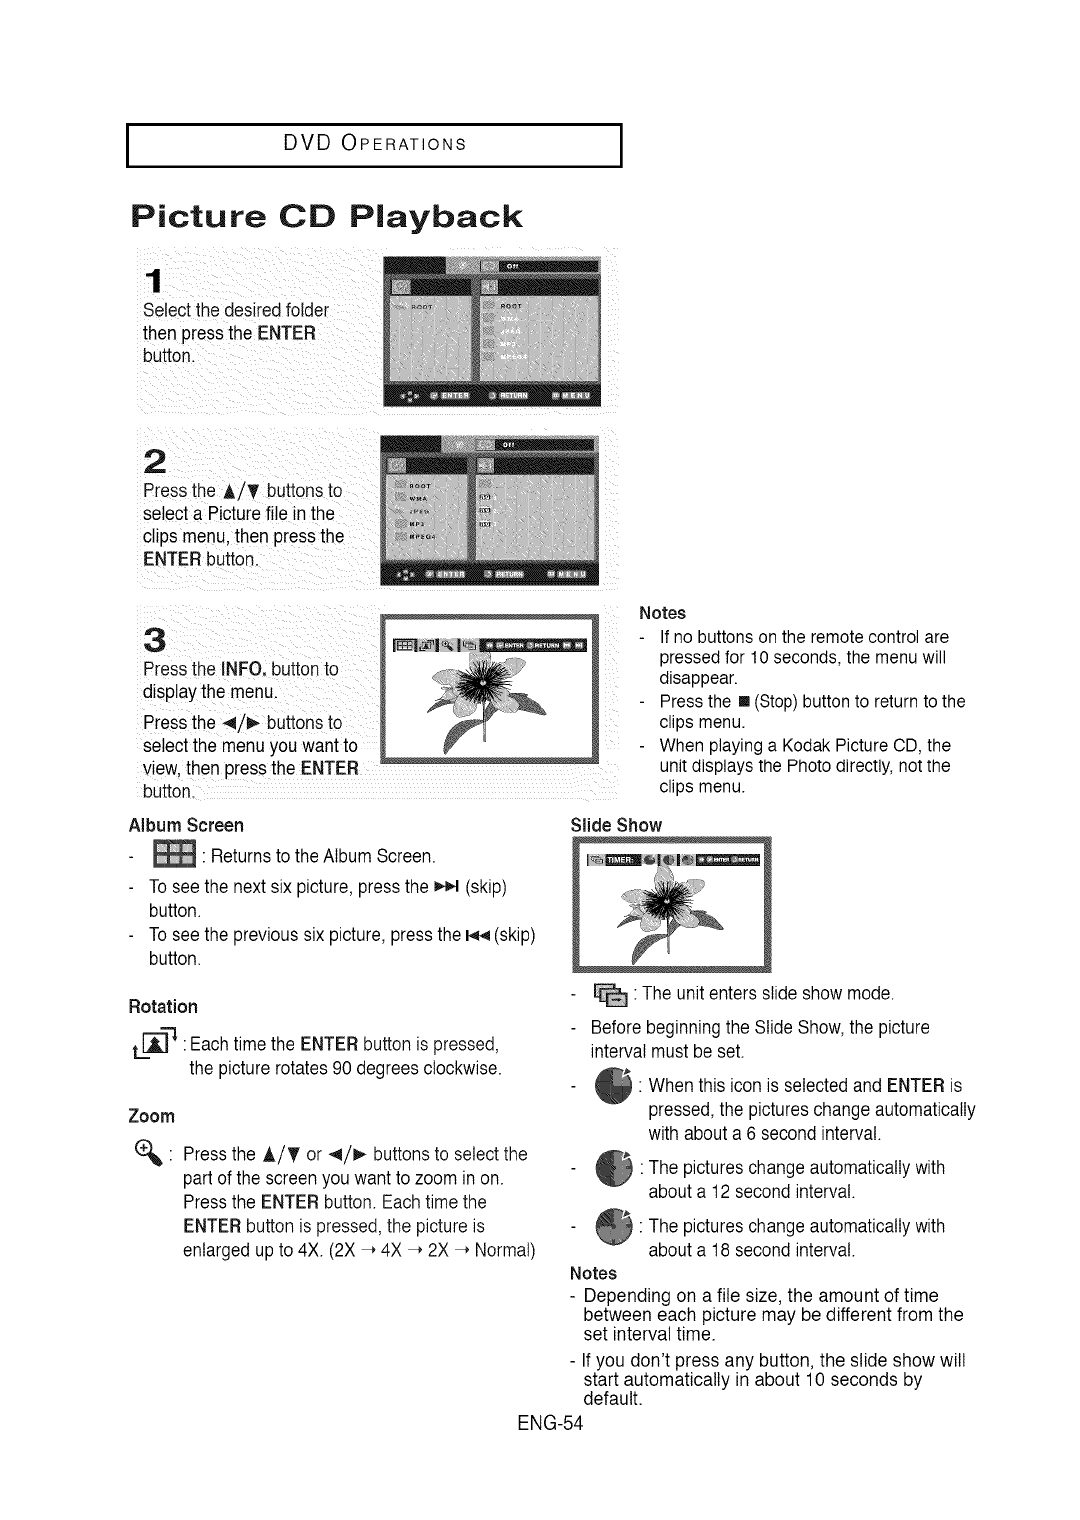
IDVD OPERATIONS I
Picture CD Playback
1
Selectthe desired folder
then pressthe ENTER
button.
2
Pressthe A/T buttons to
select a Picturefile in the
cl ps menu.then pressthe
ENTERbutton.
iL
3
Pressthe INFO. buttonto
displaythe menu.
Pressthe 4/_- buttonsto
select the menuyou wantto
view, then pressthe ENTER
button.
Notes
If no buttons on the remote control are
pressed for 10 seconds, the menu will
disappear•
Press the [] (Stop) button to return to the
clips menu.
When playing a Kodak Picture CD, the
unit displays the Photo directly, not the
clips menu.
Album Screen
_ Returnsto the Album Screen.
To see the nextsix picture, pressthe _ (skip)
button.
To see the previoussix picture,pressthe _ (skip)
button.
Rotation
L=[A-']"q": Eachtime the ENTER buttonis pressed,
the picture rotates90 degrees clockwise.
Zoom
%. Pressthe A/T or ,_/_ buttonsto select the
part of the screenyou want to zoom in on•
Pressthe ENTERbutton•Eachtime the
ENTERbutton is pressed,the pictureis
enlargedup to 4X• (2X-, 4X -, 2X -, Normal)
Slide Show
_ The unit enters slide show mode.
Before beginning the Slide Show, the picture
interval must be set.
• When this icon is selectedand ENTERis
pressed, the pictures change automatically
with about a 6 secondinterval.
•The pictureschange automaticallywith
about a 12 secondinterval•
: The pictureschange automaticallywith
about a 18 secondinterval•
Notes
- Depending on a file size, the amount of time
between each picture may be different from the
set interval time.
- If you don't press any button, the slide show will
start automatically in about 10 seconds by
default.
ENG-54
DVD OPERATIONS
CD=R JPEG Discs
- Only files with the ".jpg"and".JPG" extensionscan be played.
- Ifthe disc is not closed, it will take longerto start playingand not all ofthe recordedfiles may be played.
- Only CD-R discswith JPEG files in ISO 9660or Joliet format can be played.
- The name of the JPEG file may not be longerthan 8 charactersand shouldcontain no blank spaces or
special characters (. t= +).
- Only a consecutivelywritten multi-sessiondisccan be played.If there is a blank segment inthe multi-
session disc. the disccan be played only upto the blank segment.
- A maximumof 3000imagescan be storedon a single CD.
- Kodak PictureCDs are recommended.
- When playinga Kodak PictureCD. only the JPEG files in the picturesfolder can be played.
- Kodak PictureCD:The JPEG files in the picturesfolder can be playedautomatically.
- Konica PictureCD: Ifyou want to seethe Picture.select the JPEG files in the clipsmenu.
- Fuji PictureCD: Ifyou wantto see the Picture,select the JPEG files inthe clips menu.
- QSS PictureCD: The unit may not play QSS PictureCD.
- Ifthe number of files in I Disc is over 3000, only the first 3000 JPEG filescan be played.
- If the numberof foldersin 1 Disc is over 300, onlyJPEG files inthe first 300 folderscan be played.
ENG-55
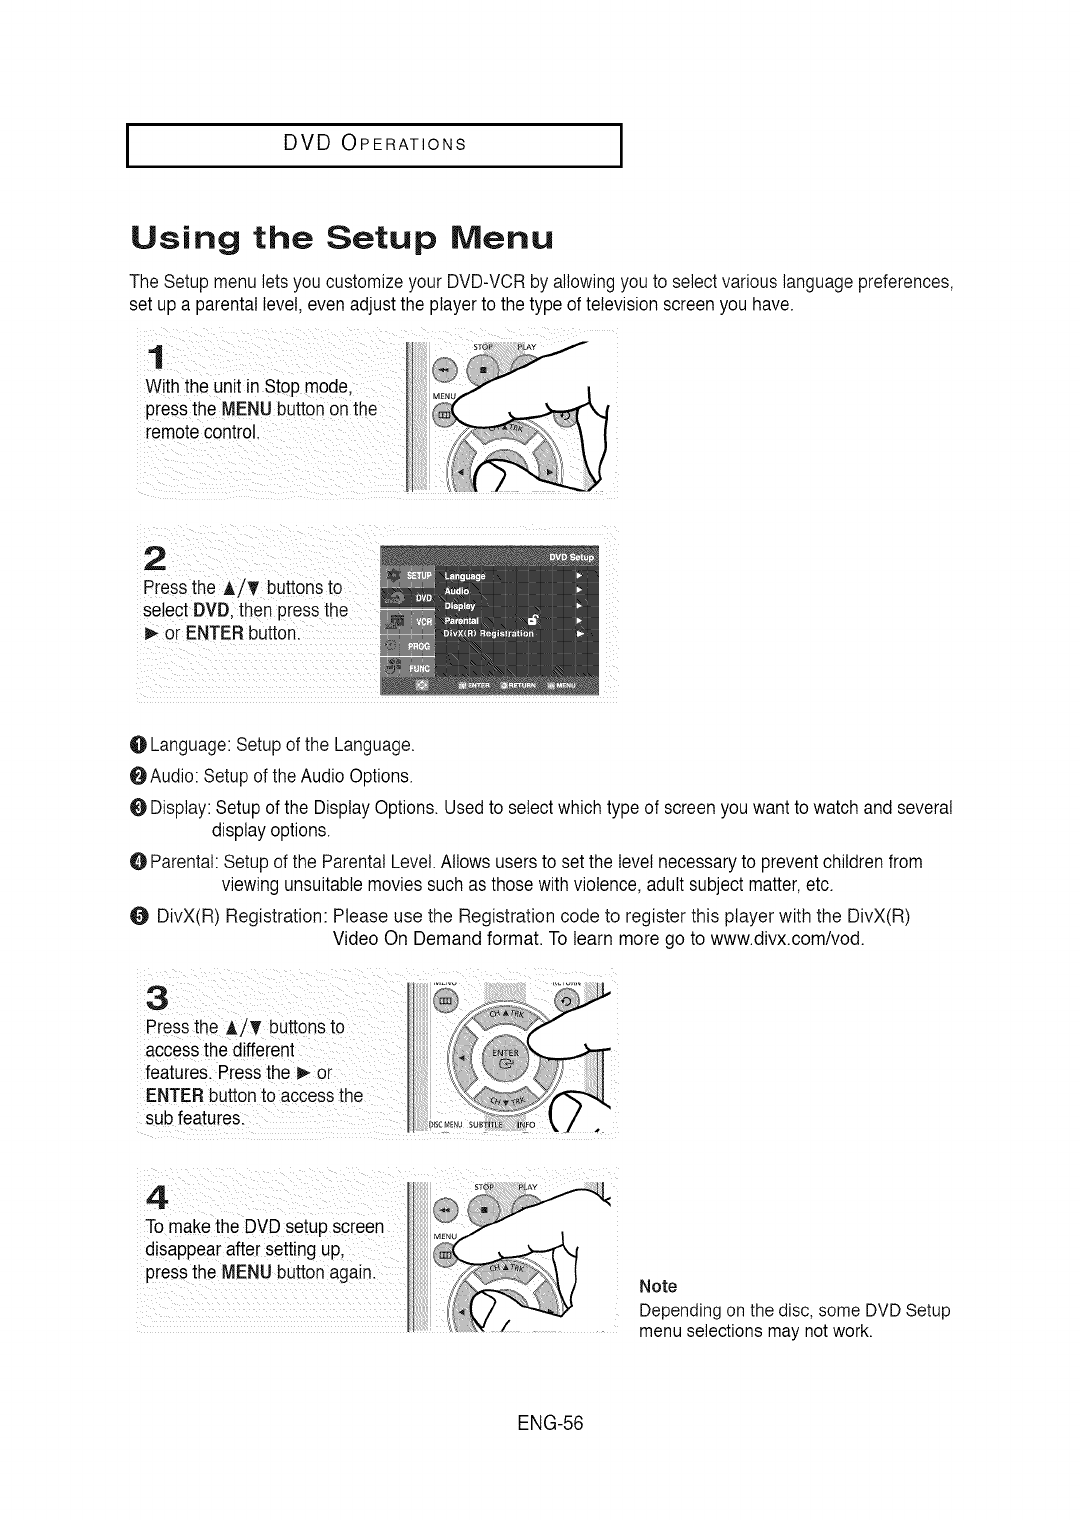
I DVD OPERATIONS I
Using the Setup Menu
The Setup menu letsyou customizeyour DVD-VCRby allowing you to select variouslanguagepreferences,
setup a parentallevel, even adjustthe playerto the type of television screenyou have.
1
With the unit in Stop mode,
pressthe MENUbutton onthe
remotecontrol.
2
Pressthe A/T buttonsto
select DVD. then pressthe
D,-or ENTERbutton.
OLanguage:Setup of the Language.
OAudio: Setupof the AudioOptions.
ODisplay:Setupof the DisplayOptions. Usedto select whichtype of screenyou want to watch and several
displayoptions.
O Parental:Setup of the Parental Level.Allows usersto setthe level necessaryto preventchildrenfrom
viewing unsuitablemovies suchas those with violence,adult subjectmatter,etc.
ODivX(R) Registration: Please use the Registration code to register this player with the DivX(R)
Video On Demand format. To learn more go to www.divx.com/vod.
Note
Depending on the disc, some DVD Setup
menu selections may not work.
ENG-56
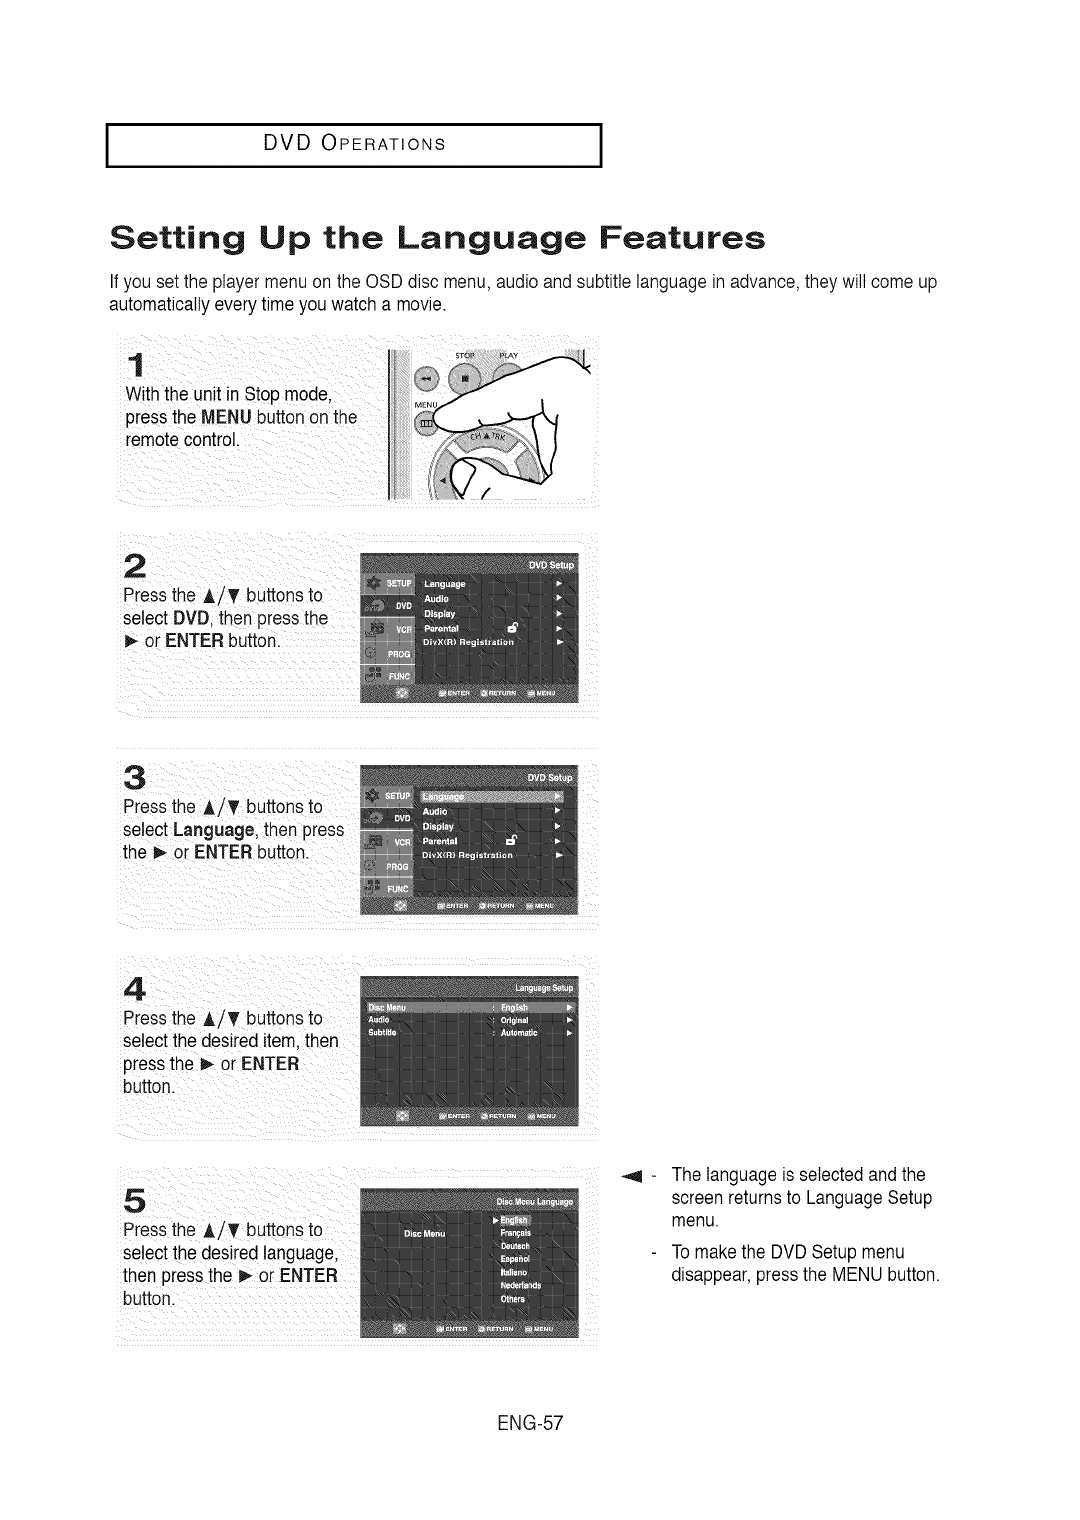
I DVD OPERATIONS
Setting Up the Language Features
Ifyou setthe player menu on the OSD disc menu,audioand subtitle languagein advance,they will comeup
automaticallyeverytime you watch a movie.
With the unit in Step mode,
Press the MENUbutton on the
remote control.
select DVDI then pressthe !
or ENTERbutton.
3
Pressthe A/T buttons to
select Language, then press
the _ or ENTERbutton.
4
Pressthe ,L/T buttons to
select the desired item.then
pressthe D,-or ENTER
button.
5
Pressthe A/T buttons to
select the desired language,
then pressthe _- or ENTER
button.
The languageis selectedand the
screenreturnsto LanguageSetup
menu.
To makethe DVDSetup menu
disappear,pressthe MENU button.
ENG-57
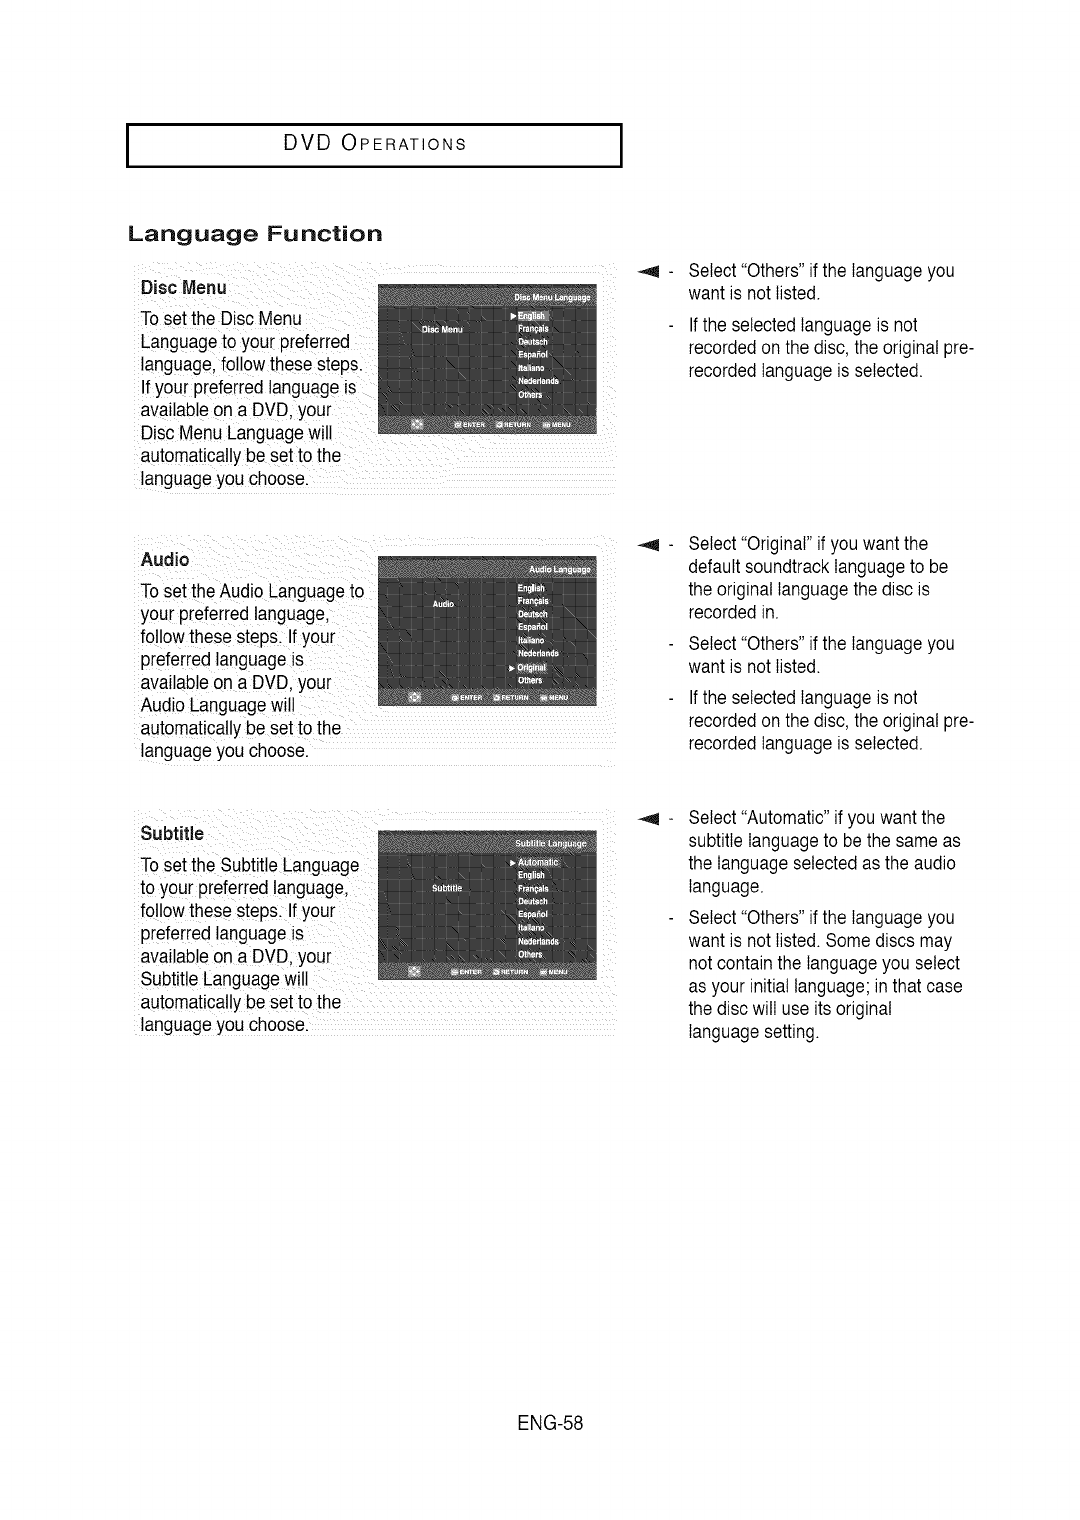
IDVD OPERATIONS I
Language Function
To setthe Disc Menu
Languageto :YOU[preferred
language,follow thesestepsi
If your preferred languageis
i
Disc MenuLanguage wil!
aut0matica!!ybe setto !he :
: !anguageyou choose:
select "Others" if the languageyou
want is not listed.
Ifthe selected languageis not
recordedon the disc, the originalpre-
recordedlanguageis selected.
Audio :
Toset the Audio Eanguageto
your preferred language:
follow these stepslIf your
preferred languageis
languageyou choose. ....
Select"Original"if you wantthe
defaultsoundtracklanguageto be
the original languagethe disc is
recorded in.
Select "Others"if the languageyou
want is not listed.
Ifthe selected languageis not
recordedon the disc, the original pre-
recordedlanguageis selected.
Subtitle :
To set the SubtitleLanguage
to your preferredlanguage,
follow these steps f your
preferred lang
automat ca y be set to the : : :
anguageyou choose. : :
Select"Automatic"if you wantthe
subtitlelanguageto bethe same as
the languageselectedas the audio
language.
Select"Others" if the languageyou
want is not listed. Somediscs may
not containthe languageyou select
as your initial language;in that case
the discwill use its original
Ianguagesetting.
ENG-58
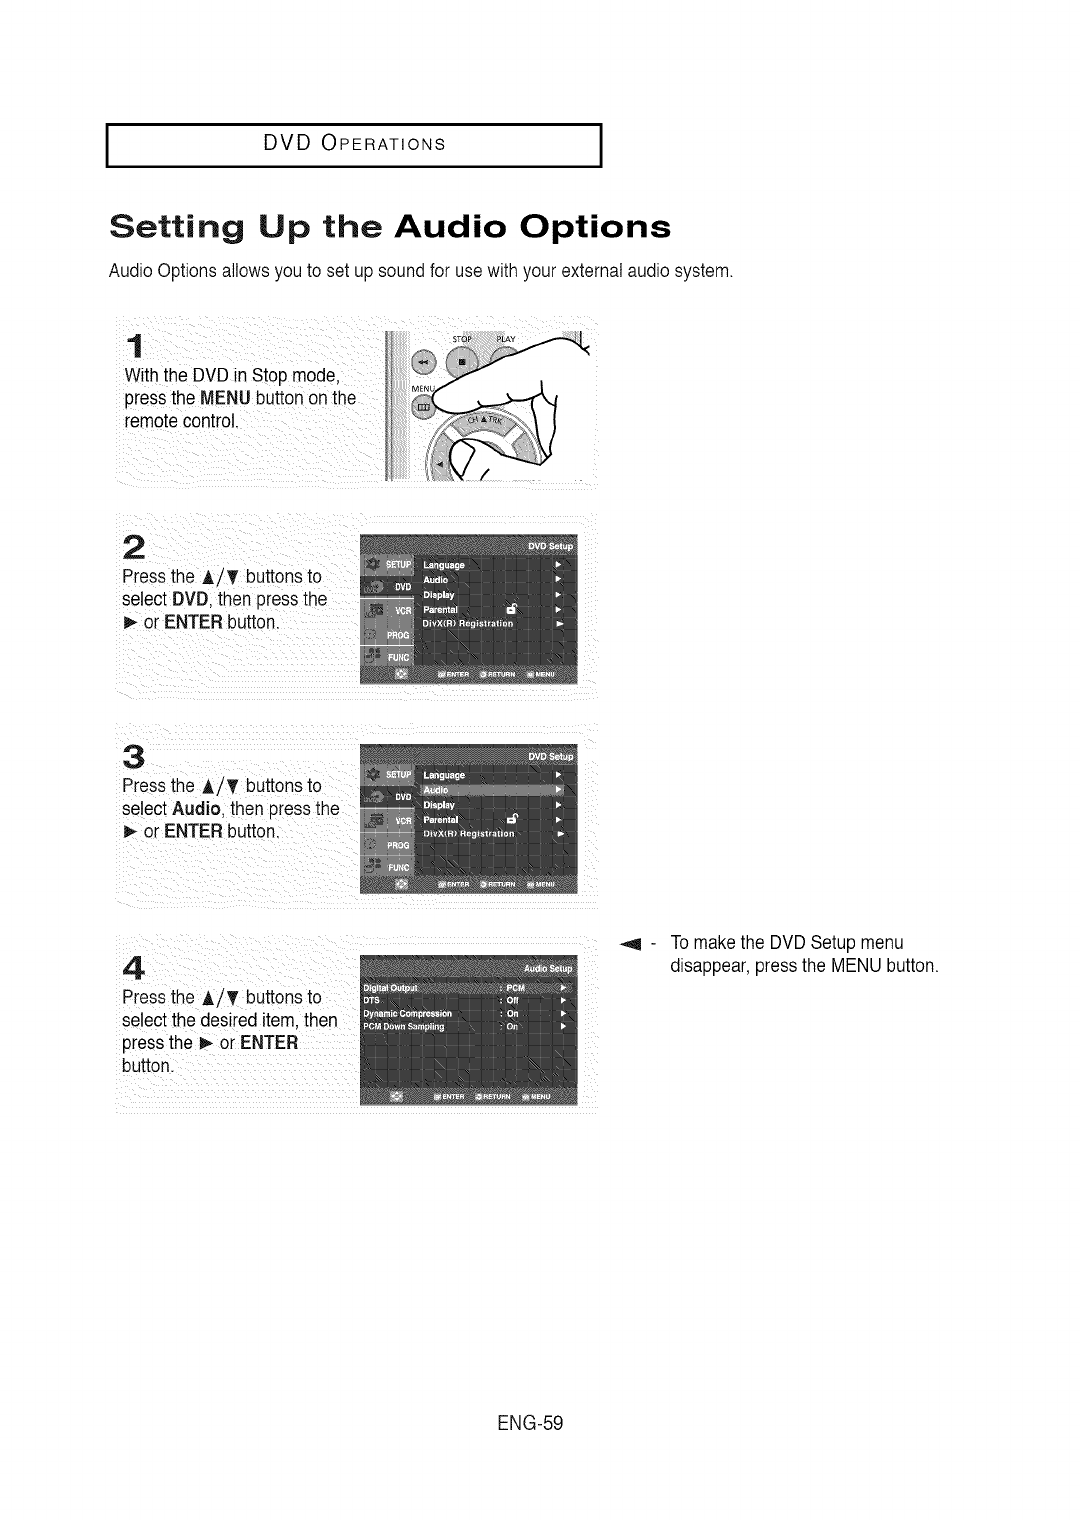
I DVD OPERATIONS
Setting Up the Audio Options
AudioOptions allows you to set up sound for usewith your externalaudiosystem.
1
Withthe DVD in Stop mode.
pressthe MENU buttonon the
remote control.
2
Pressthe A/T buttonsto
select DVD.then pressthe
P,-or ENTER button.
3
Pressthe A/T buttonsto
selectAudio. then pressthe
i_ or ENTER button.
4
Pressthe A/T buttonsto
selectthe desired item. then
pressthe _ or ENTER
button.
To makethe DVD Setup menu
disappear,pressthe MENU button.
ENG-59
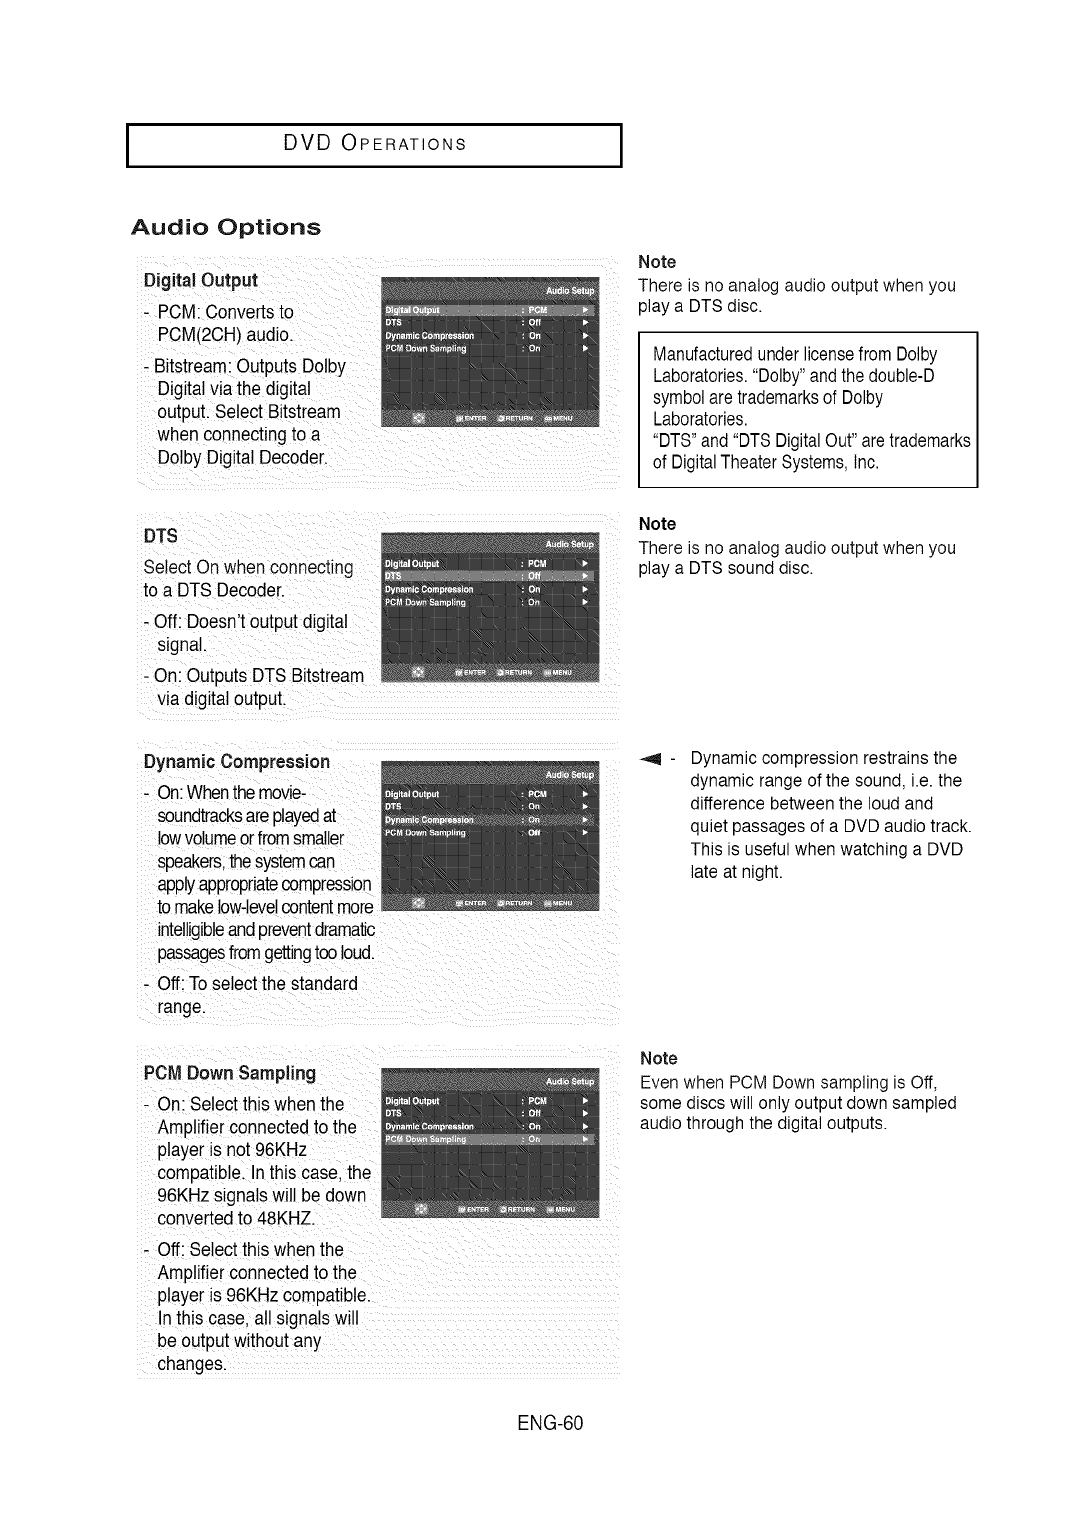
IDVD OPERATIONS I
Audio Options
Digital Output
- PCM:Convertsto
PCM(2CH)audio.
- Bitstream:Outputs Dolby
Digitalviathe digital
output. Select Bitstream
when connectingto a
DolbyDigital Decoder....
Note
There is no analog audio output when you
play a DTS disc.
Manufacturedunderlicensefrom Dolby
Laboratories."Dolby"andthe double-D
symbolaretrademarksof Dolby
Laboratories.
"DTS"and"DTSDigitalOut"aretrademarks
of DigitalTheaterSystems,Inc.
DTS
SelectOnwhen connecting
to a DTSDecoder.
- Off: Doesn't outputdigital
signal.
- On: Outputs DTS Bitstream
via digital output.
Note
There is no analog audio output when you
play a DTS sound disc.
DynamicCompression
- On:Whenthemovie-
soundtracksareplayedat
lowvolumeorfromsmaller
speakers,thesystemcan
applyappropriatecompression
to makelow-levelcontentmore
intelligibleandpreventdramatic
passagesfromgettingtooloud.
- Off: To select the standard
range.
PCM Down Sampling
- On: Selectthis when the
Amplifierconnectedto the
player is not 96KHz
compatible. Inthis case. the
96KHz signalswill be down
converted to 48KHZ.
- Off: Selectthis when the
Amplifierconnectedto the
player is 96KHzcompatible.
In this case, all signalswiJ
be output without any
changes.
Dynamic compression restrains the
dynamic range of the sound, i.e. the
difference between the loud and
quiet passages of a DVD audio track.
This is useful when watching a DVD
late at night.
Note
Even when PCM Down sampling is Off,
some discs will only output down sampled
audio through the digital outputs.
ENG-60
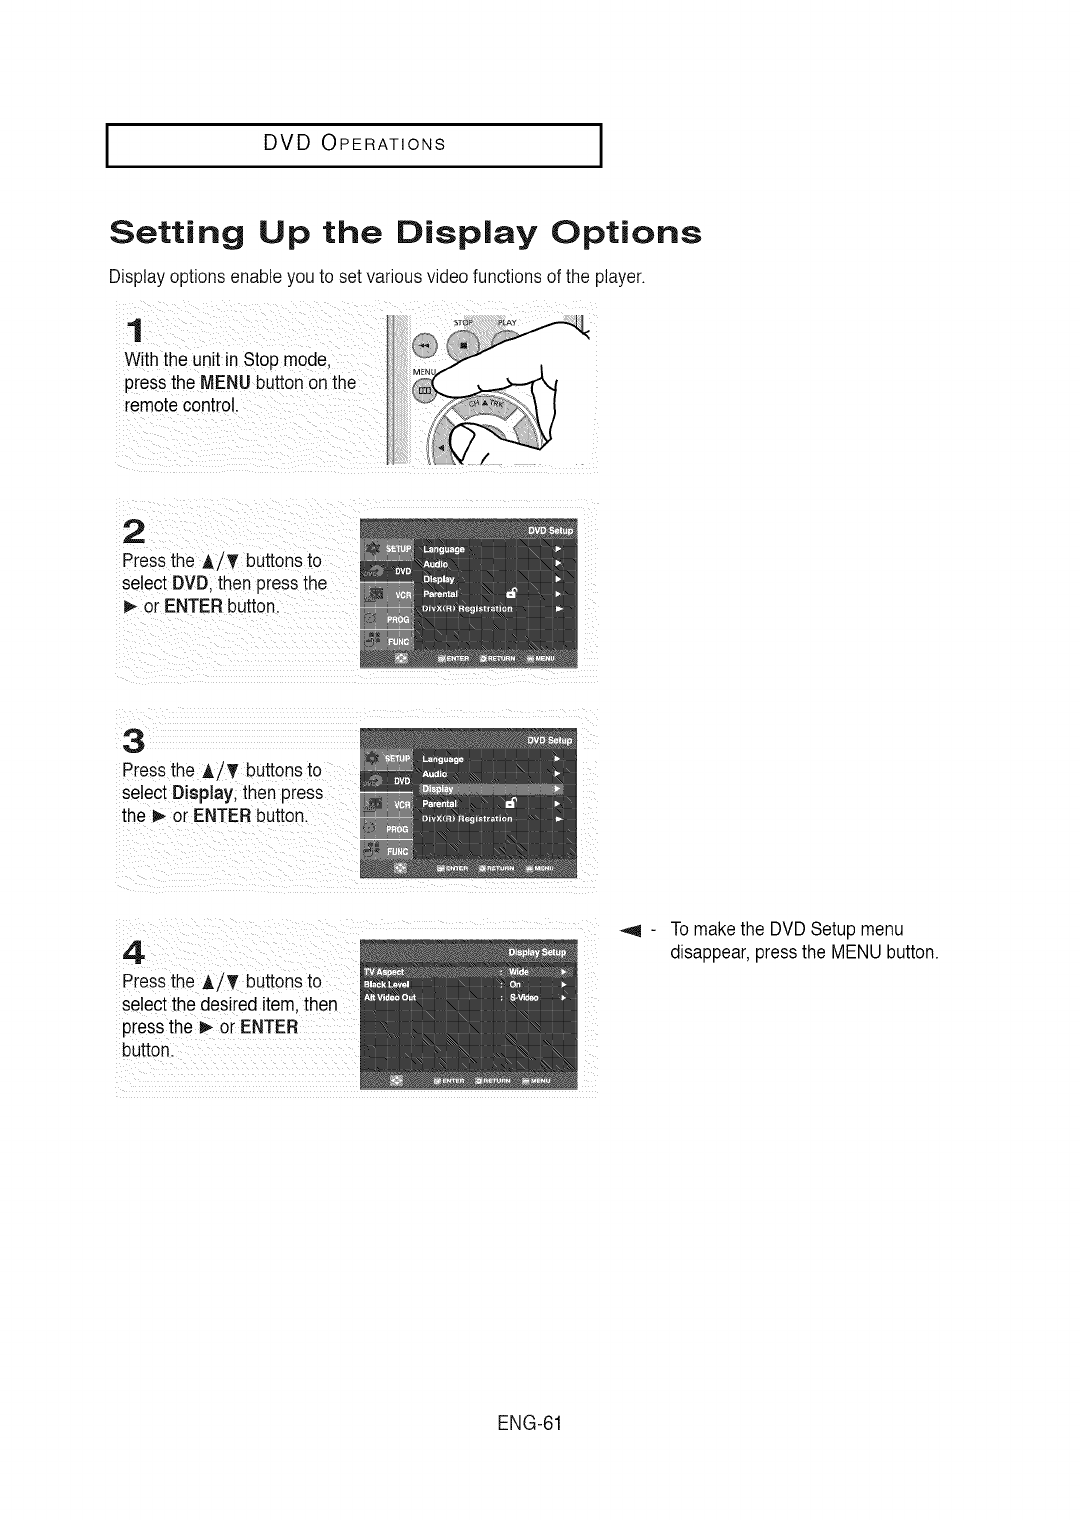
I DVD OPERATIONS
Setting Up the Display Options
Display optionsenableyou to set variousvideo functionsof the player.
1
Withthe unit inStop mode.
pressthe MENU buttonon the
remotecontrol.
2
Pressthe A/T buttonsto
select DVD.then pressthe
_,-or ENTER button.
3
Pressthe A/T buttonsto
select Display, then press
the _ or ENTER button.
4
Pressthe A/T buttonsto
selectthe desired item. then
pressthe D,-or ENTER
button.
To makethe DVD Setup menu
disappear,pressthe MENU button.
ENG-61
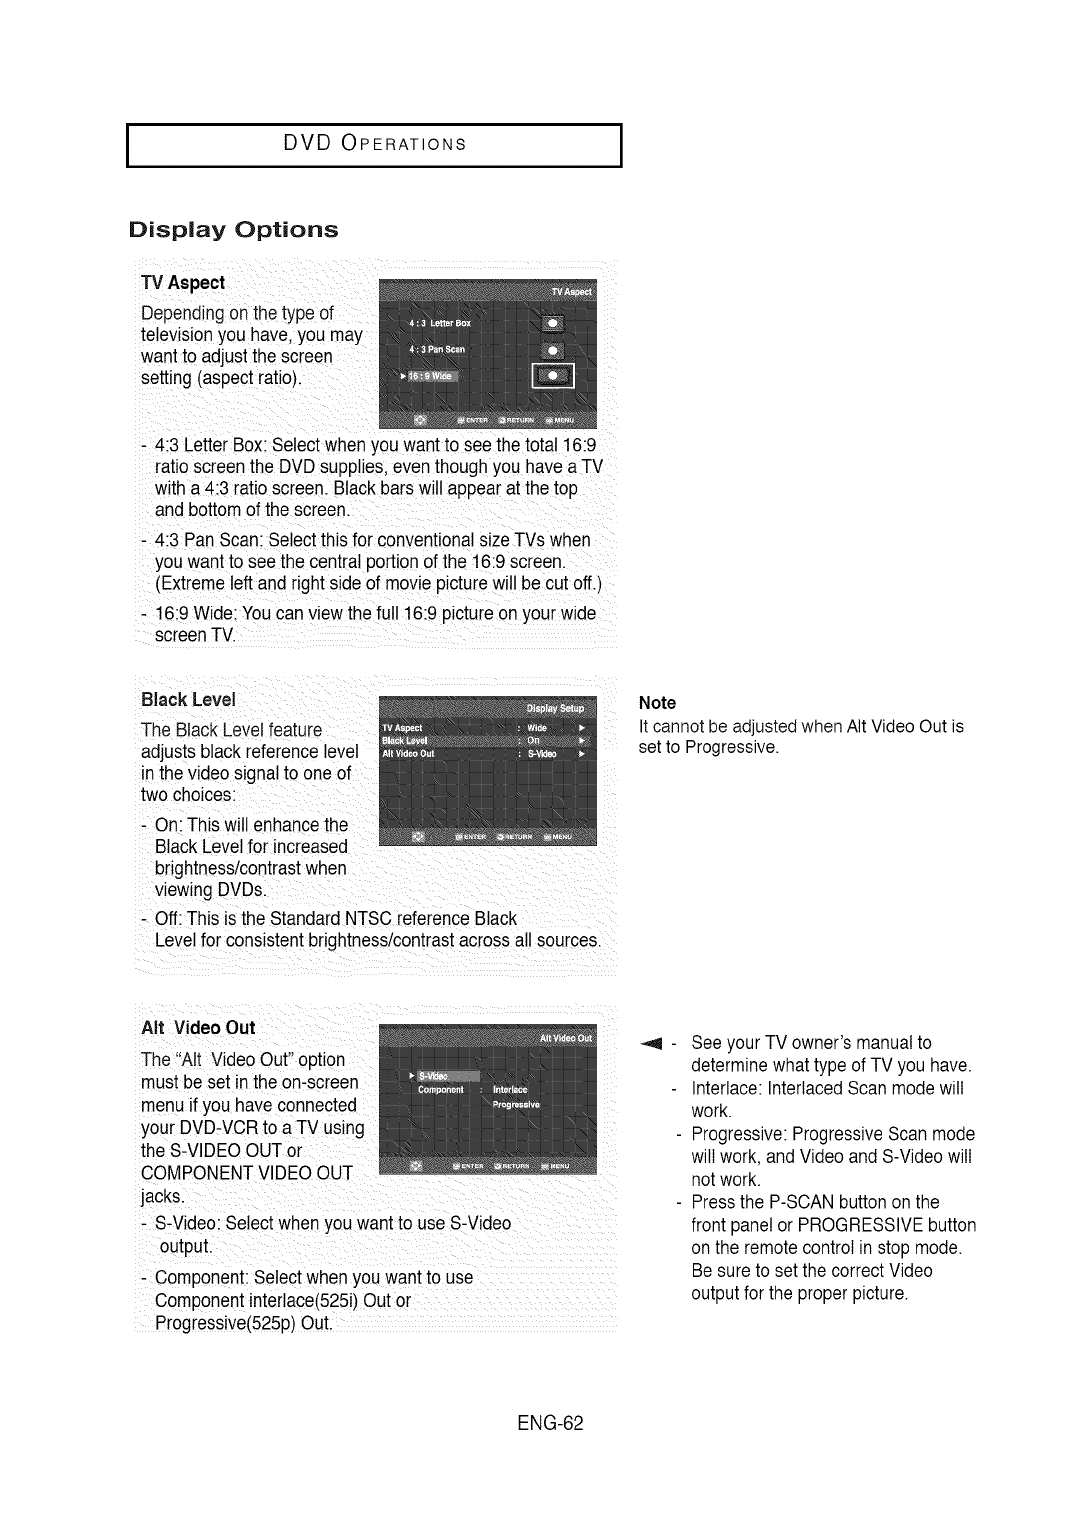
I DVD OPERATIONS I
Display Options
TV Aspect
Dependingon the type of
television you have,you may
want to adjustthe screen
setting(aspect ratio).
- 4:3 LetterBox: Selectwhen you want to see the total 16:9
ratioscreen the DVD supplies,even though you have aTV
with a4:3 ratio screen. Blackbars will appear at the top
and bottom of the screen.
- 4:3 PanScan: Selectthis for conventionalsizeTVs when
you want to see the central portion of the 16:9 screen
(Extremeleft and right side of moviepicturewill be cut off.)
16:9Wide:You canview the full 16:9 pictureon your wide
screenTV.
Black Level
The BlackLevel feature
adjustsblack referencelevel
inthe video signalto one of
two choices:
- On: This will enhancethe
BlackLevelfor increased
brightnesslcontrastwhen
viewing DVDs.
- Off: This is the Standard NTSCreferenceBlack
Levelfor consistentbrightness/contrastacross all sources.
Note
It cannot be adjusted when AIt Video Out is
set to Progressive.
AIt Video Out
The "Alt Video Out"option
mustbe set inthe on-screen
menu ifyou haveconnected
your DVD-VCRto a TV using
the S-VIDEOOUTor
COMPONENTVIDEOOUT
jacks.
- S-Video: Selectwhen you want to use S-Video
output.
- Component:Selectwhen you want to use
Component interlace(525i)Out or
Progressive(525p)Out.
Seeyour TV owner's manual to
determinewhat type of TV you have.
Interlace:InterlacedScan mode will
work.
Progressive:ProgressiveScan mode
will work, and Videoand S-Videowill
not work.
Pressthe P-SCANbuttonon the
front panelor PROGRESSIVEbutton
onthe remotecontrol in stop mode.
Be sure to setthe correctVideo
outputfor the properpicture.
ENG-62
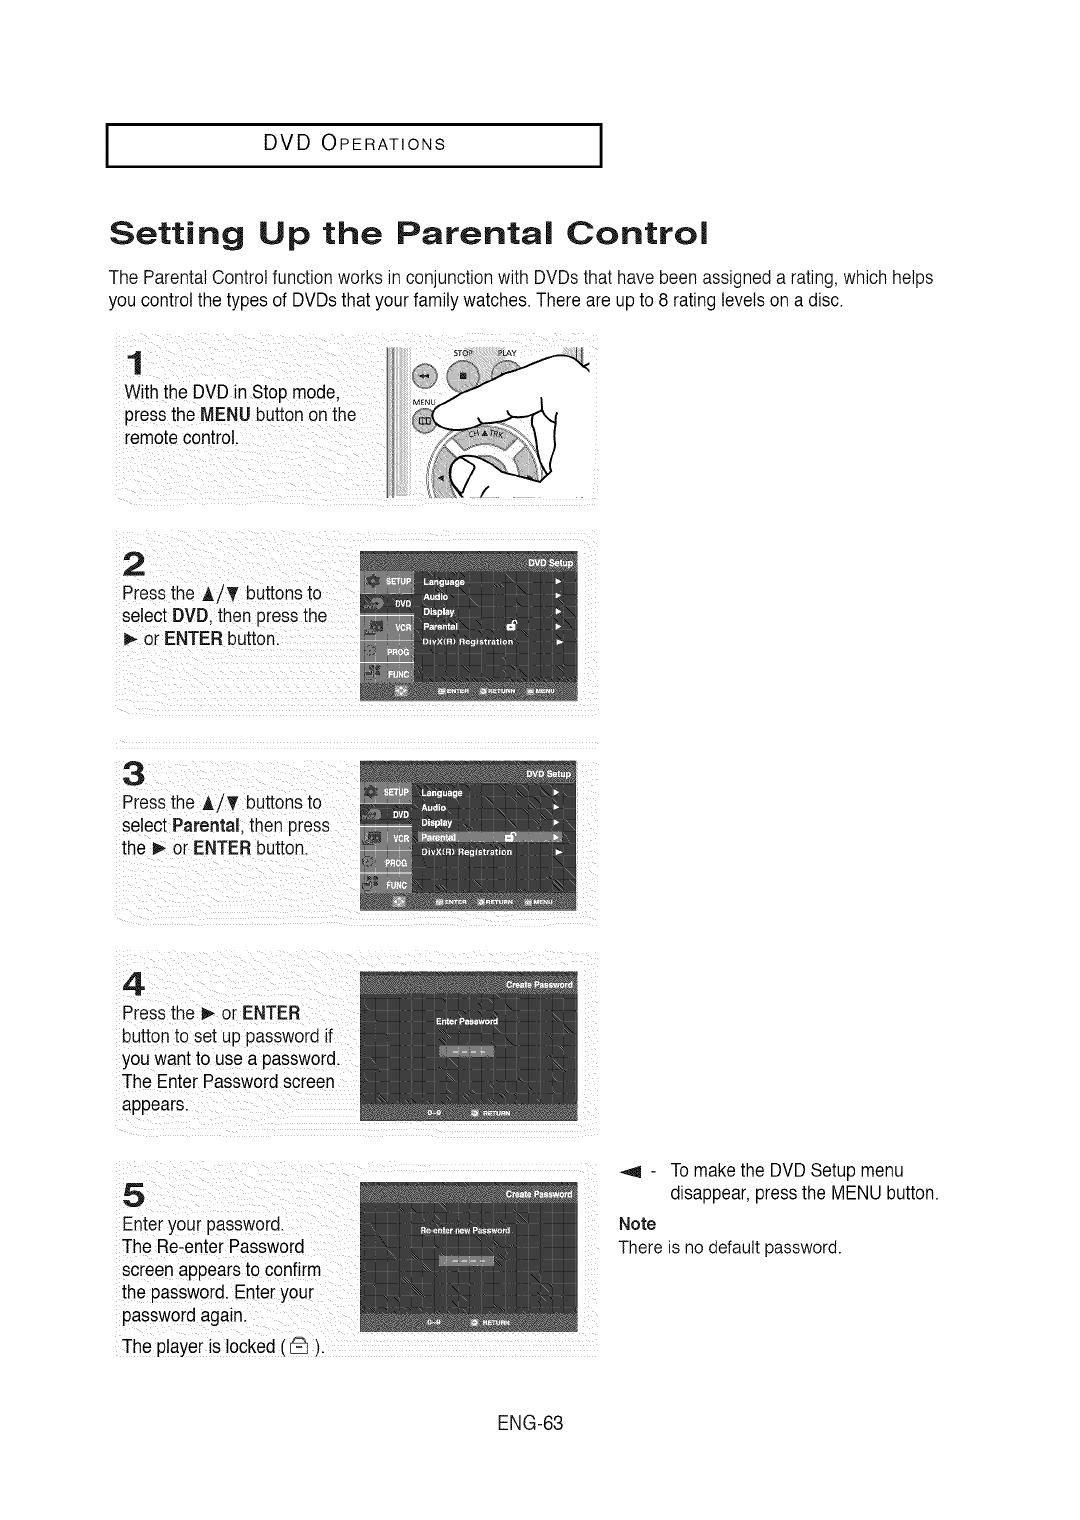
I DVD OPERATIONS
Setting Up the Parental Control
The ParentalControlfunction works in conjunctionwith DVDsthat have beenassigneda rating,whichhelps
you controlthe types of DVDsthat your family watches. There are upto 8 rating levelson a disc.
1
Withthe DVD in Stop mode.
pressthe MENU buttonon the
remotecontrol.
2
Pressthe A/_' buttonsto
select DVD.then pressthe
m,-or ENTER button.
3
Pressthe A/_' buttonsto
select Parental. then _s
the _ or ENTER button.
4
Pressthe D,-or ENTER
buttonto set up passwordif
you wantto use a password.
The Enter Passwordscreen
appears.
5
Enter your password.
The Re-enterPassword
screenappearsto confirm
the password.Enter your
passwordagain.
The player is locked(_).
_,q - To makethe DVD Setup menu
disappear,pressthe MENU button.
Note
There is no default password.
ENG-63
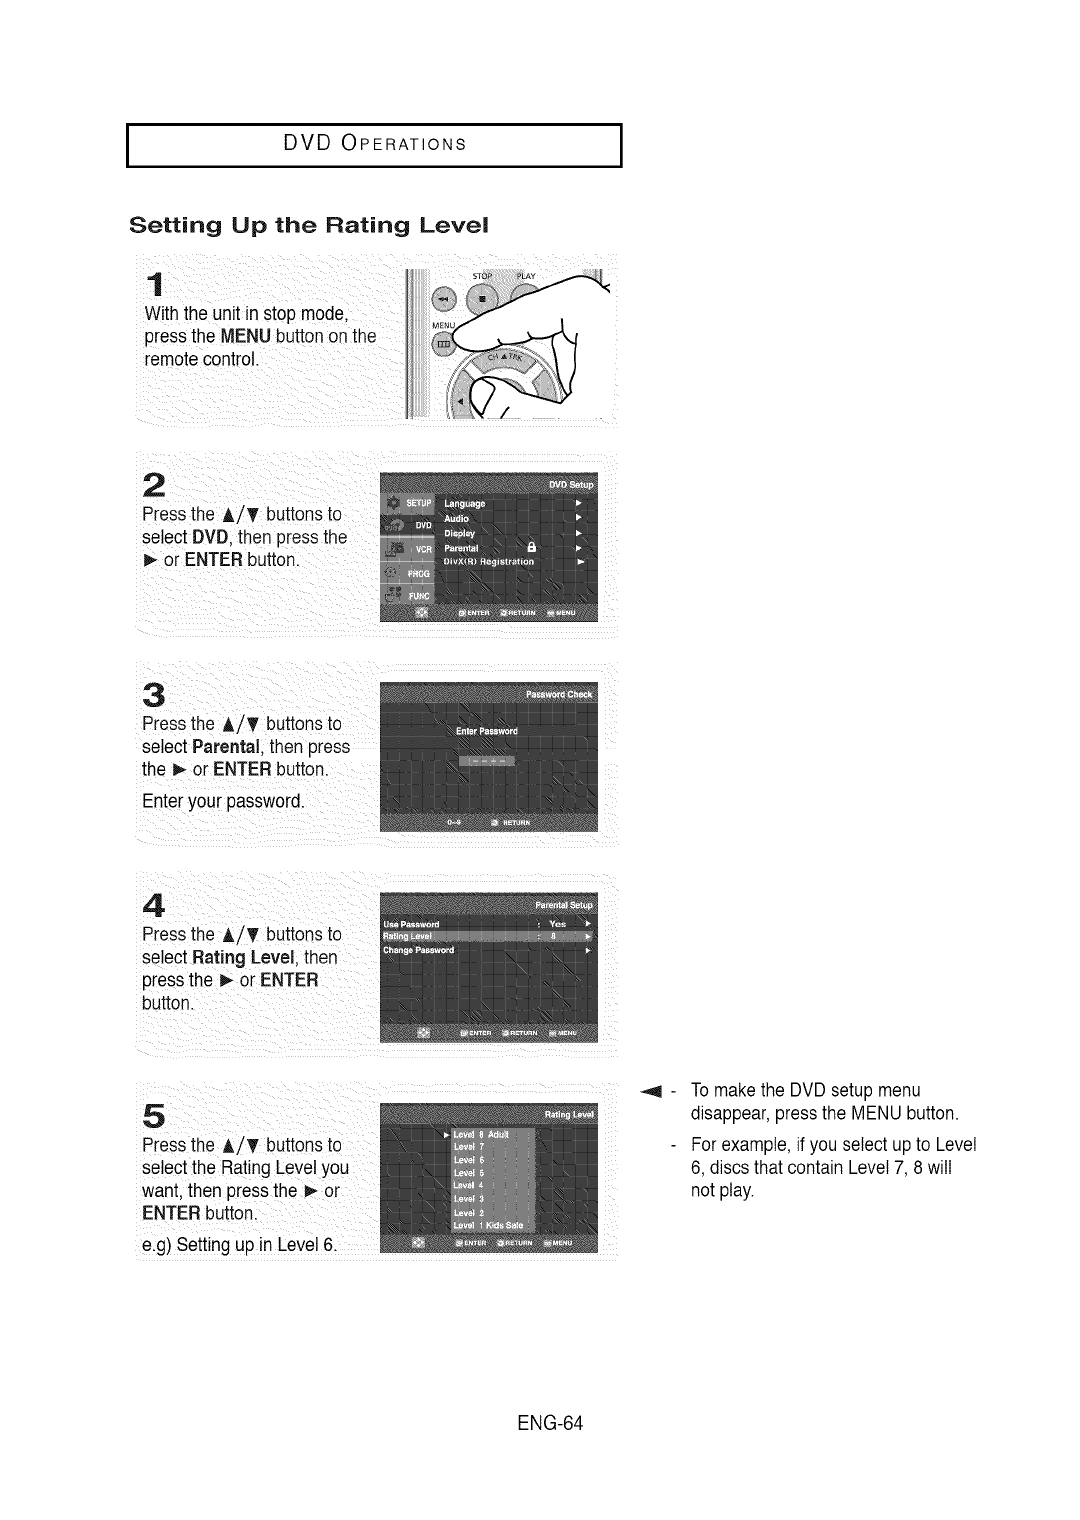
I DVD OPERATIONS I
Setting Up the Rating Level
1
Withthe unit in stopmode,
pressthe MENU buttonon the
remotecontrol
2
Pressthe AiT buttonsto
select DVD. then pressthe
_,-or ENTER button.
3
Pressthe A!_ buttonsto
select Parental, then press
the _ or ENTERbutton.
Enter your password.
4
Pressthe A/T buttonsto
select Rating Level, then
pressthe I_ or ENTER
button.
5
Pressthe A/T buttonsto
select the RatingLevelyou
want. then pressthe _ or
ENTERbutton.
e.g) Setting up in Level 6.
To makethe DVD setupmenu
disappear,pressthe MENU button.
For example,if you select up to Level
6, discs that contain Level7, 8 will
not play.
ENG-64
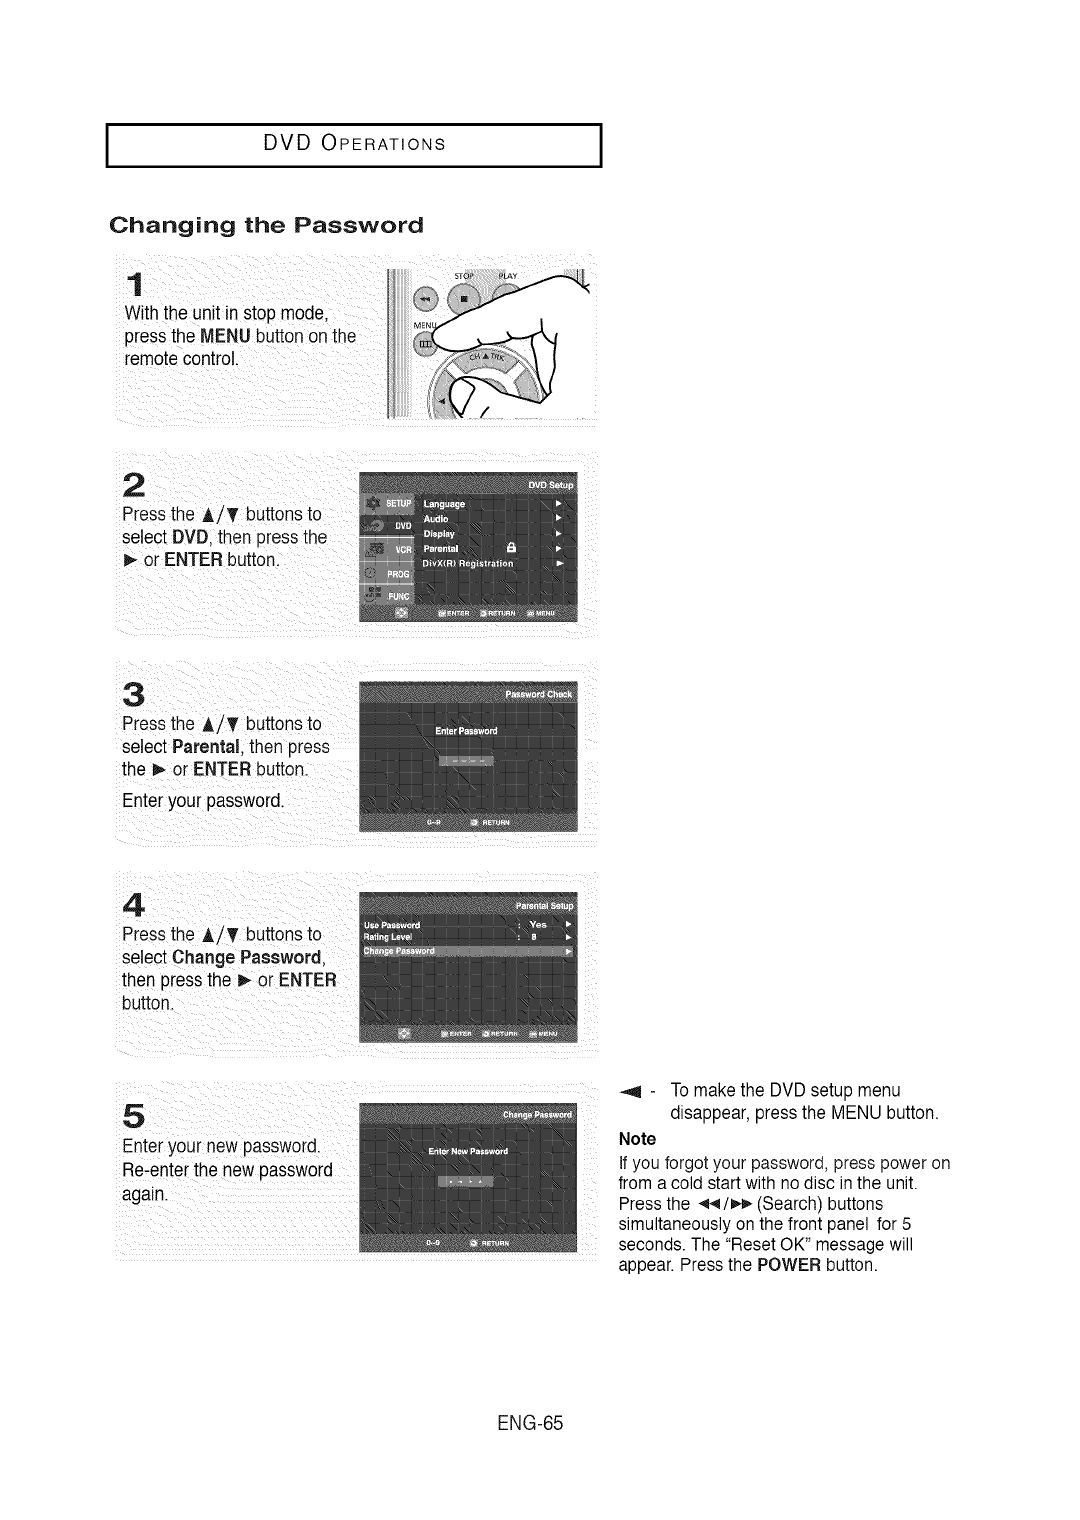
I DVD OPERATIONS
Changing the Password
1
Withthe unit instop mode.
pressthe MENU buttonon the
remotecontrol.
2
Pressthe A/T buttonsto
select DVD.then pressthe
or ENTER button.
3
Pressthe A/T buttonsto
select Parental, then press
the 1_or ENTER button.
Enter your password.
4
Pressthe A/_ buttonsto
select Change Password.
then pressthe p,-or ENTER
button.
5
Enter your new password.
Re-enterthe new password
again.
_,9 - To make the DVD setup menu
disappear, press the MENU button.
Note
If you forgot your password, press power on
from a cold start with no disc in the unit.
Press the 4_/_,¢,_(Search) buttons
simultaneously on the front panel for 5
seconds. The "Reset OK" message will
appear. Press the POWER button.
ENG-65
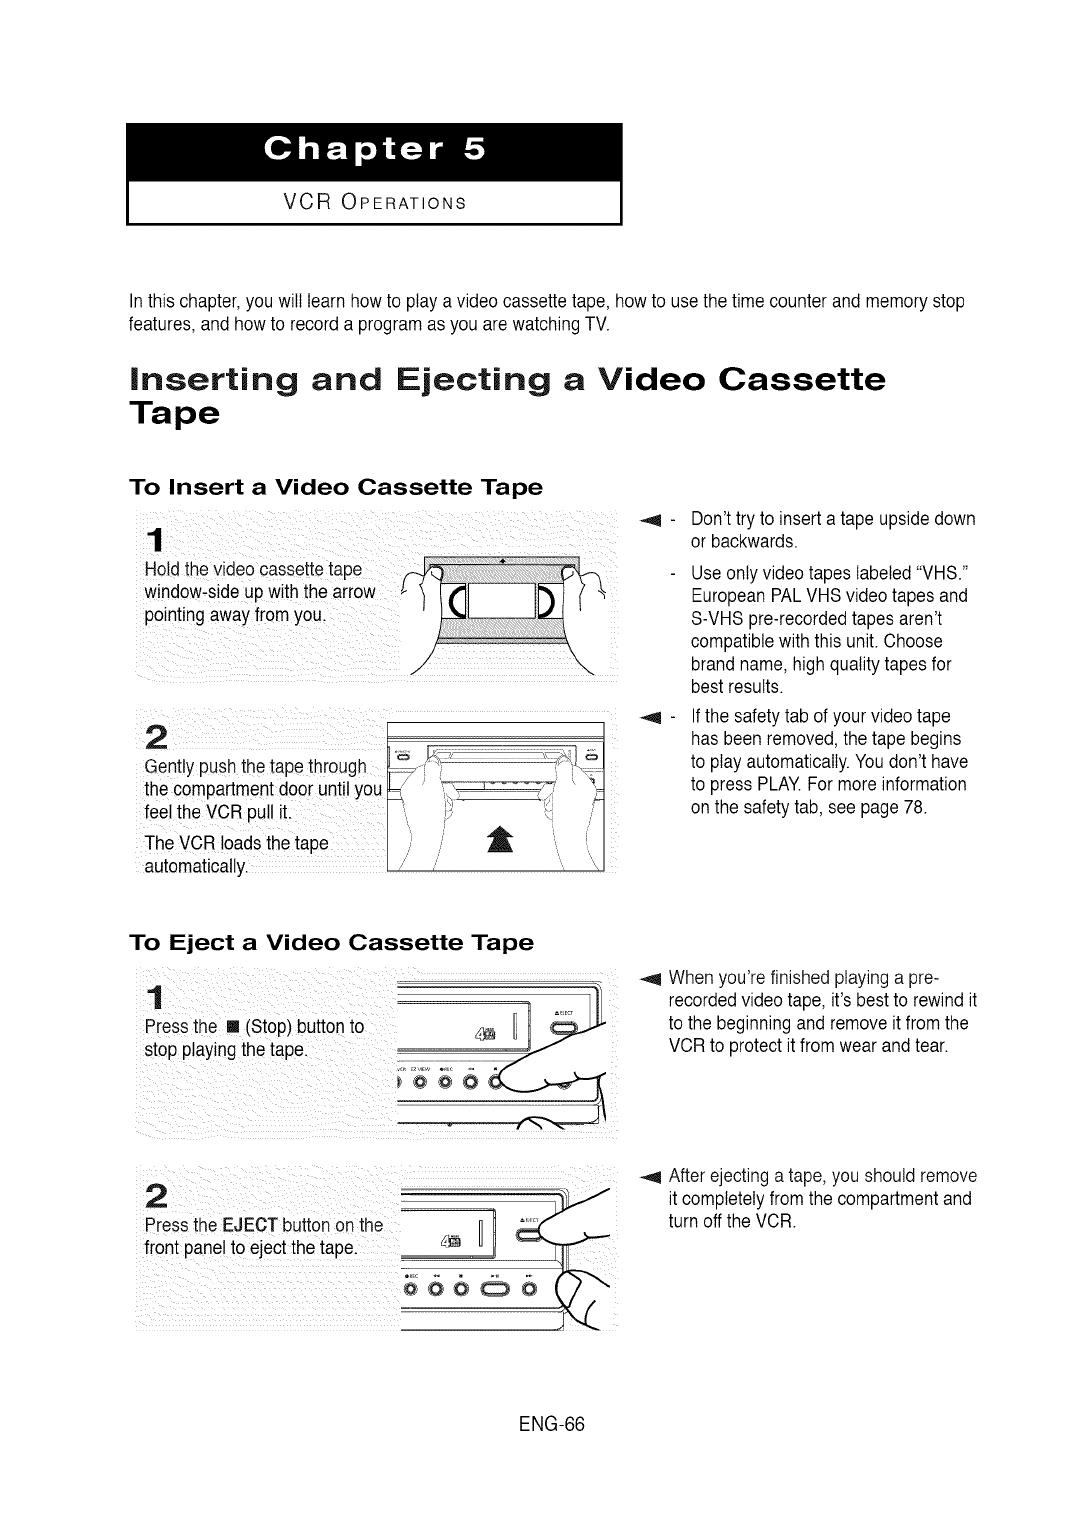
VCR OPERATIONS
Inthis chapter,you will learnhow to play a video cassette tape, howto usethe time counterand memory stop
features,and how to record a programas you are watchingTV.
Inserting and Ejecting a Video Cassette
Tape
To Insert a Video Cassette Tape
Hold thevideo cassette tape
window-sdeup withthe arro_
pointing awayfrom you,
Gently pushthe tape through _i' '' "-"
the compartmentdoor until you ' ' ,' '_:
•t '_ _................................................................................r/F
feel the VCR pul! _ ,._' ',,,, ..t-
The VCR loads thetape .......... i) "_ "........i'.
automatiCally //' ",, \
Don'ttry to inserta tape upsidedown
or backwards.
Useonly video tapes labeled"VHS."
EuropeanPALVHS video tapes and
S-VHSpre-recordedtapes aren't
compatiblewith this unit. Choose
brandname,high qualitytapes for
bestresults.
Ifthe safetytab of your video tape
has been removed,the tape begins
to play automatically.Youdon't have
to press PLAY.For more information
on the safetytab, see page78.
To Eject a Video Cassette Tape
When you're finished playinga pre-
recordedvideo tape, it's best to rewind it
to the beginningand removeit fromthe
VCR to protect it from wear andtear.
2
Pressthe EJECT button onthe
front panelto ejectthe tape
-,9 After ejectinga tape, you should remove
it completelyfromthe compartmentand
turn offthe VCR.
ENG-66

I VCR OPERATIONS
Playing aPre-Recorded Video Cassette
Tape
Playing the Tape
1
insertthe video cassettetape. = l_ _. " _,t '=
'\ , (
For more informationon the safety
tab, see page 78.
2
If the tape doesn't beginto play
automatically,pressthe _ll
(PlaytPause)button.
button to resumeplayingthe
tape_
The VCR does not play soundwhile
a video tape is paused.
See "UsingAutomaticTracking"on
the next page.
Ifyou see white lines on the screen,
see "UsingAutomaticTracking"on
page69.
Note
To view VCR playback, you must connect the Video Out (Yellow) or RF Out jack to your TV. The VCR does not
output video throught the S-Video or Component jacks.
ENG-67
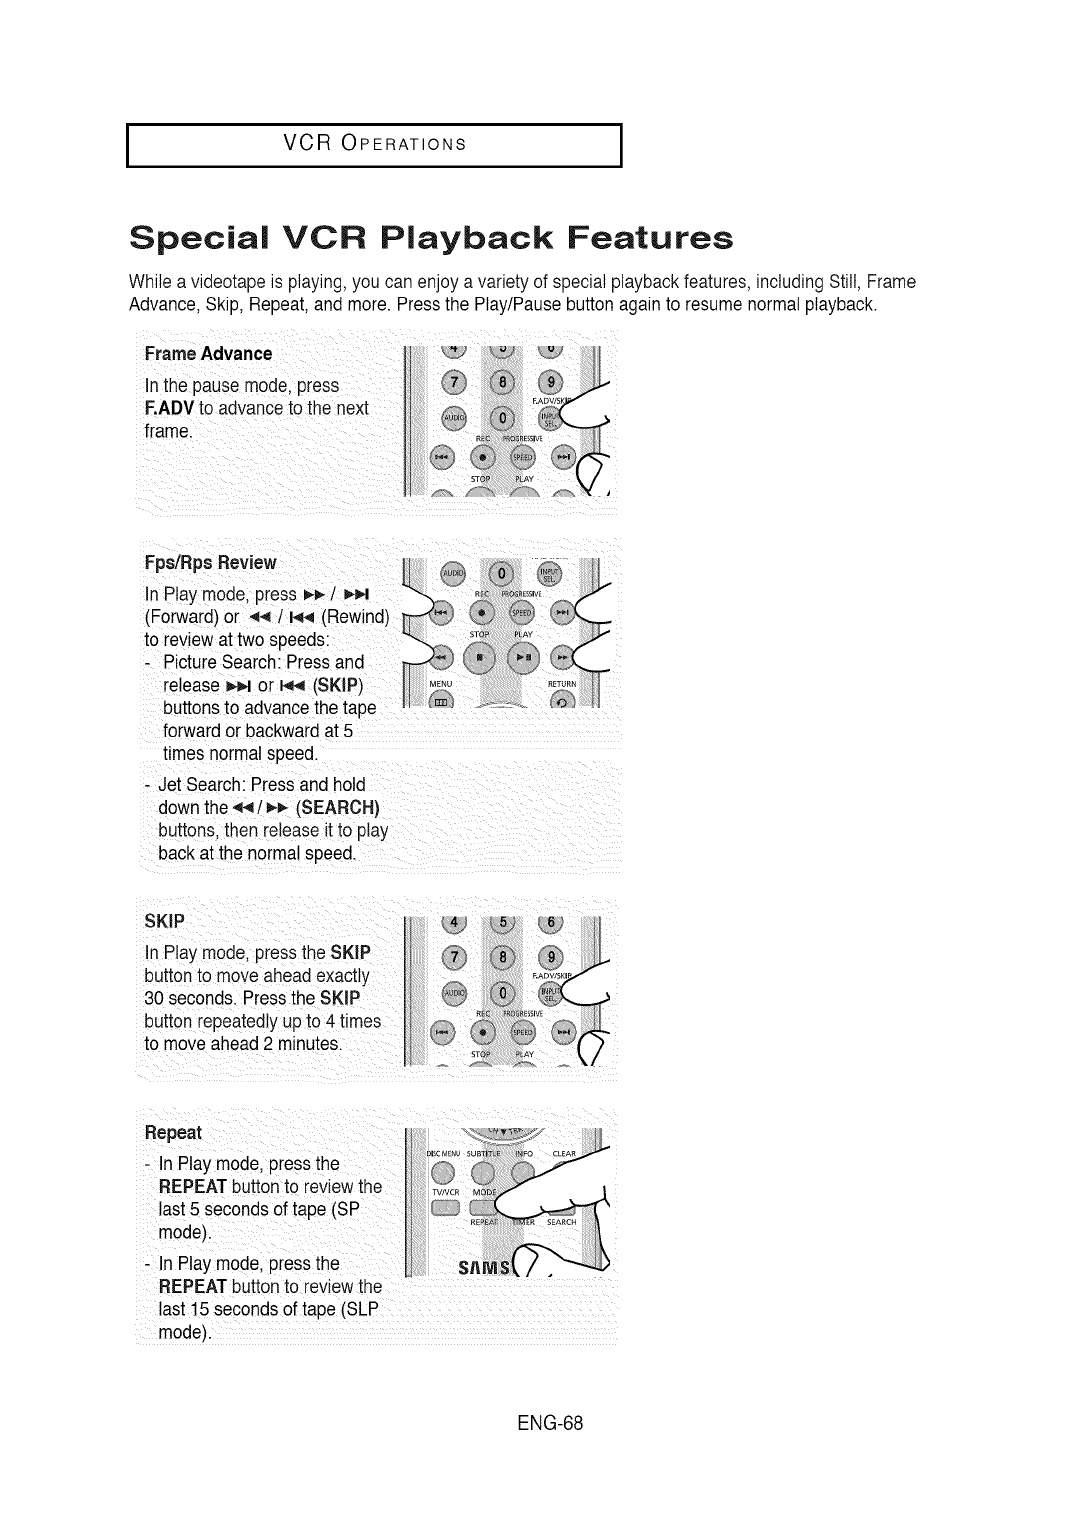
IVCR OPERATIONS I
Special VCR Playback Features
While a videotapeis playing,you can enjoy a variety of special playbackfeatures,including Still, Frame
Advance, Skip, Repeat,and more.Pressthe Play/Pausebuttonagain to resumenormal playback.
FrameAdvance
In the pause mode, press
F.ADVto advanceto the next
frame.
Fps/Rps Review
buttons to advancethe tape
forward or backwardat 5
times normalspeed.
- Jet Search: Pressand hold
down the ,q_t_ (SEARCH)
buttons,then releaseitto play
back at the normalspeed.
SKIP
In Play mode,pressthe SKIP
buttonto move aheadexactly
30 seconds.Pressthe SKIP
button repeatedlyup to 4 times
to moveahead 2 minutes.
Repeat
- In Play mode,pressthe
REPEATbuttonto reviewthe
last 5 seconds of tape (SP
mode).
- In Play mode,pressthe
REPEATbuttonto reviewthe
last 15 secondsof tape (SLP
mode).
ENG-68
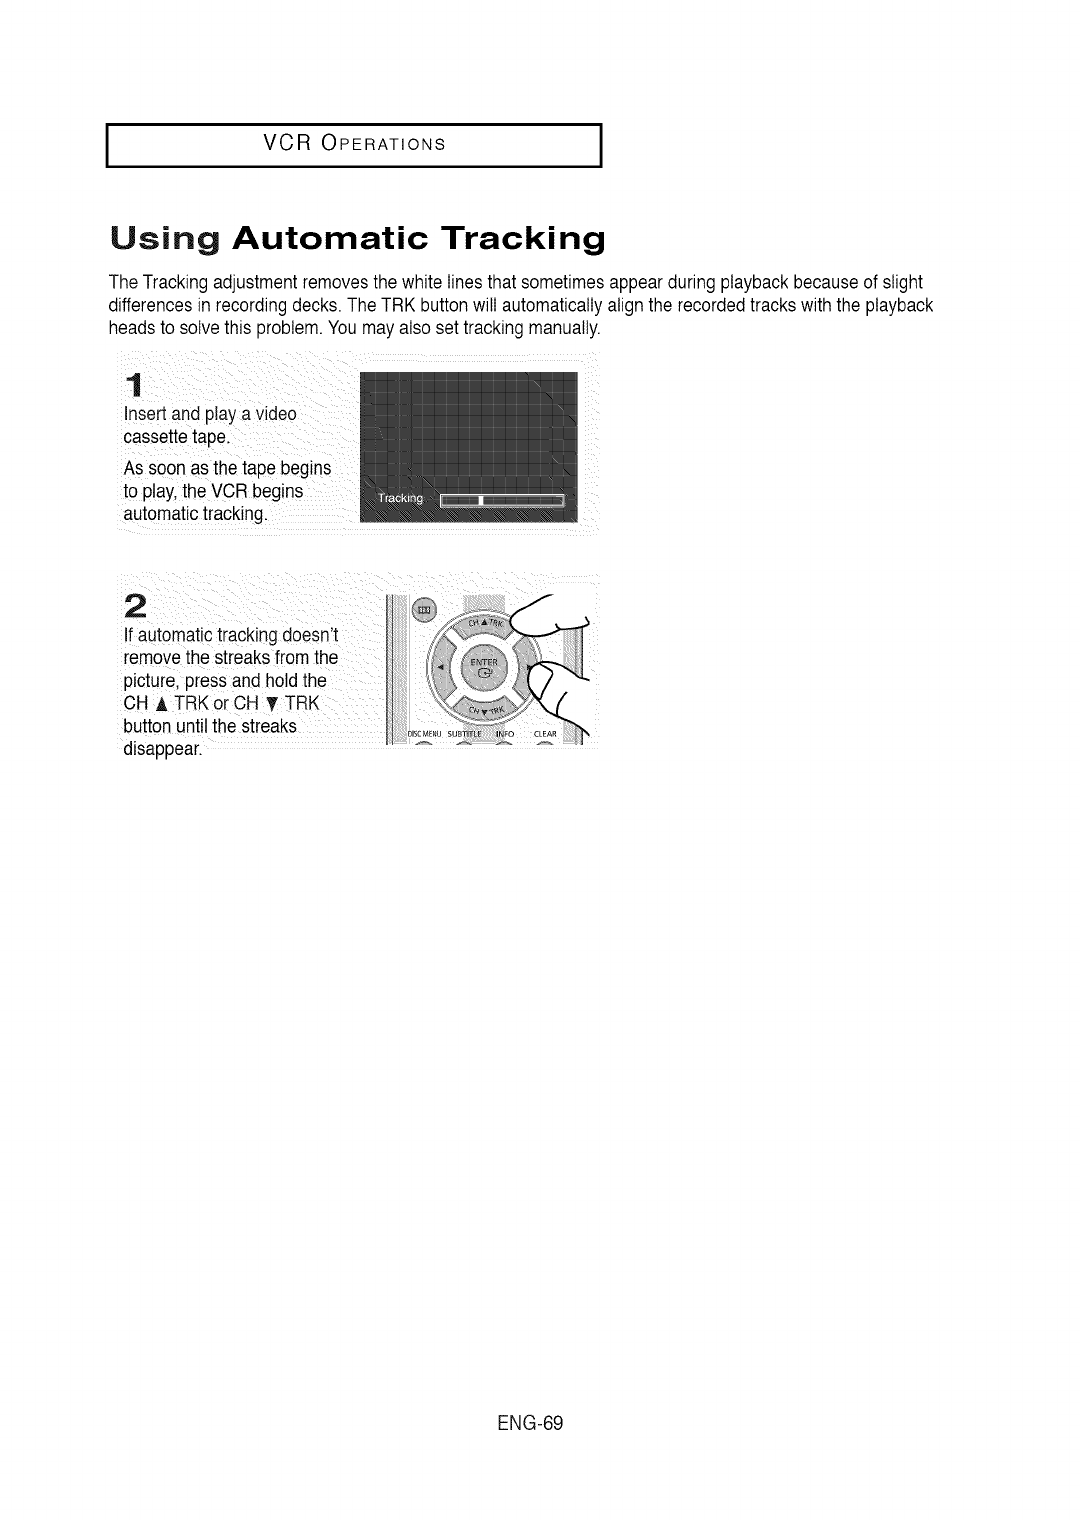
I VCR OPERATIONS
Using Automatic Tracking
The Trackingadjustmentremovesthe white linesthat sometimes appearduringplayback becauseof slight
differencesin recordingdecks.The TRK buttonwill automaticallyalignthe recordedtracks withthe playback
heads to solvethis problem.Youmayalso settracking manually.
Insertand plaYa video
cassette tape:
As soon as
to p!ay,the VCR begins
automatictracking
2
If automatictracking doesn't
removethe streaksfromthe
picture,press and holdthe
CH A TRK orCH T TRK
button until the streaks
disappear.
ENG-69
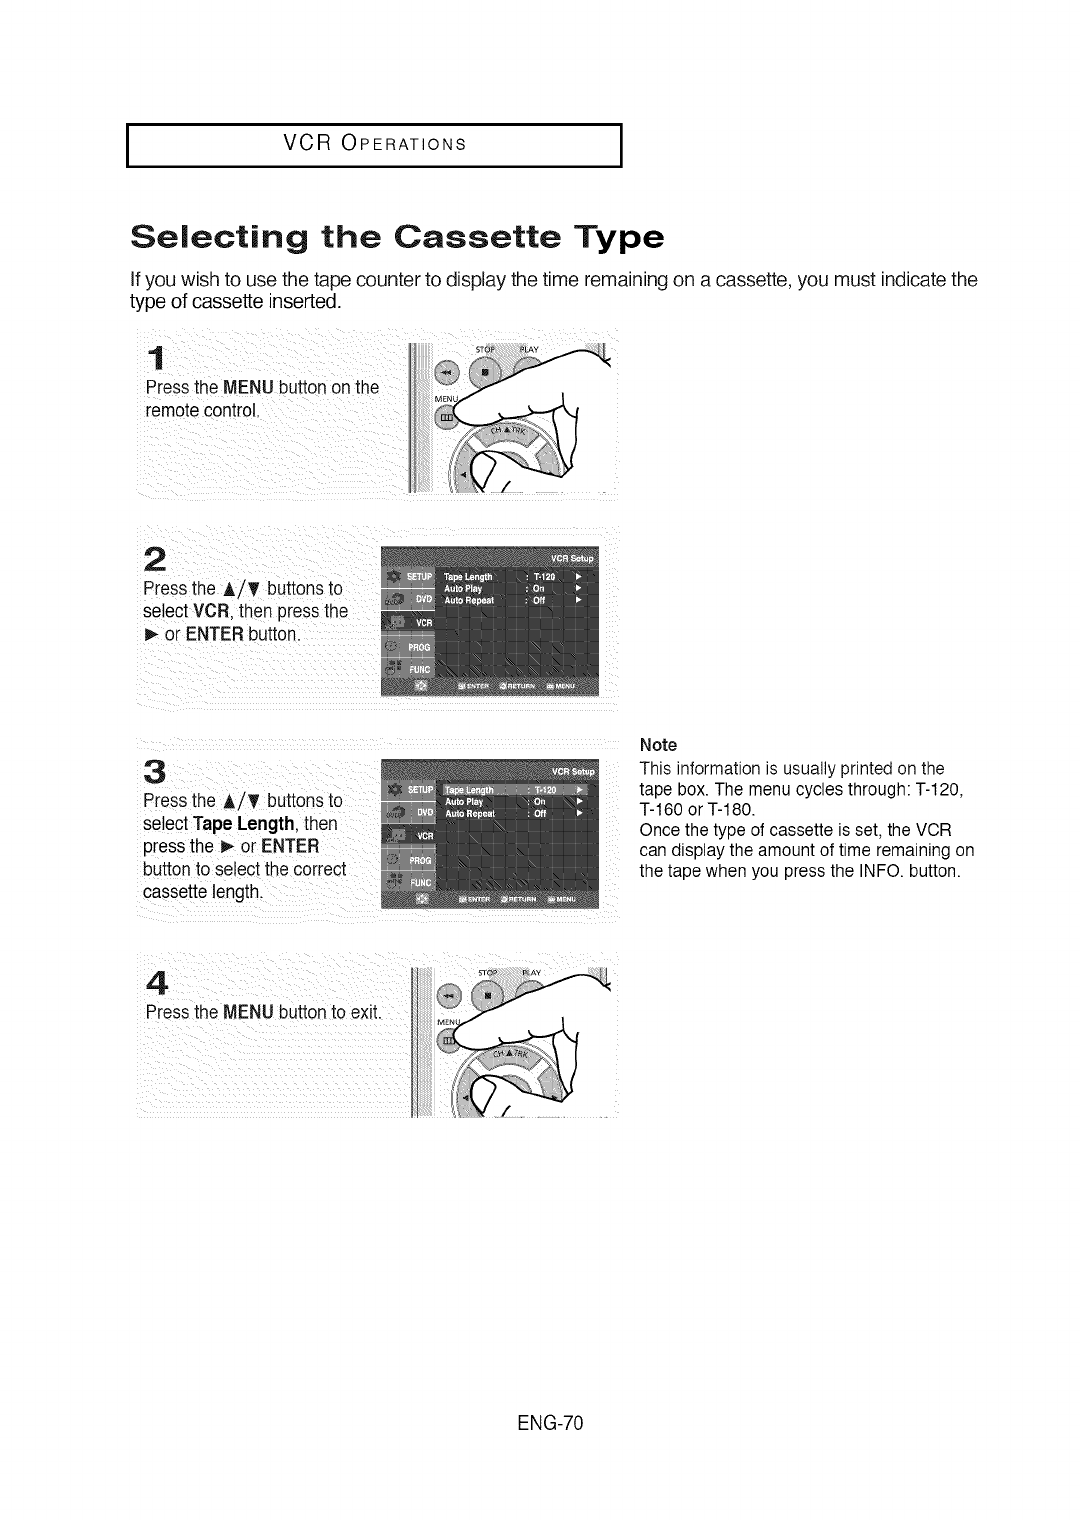
IVCR OPERATIONS I
Selecting the Cassette Type
If you wish to use the tape counter to display the time remaining on a cassette, you must indicate the
type of cassette inserted.
1
Pressthe MENUbutton onthe
remotecontrol.
2
Pressthe A/T buttons to
select VCR then pressthe
P,-or ENTERbutton.
3
Pressthe A/_' buttonsto
select Tape Length, then
pressthe _ or ENTER
buttonto select the correct
cassette length.
Note
This information is usually printed on the
tape box. The menu cycles through: T-120,
T-160 or T-180.
Once the type of cassette is set, the VCR
can display the amount of time remaining on
the tape when you press the INFO. button.
ENG-70
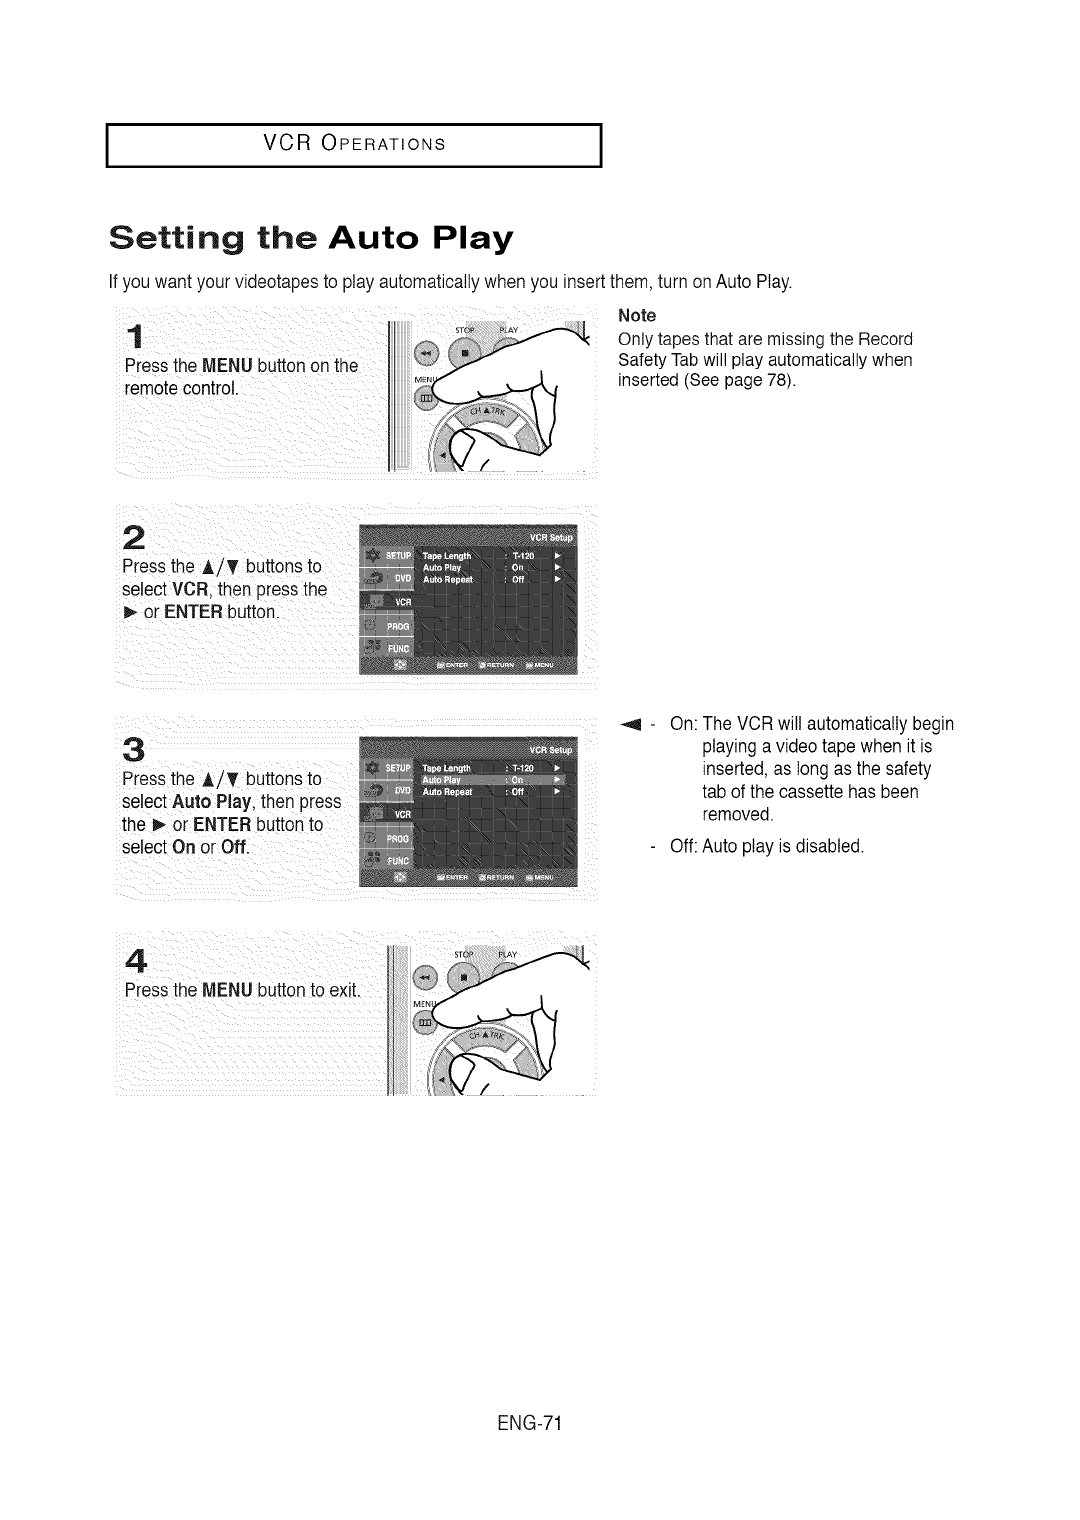
I VCR OPERATIONS
Setting the Auto Play
If you want your videotapesto play automaticallywhen you insertthem, turn on Auto Play.
1
Pressthe MENU buttonon the
remotecontrol.
Note
Only tapes that are missing the Record
Safety Tabwill play automatically when
inserted (See page 78).
2
Pressthe A/_ buttonsto
selectVCR. then pressthe
I_ or ENTER button.
3
Piess the A/T buttons to
select Auto Play,then press
the I_ or ENTER buttonto
select Onor Oft
On: The VCR will automaticallybegin
playing a video tape when it is
inserted, as long as the safety
tab of the cassettehas been
removed.
Off: Auto play is disabled.
ENG-71
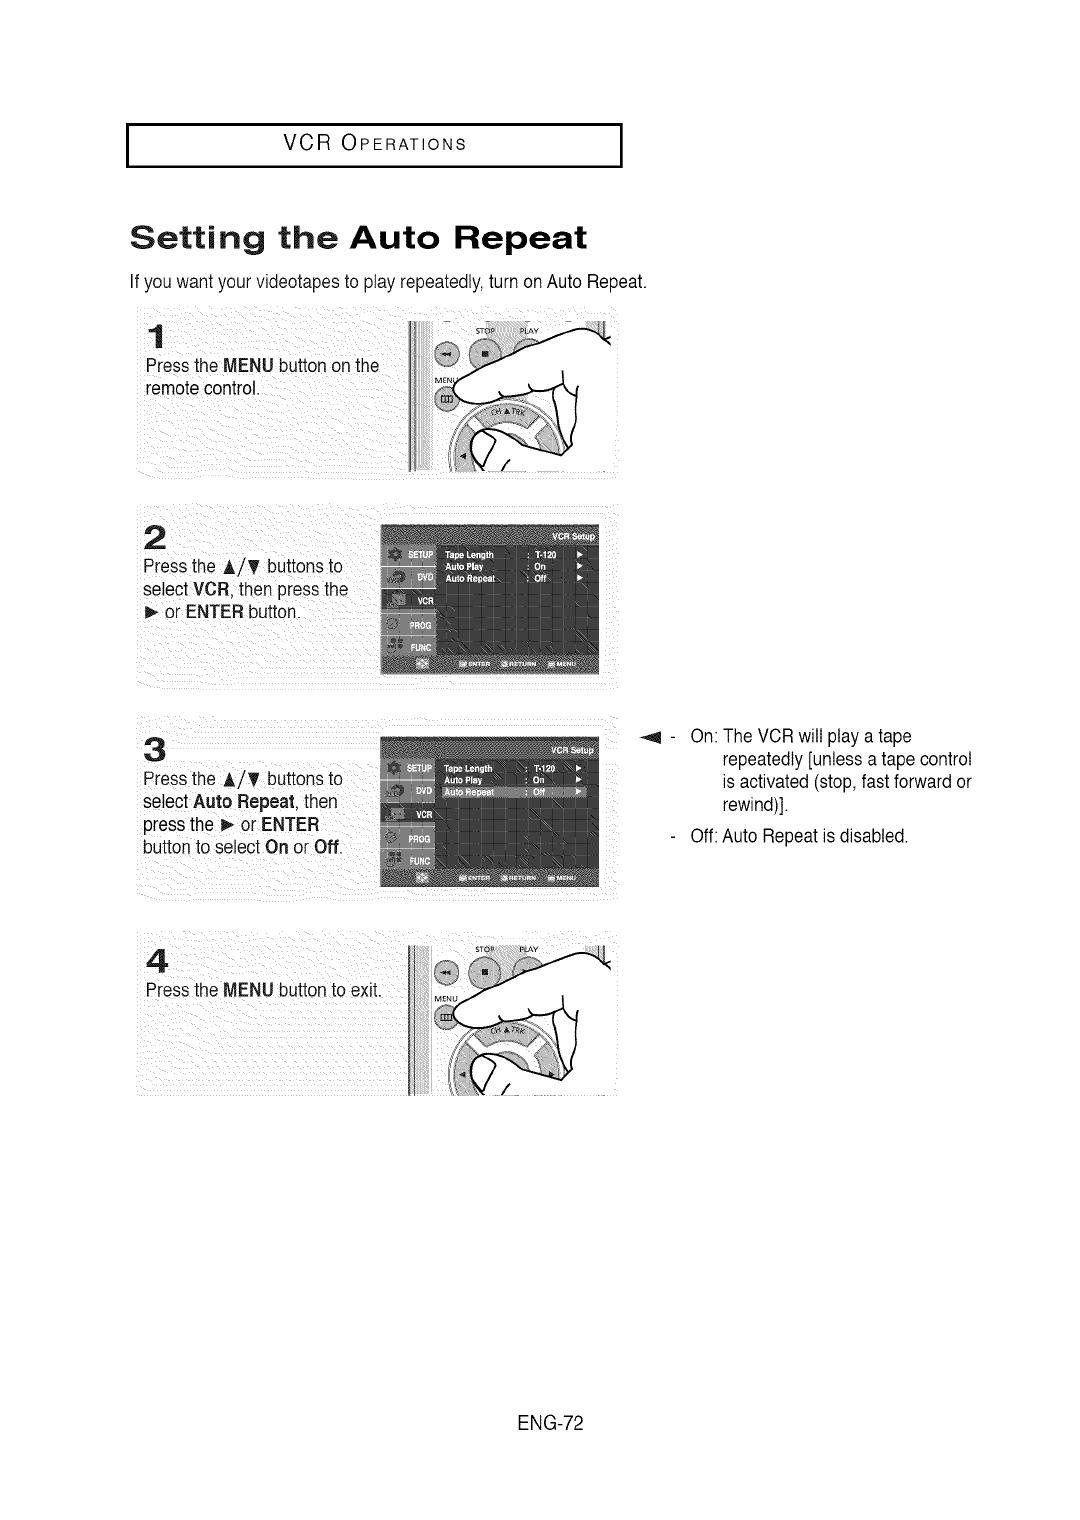
IVCR OPERATIONS I
Setting the Auto Repeat
If you want your videotapesto play repeatedly,turn onAuto Repeat.
1
Pressthe MENUbutton onthe
remotecontrol.
2
Pressthe A/_ buttons to
select VCR then pressthe
b,-or ENTERbutton.
3
Pressthe A/_' buttons to
select Auto Repeat. then
pressthe m,-or ENTER
buttonto select On or Off.
On: The VCRwill play a tape
repeatedly[unless a tape control
is activated(stop, fast forwardor
rewind)].
Off: Auto Repeatis disabled.
4
Pressthe MENUbuttonto exit.
ENG-72
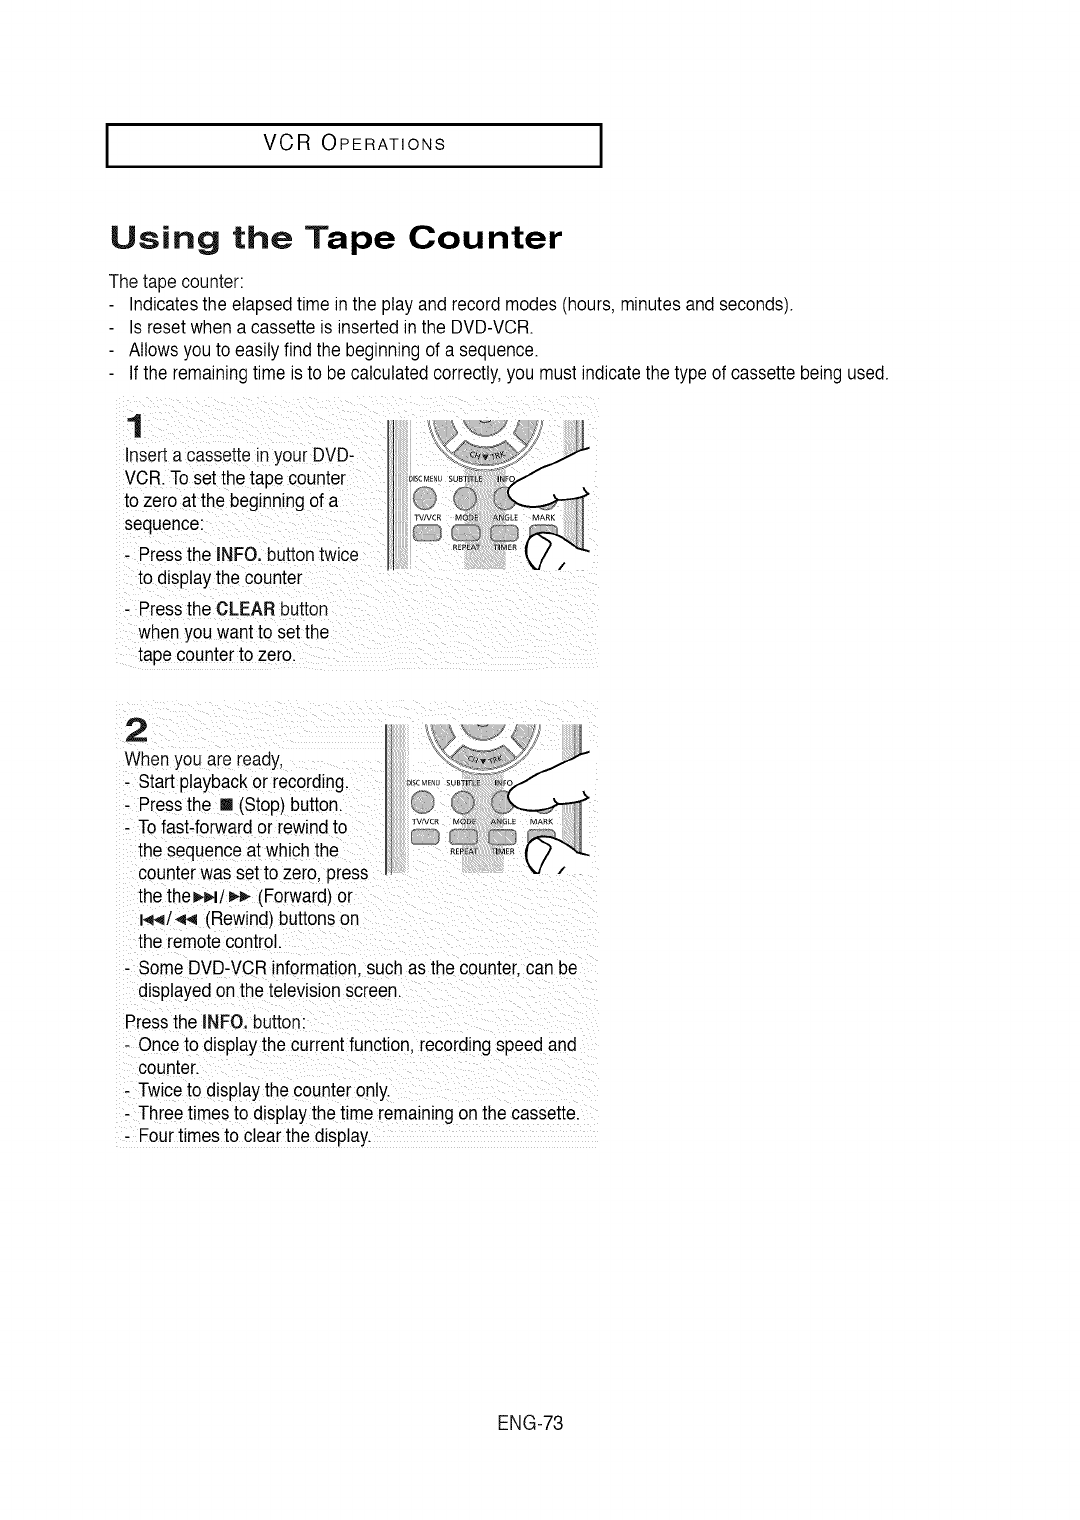
I VCR OPERATIONS
Using the Tape Counter
The tape counter:
Indicatesthe elapsedtime in the play and record modes(hours,minutes and seconds).
Isreset when a cassette is insertedinthe DVD-VCR.
Allowsyou to easily find the beginningof a sequence.
Ifthe remainingtime is to be calculatedcorrectly,you must indicatethe type of cassettebeing used.
1
nserta cassette in your DVD-
VCR. Toset the tape counter
to zero at the beginningof a
sequence:
- Pressthe INFO.buttontwice
to display the counter
- Pressthe CLEAR button
when you want to set the
tape counterto zero.
2
Whenyou are ready,
- Start playbackor recording.
- Pressthe [] (Stop) button.
- Tofast-forwardor rewindto
the sequenceat which the
counterwas set to zero, press ,
the the_,4t _ (Forward)or
i_,q/_ (Rewind) buttonson
the remotecontrol.
- Some DVD-VCRinformation,such as the counter,can be
displayedonthe television screen.
Pressthe INFO.button:
- Onceto display the currentfunction, recordingspeed and
counter.
- Twiceto displaythe counteronly.
- Threetimes to displaythe time remainingonthe cassette.
- Four timesto clear the display.
ENG-73
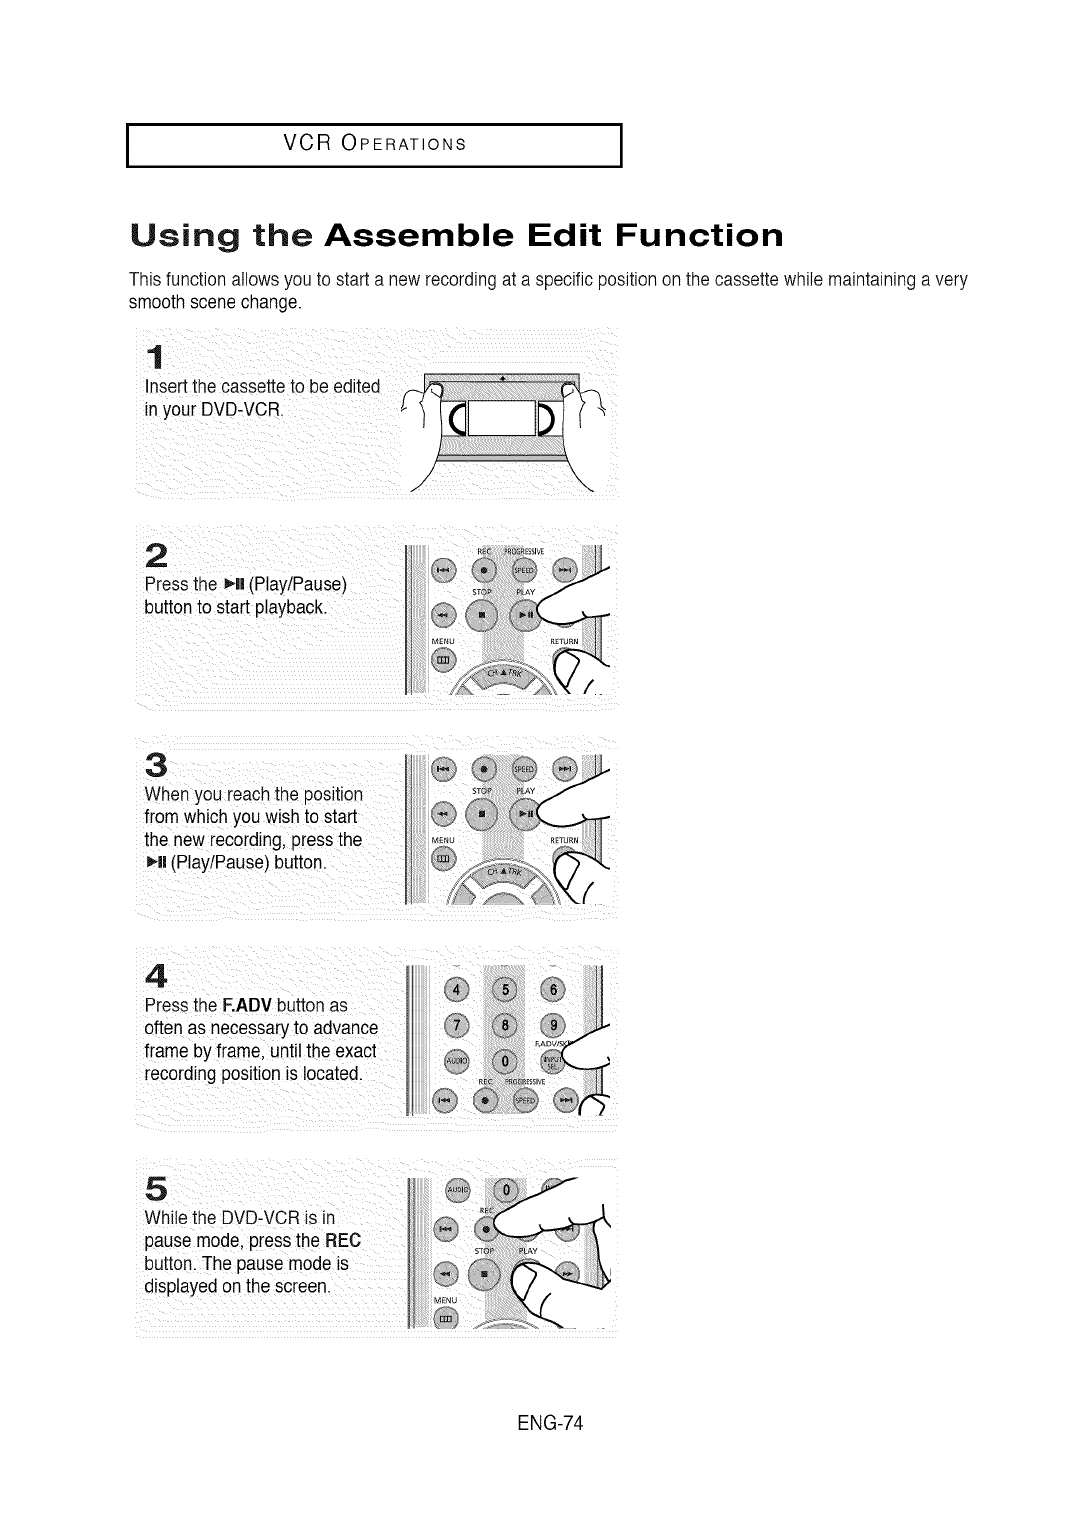
IVCR OPERATIONS I
Using the Assemble Edit Function
This functionallows you to start a new recordingat a specificpositionon the cassette while maintaininga very
smooth scenechange.
1
Insert the cassette to be edited
in your DVD-VCR.
/.-/ \\
2
Pressthe _*ll(PlaytPause)
buttonto start playback.
3
When you reachthe position
fromwhich you wish to start
the new recording,pressthe
_li (PlaytPause)button.
4
Pressthe F.ADVbutton as
often as necessaryto advance
frameby frame, until the exact
recording positionis located.
5
While the DVD-VCRis in
pause mode. press the REC
button. The pausemode is
displayedon the screen.
ENG-74
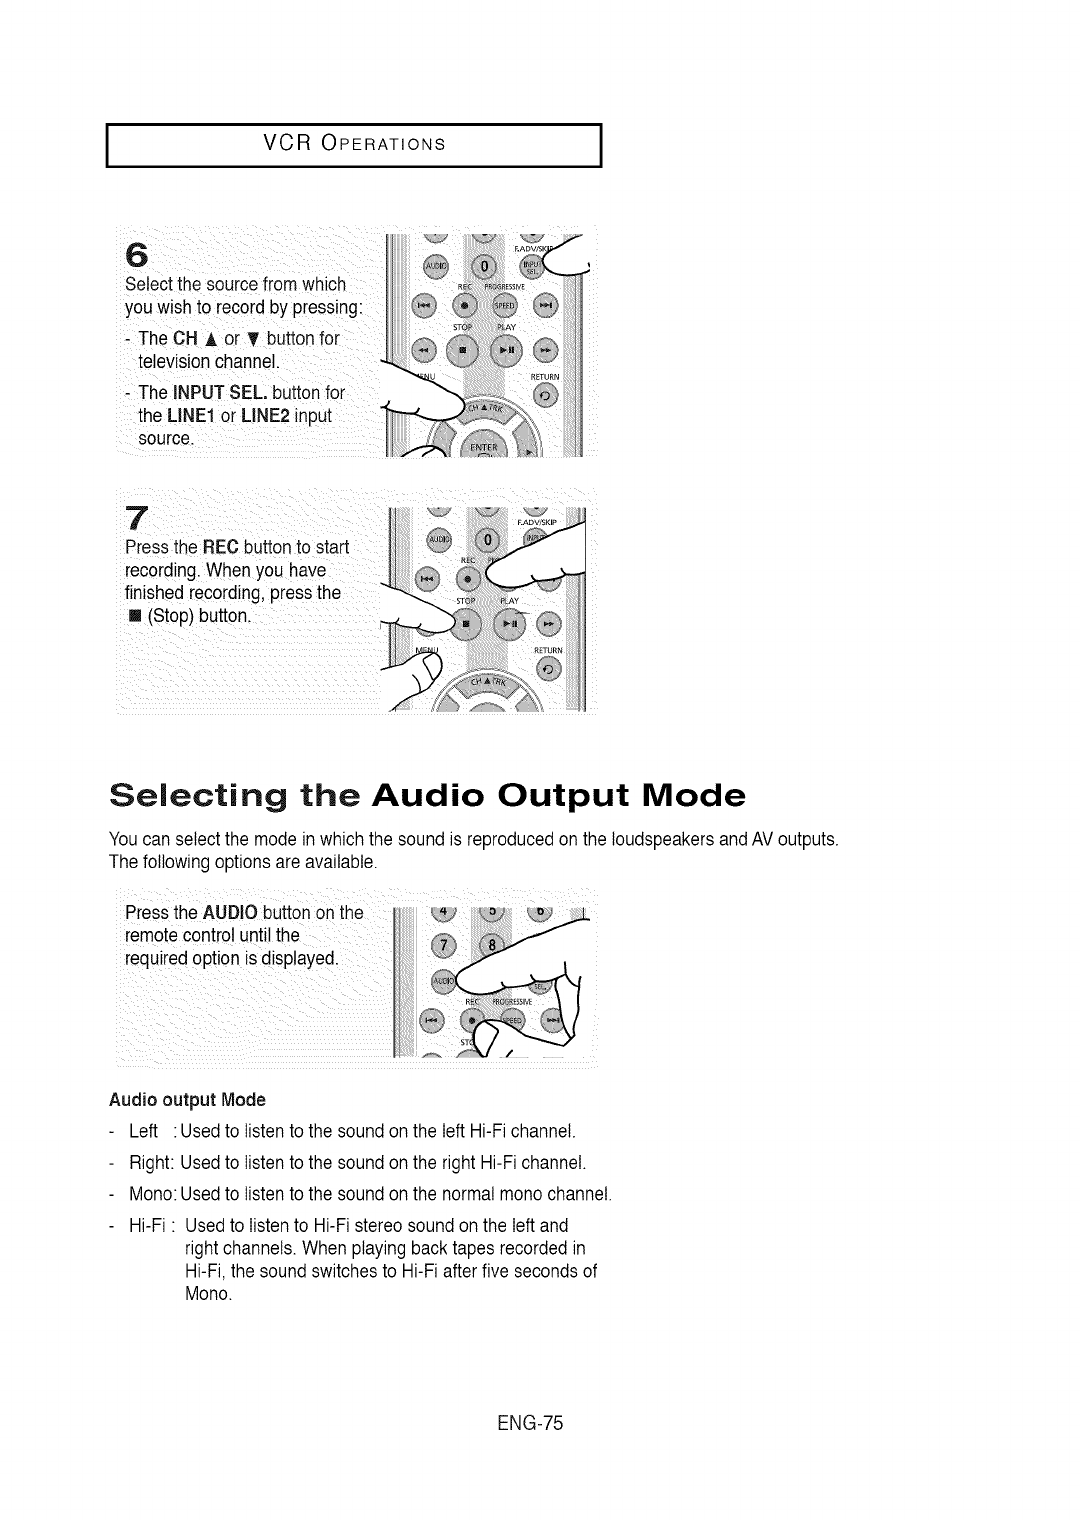
I VCR OPERATIONS
Selectthe sourcefrom which
you wish to record by p[essing:
. TheCH A or T buttonfor
televisionchannel..
-The INPUTSEL,button for
the LIND or LINE2 nput
sourcel .....
press the REC buttonto start
recording:When you have
finished reco[ding,p
[] (Stop)butt0n
Selecting the Audio Output Mode
Youcan selectthe mode in whichthe sound is reproducedon the loudspeakersandAVoutputs.
The followingoptions areavailable.
Audio output Mode
Left :Usedto listento the soundon the left Hi-Fichannel.
Right: Usedto listento the soundon the right Hi-Fi channel.
Mono:Usedto listento the sound on the normal mono channel.
Hi-Fi : Usedto listento Hi-Fistereo soundon the left and
right channels. When playing backtapes recordedin
Hi-Fi,the sound switchesto Hi-Fiafter five secondsof
Mono.
ENG-75
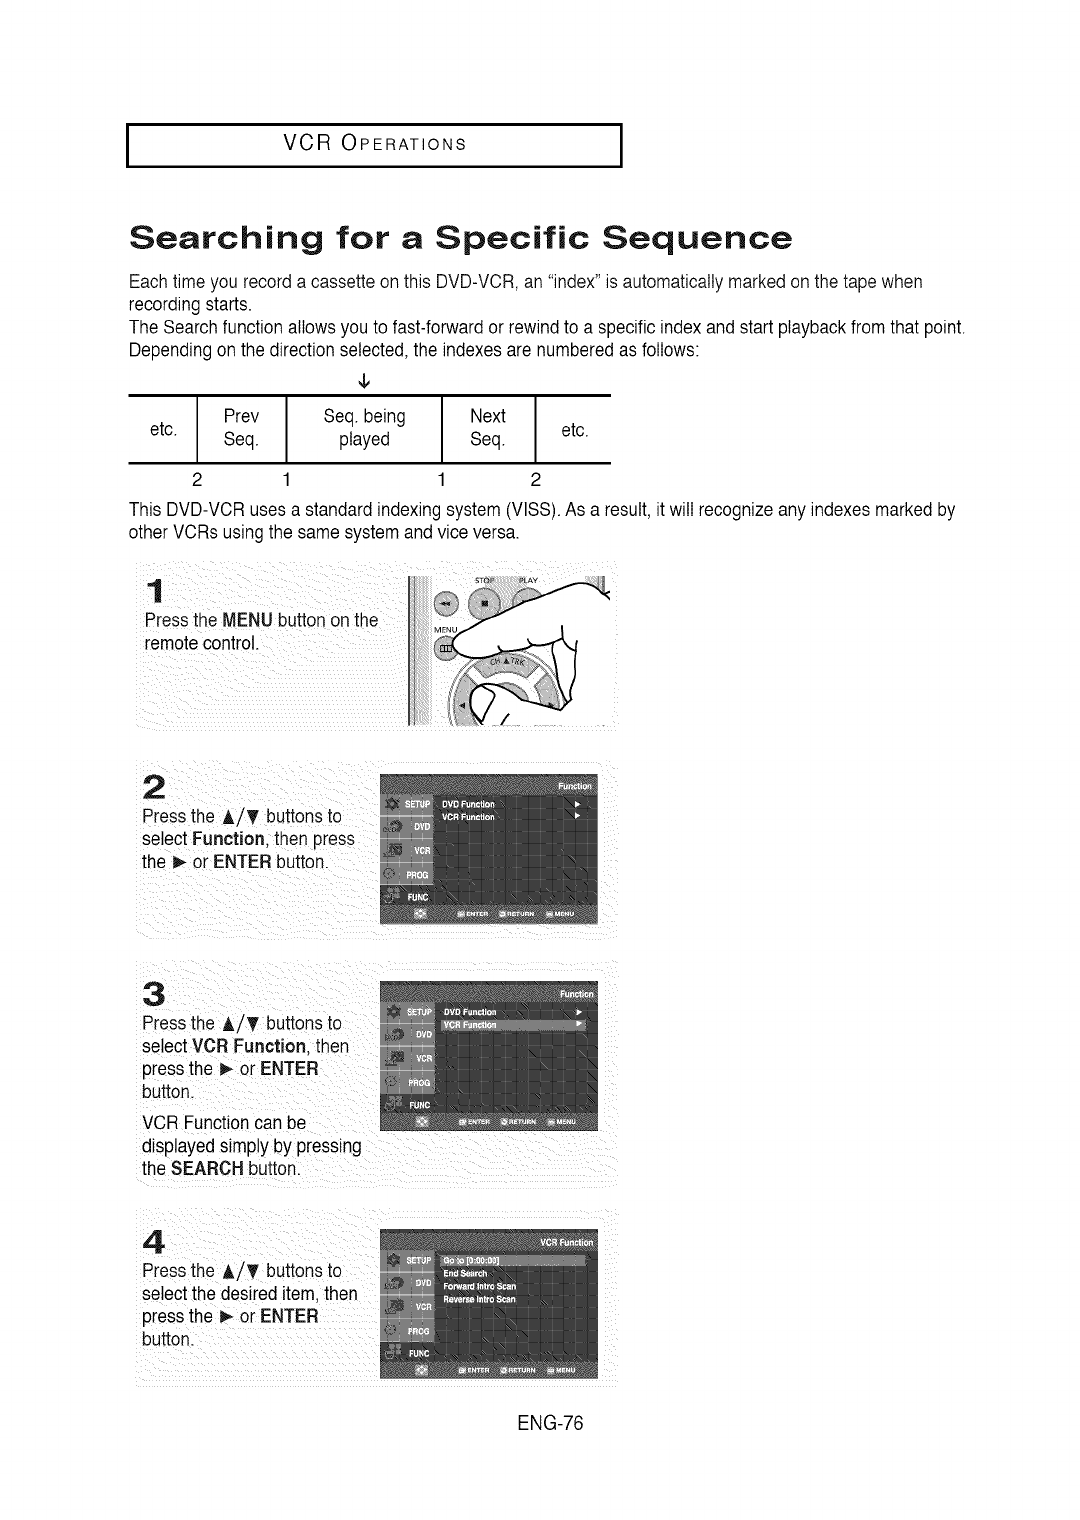
IVCR OPERATIONS I
Searching for aSpecific Sequence
Eachtime you record a cassette on this DVD-VCR,an "index"is automaticallymarkedon the tape when
recording starts.
The Searchfunction allowsyou to fast-forwardor rewind to a specificindex and start playback fromthat point.
Dependingon the directionselected,the indexesare numberedas follows:
¢
Prev Seq. being I Next
I
etc. Seq. played Seq. etc.
I
2 1 1 2
This DVD-VCR usesa standardindexingsystem (VlSS).As a result, it will recognizeany indexesmarkedby
other VCRs using the samesystem andvice versa.
1 ii::iii
Pressthe .ENU _tiOi _i i_e 0 ......
2
Pressthe A/T buttonsto
select Function. then Dress
the 1_or ENTERbutton.
3
Pressthe A/_' buttonsto
select VCR Function. then
pressthe D,-or ENTER
button.
VCR Functioncan be
displayedsimply by pressing
the SEARCH button.
4.
Pressthe A/Y buttonsto
select the desired item. then
pressthe _ or ENTER
button.
ENG-76
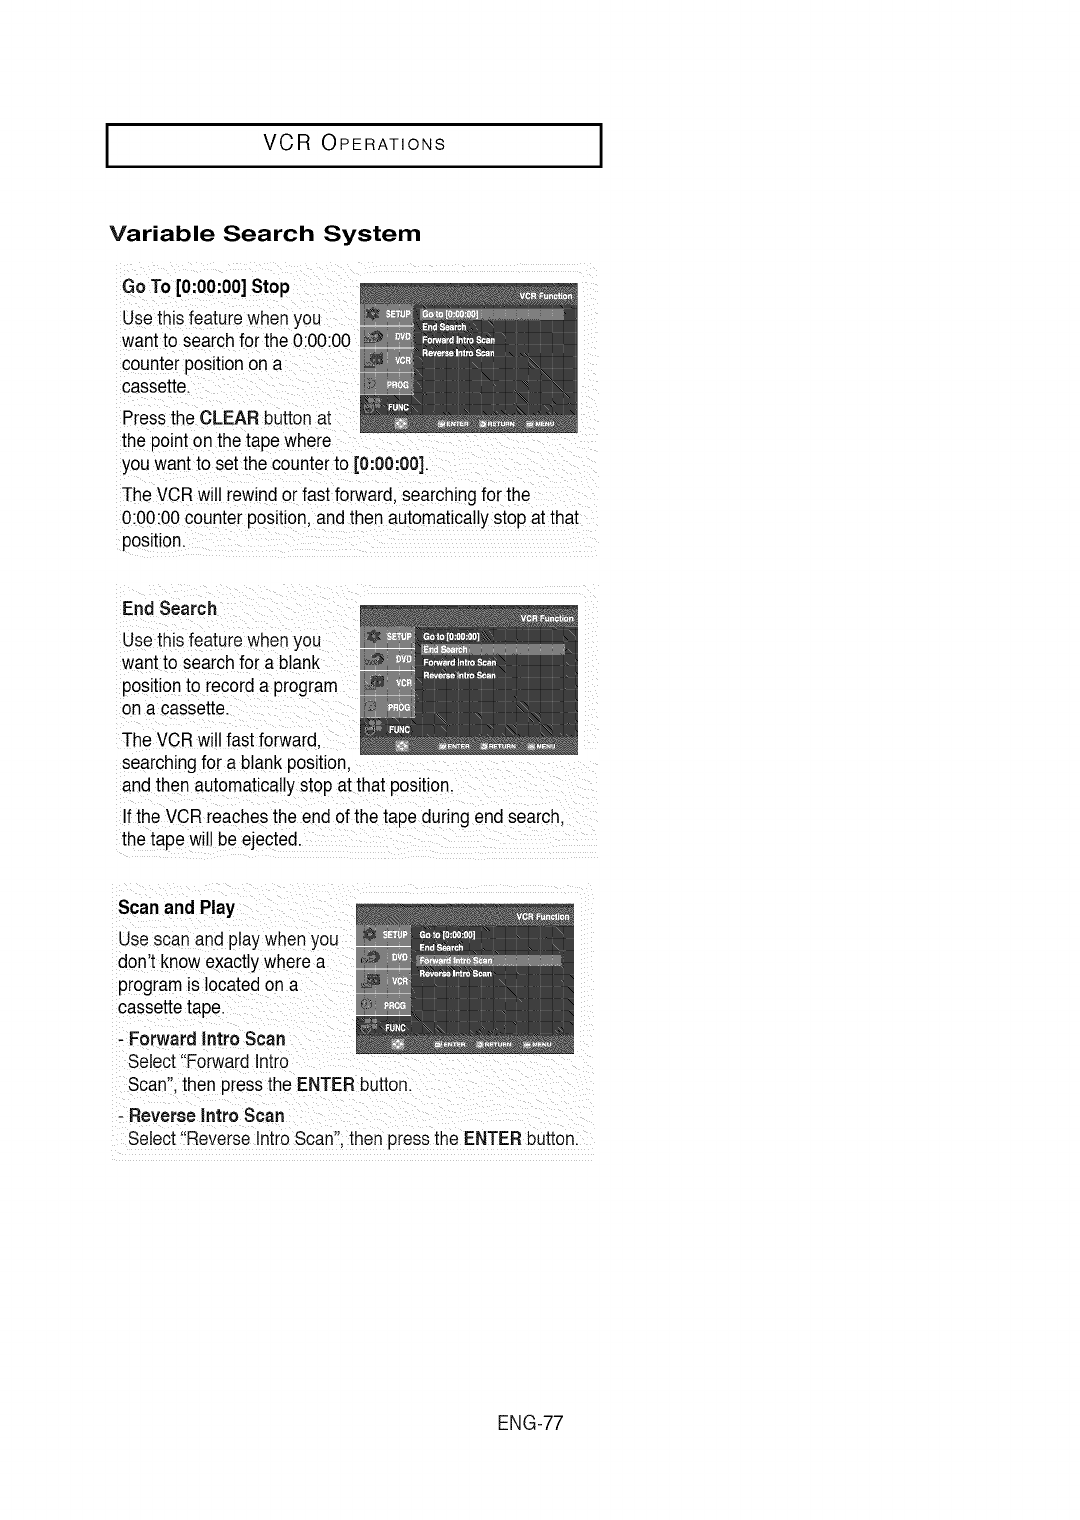
I VCR OPERATIONS
Variable Search System
Go To [0:00:00]Stop
Usethisfeaturewhen you
want to searchfor the 0:00:00
counterpositionon a
cassette.
Pressthe CLEAR buttonal
the point on the tape where
you wantto setthe counterto [0:00:00].
The VCRwill rewind orfast forward, searchingfor the
0:00:00counter position,andthen automaticallystopat that
position.
EndSearch
Usethis featurewhen yc
want to searchfor a blank
positionto recorda program
on a cassette.
The VCRwill fast forward.
searchingfor a blank position.
andthen automaticallystopat that position.
If the VCRreachesthe end of the tape duringend search.
the tape will be ejected.
Scan and Play
Use scanand play when
don't knowexactly where a
program is locatedon a
cassettetape.
- Forward Intro Scan
Select"ForwardIntro
Scan".then pressthe ENTER button.
- Reverse Intro Scan
Select"ReverseIntroScan".then pressthe ENTERbutton.
ENG-77
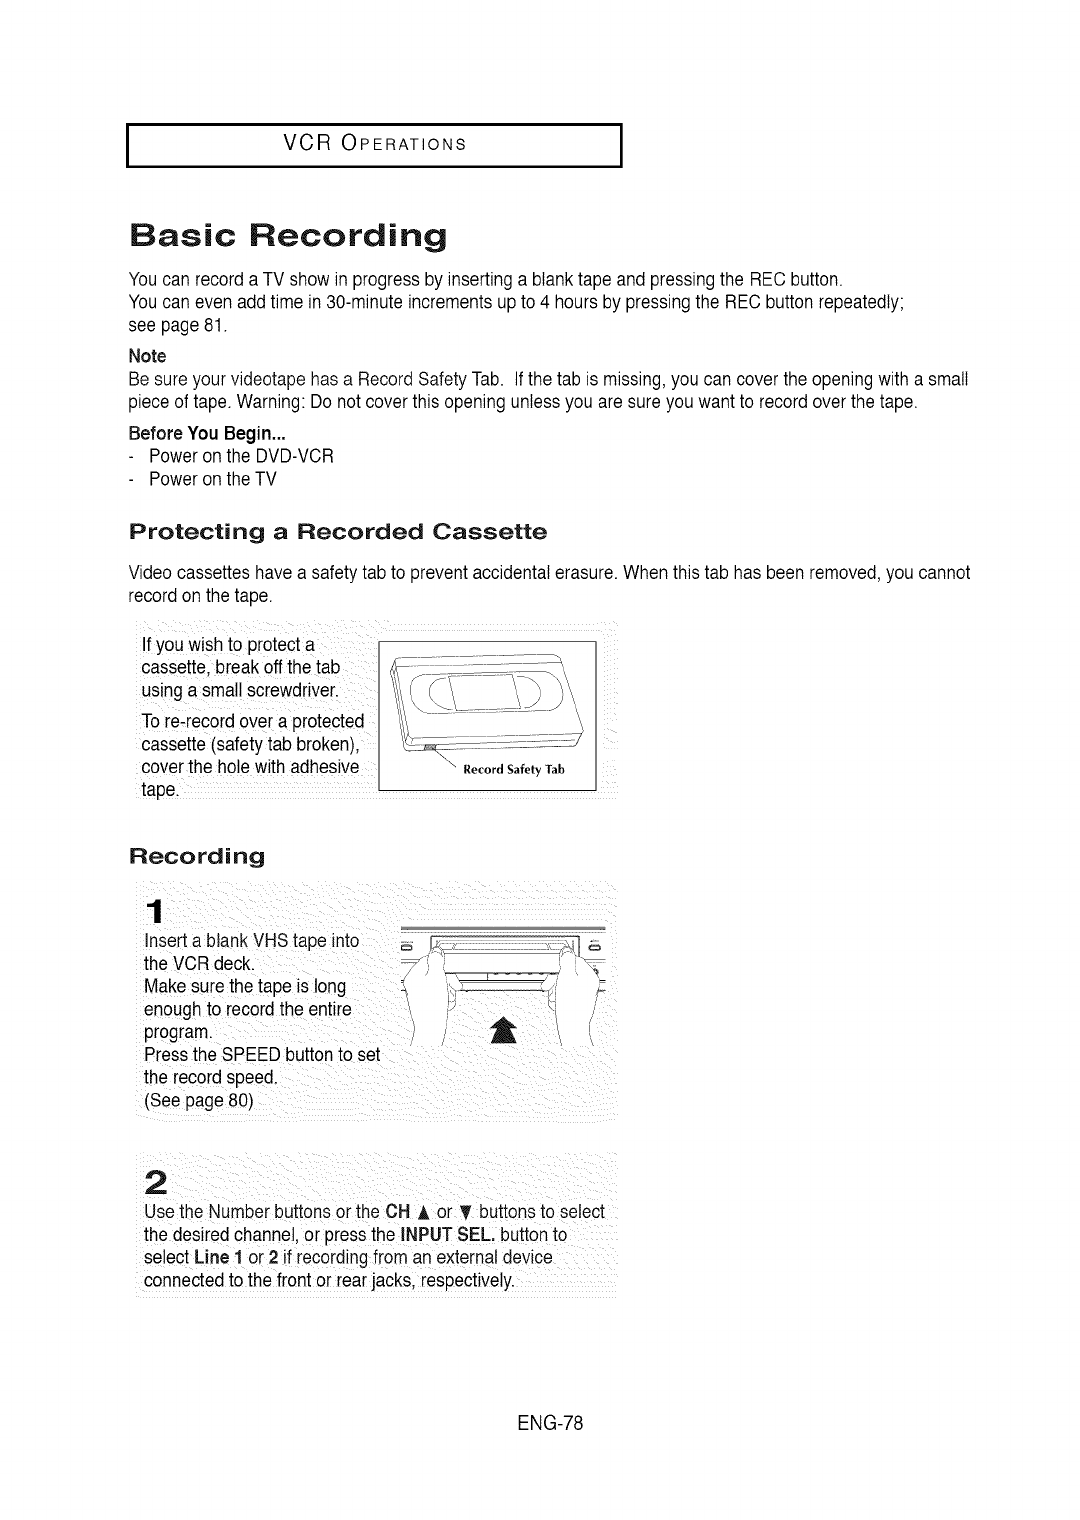
IVCR OPERATIONS I
Basic Recording
Youcan record a TV showin progressby insertinga blank tape and pressingthe REC button.
Youcan even add time in 30-minuteincrements upto 4 hours by pressingthe RECbuttonrepeatedly;
see page 81.
Note
Be sure your videotapehas a RecordSafety Tab. If the tab is missing,you can coverthe openingwith a small
piece of tape. Warning:Do not coverthis openingunlessyou are sure you want to recordover the tape.
Before You Begin...
Poweron the DVD-VCR
Poweron the TV
Protecting a Recorded Cassette
Videocassetteshave a safetytab to preventaccidentalerasure.
record onthe tape.
If you wish t0 pi0tecta
cassette, break offthe tab
using a sina!!screwdriver_
To re-record over a Protected \
cassette(safetytab broken),
coverthe holewith adhesive Record Safety Tab
tape, ............
Whenthis tab has been removed,you cannot
Recording
Insert a btankVHS tape into
the VCR deck.
Make sure the tape is !ong
enoughto record the entire /
program. (
,\
Pressthe SPEED buttonto set
the record Speed.
(see page8o)
use the Numberbuttons orthe OH A or T buttonsto select
the desired Channe!,or pressthe INPUTSEL: buttonto
so!octLine 1 or2if recordingfrom an extema!device
connectedto the front or rearjacks,respectively.
ENG-78
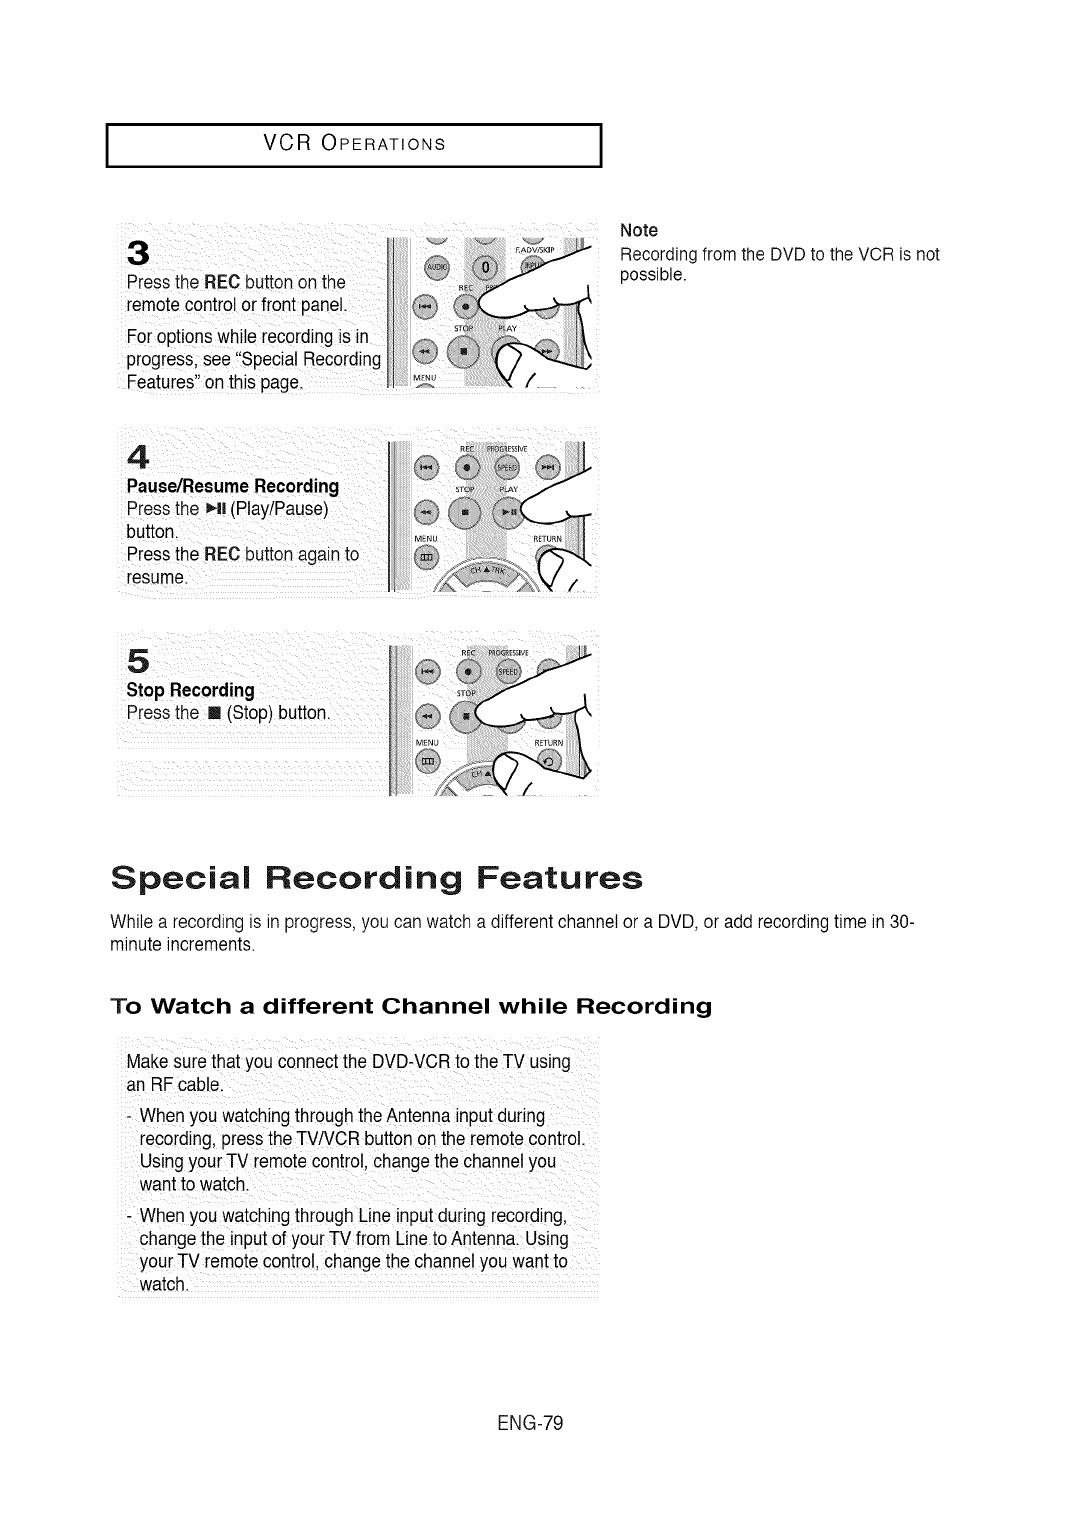
I VCR OPERATIONS
_ ......... ii!¸¸ !iiiiiiiiii! EAD
Pieis ihe RECbutto_ on the Q
remote controlor front panel.
FOr 0ptlonswh!lerecordingIS in
progress,see ,Spec_a!Recordmg
Features"on this pagel II
Note
Recording from the DVD to the VCR is not
possible.
_ii ii_ _ _ i_ i ii _ii ii_ i _ _
Special Recording Features
While a recording is in progress,you can watch a different channel or a DVD, or add recordingtime in 30-
minuteincrements.
To Watch a different Channel while Recording
Make sure that you connectthe DVD-VCRto the TV using
an RF cable
-Whe nyou watching through theAntennainputduring
recording,press the TV/VCRbutton ontheremote control.
Using your -I-Vremotecontro!_change the channe!you
want to watch.
Whenyou watchingthrough Line input during recording,
change the input of your TV f[0m Line to Antenna/Using
your TV remote control,change the channelyou wantt °
watch.
ENG-79
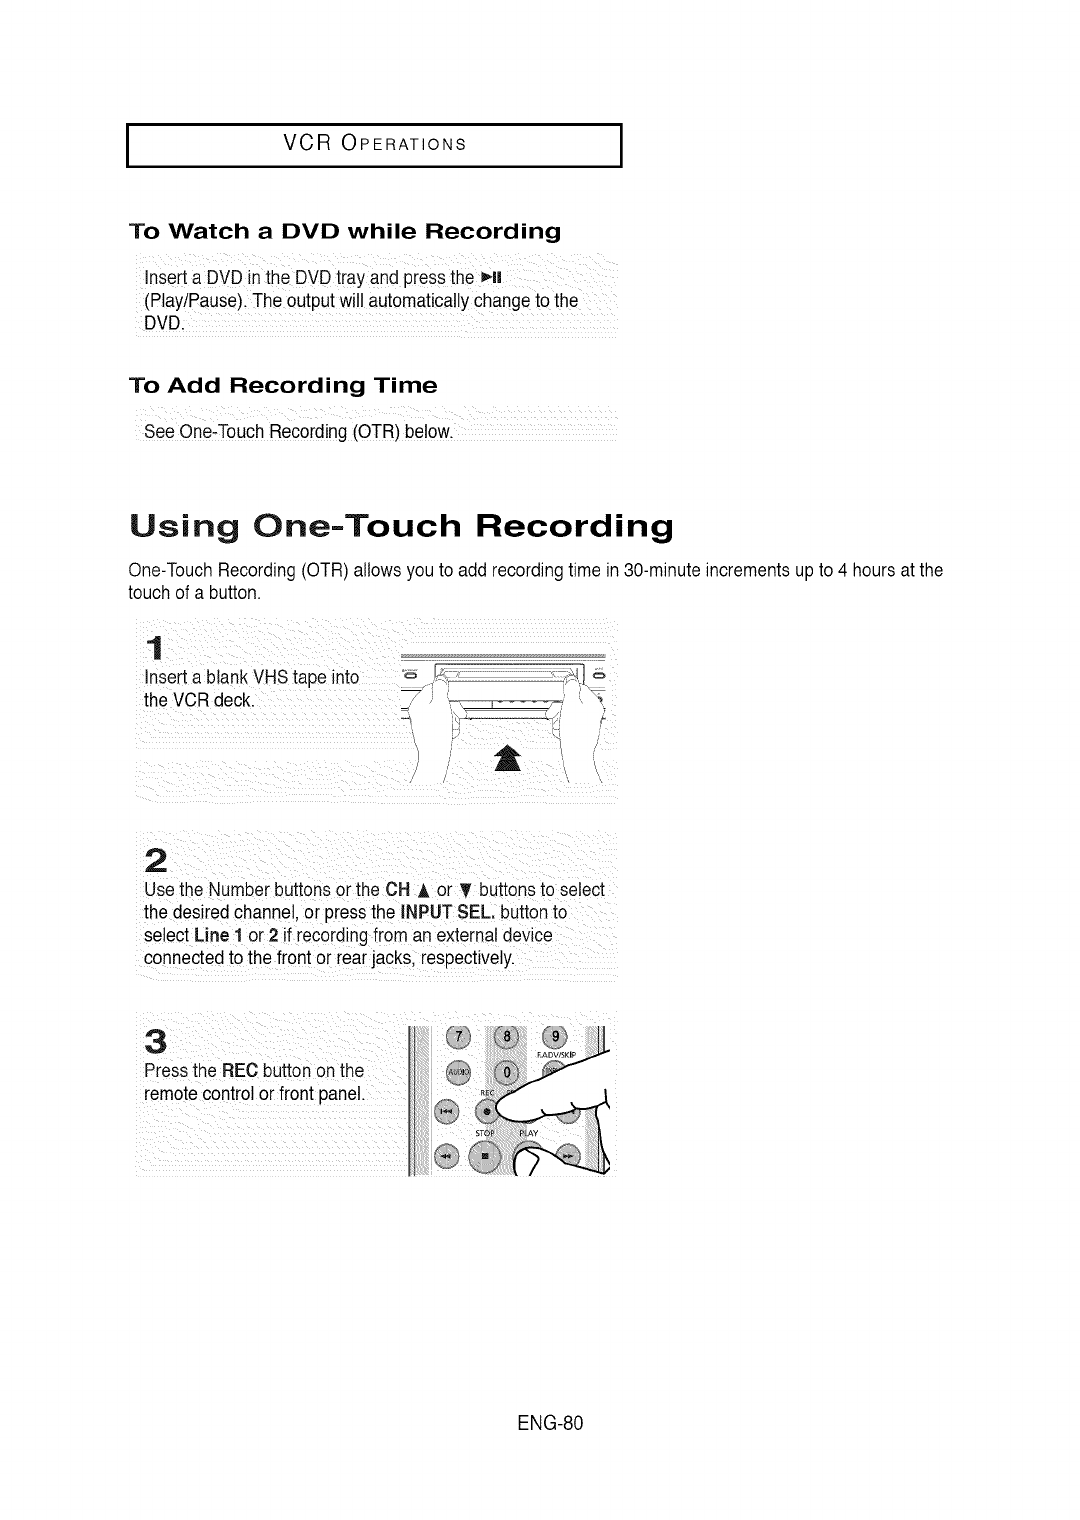

I VCR OPERATIONS
4
While in £ecord mode,press
the RECbutton againto
activate One-TouchRecording
(OTR}.
Record length 0:30 appears
on the On-screendisplayand
the DVD-VCRwill record for
exactly30 minutes.
5
Add RecordingTime
Continue pressingREC
button to add recordingtime
in 30 minuteincrementsupto
4 hours.
The DVD-VCRstops
recordingautomaticallywhen
the time has elapsed.The
DVD-VCRwill automaticallybe
turned off when the OTR
finished.
Selecting the Recording Speed
Youcan slow downthe recordingspeed from SPto SLPin orderto fit six hoursof programmingon a T-120
tape.
Note
Press the SPEEDbutton onthe The selectedRecordSpeedwill appearon
remotecontrolto selectthe the front paneldisplayandon-screen
Recordspee& display.
-SP; Standard Play,for best
-SLP: SuperLong Play,for
maximumrecording
time (3 times SP).
MaximumRecording Time - SPvs. SLP
TapeLength SP(StandardPlay)
T-120 2 hrs
T-160 2hrs 40 mins
T-180 3 hrs
SLP(SuperLong Play)
6 hrs
8 hrs
9 hrs
ENG-81
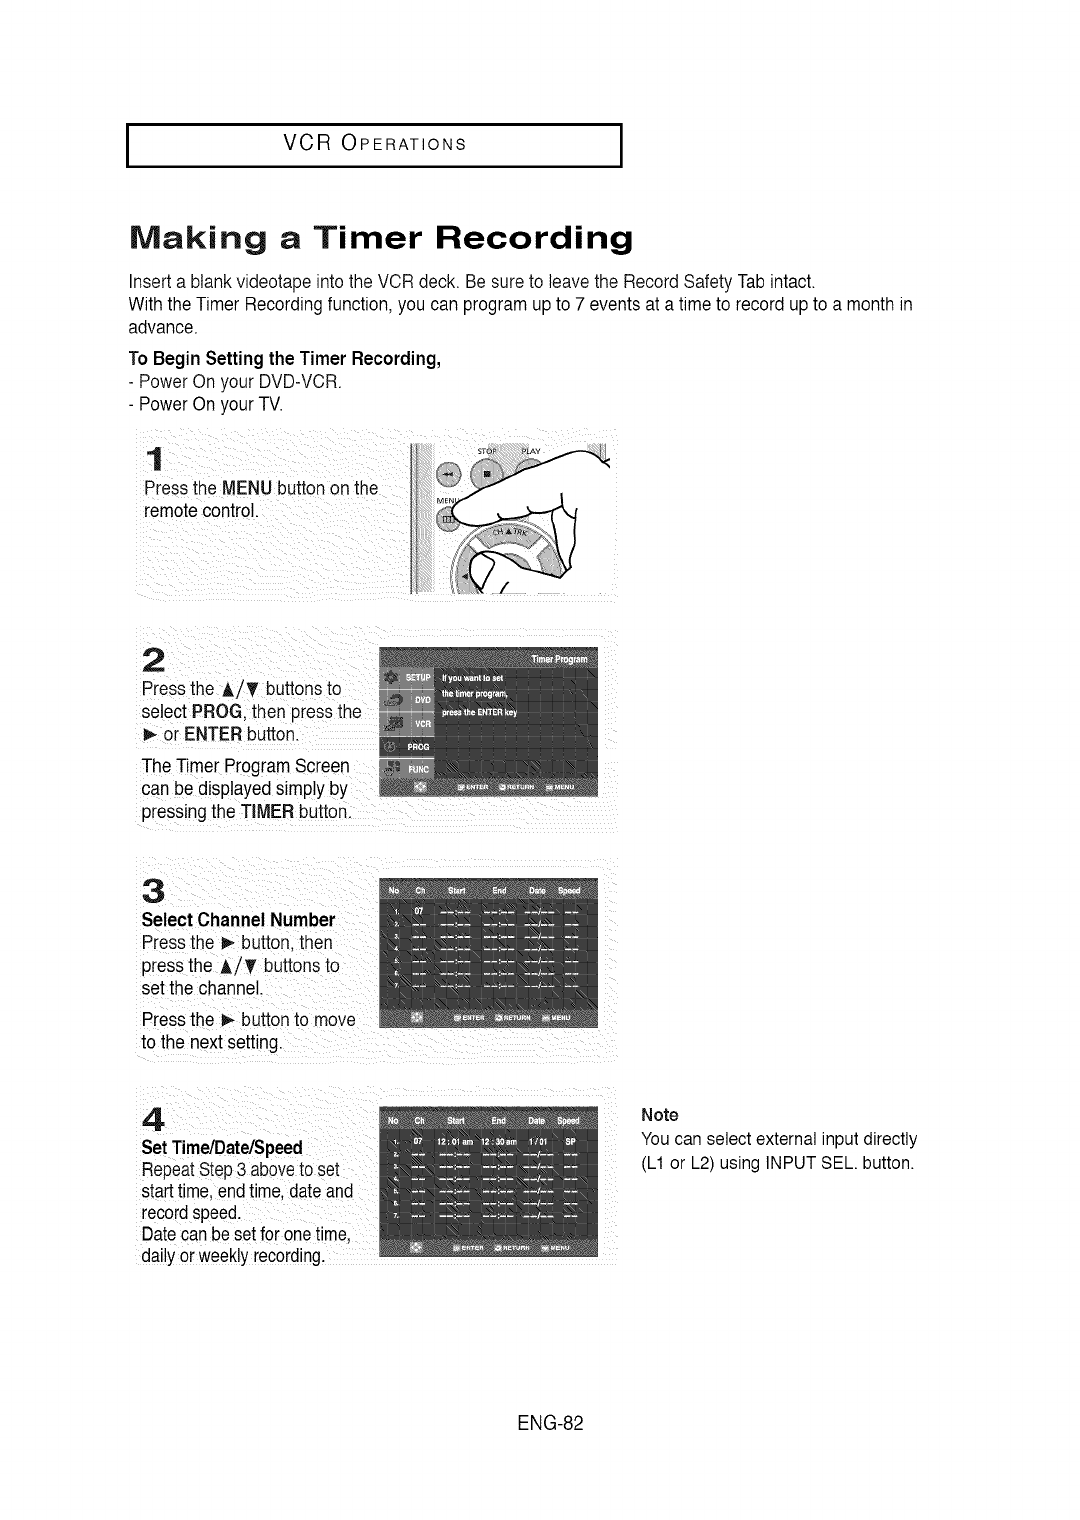
IVCR OPERATIONS I
Making a Timer Recording
Inserta blank videotapeinto the VCRdeck. Be sureto leave the RecordSafety Tabintact.
Withthe TimerRecordingfunction, you can programup to 7 events at a time to record upto a monthin
advance.
To BeginSettingthe Timer Recording,
-PowerOn your DVD-VCR
- PowerOn your TV.
1
Pressthe MENUbutton on the
remotecontrol.
2
Pressthe AiT buttonsto
select PROG then pressthe
or ENTERbutton.
The TimerProgramScreen
can be displayedsimp
pressingthe TIMERbutton.
3
Select Channel Number
Pressthe 1_button, then
pressthe A/T buttonsto
setthe channel.
Pressthe _ button to move
to the next setting.
4.
SetTime/Date/Speed
RepeatStep3 aboveto set
starttime.endtime.date and
recordspeed.
Datecan besetfor onetime.
dailyorweeklyrecording.
Note
You can select external input directly
(L1 or L2) using INPUT SEE button.
ENG-82
I VCR OPERATIONS
Selecting Auto Speed
Ifthe length of the videotape is not longenoughfor a timer
recordingin the SP mode,set the recordingtape speed to
"Auto". Recordingwill start inthe SP mode. Ifthe length is not
long enough,the tape speed will automaticallychange from SP
mode to SLPmode.
Daily/WeeklyDate Programming
Weekly [Sun~Sat]:Usethis to recordTV programsonthe same
channel at the sametime everyweek. Daily[Mon, Tue,Wed,
Thu, Fri]: Use this to record TV programson the samechannel
at the sametime every day Mondaythrough Friday.
5
SaveTimer Recording
Pressthe RETURNbuttonto
finishsetting the timer
recording.
Stop the DVD-VCRor turn the
power off. Then the DVD-VCR
will automaticallyturn on and
begin recordingat the time you
set.
Tostop the timer recording,
pressthe POWERbuttonor
pressthe [] (Stop) button
twice.
ENG-83
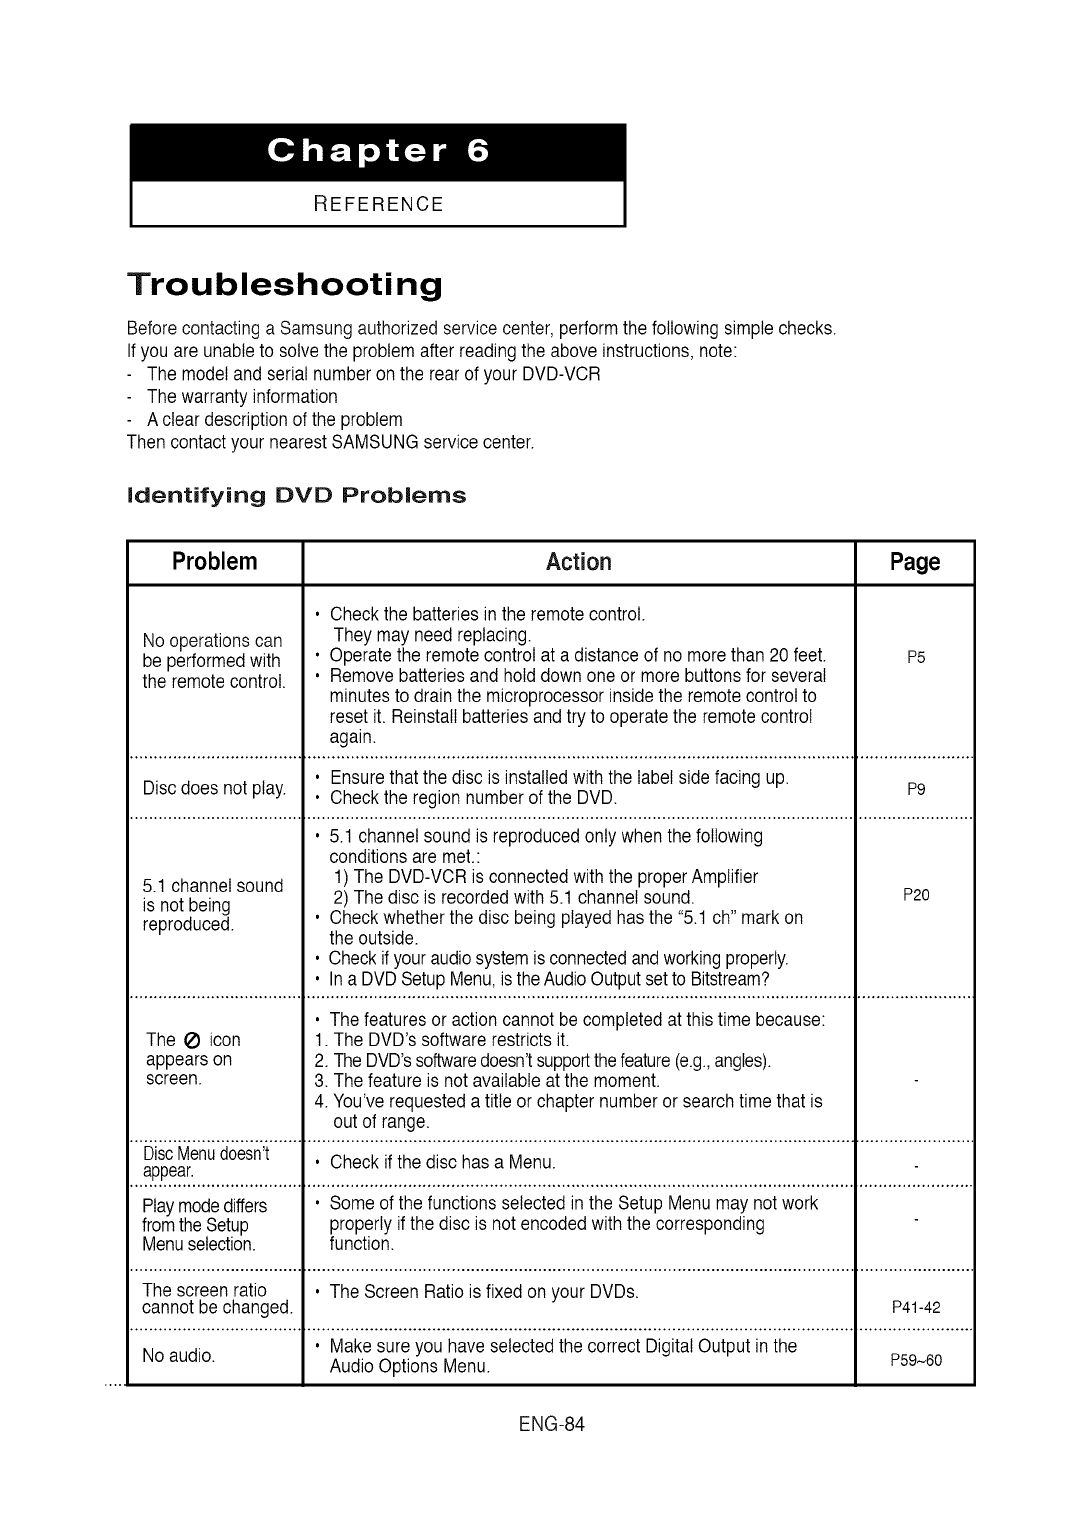
REFERENCE
Troubleshooting
Before contactinga Samsungauthorizedservicecenter, performthe followingsimplechecks.
Ifyou are unableto solve the problem after readingthe above instructions,note:
The modeland serial number on the rearof your DVD-VCR
The warranty information
A clear descriptionof the problem
Then contactyour nearestSAMSUNGservicecenter.
Identifying DVD Problems
Problem Action Page
• Check the batteries in the remotecontrol.
Nooperationscan Theymay need replacing.
be performedwith • Operatethe remotecontrolat a distance of no morethan 20 feet. P5
the remotecontrol. • Removebatteries and holddown one or more buttons for several
minutesto drainthe microprocessorinsidethe remotecontrolto
resetit. Reinstallbatteriesand try to operatethe remotecontrol
again.
• Ensurethat the disc is installedwith the labelside facing up. P9
Discdoes not play. • Check the region numberof the DVD.
• 5.1 channel sound is reproducedonly whenthe following
conditionsare met.:
5.1 channel sound 1) The DVD-VCRis connected withthe properAmplifier
is not being 2) The disc is recordedwith 5.1 channel sound. P20
reproduced. • Checkwhetherthe disc being playedhas the "5.1ch" markon
the outside.
• Check if youraudiosystemis connectedandworkingproperly.
• In a DVDSetupMenu,is the AudioOutputsetto Bitstream?
• The features or actioncannot becompleted at this time because:
The _) icon 1. The DVD's softwarerestrictsit.
appearson 2. TheDVD'ssoftwaredoesn'tsupportthefeature(e.g.,angles).
screen. 3. The featureis not available at the moment.
4. You've requesteda title or chapter numberor searchtime that is
out of range.
DiscMenudoesn't • Check if the disc has a Menu.
appear.
Playmodediffers • Some of the functionsselectedin the Setup Menu may not work
fromthe Setup properlyif the disc is not encoded withthe corresponding
Menuselection, function.
The screen ratio • The Screen Ratiois fixed on your DVDs.
cannotbe changed. P41-42
• Makesure you have selectedthe correct DigitalOutput inthe
No audio. AudioOptions Menu. P59~60
ENG-84
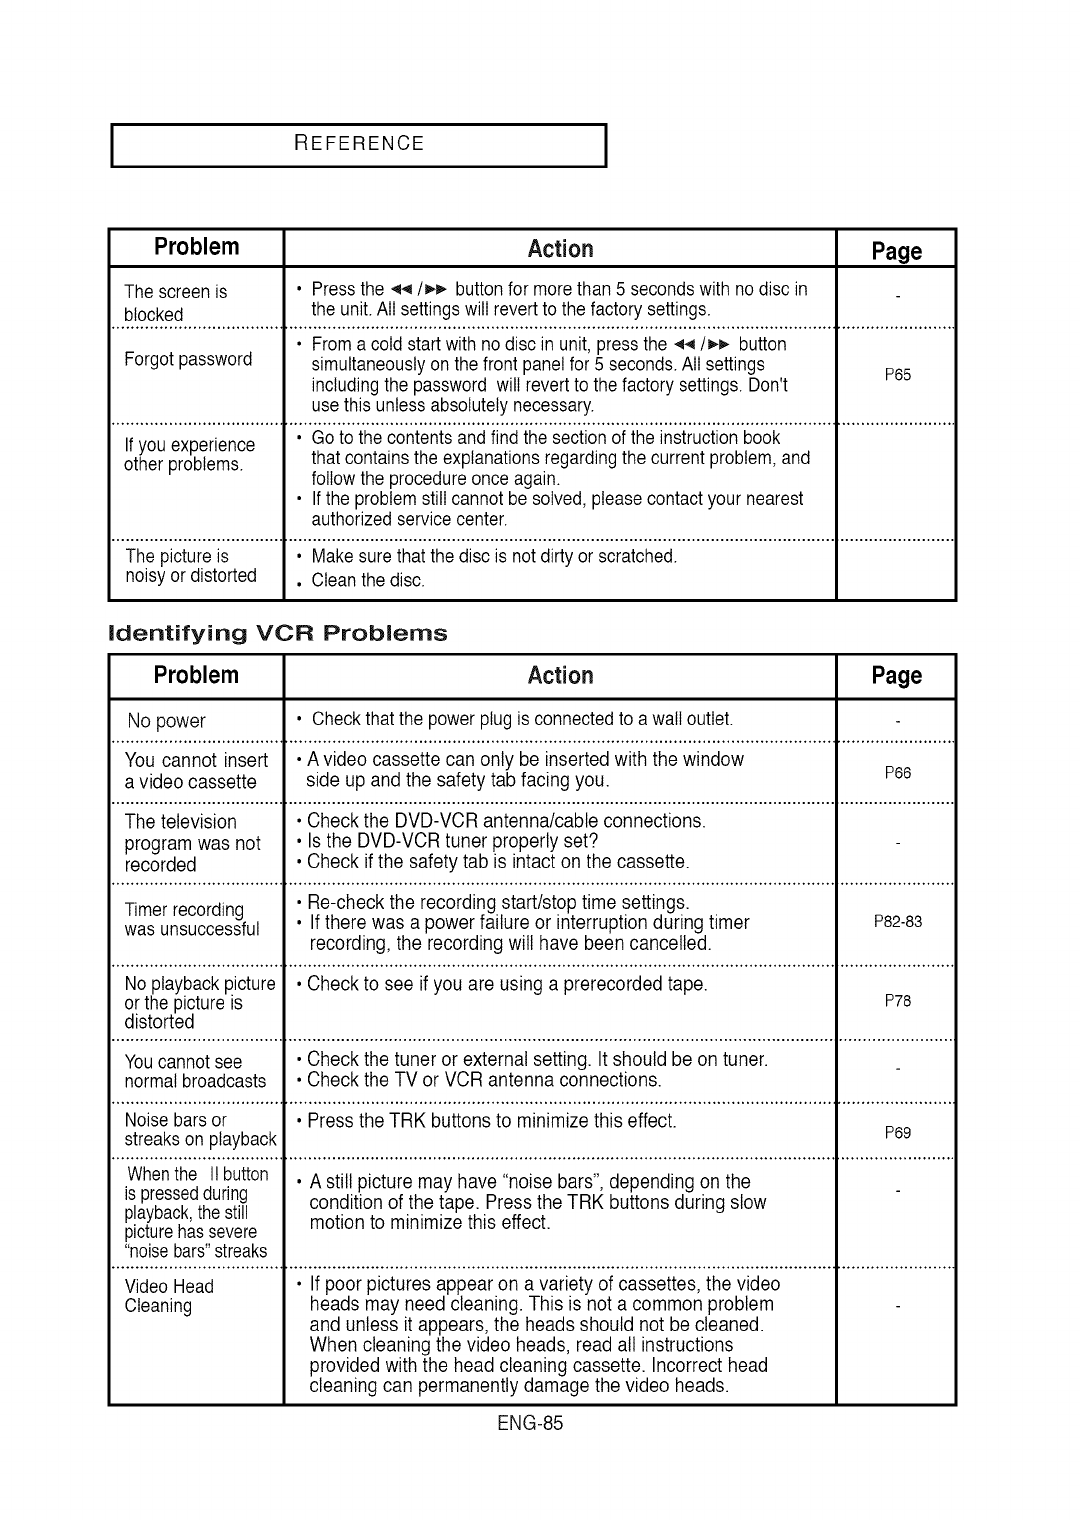
IREFERENCE I
Problem Action Page
The screen is . Pressthe .q_/)._ buttonfor morethan 5 secondswith nodisc in
blocked the unit.All settingswill revertto the factory settings.
• Froma cold start with nodisc in unit,pressthe .q4/)_,. button
Forgotpassword simultaneouslyon the front panel for 5 seconds.All settings P65
includingthe password will revertto the factory settings.Don't
use this unlessabsolutely necessary.
-ii................................. ...................................
you experience
other problems, that contains the explanationsregardingthe current problem,and
followthe procedureonce again.
• Ifthe problem still cannotbe solved, please contactyour nearest
authorizedservice center.
The pictureis . Makesure that the disc is not dirty or scratched.
noisyor distorted . Cleanthe disc.
identifying VCR Problerns
Problem Action Page
No power . Checkthat the power plug is connectedto a wall outlet.
You cannot insert •A video cassette can only be inserted with the window
a video cassette side up and the safety tab facing you. P66
The television • Check the DVD-VCR antenna/cable connections.
program was not • Is the DVD-VCR tuner properly set?
recorded • Check if the safety tab is intact on the cassette.
Timerrecording • Re-check the recording start/stop time settings.
was unsuccessful • If there was a power failure or interruption during timer P82-83
recording, the recording will have been cancelled.
No playbackpicture • Check to see if you are using a prerecorded tape.
or the pictureis P78
distorted
Youcannotsee . Check the tuner or external setting. It should be on tuner.
normal broadcasts . Check the TV or VCR antenna connections.
Noise bars or • Press the TRK buttons to minimize this effect.
streakson playback P69
Whenthe It button . A still picture may have "noise bars", depending on the
is pressedduring condition of the tape. Press the TRK buttons during slow
playback,the still motion to minimize this effect.
picturehassevere
"noisebars"streaks
Video Head • If poor pictures appear on a variety of cassettes, the video
Cleaning heads may need cleaning. This is not a common problem
and unless it appears, the heads should not be cleaned.
When cleaning the video heads, read all instructions
provided with the head cleaning cassette. Incorrect head
cleaning can permanently damage the video heads.
ENG-85
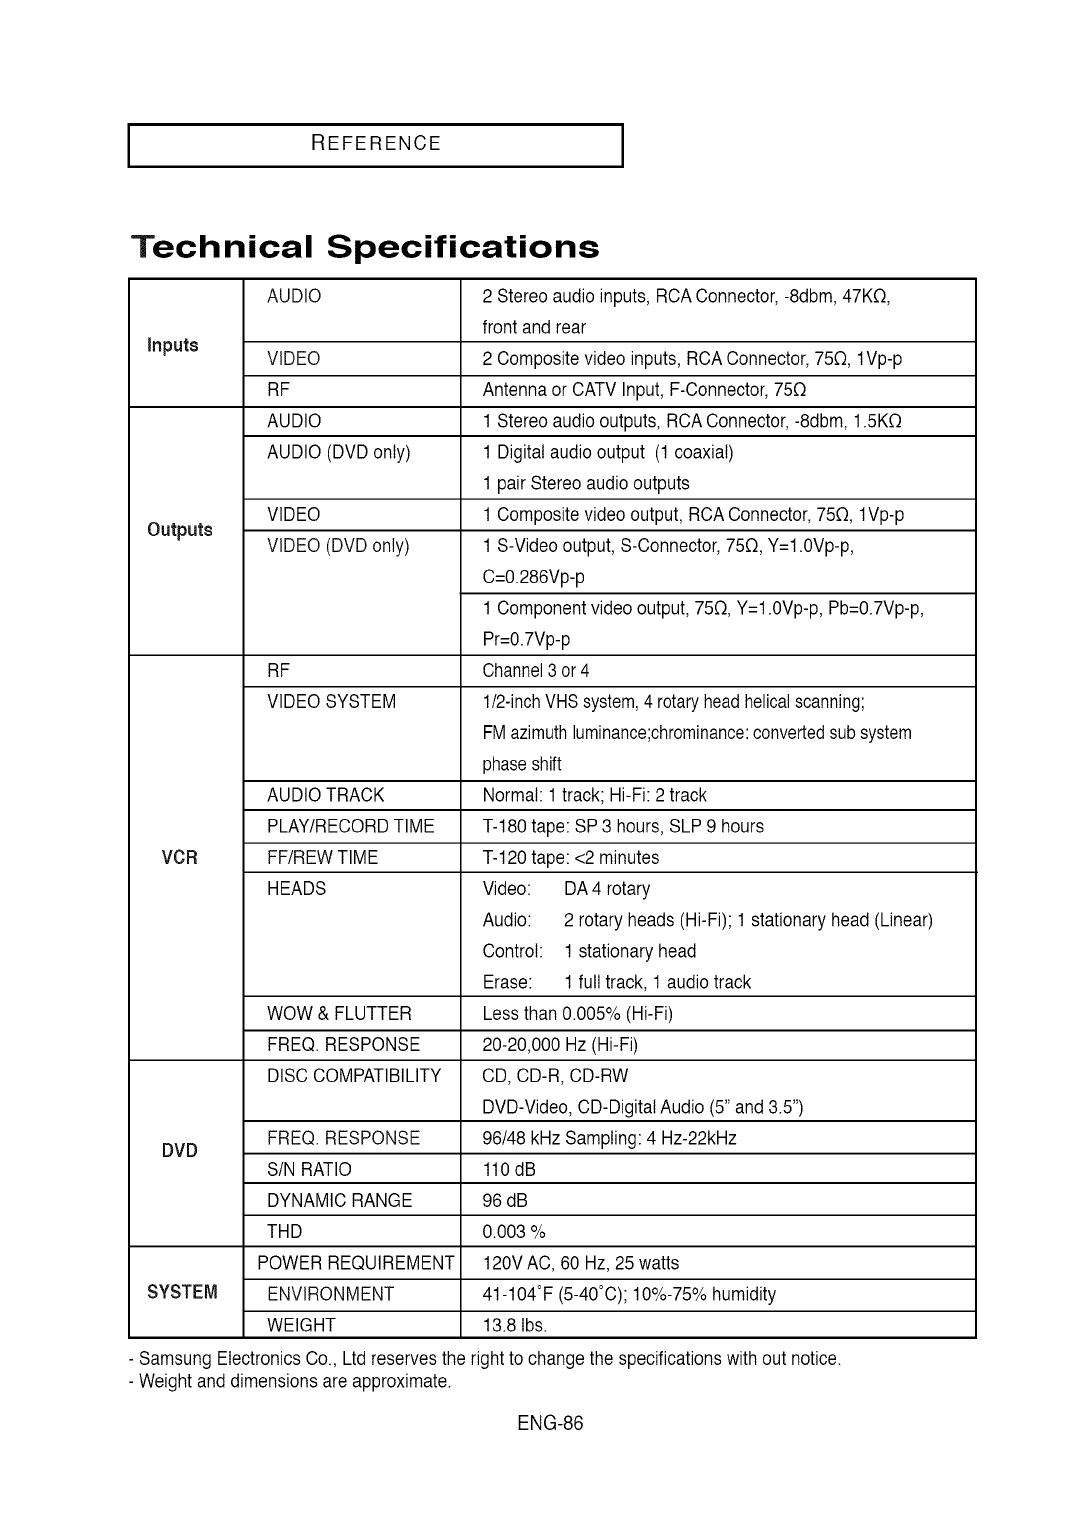
REFERENCE I
Technical Specifications
AUDIO
inputs VIDEO
RF
AUDIO
AUDIO (DVDonly)
VIDEO
Outputs VIDEO (DVDonly)
RF
VIDEO SYSTEM
AUDIO TRACK
PLAY/RECORD TIME
VCR FF/REW TIME
HEADS
2 Stereoaudio inputs, RCAConnector,-8dbm,47KO,
front and rear
2 Compositevideo inputs, RCAConnector,750, 1Vp-p
Antenna or CATV Input, F-Connector,750
1 Stereoaudio outputs,RCAConnector,-8dbm, 1.5KO
1 Digitalaudiooutput (1coaxial)
1 pair Stereo audio outputs
1 Compositevideo output, RCA Connector,750, 1Vp-p
1 S-Videooutput, S-Connector,750, Y=1.0Vp-p,
C=0.286Vp-p
1 Componentvideo output, 750, Y=1.0Vp-p,Pb=0.7Vp-p,
Pr=0.7Vp-p
Channel3 or4
1/2-inchVHSsystem,4 rotaryheadhelicalscanning;
FMazimuthluminance;chrominance:convertedsubsystem
phaseshift
Normal:1 track; Hi-Fi: 2 track
T-180tape: SP3 hours, SLP9 hours
T-120tape: <2 minutes
Video:
Audio:
Control:
Erase:
DA 4 rotary
2 rotary heads (Hi-Fi); 1 stationaryhead (Linear)
1 stationaryhead
1 full track, 1audio track
WOW & FLUTTER Less than 0.005% (Hi-Fi)
FREQ. RESPONSE 20-20,000 Hz (Hi-Fi)
DISC COMPATIBILITY CD, CD-R, CD-RW
DVD-Video, CD-Digitat Audio (5" and 3.5")
FREQ. RESPONSE 96/48 kHz Sampling: 4 Hz-22kHz
DVD SIN RATIO 110 dB
DYNAMIC RANGE 96 dB
THD 0.003 %
POWER REQUIREMENT 120V AC, 60 Hz, 25 watts
SYSTEM ENVIRONMENT 41-104°F (5-40°C); 10%-75% humidity
WEIGHT 13.8 Ibs.
- SamsungElectronicsCo., Ltd reservesthe right to changethe specificationswith out notice.
- Weightand dimensionsare approximate.
ENG-86

[ MEMO
ENG-87

1 MEMO J
ENG-88

[ MEMO
ENG-89
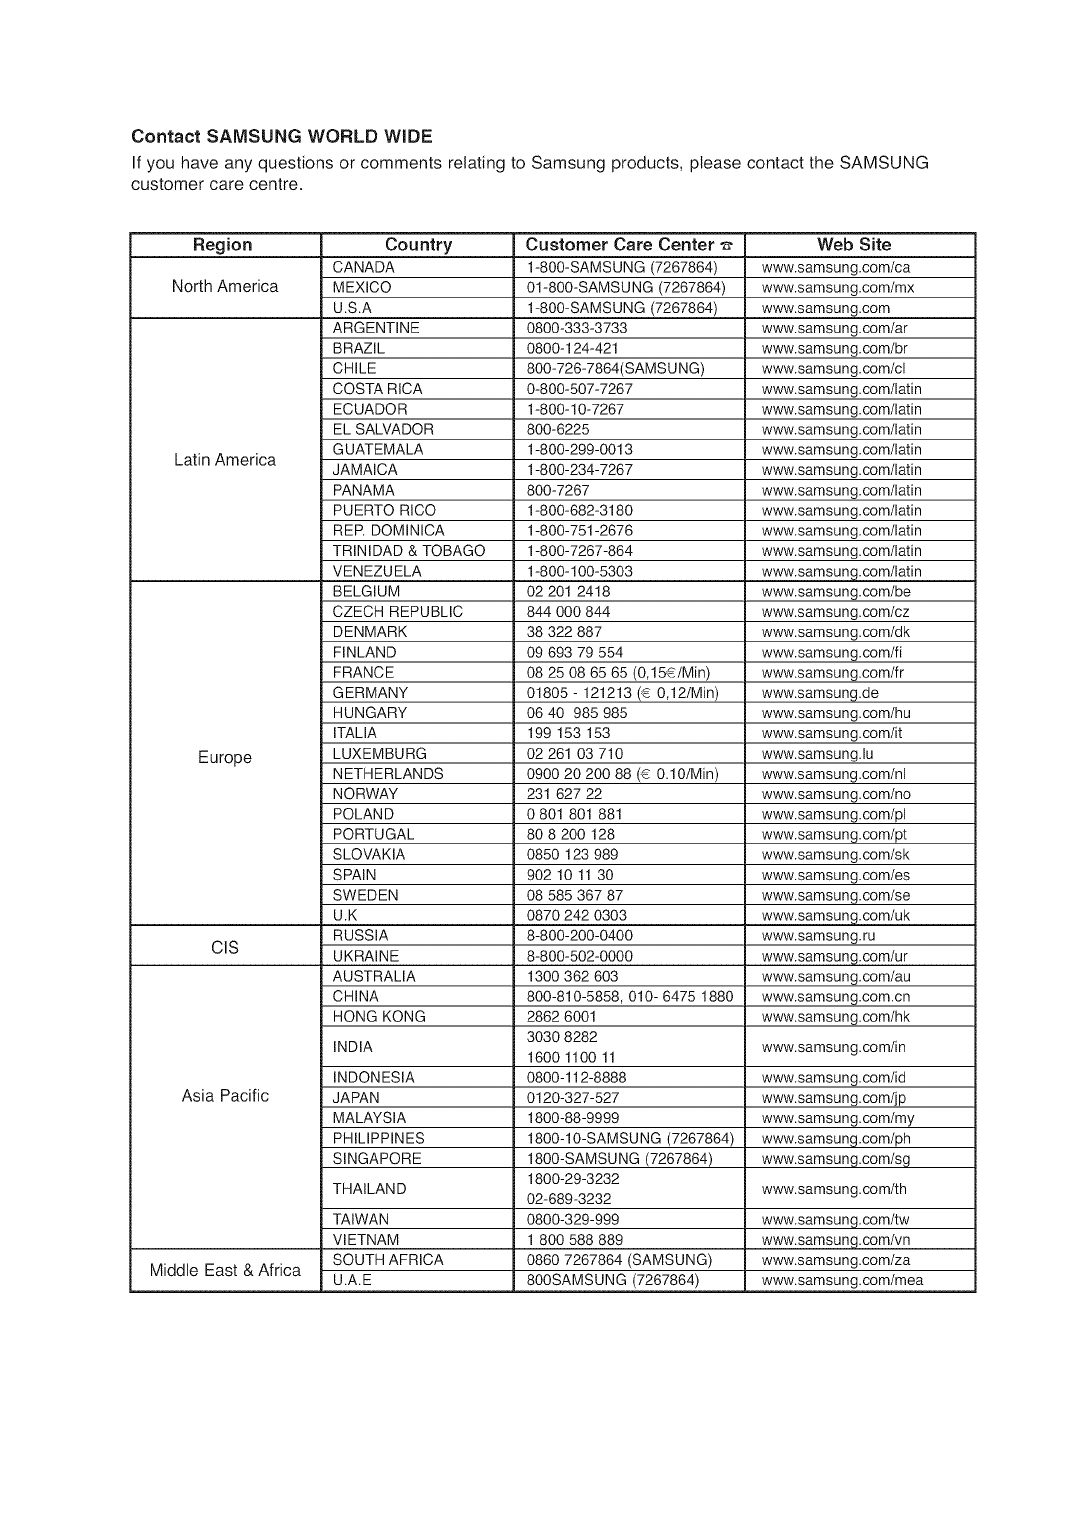
Contact SAMSUNG WORLD WIDE
If you have any questions or comments relating to Samsung products, please contact the SAMSUNG
customer care centre.
Region
North America
Latin America
Europe
CIS
Asia Pacific
Country
CANADA
MEXICO
U.S.A
ARGENTINE
BRAZIL
CHILE
COSTA RICA
ECUADOR
EL SALVADOR
GUATEMALA
JAMAICA
PANAMA
PUERTO RICO
RER DOMINICA
TRINIDAD & TOBAGO
VENEZUELA
BELGIUM
CZECH REPUBLIC
DENMARK
FINLAND
FRANCE
GERMANY
HUNGARY
ITALIA
LUXEMBURG
NETHERLANDS
NORWAY
POLAN D
PORTUGAL
SLOVAKIA
SPAIN
SWEDEN
U.K
RUSSIA
UKRAINE
AUSTRALIA
CHINA
HONG KONG
INDIA
INDONESIA
JAPAN
MALAYSIA
PHILIPPINES
SINGAPORE
THAILAND
Web Site
www.samsung.com/ca
www.samsung.com/mx
www.samsung.com
www.samsung.com/ar
www.samsung.com/br
www.samsung.com/cl
www.samsung.com/latin
www.samsung.com/latin
www.samsung.com/latin
www.samsung.com/latin
www.samsung.com/latin
www.samsung.com/latin
www.samsung.com/latin
www.samsung.com/latin
www.samsung.com/latin
_g.com/latin
www.samsung.com/be
www.samsung.com/cz
www.samsung.com/dk
www.samsung.com/fi
www.samsung.com/fr
www.samsung.de
www.samsung.com/hu
www.samsung.com/it
www.samsung.lu
www.samsung.com/nl
www.samsung.com/no
www.samsung.com/pl
www.samsung.com/pt
www.samsung.com/sk
www.samsung.com/es
www.samsung.com/se
www.samsung.com/uk
www.samsung.ru
www.samsung.comlur
www.samsung.com/au
www.samsung.com.cn
www.samsung.com/hk
Customer Care Center
1-800-SAMSUNG (7267864)
01-800-SAMSUNG (7267864)
1-800-SAMSUNG (7267864)
0800-333-3733
0800-124-421
800-726-7864(SAMSU NG)
0-800-507-7267
1-800-10-7267
800-6225
1-800-299-0013
1-800-234-7267
800-7267
1-800-682-3180
1-800-751-2676
1-800-7267-864
1-800-100-5303
02 201 2418
844 000 844
38 322 887
09 693 79 554
08 25 08 65 65 (0,15€/Min)
01805 - 121213 (€ 0,12lMin)
06 40 985 985
199 153 153
02 261 03 710
0900 20 200 88 (€ 0.10/Min)
231 627 22
0 801 801 881
80 8 200 128
0850 123 989
902 10 11 30
08 585 367 87
0870 242 0303
8-800-200-0400
8-800-502-0000
1300 362 603
800-810-5858, 010- 6475 1880
2862 6001
3030 8282
1600 1100 11
0800-112-8888
0120-327-527
1800-88-9999
1800-10-SAMSUNG (7267864)
1800-SAMSUNG (7267864)
1800-29-3232
02-689-3232
0800-329-999
1 800 588 889
0860 7267864 (SAMSUNG)
800SAMSUNG (7267864)
www.samsung.com/in
www.samsung.com/id
www.samsung.com/jp
www.samsung.com/my
www.samsung.com/ph
www.samsung.com/sg
www.samsung.com/th
TAIWAN www.samsung.com/tw
VIETNAM www.samsung.com/vn
SOUTH AFRICA www.samsung.com/za
Middle East & Africa U.A.E www.samsung.com/mea
Warranty
This SAMSUNG brand product, as supplied and distributed by SAMSUNG ELECTRONICS AMERICA, INC.
(SAMSUNG) and delivered new, in the original carton to the original consumer purchaser, is warranted by
SAMSUNGagainstmanufacturingdefects in materialsand workmanshipfor the followinglimitedwarranty period:
One (1) Year Parts /Ninety Days (90) Labor
This limited warranty beginson the originaldate of purchase,and is valid only on products purchasedand used in
the UnitedStates,and does not includetransportation,installation,removalor reinstatIation.
Warrantyrepairs must be performedby SAMSUNG'Sauthorizedservicecenter. To receivewarrantyservice,the
originaldated billof satemust be presentedupon requestas proofof purchaseto SAMSUNGor SAMSUNG'S
authorizedsewice center. Transportationto and from the servicecenter is the responsibilityof the purchaser.
SAMSUNGwill repairor replacethis product,at our optionand at no charge with new or reconditionedparts, if
found to be defectiveduringthe limitedwarranty periodspecifiedabove.The productmust be returnedduring the
warranty periodwithtransportationchargesprepaidto SAMSUNG'sdesignatedservicecenter. Priorto returning
any productfor warranty service,the purchasermust contact SAMSUNGfor problemdeterminationand service
procedures.SAMSUNGdoes not warrantuninterruptedor error-freeoperation of the product.
AIIreplaced partsand products becomethe propertyof SAMSUNGand must be returnedto SAMSUNG.
Replacementparts and productsassume the remainingoriginal warranty,or ninety (90)days, whichever is longer.
This limitedwarrantycovers manufacturingdefects in materialsand workmanshipencounteredin normal,
noncommercialuse of this productand shall not apply to the following, including,but not limitedto: damagewhich
occurs in shipment;applicationsand usesfor which this productwas not intended;failuresor problemswhich are
caused by productsor equipmentnot suppliedby SAMSUNG;accidents, misuse,abuse,neglect, misapplication,
fire, water,lightning or other acts of nature;incorrectelectrical line voltage,fluctuationsor surges;damage caused
by improperor faulty installation;improperconnectionwith any peripheral;productalterationor modification;
improperor unauthorizedrepair; cosmeticdamage or exteriorfinish; productwith altered serial numbers;failure to
followoperating instructions,customeradjustments,maintenanceand environmentalinstructionsthat are covered
and prescribedin the instructionbook; use of non-SAMSUNGor unauthorizedparts, supplies, accessoriesor
equipmentwhichdamage this productor result in serviceproblems;failures or problemsdueto incompatibility
with other equipment.
ContactSAMSUNGWORLDWIDE
IfyouhaveanyquestionsorcommentsrelatingtoSamsungproducts,
pleasecontacttheSAMSUNGcustomercarecentre.
1-800-SAMSUNG(7267864)/www.samsung.com
Samsung Electronics America, Inc.
105 Challenger Road
Ridgefield Park, NJ 07660-0511
1-800-SAMSUNG (7267864)
www.samsung.com
AK68-00956E Rev.02
