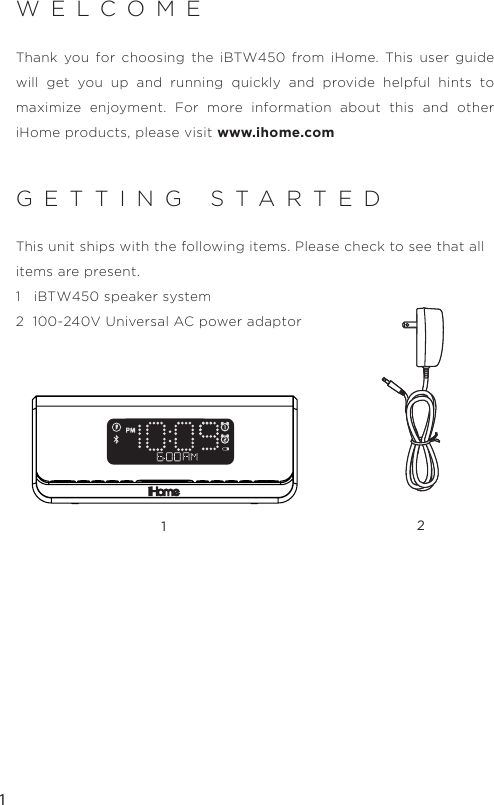
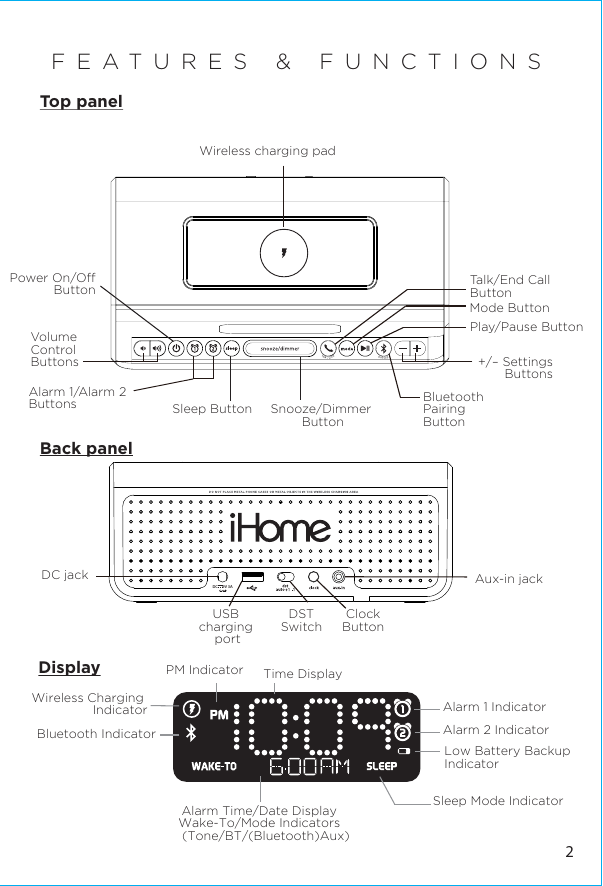
SDI Technologies IBTW450 Dual Charging Stereo Speaker System + Dual Alarm User Manual iBTW450 IB v6
SDI Technologies Inc. Dual Charging Stereo Speaker System + Dual Alarm iBTW450 IB v6
UserManual.wiki
>
SDI Technologies
>
IBTW450 User Manual
user manual
Navigation menu
Upload a User Manual
Namespaces
Wiki Guide
HTML
PDF
Info
Views
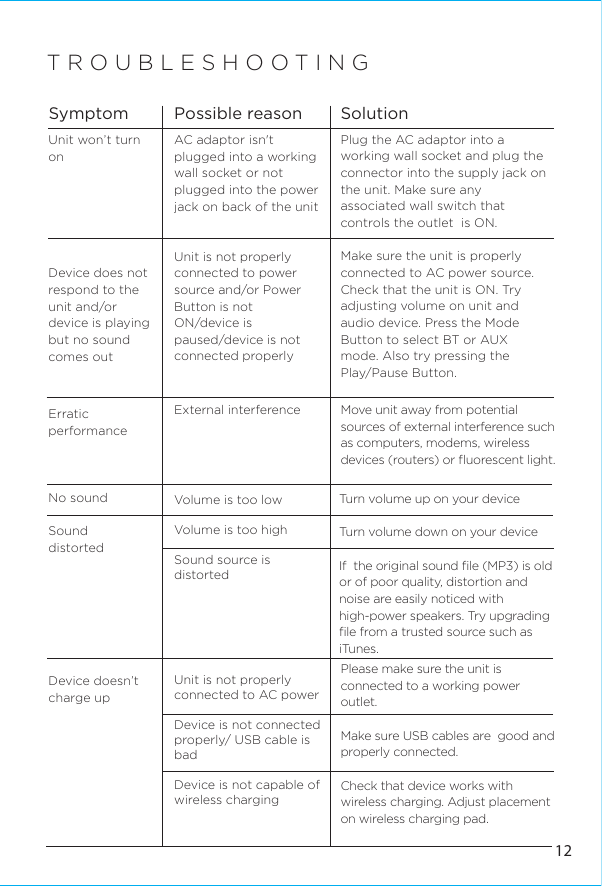
User Manual
Discussion / Help
Navigation