SII Data Service SA-4320 Order Entry System Handheld Terminal User Manual 2
SII Data Service Corporation Order Entry System Handheld Terminal 2
UserManual.wiki
>
SII Data Service
>
SA-4320 User Manual
>
user manual 2
Contents
1.
user manual 1
2.
user manual 2
user manual 2
Navigation menu
Upload a User Manual
Namespaces
Wiki Guide
HTML
PDF
Info
Views
User Manual
Discussion / Help
Navigation


![Chapter 4: Terminal Settings Mode Functions 4-34.3 Functions Specifications 4.3.1 Function Menu Press menu keys for terminal settings. Fig. 4-2: Function Menu [Version] displays the version screen. [Parameters] displays the parameters screen. [WLAN Test] displays the WLAN test screen. [Touchscreen Calibration] displays the touchscreen calibration screen. [Reboot] restarts the OS.](https://usermanual.wiki/SII-Data-Service/SA-4320.user-manual-2/User-Guide-842337-Page-29.png)
![4-4 4.3.2 Version This function displays the versions of the OS, firmware, and library in the terminal. Select [Version] on the function menu. Fig. 4-3: Version](https://usermanual.wiki/SII-Data-Service/SA-4320.user-manual-2/User-Guide-842337-Page-30.png)
![Chapter 4: Terminal Settings Mode Functions 4-54.3.3 Parameters This function sets the parameters. Select [Parameters] on the function menu. Fig. 4-4: Parameters](https://usermanual.wiki/SII-Data-Service/SA-4320.user-manual-2/User-Guide-842337-Page-31.png)
![4-6 (1) LCD Brightness Use this function to set the LCD brightness. The set values are stored and saved, even if the device is reset. Select [Parameters] – [LCD Brightness] from the function menu. Select and press number from [1] to [5] onscreen to set the brightness. [5] is the brightest. The setting is preconfigured to [3]. Fig. 4-5: LCD brightness](https://usermanual.wiki/SII-Data-Service/SA-4320.user-manual-2/User-Guide-842337-Page-32.png)
![Chapter 4: Terminal Settings Mode Functions 4-7(2) Buzzer Use this function to set the buzzer. The set values are saved, even if the device is reset. Select [Parameters] – [Buzzer] from the function menu. Select and touch the screen to change the settings. The settings are preconfigured to “Small and Low”. Fig. 4-6: Buzzer](https://usermanual.wiki/SII-Data-Service/SA-4320.user-manual-2/User-Guide-842337-Page-33.png)
![4-8 (3) Date/time Use this function to set date and time. The set date and time are saved, even if the device is reset, when the battery voltage is within operating parameters. Select [Parameters] – [Date/time] from the function menu. The current set value is displayed at the top of the screen. Touch the parameter to be changed. The selected parameters are underlined. Press the numeric keypad onscreen to change the value. Always enter two digits; for example, enter “01” for January. Press [Enter]. The message "Settings completed” appears, and the settings are saved. Fig. 4-7: Date/time](https://usermanual.wiki/SII-Data-Service/SA-4320.user-manual-2/User-Guide-842337-Page-34.png)
![Chapter 4: Terminal Settings Mode Functions 4-9(4) Serial Number Use this function to refer to the product serial number and the wireless module MAC address. Select [Parameters] – [Serial No.] from the function menu. Fig. 4-8: Serial No.](https://usermanual.wiki/SII-Data-Service/SA-4320.user-manual-2/User-Guide-842337-Page-35.png)
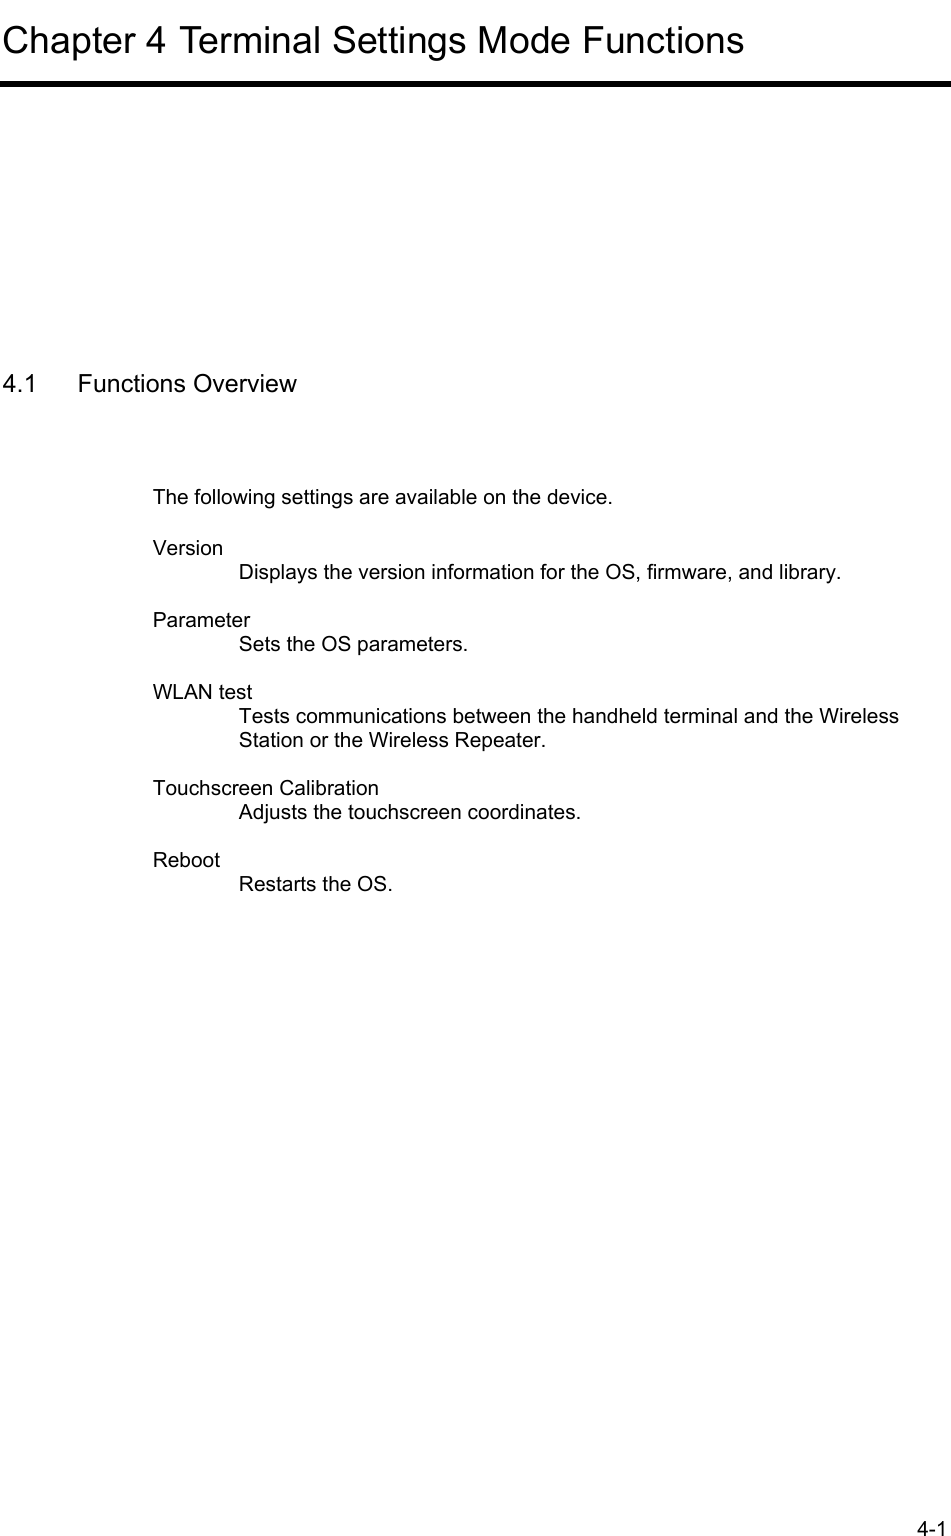
![4-10 4.3.4 WLAN test ○ Standard test This function tests the communications between the device, the Wireless Station, and the Wireless Repeater. Test the communication environment of the anticipated installation sites if the wireless area measurement does not assure it as an optimum site. When performing the standard test before installing in the store, place the Wireless Station (or Wireless Repeater) at the expected installation site, and set to test mode. Refer to each device’s manual for how to set to test mode. Use normal mode if the operation has already started in the store. Select [WLAN Test] – [Standard Test] from the function menu. ○ Advanced test This function tests the communications between the device, the Wireless Station, and the Wireless Repeater. When performing the standard test before installing in the store, place the devices at the expected installation sites, and set to test mode. Refer to each device’s manual for how to set to test mode. Use normal mode if the operation has already started in the store. Select [WLAN Test] – [Advanced Test] from the function menu. ○ Receive mode This mode sets the receiver. ○ Area test This function lists signal levels between the device and all the stations (repeaters) available for the device. The signal level data is refreshed every 8 seconds. Set the same system ID as the station when performing this test.](https://usermanual.wiki/SII-Data-Service/SA-4320.user-manual-2/User-Guide-842337-Page-36.png)
![4-12 Specify the destination. Select Wireless Station (WS) or Wireless Repeater (WR). If several communications destinations have been installed, change the station address using [▲] and [▼]. Fig. 4-10: WLAN test (Specifying destination)](https://usermanual.wiki/SII-Data-Service/SA-4320.user-manual-2/User-Guide-842337-Page-38.png)
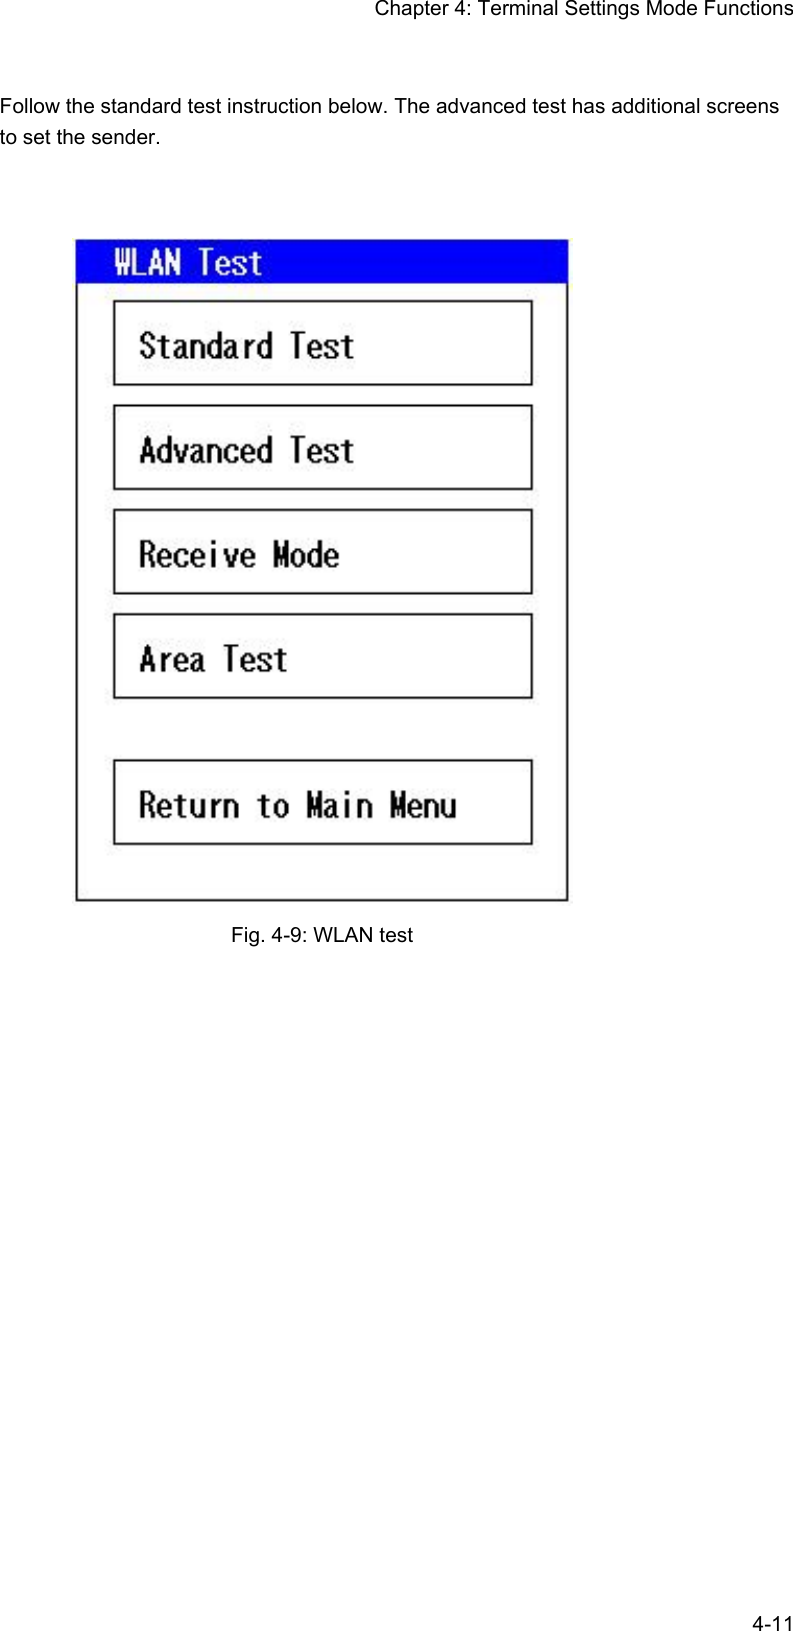
![Chapter 4: Terminal Settings Mode Functions 4-13 Specify the communications channel from 1, 6 or 13. Confirm the settings, and touch [Start]. Communications may be performed via the channel set in the partner device, not via the channel set in this device. [Mode]: There are two modes, test mode and normal mode. Use the test mode if the station is set to test mode. When performing the test after installing the devices at the store, use the normal mode and set the same system ID as the station. Note that some countries and regions cannot use channel 13 due to Radio Law regulations. Fig. 4-11: WLAN test (Specifying channel)](https://usermanual.wiki/SII-Data-Service/SA-4320.user-manual-2/User-Guide-842337-Page-39.png)
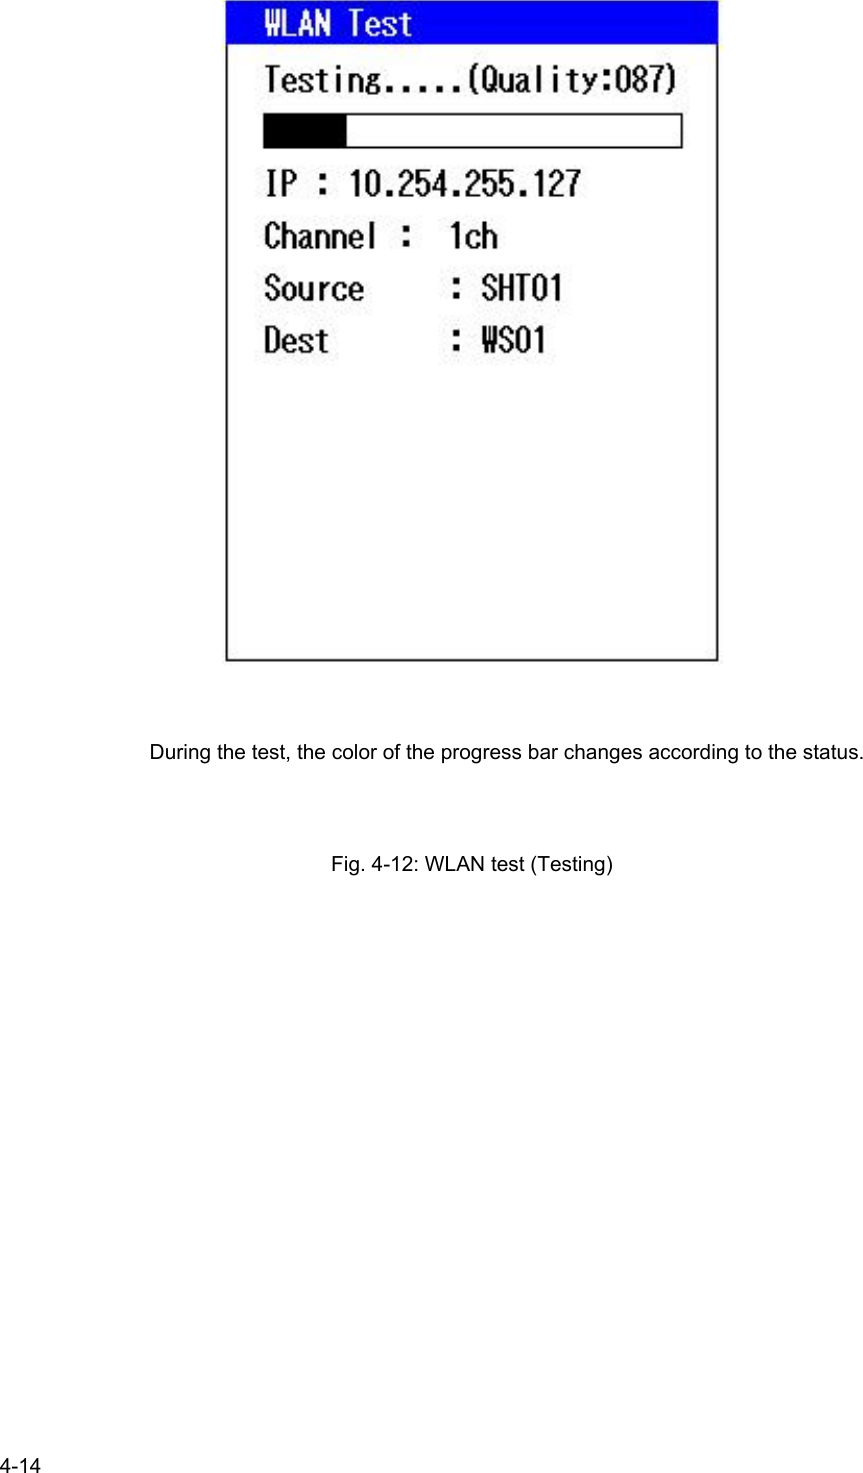
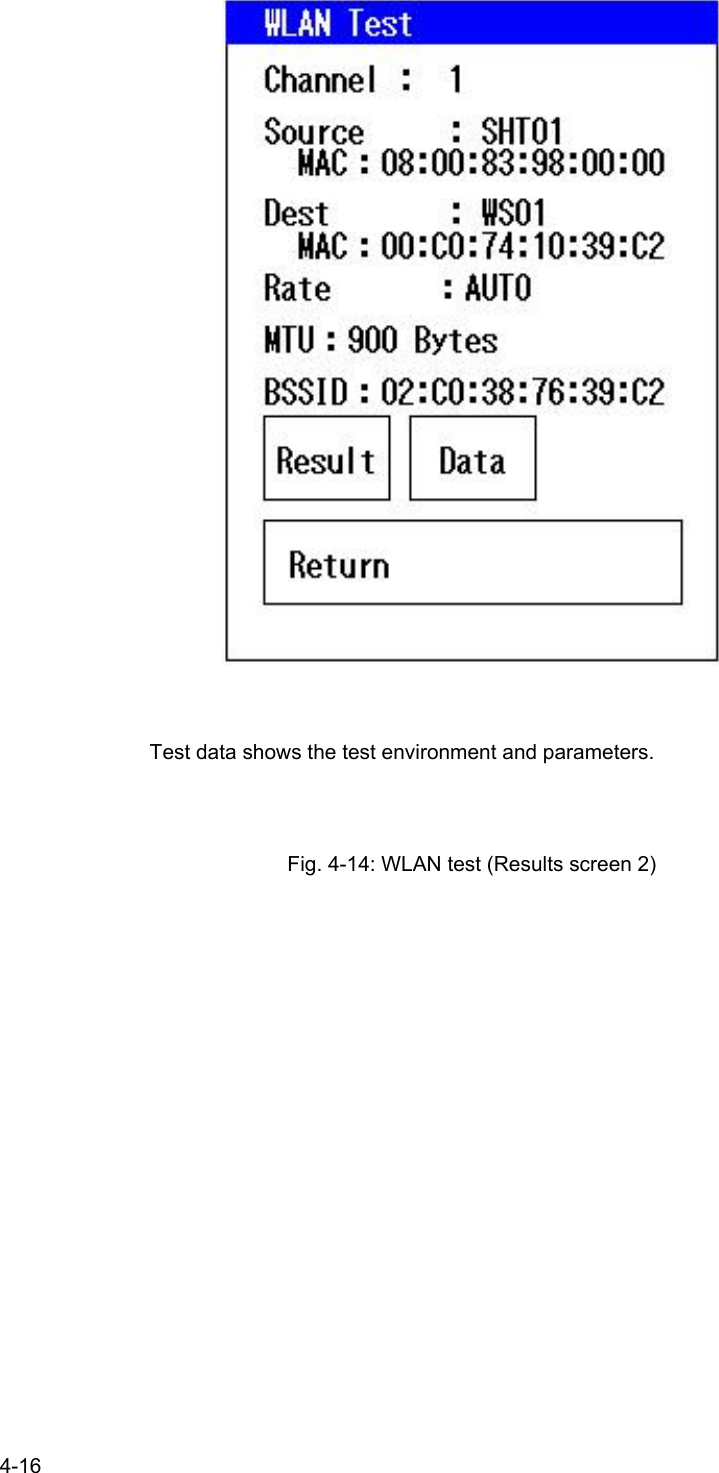
![Chapter 4: Terminal Settings Mode Functions 4-15 Press [Result] after the test to display the result. The higher the value of each signal, the better the communications environment. The noise level value of the station is displayed as “0” because only the Handheld Terminals can measure noise level. [Strong]: Communications are performed in the best conditions. [Good] : Communications can be performed. [Poor] : Communications cannot be performed. Note that the test result is an approximate indication. Environmental changes may cause communications malfunctions even if the installation sites have not changed. Fig. 4-13: WLAN test (Results screen 1)](https://usermanual.wiki/SII-Data-Service/SA-4320.user-manual-2/User-Guide-842337-Page-41.png)
![Chapter 4: Terminal Settings Mode Functions 4-174.3.5 Touchscreen Calibration Use this function to adjust the touchscreen calibration. Touch the crosses according to the messages. The following displays will appear: top left OK, top right OK, bottom left OK, and bottom right OK. [Return to Main Menu] appears when the screen is adjusted properly. If the crosses cannot be touched accurately, the touchscreen calibration can be canceled by pressing any side key or sheet key. In this case, the settings will not be saved. Fig. 4-15: Touchscreen Calibration Touch the cross in the top left The screen changes automatically Touch the crosses according to the message](https://usermanual.wiki/SII-Data-Service/SA-4320.user-manual-2/User-Guide-842337-Page-43.png)
![6-2 6.1.1 Transfer failure caused by the system (or device) , or several Handheld Terminals are malfunctioning Problem Probable Cause Solution None of the Handheld Terminals can communicate. - Wireless Station is malfunctioning - Turn on the power supply to the Wireless Station again. The malfunctioning Handheld Terminals cannot be specified. Communication failures due to other radio waves - External noise - A device with the same frequency is being used nearby. - Remove the source of the external radio waves, for example try stopping nearby microwave ovens. There are locations where wireless communications are disabled. The Wireless Stations are not installed at appropriate sites. - Search for an available communication area. Select [Function Menu] – [WLAN Test].- Move the Wireless Station to a suitable site. - A specific Handheld Terminal is malfunctioning. - Multiple Handheld Terminals are likely to be malfunctioning simultaneously. Frequency drifts or other abnormalities on the Wireless Station (1) Specify the combination of Wireless Station and Handheld Terminals that cannot communicate. Select [Function Menu] – [WLAN Test]. (2) If malfunctioning Handheld Terminals can communicate with other Wireless Stations, the Wireless Station is malfunctioning. The device is malfunctioning if wireless transfer is still disabled after trying the above solutions. Return the device to your local service center.](https://usermanual.wiki/SII-Data-Service/SA-4320.user-manual-2/User-Guide-842337-Page-54.png)
![Chapter 6: Troubleshooting 6-36.1.2 Communication failure caused by the use of a Handheld Terminal, or malfunction frequently occurs with a single Handheld Terminal Problem Probable Cause Solution - The Wireless Station is too far from the Handheld Terminal. - The Wireless Station is not in sight. - The device is used in an area with electromagnetic wave interference. - The signal does not reach. Move to a closer location where the Wireless Station is visible. - Occurs in a specific Handheld Terminal when used in conjunction with the maintenance Handheld Terminal. System IDs are incorrect. (1) Set the system ID according to the application program operation manual. The device is malfunctioning if wireless transfer is still disabled after trying the above solutions. Return the device to your local service center. 6.1.3 Communication failure caused by the Handheld Terminal Problem Probable Cause Solution - A specific Handheld Terminal cannot communicate. - The Handheld Terminal is malfunctioning - Operations temporarily malfunctioned due to a shock, such as being dropped. - Operations temporarily malfunctioned due to a drop in battery voltage. (1) Replace with a charged battery pack if the LED is flashing (orange). (2) Reset the device. (3) Check whether the Handheld Terminal is malfunctioning. Select [Function Menu] – [WLAN Test].Change the distance to test and compare with other Handheld Terminals. (4) If the test result is normal, the operations malfunction was probably temporary. Download the application program again. The device is malfunctioning if wireless transfer is still disabled after trying the above solutions. Return the device to your local service center.](https://usermanual.wiki/SII-Data-Service/SA-4320.user-manual-2/User-Guide-842337-Page-55.png)
![Chapter 6: Troubleshooting 6-56.3 The keypad tone does not sound, or the sound is too loud or too quiet Probable Cause Solution The set volume for the keypad tone is inappropriate. ・ Set the volume again. ・ If the volume is still inappropriate after resetting, adjust the volume: select [Function Menu] – [Parameters] – [Buzzer]. The device is malfunctioning if the volume still cannot be adjusted after trying the above solutions. Return the device to your local service center. 6.4 The system does not respond to key entries Probable Cause Solution Program runaways Keys are malfunctioning (1) Reset the device. (2) Assess if the device is malfunctioning. See “6.10: Program runaway”. (3) Download the application program. Sheet key unit service life If the above procedures do not solve the problem, the malfunction may be due to the sheet key service life. Purchase and replace with a new sheet key unit. The device is malfunctioning if the system still does not respond after trying the above solutions. Return the device to your local service center.](https://usermanual.wiki/SII-Data-Service/SA-4320.user-manual-2/User-Guide-842337-Page-57.png)