SIRIUS Sxvct1 Installation Wcrop Commander Guide One Sheet User Manual
Sxvct1 Installation Wcrop SXVCT1_installation___WCrop
2016-03-11
User Manual: SIRIUS Sxvct1 Installation Wcrop
Open the PDF directly: View PDF ![]() .
.
Page Count: 2
© 2015 Sirius XM Radio Inc. Commander Touch Template 151022
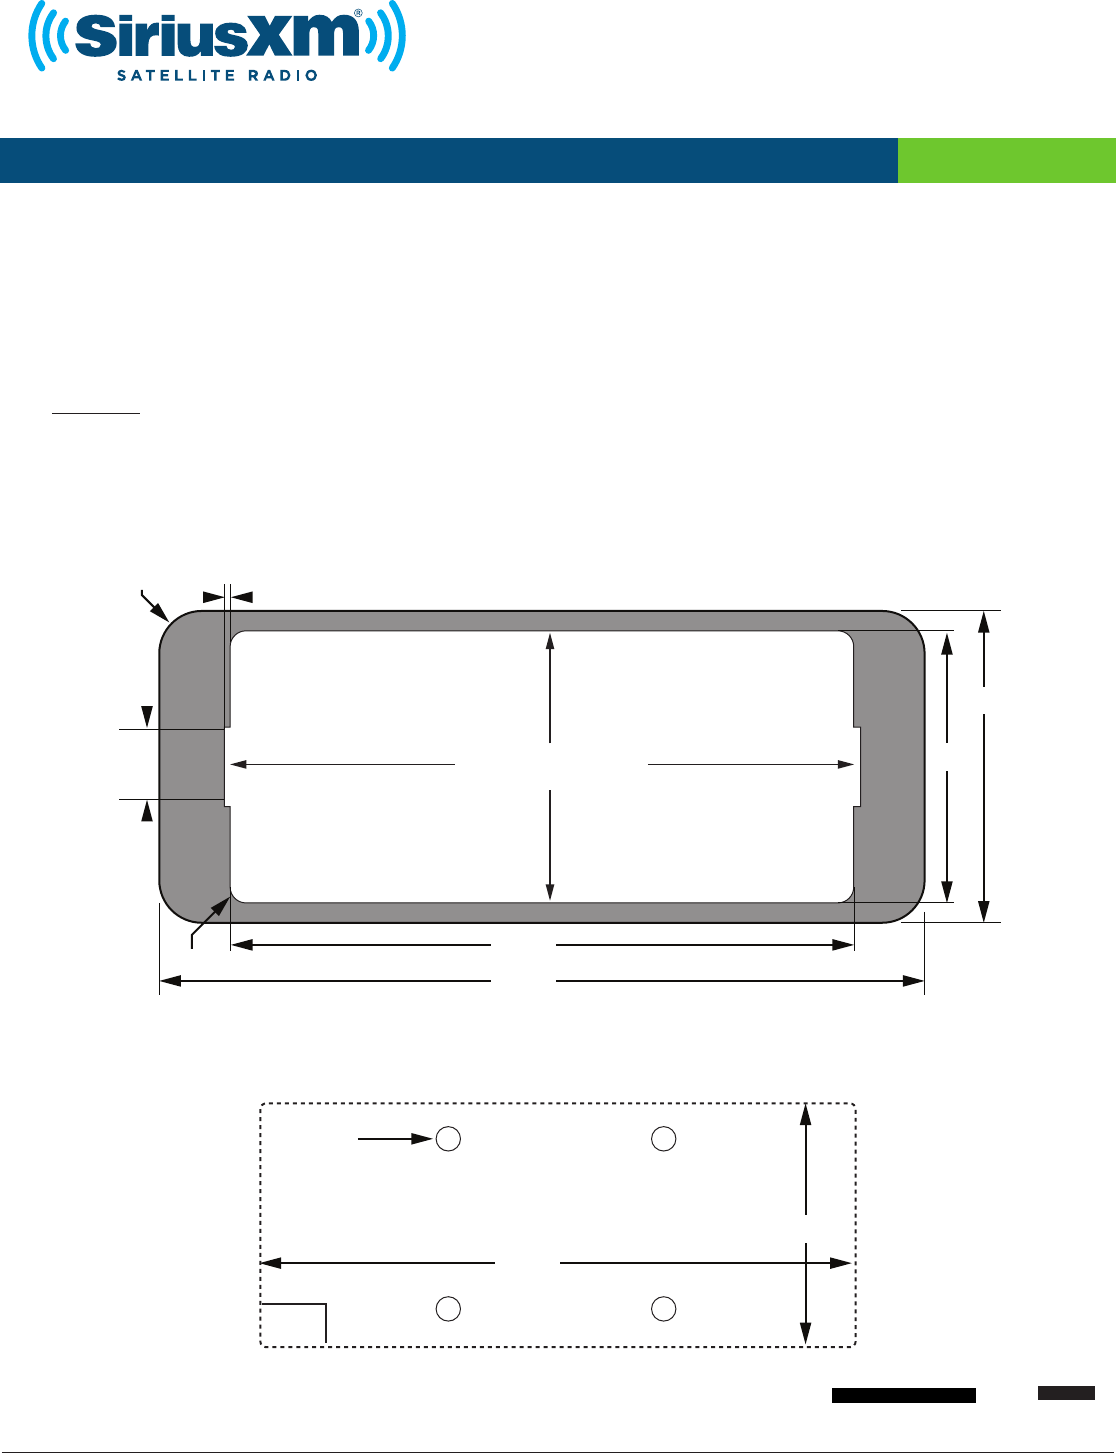
Commander Touch Installation Templates
FOR INSTALLATION PURPOSES ONLY
Model #: SXVCT1
Below are two templates provided for installing the Commander Touch Display Controller.
1. Flush Mount Template - Use when installing the Display Controller when utilizing the
included Flush Mount. Review the additional instructions on the next page for installing
the Flush Mount before cutting the opening.
2. Surface Mount Template - Use when Surface Mounting the Display Controller.
CAUTION: When printing these templates, be sure the print settings are set to print “actual size” and not “fit
to page”. Avoid reducing or enlarging the print size. Before cutting any openings, confirm that the templates
are printed the exact size by measuring one of the lengths below with a ruler.
one inch 10 mm
110mm
14mm
1mm
48mm
R2.8 mm
135mm
R7.5 mm
55mm
cut and remove
1. Flush Mount Template (See installation instructions on the next page)
TOP - FRONT
Cable
Area
105mm
4mm
43mm
5/32”
2. Surface Mount Template
© 2015 Sirius XM Radio Inc. Commander Touch Template 151022
Commander Touch Installation Templates
FOR INSTALLATION PURPOSES ONLY
Model #: SXVCT1
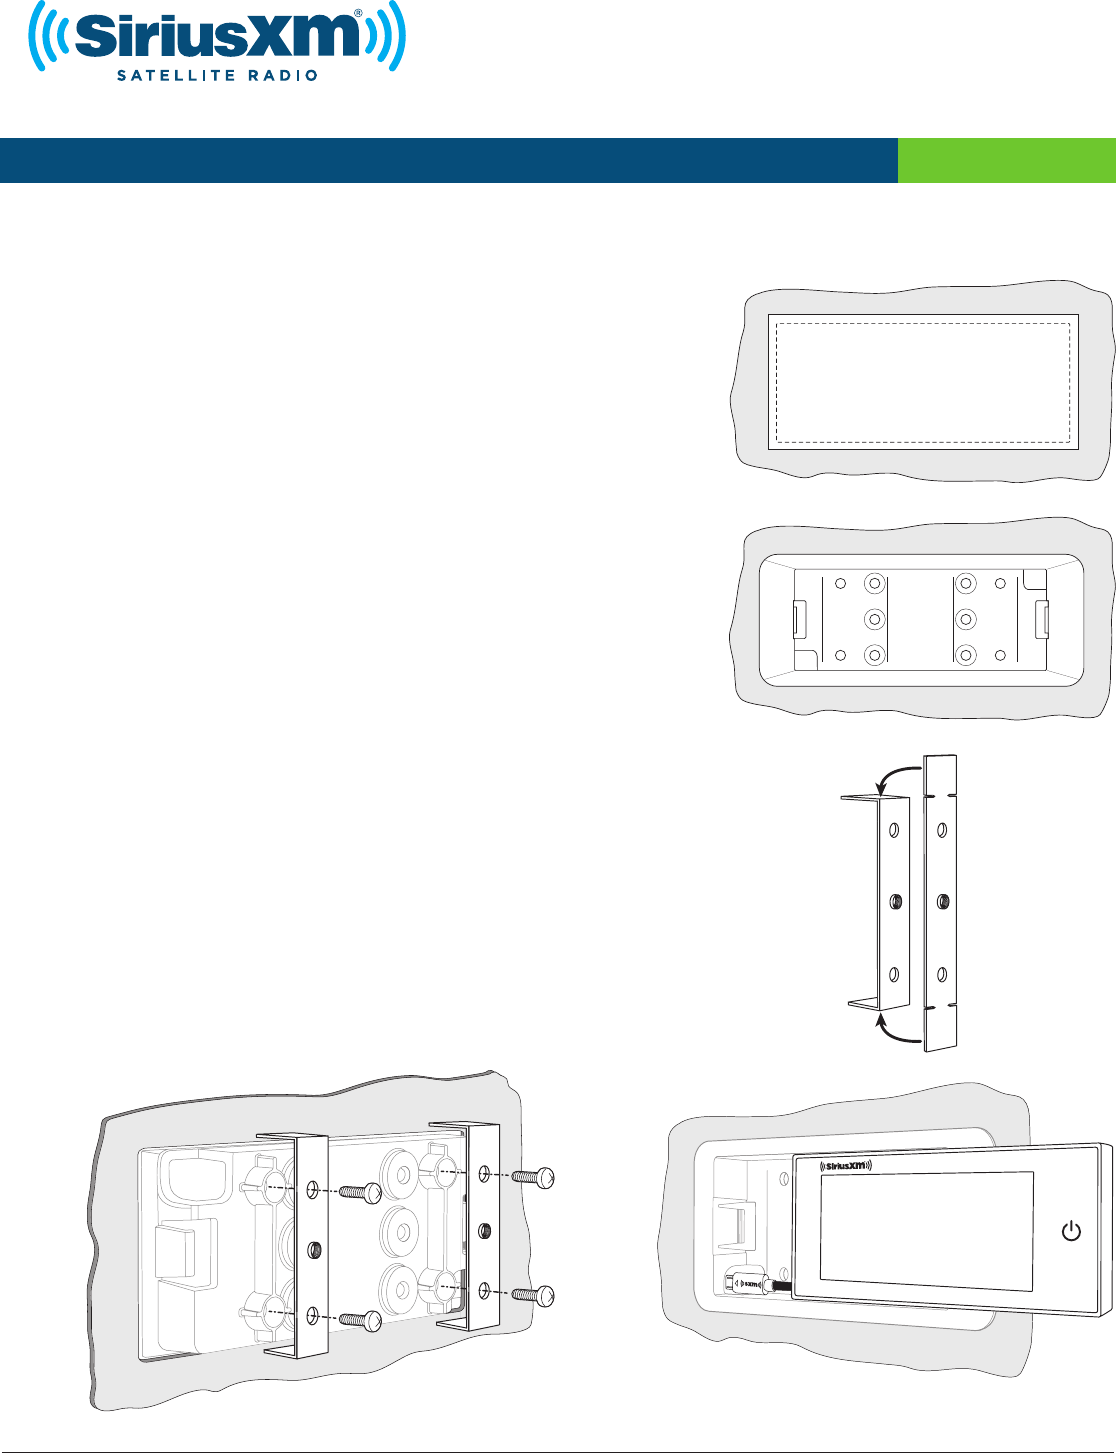
Installing the Commander Touch Display Controller Using the Flush Mount
A. Locate a suitable place in your dash or center console for installing the
Flush Mount. The Flush Mount requires an opening of 48 mm high x 110
mm wide, and an approximate clearance behind the dashboard or console
of 25 mm depth to accommodate the Mounting Brackets. Avoid any
location which will block or interfere with an airbag, or a location which
interferes with the safe operation of the vehicle.
B. Place the template on the area selected and carefully cut the opening,
following the outline on the template.
C. Once the opening has been cut, remove the template and place the
Flush Mount in the opening. The Flush Mount is asymmetrical so the
top/bottom orientation is not important.
D. Bend each of the two Mounting Brackets into a U shape.
E. Attach the Mounting Brackets to the rear of the Flush Mount, using the
provided 4 screws. Position the legs of the Mounting Brackets against the
inside of the dash or console surface and tighten the screws. Note that you
may need to bend or cut the ends of the mounting brackets depending on
the specific application.
F. Once the Flush Mount is secured in place, insert the Commander Touch
Display Controller into the Flush Mount. First, route the cable from the left
side of the Display Controller into the opening at the bottom left of the Flush
Mount, and then gently press the Display Controller into the Flush Mount, left
side first and then the right side. It will snap into place.
G. Route the cable from the Display Controller to the place behind the dash or
center console where you plan to install the Tuner Module.
A. - B.
C.
D.
F.
E.
