SK Teletech SK-7400 Single-Band CDMA Phone User Manual User s Manual
SK Teletech Company Limited Single-Band CDMA Phone User s Manual
UserManual.wiki
>
SK Teletech
>
SK 7400 User Manual
Users Manual
Navigation menu
Upload a User Manual
Namespaces
Wiki Guide
HTML
PDF
Info
Views
User Manual
Discussion / Help
Navigation
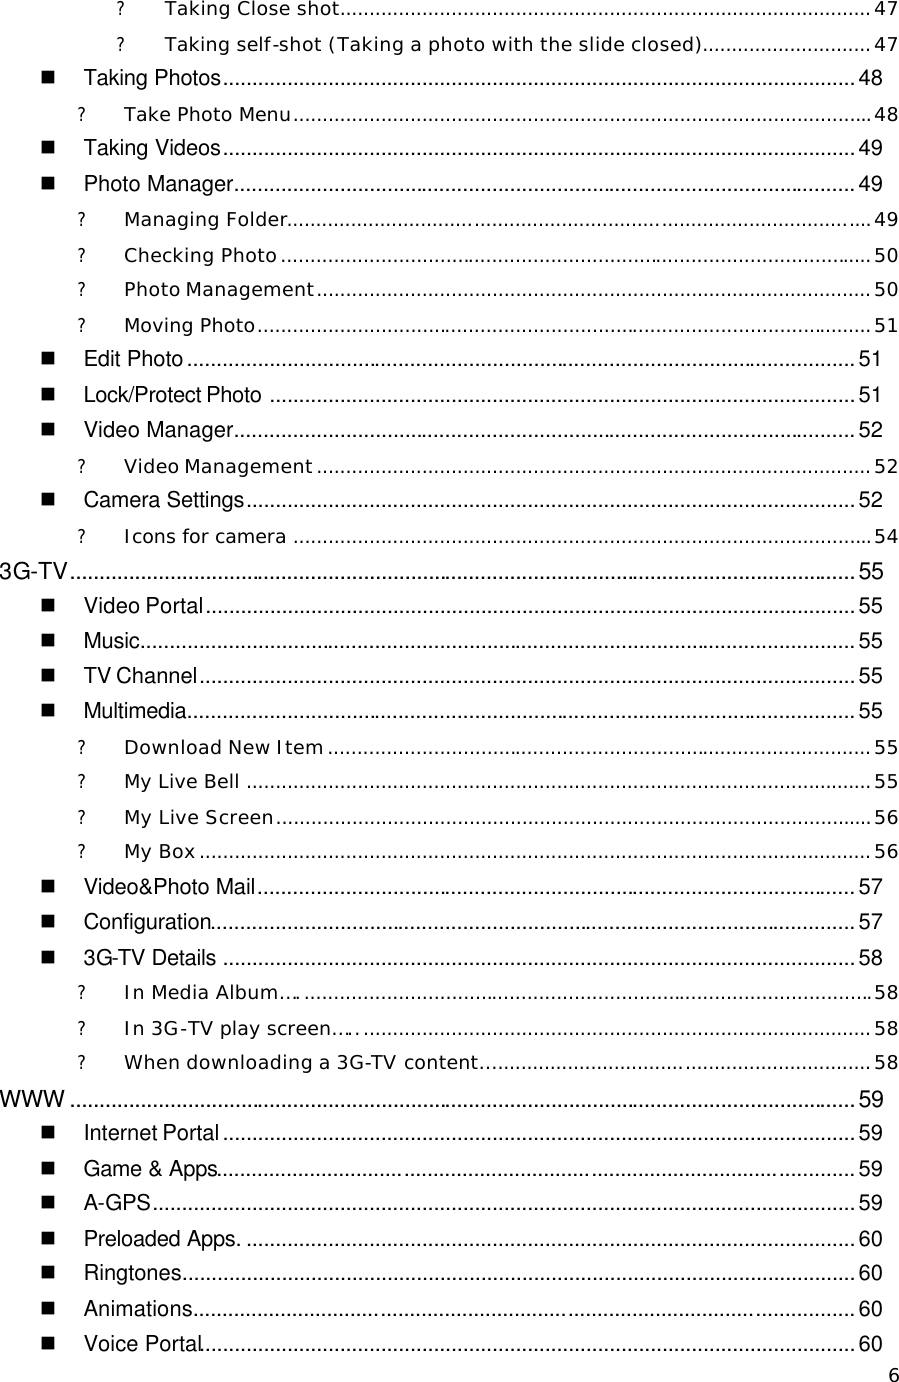

![24n How to use the linked menus 1. You can use the linked menus if Menu is displayed on the bottom of the screen. 2. If you press [Menu], the functions that you can use are displayed on the menu. 3. Menus are varied depending on where you have pressed . e.g. : Selecting linked menu of Calling List. (Down), (Right) n How to Activate and Select Menu Ex) Enter a phonebook: James, Friend, Home Number 123-4567, and Memo. 1. Press [P-Book] and (4)[New Entry]. 2. Press (OK)[Sel]. 3. Enter Name, and press (OK)[Done]. - Press (OK)[Done] to automatically move to the next item. 4. Press (OK)[Sel] and (Up/down). - After moving to the required group, press (OK)[Sel]. 6. Press (OK)[Sel] and (Up/down). - The cursor is moved automatically to the next item. - After moving to the required icon, press (OK)[Sel]. 7. Press (OK)[Sel], enter the number and press (OK). - The cursor is moved automatically to the next item. 8. Move to the Add Data box by moving (Up/Down). 9. Press (OK)[Sel]. - After moving to the required icon, press (OK)[Sel]. 10. After selecting (3)[Memo], enter the memo and press (OK)[Done]. 11. Press (SMS)[Save].](https://usermanual.wiki/SK-Teletech/SK-7400/User-Guide-566572-Page-23.png)
![29 n Redialing Calls You can make a call to the last dialed number by pressing a key. ? Redialing the Last Number You can make a call to the last connected number. 1. Press . ? Redialing the Recently Called/Calling Number - “40 “of the recently called/calling numbers are displayed. You can select a number and press to make a call. ? Called Number 1. Press (Down), (Left)[Called History]. - Search a required number with (Up/Down) key. - If the number is registered in Phonebook, the name and icon are displayed. 2. Press (OK). - The number and called time are displayed. 3. Press . ? Calling Number 1. Press (Down), (Right)[Calling History]. - Search a required number with (Up/Down) key. - If the number is registered in Phonebook, the name and icon are displayed. 2. Press (OK). * The number and called time are displayed. 3. Press . * If the call history is locked, you cannot make a call by pressing the Send key. * If numbers of calls are made/received to/from the same number, the last calling/called times are displayed only. If you want to check the calling/called count, press (WWW)[Menu], and then [1] [Called Time / Calling Time].](https://usermanual.wiki/SK-Teletech/SK-7400/User-Guide-566572-Page-28.png)
![311. Press (WWW)[Menu] during the call 2. Press (1)[Read Message] to read the text message. * If a new message is received during a call, you can read the message by press (OK). * You can select alarm during a call. (See P.39) * After reading a text message, press to return to the call screen. ? Muting You can mute your voice over the phone. 1. Press (WWW)[Menu] during a call. 2. Press (2)[Mute]. - Press (SMS)[Rel] to release mute function and return to the call screen. ? Searching phone number You can search a phone number you need during a call. 1. Press (SMS)[P -Book] during a call. 2. Select the searching method you want among (1)Speed Search, (2)Search by Name / (3)Number. - Refer to PhoneBook menu (See P. 00). ? Making new entry You can enter new phone numbers on your phone during a call. 1. Press (SMS)[P -Book] during a call. 2. Press (4)[New Entry]. - Refer to PhoneBook menu (See P. 00). ? My Info You can check out the information of your phone during a call. 1. Press (SMS)[P -Book] during a call. 2. Press (#)[My Info]. n Auto Answer You can use this Auto Answer function when you cannot receive a call. ? Setting Auto Answer Select Ring Duration and Auto Answer Mode.](https://usermanual.wiki/SK-Teletech/SK-7400/User-Guide-566572-Page-30.png)
![321. (Left)[Menu] + (5)[Setup] + (6)[Auto Answer] 2. (1)[Set Auto Answer] + (OK) - Set ring time with (Left/Right), and then press (OK). - Set Auto Answer Mode with (Left/Right), and then press (OK). 3. Press (SMS)[Save] to save setting. * The phone rings and vibrates for the selected time, and returns to Auto Answer mode. * Select the greeting for Auto Answer mode. * Default greeting is “Normal”. ? Recording/playing Greeting You can record the greeting with your voice. 1. (Left)[Menu] + (5)[Setup] + (6)[Auto Answer] 2. (2)[Greeting Message] - Press (OK) to record the message, and then, press (SMS)[Save] to save the recording. * You can record the message of up to 30 sec. * You can play the recorded message with (SMS)[Play]. ? Using Auto Answer Button You can activate Auto Answer function by pressing a button. 1. Open the slide and press and hold on the right side of the phone. 2. You can cancel the function by pressing and holding again. - If the Auto Answer function is canceled the phone returns to main LCD. * If Auto Answer is activated, when the caller records a message, a missed call is indicated on the LCD. * You can activate Ans. Machine by pressing and holding if a call comes in. * If a call is received, the phone Rings or vibrates for the selected time, and switches into Auto Answer mode. * The caller can record a message for 30 seconds. * Total recording time (Sum of the time distributed on Auto Answer and Recording) is 4 minutes. ? Playing recorded messages 1. Open the slide, and press and hold (0). 2. Press (OK)[Play] to play the message. - If you press (WWW)[Menu] and then select (3)[Cont. play], recorded messages are played in order. Unchecked auto answer message Checked auto answer message](https://usermanual.wiki/SK-Teletech/SK-7400/User-Guide-566572-Page-31.png)
![33 * Refer to the recording/playing guide for details. (See P.00) n Recording/Playing You can make recording/playing in idle mode or during a call. ? Recording 1. Open the slide, and press and hold (0). 2. Press (SMS)[REC] to start recording. 3. Press (OK)[Save] to save the recorded content. * You can press and hold (0) in recording list. * Press (SMS)[Cancel] to stop and save recording. * Press and hold (0) during a call to record the call. However, you cannot play or cancel recording. Recording is stopped and saved automatically if the call is finished. ? Playing 1. Open the slide, and press and hold ( 0 ) . 2. Select a desired item with (Up/Down). * You can delete the selected item by pressing (WWW)[Menu] and selecting (1)[Delete]. 3. Press (OK)[Play] to start playing. * If a call is received during the playing, the playing mode is deactivated. You can answer the call by pressing any key except [End]. Even if the phone is set to Ring, the phone vibrates. n Viewing Called/Calling History You can check the missed call number list and called/calling number list. ? Viewing Calling History 1. Press (Down), (Right)[Calling History] - Press (WWW)[Menu] to display calling time, and information on phonebook and message. 2. Search a required number with (Up/Down) key.](https://usermanual.wiki/SK-Teletech/SK-7400/User-Guide-566572-Page-32.png)
![343. Press (OK). ? Viewing Called History 1. Press (Down), (Left)[Called History] - Press (WWW)[Menu] to display called time, and information on phonebook and message. 2. Search a required number with (Up/Down) key. 3. Press (OK). * If numbers of calls are made/received to/from the same number, the last calling/called times are displayed. * 40 numbers are displayed for a calling/called list respectively, and calling/called times are displayed for 15 items respectively. n Etiquette You can use this function in public space or in a classroom. ? Etiquette Mode on Main LCD 1. Open the slide, and press and hold (*). - The Etiquette icon is displayed, the phone is set to Vib, and key tone, slide opening/closing tone and menu tone are deactivated. 2. Press and hold (*) to release the Etiquette mode. - The Etiquette icon ( ) is disappeared from the LCD screen, and the phone returns to the previous status. ? Etiquette Mode During a Call 1. Press and hold ( * ) during a call. is displayed, the key tone is deactivated. 2. Press and hold ( * ) to release the Etiquette mode. is disappeared from the LCD screen, and the phone returns to the previous status. * Etiquette mode is maintained even after power OFF->ON unless you release the mode. * Whisper mode - The microphone volume gets high so that you can speak in small voice. * Key tone off - The keypad tone is off. (See P.00) * Effect tone off - Sliding tone and menu tone are off. (See P.00) * Alert off - Various alerts are off. (See P.00) * See “Adjusting volume ” on how to adjust volume for key tone, effect tone and alert. (See P.00) n Hold on Mode](https://usermanual.wiki/SK-Teletech/SK-7400/User-Guide-566572-Page-33.png)
![35You can hold the call for a short time. 1. If the phone rings as the slide is open, press and hold (OK). - If the Hold on mode is selected, the message is displayed with the announcement. 2. If you want to release the hold on mode and to answer the call, press any key. * This function is available only when the slide is open. * If you have set the phone “Open & Press” for a way to receive an incoming call, open the slide and press & hold (OK) to activate the hold on mode. n My Info Enter your information (Name, Mail Address, Photo, and etc.). 1. Press (Right) + (#)[My Info] - Press (WWW)[Menu] to add or delete photos or pictures. * Enter your information right after purchasing the phone. n Basic Operation Details ? Making Calls - To make a call to the number in the phonebook, refer to Phonebook menu. (See P.00) ? Auto Answer - If you press after you set the Auto Answer function, the mode changes to Normal/Conference/Class/User Defined in order. - Even in Auto Answer function, you can answer the call by pressing and finish the call by pressing . The recording made before you answer is automatically saved. - You can save up to 20 recording files (Sum of the files distributed on Auto Answer and Recording). ? Recording * If you receive a call during recording, recording is finished and is automatically saved. * If the total recording time (4 minutes) is used up, you cannot save any more recording file. * The maximum recording time is 4 minutes, and recording count is 20. (You cannot save any more recording file if the number of recording files reaches 20. Delete a file if you want to make a recording file.)](https://usermanual.wiki/SK-Teletech/SK-7400/User-Guide-566572-Page-34.png)
![36Phone Book n Entering Phonebook Enter Phone Number, E-mail Address, Photo, Anniversary or other Memo. ? Add Data Search a required n umber with (Up/Down) key. 1. Press (Right) + (4)[New Entry] 2. Highlight a text box by moving (Up/Down) and press (OK) for input. 3. Press (www)[Menu] to add new data and press (OK). 4. Press (SMS)[Save]. ? Add Data on Main LCD You can save a phone number on main LCD. ? New - Make new entry on main LCD 1. Enter phone number + (OK)[Save] + (1)[New Entry] 2. (OK)[Select] - Move to New Entry screen. ? Add Number - Add a number to the existing name on the phone book. 1. Enter phone number + (OK) + (2)[Existing Name] 2. Press (OK)[Select] 3. Highlight the group/name to add the number by moving (Up/Down). 4. Press (OK)[Select] and press (SMS)[Save]. * Refer to “Speed Search”. (See P.00) ? Edit Data Using the search method, edit the existing data. 1. Press (Right) + (1)[Speed Search] 2. Highlight the group/name to edit by moving (Up/Down) and press (OK)[Select]](https://usermanual.wiki/SK-Teletech/SK-7400/User-Guide-566572-Page-35.png)
![373. Press (SMS)[Edit] to edit data. * Press (WWW)[Menu] in Edit screen to add an item. ? Delete Name Using the search method, delete the names. 1. Press (Right)[Book] + (1)[Speed Search] 2. Highlight the group/name to delete by moving (Up/Down) and press (OK)[Select]. 3. Press (WWW)[Menu], select (3)[Delete Name], and then, (OK)[Select]. n Speed Search You can search phonebook data in all Name List or by group name. ? Search in All Name List Search the desired item in all Name List. 1. Press (Right) + (1)[Speed Search] 2. Select (1)[All Name List]. 3. Highlight a name by moving (Up/Down) and press (OK)[Select]. 4. Press(Send). * Press (SMS)[New] to move to New Entry. * You can search a secret group with “Speed Search ” only. ? Search by Group Search data by group. 1. Press (Right) + (1)[Speed Search] 2. Highlight the group which the name you need belongs to by moving (Up/Down), and press (OK)[Select]. 3. Press (Send). * Only the group that contains the data is displayed. n Search by Name Search a phone number by name (entire or part of the name). 1. Press (Right) + (2)[Search by Name] 2. Enter part of or entire name, and press (OK)[Done]. 3. Highlight a name by moving (Up/Down) and press (OK)[Sel]. 4. Press (Send) * The name in the secret group is not displayed. You should release the secret group to](https://usermanual.wiki/SK-Teletech/SK-7400/User-Guide-566572-Page-36.png)
![38search the name. (See P.00) n Search by Number Search a phone number by number (entire or part of the number). 1. Press (Right) + (3)[Search by Number] 2. Enter part of or entire number, and press (OK)[Confirm]. 3. Highlight a number by moving (Up/Down), and press (OK)[Sel]. 4. Press (Send). * The number in the secret group is not displayed. You should release the secret group to search the name. n Edit Turbo Dial You can edit the speed dial. ? Add Turbo Dial You can add a frequently dialed number as a speed dial. 1. Press (Right)+ (5)[Edit Turbo Dial] 2. Highlight a Turbo Dial number you want by moving (Up),(Down). 3. Press (OK)[Select]. 3. Highlight the group/name to get the Turbo Dial number by moving (Up),(Down). 4. Press (OK)[Select]. * This function is disabled if there is no phone number in the phonebook. ? Edit Turbo Dial You can modify/delete the existing Turbo Dial. 1. Press (Right)+ (5)[Edit Turbo Dial] 2. Press (SMS)[Del] to delete a Turbo Dial number. 3. Press (WWW)[Mod] to modify a Turbo Dial number. * Even if a Turbo Dial is deleted, the number on the phonebook is not deleted. If the data is deleted from the phone book, Turbo Dial is also canceled. n Edit Group You can Add, Modify, Delete a Group, or Edit group data. ? Adding a Group You can add a new group.](https://usermanual.wiki/SK-Teletech/SK-7400/User-Guide-566572-Page-37.png)
![391. Press(Right) + (6)[Memory Group] 2. Press (SMS)[New] and enter new group name. 3. Press (OK)[Done]. - Select secret group option with (Left),(Right). ? Setting Secret Group -You should enter password to search a phone number in a secret group. -You can search a number in a secret group with “Speed Search” only, and not by Name or by Number. - In order to release a secret group, select “General” as the group attribute. - If you make a call to the person in secret group, not the name is appeared on the LCD but the phone number is. -You can save up to 21 groups including [No group]. If all 21 groups are created, you cannot add a group. ? Modifying a Group You can edit name or data of the existing group. 1. Press (Right) + (6)[Memory Group] 2. Highlight the group to edit by moving (Up/Down). 2. Press(OK)[Select]. - Modify group. 3. Save the change with (SMS)[Save]. * You cannot modify group name and attribute of [No group]. ? Deleting a Group You can delete the existing group or the group name. 1. Press (Right) + (6)[Memory Group] 2. Highlight the group to delete by moving (Up/Down). 3. Press (WWW)[Menu] * Press (1)[Del Group] to delete the group. * Press (2)[Del Group Name] to delete the group name. 4. Press (OK)[Select]. * In order to delete a name of a secret group, you should enter the password. ? Arranging Group name You can edit the order of group name arranged automatically or in the way you prefer.](https://usermanual.wiki/SK-Teletech/SK-7400/User-Guide-566572-Page-38.png)
![401. Press (Right) + (6)[Memory Group] 2. Press (WWW)[Menu] * Press (3)[Edit order] to edit the group order on your preference. * Press (4)[Sort group] to edit the group order automatically in alphabetical order. 3. Press (OK)[Select].](https://usermanual.wiki/SK-Teletech/SK-7400/User-Guide-566572-Page-39.png)
![41Message Function n Reading Text Messages Read the text message and check the callback number. 1. Press (SMS)+ (1)[In-Box] + (1)[Text Message] 2. Highlight a message by moving (Up/Down). - (Unsealed envelope Icon) indicates the message you have read - (Sealed envelope Icon) indicates the new messages. * Press (www)[Menu]. (1)[Delete All Msg] to delete the selected message. * Press (www) [Menu]. (2)[Save Msg] to save the message. * Press (OK)[Reply] to read the message and send the reply immediately. * Press (SMS)[Fwd] to forward the message to a 3 rd party. * Select other messages with (Left), (Right). * Up to 99 text messages can be received. If the number of text messages exceeds 99, a message is deleted on an arrival time basis. n Checking Voice Message You can check the voice message recorded in In-Box for missed call or when the phone was off. 1. Press (SMS)+ (1)[In-Box] + (2)[Voice Message] * Press (SMS) to delete the selected message. * Press (WWW) [Delete All] to delete all the voice messages. * Press (Up/Down) and (Send Key) to call back. * Up to 20 voice messages can be received. If the number of voice messages exceeds 20, a message is deleted on an arrival time basis. * (SEND KEY) allows you to automatically connect to the other party’s number. n Saving Text Messages Move the important text messages to Saved Message so that they should not be automatically deleted. 1. Press (SMS) + (1)[In-Box]+ (3)[Saved Msg] 2. Press (OK)[Sel] * Up to 40 text messages are stored in Saved Msg](https://usermanual.wiki/SK-Teletech/SK-7400/User-Guide-566572-Page-40.png)
![42n Entering Text Messages 1. Press (SMS) + (2)[Out-Box] + (1)[New Message] 2. Press (OK)[Input] and enter the text, or enter the text directly. 3. Press (SMS) to select a language, symbols or numbers. 4. Press (OK)[Done] to move to the next text box. 5. Press (WWW)[Menu] to select the phone number. 6. Press (Send). - Press (clear/cancel) to delete a character. Press and hold the key to delete entire words. Press (Right) to enter a space. - Press the (WWW)[Menu] button to save the text during entering the text, or to display the saved text. - You can broadcast a message to up to 20 receivers at a time. ? Saving Sentences You can save the frequently used sentences, and retrieve and paste them to new messages. 1. Press (SMS) + (2)[Out-Box] + (1)[New Message] * Enter the frequently used sentences. 2. Press (www)[Menu] + (1)[Save As Phrase] +(OK) * The selected sentence is saved in Phrase ? Retrieving Sentences You can import the sentences saved in Phrase to the message you are creating. 1. Press (SMS) + (2)[Out-Box] + (1)[New Message] 2. Press (WWW)[Menu] + (2)[Input Phrase] 3. Select the phrase to use by moving (Up/Down). 4. Press (OK)[Write]. * You should save sentences in Quick Text in order to use the retrieving function. ? Searching Phone Numbers You can search phone numbers easily from Phonebook or in the call history. ? Speed Search 1. Press (SMS) + (2)[Out-Box] + (1)[New Message] 2. Place the cursor at Other Party Number. 3. Press (WWW)[Menu] + (3)[Speed Search].](https://usermanual.wiki/SK-Teletech/SK-7400/User-Guide-566572-Page-41.png)
![434. Press (OK)[Select].](https://usermanual.wiki/SK-Teletech/SK-7400/User-Guide-566572-Page-42.png)
![44? Broadcasting You can send a message to up to 20 receivers at the same time. 1. Press (SMS) + (2)[Out-Box] + (1)[New Message] 2. Place the cursor at Other Party Number. 3. Press (WWW)[Menu] + (3)[Speed Search]. 4. Select the group to add by pressing (SMS)[Add]. * Only the mobile phone numbers are entered, and if a receiver has two or more mobile phone numbers, the first entered one is selected. n Managing Outgoing Box The transmission failed messages, the messages saved before transmission, and the messages not completed due to incoming calls are stored. 1. Press (SMS) + (2)[Out-Box] + (2)[Outgoing Box] 2. Select the message you want by moving (Up/Down). 3. Press (OK)[Select]. * In case of broadcasting, the same number of messages as broadcasting is saved along with called numbers. * Up to 99 messages are stored. n Managing Sent Message The successfully sent messages are stored. 1. Press (SMS) + (2)[Out-Box] + (3)[Sent Message] 2. Select the message you want by moving(Up/Down). 3. Press(OK)[Select]. * In case of broadcasting, the same number of messages as broadcasting is saved along with called numbers. * Up to 99 messages are stored. n Managing Phrases Save the frequently used sentences, and retrieve them when preparing a message. 1. (SMS) + (2)[Out-Box] + (4)[Phrase] 2. (OK)[Select]. * To use the saved sentence again, press (OK), and modify the sentence before sending the message. Refer to Entering Text Message. (See P.00) n MMS(Multimedia Messaging Service) MMS service enables you to attach video, music and voice to the text messages, or to use various effects including color of the words and background of the messages.](https://usermanual.wiki/SK-Teletech/SK-7400/User-Guide-566572-Page-43.png)
![45? Entering New Message 1. Press(SMS) + (3)[MMS] + (1)[New Message] 2. Press (OK)[Select], Enter text - Enter the text. You can change the character mode with (SMS), and (OK)[Done] 3. Press (OK)[Select]+ Select Contents - Select Photo & Sound, Video, Contents attachment with (Left), (Right), and then, press (OK). 4. Press (SMS)[Next] + Select the required transmission mode, Subject. Send To Number 5. Press (SMS)[Send] * You can save all type of contents within the storage capacity. * Image : The images downloaded with MMS or taken with the camera are listed. The available image size is [176X144] only. * Background Music : The music files exclusive for MMS are listed. * Video : The MMS contents downloaded from WWW and the moving images in Video Manager are listed. * Attach file : You can attach various sizes of image files, background, music, and voice file to the message. * Contents exclusive for MMS should be downloaded separately. ? Managing In -box You can save the received messages and send reply. 1. Press (SMS) + (3)[MMS] + (2)[In-Box] 2. Press (OK)[Select]. 3. Press (OK)[Play] - On the new message screen press (WWW)[Reply] to send the reply. ? Managing Out-box You can save the sent messages, and edit the saved messages to send replies. 1. Press (SMS) + (3)[MMS] + (3)[Out-box]. 2. Press (OK)[Select]. 3. Press (OK)[Play] - In order to use the stored message, press (www)[Menu]. + (1)[Resend]. ? Managing Draft-box The messages failed to transmit and the messages entered before transmission are stored. 1. Press (SMS) + (3)[MMS] + (4)[Draft-box]](https://usermanual.wiki/SK-Teletech/SK-7400/User-Guide-566572-Page-44.png)
![462. Press (OK)[Select]. ? Managing Alert-Box 1. Press (SMS) + (3)[MMS] + (5)[Alert Box] 2. Press (OK)[Select]. ? Manager 1. Press (SMS) + (3)[MMS] + (6)[Manager] 2. Press (OK)[Select]. n Setting Message Alert You can select Ring/Lamp for new message alert. 1. Press (SMS) + (4)[Set Msg Alert] 2. Select a text box by moving (Up/Down), and scroll through the option with (Left/Right). 3. Press (SMS)[Save]. *Alert Type - Mute : LCD blinks once. - 1 time : LCD blinks once and rings. - Every 2min : LCD blinks once and rings at every 2 minutes until you check the message. * Alert is off, even if new message alert is set to 1 time or every 2min, if Ringer/vib. is set to mute. (See P.00) * You can adjust volume of alert tone at Set sound. (See P.00) * Alert in call : Select whether to activate new message alert during a call. n Deleting All Messages 1. (SMS) + (5)[Delete All Msg] 2. Enter the password - * The default password is ‘0000’. 3 Select the message type to delete by moving (Up/Down) and press (OK)[Select]. - Select delete or not with (Left),(Right).](https://usermanual.wiki/SK-Teletech/SK-7400/User-Guide-566572-Page-45.png)
![48- You can check the saved photo in Photo Manager. (See P.00) n Taking Photos You can take the photo of the required object with the built-in camera. 1. ( ) + (1)[Take Photo] - You can select brightness in 9 steps with (Left)/(Right) buttons. - You can adjust zoom with (Up)/(Down) buttons. Zoom steps are depending on the size 2. (OK)[Shoot] - Photos are automatically named. You can rename photos with (SMS)[New]. - Press to cancel saving. 3. (OK)[Save] ? Take Photo Menu Press (WWW)[Menu] to use various functions while you are taking a photo. 1. Press (WWW)[Menu]+(1)[Photo Size] - You can select the photo size from [1024×1280], [960×1280], [800×1000], [480×640], [240×320], [176×220], [176×144]. 2. Press (WWW)[Menu]+(2)[Option] * If multi-shot mode is auto, photos are taken at regular interval. If it I manual, you can set the interval between the shots. Multi-shot is not available if the photo size is [880×1144] and [768×1024]. * You can select (2sec), (5sec),(10sec) and (Off) for timer Setting. The default is (Off). * You can select (Auto), (Outdoors), (Night), and (High Sensitive) in Camera Option menu. 3. Press (WWW)[Menu]+(3)[Photo Effect On] *You can take a photo in various tones: [Normal], [Gray], [Sepia], [Negative], [Antique], [Reddish], [Greenish], and [Bluish]. 4. Press (WWW)[Menu]+(4)[Photo Frame] * You can use various white balance effects [AUTO], [SUNNY], [NIGHT]. 5. Press (WWW)[Menu]+(5)[Quality] * You can select the resolution between [SUPER FINE], [FINE] and [NORMAL]. The default is [FINE]. 6. Press (WWW)[Menu]+(6)[Mgmt] * You can view photos in Photo Management. 7. Press (WWW)[Menu]+()[Camera Setting] * You can control the camera setting. * If there is an incoming call in the camera mode, the phone switches into the receiving call mode.](https://usermanual.wiki/SK-Teletech/SK-7400/User-Guide-566572-Page-47.png)
![49* You should select Save to save the photo. * You can save contents within the capacity regardless of content types (Photo, Video or MMS). * You can save up to 500 photo files. If memory is full, you cannot save any more photos even if fewer than 500 photos are already saved. * The camera sensor me asures light at every 2 seconds, and if light changes in a large scale, the screen may blink to adjust the sensor. Please wait for a few seconds to take a photo. * There can be a difference in brightness and size of the screen before and after taking a photo depending on the size and effect. * If you press (End) when a morning call or an alarm rings while taking a picture, the phone switches into the taking a picture mode. * Taking photo in the dark may cause slow screen speed and noise. n Taking Videos You can take video with the built-in camera. 1. + (2)[Take Video] - You can select brightness in 9 steps with (Left)/(Right) buttons. 2. (OK)[Take videos] + (OK)[Shoot] + (OK)[Stop] - Recording time is displayed on LCD. - You can view the saved video in Video Mgmt. - You can rename the video already saved. * You can use zooming with (Up), (Down), and adjust brightness with (Left), (Right) while taking the video. (You can use digital zoom as in the photo mode.) * If [MMS] is selected, you can take and play the video for MMS. * You can use various effects when taking a video. * You can insert images with the Fun Frame function. * You can select the resolution from [HQ], [ST] and [EC]. The file size varies depending on the resolution. * You can check and manage the video files in Video Mgmt. Refer to Managing Video for details. (See P.00) * You can set the environments in Camera Settings. n Photo Manager You can manage the photos stored in the phone. ? Managing Folder](https://usermanual.wiki/SK-Teletech/SK-7400/User-Guide-566572-Page-48.png)
![501. + (3)[Photo Mgmt] +(1)[Folder1] * The photos taken with the phone are stored in [Folder1]. * You can set Secret for other folders than [Folder1]. * If you wish to open another folder, press (WWW)[Menu] and (3)[Change Folder]. You can select a folder with (Up), (Down). * You can select a folder with (Left), (Right) when checking the photos on the list. ? Checking Photo You can check the photos stored in the phone. 1. + (3)[Photo Mgmt] +(OK) - Move previous/next with (Left),(Right). 2. Check the photos you want with (SMS)[Check]. ? Photo Management Select (WWW)[Menu] to use the Photo Management functions. 1. (WWW)[Menu]+(1)[Picture Set] - You can set the photos for main LCD, incoming calls, power on, power off and starting WWW. 2. (WWW)[Menu]+(2)[Change Order] - You can arrange order of the photos by date, file size, name, or user. 3. (WWW)[Menu]+(3)[Change Folder] - You can move a photo to other folders. If you wish to move numbers of photos to other folders. 4. (WWW)[Menu]+(4)[Delete] - You can delete a photo. 5. (WWW)[Menu]+(5)[Connect MMS] - You can attach a photo to MMS message. 6. (WWW)[Menu]+(6)[Edit] - You can rename a photo. 7. (WWW)[Menu]+(7)[Security] - You can select protect/lock for the selected photo. (See P.107) 8. (WWW)[Menu]+(8)[Select All] - You can select all files. 9. (WWW)[Menu]+(9)[File Info] - You can view information on the selected photo.](https://usermanual.wiki/SK-Teletech/SK-7400/User-Guide-566572-Page-49.png)
![51? Moving Photo You can move photos from [Folder1] to other folders. 1. + (3)[Photo Mgmt] +(SMS)[Check] 2. Press (WWW)[Menu], (2)[Move Folder], and select the destined folder with (OK)[Sel]. * You have to check at least two photos to use the Slide Show function. You can check up to 9 photos for slide show. If you create a slide show with the checked photos, the original photos are stored separately from the slide show photos. * You can create up to 6 slide shows. An icon is marked on the photos used in a slide show. n Edit Photo 1. + (3)[Photo Mgmt]+(OK)[Select] 2. Search the photo to edit by using (Up/Down) and press (OK)[Select]. 3. (Menu)[WWW] + (6)[Edit] - Rename : You can rename the photo. - Resize : you can resize the photo. - Photo Frame : You can select various frames if the photo is [176×240], [176×144] or [128×96]. - Photo Effect: You can apply various effects to the photo. (It may take time to be applied depending on the effect.) n Lock/Protect Photo 1. + (3)[Photo Mgmt] * Search the photo to lock/protect by using (Up/Down). 2. (Menu)[WWW] + (7)[Security] + Set Protect/Lock 3. (SMS)[Save] * The lock image is displayed if the locked photo is used for incoming call, power on, power off or alarm screen. * If you select a [Slide Show] for the main LCD screen, the lock image is displayed for the locked photo. * If you use a locked photo as a P -book ID, you should enter the password. If a cropped photo is saved with ‘(2) Overwrite’, you should enter the password to check the photos in P-book. * Even when you delete all photos, the protected photos are not deleted. You should release protection before deleting photos.](https://usermanual.wiki/SK-Teletech/SK-7400/User-Guide-566572-Page-50.png)
![52* Select the locked photo, and release lock with (WWW)[Menu] to release lock. Or enter password to change the items. * See P.00 on how to lock all functions. n Video Manager 1. + (4)[Video Mgmt]. 2. Press (OK). ? Video Management Select (WWW)[Menu] to use the Video Management functions. 1. (WWW)[Menu]+(1)[Picture Set] - You can set the video for main LCD, power on and power off. 2. (WWW)[Menu]+(2)[Edit Order] - You can sort the video files by date, by size, by name and by user. 3. (WWW)[Menu]+(3)[Move to] - Move the video file to other folder. If you wish to move numbers of video files, check the files by pressing (SMS), and move them to other folder. 4. (WWW)[Menu]+(4)[Delete] - You can delete a video file. 5. (WWW)[Menu]+(5)[Connect MMS] - You can attach a video file to MMS message 6. (WWW)[Menu]+(6)[Edit Name] You can rename the video file. 7. (WWW)[Menu]+(7)[Security] -You cannot delete the protected video file. You should enter the password to check the locked video. 8. (WWW)[Menu]+(8)[Select All] -Select all video files in Video Manager. 9. (WWW)[Menu]+(9)[File Info] -You can view information on a video file. n Camera Settings You can set the environments for the camera function. 1. +(5)[Camera Setting]+(OK) * Slide close : Select whether to continue taking video or photo when the slide is closed. * Shutter sound : Alert for photo](https://usermanual.wiki/SK-Teletech/SK-7400/User-Guide-566572-Page-51.png)
![55 3G-TV n Video Portal You can download music file, music video file and movie through the 3G-TV services. 1. Press (OK) + (1) Video Portal to access 3G-TV. - Either you can press and hold (OK). - To exit from the 3G-TV services, press (END). n Music You can store and play the music files downloaded through the 3G-TV services. 1. Download Music 2. Play List n TV Channel You can watch the selected channel accessing the 3G-TV services. n Multimedia ? Download New Item You can download a new content accessing the 3G-TV services. ? My Live Bell You can store and play the live bell downloaded through the 3G-TV services. 1. Press (OK)[3G-TV]+(4)[Multimedia] 2. Press (2)[My Live Bell] - Select (www)[Menu] to use various sub-menus. 3. Press (OK)[Play] - Press (OK) to pause while playing, press (OK) again to resume playing. Press and hold (Left) to rewind, and press and hold (Right) to fast forward. Use (UP) and (Down) to adjust the volume. * There is a difference in sound quality between the stereo earphone microphone and the speaker. * The player screen is user-definable. (See P.00) * You can set the phone either to continue or stop playing when the slide is closed while playing.](https://usermanual.wiki/SK-Teletech/SK-7400/User-Guide-566572-Page-54.png)
![56(See P.00) * If a call is received while a multimedia file is playing, the phone stops playing the file, and rings. To answer the call, press (Send). If the call ends, the phone resumes playing the file. * If a new message is received while a file is playing, the phone vibrates, and displays on the top of the screen. * If the phone is set to Etiquette mode, the phone displays a message asking whether to disable the Etiquette mode. If you select “Yes” the Etiquette mode is disabled and the phone resumes playing the multimedia file. If you select “No”, the phone plays the file, muting the sound. * See P.00 for details of 3G-TV services. ? My Live Screen You can store and play the live screen downloaded through the 3G-TV services. 1. Press (OK)[3G-TV]+(4)[Multimedia] 2. Press (3)[My Live Screen] - Press (www)[Menu] +(1)[file] to set the file as a screen for standby, on/off of power, or start of www. - Select (www)[Menu] to use various sub-menus. * Sort: You can sort the files by date, by size, by file name or as designated by the user. * Move: You can move the files to other folders. In order to move numbers of contents, check the files with (SMS) and press (WWW), (2)[Move]. * Delete: You can delete the selected file. * Rename: You can rename the file. * Protect/Lock: You cannot delete the protected file, and cannot play the locked file. is indicated on the file being played, on the locked file, and on the protected/locked file. * Select all: All the files in Live Screen are selected. 3. (OK)[Play] ? My Box You can store and play the music files and the video files downloaded through the 3G-TV services. 1. Press (OK)[3G-TV]+(4)[Multimedia] 2. Press (4)[My BOX] - Navigate to the file you wish to play with (UP) and (Down), and press (SMS) to check/uncheck the file.](https://usermanual.wiki/SK-Teletech/SK-7400/User-Guide-566572-Page-55.png)
![57- Select (www)[Menu] to use various sub-menus. * Play checked file: You can play the checked file. * Move: You can move the checked files to other folders. * Delete checked file: You can delete the checked files. * Protect/Lock: You can protect or lock the checked files. * Uncheck all: You can uncheck all files. * See P.000 for details of 3G-TV services. 3. (OK)[Play] -Press (SMS) to mute the sound. n Video&Photo Mail 1. Press (OK)[3G-TV]+(5)[Video&Photo Mail] 2. Select the menu you want to use. (1)[ New Message] (2)[In-box] (3)[Out-Box] (4) [Draft-Box] (5) [Alert MMS] (6) [Manager] See P.00 for details of video mail. n Configuration You can configure your phone for 3G-TV services. 1. Press (OK)[3G-TV]+(6)[Configuration] 2. (1)[Set Music Skin]: - You can set preferences for Live Bell screen. (2)[Play Mode]: - You can configure the environment for playing contents. - Play Once: The files in the list are played once. - Repeat: The files in the list are played repeatedly. - Sequential: The files in the list are played in sequence. - Random: The files in the list are played randomly. - Lighting on: Light is always on when a file is playing. - Auto Lighting: If Auto LCD is selected, LCD is on for the designated time period. - Continue Play: The phone continues playing when you close the slide. - Stop Play: The phone stops playing when you close the slide. (Content play times and sequence are applied if “Play checked file” is selected.) (3)[Memory Info]: - The phone displays the memory used for photo, video, live bell, live screen, 3G-TV and](https://usermanual.wiki/SK-Teletech/SK-7400/User-Guide-566572-Page-56.png)
![58MMS, and the remaining memory. (4)[Live Screen Sound]: - You can select the sound if you have selected the live screen as the standby screen. 3. (SMS)[Save] n 3G-TV Details ? In Media Album…. ? In 3G-TV play screen….. - Play previous/next: Select two or more contents in the Media Album, select “Play checked file” and press or to play the previous or next file, respectively. - Resize play screen: Press [Wide] while Live Bell, Live Screen or Media Album is playing to resize the screen to full size. In full size, part of the image can be cut off. - Player performance may be deteriorated when playing high quality content. ? When downloading a 3G-TV content… - When downloading 3G-TV content with long play time, the phone may fail to download the content and display the warning message. : Downloaded content. : Content not completely downloaded. You can resume downloading of the content. : Protected content : Locked content : Protected and locked content : Th e content recorded during streaming service : The content which is expired and cannot be played](https://usermanual.wiki/SK-Teletech/SK-7400/User-Guide-566572-Page-57.png)
![59 WWW n Internet Portal You can use this menu while searching information in WWW. 1. Press (WWW)[Menu]. 2. Press (1)[Connect WWW]. * Press and hold (WWW) at any screen while searching website to move to the WWW initial screen. * The site providing PCL configures the relevant (WWW)[Menu] and provides you (WWW)[WWW] services. * Initial screen and service are subject to change due to development of better service and technology by business operator. * For releasing the connection to WWW, press . n Game & Apps You can download the various multimedia contents from the WWW to enjoy fully the service of (WWW) at anytime in anywhere. 1. Press (WWW)[Menu]. 2. Press (2)[Games & Apps]. 3. Press (OK)[Sel]. * Move to the contents you want using (Up/Down) Keys to download and save the contents. * Downloaded SK-7200 contents will be saved in (1)[Download] of (2)[activate] * The menu or display of WWW service may be altered without notice according to the operators` circumstances. n A-GPS 1. Press (WWW)[Menu]. 2. Press (3)[A-GPS]. 3. (1)[My Map] (2)[Voice Navigation] (3)[Speed Traps Detector] (4)[Where is My Kid] (5)[Emergency Button]](https://usermanual.wiki/SK-Teletech/SK-7400/User-Guide-566572-Page-58.png)
![60 n Preloaded Apps. 1. Press (WWW)[Menu]. 2. Press (4)[Preloaded Apps.] 3. (1)[Email] , (2)[Voice Phone Book] (3)Outlook (4)Icamera *You can write or receive e -mail by e -mail client embedded on the phone. * The menu or display of WWW service may be altered without notice according to the operators circumstances. n Ringtones You can execute the designated bell sound if you receive a call from the designated caller by download the Ringtones from WWW. 1. Press (WWW)[Menu]. 2. Press (5)[Ringtones] 3. Press the Bell moving to the contents you want to download it. * The contents of WWW service are subject to change due to development of better service and technology by business operator. * Downloaded Ringtones contents will be saved in ()[Ringtones] of (WWW)[WWW]. * Downloaded contents will be saved in (1)[Download] of (2)[activate] n Animations You can execute the designated animation if you receive a call from the designated caller by download the Animation from WWW. 1. Press (WWW)[Menu]. 2. Press (6)[Animations]. 3. Press the Animations moving to the contents you want to download it. * Downloaded contents will be saved in (1)[Download] of (2)[activate] n Voice Portal You can connect to the voice guide service portal provided by PCL. 1. Press (WWW)[Menu]. 2. Press (7)[Voice Portal]. * The contents of WWW service are subject to change due to development of better service and technology by business operator.](https://usermanual.wiki/SK-Teletech/SK-7400/User-Guide-566572-Page-59.png)
![61n SMS Info. You can select the relevant Sub Menu to request the desired information. 6 Main Menus(News, sport, Entertainment, Fun, Finance, Astrology). Select the relevant Sub Menu to request the desired information. 1. Press (WWW)[Menu]. 2. Press (8)[SMS Info.]. n What`s New? Provide the relevant services by connecting to site provided by PCL. 1. Press (WWW)[Menu]. 2. Press (9)[What`s New]. * area where radio coverage is weak.](https://usermanual.wiki/SK-Teletech/SK-7400/User-Guide-566572-Page-60.png)
![62 MP3 ? MP3 is the exclusive MP3 player that downloads, stores, plays and manages MP3 files. n How to use Data Manager 1. Before connecting the mobile phone to the computer with the Data Manager cable IMCBL-900,, install the Data Manager program on the computer. 2. You can download the Data Manager program from the website of SK Mobile (www.skmobile.com.cn). n Accessing Data Manager 1. Connect the cable to the computer USB 2. Remove the rubber cap on the bottom of the phone, and connect the cable to the phone. 3. Check the connection between the PC and the phone, and run the downloaded Data Manager program. n Downloading MP3 files 1. After starting Data Manager, select and send an MP3 file to the phone. - The phone must be connected with the PC with the Data Manager program. * Before downloading MP3 files, check the storage capacity in (OK)?(3)?(1). n MP3 Player 1. Press (OK)[MP3] + (1)[My MP3]. - Select an MP3 file you want to play with (Up/Down)and check/release with (SMS)[Select]. 2. Press (WWW)[Menu] + (1)[Check All]. - If you wish to play a specific file: Select the file with (Up/Down), and press (OK). - The player pauses if you press (OK) during the play. Press (OK) again to resume playing. - Press (Left) shortly to go to the start of the file (to the previous file if you press shorter than 1sec), press and hold to rewind, press (Right)to go to the next file, and press and hold to fast-forward. Adjust volume with (Up/Down). - Press (SMS)) to mute during play. - Press (WWW) to move to the menu during play. - If you press during playing, the play mode changed in the order of normal/repeat/sequence/repeat in sequence/random/repeat in random. 3. Press (OK)[OK Play] to play MP3.](https://usermanual.wiki/SK-Teletech/SK-7400/User-Guide-566572-Page-61.png)
![63* You can use the following functions in (WWW)[Menu]. - Check All: Play all files in the list. - Change Order : Change the order of selected files. - Rename: Change the name of the selected MP3 file. - Lock: Protected MP3 file cannot be deleted, and locked file cannot be played. - Delete: Delete the selected file. - File info: View information on the downloaded MP3 file. * The phone rings, the call receiving screen is displayed. Press (End) to receive the call. Go back to MP3 file list when the call is finished. n Skin Setting You can set the MP3 play screen. 1. Press (OK) + (2). - Select a skin with (Left/Right). 2. Press (SMS)[Save] to save the skin. n MP3 setting ? Play setting 1. Press (OK) + (3) + (2)[Option Setting]. - Press (OK) to move to the next item, and set the item in the save manner. 2. Press (SMS)[Save] to save the selected setting. * Closing Slide : Decide whether to continue playing MP3 when you close the slide. Stop Play - Play stops if the slide is closed. Continue Play - Play continues even if the slide is closed. (Default) * Recursive : Set how many times the selected music files to be repeated. (Once/ Twice/ Thrice/ Four Times/ Five Times (Default) )](https://usermanual.wiki/SK-Teletech/SK-7400/User-Guide-566572-Page-62.png)
![64 Sound n Ring/Vibrator You can select various rings. 1. Press (Left)[Menu] + (1)[Sound] + (1)[Ring/Vibrator]. 2. Select a text box by moving (Up/Down) - Scroll through the options by moving (Left/Right). 3. Press (SMS) to save the setting. * In the etiquette mode, the phone is always in the vibration mode even if you select a ring. * If you set the ring duration, the phone rings for the given seconds, and LCD blinks. In etiquette mode, or if Vibration is selected, however, the phone vibrates. n Setting Group Ring The designated ringer is on for incoming calls from the designated group. 1. Press (Left)[Menu] + (1)[Sound] + (2)[Set Group Ring] 2. Select a text box by moving (Up/Down) - Scroll through the options by moving (Left/Right). 3. Press (SMS) to save the setting. - If you select <Unclassified>, the selected ring is on instead of the ringer set by group. n Slide Effect You can set the slide open/close tone, key tone and menu tone. 1. Press (Left)[Menu] + (1)[Sound] + (3)[Slide Effect] 2. Select an item by moving (Up/Down). 3. Press (SMS)[Save]. * Press (WWW)[Menu] and select (1)[Mute] to disable the effects. * Slide open/close tone : The sound effect for slide open/close. * Key tone : The sound effect for key action * Menu tone : The sound effect for selection of menu. n Sound Effect You can select various Alerts. 1. Press (Left)[Menu] + (1)[Sound] + (4)[Sound Effect] - Select an item with (Up/Down). Refer to Basic Operation.(See P.17~18) - Press (WWW)[Menu] and select (1)[Mute] to disable the effects.](https://usermanual.wiki/SK-Teletech/SK-7400/User-Guide-566572-Page-63.png)
![652. Press (SMS)[Save] to save the setting. * Dialog box Tone: Alert for message box * Connection Tone : Alert for call connection * Minute Alert : Alert for 1minute call time r * Service Alert: Alert for out of service area * Low battery. Tone : Alert for low battery n Selecting Vib Mode You can select one of the 5 different vibration modes. 1. Press (Left)[Menu] + (1)[Sound] + (5)[Select Vib Mode] 2. Scroll through the options by using (Up/Down) 3. Press (OK)[Sel] * Normal * Getting Longer * Getting Shorter * Increasingly * Decreasingly * You can activate the vibration mode only when you set the ringer to Vibrator. n Volume You can adjust volumes. 1. Press (Left)[Menu]+ (1)[Sound] + (6)[Volume] 2. Press (SMS)[Save] * Volume : You can adjust the earpiece volume. * Effect : Slide open/close tone, key tone and menu tone volume * Warn : Dialog box, Connect, Minute, No service, Low battery alert volume * Ringer : Incoming ringer volume * Alarm : Alarm bell volume * Msg : New message alert volume * Game: Game sound volume * Start & End : Power on/off volume n Missed Call You can set the missed call function. 1. Press (Left)[Menu] + (1)[Sound] + (7)[Missed Call] 2. Select a text box by moving (Up/Down) 3. Scroll through the options by moving (Left/Right) 4. Press (SMS)[Save] * Alarm Set : You can select Every 2min, After 2min or No alert.](https://usermanual.wiki/SK-Teletech/SK-7400/User-Guide-566572-Page-64.png)
![66* Alarm Type : Select one of the four alert tones. * Alarm Volume : You can adjust volume. n My Bell You can manage the downloaded bells and the bells received via IrDA communication. 1. (UP)[Multimedia] + (6)[My Bell] <My Bell Menu> - Set as Ringer : Set the selected bell as the ringer. - Edit Order : Sort the bells by date/size/name/user ) - Move to : Move the folder that the selected bell belongs to. - Delete : Deleted the selected file. - Secret : Set the selected bell a secret. - Secret All : Select all the files. - File Info. : Check the capacity by contents. - You can save contents within the capacity regardless of content types.](https://usermanual.wiki/SK-Teletech/SK-7400/User-Guide-566572-Page-65.png)
![67 Display n Decoration You can select the background. 1. Press Left[Menu] + (2)[Display] + (1)[Decoration]. - Select a text box by moving (up/Down) - Scroll through the options by moving (Up/Down) - Press (WWW)[Preview] to preview background. 2. Press (SMS) to save the setting. * Picture: Picture for the main LCD. * Animation Effect: Moving animation icon for the main LCD. * Clock/Calendar: Types of clock & calendar for the main LCD. * Help Line: You can select whether to show the help line icons or not on the main LCD. * Set Phone Name: You can select whether to show the phone name or not on the main LCD. * Phone Name: You can enter the phone name. * Phone Name Color: You can select the color of your phone name. * If you select an animation for background, the battery operation time reduces. * You can select [No picture] for background. * If you select [Slide Show] for background, the photos selected for the slide show are displayed by turns. If you use a locked photo in the slide show, the lock image is displayed. If no photo is selected as the slide show, [Slide Show] is not displayed for Background setting. n Setting Picture You can set the photos for main LCD, incoming calls, power on, power off and starting WWW. 1. (Left)[Menu] + (2)[Display] 2. (2)[Set Picture] - Select an item by moving (Up/Down). - Scroll through the options by moving (Left/Right). - Press (WWW) to preview the screen. 3. Press (SMS) to save the setting. * The picture contents are [Default picture], [My picture], [My photo], [My video] and [No picture]. * If there is no content, the list is not displayed. n Menu Theme](https://usermanual.wiki/SK-Teletech/SK-7400/User-Guide-566572-Page-66.png)
![681. (Left)[Menu]+ (2)[Display] 2. (3)[Menu Theme] - Basic / Special styles are available. 3. (OK) * The default is special style. n Light 1. (Left)[Menu] + (2)[Display] 2. (4)[Light] * Select an item with (Up/Down), and press (OK). 3. Press (SMS) to save the setting. * Type of LCD Backlight - 10 Sec Auto LCD : Backlight is on for 10 seconds when you open the slide or press any key. - 20 Sec Auto LCD: Backlight is on for 20 seconds when you open the slide or press any key. - 30 Sec Auto LCD: Backlight is on for 30 seconds when you open the slide or press any key. - Always On: Backlight is on when slide is open. - No Used: Backlight is off when you open the slide or press any key. * If Backlight is set to ‘Always’, the battery operation time can be reduced. * Type of backlight for closing slide - LCD off : Backlight is off when you close the slide or press the side key. - LCD Off in 1 sec : Backlight is on for 1 second when you close the slide or press the side key. - LCD Off in 3 sec : Backlight is on for 3 seconds when you close the slide or press the side key. - LCD Off in 9 sec : Light is on for 9 sec if you close the folder or press a side key. - Off by Stage : Light is off in two steps if you close the slide. n Setting Service Lamp You can select the outside key LED color when slide is closed. 1. (Left)[Menu]+(2)[Display] 2. (5)[Set Service Lamp] 3. (SMS)[Save] ? * What is service lamp? : As the outside key LED lamp, it indicates that phone power is on when LCD light is off with the slide closed.](https://usermanual.wiki/SK-Teletech/SK-7400/User-Guide-566572-Page-67.png)
![69*Setting time : LED blinks at the selected interval. n Closing Slide You can set LCD screen and backlight for closed slide. 1. (Left)[Menu] + (2)[Display] + (6)[Closing Slide] * Select an item with (Up/Down), and press (OK). 2. (SMS)[Save] to save the setting *View clock : Clock image is displayed instead of the standby screen on the LCD when LCD light is off. *View main LCD : Standby screen is displayed on the LCD when LCD light is off. *Front Key Press : You can switch on LCD light with front key as the slide is closed. n My Picture You can designate a saved picture, rename files, check user info, or delete pictures. 1. Press (Up)[Multimedia] +(7)[My Picture] + (OK) * Select an item with (Up/Down), and press (OK). 2. Press (SMS) to save the setting. * You can save the contents in flexible manner within the memory capacity regardless of type of contents. * You can save up to 99 files in My Picture .](https://usermanual.wiki/SK-Teletech/SK-7400/User-Guide-566572-Page-68.png)
![70 Info. Manager n Scheduler (Solar/Lunar) calendars between January, 1996 to December, 2015 are displayed. ? Add Schedule You can save schedules. 1. Press (Left)[Menu] + (3)[Info. Manager] + (1)[New Schedule] 2. Select a day to add new schedule. 3. Press (WWW) [Menu] to set time and repetition. (1) Set time (2) Everyday (3) Every Week (4) Every Month (5) Every Year 4. (SMS)[Save] * You can save up to 10 schedules and 5 anniversaries in a day. * Press (SMS) to change scheduler screen (by week, by day, by month). * Press ( * ) to go to previous month, and (#) to next month. ? Add Anniversary You can save anniversaries. 1. Press (Left)[Menu] + (3)[Info. Manager] + (2)[Add Anniversary] 2. Enter the anniversary. 3. Press (SMS)[Save]. ? Delete Schedule You can delete the schedule or anniversary that you do not need to use any more. 1. Press (Left)[Menu] + (3)[Info. Manager] + (3)[Delete Schedule] 2. Select between (1)[Schedule] and (2)[Anniversary]. 3. Highlight the schedule or anniversary that you want to delete by moving (Up/Down). 4. Press (SMS)[Delete] to delete. ? View List](https://usermanual.wiki/SK-Teletech/SK-7400/User-Guide-566572-Page-69.png)
![71You can see the list of schedule or anniversary that you have made. 1. Press (Left)[Menu] + (3)[Info. Manager] + (4)[View List] 2. Select what to see between (1)[Schedule List] and (2)[Anniv List]. - Select a month by moving (Left)/(Right). - Highlight a day by moving (Up/Down). 3. Press (OKSelect). * The anniversaries you entered in P-Book are saved in Scheduler. ? Set Alarm You can set alarm for schedules and anniversaries. 1. Press (Left)[Menu] + (3)[Info. Manager] + (5)[Set Alarm] 2. Select where to set alarm between (1)[Schedule] and (2)[Anniversary]. - Highlight a text box by moving (Up/Down). - Scroll through the options by moving (Left/Right) 3. Press (SMS)[Save]. ? Search Calendar You can enter the day in search calendar to find anniversaries and schedules. 1. Press (Left)[Menu] + (3)[Info. Manager] + (6)[Search Calendar] 2. Enter the day you want in the search box. 3. Press (OK)[Done]. ? Reservations or schedules on the phonebook. . # Anniversary on the Phonebook. n Alarm Clock : shows weekends and holidays : shows anniversaries : shows the schedule : Meeting : Wedding : Birthday : Other anniversaries than birthday, meeting and wedding.](https://usermanual.wiki/SK-Teletech/SK-7400/User-Guide-566572-Page-70.png)
![72Alarm Clock rings at a given interval until you disable it by pressing a specific key. (Snooze) 1. Press (Left)[Menu] + (3)[Info. Manager] + (2)[Alarm Clock] * Select the text box by moving (Up/Down). * Scroll through the options by moving (Left/Right). 2. Press (SMS)[Save] * Enter the repeat count for snooze function. If you press any key except (Send) when the alarm is on, the alarm at that stage gets off. You should press (Send) to deactivate the snooze function. * If you select Holiday Alarm Off, Alarm Clock alarm does not ring on holidays. * If both Alarm Clock and alarm are selected, the Alarm Clock rings first, and then, alarm rings when Alarm Clock is finished. n To Do You can set alarms at any required time. ? Setting Time 1. Press (Left)[Menu] + (3)[Info. Manager]+ (3)[To Do] 2. Press (SMS)[New] + (5)[Set time] 3. Press (SMS)[Save] * For After 10min ~ Every month, alarm rings once at the designated time. The alarms that ring once are automatically deleted after the alarm action. * You can set up to 10 alarms. * If the phone is off at the alarm time, alarm rings right after the phone is switched on. * If you are engaged in a call at the alarm time, the alarm rings right after you finish the call. n My Memo You can simply make memo. ? Adding Memo 1. Press (Left)[Menu] + (3)[Info. Manager]+ (4)[My Memo] 2. Press (SMS)[New] 3. Press (OK)[Done] * You can save up to 10 memos. ? Editing Memo](https://usermanual.wiki/SK-Teletech/SK-7400/User-Guide-566572-Page-71.png)
![731. Press (Left)[Menu] + (3)[Info. Manager]+(4)[My Memo] * Select the item with (Up),(Down). 2. Press (SMS)[Edit], and select (OK) after editing. * You can save up to 10 memos. n Calculator You can use the calculator with the memory function and the total function. e.g.) <9 X 7> 1. Press (Left)[Menu] + (3)[Info. Manager] + (5)[Calculator] 2. Press (9) + (Up) + (7) + (OK) * You can use an operator repeatedly. * The answer to the calculation should be not longer than 11 digits. If the answer exceeds 11 digits, an [Error] message is displayed, and calculation function is disabled. * Press to delete a character, or press and hold to delete all. - Memory : Save the answer. - Memory Plus : Add the answer to the saved memory. - Memory Recall: Import the last answer (memory) to the operation answer screen. - Memory Clear : Delete the memory. The operation detail is not deleted. - Initialize : All the operation details are deleted. n Stop watch You can use the stopwatch function with simple key action. 1. Press (Left)[Menu] + (3)[Info. Manager]+ (6)[Stop watch] 2. Press (OK)[Start] 3. Press (SMS)[Stop] * Press (OK)[Save] if you need intermediate records during operation of the stopwatch. You can check the saved time with (WWW)[View]. * If there is an incoming call during operation of stopwatch, the stopwatch operation is finished. * You can save up to 20 stopwatch records. n World Time You can check the world time. 1. Press (Left)[Menu] + (3)[Info. Manager] + (7)[World Time] * Check the world time with (Up),(Down). 2. Press (SMS)[DST] * Move to a city on the world map with (Left)/(Right) button. * You can set summer time of each city in DST(Daylight Saving Time). DST is applied once](https://usermanual.wiki/SK-Teletech/SK-7400/User-Guide-566572-Page-72.png)
![75 Game n Accessing Game 1. (WWW)[Menu]+(4)[Game]+(1)[Brain Force]/(2)[PUZBUZ] - See Volume in Sound (P.59) for how to adjust volume. ? BRAIN FORCE * Story mode : The brain force story is unfolded if you press (Under) and (OK). * Pair Match : You can select one of the five characters and play matches with other characters. The game is cleared if you win all other characters. * Survival mode : You can select one of the five characters and play matches until your energy goes down to ‘0’. The number of characters you won is displayed on the upper part of the LCD screen. If you win, energy and rage gage increase. * Options : You can set the level, time and vibration. ? How to use techniques by character When the anger gauge reaches a certain level, special techniques (techniques to use Anger Gauge) can be used. 1. Chris. Dash : 4-4, 6-6 Fist : 9 Triple Blow : 9-9-9 Aero Cannon : 5-6 Upper kick : 8 Lower kick : 7 ? Techniques to use anger gauge Atomic cannon: 5-2 Knee Bazoka : 6 -6-6 1. Mark Dash : 4-4, 6-6 Fist : 9 Triple Combination : 9-9-9 Aero Cannon : 5-6 Upper kick : 8 Lower kick : 7 ? Techniques to use anger gauge Atomic cannon: 5-2 Knee Bazoka : 6-6-6 3. jin Dash : 4-4, 6-6 Fist : 9 Triple Combination : 9-9-9 Aero Cannon : 5 Upper kick : 8 Lower kick : 7 ? Techniques to use anger gauge Atomic cannon: 6-2 - Jin can attack a fallen enemy. 4. Stacey Dash : 4-4, 6-6 Fist : 9 Ultimate Chop Combo: 9-9-9 Psychic Needle : 5-6 Upper kick : 8 Lower kick : 7 ? Techniques to use anger gauge Rising Grinder: 6-2 - Stacey can attack a fallen enemy. 5. Kimura Body Block : 4-4, 6-6 Fist : 9 Lower attack : 8 ? Techniques to use anger gauge Front brain stimulus EOF: 5 -Defeat the enemy with frame. 5. Kimura](https://usermanual.wiki/SK-Teletech/SK-7400/User-Guide-566572-Page-74.png)
![78 Setup n Option/Auto You can set the call receiving method with closed slide and the dial font size. ? Option 1. Press (Left)[Menu] + (5)[Setup] + (1)[Option/Auto] 2. Press (1)[Option] - Select the item with (Up), (Down), and press (OK). 3. Press (SMS)[Save] * Call receiving method with closed slide : Open Slide, Open & Press Key, or Press Send Key. * Dial font size : Select the font size of the figure displayed on the LCD screen when making a call ? Auto Function 1. Press (Left)[Menu] + (5)[Setup] + (1) [Option/Auto] 2. Press (2)[Auto Function] - Select the item with (Up), (Down), and press (OK). 3. Press (SMS)[Save] * You can set [Auto Redialing], [Hands Free]. [Earphone], and enter the local area code. n Security ? Auto Lock / Info Lock You can lock/unlock a specific function of the phone which requires you to enter the password. 1. Press (Left)[Menu] + (5)[Setup] + (2)[Security] - The default password is ‘0000’. 2. Press (1) Auto Lock / (2) Info Lock 3. Press (OK)[Sel] * If you select (1)[Auto Lock], all the functions are locked. * If you select (2)[Info Lock] is displayed on the upper part of the LCD screen.](https://usermanual.wiki/SK-Teletech/SK-7400/User-Guide-566572-Page-77.png)
![79? Set Password 1. Press (Left)[Menu] + (5)[Setup] + (2)[Security] 2. Press (3)[Set Password] * The default password is ‘0000’. 3. Password + New Password + New Password. ? Init by Function ? Initialize P-book You can reset P -book to the default status at the purchasing of the phone. 1. Press (Left)[Menu] + (5)[Setup]+ (2)[Security] - The default password is ‘0000’. 2. Press (4)[Init by Function] + (1)[Initialize P-Book] 3. Press (OK)[Sel] - Select “Yes” or “No“. ? Initialize System If you select Master Reset, all the data (P -Book, sent/received messages, memo, Live Bell, Live Screen, bell/Picture/Photo/Video) are deleted except the default bell and picture. 1. Press (Left)[Menu] + (5)[Setup]+ (2)[Security] - The default password is ‘0000’. 2. Press (4)[Init by Function] + (2)[Initialize System] 3. Press (OK)[Sel] - Select “Yes” or “No“. n Language You can select an appropriate language among Hebrew, English, Russian. 1. Press (Left)[Menu] + (5)[Setup] + (3)[Language] 2. Press (OK)[Sel] Use (UP),(Down). 3. Press (OK)[Sel] n Memory Info ? Check Memory Info 1. Press (Left)[Menu] + (5)[Setup] + (4)[Memory Info] 2. Press (1)[Memory Info]](https://usermanual.wiki/SK-Teletech/SK-7400/User-Guide-566572-Page-78.png)
![80- You can check memory information on My Picture, My Bell, Wizard, ? Check 3G-TV Memory Info 1. Press (Left)[Menu] + (5)[Setup] + (4)[Memory Info] 2. Press (2)[3G-TV Memory Info] - You can check memory information on Photo, Video, Live Bell, Live Screen, 3G-TV, MMS. n Call Timers You can check Last/Total/Lifetime Call for Send Voice, Recv Voice, Use WWW, Send Data and Recv Data. 1. Press (Left)[Menu] + (5)[Setup]+ (5)[Call Timers] (1) Last Call - You can check the last send/received call time. (2) Lifetime Call - You can check the call time from purchasing of the phone. The record is deleted with master reset (See P.00). (3) Total Call - You can check the call time from the last reset. - Send Voice : Total time of calls made - Receive Voice : Total time of calls received - WWW Use Time : Total time of WWW service connection - Send Data : Total time of calls made for wireless data service - Receive Data : Total time of calls received for wireless data service n Auto Answer ? Set Auto Answer 1. Press (Left)[Menu] + (5)[Setup] + (6)[Auto Answer] 2. Press (1)[Set Auto Answer] * Select the item with (Up), (Down), and press (OK). 3. Press (SMS)[Save] n Record/Play Greeting Message 1. Press (Left)[Menu]+ (5)[Setup + (6)[Auto Answer] 2. Press (2)[Greeting Message] 3. Press (OK)[Rec]](https://usermanual.wiki/SK-Teletech/SK-7400/User-Guide-566572-Page-79.png)
![81- Press (SMS)[Save] to save the message. * The maximum recording time is 30 seconds. * If a message is already recorded, press (SMS)[Play] to check the recorded voice. n S/W Version 1. Press (Left)[Menu] + (5)[Setup] + (7)[S/W Version] - The S/W version displayed at purchasing of the phone is the release version number. n Comm. Setup ? Data Service You can set environment for data service including Internet / PC communication / FAX. 1. Press (Left)[Menu] + (5)[Setup]+ (8)[Comm. Setup] 2. Press (1)[Data Service] and (OK)[Select] in turn, and select receiving mode. 3. Press (Up/Down) keys to move to the item and Press (OK) [conf]. 4. Press (SMS)[Save] ? Incoming Mode - For Modem and FAX, you should select Modem Mode or FAX Mode. However, you do not need to set receiving mode for Modem or FAX origination. ? Internet Speed (?? ??? ??? ?? ???? ??? ??? ??) - You can use high speed wireless data communication of up to 153 Kbps with CDMA 2000 1X EV-DO support. - Internet service rate is divided into 9.6 Kbps, 14.4 Kbps and 64Kbps. - You can use Internet service in the maximum rate of 64 Kbps. - In normal rate, you can use Internet service in the rate of 9.6 Kbps or 14.4 Kbps. 9.6 Kbps is provided when 14.4 Kbps is unavailable. - It is much stable to use data cable than to use IrDA when you use the Internet service in maximum rate. You need to set “Communication with PC” in IrDA menu and is disconnected if you do not use PC and phone for more than 10 minutes. - If there is no data receiving and transmitting for 4 minutes and 15 seconds during high-speed packet data service, using data cable, (dormant) will be displayed on the upper part of LCD. Fee is not charged while the is displayed.](https://usermanual.wiki/SK-Teletech/SK-7400/User-Guide-566572-Page-80.png)
![82? Port Set Port setting differs depending on the cable for data usage. ? PC Baud Rate PC Baud Rate : Set interface rate between PC and mobile phone. 1. Press (Up/Down) to select the item, and press (OK) [conf] 2. Press (SMS) [Save].. - The maximum speed in desktop/notebook is 115,200bps. - It supports up to 64 kbps for communication speed with PC when using IrDA. - The recommended speed for using fax data service is 19,200 bps. . ? WWW font Config Settings 1. (Left)[Menu] + (5)[Setup]+ (8)[Comm. Setup] 2. (2)[WWW Config] - The default password is ‘0000’. 3. (SMS)[Save] - Select the item with (Up), (Down), and press (OK).](https://usermanual.wiki/SK-Teletech/SK-7400/User-Guide-566572-Page-81.png)
![83 IrDA n Phone To Phone You can exchange data with other phone with the IrDA function. 1. Press (Left)[Menu] + (6)[IrDA] + (1)[Phone To Phone] (1) Receiving Mode - In order to receive bell/picture/photo/P-book from other phones, select Receive mode. Press (CLR Key) if you want to cancel receiving. (2) Send Bell - You can send a bell to other phones. Select the item with (SMS)[Check], and press (OK). (3) Send Picture - You can send the animation data to other phones. Select the item with (SMS)[Check], and press (OK). (4) Send Photo - You can send the photo data to other phones. Select the item with (SMS)[Check], and press (OK). (5) Send Phone Book * You can Book data to other phones. Select the item and press (OK). (You can check the required item only in Send by Group.) n Phone To PC You can perform wireless data communication with PC or use the data manager function via IrDA. ? Phone Settings 1. Press (Left)[Menu] + (6)[IrDA]+ (2)[Phone To PC] 2. Select the required item by moving (Up),(Down). 3. Press (OK). * If IrDA is connected with PC, is displayed on the main LCD. * IrDA communication is available when the IrDA window of the phone is within 30° and 10cm from the IrDA window of the PC. * If Phone To PC communication does not function for over 10 minutes, connection is released and is disappeared.](https://usermanual.wiki/SK-Teletech/SK-7400/User-Guide-566572-Page-82.png)
![84? PC Settings Because SK-7200 has the IrDA function built-in, you can use the data manager and the data service with the PC with the IrDA function. 1. The PC with the IrDA communication device needs to have the IrDA communication program. 2. In “Start ? Setting ? Control Board”, double click the [IrDA] icon. 3. Before IrDA communication, check if “Virtual IrDA COM port” or “IrDA device connected port (COM3, COM4, and etc.)” is selected in the settings for Data Manager or Hyper Terminal. * The virtual IrDA COM port is supported in Windows 2000/XP. * The phone supports IrDA communication with PC at up to 64Kbps. * Refer to the PC manual for IrDA setting in the PC. n IrDA Communication Details ? Phone To Phone IrDA communication 1. Send Bell, Send Picture, Send Photo In order to send a locked item, enter the password. If you select to send all, all items except the locked item are sent. 2. Send Phone Book * Send All : You can send the entire P-book. * By Group : You can send the P-book by group. * By Name : You can send the P -book by name. * Turbo Dial : You can send the Turbo Dial numbers. * My Info : You can send your information. The information is stored in [No Group]. * If the same name is already in the phonebook, a message appears, asking you if you want to overwrite. If you select [Yes to all], all the data are overwritten without further confirmation messages. * When you send the P-book to another phone that does not support two phone numbers of the same kind, if two or more phone numbers of a person of the same kind are sent, only one phone number is received. Call receive ratio can be lowered during IrDA communication.](https://usermanual.wiki/SK-Teletech/SK-7400/User-Guide-566572-Page-83.png)
![93?T Pull off the road and park before making or answering a call if driving conditions so require. n ELECTRONIC DEVICES Most modern electronic equipment is shielded from RF signals. However, certain electronic equipment may not be shielded against the RF signals from your wireless phone. ? Pacemakers The Health Industry Manufacturers Association recommends that a minimum separation of six (6”) inches be maintained between a handheld wireless phone and a pacemaker to avoid potential interference with the pacemaker. These recommendations are consistent with the independent research by and recommendations of Wireless Technology Research. Persons with pacemakers: ?T Should ALWAYS keep the phone more than six inches from their pacemaker when the phone is turned ON; ?T Should not carry the phone in a breast pocket; ?T Should use the ear opposite the pacemaker to minimize the potential for interference . ?T If you have any reason to suspect that interference is taking place, turn your phone OFF immediately. ? Hearing Aids Some digital wireless phones may interfere with some hearing aids. In the event of such interference, you may want to consult your service provider. [or call the customer service line to discuss alternatives.] Optional for each phone manufacturer. Hearing Aid Compatibility with Mobile Phones When some mobile phones are used near some hearing devices (hearing aids and cochlear implants), users may detect a buzzing, humming, or whining noise. Some hearing devices are more immune than others to this interference noise, and phones also vary in the amount of interference they generate. The wireless telephone industry has developed ratings for some of their mobile phones, to assist hearing device users in finding phones that may be compatible with their hearing devices. Not all phones have been rated. Phones that are rated have the rating on their](https://usermanual.wiki/SK-Teletech/SK-7400/User-Guide-566572-Page-92.png)