SKSpruce Technologies WIA3200 Indoor Access Point User Manual JadeOS 1 x
Skspruce Technologies Inc. Indoor Access Point JadeOS 1 x
UserManual.wiki
>
SKSpruce Technologies
>
WIA3200 User Manual
Users Manual
Navigation menu
Upload a User Manual
Namespaces
Wiki Guide
HTML
PDF
Info
Views
User Manual
Discussion / Help
Navigation


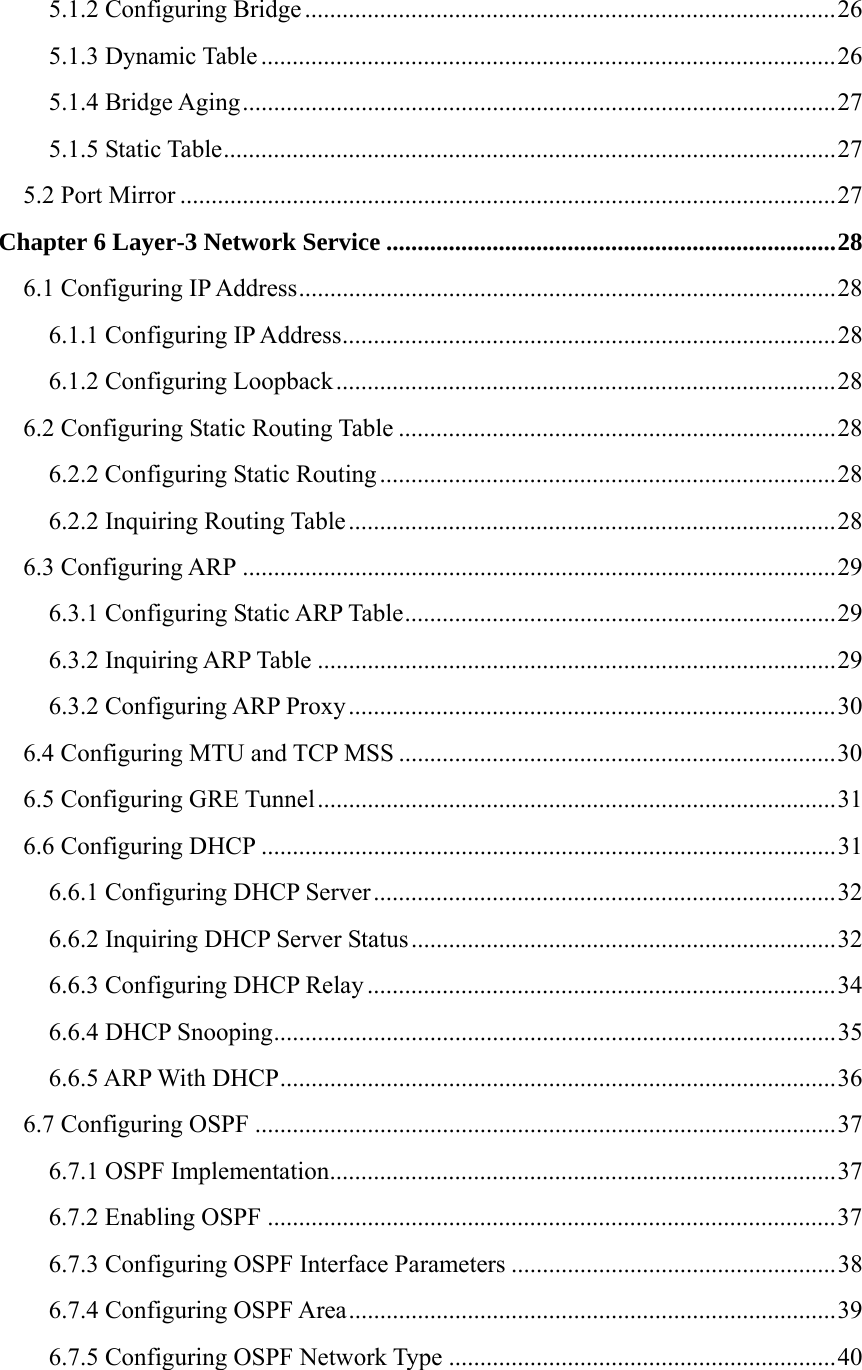


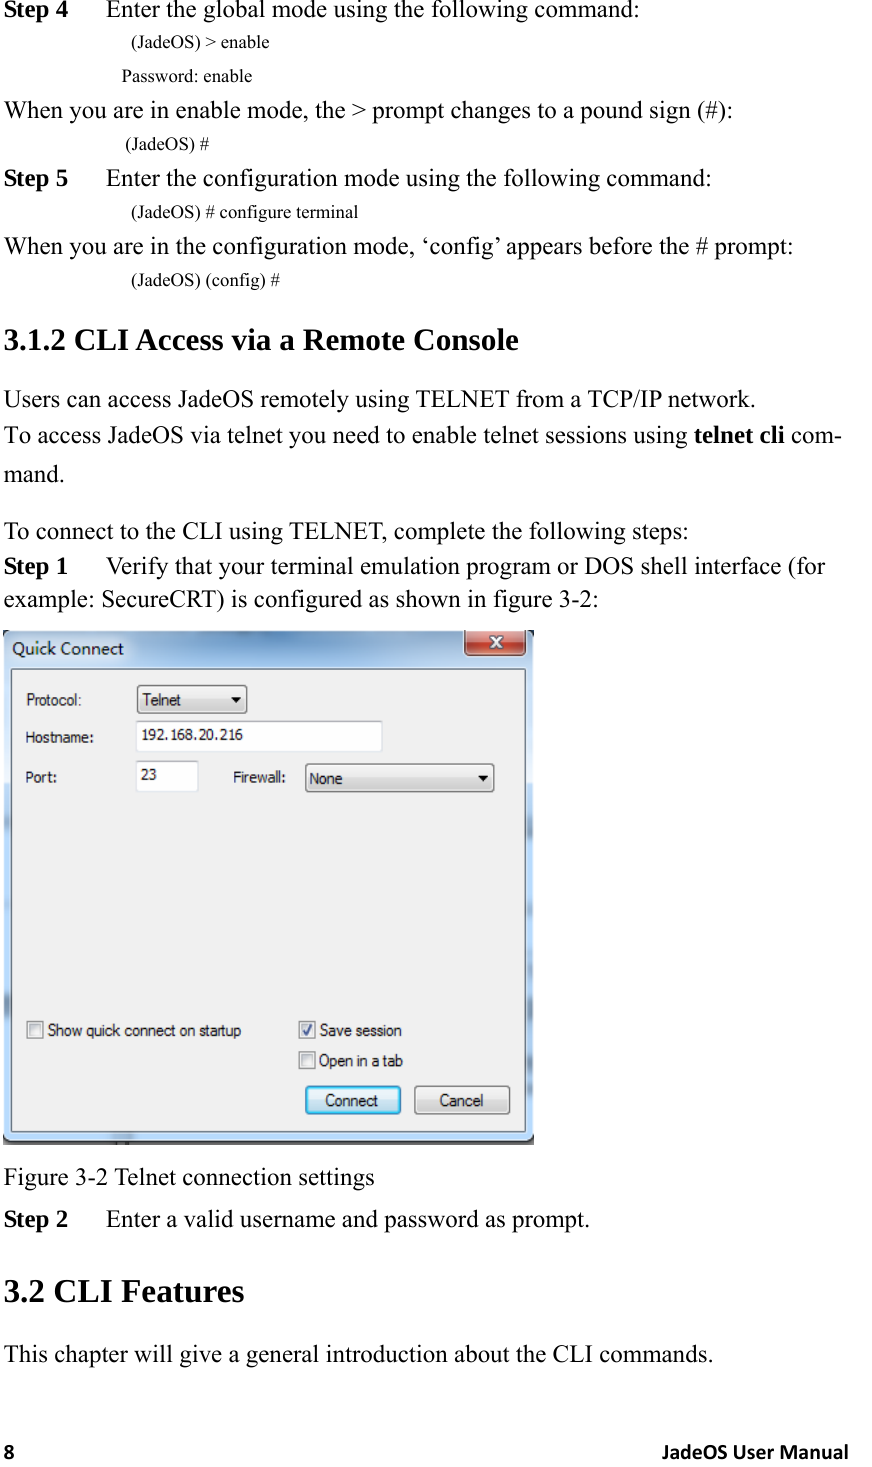

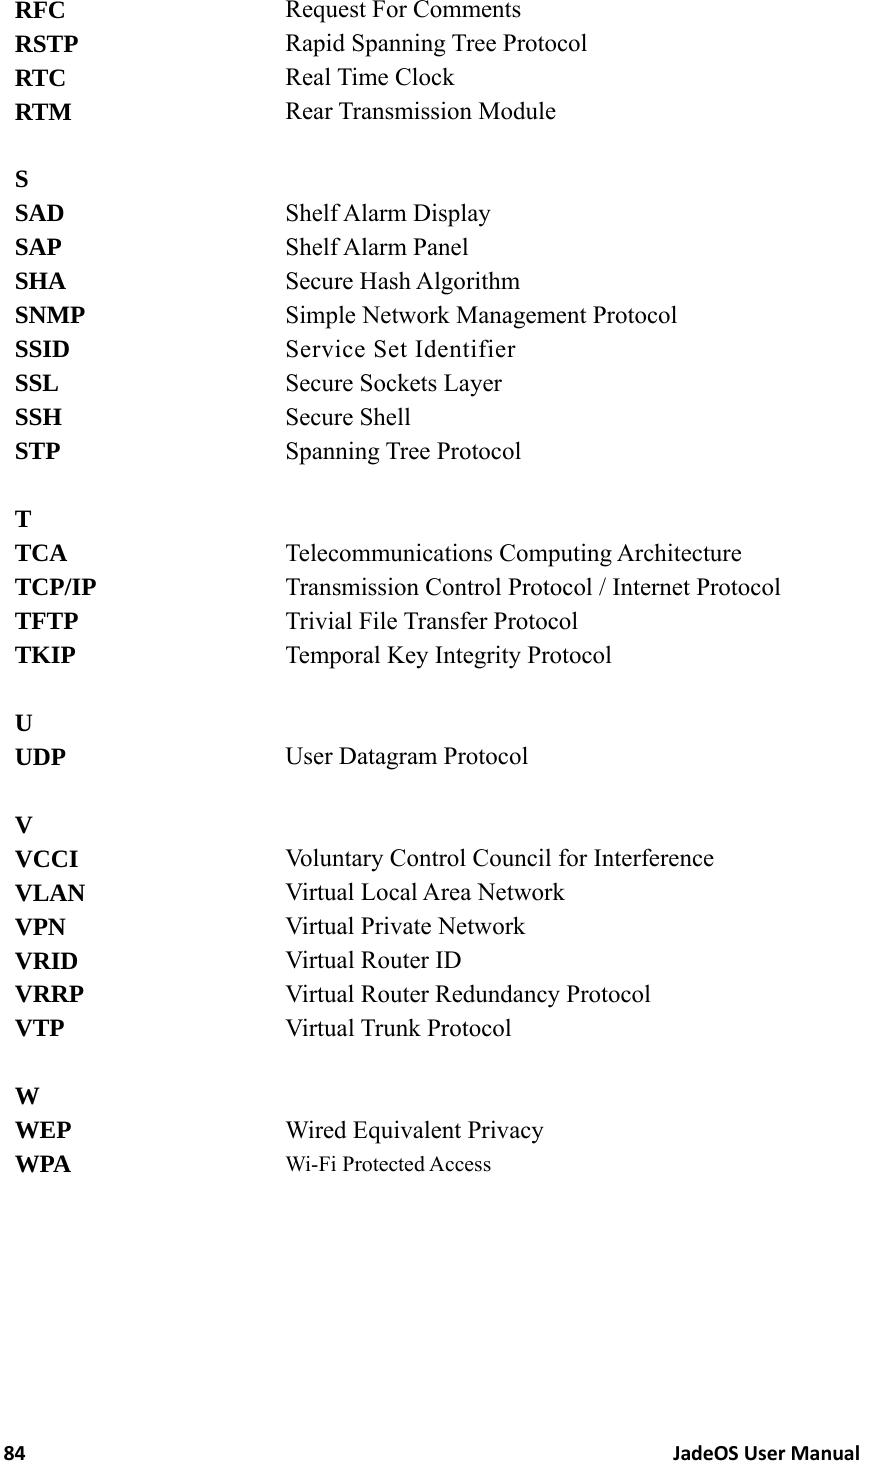
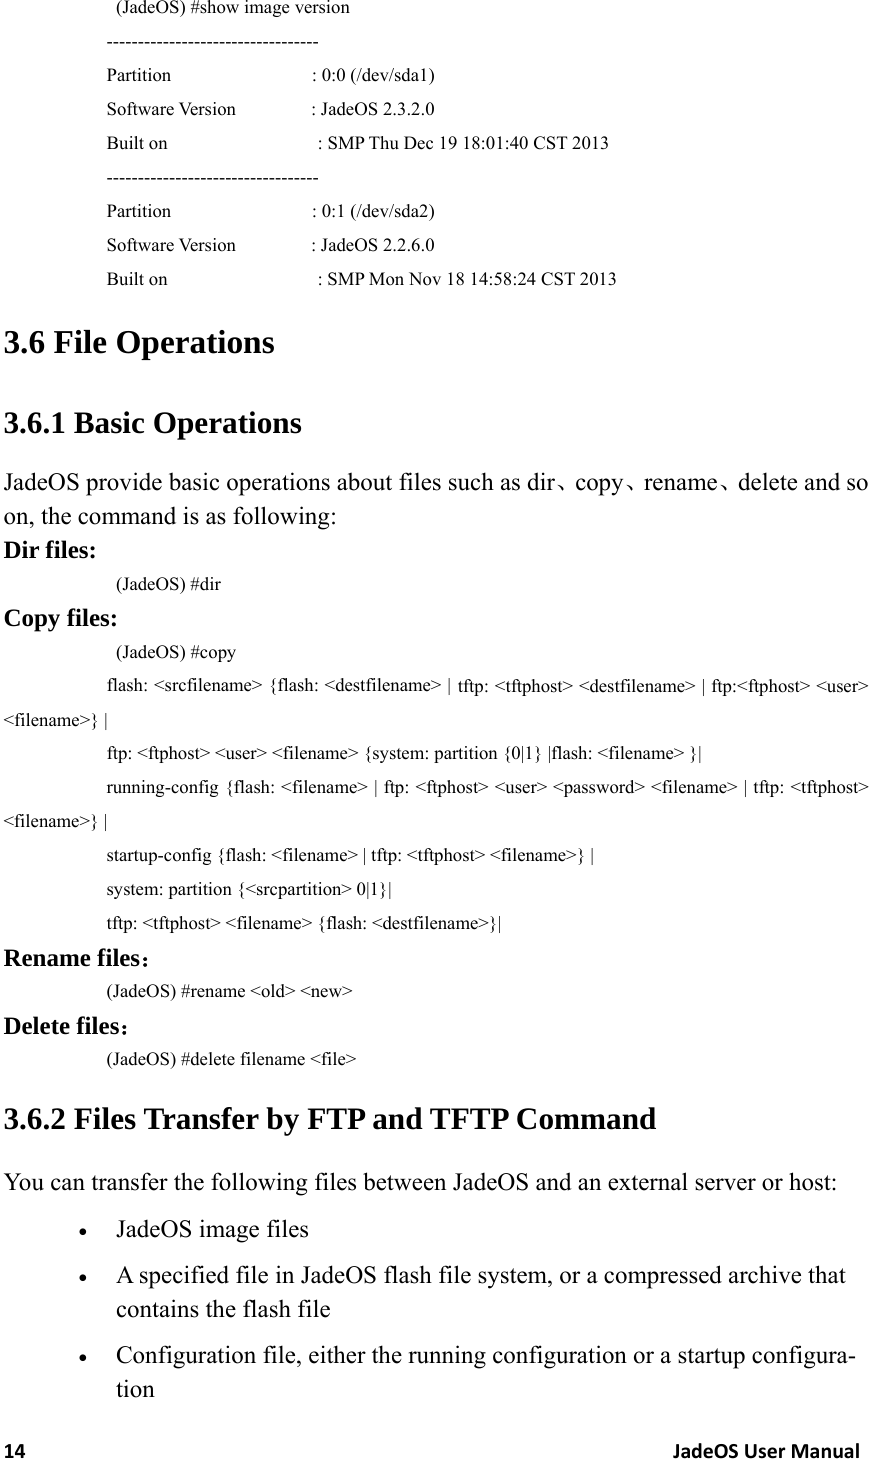
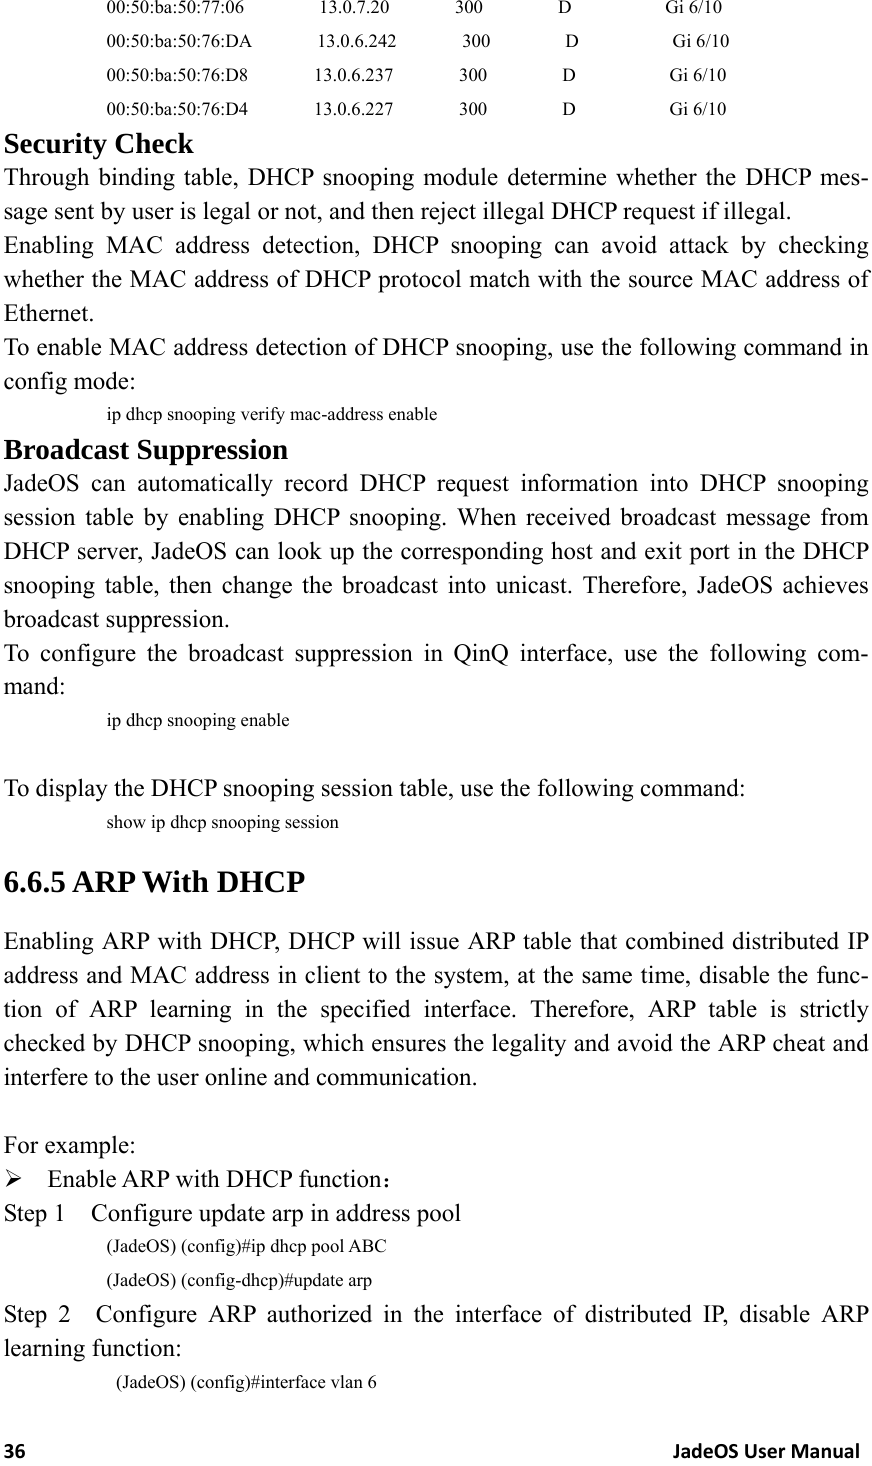
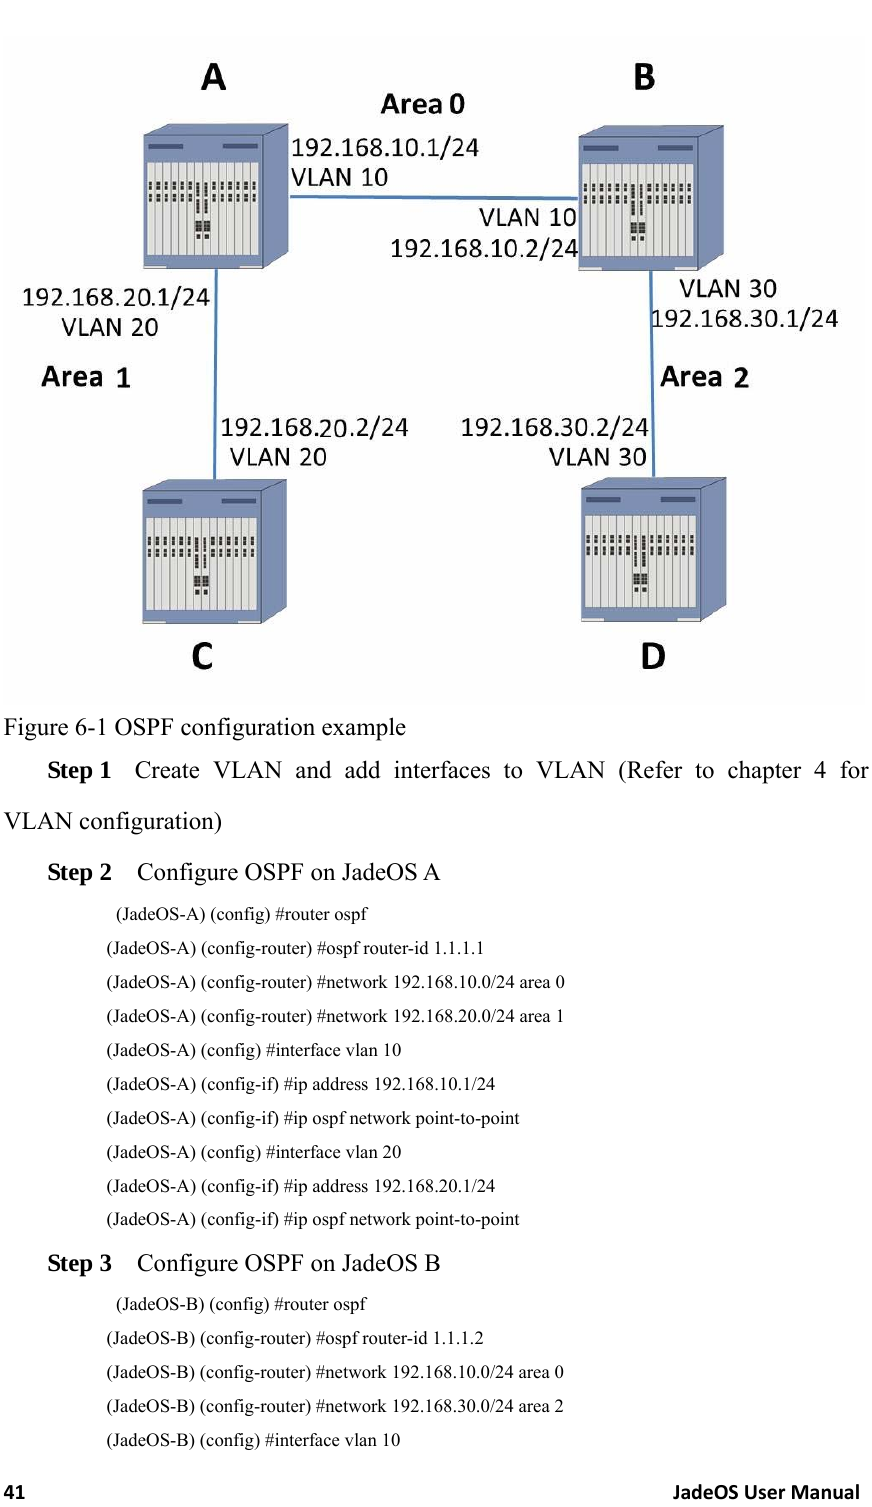
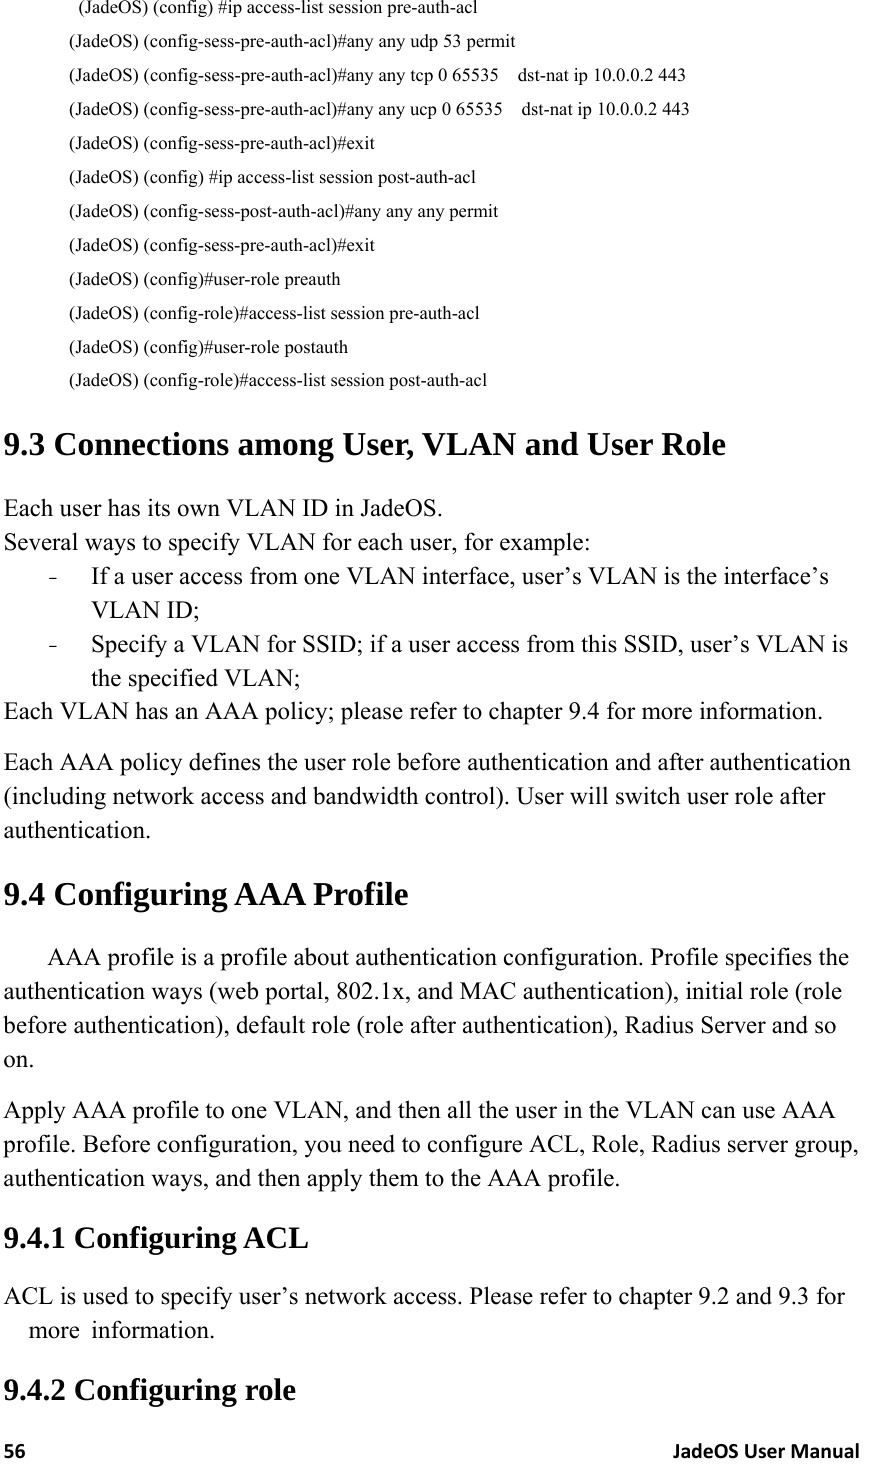
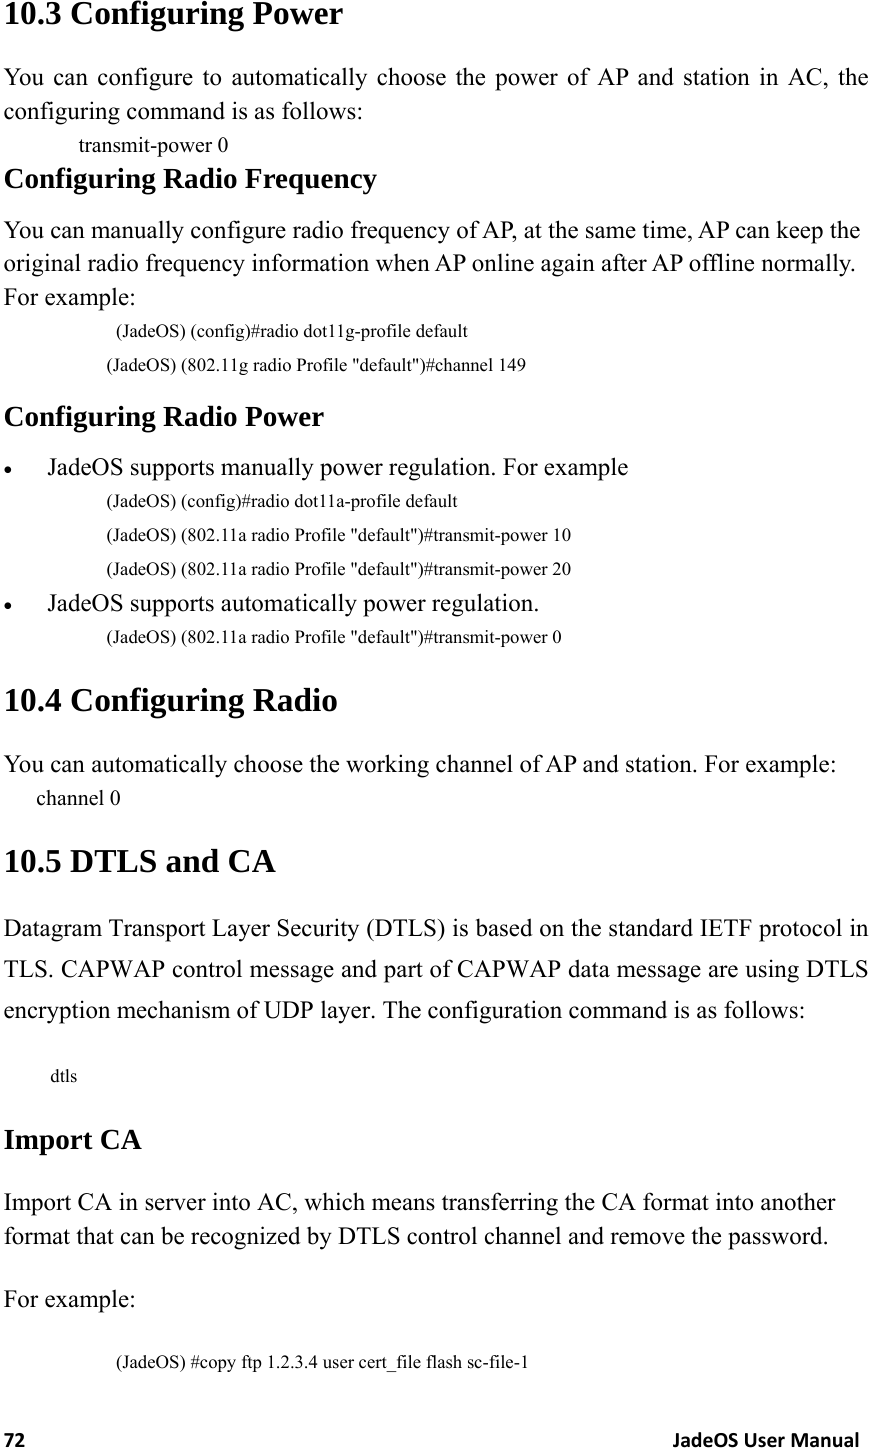
![13JadeOSUserManualYou can save configuration files into JadeOS and copy to an external server. copy startup-config flash: <filename> copy startup-config tftp: <tftphost> <filename> copy running-config flash: <filename> copy running-config ftp: <ftphost> <user> <password> <filename> [<remote-dir>] copy running-config startup-config copy running-config tftp: <tftphost> <filename> 3.5 System Update The system image file is stored in the Compact Flash (CF) on each line card. Every time you start the system, bootloader will automatically download the image to sys-tem RAM. The CF card is divided into two partitions which both contain the system image files. At the factory default setting, bootloader will download image files from partition 0. After system updating, JadeOS will automatically start from the partition which contains the updated image files. You can also spiffy which partition to start from manually. To update the system image file, complete the following steps: Step 1 Input the user name and password after connecting the JadeOS through SSH, telnet or console. Step 2 Turn into the global configuration mode by entering the command config-ure terminal. Step 3 Turn into the interface configuration mode by entering the command inter-face mgmt. Step 4 Set mgmt interface IP address and make sure the tftp or ftp server is ok. Step 5 Copy the image file to partition 0/1 on CF card. The system will reboot after the update complete. Note: It’s recommended that you update the system image files from the partition which the system is not working on to avoid that the current image files are erased. For example: if the system is working on partition 0, please update the system image files from partition 1. To change boot partition, use following command in Config mode: (JadeOS) (config)#boot system partition 0 To view image information about boot partition, use following command in enable mode:](https://usermanual.wiki/SKSpruce-Technologies/WIA3200/User-Guide-2395330-Page-23.png)
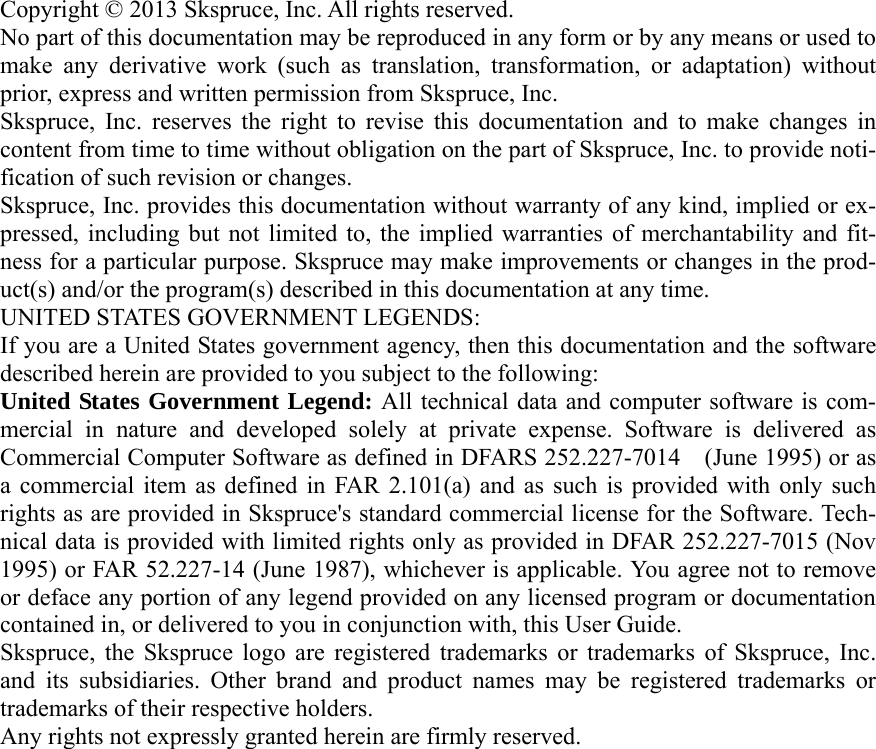
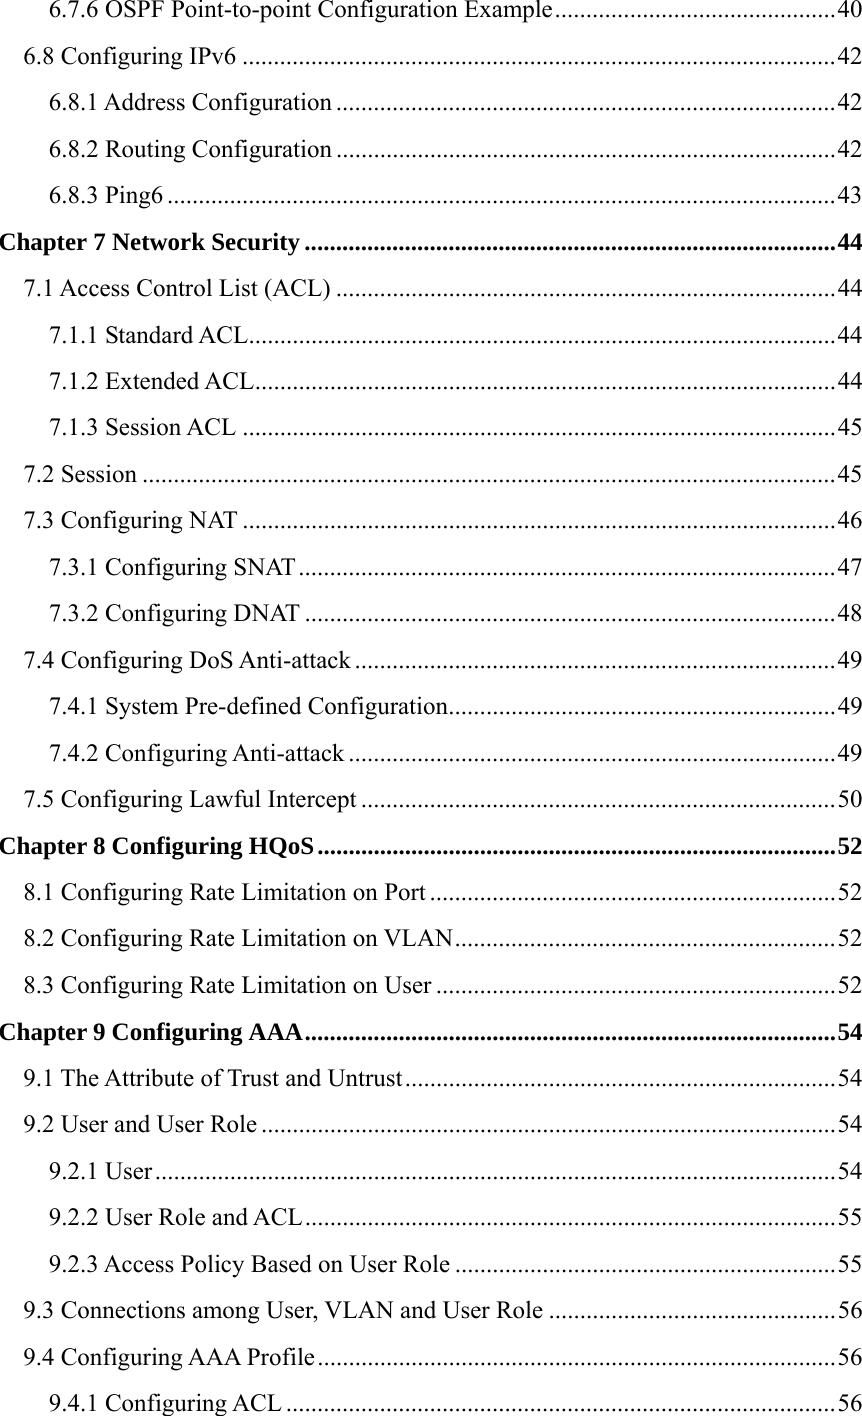
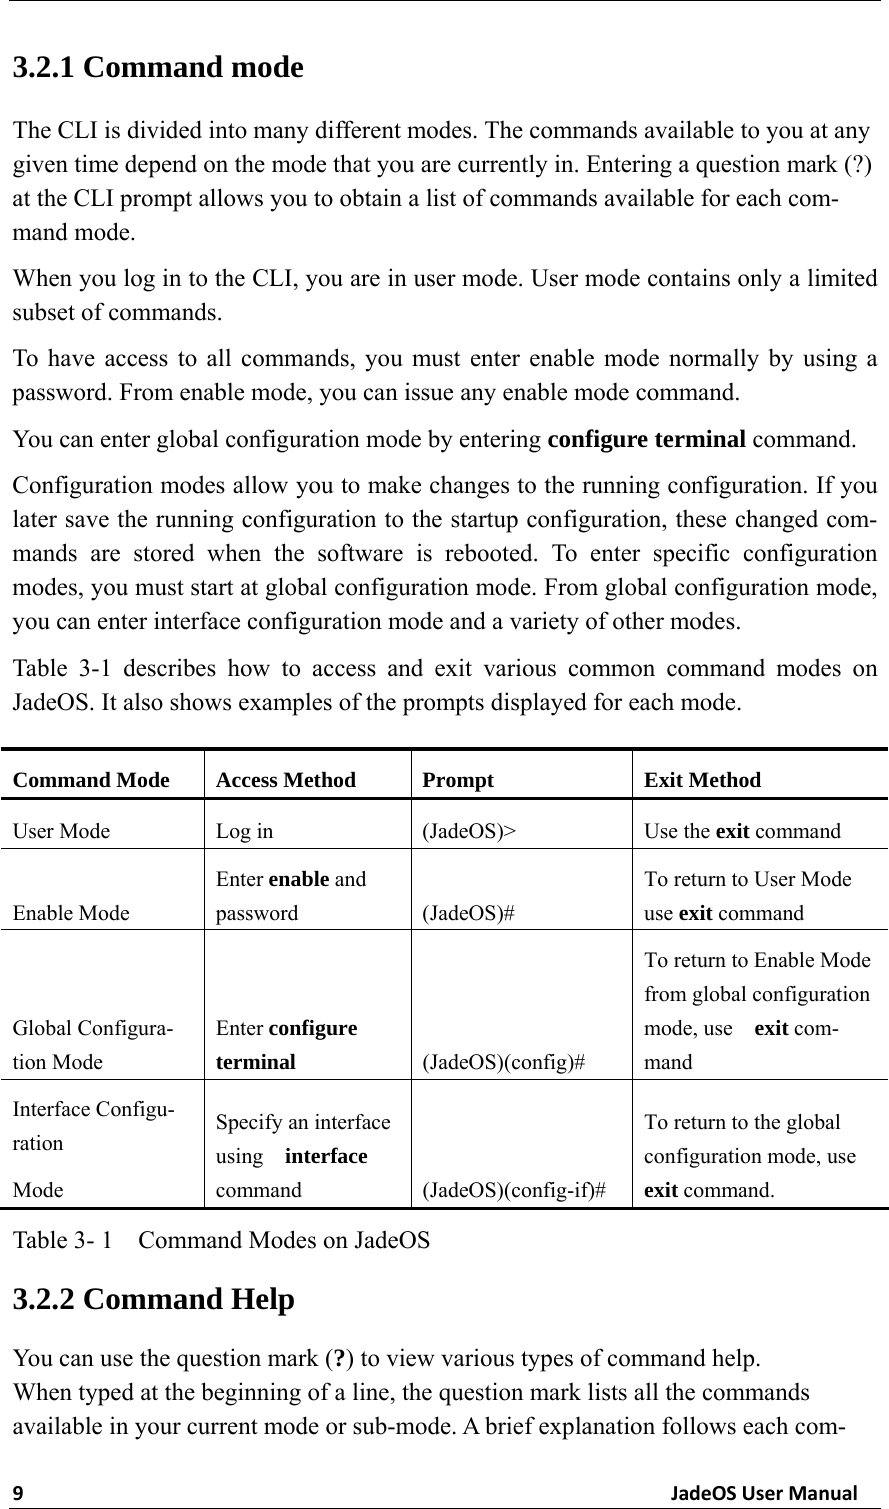
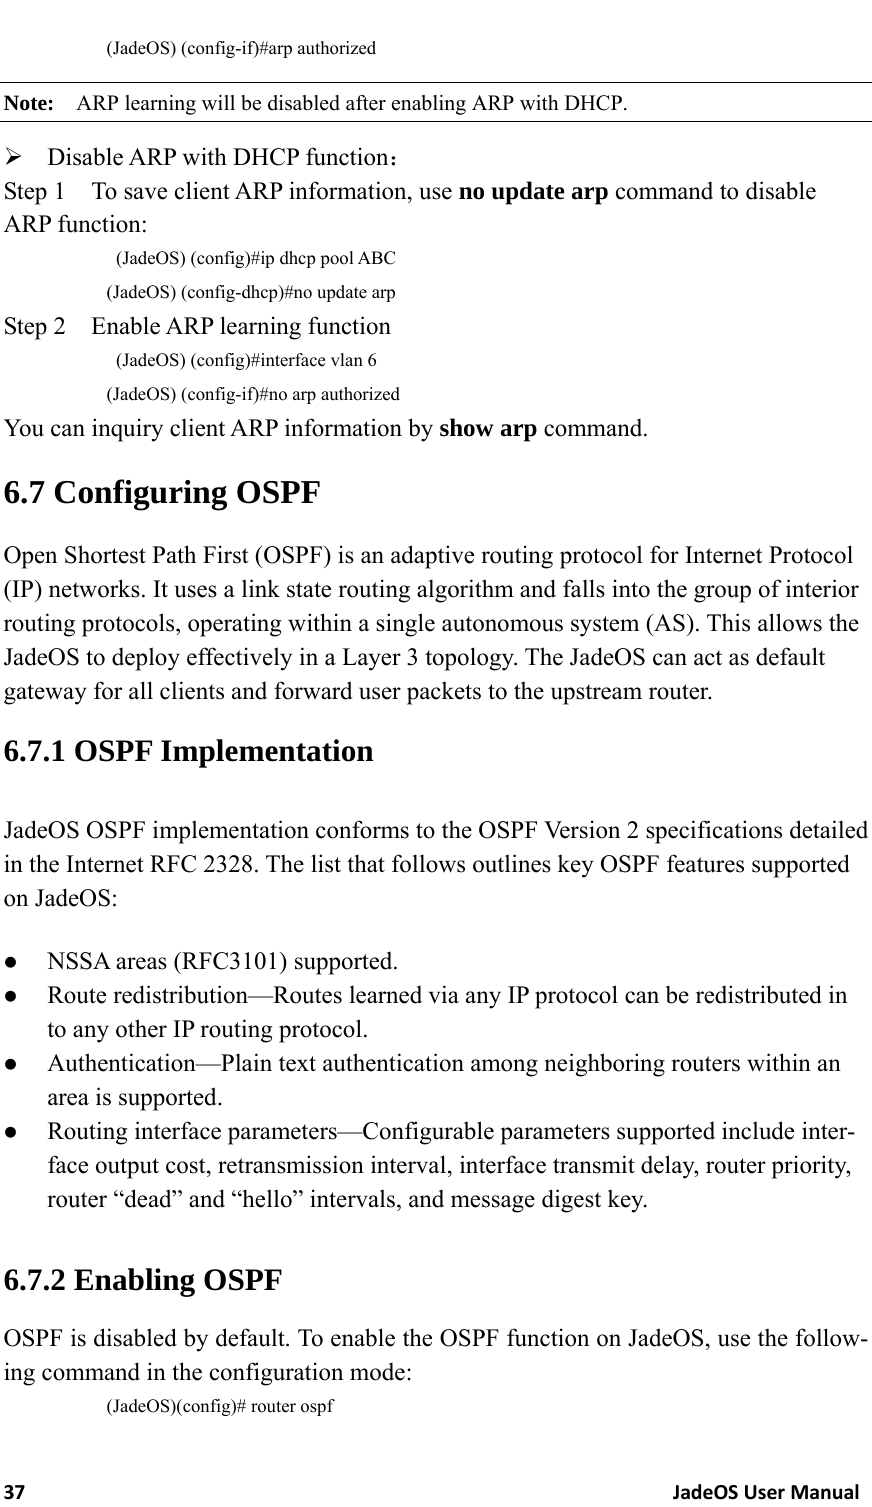
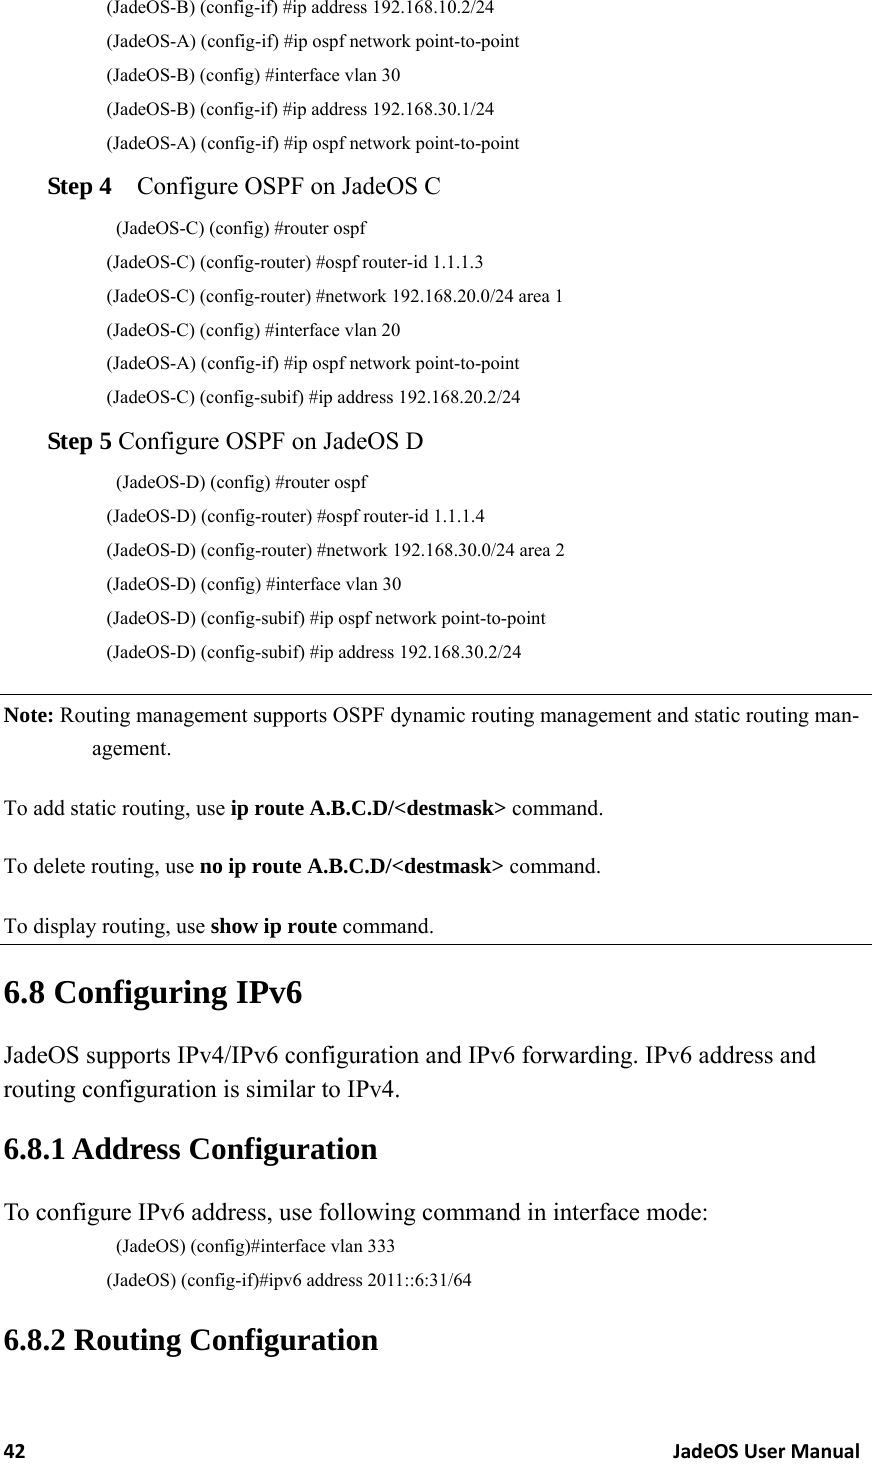
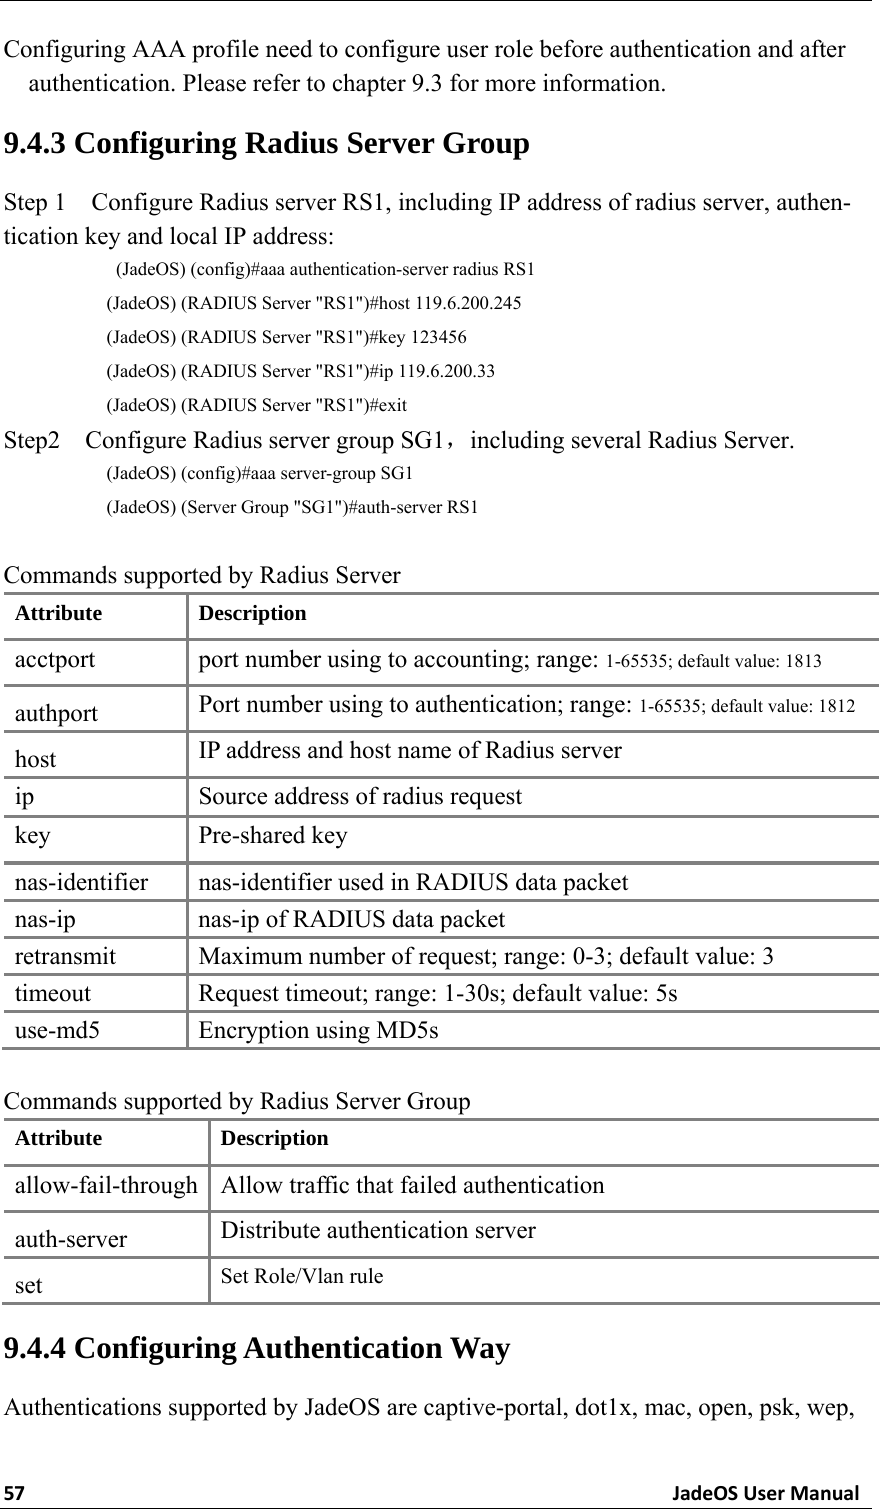
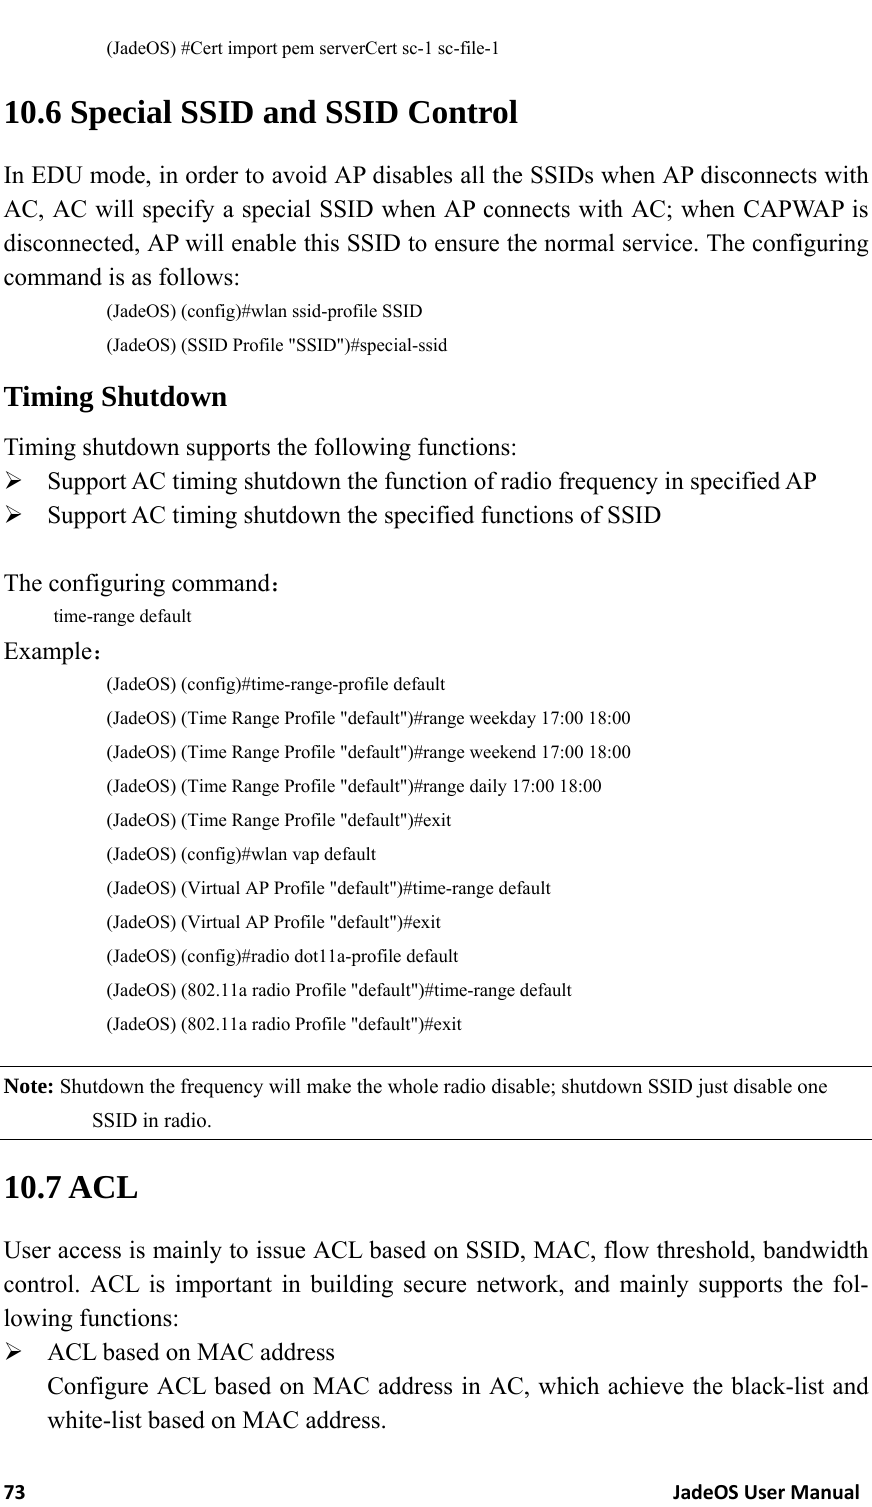
![15JadeOSUserManual• Log files You can use the following protocols to transfer files between JadeOS and external server or host: • File Transfer Protocol (FTP) • Trivial File Transfer Protocol (TFTP) Sever Type Configuration Trivial File Transfer Proto-col(TFTP) IP address of the server Filename File Transfer Protocol(FTP) IP address of the server Username and password to log into server Filename Table 3- 3 Parameters of TFTP and FTP Configuration 3.6.3 JadeOS Image Image Files Transfer You can copy JadeOS image files to JadeOS or equipment by TFTP or FTP server. When you transfer a JadeOS image file to equipment, you must specify the partition which the file is copied to. You have the option of rebooting JadeOS with the trans-ferred image file. copy tftp: <tftphost> <filename> system: partition {0|1} copy ftp: <ftphost> <user> <filename> system: partition {0|1} copy scp: <scphost> <username> <filename> system: partition [0|1] 3.6.5 Log Files Storage You can save log files into a compressed archive and copy to an external TFTP server. tar logs copy flash: logs.tar tftp: <tftphost> <destfilename> copy flash: logs.tar scp: <scphost> <username> <destfilename> 3.7 User Management To create users, you can use the command: mgmt-user <user> <password> For example, create a user account “test” and password “123456”: (JadeOS) (config)#mgmt-user test 123456 To inquire users in the system, you can use the command:](https://usermanual.wiki/SKSpruce-Technologies/WIA3200/User-Guide-2395330-Page-25.png)
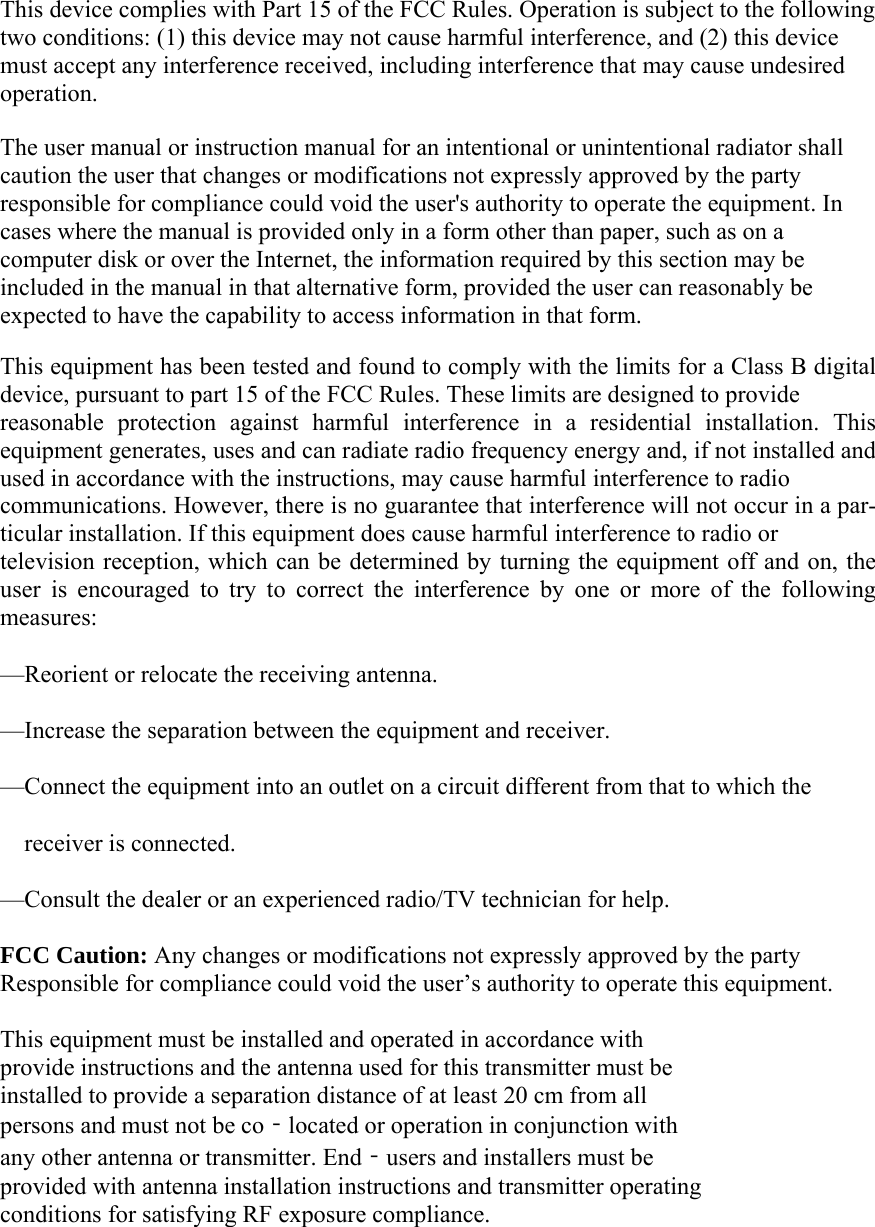
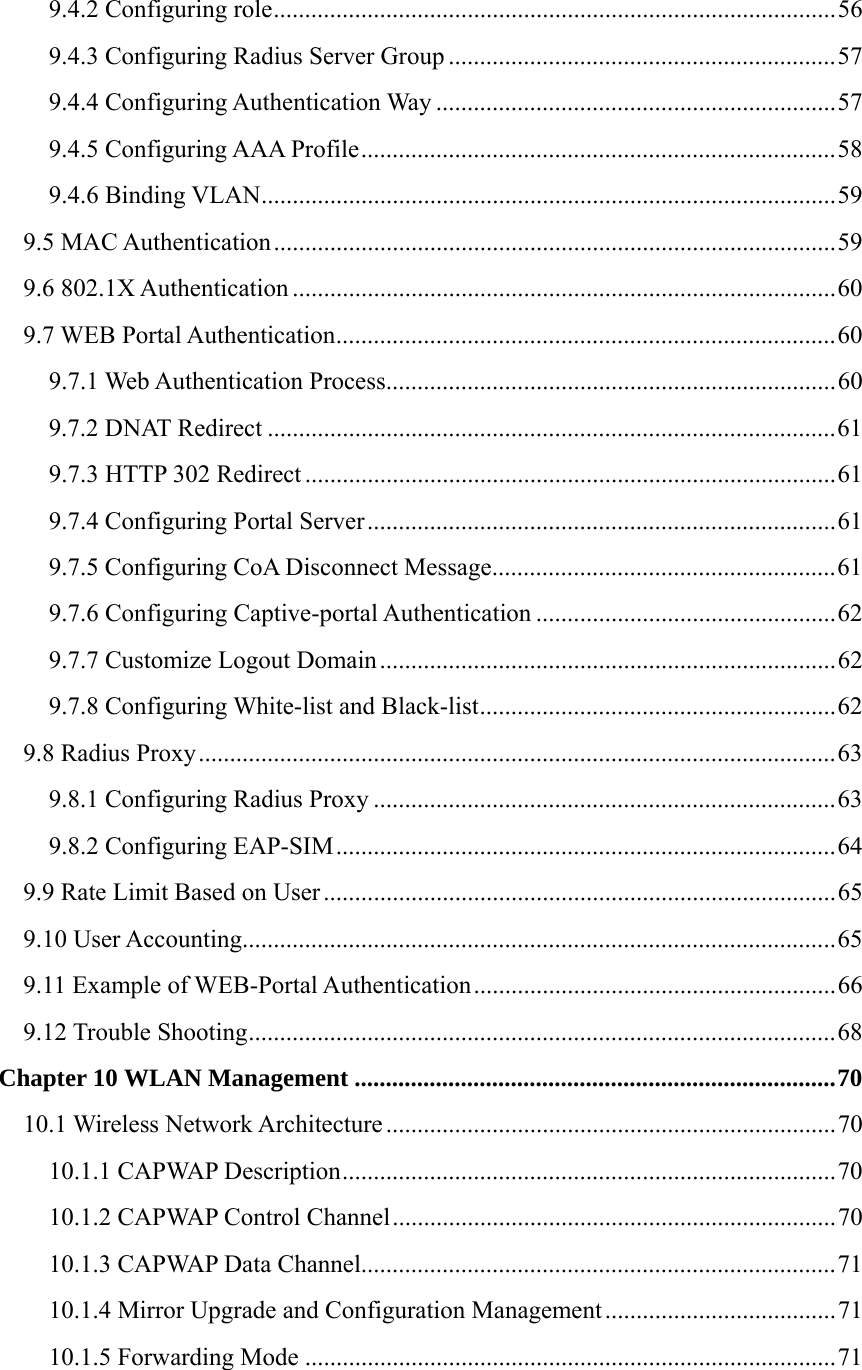
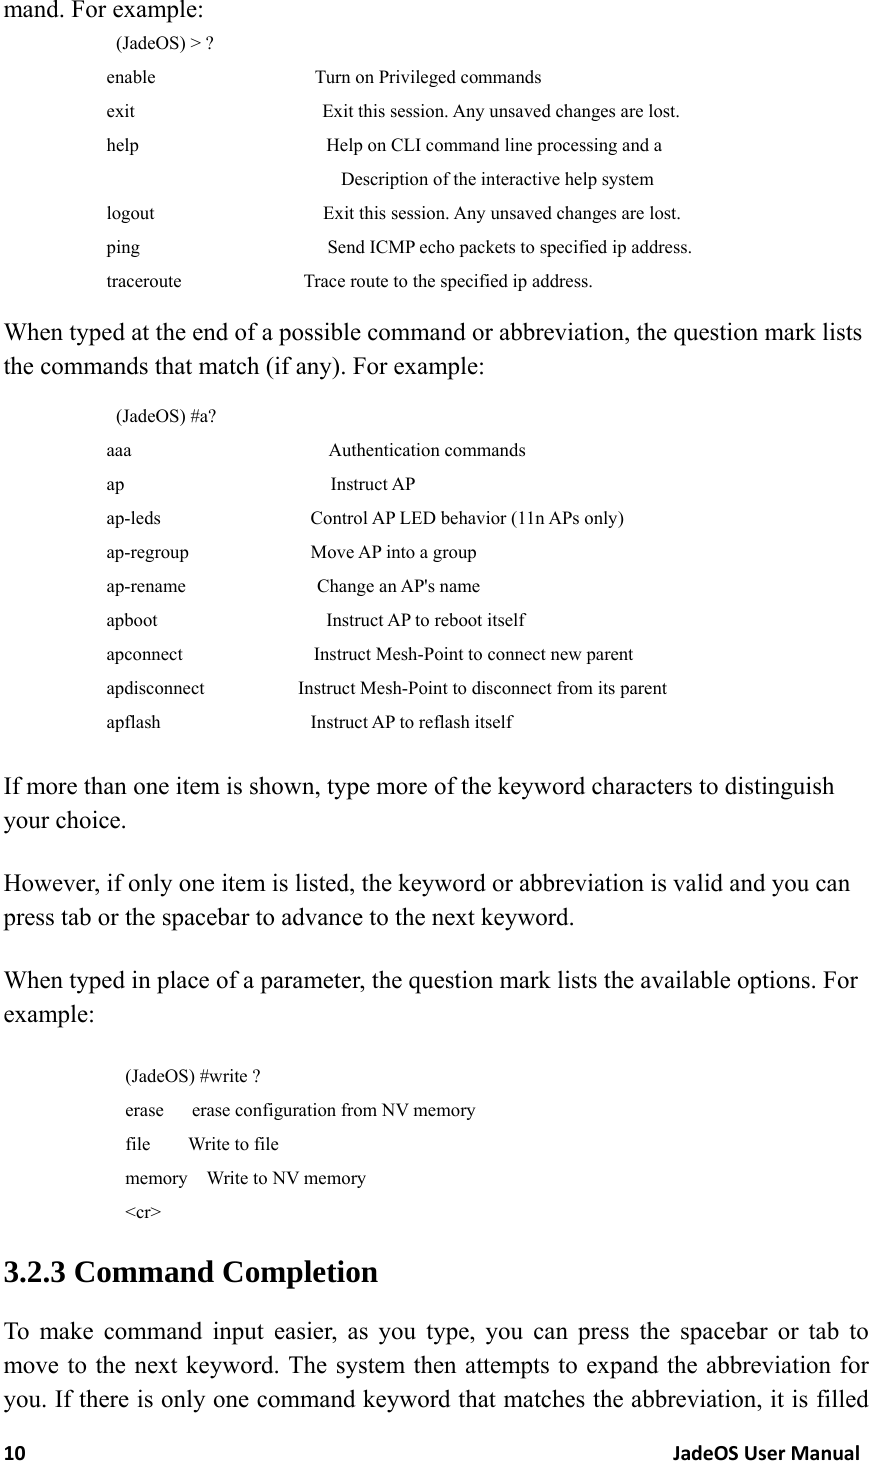
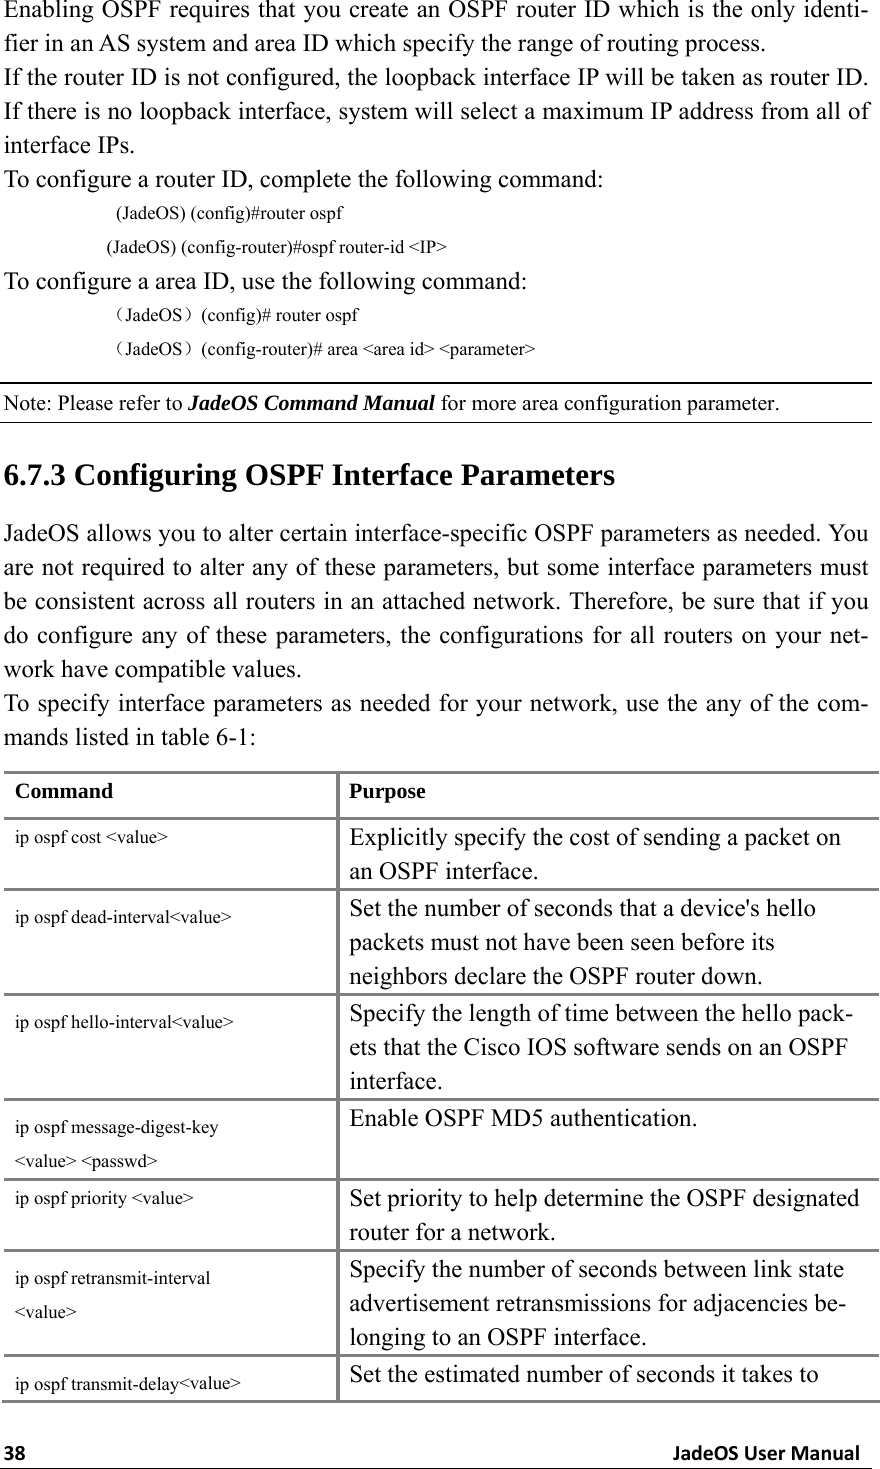
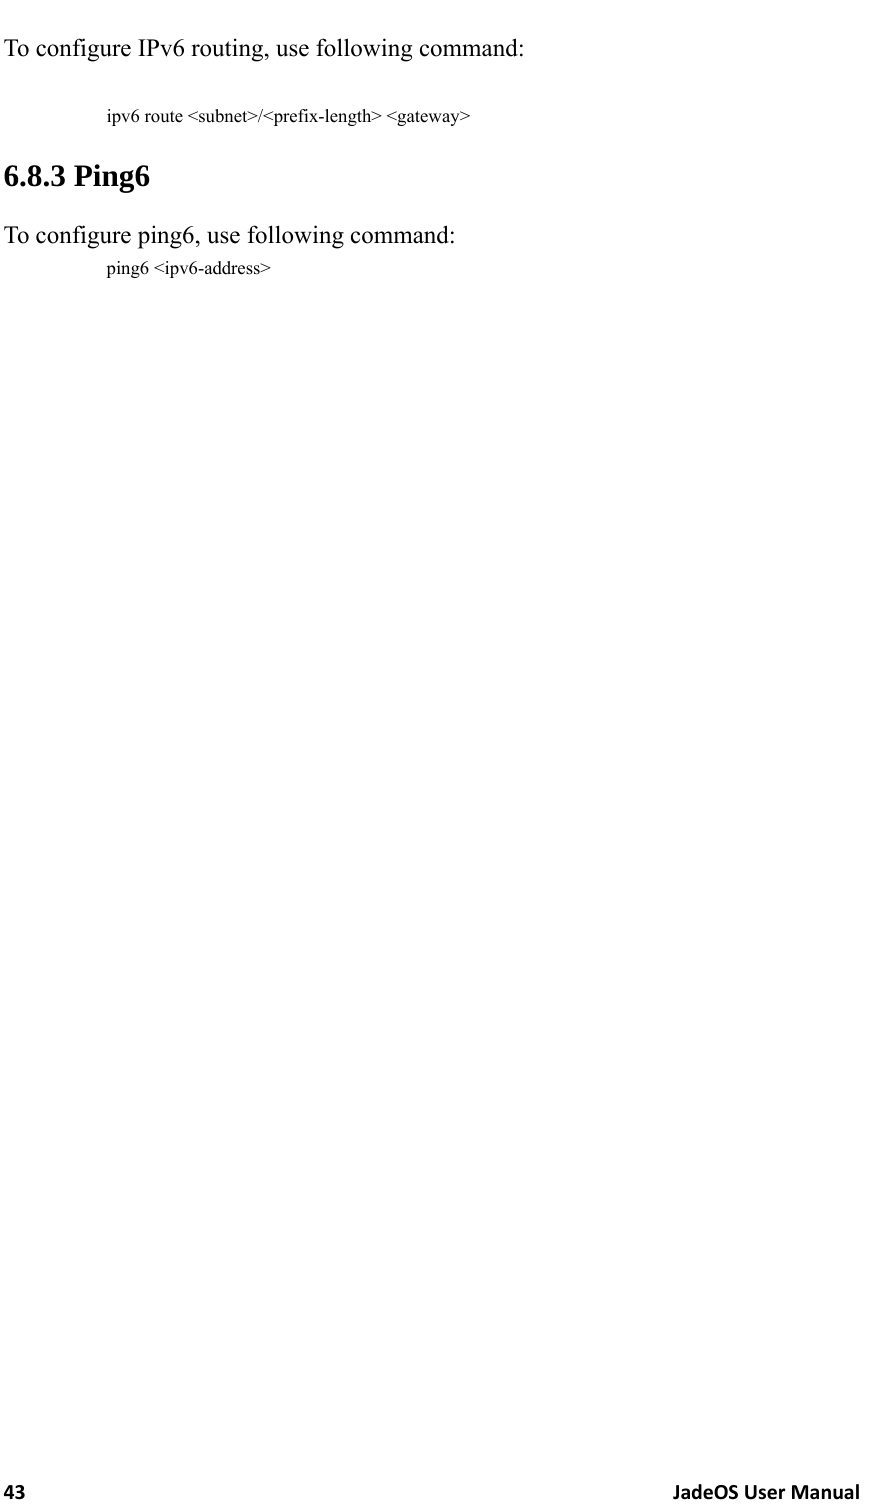
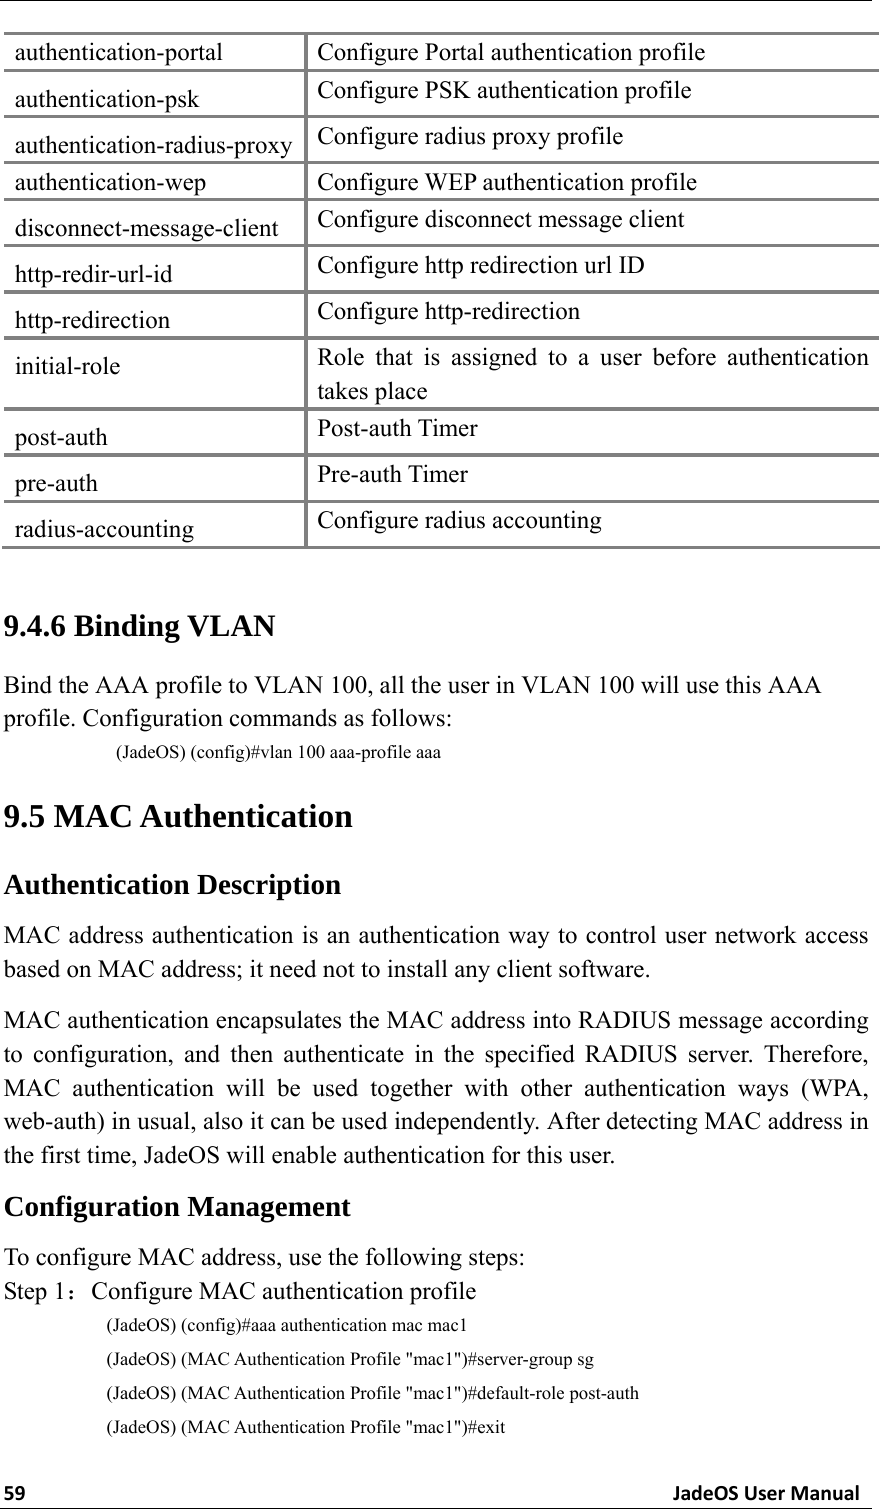
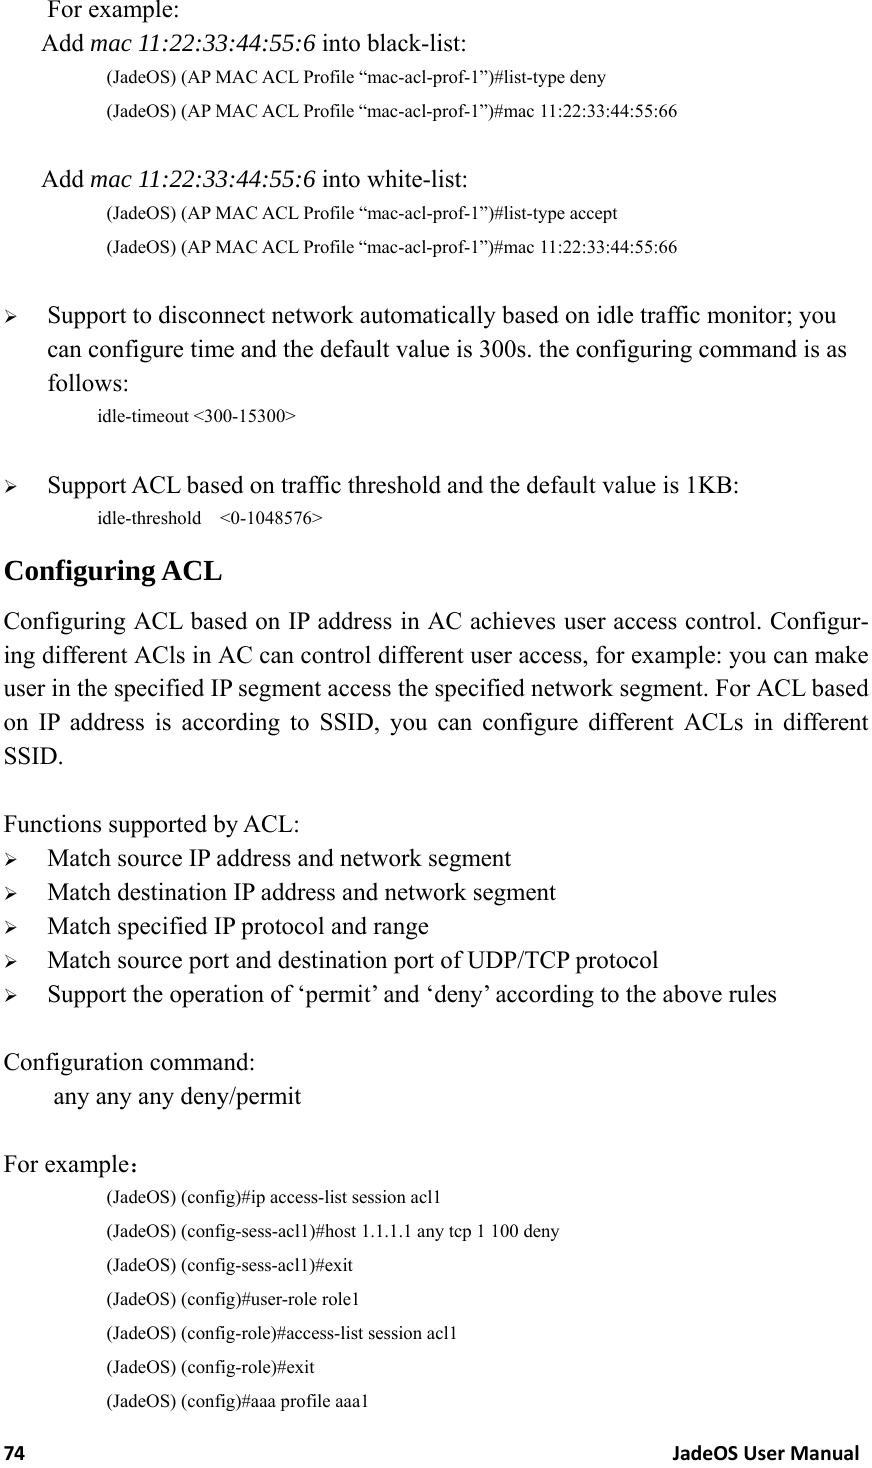
![16JadeOSUserManual (JadeOS) #who vty[0] connected from 192.168.16.21 vty[1] connected from 192.168.16.22 vty[2] connected from 192.168.16.19 vty[3] connected from 192.168.16.19 3.8 Configuring System Settings 3.8.1 Setting Hostname The factory default hostname is JadeOS. You can change the hostname using the fol-lowing command: hostname <hostname> For example: (JadeOS) (config) #hostname Gate (Gate) (config) # 3.8.2 Setting Country Code JadeOS are designed to manage the access points which are located in many countries with different requirements. The radios within the access points are assigned to a spe-cific regulatory domain at the factory. You can specify a particular country code for each country (such as FR for France or ES for Spain). Configuring a country code ensures that each radio’s broadcast frequency bands, interfaces, channels, and transmit power levels which are compliant with country-specific regulations. When the JadeOS start for the first time, the system will prompt you to enter the country code which country the JadeOS is located and you need to confirm the coun-try code by entering ‘yes’. 3.8.3 Setting Administrator Password To log in JadeOS, you must enter the administrator user account and password. The factory default user account is ‘admin’ and the password is “admins”. A prompt ‘Enter password for admin login’ will be displayed after you enter the ad-ministrator user account ‘admin’. You can enter the password that you want to set and retype it to confirm. Except for the administrator user, you can set 9 users. 3.8.4 Setting System Clock You can set the JadeOS system date and time manually using the configuration wizard when you start the JadeOS system for the first time. Greenwich Mean Time (GMT) is used as the standard for setting the time zone.](https://usermanual.wiki/SKSpruce-Technologies/WIA3200/User-Guide-2395330-Page-26.png)
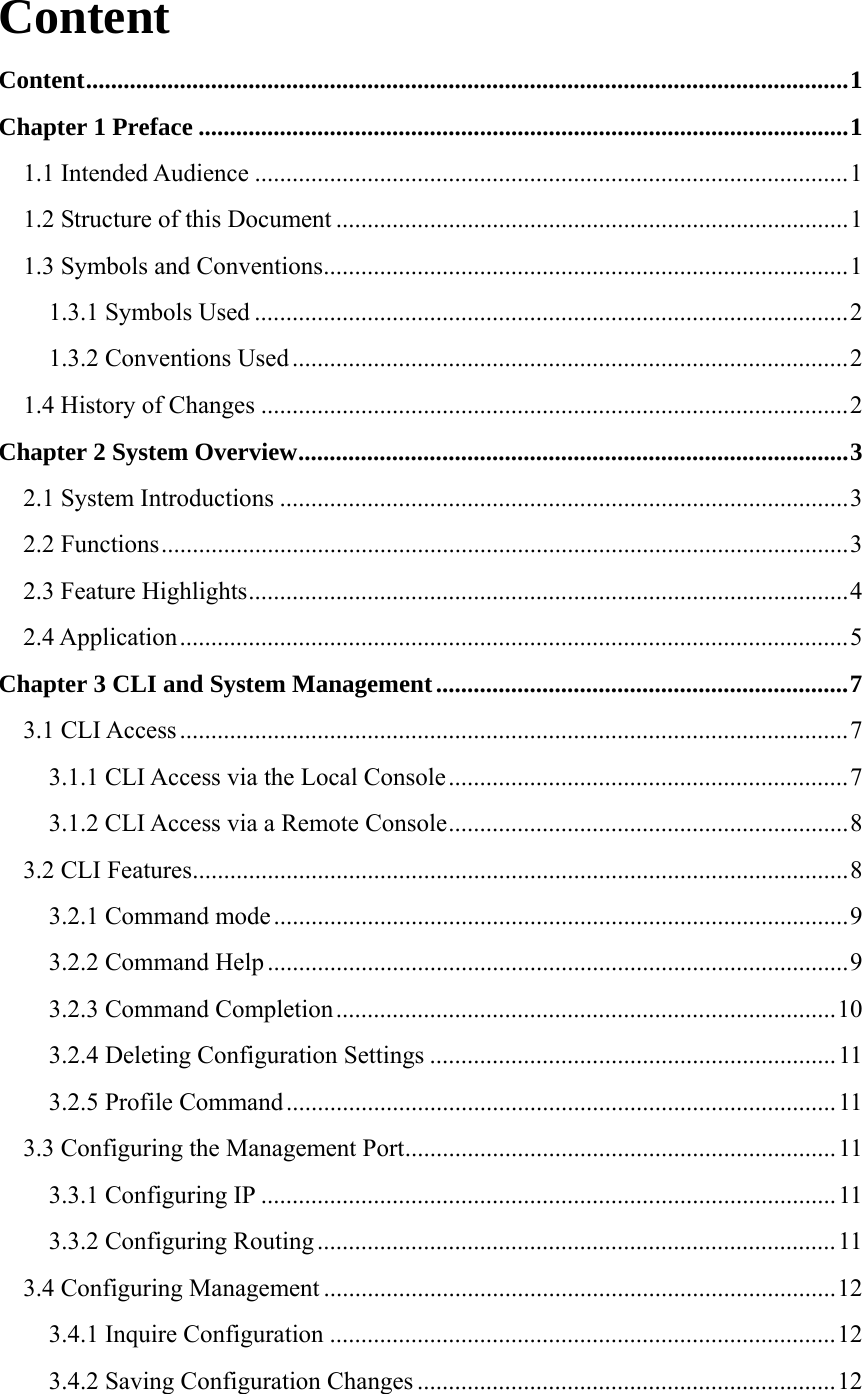
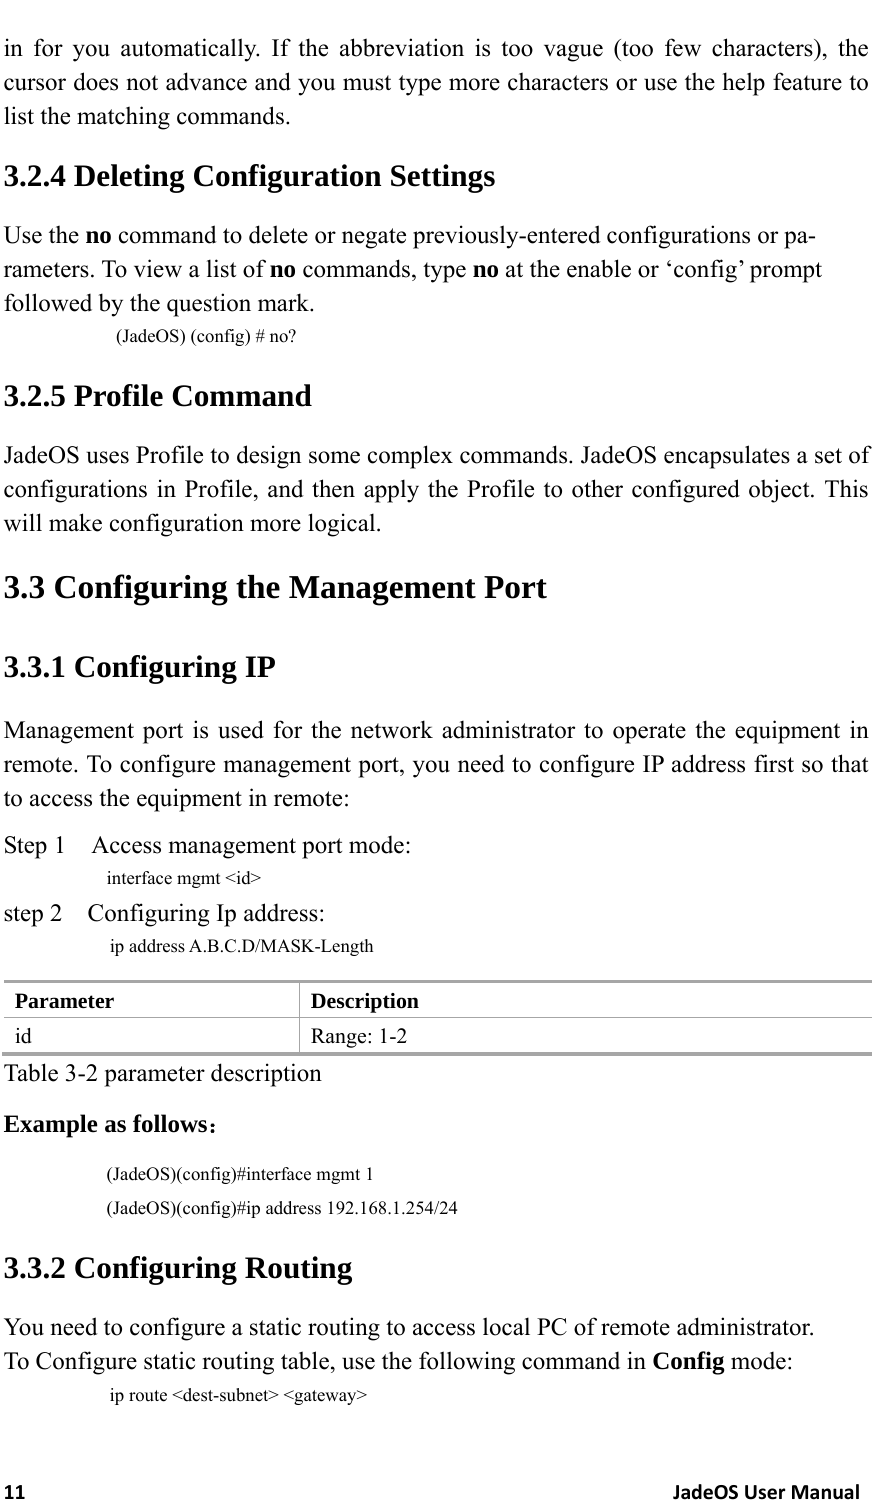
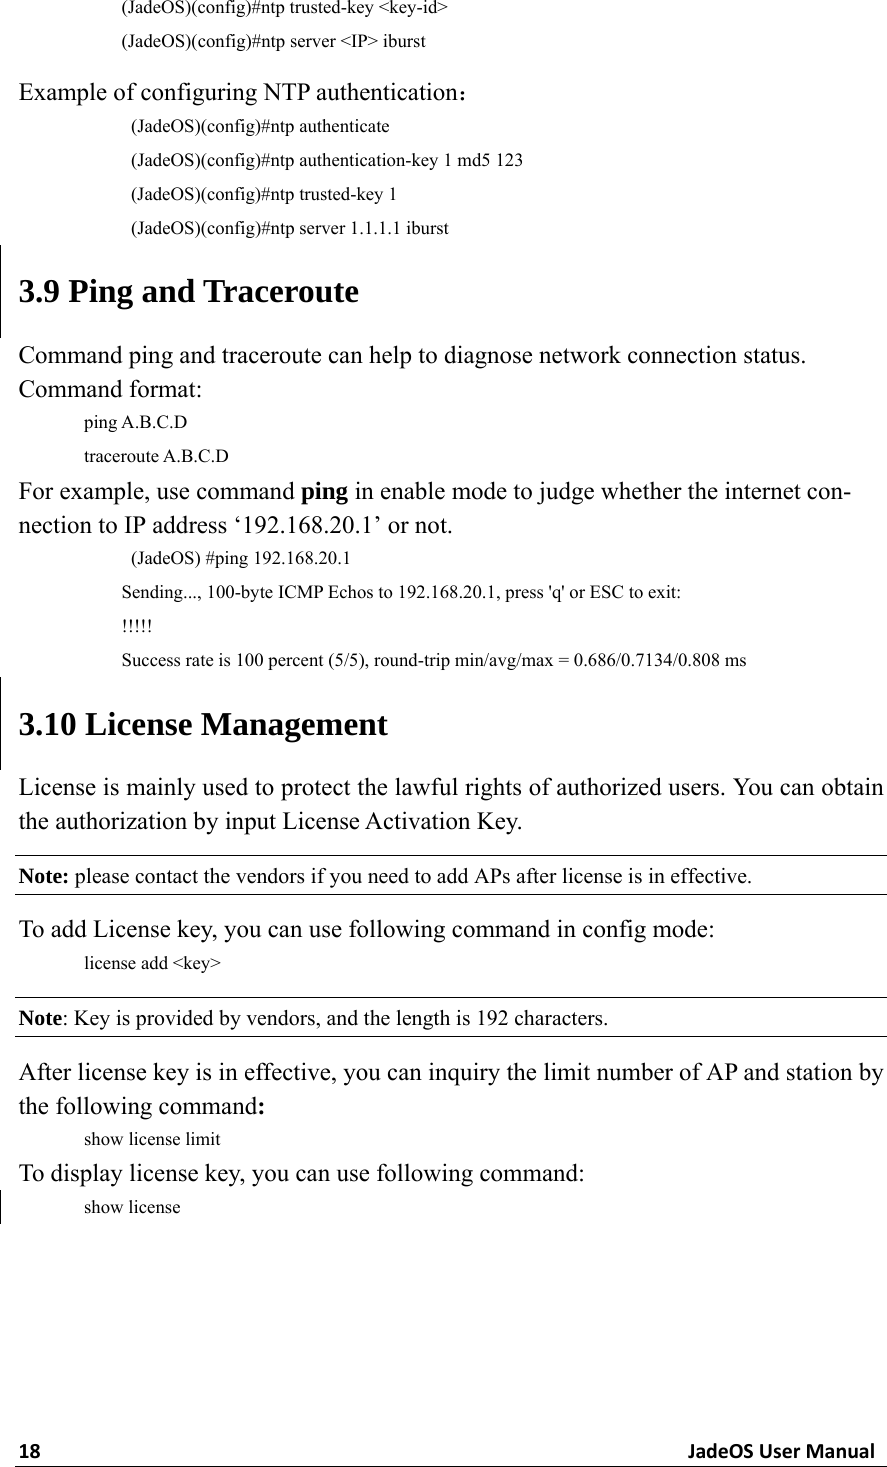
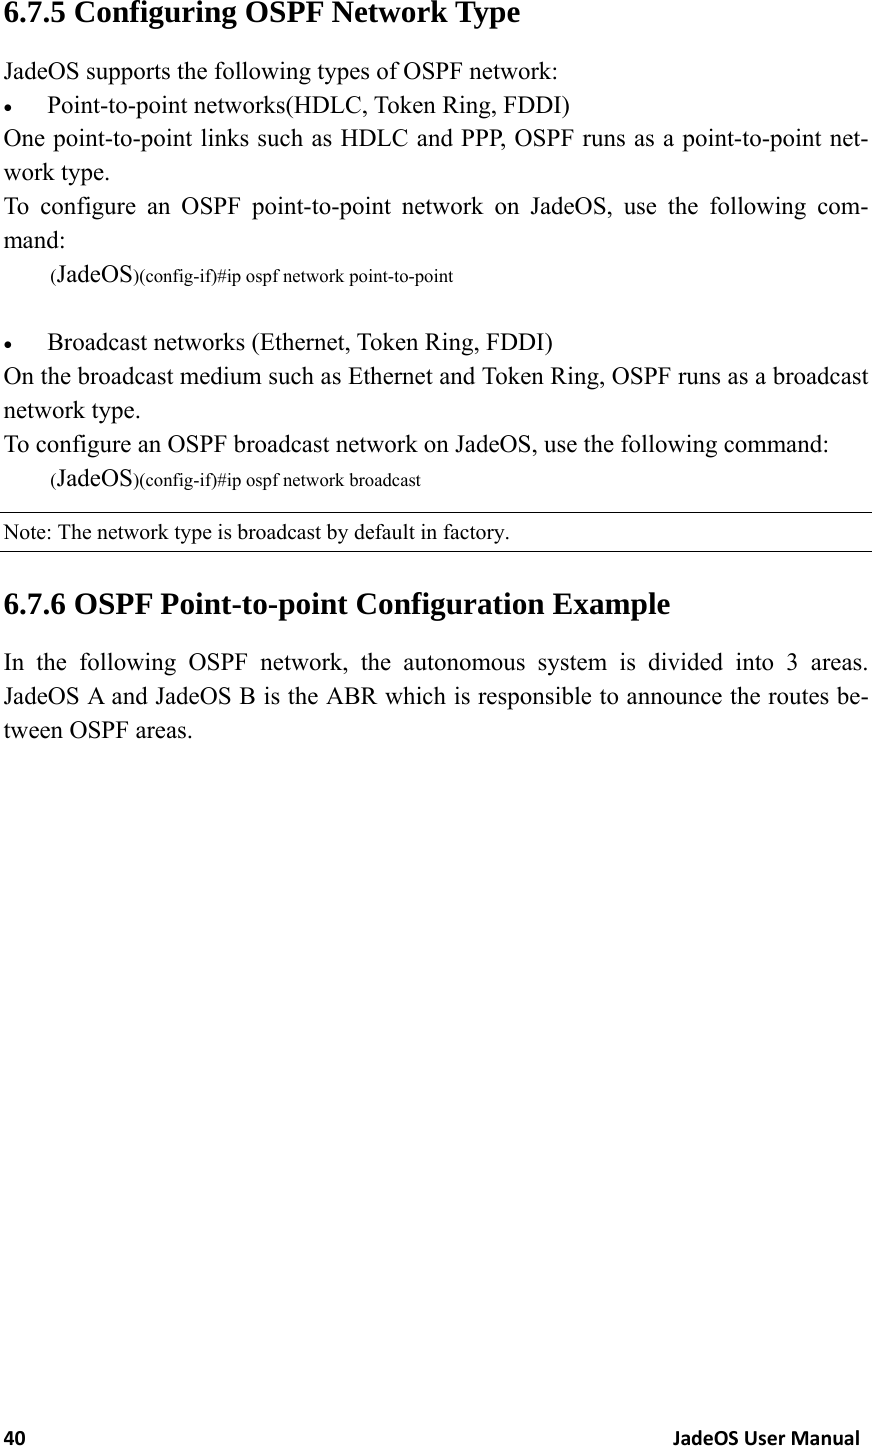
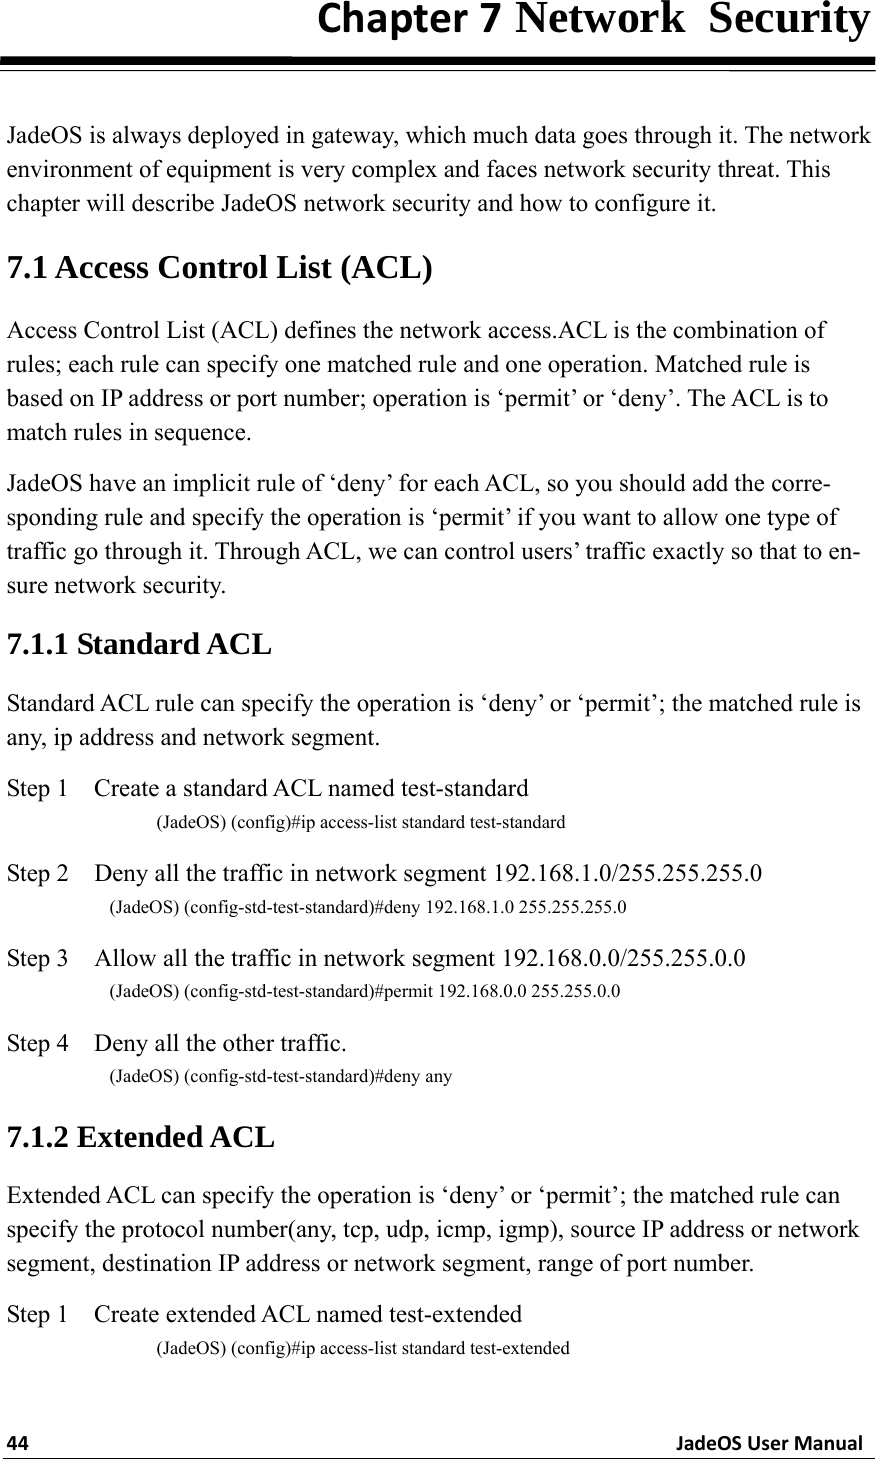
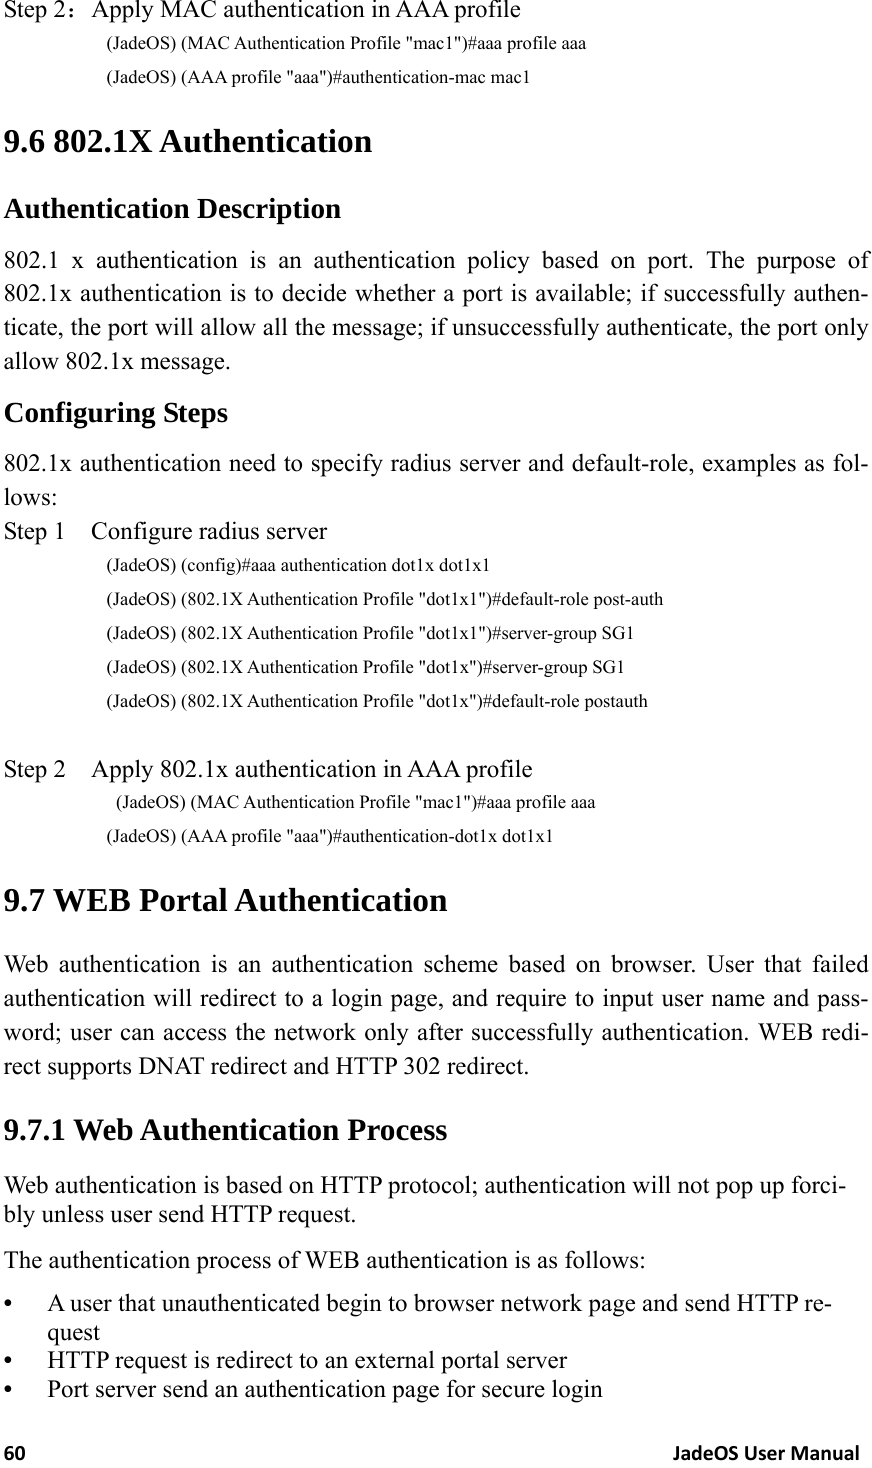
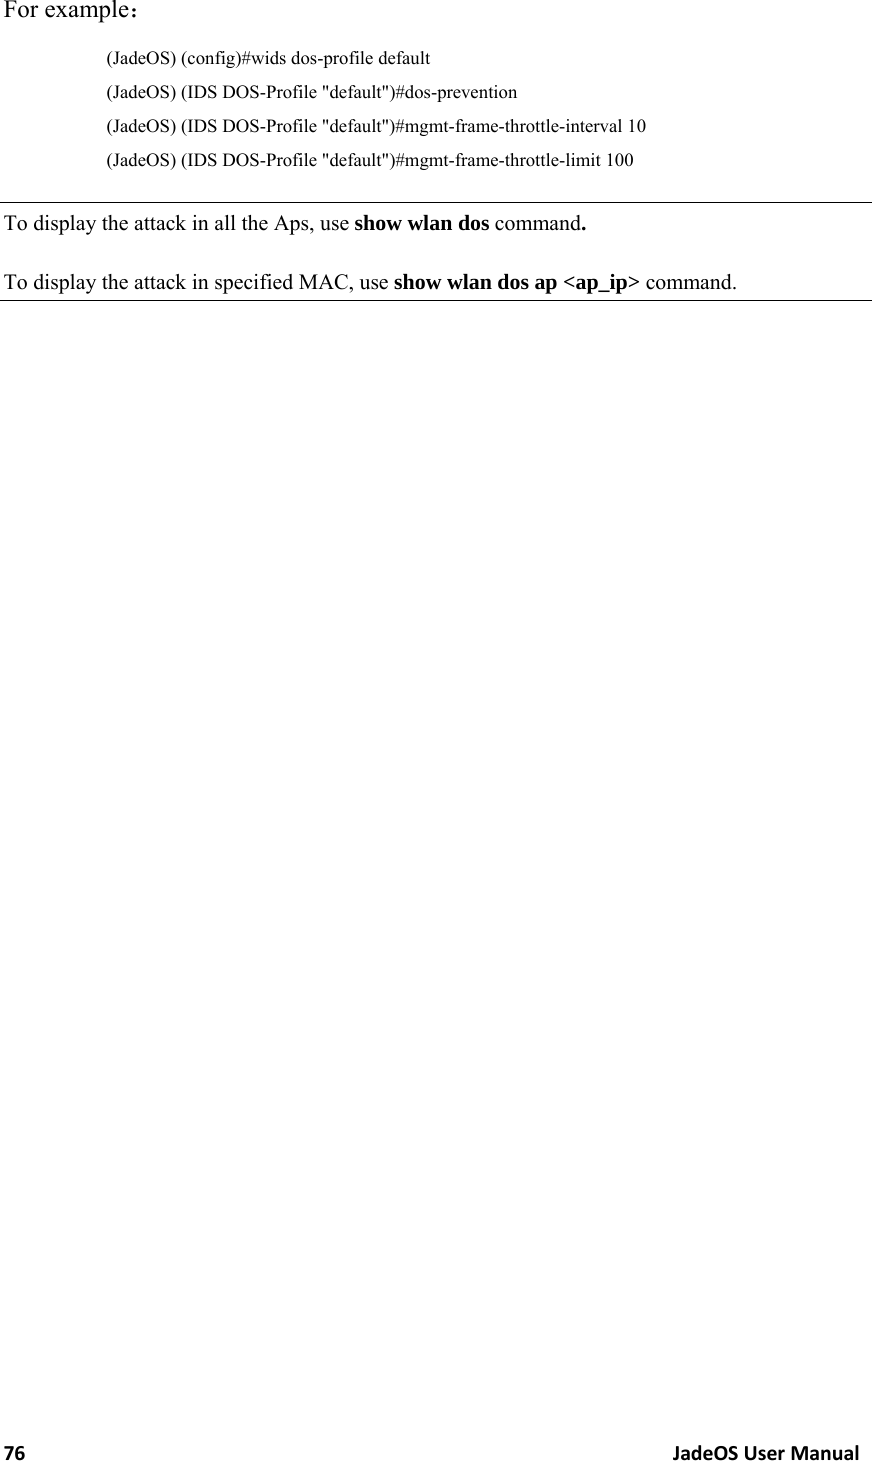
![17JadeOSUserManual¾ Setting the System Clock Manually To set the date and time, enter the following command in privileged mode: clock set <year><month><date><hour><minutes><seconds> To set the time zone and daylight savings time adjustment, enter the following com-mands in configure mode: clock timezone<WORD><-23 - 23> clock summer-time <zone> [recurring] <1-4><start day><start month><hh:mm> first<start day><start month><hh:mm> last<start day><start month><hh:mm> <1-4><end day><end month><hh:mm> first<end day><end month><hh:mm> last<end day><end month><hh:mm> [<-23 - 23>] ¾ Setting the System Clock with NTP You can use NTP (Network Time Protocol) to synchronize JadeOS to a central time source. 3.8.5 Clock Synchronization For each NTP server, you can optionally specify the NTP iburst mode for faster clock synchronization. The iburst mode sends up ten queries within the first minute to the NTP server. (When iburst mode is not enabled, only one query is sent within the first minute to the NTP server.) After the first minute, the iburst mode typically synchro-nizes the clock so that queries need to be sent at intervals of 64 seconds or more. You can add a NTP server using the following command: ntp server <ipaddr> [iburst] 3.8.6 Configuring NTP Authentication The NTP adds security to an NTP client by authenticating the server before synchro-nizing the local clock. NTP authentication works by using a symmetric key which is configured by the user. The secret key is shared by both JadeOS and an external NTP server. This helps identify secure servers from fraudulent servers. This example enables NTP authentication, add authentication secret keys into the da-tabase, and specifies a subset of keys which are trusted. It also enables the iburst op-tion. (JadeOS)(config)#ntp authenticate (JadeOS)(config)#ntp authentication-key <key-id> md5 <key-secret>](https://usermanual.wiki/SKSpruce-Technologies/WIA3200/User-Guide-2395330-Page-27.png)
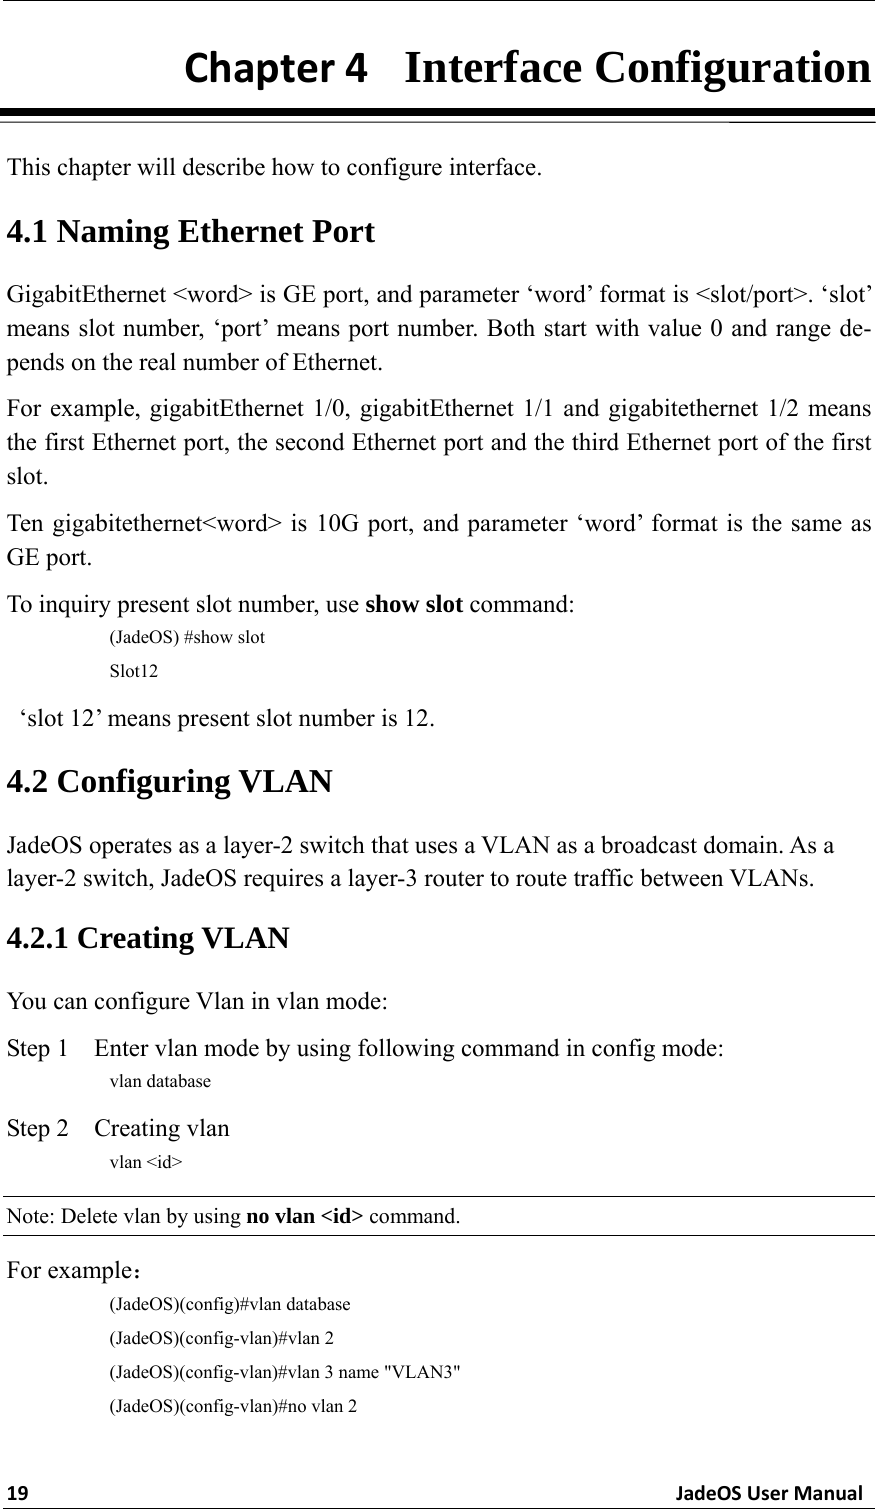
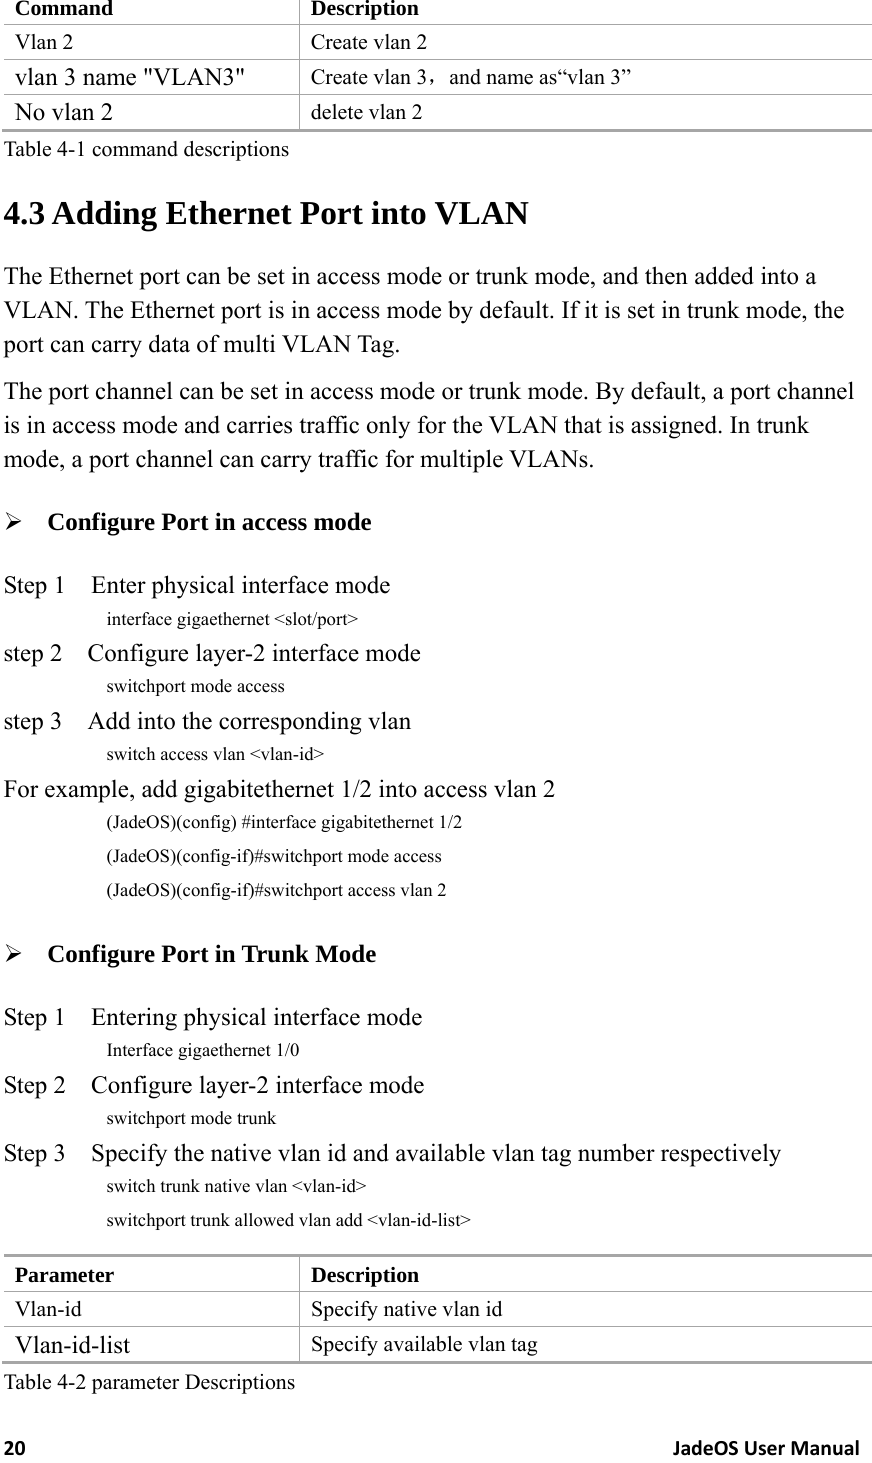
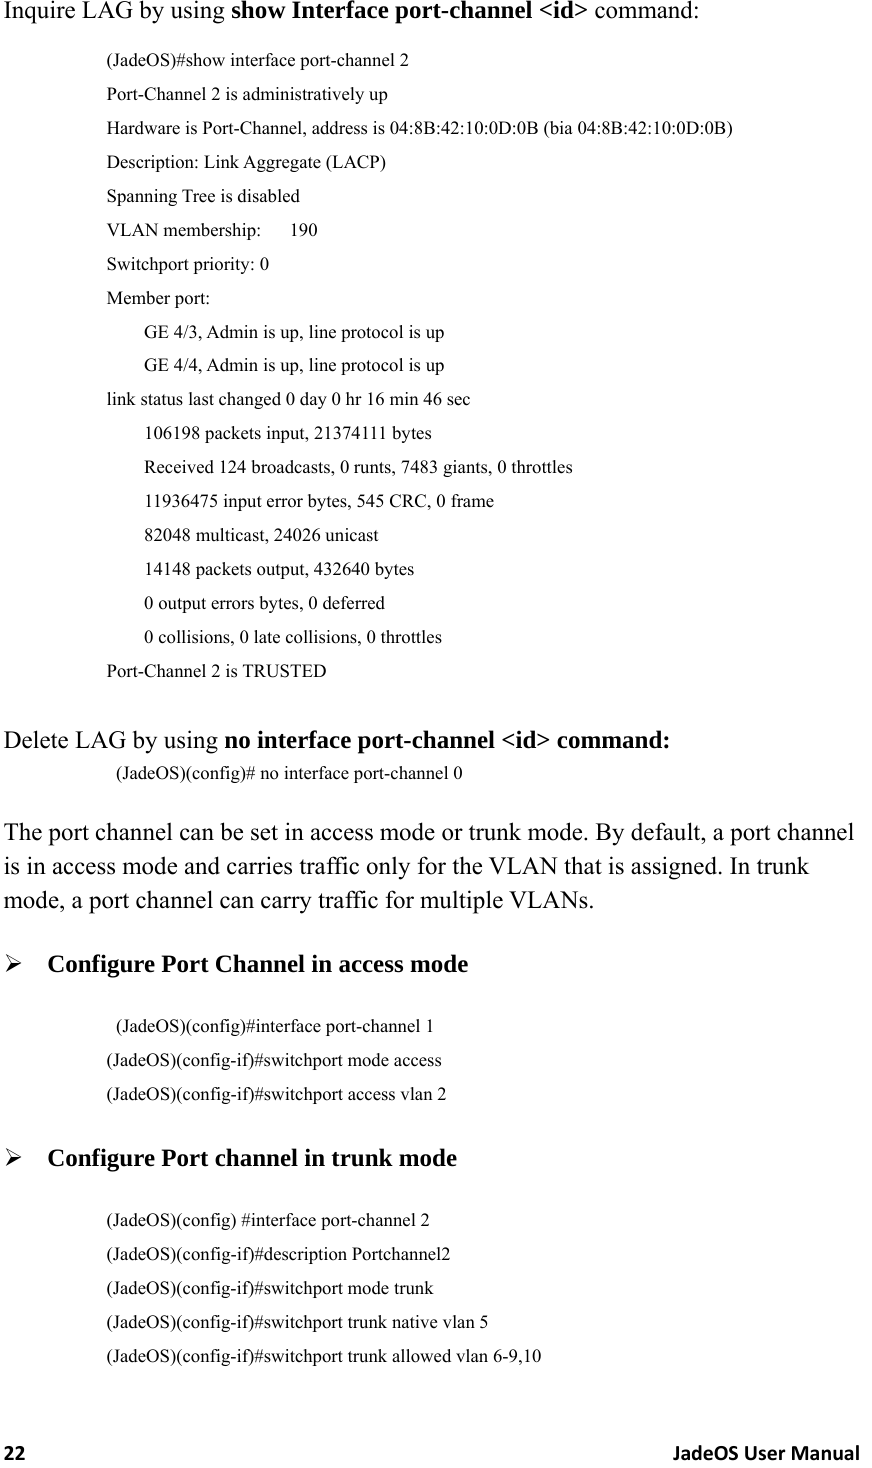
![21JadeOSUserManualFor example,add gigabitethernet 1/2 into access vlan 2 (JadeOS)(config) #interface gigabitethernet 1/2 (JadeOS)(config-if)#switchport mode trunk (JadeOS)(config-if)#switchport trunk native vlan 4 (JadeOS)(config-if)#switchport trunk allowed vlan add 5-10,11,12 4.4 Configuring VLAN Interface Command to configure VLAN Interface: interface vlan <1-4094> Note: you need to create VLAN first before configuring Vlan Interface. For example: (JadeOS) (config)#interface vlan 2 (JadeOS) (config-if)#ip address 10.0.0.1/24 4.5 Configuring Port Channel Link aggregation provides higher total bandwidth, auto-negotiation, and recovery by combining parallel network links between devices as a single link. Port-Channels provide a mechanism for aggregating multiple physical Ethernet links to a single logical Ethernet link. Port-Channels are typically used to increase availability and bandwidth, while simplifying the network topology. Step 1 Configure port-channel in config mode: Interface port-channel <id> Step 2 Add Ethernet port into aggregation group in port-channel interface mode: add [gigabitethernet <slot>/<port> | tengigabitethernet <slot>/<port>] Note: To delete one port, use following command: del [gigabitethernet <slot>/<port> | tengigabitethernet <slot>/<port>] Step 3 Configure balance arithmetic, now it supports arithmetic of active-standby and load-balance: (JadeOS)(config-if)#balance arithmetic active-stanby (JadeOS)(config-if)#balance arithmetic load-balance Examples : (JadeOS)(config)#interface port-channel 1 (JadeOS)(config-if)#add gigabitethernet 2/1 (JadeOS)(config-if)#balance arithmetic active-stanby (JadeOS)(config-if)#balance arithmetic load-balance](https://usermanual.wiki/SKSpruce-Technologies/WIA3200/User-Guide-2395330-Page-31.png)
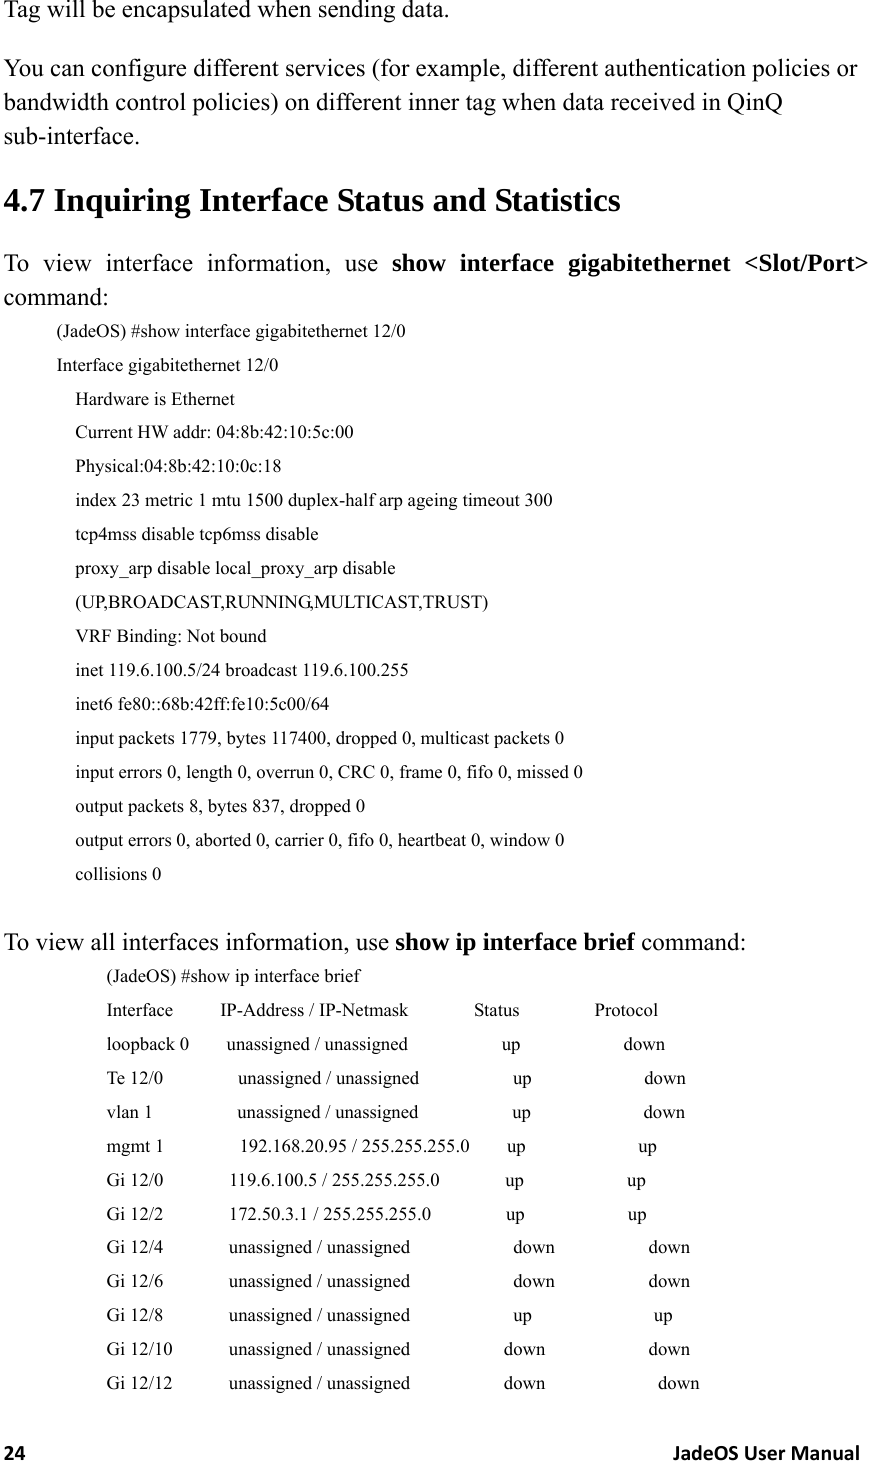
![23JadeOSUserManual4.6 Configuring QinQ 4.6.1 Configuring QinQ Defined in IEEE802.1Q, VLAN Tag domain only uses 12 bytes to indicate VLAN ID, so equipment can support up to 4094 VLANs. Some scenarios, especially in metro-politan area network, require a separate VLAN for customers. Therefore, 4094 VLAN cannot meet the requirement. The 802.1QinQ expands VLAN space by using a VLAN-in-VLAN hierarchy and tagging the tagged packets. At the same time, QinQ makes SP use one VLAN supports the entire customer's VLANs. SP provides differ-ent service for different customers by decapsulating inner and outer vlan tag of users’ message. Configuring QinQ by using following command: Step 1 Create QinQ sub-interface in physical interface: interface gigabitethernet/tengigabitethernet <slot>/<port>.<subif> parameter description slot Slot number,range: 1-13 port Port number subif Sub interface,range: 1-16760836 table 4-3 Parameter Description For example, create QinQ sub-interface gigabitethernet 1/0.1 in Ethernet interface gi-gabitethernet 1/0: interface gigabitethernet 1/0.1 step 2 Specify QinQ inner and outer tag encapsulation dot1q <outer-vlan-id> second-dot1q <vlan-id|[begin-end]> Parameter Description out-vlan-id Single tag number,range: 1-4094 vlan-id|[begin-end] Single tag number, range: 1-4094; or range, for example: 100-200 table 4-4 Parameter Description For example: create a QinQ interface that outer tag is 1000 and inner tag range is 100-200, and configure IP address as a layer-3 interface. (JadeOS)(config)#interface gigabitethernet 10/0.1 (JadeOS)(config-subif)# encapsulation dot1q 1000 second-dot1q 100-200 (JadeOS)(config-subif)#ip address 1.1.1.1/32 The sub-interface can be used as a layer-3 routing sub-interface. You can configure IP address and routing in it. 2 QinQ Tag will be peeled when receiving data, and 2 QinQ](https://usermanual.wiki/SKSpruce-Technologies/WIA3200/User-Guide-2395330-Page-33.png)

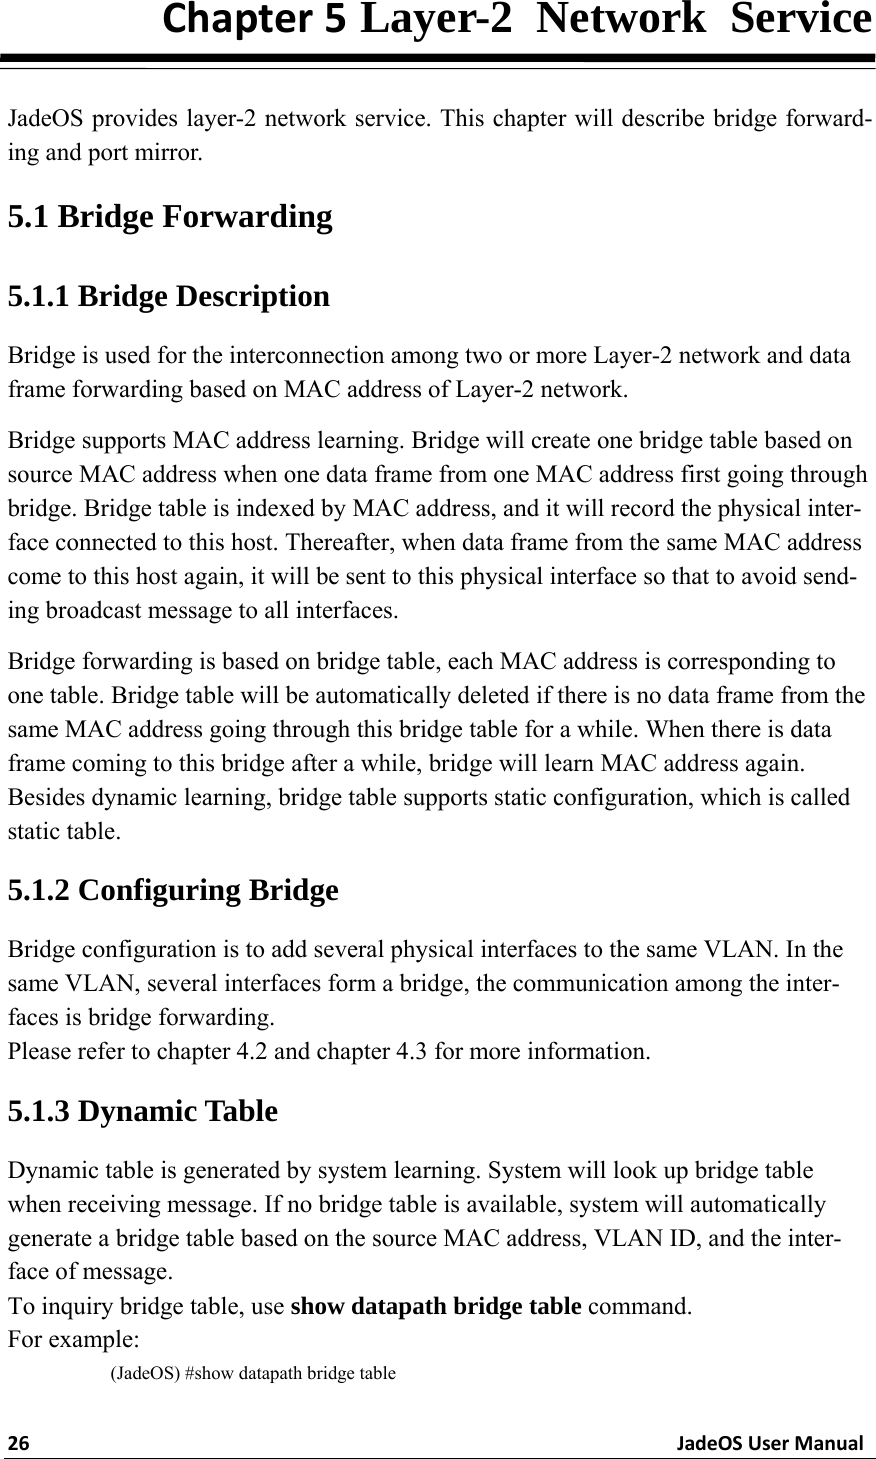
![27JadeOSUserManualDatapath Bridge Table Entries ----------------------------- Flags: P - Permanent, D - Deny, M - Mobile, L - Local MAC VLAN Assigned VLAN Destination Flags Aging-time -------------- ---- ------------- --------- ----- ------- 04:8B:42:12:00:81 5 5 Local PL 04:8B:42:12:0A:81 85 85 Local PL 04:8B:42:12:0A:A1 86 86 Local PL 04:8B:42:12:0A:C1 87 87 Local PL 04:8B:42:12:0A:E1 88 88 Local PL 5.1.4 Bridge Aging The bridge aging time is 15 minutes by default. If no traffic in 15 minutes, bridge ta-ble will be aging. 5.1.5 Static Table Static bridge table will not be aging. To configure static table, use following command in config mode: mac-address-table static <mac address> [discard/forward] gigabitethernet <slot/port> Vlan <vlan-id> For example: (JadeOS)(config)#mac-address-table static 04:8b:42:22:05:6f discard gigabitethernet 1/0 vlan 2 Note: To delete bridge table, use following command in config mode: no mac-address-table static <mac address> <discard/forward> <gigabitethernet> <vlan> 5.2 Port Mirror Mirror mode enables you to duplicate to another port all of the traffic originating from or terminating at a single client device or access point. It is useful in diagnosing spe-cific network problems. Mirror mode should be enabled only on an unused port as any connections to this port become unresponsive. You can configure port mirroring using the following commands: (config)#interface{tengigabitethernet|gigabitethernet} <slot>/<port> (config-if)#mirror interface vlan <VLAN ID> direction {both | receive | transmit}](https://usermanual.wiki/SKSpruce-Technologies/WIA3200/User-Guide-2395330-Page-37.png)
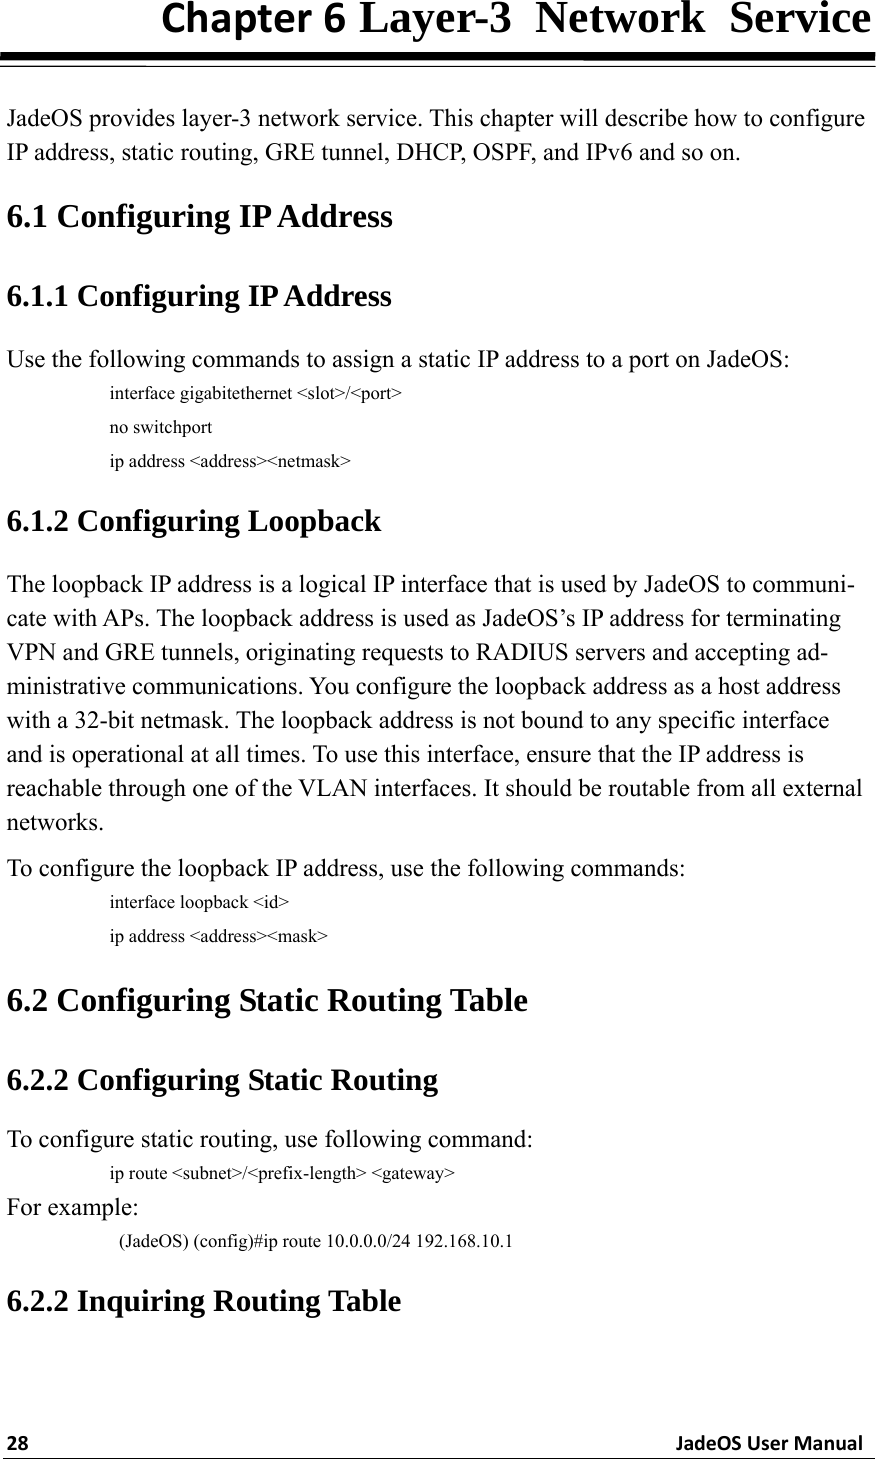
![29JadeOSUserManualTo inquiry system routing table, including direct routing and static configuring rout-ing, use show ip route command. (JadeOS) #show ip route Codes: K - kernel, C - connected, S - static, R - RIP, B - BGP O - OSPF, IA - OSPF inter area N1 - OSPF NSSA external type 1, N2 - OSPF NSSA external type 2 E1 - OSPF external type 1, E2 - OSPF external type 2 i - IS-IS, L1 - IS-IS level-1, L2 - IS-IS level-2, ia - IS-IS inter area * - candidate default S 10.2.20.0/24 [1/0] via 192.168.20.1, mgmt 1 S 18.0.0.0/8 [1/0] via 192.168.20.1, mgmt 1 C 80.1.0.0/16 is directly connected, vlan 80 C 119.6.100.0/24 is directly connected, Gi 12/0 S 119.6.200.0/24 [1/0] via 119.6.100.1, Gi 12/0 C 172.50.3.0/24 is directly connected, Gi 12/2 S 192.168.0.0/16 [1/0] via 192.168.20.1, mgmt 1 C 192.168.20.0/24 is directly connected, mgmt 1 6.3 Configuring ARP JadeOS supports configuring static ARP table. Address Resolution Protocol (ARP) is a TCP/IP protocol used for resolution of net-work layer IP address into link layer MAC address, a critical function in multi-ple-access networks. ARP was defined by RFC 826 in 1982. Besides the basic ARP function, JadeOS also support local proxy ARP and DHCP au-thorized ARP. It is effectively avoided ARP cheat and attack by DHCP Snooping, which enhances the security of public wireless LANs communication. 6.3.1 Configuring Static ARP Table Dynamic ARP learning is enabling in JadeOS port by default. To add static ARP table, use following command: arp <ipaddr> <macaddr> To delete ARP cache entry, use no arp command: no arp <ipaddr> <macaddr> For example: (JadeOS) (config) #arp 10.1.2.23 00:19:87:0D:5C:2C 6.3.2 Inquiring ARP Table](https://usermanual.wiki/SKSpruce-Technologies/WIA3200/User-Guide-2395330-Page-39.png)

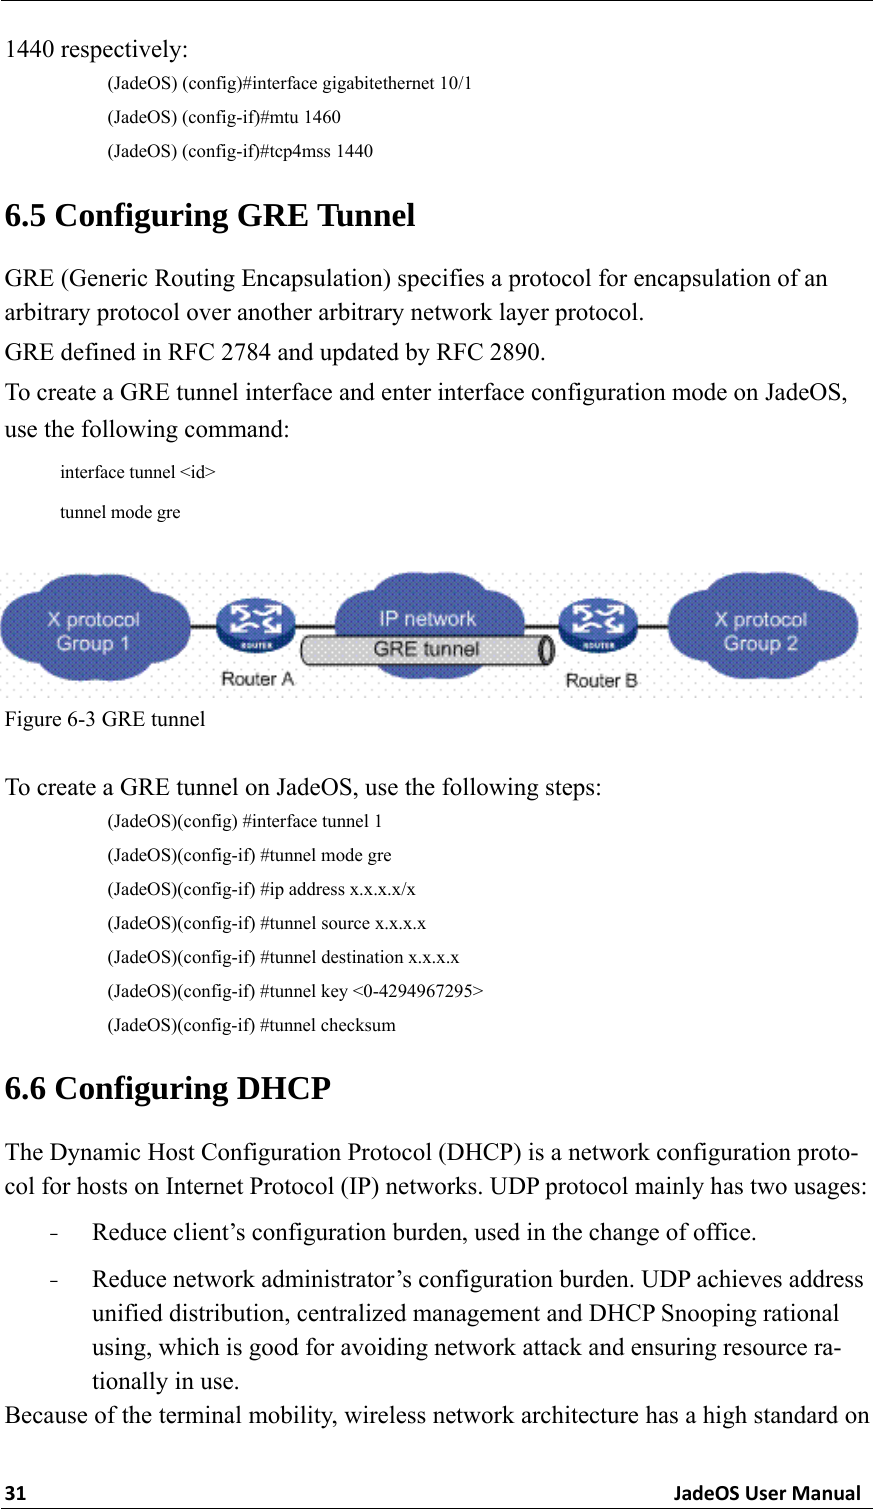
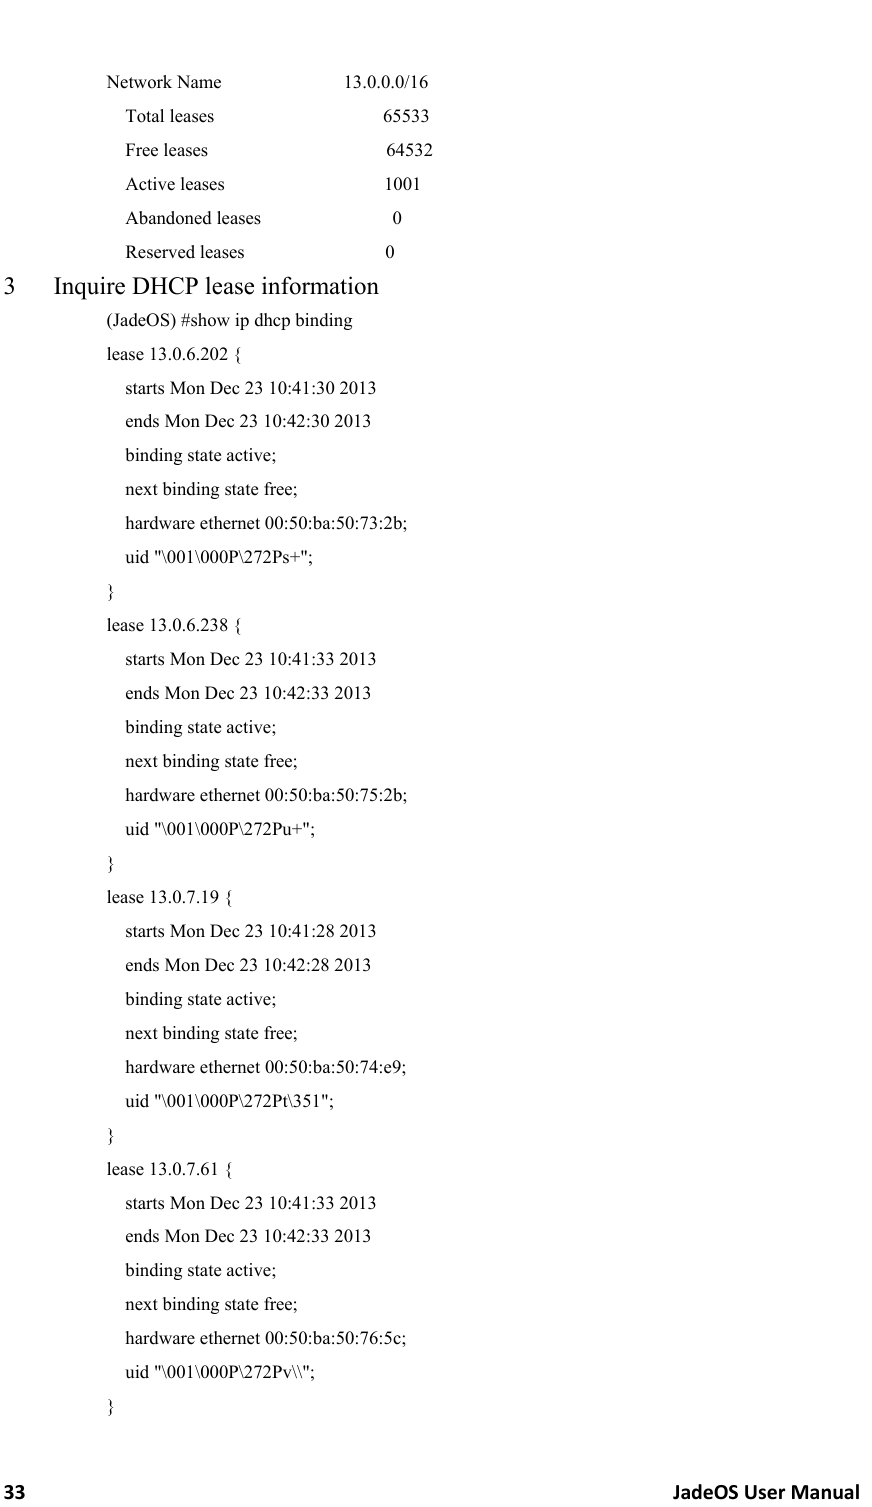
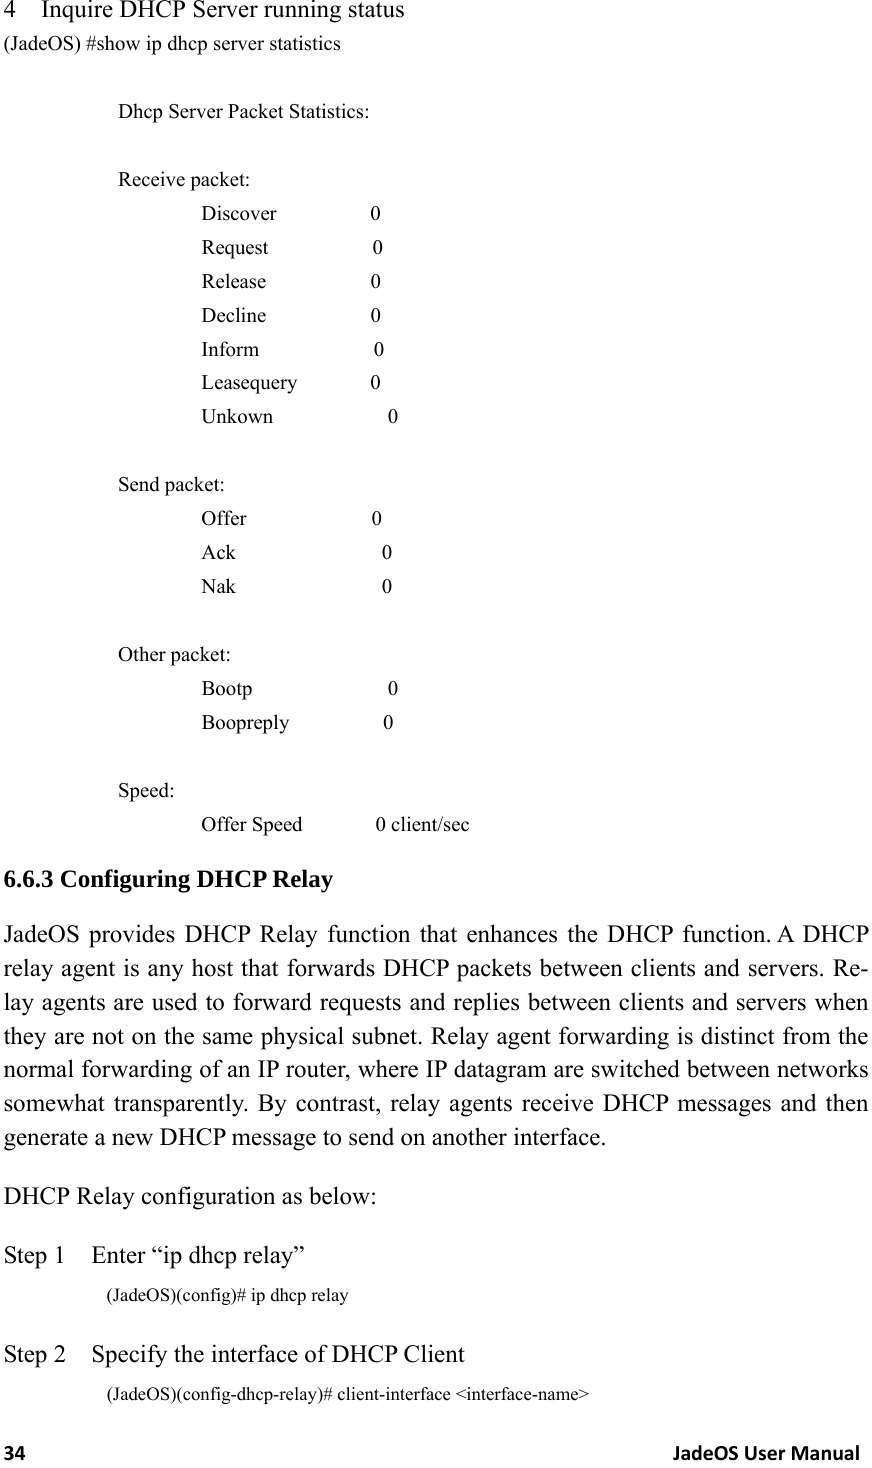
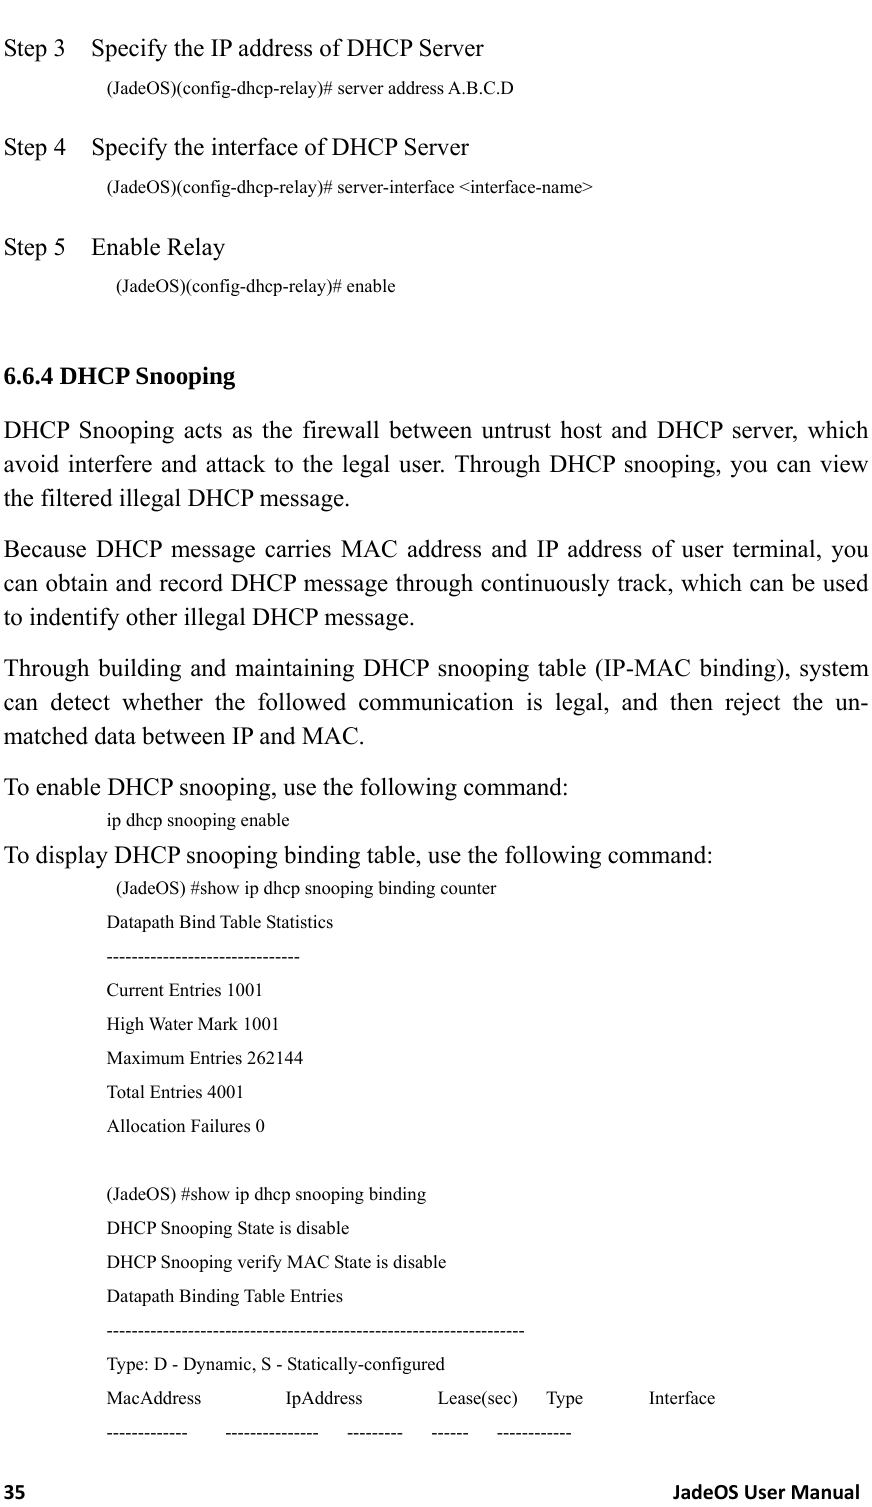
![32JadeOSUserManualDHCP protocol. It still has high standard on the scale of address pool and address dis-tribution rate in SP environment. 6.6.1 Configuring DHCP Server To configure DHCP server, use following command: Step 1 Create one or more DHCP address pool: ip dhcp pool <pool-name> Step 2 Specify the gateway of DHCP client default-router A.B.C.D Step 3 Specify the DNS server of DHCP client dns-server A.B.C.D Step 4 Specify the lease time Lease <days> <hours> <minites> <seconds> Step 5 Specify the range of address pool network <subnet> <mask> Step 6 (optional) DHCP issue ARP table that combined with IP and MAC address of client to the system. update arp Step 7 (optional) Specify the reserved IP address or IP range, which is the IP address not assigned to the client. ip dhcp excluded-address <start-address> [<end-address>] Step 8 Enable DHCP service service dhcp 6.6.2 Inquiring DHCP Server Status 1 Inquire DHCP Configuration (JadeOS) #show ip dhcp database DHCP enabled ping-check false; broadcast; # vlan409 subnet 172.40.9.0 netmask 255.255.255.0 { lease-time 1 days,0 hours, 0 minutes, 0 seconds; option routers 172.40.9.1; range 172.40.9.2 172.40.9.254; } 2 Inquire DHCP lease statistics (JadeOS) #show ip dhcp statistics](https://usermanual.wiki/SKSpruce-Technologies/WIA3200/User-Guide-2395330-Page-42.png)
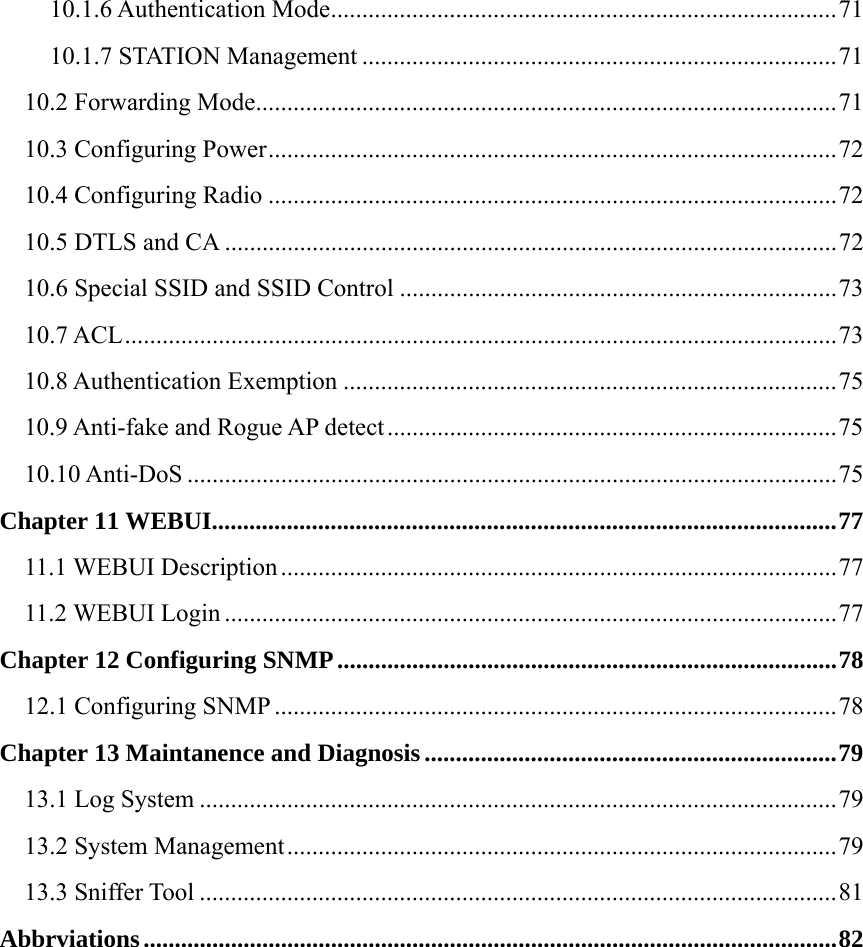
![39JadeOSUserManualtransmit a link state update packet on an OSPF in-terface. Table 6-1 OSPF Interface Parameter 6.7.4 Configuring OSPF Area JadeOS OSPF supports the following types of area: z Stub area Stub areas are areas in to which information on external routes is not sent. Instead, there is a default external route generated by the area border router, into the stub area for destinations outside the autonomous system. To take advantage of the OSPF stub area support, default routing must be in the stub area, you can configure no-summary on the ABR to prevent it from sending summary link advertisement into the stub area. To configure a stub area on JadeOS, use the following command: area <area-id> stub [no-summary] For example, configure area 1.1.1.1 as stub area on JadeOS: (JadeOS) (config) #router ospf (JadeOS) (config-router) # area 2 stub no-summary z NSSA(Not So Stubby Area) area NSSA area is similar to OSPF stub area. NSSA does not flood Type 5 (External Link State Advertisements)LSA form the core into the area, but it has the ability of import-ing AS external routes in a limited fashion within the area. NSSA allows importing of Type 7 AS external routes within NSSA area by redistribution. These Type 7 LSAs are translated into Type 5 LSAs by NSSA ABR which are flooded throughout the whole routing domain. To configure a NSSA area on JadeOS, use the following command: area <area-id> nssa [ no-redistribution ] [no-summary ] [default-information-originate] Example 1, configure area 1.1.1.1 as totally NSSA area on JadeOS: (JadeOS)(config)# router ospf (JadeOS) (config-router) # area 1 nssa no-summary Example 2, configure area 1.1.1.1 as non-totally NSSA area, not importing type-7 ex-ternal routes to the area: (JadeOS)(config)# router ospf area 1.1.1.1 (JadeOS)(config-router) # nssa no-redistribution Example 3, configure area 1.1.1.1as non-totally NSSA area, importing a default route to the area: (JadeOS)(config)# router ospf (JadeOS)(config-router) # area 1 nssa default-information-originate](https://usermanual.wiki/SKSpruce-Technologies/WIA3200/User-Guide-2395330-Page-49.png)
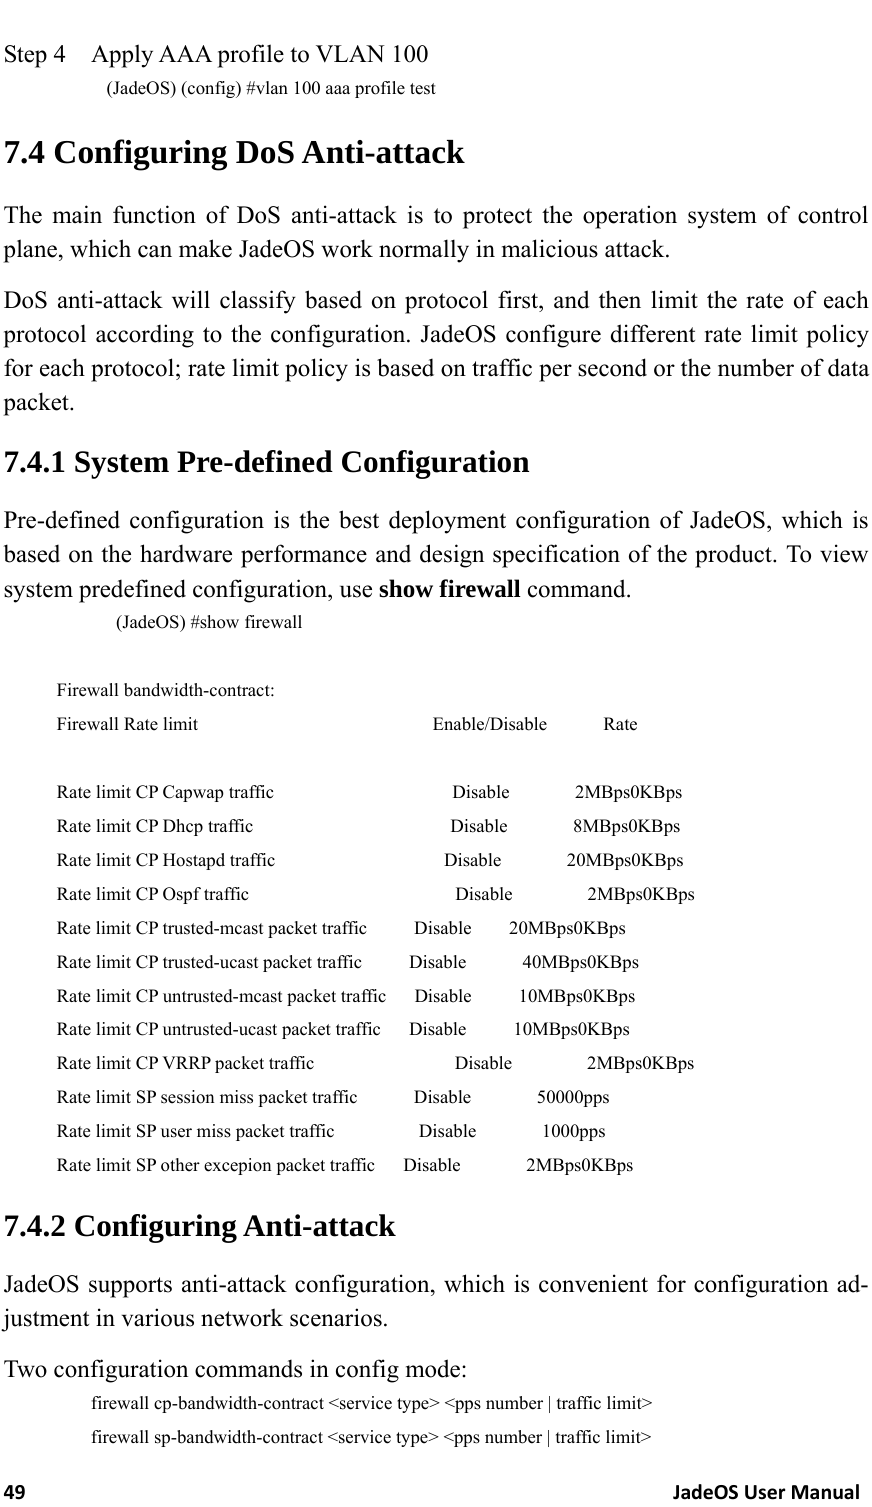
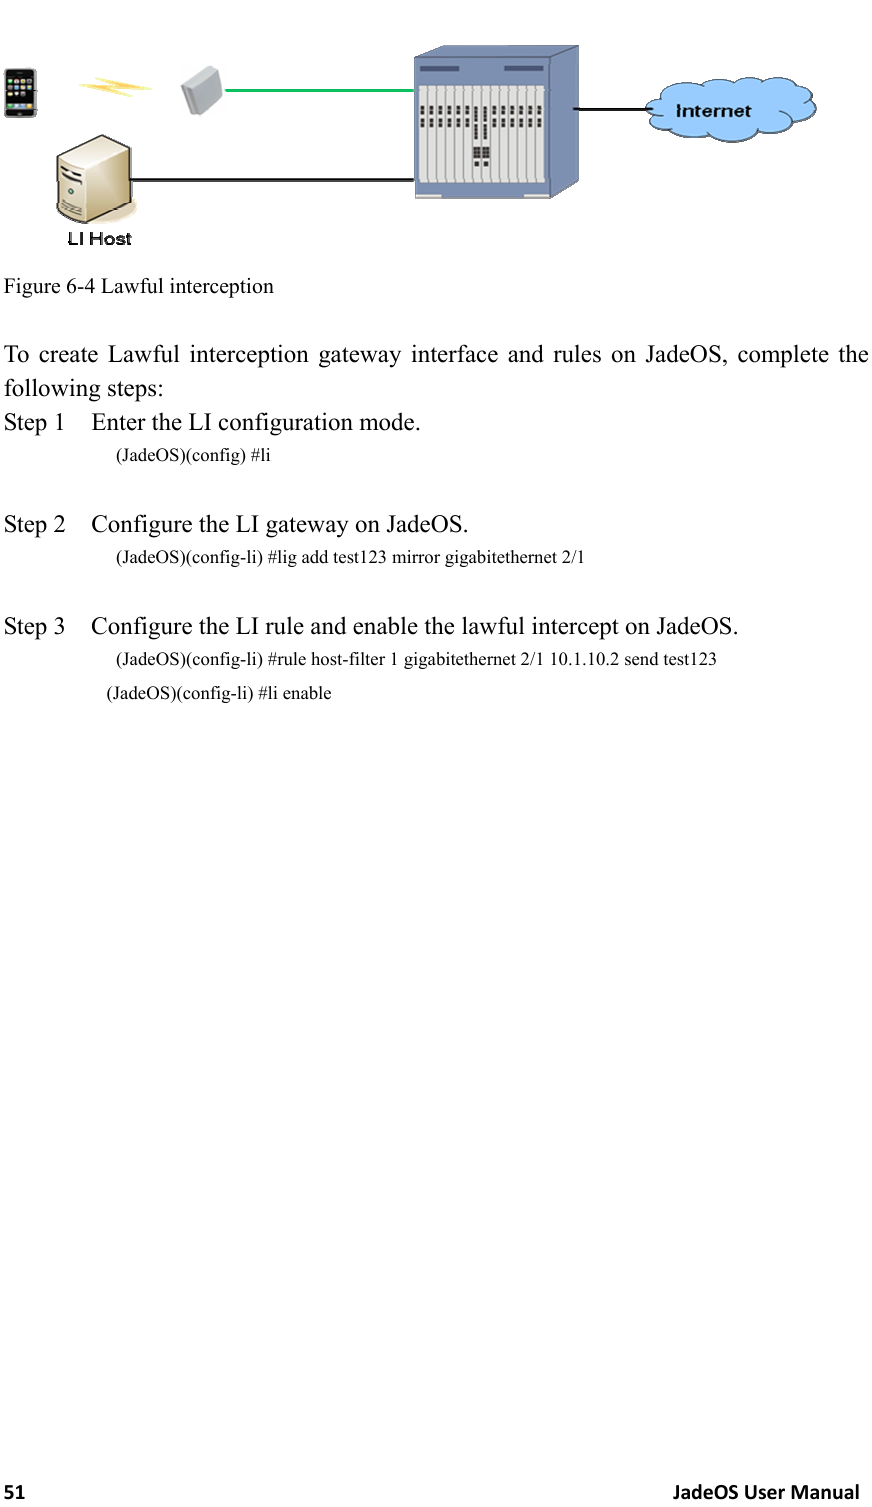
![50JadeOSUserManualFor example: To configure the rate limit of session creation is 50000 per second: (JadeOS) (config)#firewall sp-bandwidth-contract session pps 50000 To configure the rate limit of new online user is 700 per second: (JadeOS) (config)#firewall sp-bandwidth-contract user pps 700 To configure the rate of receiving DHCP message is 2000 per second: (JadeOS) (config)#firewall cp-bandwidth-contract dhcp pps 2000 To configure the rate of receiving ARP message is 2000 per second: (JadeOS) (config)#firewall cp-bandwidth-contract arp pps 2000 To configure the rate of receiving unicast message that failed authentication is 10Mbps: (JadeOS) (config)#firewall cp-bandwidth-contract untrusted-ucast 10 0 7.5 Configuring Lawful Intercept Lawful intercept is a process that enables a Law Enforcement Agency (LEA) to per-form electronic surveillance on an individual (a target) as authorized by a judicial or administrative order. To facilitate the lawful intercept process, certain legislation and regulations require service providers (SPs) and Internet service providers (ISPs) to implement their networks to explicitly support authorized electronic surveillance. The surveillance is performed through the use of wiretaps on traditional telecommu-nications and Internet services in voice, data, and multiservice networks. The LEA delivers a request for a wiretap to the target's service provider, who is responsible for intercepting data communication to and from the individual. The service provider uses the target's IP address or session to determine which of its edge routers handles the target's traffic (data communication). The service provider then intercepts the target's traffic as it passes through the router, and sends a copy of the intercepted traffic to the LEA without the target's knowledge. Configuration Steps: Step 1 To create LIG (LI gateway), and specify the encapsulation way of traffic sent to LIG, use the following command in LI mode: lig add <li-gateway-name> [mirror|udp][interface|id] Step 2 To add LI rule, and specify LI name (based on ACL, IP, MAC, network seg-ment) and LIG which receives the LI traffic, use the following command: rule [acl-filter | host-filter | mac-filter | net-filter] send <lig-name> acl-filter add lawful intercept rule, intercept data streams host-filter add lawful intercept rule, intercept host data streams mac-filter add lawful intercept rule, intercept ethernet data streams net-filter add lawful intercept rule, intercept host data streams](https://usermanual.wiki/SKSpruce-Technologies/WIA3200/User-Guide-2395330-Page-60.png)
![52JadeOSUserManualChapter8 Configuring HQoS With the rapid development of the computer network, services such as bandwidth, delay, jitter sensitive voice and video are transferred through IP network tunnel. JadeOS support HQoS (hierarchical QoS) technology which can classify the type of service traffic; it can also uniformly manage and hierarchically schedule the transfer objects, such as several users, multi-service, and several types of traffic and so on, which ensure the quality for different data service. To enable or disable HQoS function in JadeOS, use following command in config mode: hqos-switch [on|off] 8.1 Configuring Rate Limitation on Port To configure the rate limitation for port on JadeOS, using following command: rate-limit [down|up] (0-10240) [bps|kbps|mbps] For example, to configure the rate limit of in direction is 200 Mbps and the rate of out direction is 300 Mbps: (JadeOS)(config)#interface gigabitethernet 1/0 (JadeOS)(config-if)#rate-limit up 200 mbps (JadeOS)(config-if)#rate-limit down 300 mbps 8.2 Configuring Rate Limitation on VLAN To configure the rate limitation for VLAN on JadeOS, using following command: (JadeOS)(config)#interface vlan 100 (JadeOS)(config-if)#rate-limit up 200 mbps (JadeOS)(config-if)#rate-limit down 1 mbps 8.3 Configuring Rate Limitation on User To configure the rate limitation for user on JadeOS, using following steps: Step 1 To configure bandwidth named ‘BW-8M’ and ‘BW-2M’, using following command: (JadeOS) (config)#aaa bandwidth-contract BW-8M mbits 8 (JadeOS) (config)#aaa bandwidth-contract BW-2M mbits 2 Step 2 To configure the downstream bandwidth named ‘BW-8M’ and the upstream bandwidth named ‘BW-2M’ in user role, using following command: (JadeOS) (config)#user-role postauth](https://usermanual.wiki/SKSpruce-Technologies/WIA3200/User-Guide-2395330-Page-62.png)


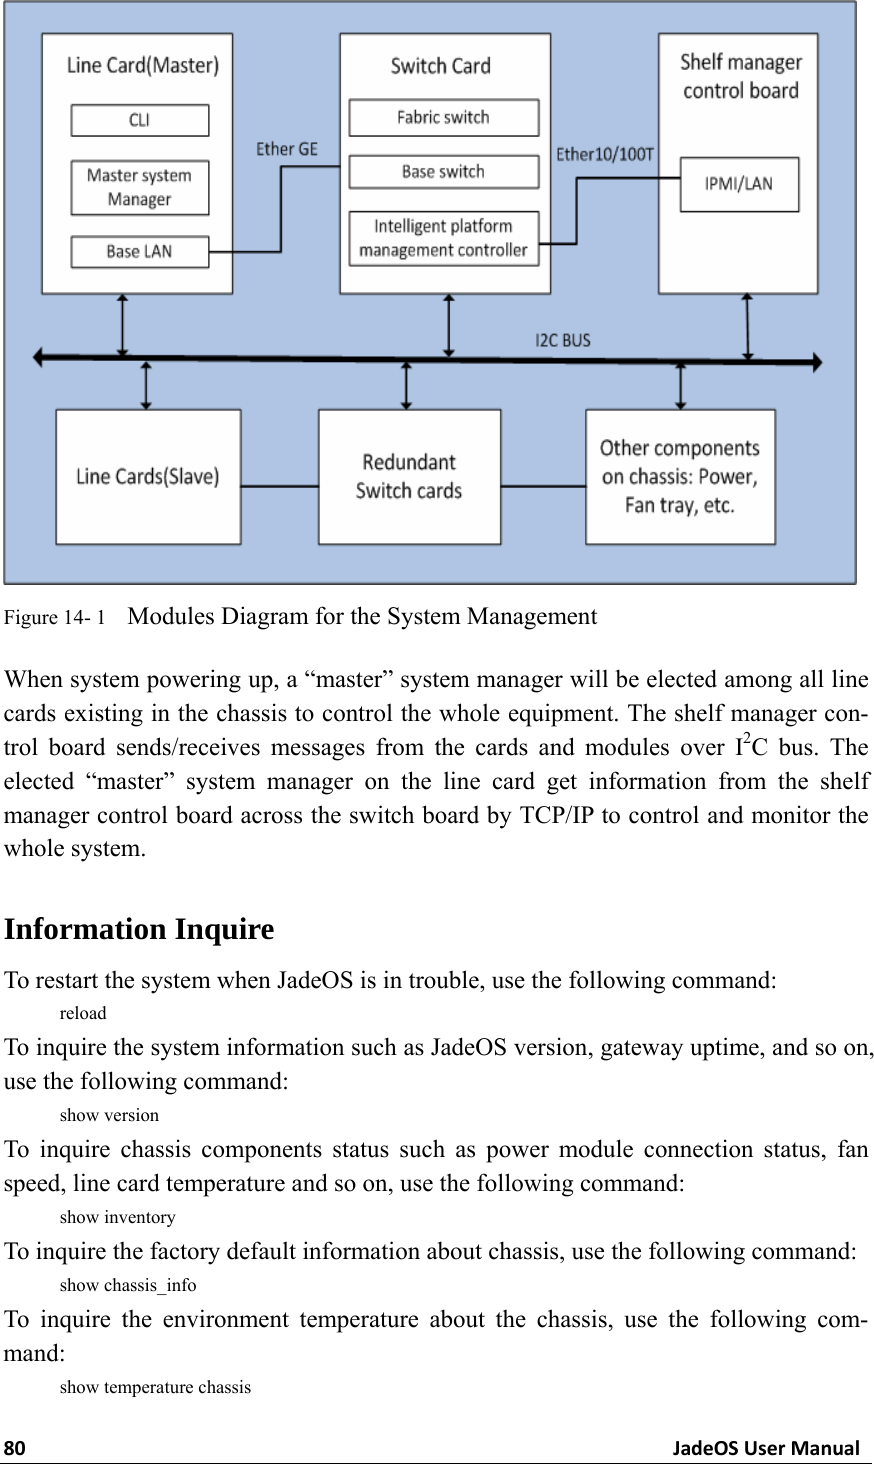
![79JadeOSUserManualChapter12 Maintanence and Diagnosis 13.1 Log System Log system is used to record system running status, which can be saved in local or remote log server. Log is classified to 8 levels from emerg to debug, and the default level is error. To set log level, use the following command in config mode: logging level <level> <all|category> [process app] logging <IP> [severity level] [type category] Note:log level: emerg , alert, crit, err, warning, notice, info, debug. To set the log size in local server, use the command in config mode: log size <100-102400> (unit:KB) To recovery the log level in local to the default, use the command in config mode: no logging level <level> <all|category> [process app] no logging <IP> [severity level] [type category] For example: (JadeOS)(config)#logging level err all (JadeOS)(config)#logging 192.168.16.84 (JadeOS)(config)#log size 102400 (JadeOS)(config)#end To inquiry the local log, use the command in enable mode: show log <all|category [app]> [line] (JadeOS) #show log all 13.2 System Management JadeOS is a unified multi-level scalable technology. It uses the active-standby mode in control plane and active-active mode in data plane to achieve the high performance and high availability. The distributed architecture has been extended to meet require-ments of high performance equipment. You can have a general view for the system management and telecommunications among all modules in figure 14-1.](https://usermanual.wiki/SKSpruce-Technologies/WIA3200/User-Guide-2395330-Page-89.png)