SKYPINE ELECTRONICS CNE6923A Car Navigation & Entertainment System User Manual 1
SKYPINE ELECTRONICS (SHEN ZHEN) CO., LTD. Car Navigation & Entertainment System 1
UserManual.wiki
>
SKYPINE ELECTRONICS
>
CNE6923A User Manual
User Manual
Navigation menu
Upload a User Manual
Namespaces
Wiki Guide
HTML
PDF
Info
Views
User Manual
Discussion / Help
Navigation


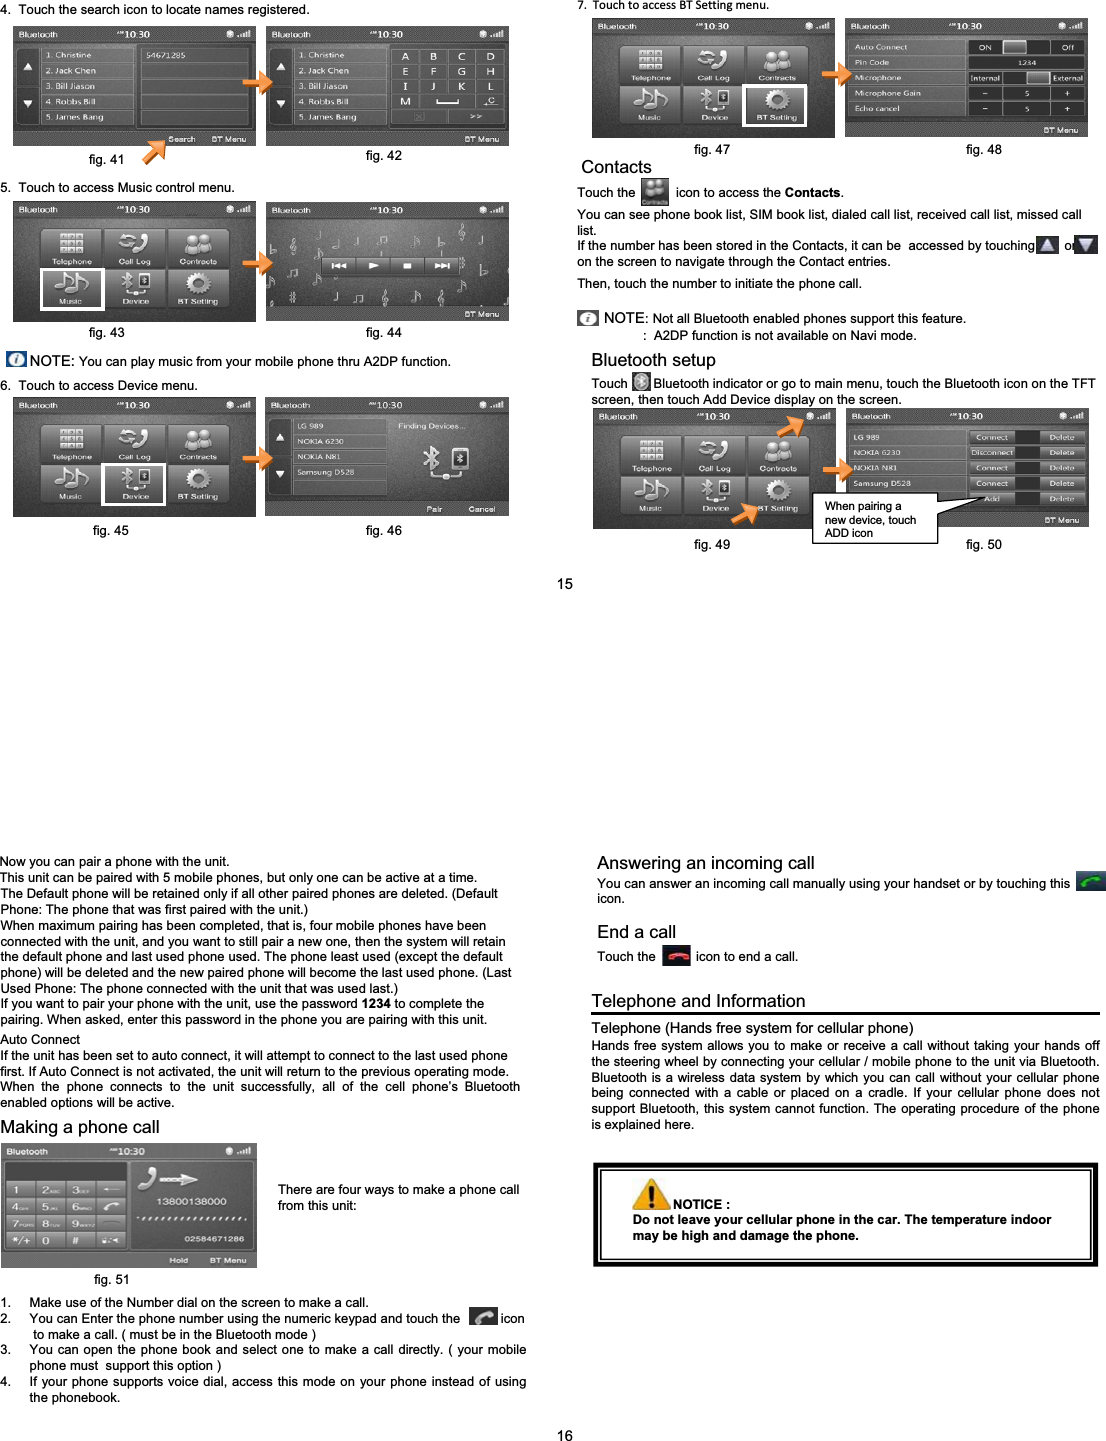
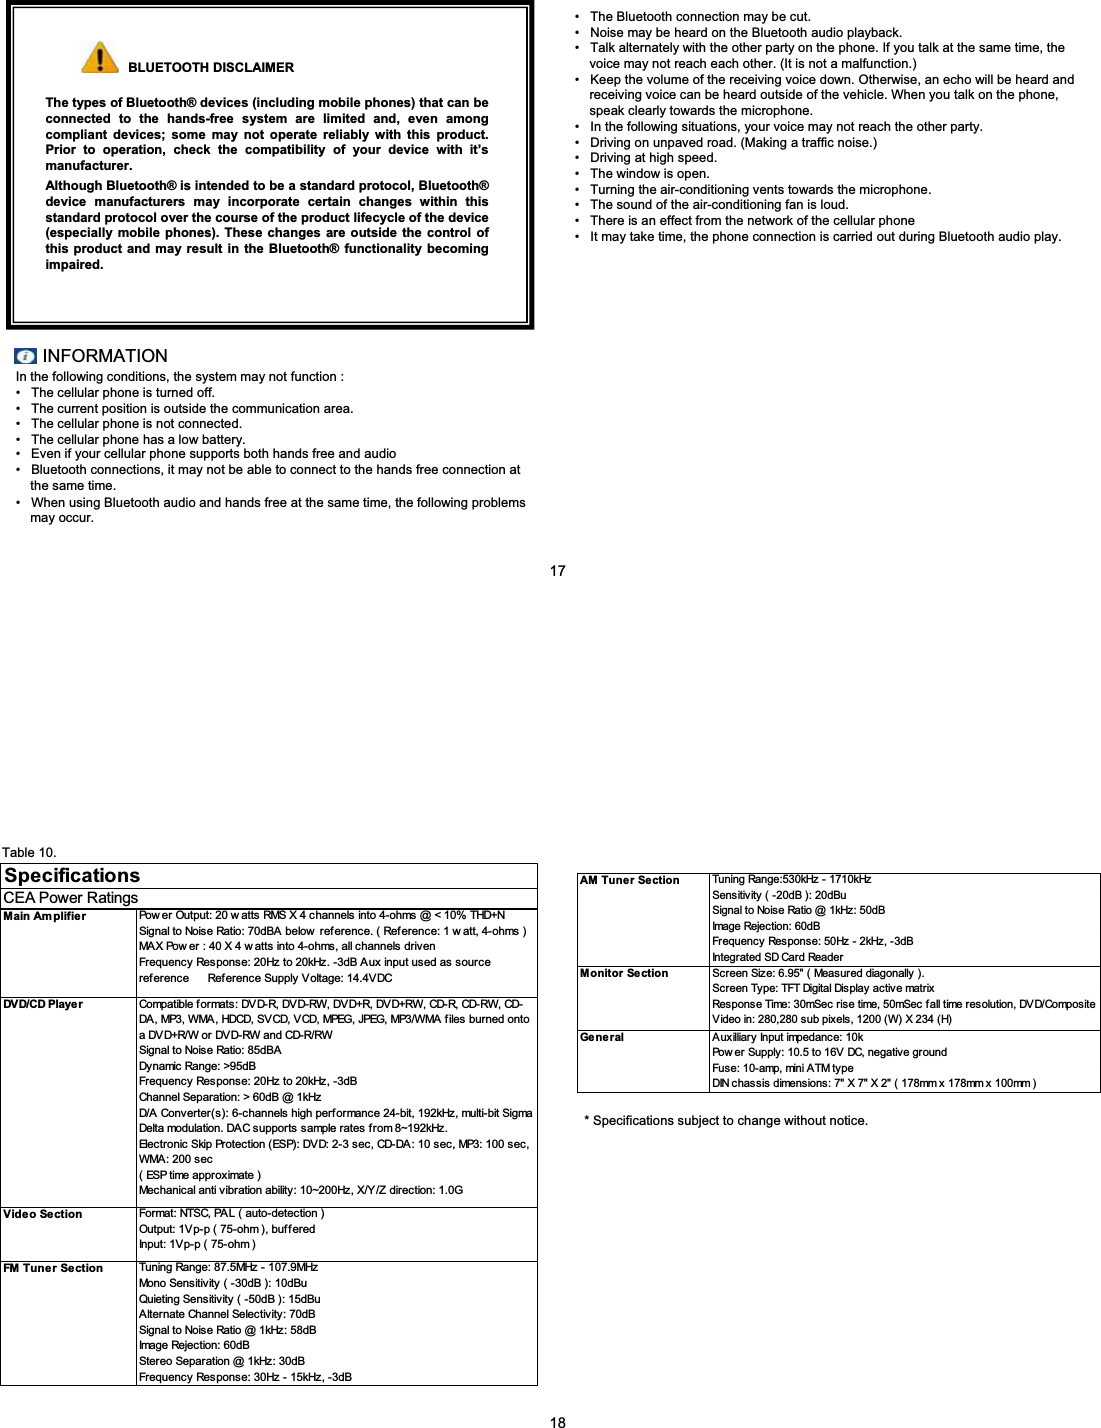
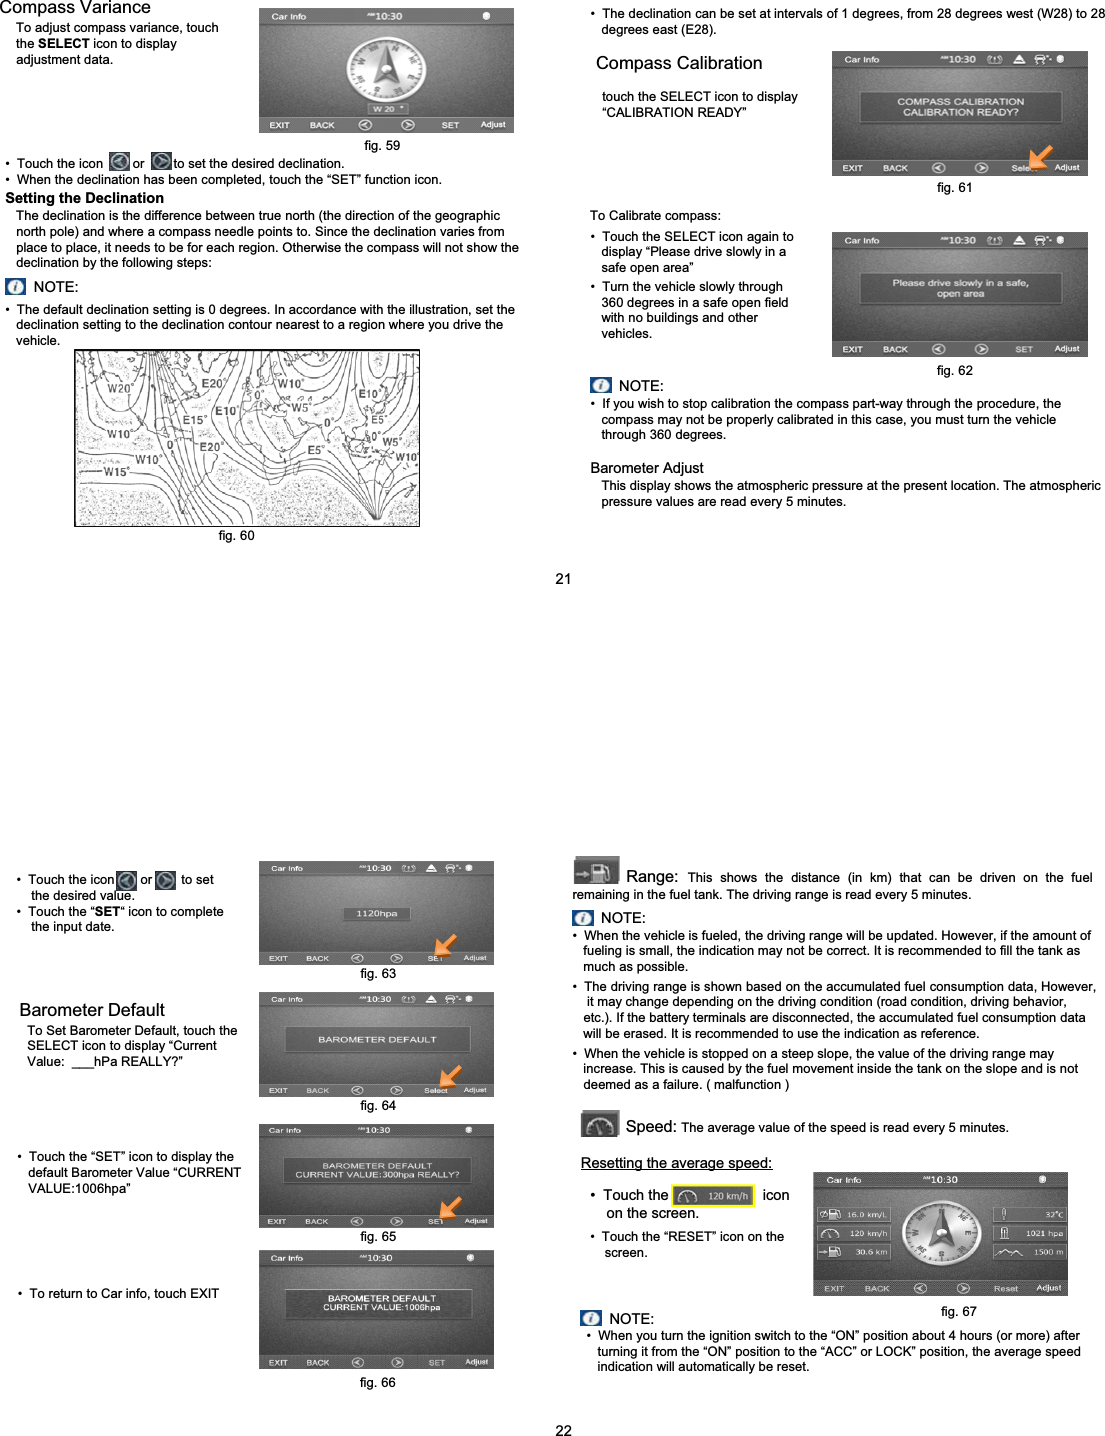
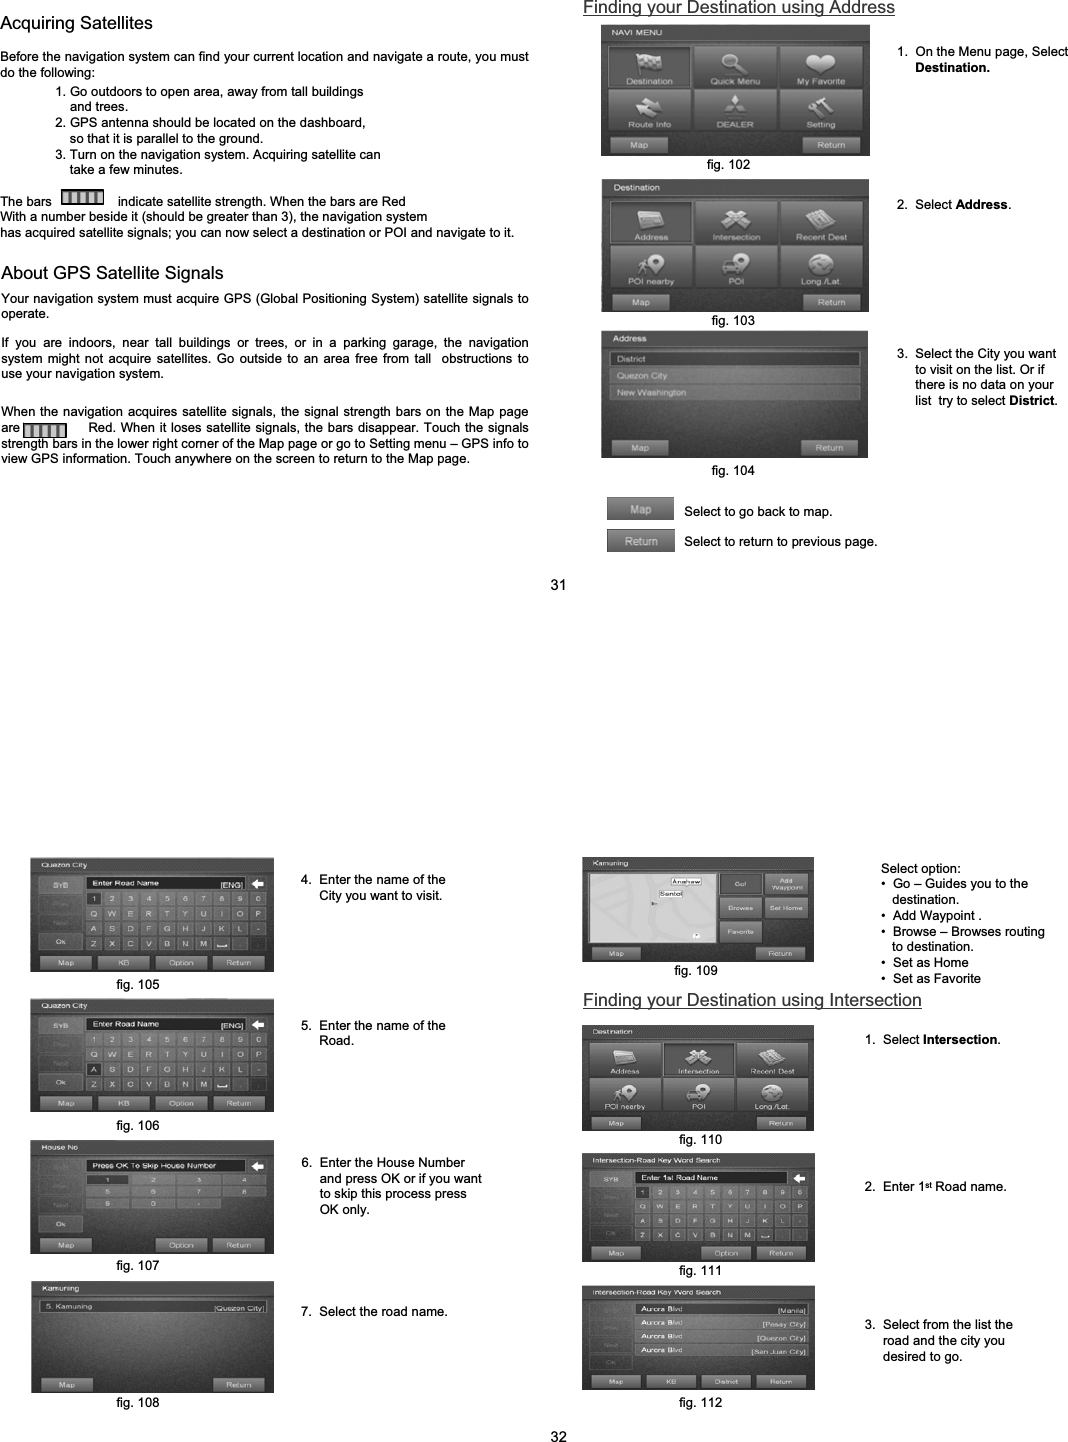
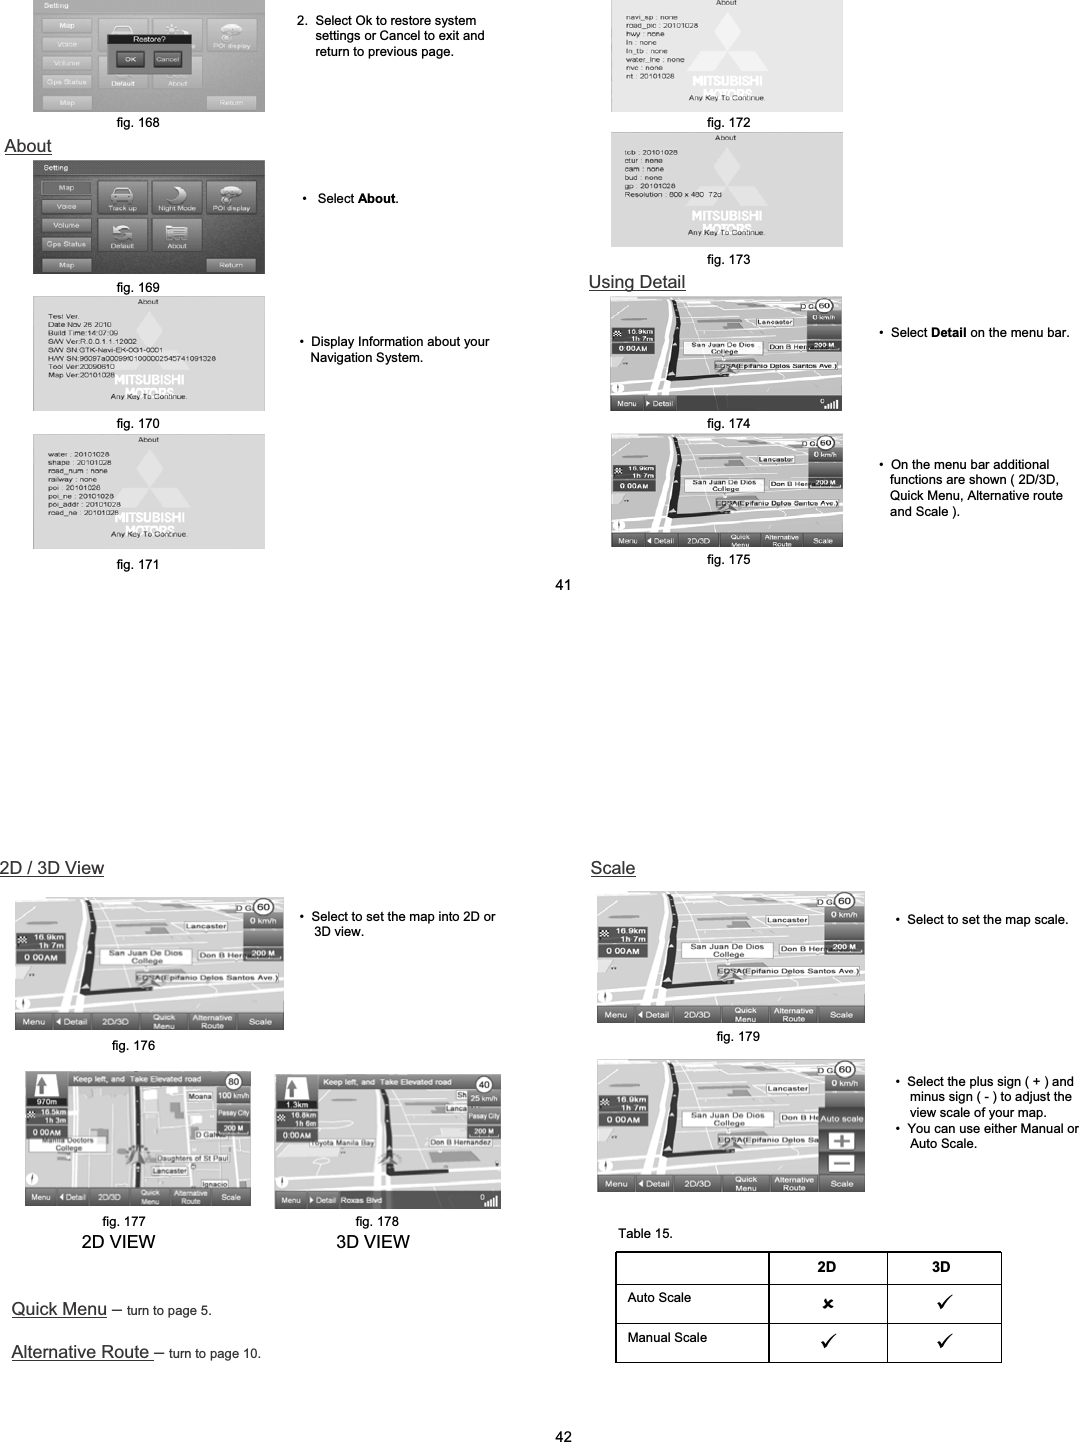
![Periodic Maintenance RequiredZOutside Temperature ^Compass[Barometer _Range\Elevation `Speed]Adjust (Adjustment) aFuel EconomyMulti-Information Display10987654321After the display of the opening LOGO for about 15 seconds, Vehicle Information replacesit as the DEFAULT display, the last source will have audio only.XDigital ClockYWarning DisplayTire Pressure Monitor SystemFunctional icon: You can Select Functions to adjust / set, exiting and return to previous selection.Digital Clock:Indicates the time.Changing the clock settings, from main menu touch the Setup icon to display generalsetup menu. ¼Page 8Warning Display (See Page 29 - 31)•NOTE :Outside Temperature: The outside temperature is read every five (5) minutes.Barometer: This display shows the atmospheric pressure at the present location,values are read every five(5) minutes.Touching the RESET function will not reset the indication hPaElevation: The current elevation in units is 100m (400ft) as shown. Theelevation is read every five(5) minutes.To adjust the elevation: Touch the elevation icon on the screen, then adjustby touching icon or .The adjusment icon increases by 100m (400ft) every time you lightly touch theicon. Continuous touching of the icon for about two (2) seconds or more, will result in the indication to fast-forward. Then the setting changes to the elevation selected.The adjustment icon decreases by 100m (400ft) every time you lightly touch theicon. Continuous touching of the icon for about two (2) seconds or more, will result in the indication to fast-forward. Then the setting changes to the elevation selected.19fig. 52fig. 53NOTE:• The elevation is determined from changes in atmospheric pressure. Depending on weather conditions, the indicated elevation may differ from the actual elevation. Variations in atmospheric pressure can cause different elevation to be shown even in the same location. Use the indication as a guide only.Fuel Economy: The average value of the fuel consumption is read every 5 minutes.Resetting the average fuel consumption:• Touch the icon on the screen.• Touch the “RESET” icon on the screen.• Value shown “ --,- “ km/L.NOTE :• When the average fuel consumption cannot be calculated, “- -,-“will be shown.• The average and momentary fuel consumption change will depend on the driving condition (road condition, driving behavior, etc.). The indication may differ from the actual fuel consumption. Therefore, it is recommended to use the indication only as reference.Compass: This compass shows the direction of the vehicle.NOTE:• This system uses the earth’s magnetic field, and so may not show the correct direction depending on the traffic condition or in the following places where the earth’s magnetic field is disrupted.¾Car parks located in buildings and tunnels.¾Expressways and undergrounds cables.¾Areas along railroadsAdjust (adjustment)Every time the “Adjust” icon is touched lightly, the display will change into two selections :Touching the ADJUST icon will display compass VARIANCE as default, to search CALIBRATION, touch the icon or . 1. COMPASS SETTING2. BAROMETER SETTINGTouching the ADJUST icon will display Barometer ADJUST, to search Barometer DEFAULT, touch the icon or . 20fig. 54fig. 55 fig. 56fig. 57 fig. 58](https://usermanual.wiki/SKYPINE-ELECTRONICS/CNE6923A/User-Guide-1459850-Page-12.png)