SMA Solar Technology SUNNYVIEW Ultra Low Power 802.11 b/g/n Module User Manual
SMA Solar Technology AG Ultra Low Power 802.11 b/g/n Module
UserManual.wiki
>
SMA Solar Technology
>
SUNNYVIEW User Manual
User Manual
Navigation menu
Upload a User Manual
Namespaces
Wiki Guide
HTML
PDF
Info
Views
User Manual
Discussion / Help
Navigation
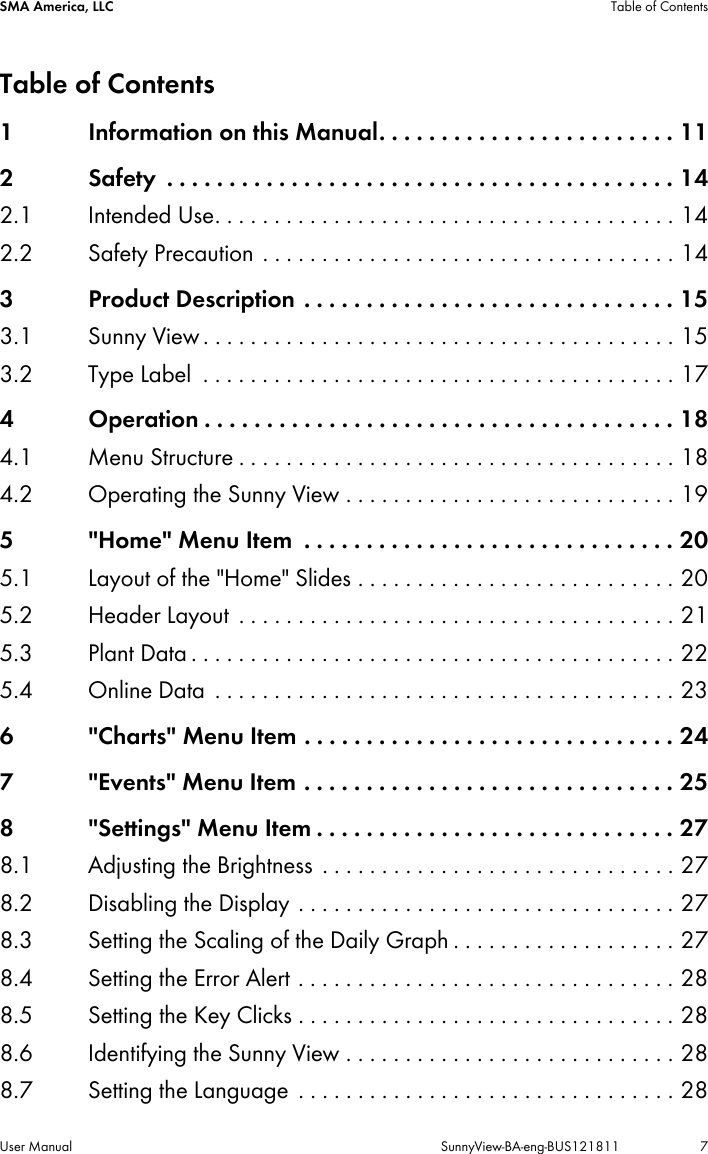
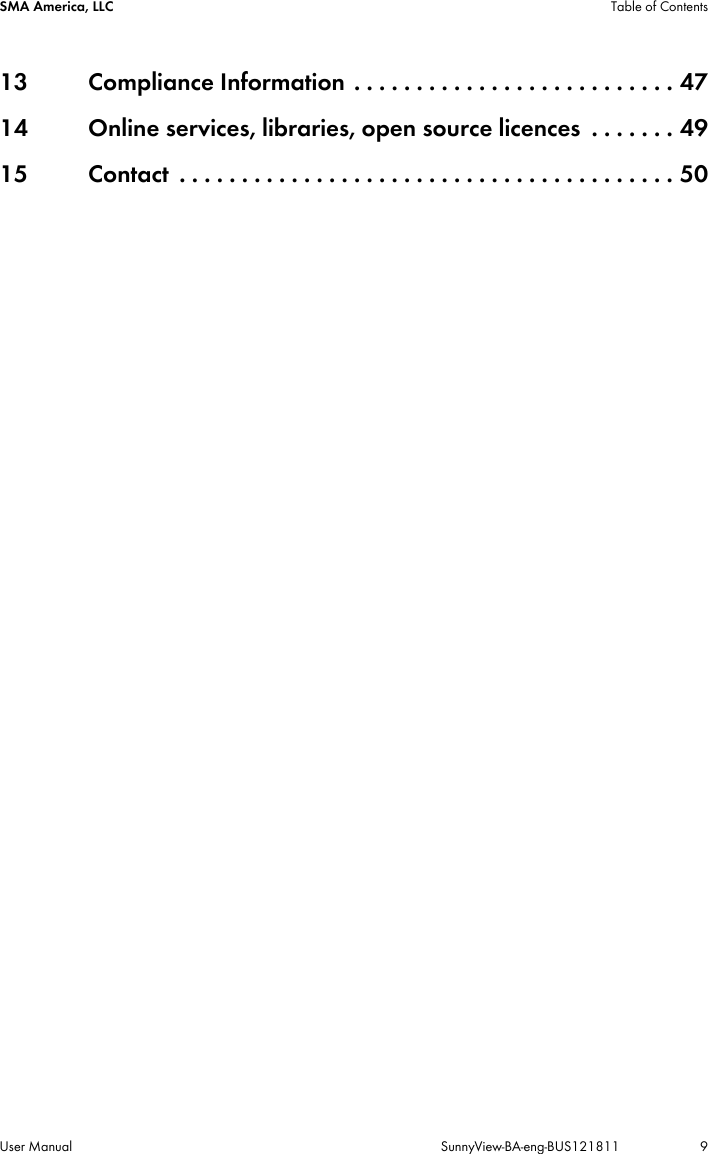

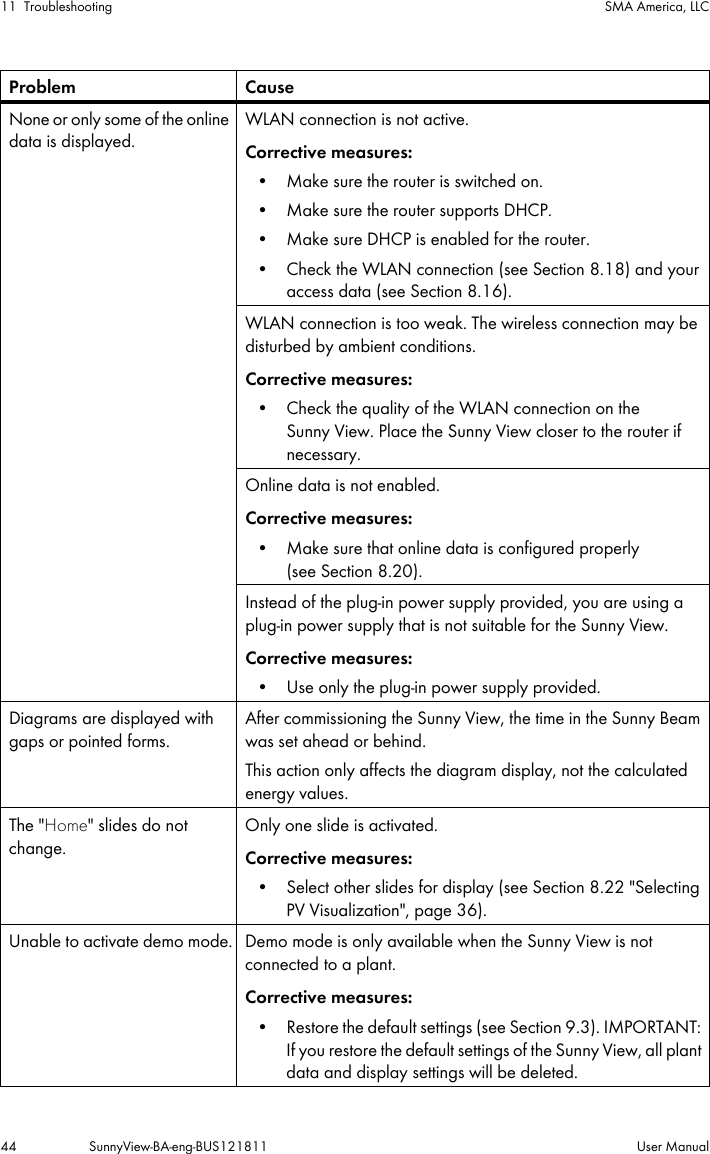
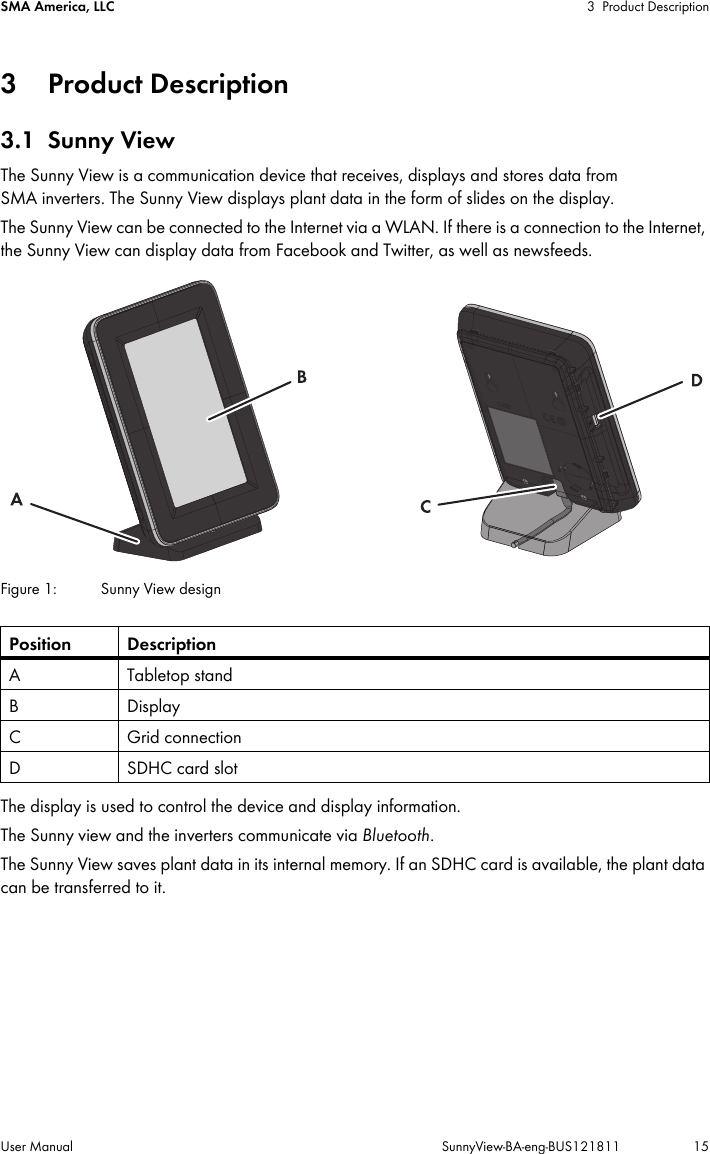
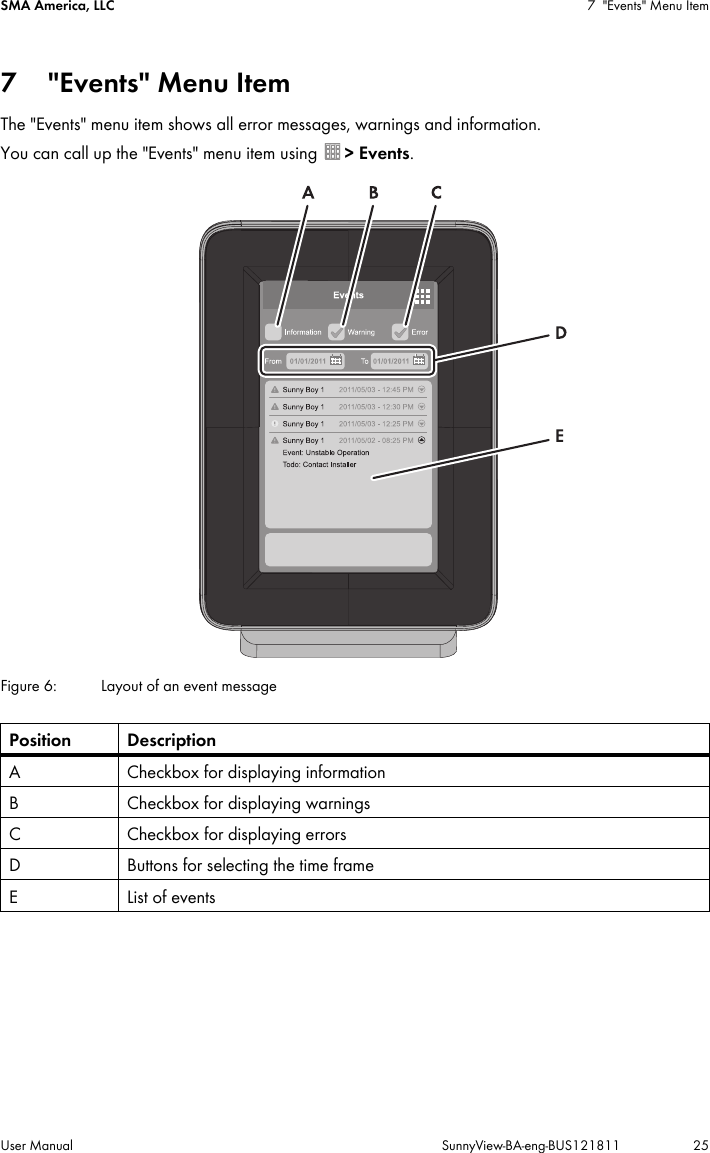
![1 Information on this Manual SMA America, LLC12 SunnyView-BA-eng-BUS121811 User ManualTypographyNomenclatureThe following nomenclature is used in this manual:Typography Usage Example"light" • Display messages• Parameters•Connections•Slots•Text boxes• Enter your e-mail address and password in the "E-mail" and "Password" text boxes.bold • Elements to be selected• Elements to be entered.• Enable the dynamic option.>• Series of elements that are to be selected on the software user interface or display.• Select Settings > Date.[Button/Key]•Buttons•Keys• Select [Next].Complete designation Designation in this manualSystem comprised of a PV array, monitoring devices and invertersPlantSMA Bluetooth® Wireless Technology BluetoothSMA America Production, LLC and SMA Solar Technology Canada Inc.SMA](https://usermanual.wiki/SMA-Solar-Technology/SUNNYVIEW/User-Guide-1731935-Page-12.png)
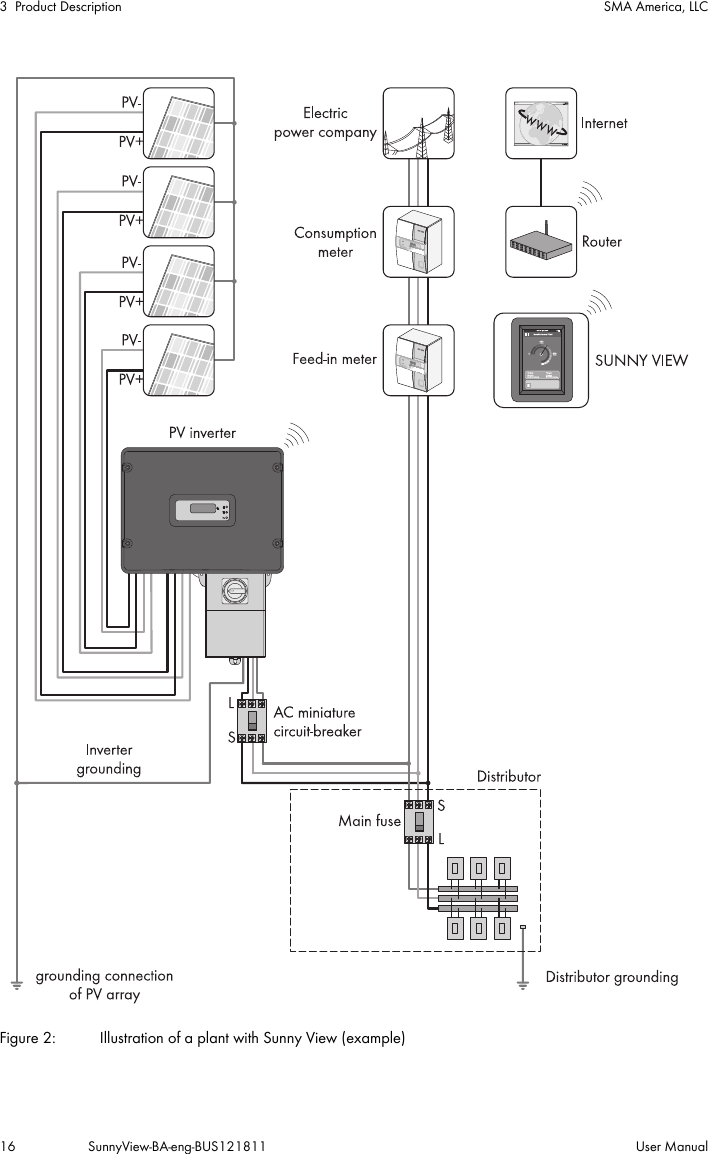
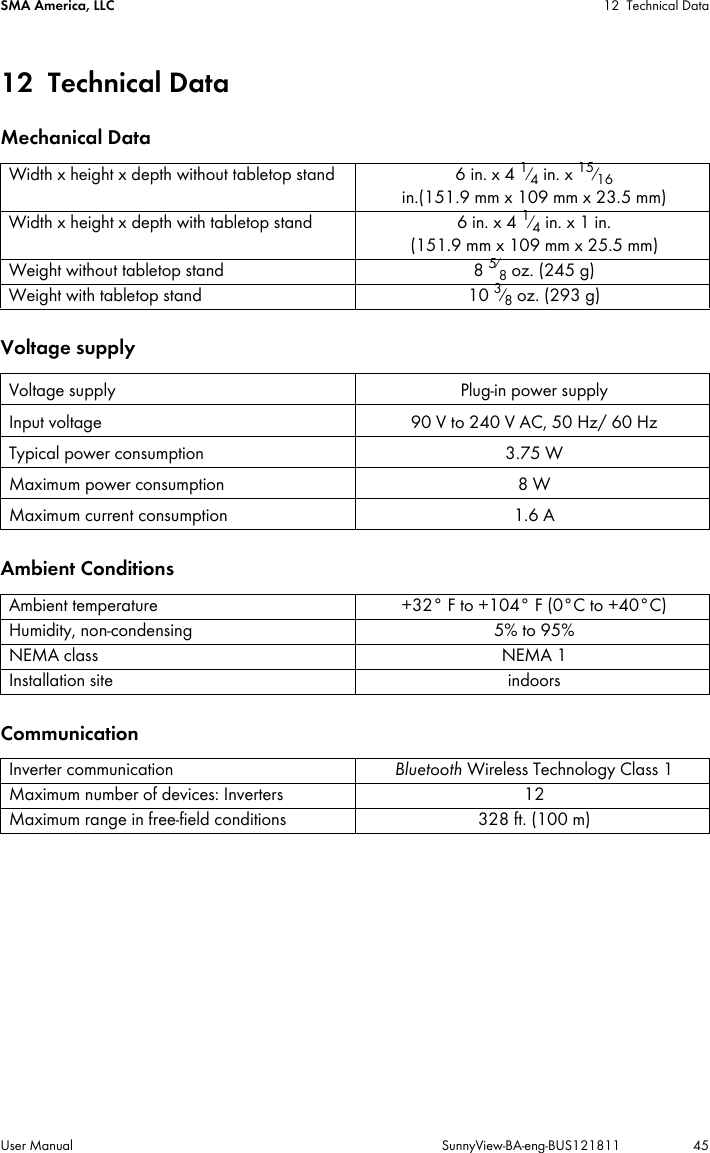
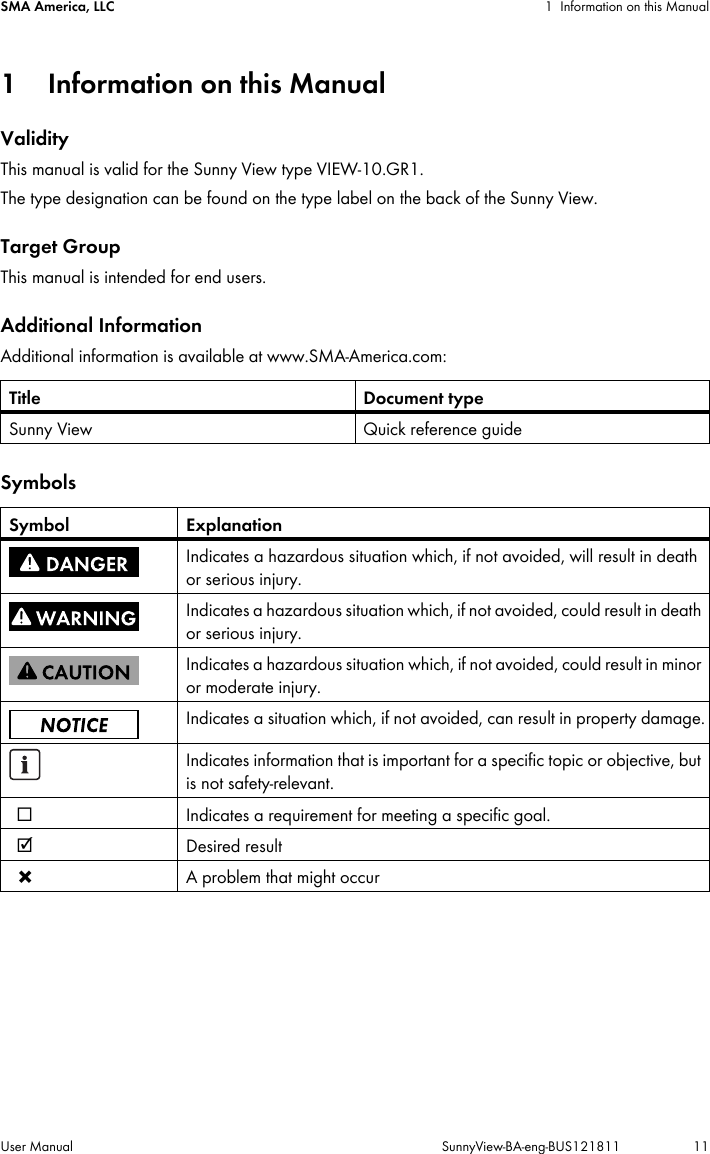
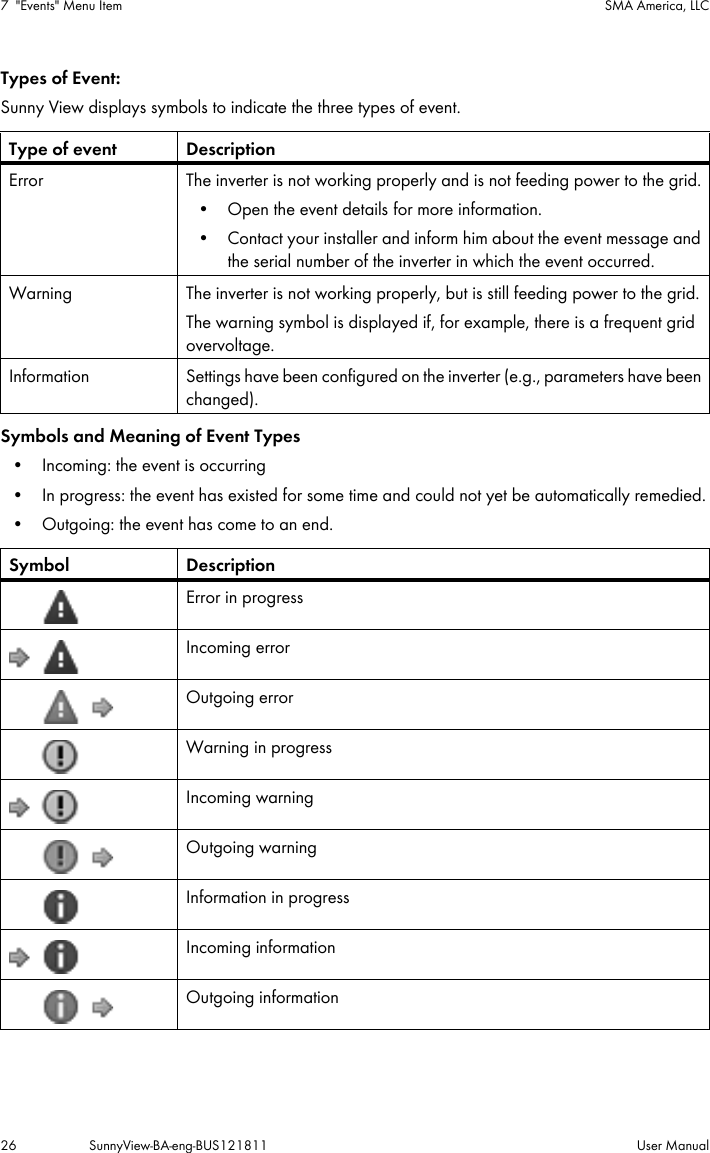
![5 "Home" Menu Item SMA America, LLC22 SunnyView-BA-eng-BUS121811 User Manual5.3 Plant DataPlant data is divided into multiple slides. You can scroll through the slides by dragging your finger from the left or right. The slides change automatically after a preset time. You can change the preset time (see Section 8.21 "Changing the Duration of the Slide Show", page 36). You can enable or disable the slides under settings (see Section 8.22 "Selecting PV Visualization", page 36).SlidesDescription DescriptionOverview This slide provides an overview of the entire yield of your plant.Power and energy This slide shows the current power, the daily power and the total energy yield of the plant.Power chart This diagram shows the daily power of the plant.Yield estimate This slide shows the total and daily revenue for grid feed-in.CO2 avoidance This slide shows the daily and overall amount of CO2 saved.Saved kilometers/miles This slide shows the daily and overall number of kilometers/miles saved.Errors and warnings This slide appears automatically when an error or warning occurs. An alarm sounds only when an error event occurs and the inverter stops feeding power to the grid (see Section 8.4 "Setting the Error Alert", page 28).Press the [Close] button to acknowledge the event. Press the [Details] button to access the event list (see Section 7). If not acknowledged, the alarm will sound again after a preset interval.Weather If meteorological data is available from the Internet, this slide shows the following meteorological data for the preset location:• Current weather • Forecast for the next three days](https://usermanual.wiki/SMA-Solar-Technology/SUNNYVIEW/User-Guide-1731935-Page-22.png)
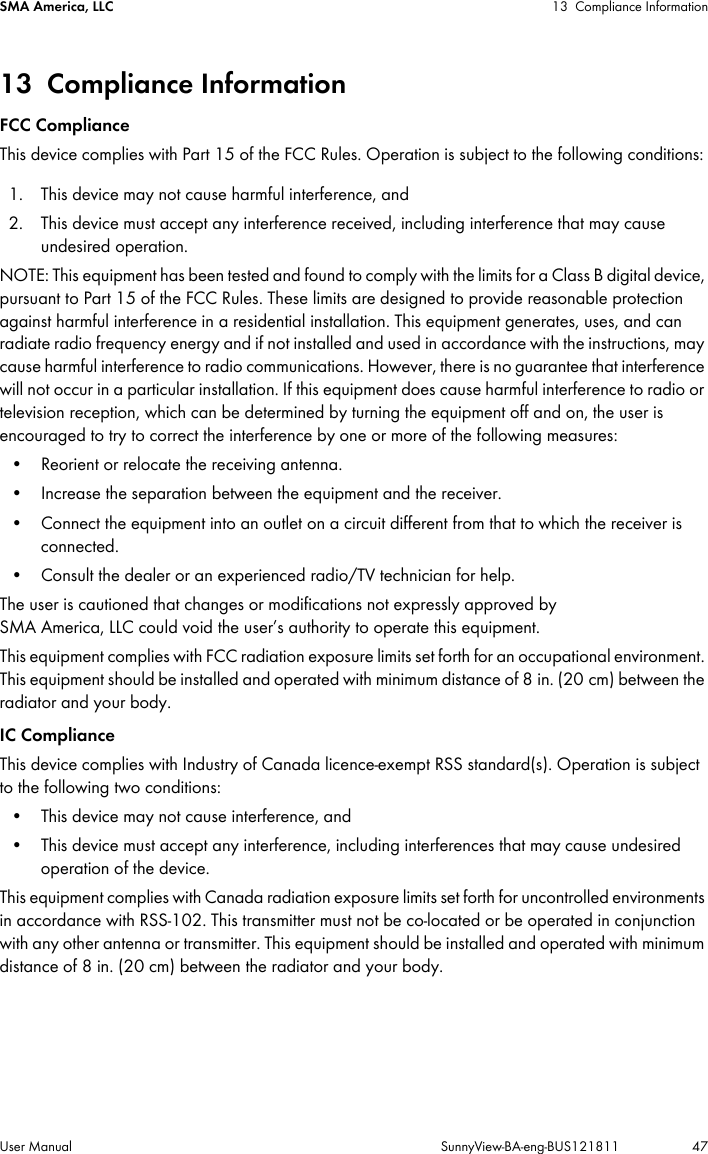
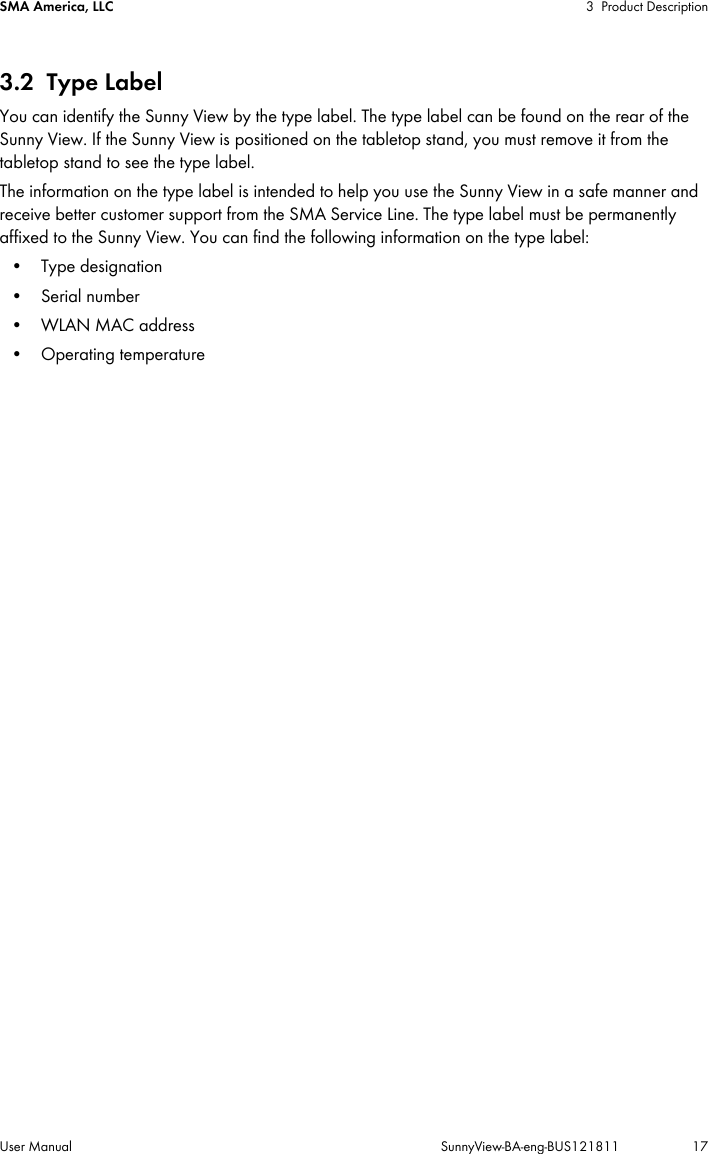
![SMA America, LLC 5 "Home" Menu ItemUser Manual SunnyView-BA-eng-BUS121811 235.4 Online DataRequirement for displaying online data:☐ An Internet connection must be established (see Section 8.18 "Setting up a WLAN Connection", page 35).The online data changes after a set interval. To scroll through the data, drag your finger from the left or right. By tapping the online data you can zoom to a full-screen view. Tap the [Close] button to minimize the view.The following types of online data are available:• Facebook• Twitter• NewsfeedThe Sunny View will display the last 10 messages of the last 7 days. Control elements within the messages (e.g. hyperlinks) will not function. The displays can be enabled or disabled individually (see Section 8.20 "Configuring Online Data", page 35).You cannot send data via the Internet using the Sunny View.](https://usermanual.wiki/SMA-Solar-Technology/SUNNYVIEW/User-Guide-1731935-Page-23.png)
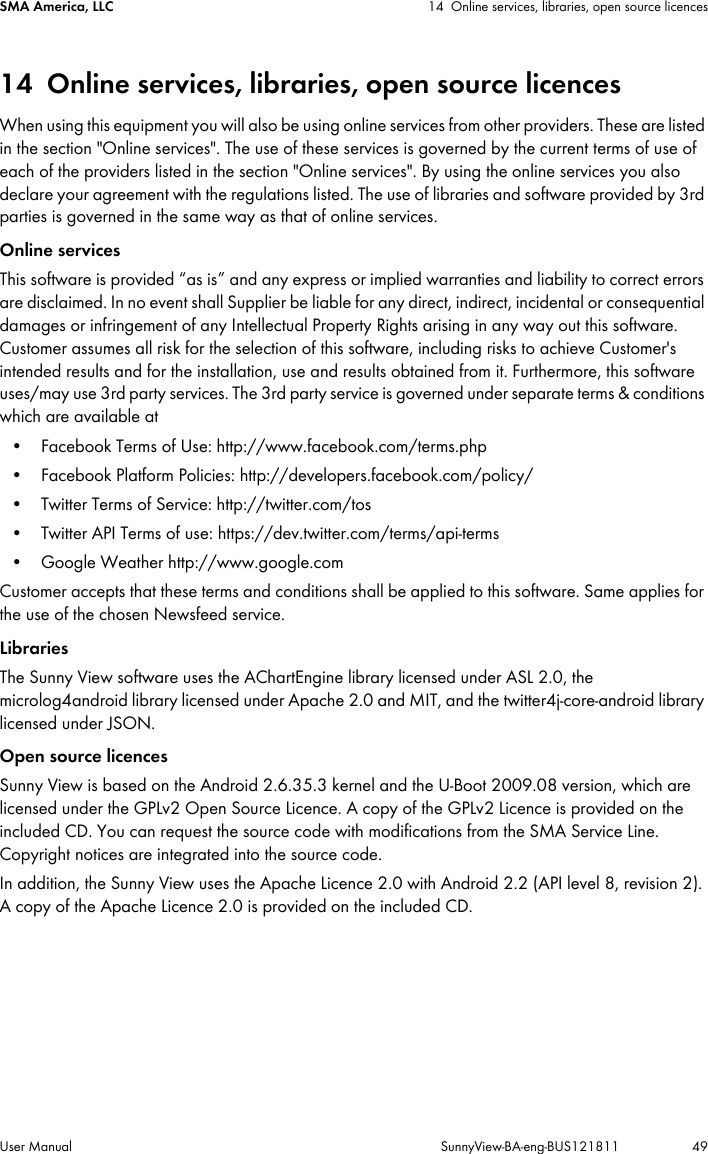
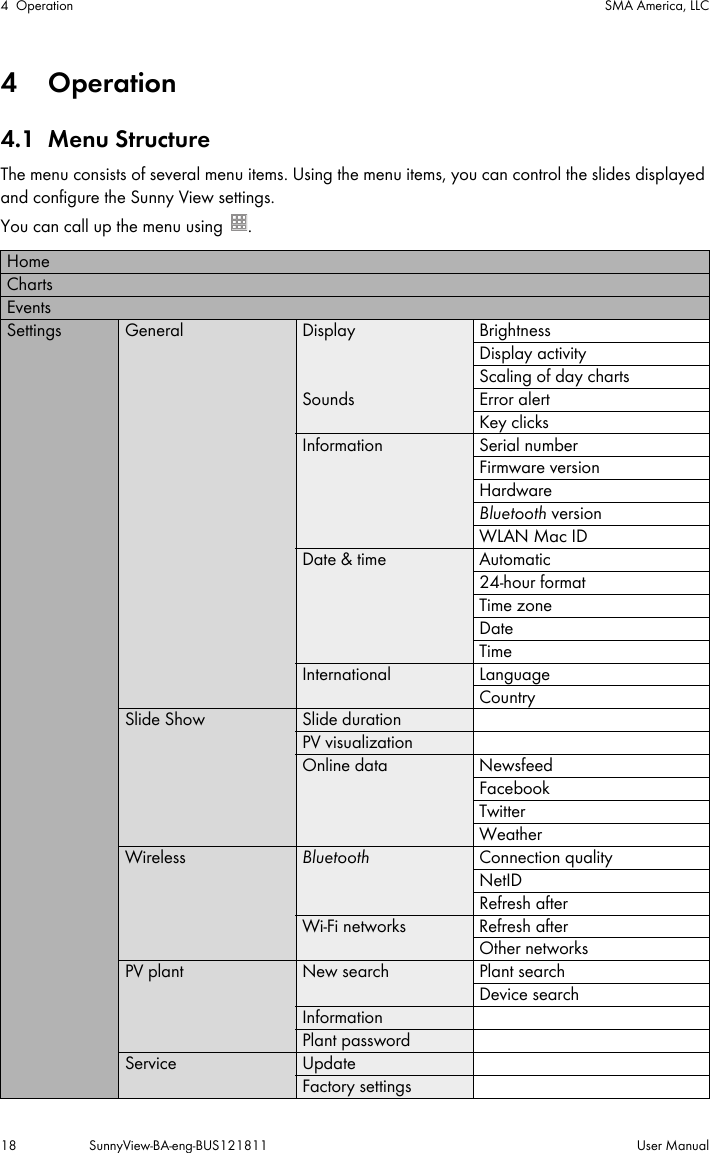
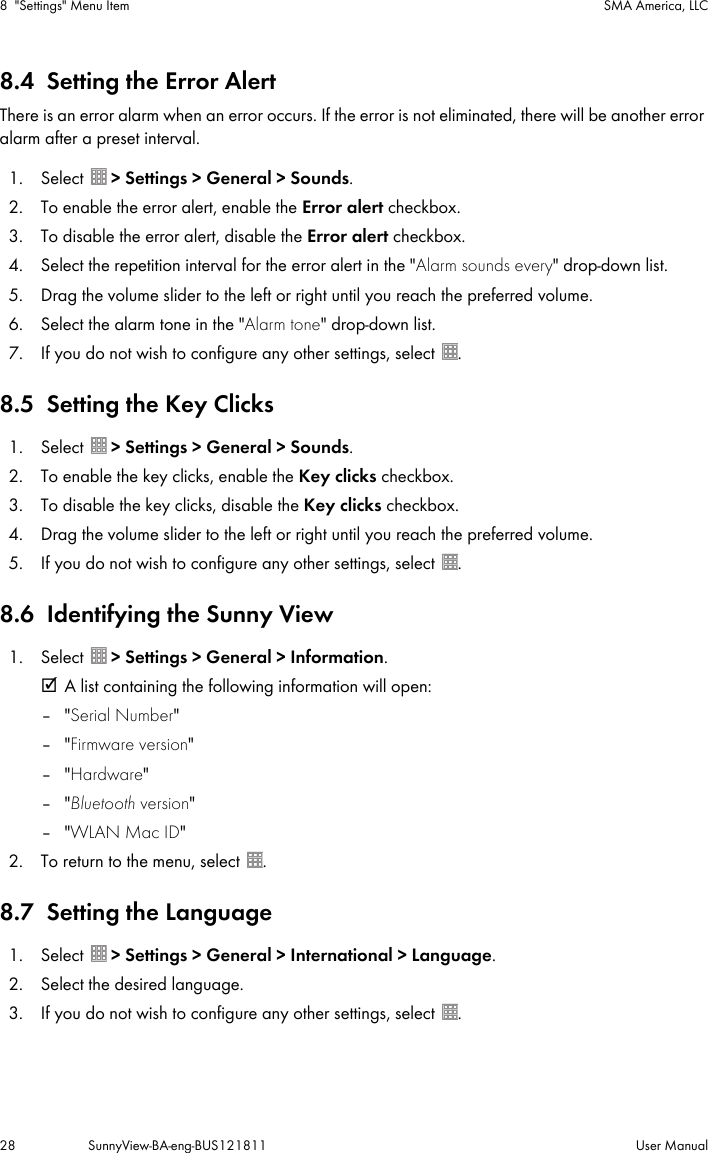
![SMA America, LLC 8 "Settings" Menu ItemUser Manual SunnyView-BA-eng-BUS121811 278 "Settings" Menu Item8.1 Adjusting the BrightnessThe display may be too bright or too dark depending on lighting conditions. If this is the case, you can adjust the brightness of the Sunny View.1. Select > Settings > General > Display.2. Drag the brightness slider to the right or left to adjust the brightness to the preferred level.8.2 Disabling the DisplayYou can disable the display or configure the settings in such a way that it disables automatically after a preset time. When disabled, the display is switched off. This means the Sunny View requires less electric current.1. Select > Settings > General > Display.2. Set the desired time period for disconnection.3. If you would like to disconnect after a preset time:• Enable the Off after option.• Select the desired time in the appropriate drop-down list.4. If you do not wish to configure any other settings, select .☑ After the preset time, the display will be disabled.5. Simply touch the display to re-enable it.8.3 Setting the Scaling of the Daily GraphYou can choose between static or dynamic scaling for the daily graph. If static scaling is selected, the diagram can be scaled to a set maximum threshold (e.g., the maximum power of your plant). With dynamic scaling, the maximum thresholds of the measured values are used as the basis for scaling.1. Select > Settings > General > Display.2. If you prefer static scaling for the daily graph:• Enable the Static option.• Enter the power of your plant in the appropriate text box.Tip: You can reset the scaling to match the maximum power of your plant's inverter by pressing the [Reset to plant power] button. This value can deviate from the actual maximum power of your plant.3. If you prefer dynamic scaling for the daily chart, enable the Dynamic option.4. If you do not wish to configure any other settings, select .](https://usermanual.wiki/SMA-Solar-Technology/SUNNYVIEW/User-Guide-1731935-Page-27.png)
![SMA America, LLC 8 "Settings" Menu ItemUser Manual SunnyView-BA-eng-BUS121811 298.8 Country Settings1. Select > Settings > General > International > Country.2. Select a country.3. Check the country settings. Change the country settings if necessary.Tip: Press the [Reset] button to restore the default country settings.4. Select [Next].5. If you do not wish to configure any other settings, select .8.9 Setting the Date and TimeThe Sunny View can be set for automatic time synchronization if a WLAN connection is available (see Section 8.18 "Setting up a WLAN Connection", page 35) and the "Automatic" checkbox is activated. You can choose between a 12-hour or 24-hour time format by selecting the "24-hour format" checkbox accordingly.1. Select > Settings > General > Date & time.2. In the "Time zone" field select the desired time zone.3. In the "Date" field, select the date.4. Set the date using [+] and [‒].5. Select [Accept].6. In the "Time" field, select the time.7. Set the time using [+] and [‒].8. Select [Set].9. If you do not wish to configure any other settings, select .Diagrams may be incorrectly displayedChanging the set time while the inverter is feeding in can cause diagrams to be displayed with permanent errors.• Only change the set time when the inverters are not feeding in (e.g., when it is dark).](https://usermanual.wiki/SMA-Solar-Technology/SUNNYVIEW/User-Guide-1731935-Page-29.png)
![8 "Settings" Menu Item SMA America, LLC30 SunnyView-BA-eng-BUS121811 User Manual8.10 Searching for a New PlantIf you want the Sunny View to monitor a different plant, you can search for a new plant.Requirement:☐ The plant may have a maximum of 12 inverters.1. Select > Settings > PV plant > New search > Plant search.2. Select [Search].☑ The Sunny View searches for plants within its range.☑ The Sunny View shows all plants found in the search with their NetIDs.3. Select the desired plant.4. Select [Next].5. Enter the plant password.6. Select [Next].7. If you want to use the 24-hour format for the time display, select the 24-hour format checkbox.8. Set the time zone, date format and time.9. Select [Next].10. Select the desired slides for the plant.11. Select [Next].Settings and CSV filesAll Sunny View settings are saved. If an SDHC card is inserted, it will also contain the CSV files of the previous plant.Possible restart of Sunny ViewIf the Sunny View was previously connected to another plant, it will restart itself.](https://usermanual.wiki/SMA-Solar-Technology/SUNNYVIEW/User-Guide-1731935-Page-30.png)
![SMA America, LLC 8 "Settings" Menu ItemUser Manual SunnyView-BA-eng-BUS121811 318.11 Adding a New DeviceIf you are commissioning a new device and the Sunny View does not automatically add the device to the plant, you need to carry out a device search. Requirements:☐ The plant may have a maximum of 12 inverters.☐ The new device must have the same NetID as all the other plant devices (see manual for the Bluetooth device).1. Select > Settings > PV plant > New search > Device search.☑ The Sunny View lists the new devices.2. Select the desired device.3. Select [Next].4. Enable the as a plant extension option.5. Select [Next].6. Enter the password for the new device.☑ The Sunny View connects with the new device and transfers the existing plant password to the new device.7. Select [Next].8. Enter the device name.9. Select [Next].10. If you want to add another device, select [Add] and proceed to Item 2.11. Select [Home].Default password on deliveryThe default password on delivery is 0000.](https://usermanual.wiki/SMA-Solar-Technology/SUNNYVIEW/User-Guide-1731935-Page-31.png)
![8 "Settings" Menu Item SMA America, LLC32 SunnyView-BA-eng-BUS121811 User Manual8.12 Replacing a DeviceIf you want to replace an existing device with a new device, you will have to perform a device search in the Sunny View.Requirement:☐ The new device must have the same NetID as all the other plant devices (see manual for the Bluetooth device).1. Select > Settings > PV plant > New search > Device search.2. Select [Search].☑ The Sunny View searches for devices within its range.☑ The Sunny View shows all the devices in your plant that were found in the search.3. Select the desired device.4. Select [Next].5. Enable the as a device replacement option.6. Select [Next].7. Select the device you want to replace.8. Select [Next].9. Enter the device password.10. Select [Next].11. Enter the plant password.12. Select [Next].13. Enter the device name.14. Select [Next].15. If you want to replace another device, select [Add].16. Select [Home].8.13 Changing the Device NameThe default name of the device is the serial number of the inverter. You can assign a unique name to the device.1. Select > Settings > PV plant > Information.2. Select the desired device.3. Select [Device name].4. Enter a device name.5. Select [Save].](https://usermanual.wiki/SMA-Solar-Technology/SUNNYVIEW/User-Guide-1731935-Page-32.png)
![SMA America, LLC 8 "Settings" Menu ItemUser Manual SunnyView-BA-eng-BUS121811 338.14 Changing the Plant PasswordThe plant password is used for all devices in the plant to prevent unauthorized access. The plant password can have a maximum of 12 characters. The password may contain the following characters: A to Z, a to z, 0 to 9, ? , _ , ! and - .1. Select > Settings > PV plant > Plant password.2. Enter a new password in the "Set password" and "Confirm password" text boxes.3. Select [Save].8.15 What to Do in Case of a Lost Plant PasswordIf you forget the plant password, contact the SMA Service Line. You will be given a personal unlocking key (PUK) for each device, which can then be used to unblock the device. After you enter the PUK, the password for each device must be changed to a shared plant password (see Section 8.16).If you are not the plant owner, you must communicate the new plant password to the plant owner.](https://usermanual.wiki/SMA-Solar-Technology/SUNNYVIEW/User-Guide-1731935-Page-33.png)
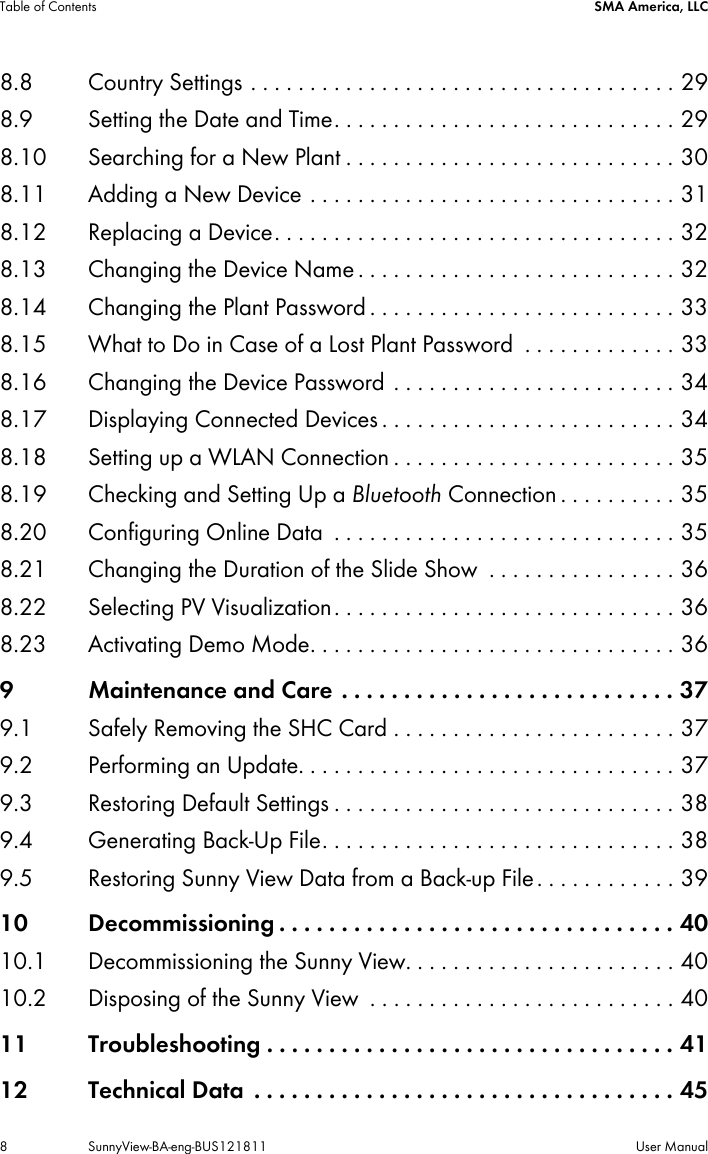
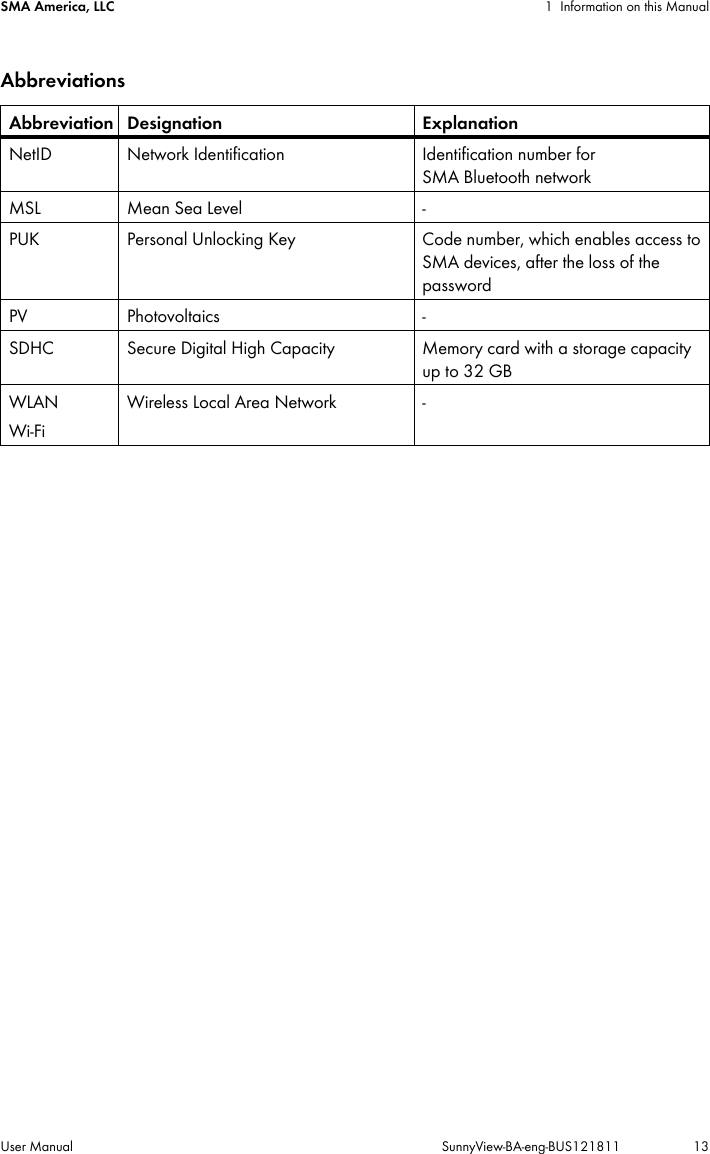
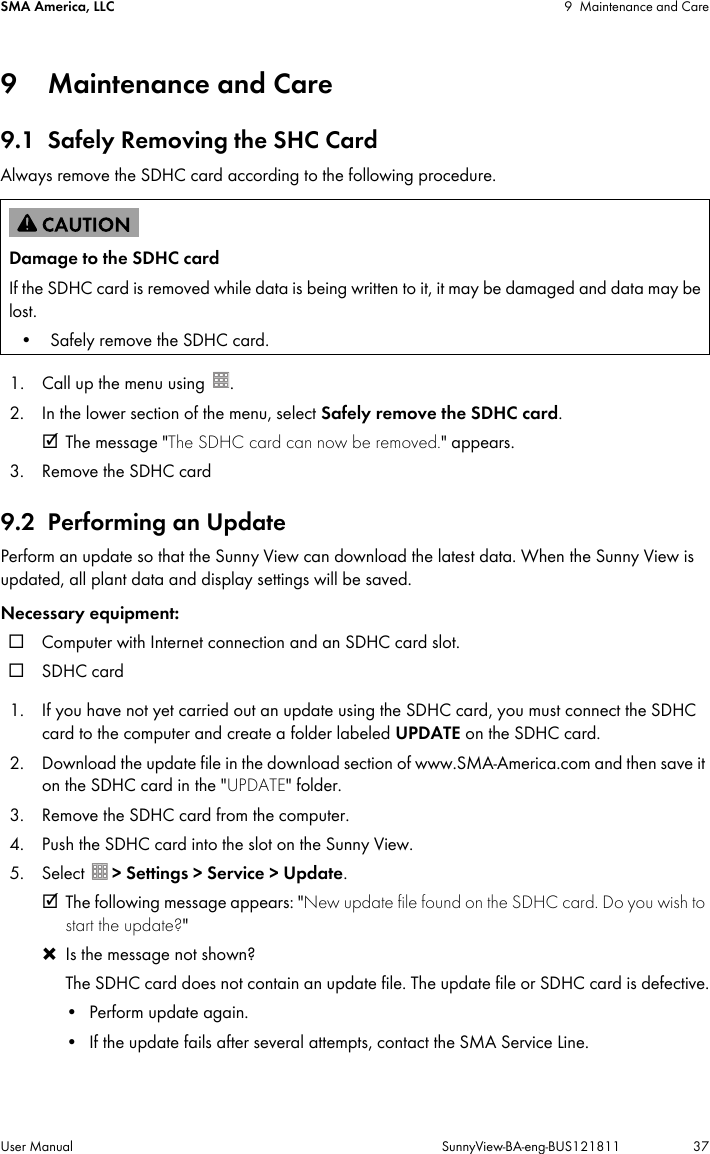
![8 "Settings" Menu Item SMA America, LLC34 SunnyView-BA-eng-BUS121811 User Manual8.16 Changing the Device PasswordThe device password can have a maximum of 12 characters. The password may contain the following characters: A to Z, a to z, 0 to 9, ? , _ , ! and - .1. Select > Settings > PV plant > Information.2. Select the desired device.3. Select [Device password].4. Enter a new password in the "Set password" and "Confirm password" text boxes.5. Select [Save].8.17 Displaying Connected Devices1. Select > Settings > PV plant > Information.☑ The Sunny View displays a list of connected devices with the following symbols:2. Select the desired device.☑ Sunny View displays the type, serial number and software version of the device.Symbol Status SignificanceNeutral The status of the device is currently being updated.OK The device is operational and working properly.Warning The device is not working properly, but can still feed power to the grid.Error The device is not working properly and does not feed power to the grid.Communication Errors Unable to communicate with the device at the moment. Possible causes include the overnight shutdown setting for the inverter.Lock A password other than the plant password has been set for the device. Unable to access the device.](https://usermanual.wiki/SMA-Solar-Technology/SUNNYVIEW/User-Guide-1731935-Page-34.png)
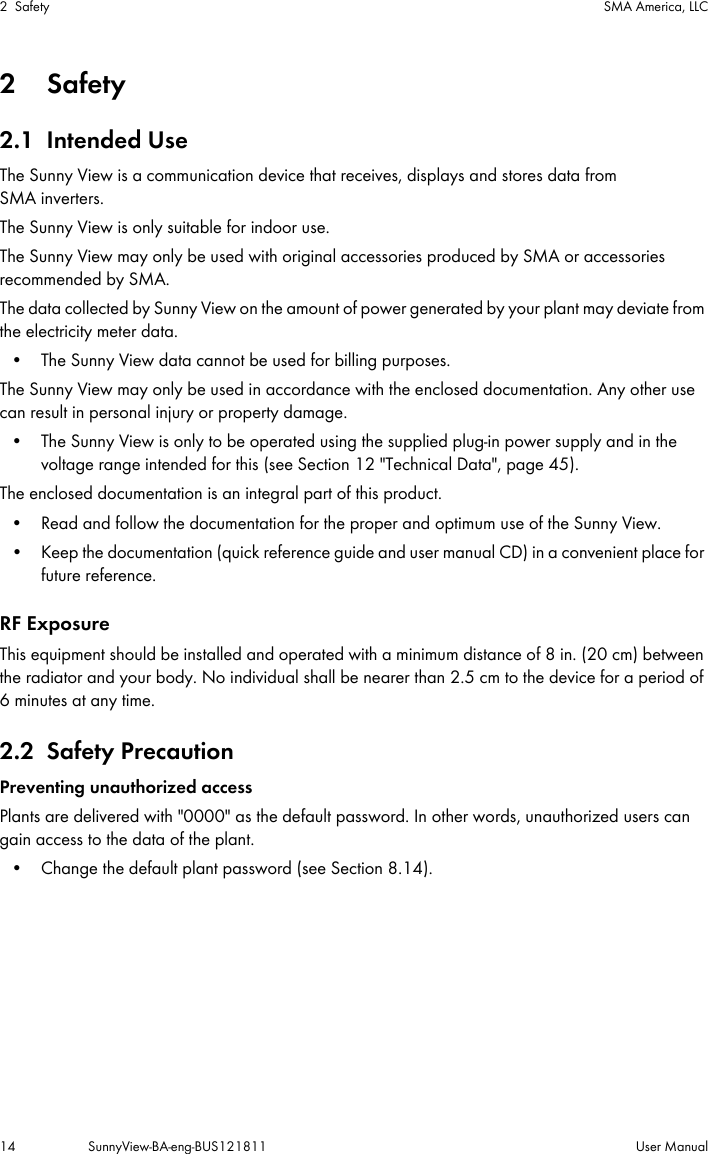
![SMA America, LLC 8 "Settings" Menu ItemUser Manual SunnyView-BA-eng-BUS121811 358.18 Setting up a WLAN ConnectionThe WLAN router is used to establish a wireless connection to the Internet. You can define the interval at which the Sunny View updates online data. The WLAN connection is deactivated by default.Router requirements:☐ The router must support DHCP and DHCP must be enabled for the router.☐ The router must support the transmission standard IEEE 802.11b or IEEE 802.11g.1. Select > Settings > Wireless.2. Enable the Wi-Fi networks checkbox.3. If the desired network is not displayed, search for the network:•Select [Other networks].•In the "Name" field, enter the name of the network.•In the "Security" field, select the desired encryption method.•Select [Accept].4. If the network is password-protected, enter the password in the text box.5. Using the drop-down list "Refresh after", set how often the Sunny View online data is updated from the Internet.6. If you do not wish to configure any other settings, select .8.19 Checking and Setting Up a Bluetooth ConnectionThe connection of the Sunny View to your plant is established via Bluetooth. You can check the quality of your Bluetooth connection and the NetID, and set how often the Sunny View plant data is updated.1. Select > Settings > Wireless.☑ The quality of the Bluetooth connection and the NetID is displayed.2. Using the drop-down list "Refresh after", set how often the Sunny View plant data is updated.3. If you do not wish to configure any other settings, select .8.20 Configuring Online Data1. Select > Settings > Slide show > Online data.2. If you want a newsfeed:• Enable the Newsfeed checkbox.• Type the Internet address of the RSS feed or Atom feed in the "URL" text box.3. If you want to connect to Facebook:• Enable the Facebook checkbox.• Enter the e-mail address and password of the Facebook account in the "E-mail" and "Password" text boxes.](https://usermanual.wiki/SMA-Solar-Technology/SUNNYVIEW/User-Guide-1731935-Page-35.png)
![8 "Settings" Menu Item SMA America, LLC36 SunnyView-BA-eng-BUS121811 User Manual•Select [Login].4. If you want to connect to Twitter:• Enable the Twitter checkbox.• Enter the user name/e-mail address and password of the Twitter account in the "User name or e-mail" and "Password" text boxes.•Select [Login].5. If you want to display the weather:• Enable the Weather checkbox.• Enter the city or ZIP code in the "City/ZIP" text box.6. If you do not wish to configure any other settings, select .8.21 Changing the Duration of the Slide ShowThe slides in the slide show change after a preset display time.1. Select > Settings > Slide show.2. Select the desired display time in the "Slide duration" drop-down list.3. If you do not wish to configure any other settings, select .8.22 Selecting PV VisualizationSunny View shows the slide show only with slides that you have selected. For some slides you will need to specify additional information using the text boxes, drop-down menus and sliders. Tap the Info icon for more information. You will find an overview of the slides in the "Plant data" section (see Section 5.3).1. Select > Settings > Slide show > PV visualization.☑ A list of all slides will open.2. Select and enable the slides you want to display.3. If you do not wish to configure any other settings, select .8.23 Activating Demo ModeThe demo mode simulates the process of operating a plant. It can therefore be used to demonstrate how the Sunny View is operating. The Sunny View simulates a plant with a power of 4.5 kWp. Activating Demo Mode After CommissioningRequirement:☐ The Sunny View must not be connected to a plant.1. Select > Settings > PV plant > New search > Plant search.2. Select [Demo mode].3. If you do not wish to configure any other settings, select .](https://usermanual.wiki/SMA-Solar-Technology/SUNNYVIEW/User-Guide-1731935-Page-36.png)
![9 Maintenance and Care SMA America, LLC38 SunnyView-BA-eng-BUS121811 User Manual6. Select [Start update].☑ The update procedure starts. The Sunny View displays the message "Update successful!" and restarts.✖"Update failed!" message appears on the display.The update file or SDHC card is defective.• Perform update again.• If the update fails after several attempts, contact the SMA Service Line.9.3 Restoring Default SettingsIf you wish to restore the default setting of the Sunny View, note that all plant data and display settings will be deleted. The saved plant data and CSV files will remain on the SDHC card.Restoring the default settings can take several minutes.1. Select > Settings > Service > Factory settings.☑ The following message appears: "After a reset to factory settings, your plant data and settings are deleted."2. Select [Reset].9.4 Generating Back-Up FileWhen you generate a back-up file, the Sunny View will save all plant data and settings to your SDHC card. A back-up file will allow you to restore all your data when you replace the Sunny View or reset the device to the default settings. You can generate back-up files automatically or manually. In automatic mode the Sunny View will automatically generate a back-up file at regular intervals. Requirement:☐ An SDHC card must be inserted in the slot.1. Select > Settings > Service > Back-up file > Generate back-up file.2. If you prefer automatic back-up creation:• Select the option automatically.• Select the desired interval from the drop-down list.3. If you would like to generate a back-up file manually, activate the option manually.Damage of the Sunny View due to disconnection from the electricity supplyDisconnecting the Sunny View from the electricity supply during the update procedure or when restarting may damage the Sunny View.•Do not remove the plug-in power supply from the socket-outlet during the update procedure or when restarting.](https://usermanual.wiki/SMA-Solar-Technology/SUNNYVIEW/User-Guide-1731935-Page-38.png)
![SMA America, LLC 9 Maintenance and CareUser Manual SunnyView-BA-eng-BUS121811 394. Select [Next].☑ The following message appears: "Back-up file was generated successfully!"☑ The following message appears: "Please insert an SDHC card with at least xx MB free space."The SDHC card does not have enough memory available or is not inserted into the device.• Insert a SDHC card with enough memory.•Select [Repeat].9.5 Restoring Sunny View Data from a Back-up FileRequirement:☐ An SDHC card containing the back-up file must be inserted in the slot.1. Select > Settings > Service > Back-up file > Restore from back-up file.☑ The following message appears: "Do you want to restore the back-up file with all data and settings on this Sunny View?"2. Select [Restore].☑ The following message appears: "The data and settings were successfully restored from the back-up file!"✖ The following message appears: "No back-up file found."• Make sure an SDHC card with the back-up file is inserted into the device.Overwriting plant data and settingsWhen you restore a back-up, all plant data and settings are overwritten.](https://usermanual.wiki/SMA-Solar-Technology/SUNNYVIEW/User-Guide-1731935-Page-39.png)