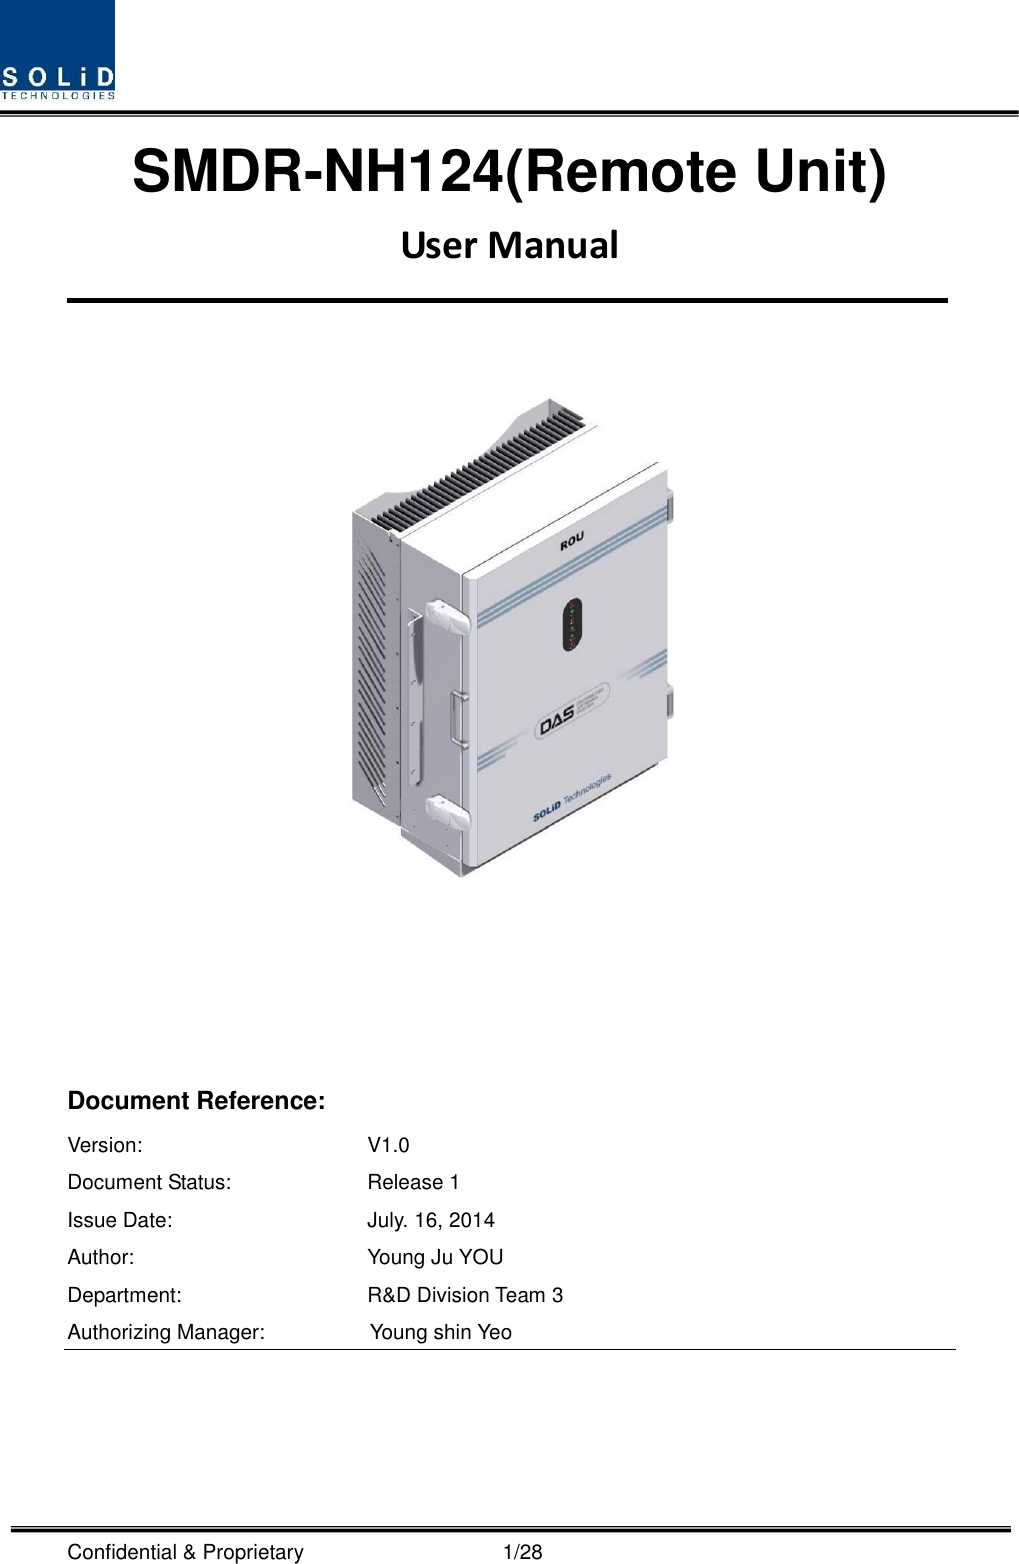
SOLiD 19PAWS1MIMO RDU Module (1900P/AWS-1 (MIMO)) User Manual MB DAS
SOLiD, Inc. RDU Module (1900P/AWS-1 (MIMO)) MB DAS
UserManual.wiki
>
SOLiD
>
19PAWS1MIMO User Manual
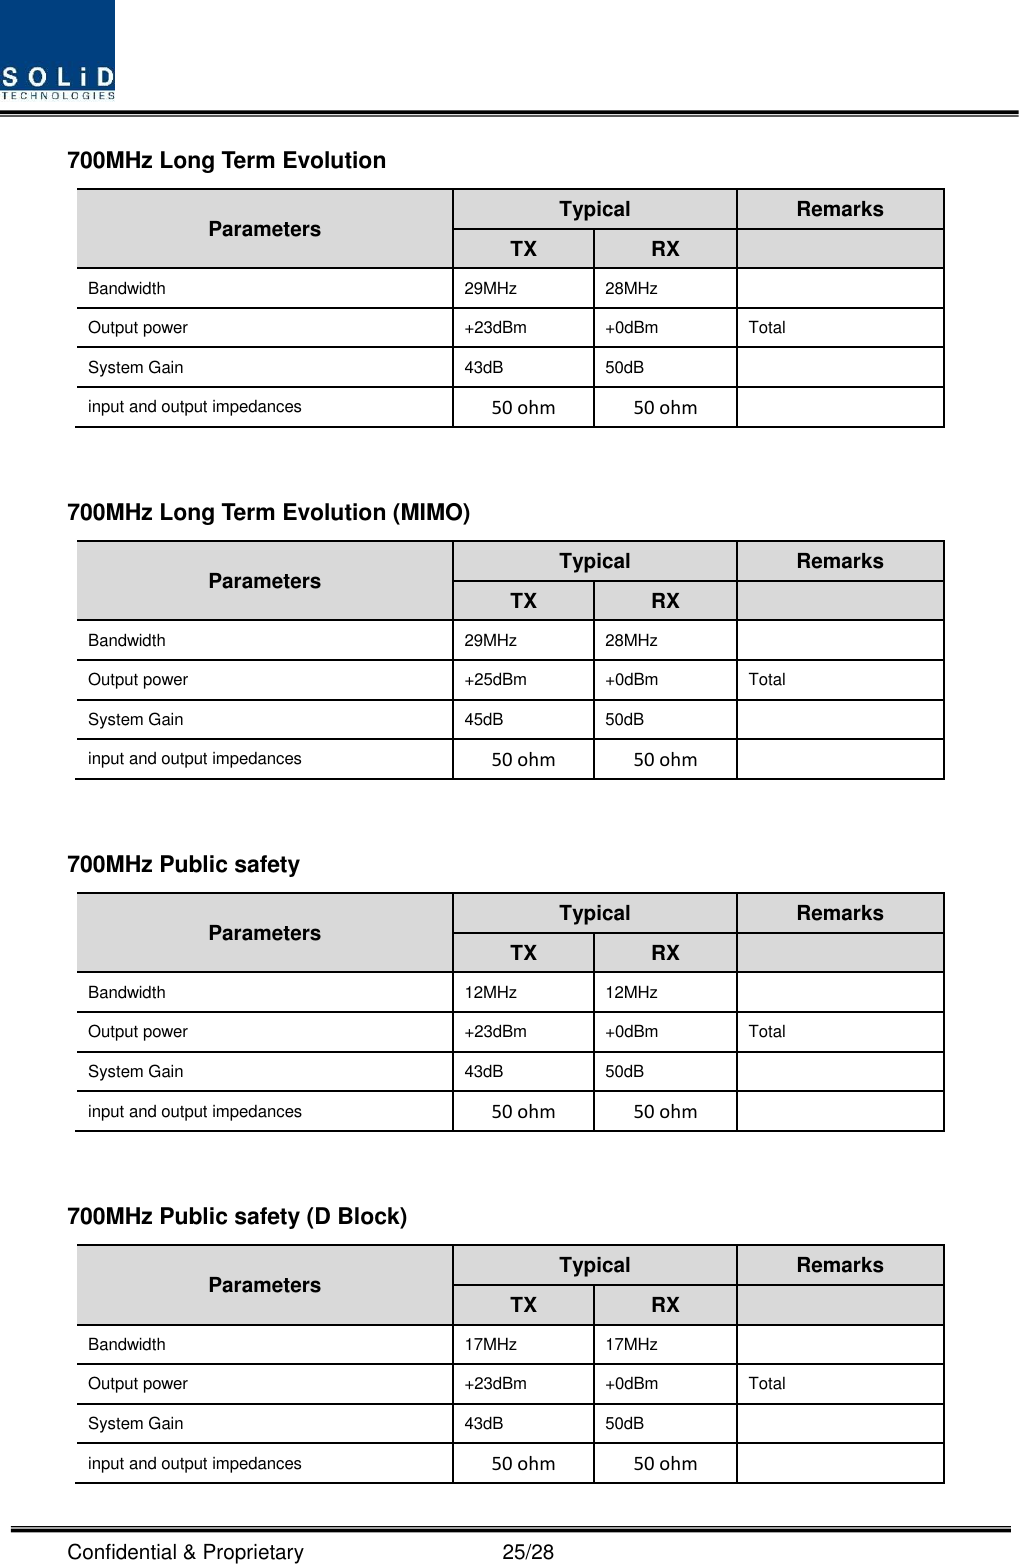
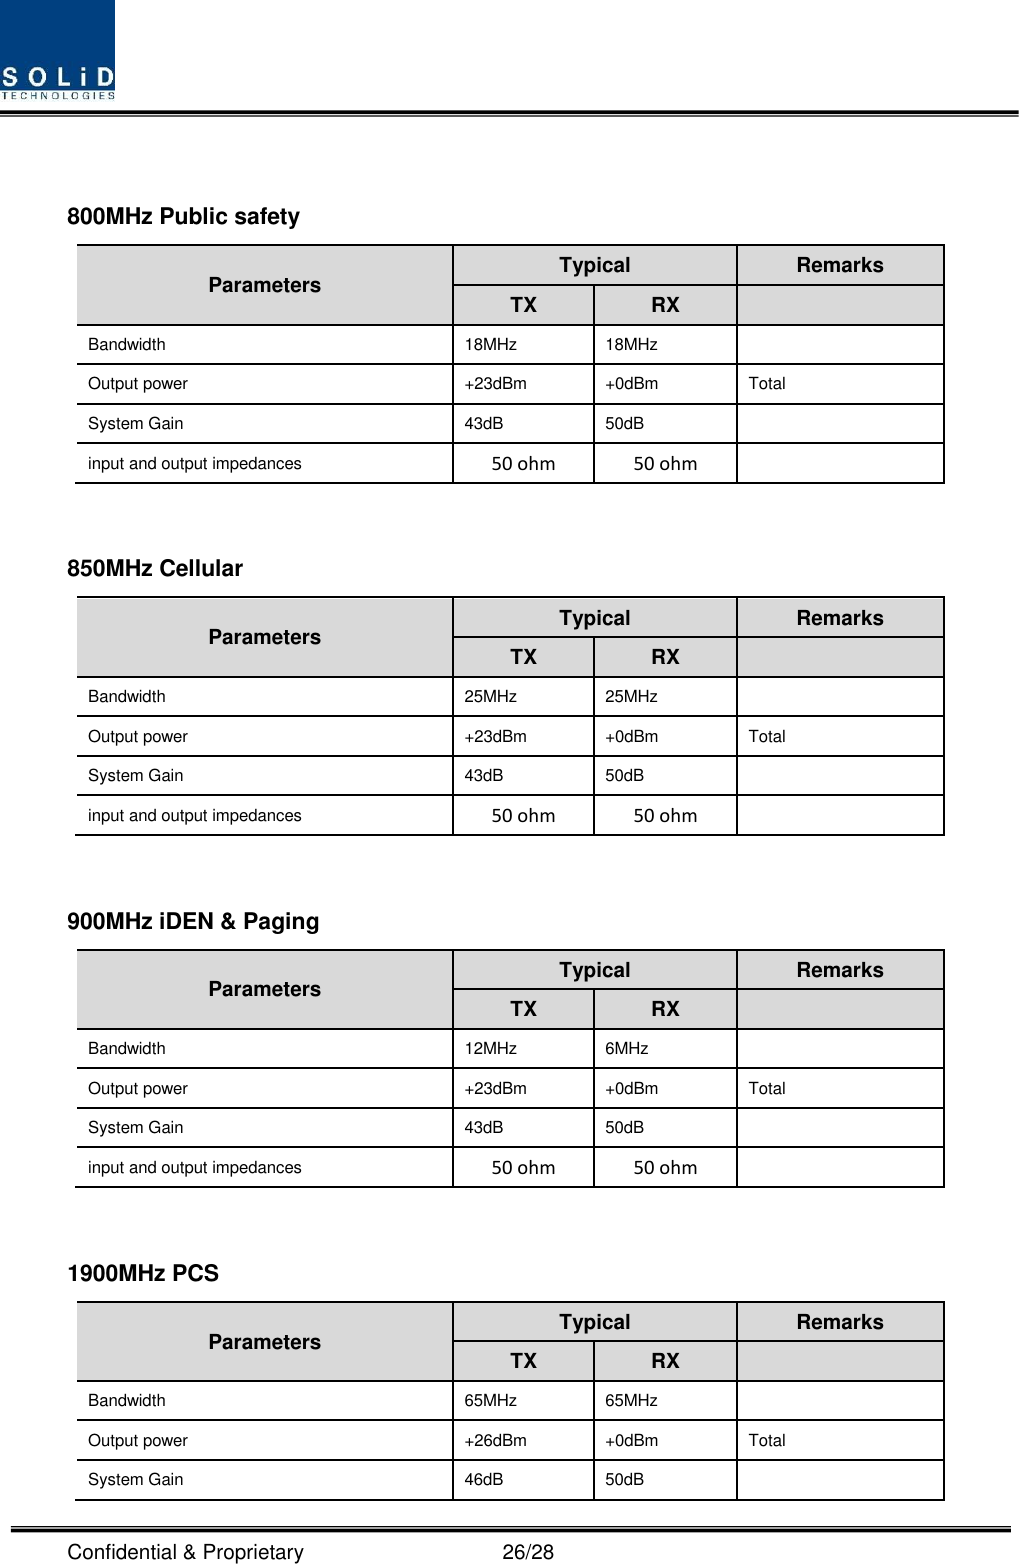
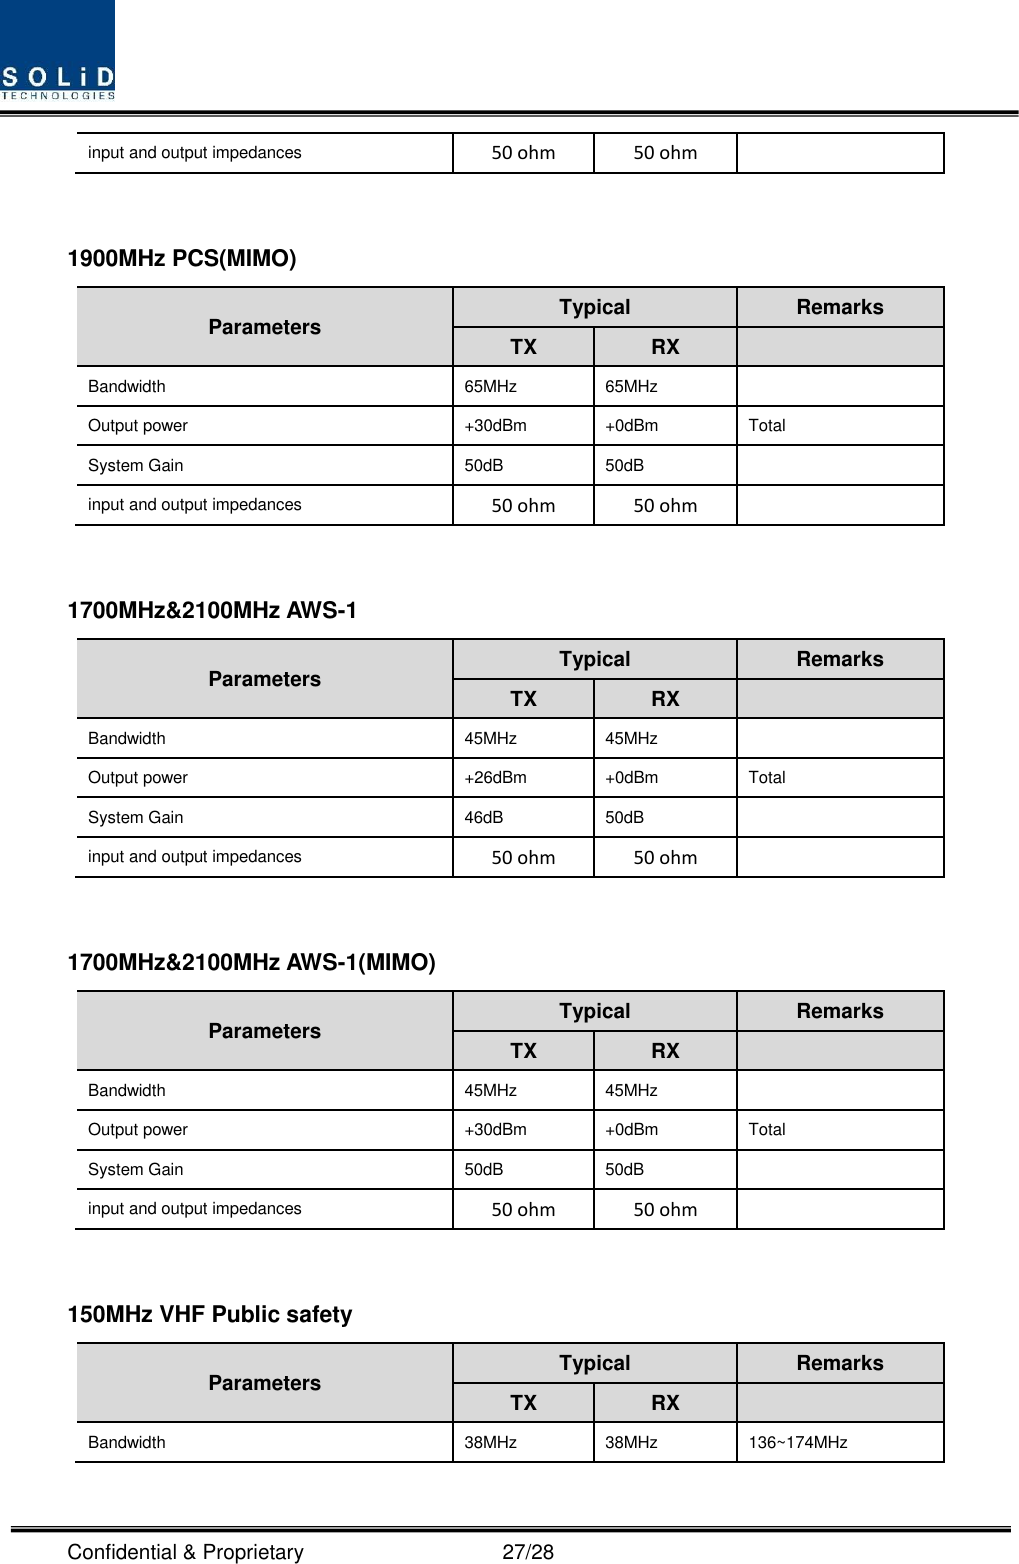
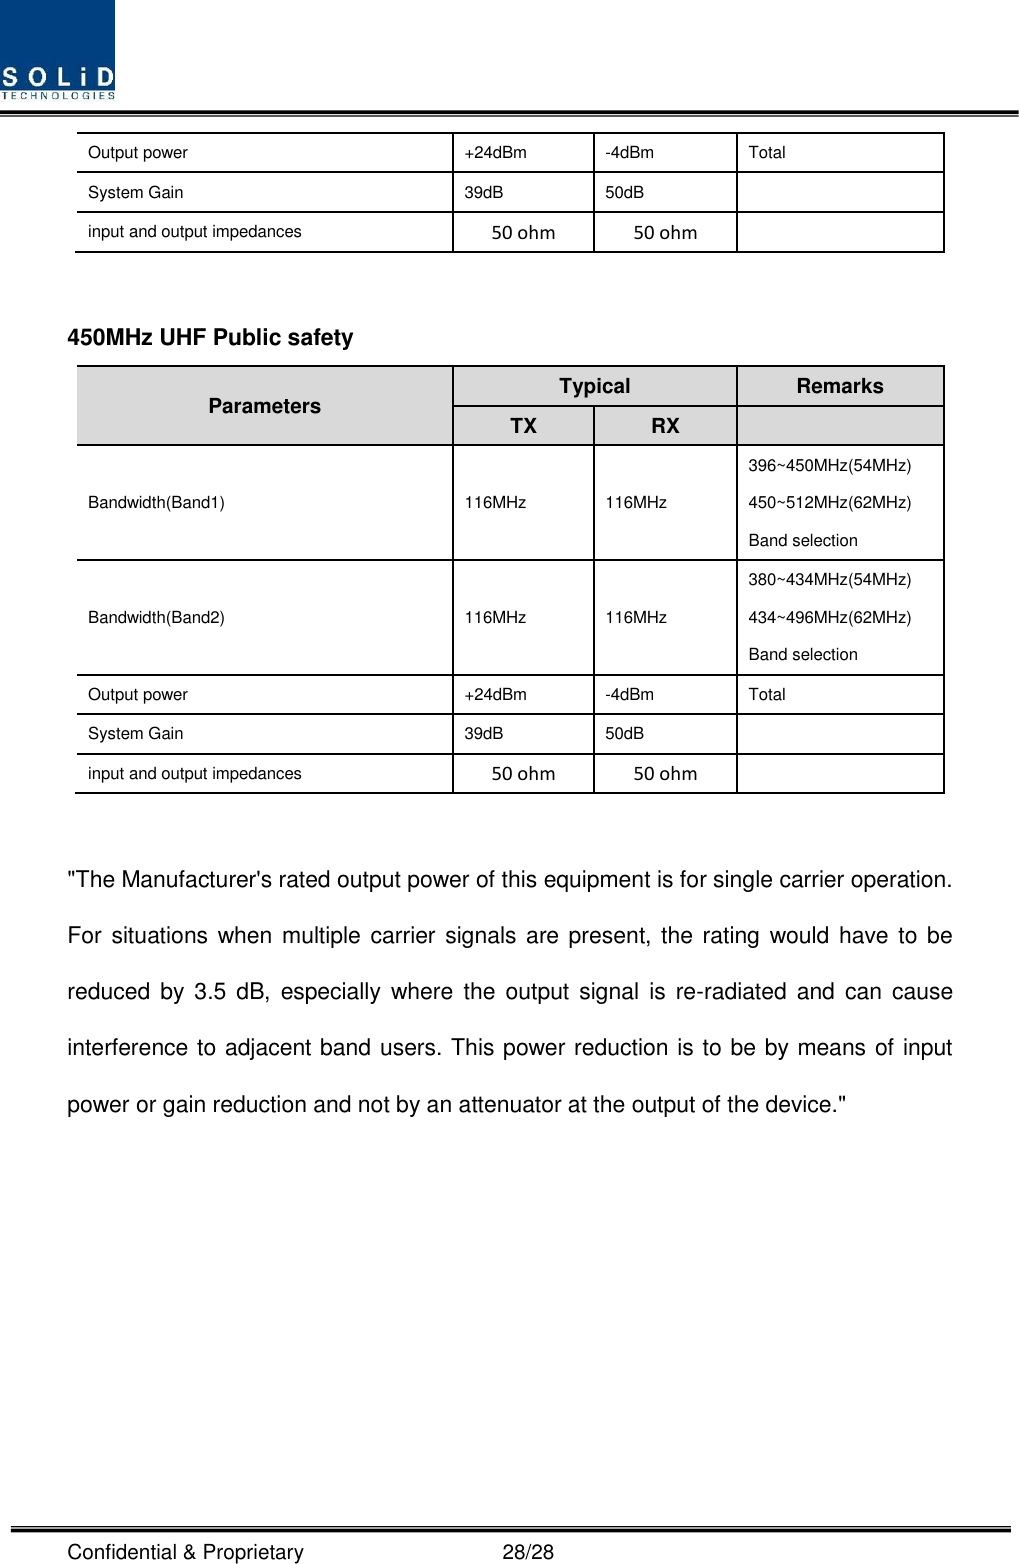
User Manul
Navigation menu
Upload a User Manual
Namespaces
Wiki Guide
HTML
PDF
Info
Views
User Manual
Discussion / Help
Navigation