SSV Works MRB3 MRB3 Wired Remote and Black Box User Manual
SSV Works, Inc MRB3 Wired Remote and Black Box
User Manual

User Guide
MRB3
Bluetooth® Media Controller
Corporate: SSV WORKS, 201 N. Rice Ave Unit A, Oxnard, CA 93030
Web: www.SSVworks.com | Phone: 818-991-1778 | Fax: 866-293-6751
The Bluetooth® word mark and logos are registered trademarks owned by Bluetooth SIG,Inc. and any use of such
marks by SSV Works is under license. © 2016 SSV Works, Oxnard, CA 93030 MRB3 Rev. B 3-22-16
Do not attempt to disassemble or repair the MRB3 yourself. Please call SSV Works for
technical assistance or repair information. Changes or modications to the MRB3 not
authorized by SSV Works will void the warranty.
SSV Works recommends disconnecting the negative battery terminal before
beginning any installation.
SAFETY INFORMATION
!
RADIO FUNCTIONS
CONNECTING AN EXTERNAL AUDIO DEVICE (OPTIONAL)
BLUETOOTH AUDIO STREAMING
MRB3
WARRANTY INFORMATION:
All SSV Works enclosures are covered by a limited lifetime warranty against defects in material or workmanship. All
SSV Works Electronics are covered by a limited 1 year warranty against defects in material or workmanship. Labor for
replacement of defective components is not covered. All SSV Works Speakers are covered by a limited 1 year warranty
against defects in material or workmanship. Contact SSV Works for further warranty information.
Selecting FM/AM Band: Press MODE until the FM or AM band shows on the display.
Automatic Station Search: Press or to start automatic station search. The search
stops when a station is found.
Manual Station Search: Press and hold or until M - SEEK. Press the or
briey to change the frequency until the desired frequency is set. Change to Automatic
search (A - SEEK) mode after a station is found.
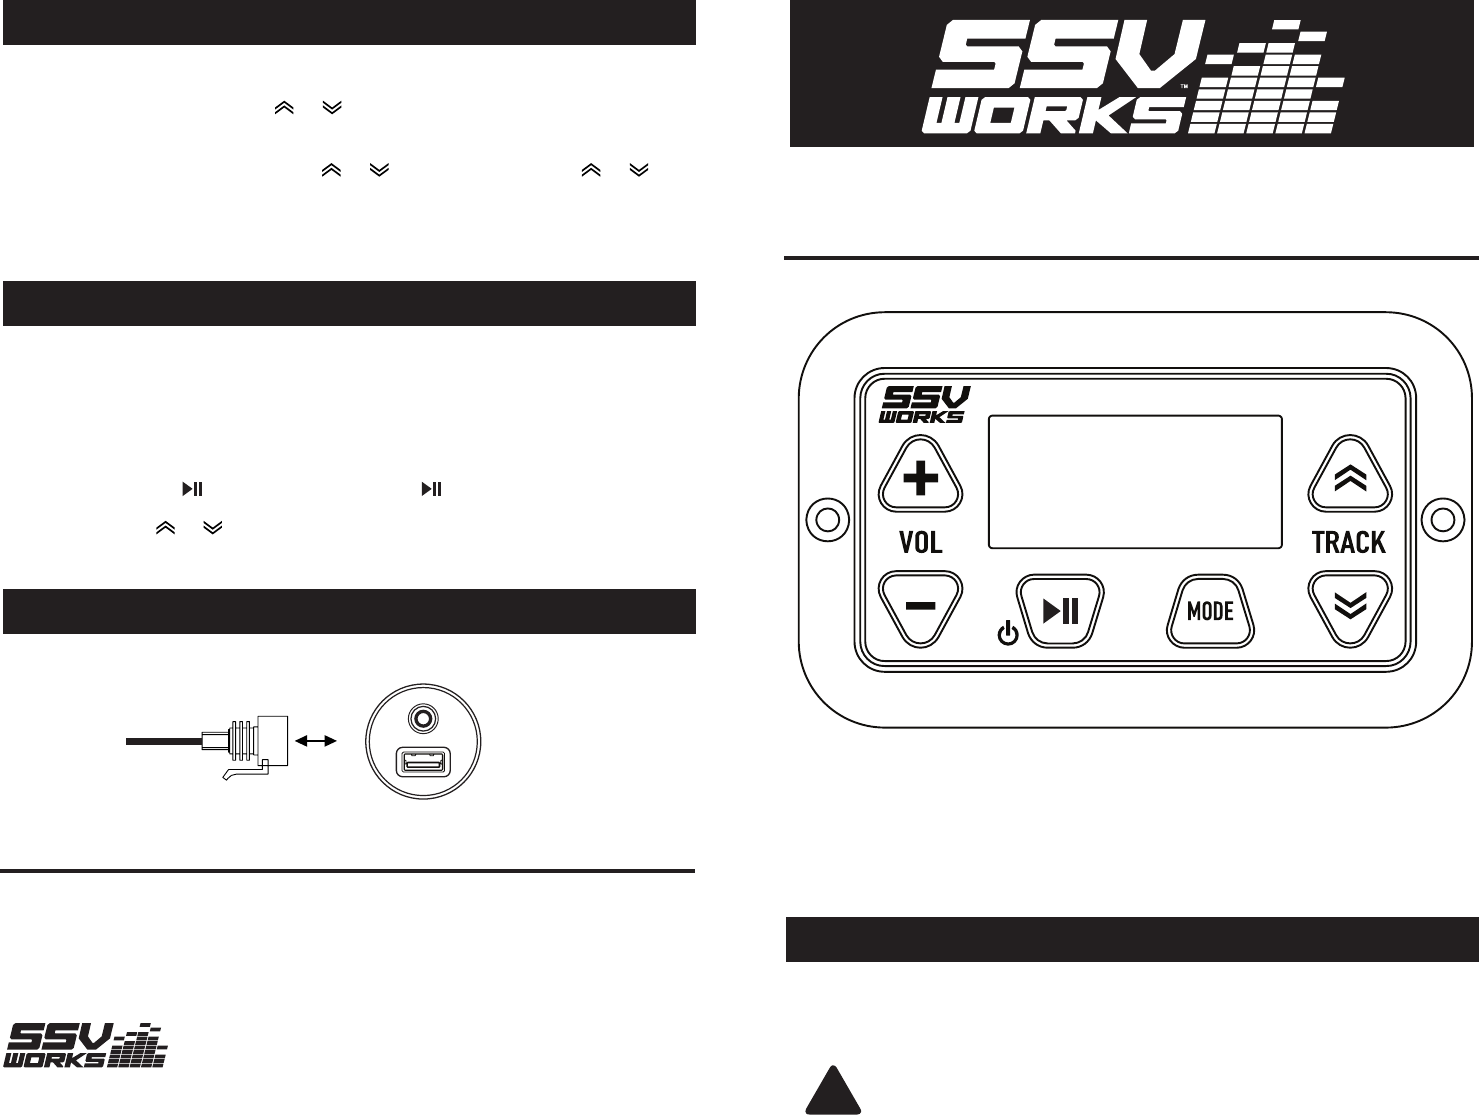
- Press MODE until AUX shows on the display.
Add 3.5mm AUX-in
and USB Charging with
SSV Works 3PUSB35A
(sold separately)
1. Open the Bluetooth setup program on the mobile device and activate the Bluetooth feature
2. The device will show up as “SSV”. Select this device and enter passkey: OOOO
3. After successfully pairing, a Bluetooth logo will appear on the phone menu screen and
show “CONNECT” “BT MUSIC” on the device LCD display.
Stop Playback: Press briey to pause music. Press button again to continue playback.
Skip Track: Press or to play previous/next song.
Line in

MRB3
1. Play/Pause
Power On/Off
Mute
2. Volume Up/Down
3. Mode
4. Track Forward/Back
Station Forward/Back
Menu Settings Up/Down
5. LCD Display
BUTTON LOCATIONS AND FUNCTIONS
GENERAL OPERATIONS
1
5
34
2
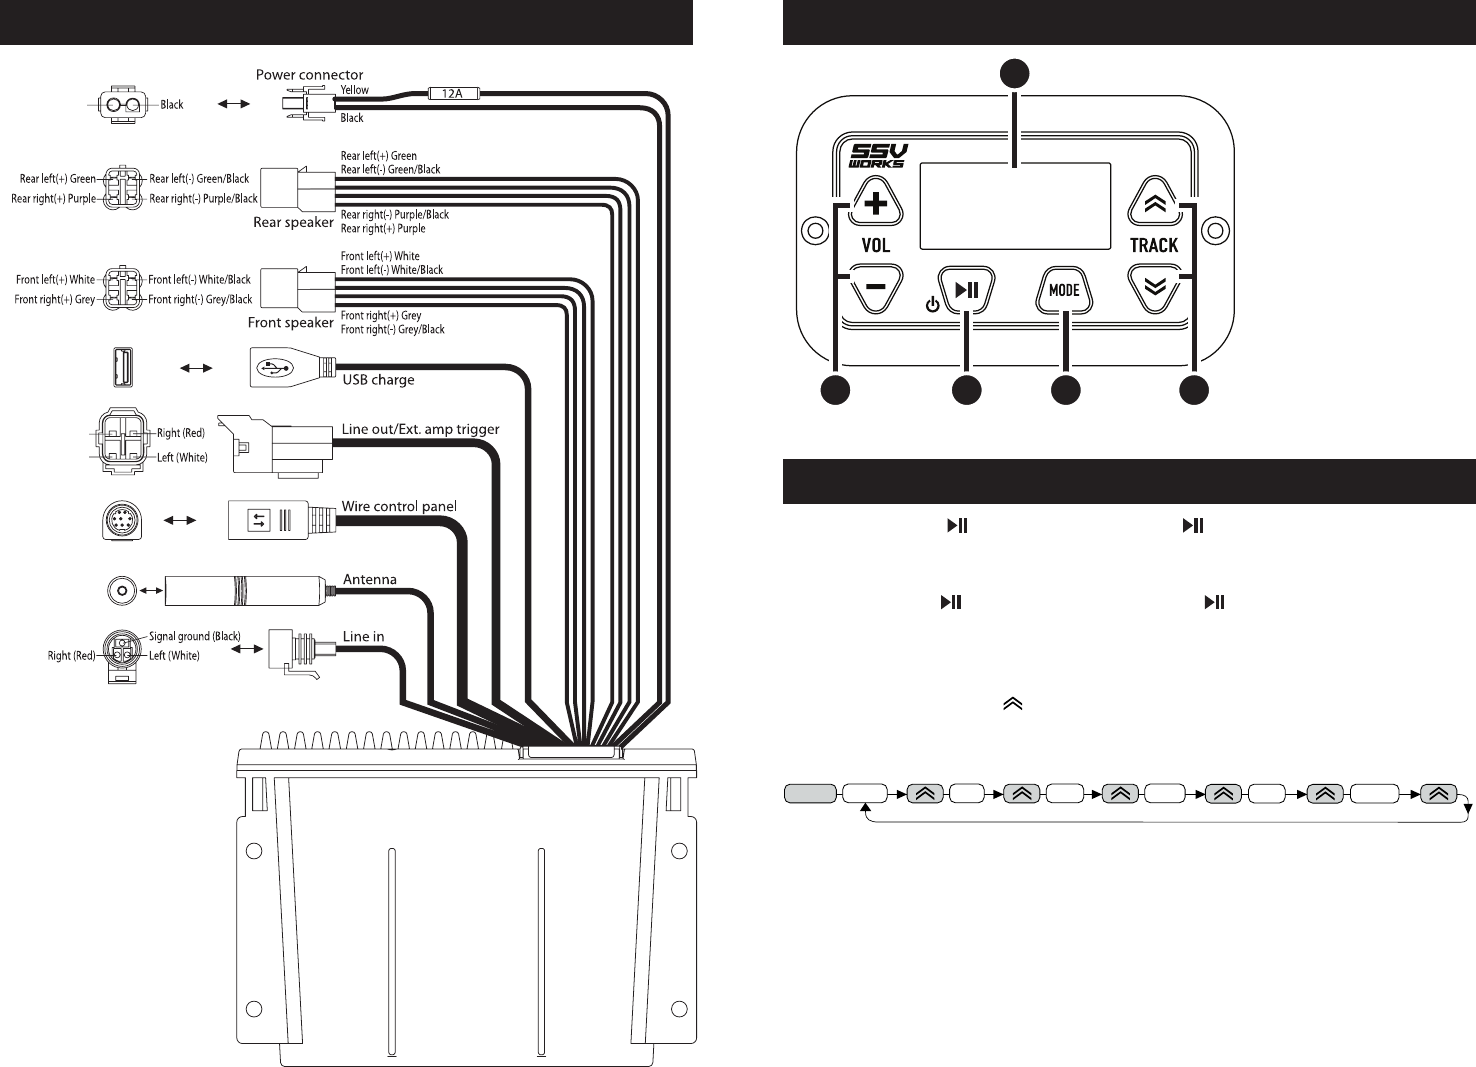
AMPLIFIER WIRING DIAGRAM
USB charge
Line out/Ext. amp trigger
Wire control panel
Antenna
Line in
Rear speaker
Front speaker
Right (Red)Signal ground
AMP turn on Left (White)
Signal ground (Black)
Left (White)Right (Red)
Rear left(-) Green/Black
Rear left(+) Green
Rear left(-) Green/Black
Rear right(-) Purple/Black
Rear right(+) Purple
Front left(+) White
Front left(-) White/Black
Front right(+) Grey
Front right(-) Grey/Black
Rear left(+) Green
Rear right(-) Purple/BlackRear right(+) Purple
Power connector
Yellow
12A
Black
Black
Backup yellow
Front left(-) White/BlackFront left(+) White
Front right(-) Grey/BlackFront right(+) Grey
can’t read USB data
charge only
12v+ Yellow
does not read
USB data
USB 1A charge input
Signal ground
(Black)
AMP turn on
(Blue)
Power On/Off: Press to power on. Press and hold to power off.
Volume: Press the VOL(+) or (-) button to increase or decrease the volume.
Mute On/Off: Press briey to mute the sound. Press again to un-mute the sound.
Mode Sources: Press the MODE button to switch between AUX, FM, AM, Bluetooth (BT MUSIC).
Mode Settings (Bass/Treble/Balance/Fader/EQ/Loudness): Press the MODE button for
2 seconds and then press the button until the function you want is shown on the display.
Press VOL(+) (-) to change the settings of the menu item displayed.
Bass (BAS)/Treble (TRE): Press the VOL(+) or (-) button to adjust Bass & Treble.
Balance (BAL): Press VOL(+) or (-) to adjust balance (sound distribution between the right and
left speakers).
Fader (FAD): Press VOL(+) or (-) to adjust sound distribution between the front and rear speakers.
Equalizer (EQ): Press VOL(+) or (-) to select one of the EQ options: OFF, FLAT, CLASS, POP,
ROCK, JAZZ, METAL. The equalizer will be disabled if EQ OFF is set. The equalizer setting is shown
at the bottom of the display.
Loudness (LOUD): Press VOL(+) or (-) (LOUD ON) or to disable the function (LOUD OFF). When
the loudness function is on, LOUD is shown on the right of the display.
2 sec.
MODE BASS TRE BAL FAD EQ LOUD
USB charge
Line out/Ext. amp trigger
Wire control panel
Antenna
Line in
Rear speaker
Front speaker
Right (Red)Signal ground
AMP turn on Left (White)
Signal ground (Black)
Left (White)Right (Red)
Rear left(-) Green/Black
Rear left(+) Green
Rear left(-) Green/Black
Rear right(-) Purple/Black
Rear right(+) Purple
Front left(+) White
Front left(-) White/Black
Front right(+) Grey
Front right(-) Grey/Black
Rear left(+) Green
Rear right(-) Purple/BlackRear right(+) Purple
Power connector
Yellow
12A
Black
Black
Backup yellow
Front left(-) White/BlackFront left(+) White
Front right(-) Grey/BlackFront right(+) Grey
can’t read USB data
charge only
Technical speci ications
87.5-107.9MHz
200kHz
2.8μV
30dB
TUNER FM Frequency
RangeChannelStep
Sensitivity
StereoSeparationSignal
toNoiseRatio
50dB
This device complies with part 15 of the FCC Rules. Operation is subject to the
following two conditions: (1) This device may not cause harmful interference, and
(2) this device must accept any interference received, including interference that
may cause undesired operation.
FCC Caution
Any Changes or modifications not expressly approved by the party responsible
for compliance could void the user's authority to operate the equipment.
Note: This equipment has been tested and found to comply with the limits for a
Class B digital device, pursuant to part 15 of the FCC Rules. These limits are
designed to provide reasonable protection against harmful interference in a
residential installation. This equipment generates uses and can radiate radio
frequency energy and, if not installed and used in accordance with the instructions,
may cause harmful interference to radio communications. However, there is no
guarantee that interference will not occur in a particular installation. If this
equipment does cause harmful interference to radio or television reception, which
can be determined by turning the equipment off and on, the user is encouraged to
try to correct the interference by one or more of the following measures:
-Reorient or relocate the receiving antenna.
-Increase the separation between the equipment and receiver.
-Connect the equipment into an outlet on a circuit different from that to which the
receiver is connected. -Consult the dealer or an experienced radio/TV technician
for help.
The device has been evaluated to meet general RF exposure requirement. The
device can be used in portable exposure condition without restriction.