SZ DJI TECHNOLOGY GL3581503 Remote Controller User Manual 1
SZ DJI TECHNOLOGY CO., LTD Remote Controller 1
UserManual.wiki
>
SZ DJI TECHNOLOGY
>
GL3581503 User Manual
>
User Manual 1
Contents
1.
User Manual 1
2.
User Manual 2
3.
Users Manual 1
4.
Users Manual 2
User Manual 1
Navigation menu
Upload a User Manual
Namespaces
Wiki Guide
HTML
PDF
Info
Views
User Manual
Discussion / Help
Navigation
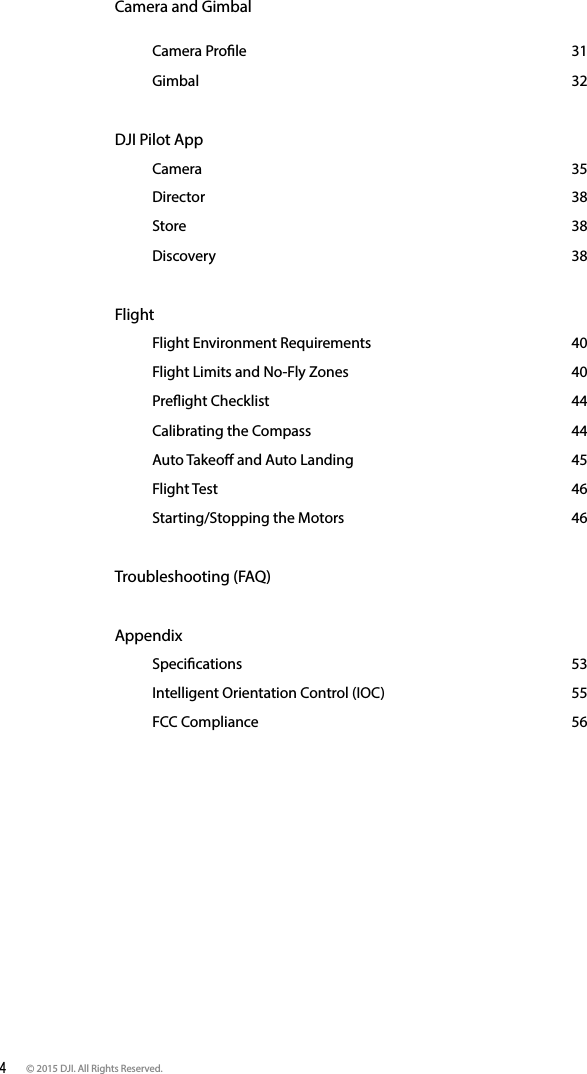
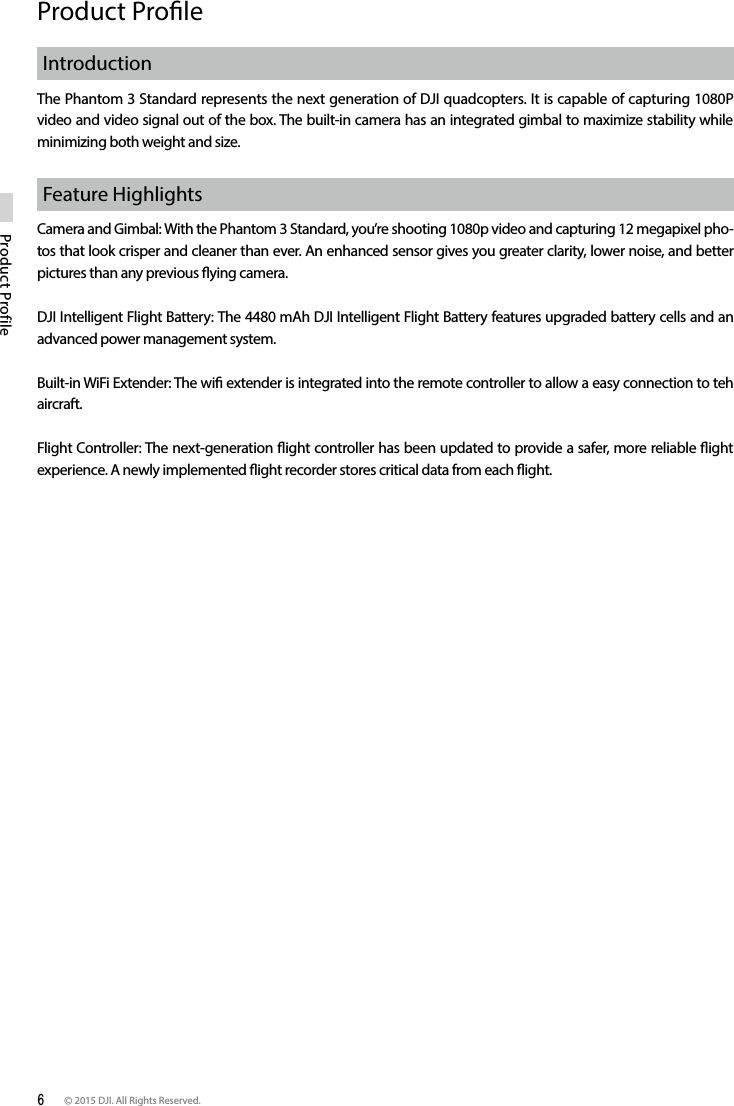
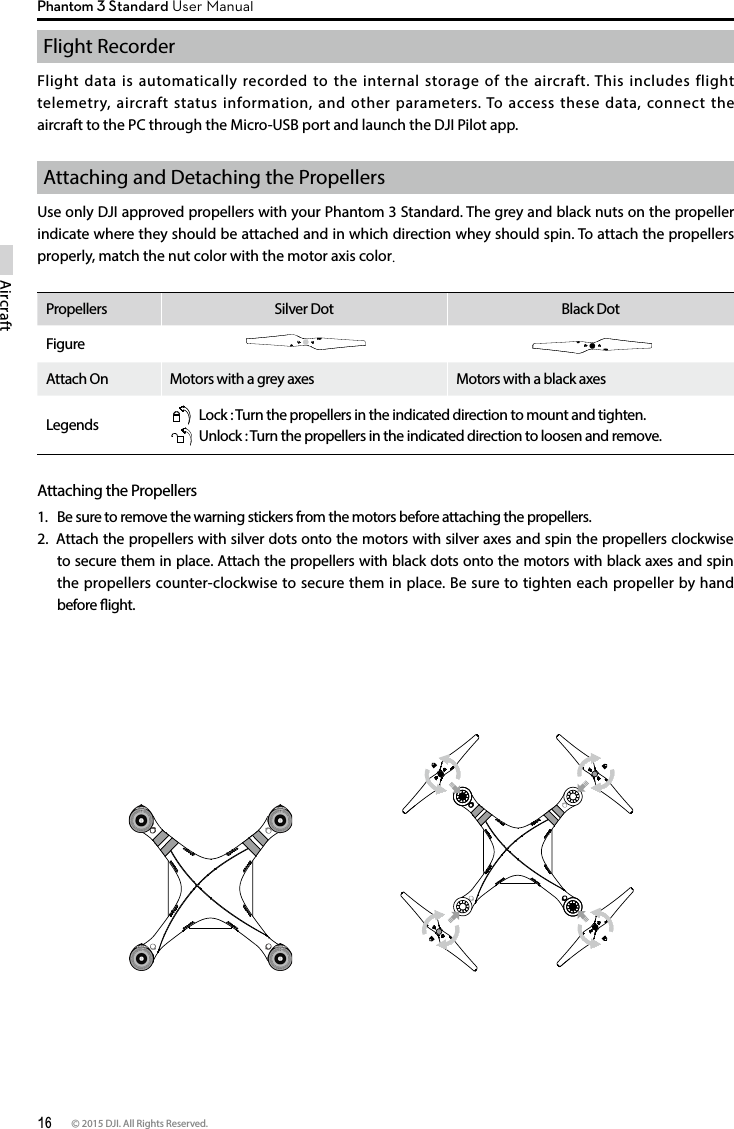
![8 © 2015 DJI. All Rights Reserved. Product ProfilePhantom 3 Standard User ManualAircraft Diagram[1] Gimbal and Camera[2] [Camera Micro-SD Card Slot[3] Aircraft Micro-USB Port[4] Front LED Indicator[5] Landing gear[6] Motor [7] Rear LED Indicator[8] Antennas[10][11]](https://usermanual.wiki/SZ-DJI-TECHNOLOGY/GL3581503.User-Manual-1/User-Guide-2687322-Page-8.png)
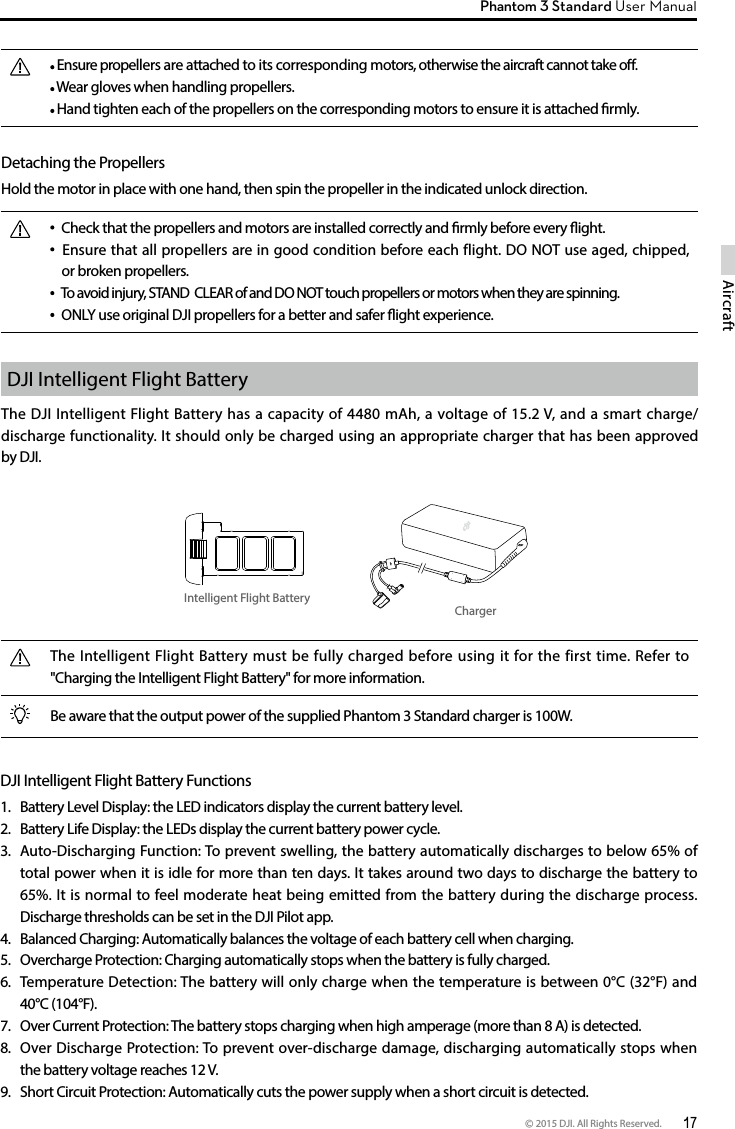
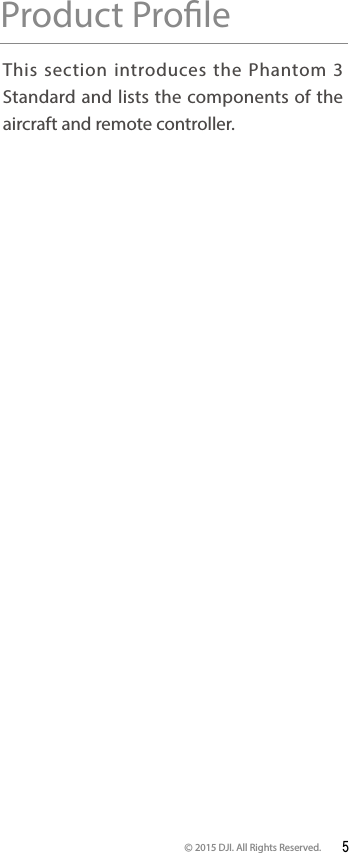
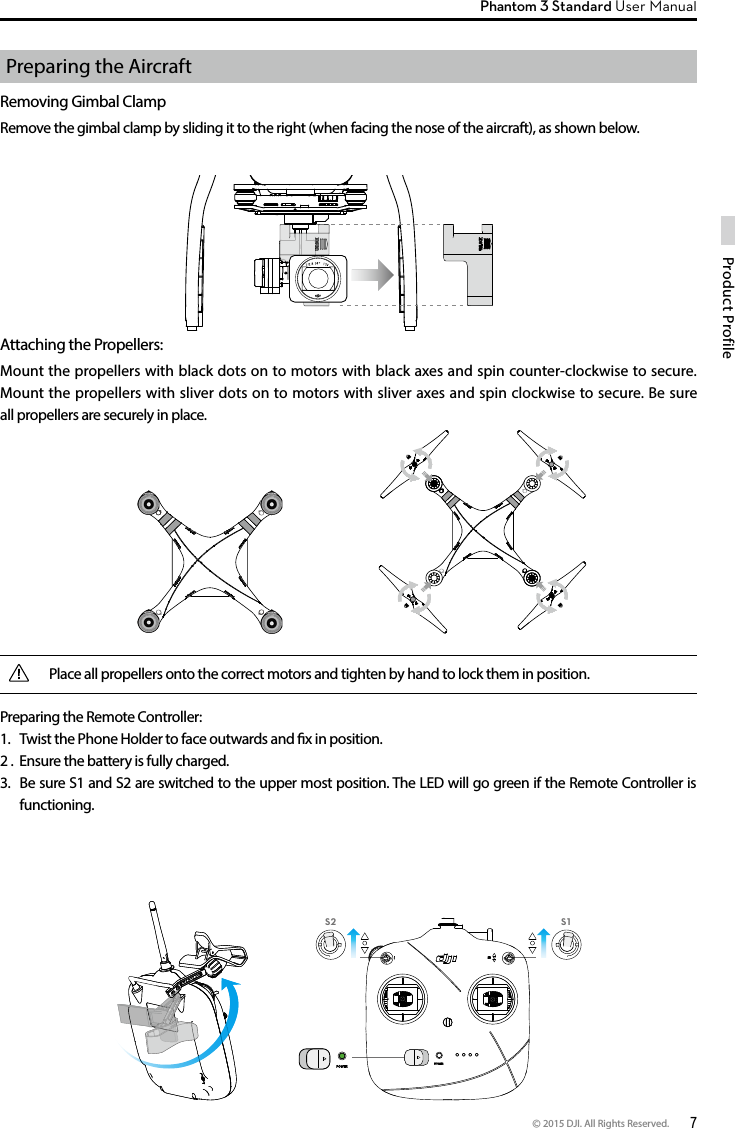
![© 2015 DJI. All Rights Reserved. 9Product ProfilePhantom 3 Standard User Manual Remote Controller Diagram[1] Power Button[2] Status LED[3] Battery Level LEDs[4] Neck Strap Securing Hole[5] S1 Switch[6] S2 Switch[7] Control Stick [8] Phone Holder[9] Antennas[10] Gimbal Dial[11] Charging Port](https://usermanual.wiki/SZ-DJI-TECHNOLOGY/GL3581503.User-Manual-1/User-Guide-2687322-Page-9.png)