SZ DJI TECHNOLOGY HG800TX15 RONIN-M TX User Manual 3
SZ DJI TECHNOLOGY CO., LTD RONIN-M TX 3
UserManual.wiki
>
SZ DJI TECHNOLOGY
>
HG800TX15 User Manual
>
User Manual 3
Contents
1.
User Manual 1
2.
User Manual 2
3.
User Manual 3
4.
User Manual 4
5.
User Manual 5
6.
User Manual 6
User Manual 3
Navigation menu
Upload a User Manual
Namespaces
Wiki Guide
HTML
PDF
Info
Views
User Manual
Discussion / Help
Navigation
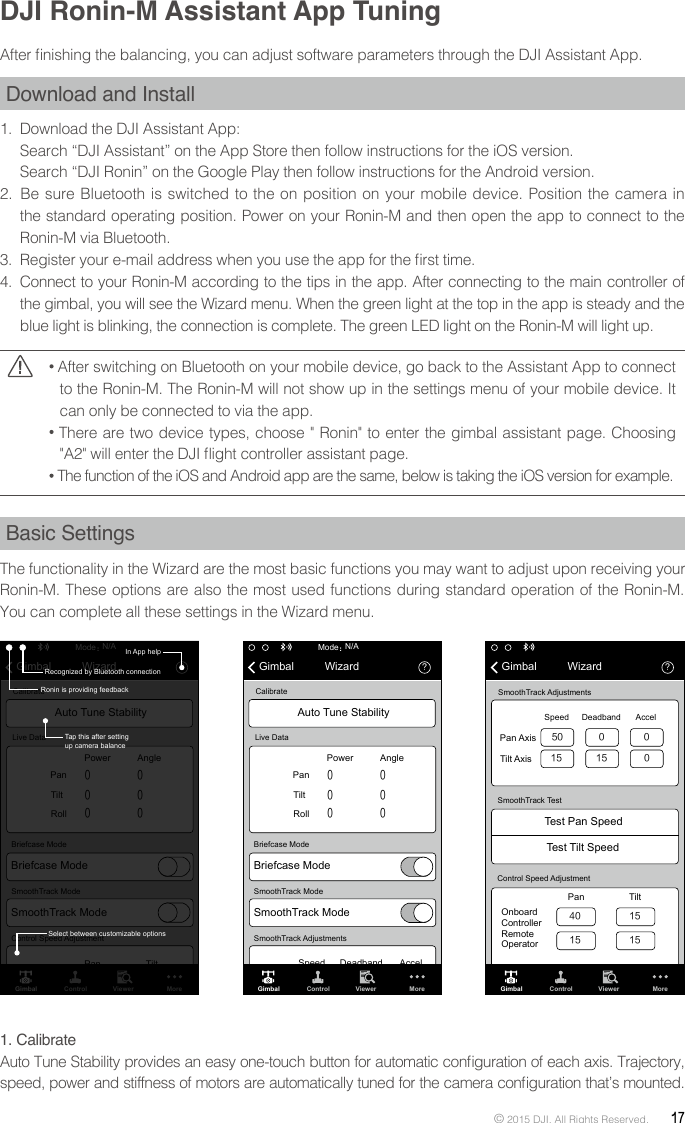
![Ronin-M User Manual16 © 2015 DJI. All Rights Reserved. Step 4: Balancing the Pan AxisThe entire mass below the pan motor must be balanced on the central axis line of the pan motor. To achieve this balance, you must slide the pan axis slider.1. Open the clamp [1] on the pan axis and turn the knob [2] to slide the assembly. Identify if the Ronin-M is front heavy or rear heavy. 2. While the Ronin-M is resting on the tuning stand, try rotating the Ronin-M along the pan axis by lifting one side of the handle bar. If the camera does not swing, the pan axis is properly balanced. Tighten the clamp after balancing is completed.Advanced Roll AdjustmentIf additional roll adjustment is needed in cases where the camera itself is too light in comparison to the tilt motor assembly, advanced roll adjustment can be achieved by loosening the indicated screws and pushing the assembly to the right or left.[1][2]1. Loosen the camera base's side clamp to allow the camera and mounting plate to slide forwards and backwards. Slide the camera forwards or backwards until the Tilt Axis remains level. It takes very small adjustments to get the balance right.2. Tighten the side clamp to lock the camera and mounting plate in position. If properly balanced, the camera should be able to remain steady in any given tilt angle.](https://usermanual.wiki/SZ-DJI-TECHNOLOGY/HG800TX15.User-Manual-3/User-Guide-2580718-Page-1.png)