SZ DJI TECHNOLOGY HG9001407 RONIN User Manual Ronin V1 0
SZ DJI TECHNOLOGY CO., LTD RONIN Ronin V1 0
UserManual.wiki
>
SZ DJI TECHNOLOGY
>
HG9001407 User Manual
>
user manual part 2
Contents
1.
user manual part 1
2.
user manual part 2
user manual part 2
Navigation menu
Upload a User Manual
Namespaces
Wiki Guide
HTML
PDF
Info
Views
User Manual
Discussion / Help
Navigation
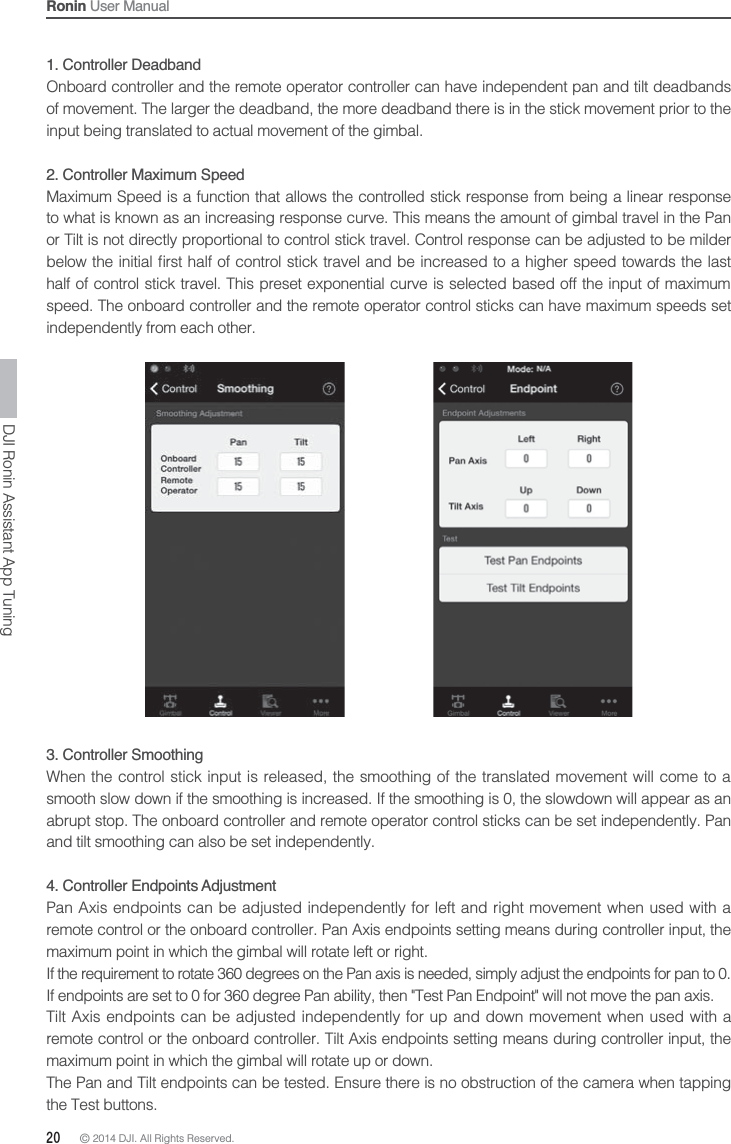
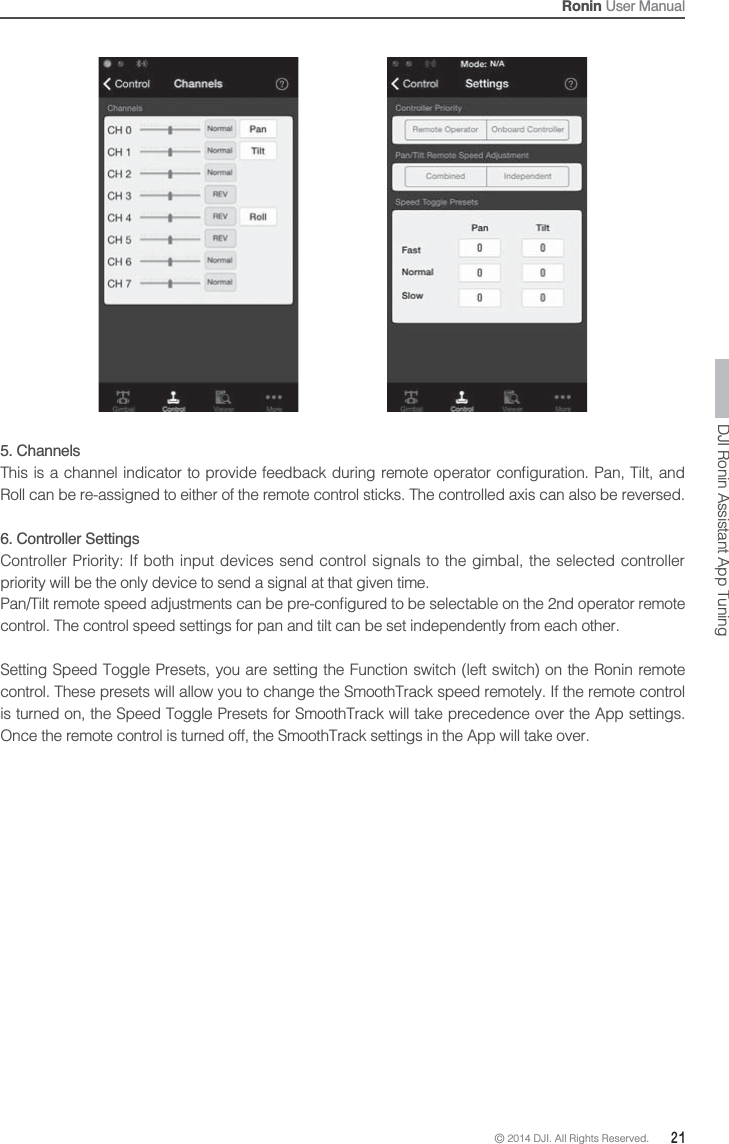
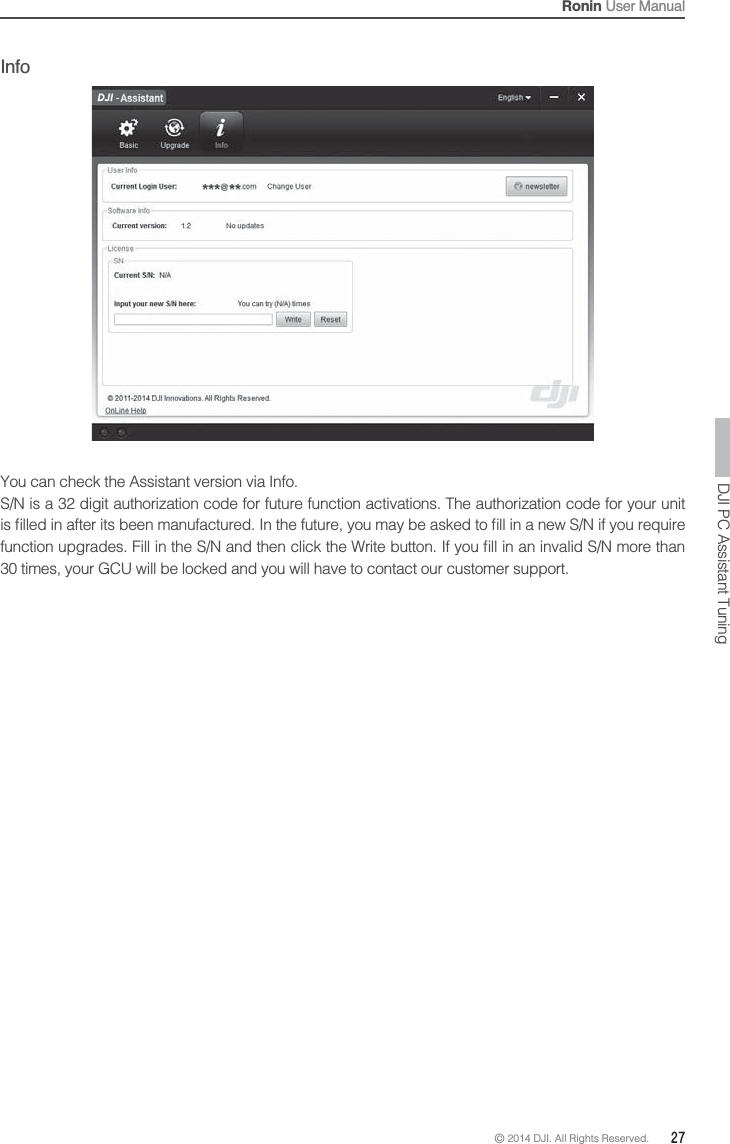
![28 © 2014 DJI. All Rights Reserved. Remote ControlConnecting the Remote Control to Ronin1. Insert four AA batteries into the battery compartment on the back of the remote control. Pay attention to the negative and positive poles.2. Turn on the Ronin, then turn on the Remote Controllers's power switch. The LED on the Ronin will blink red at this time.3. Press and hold the Bind button (shown below) for a few seconds until the LED blinks green three times. If the LED changes to a solid, red light, the remote control and the Ronin have been successfully bound. The binding process only needs to be done once unless the bind button is pressed or if the Ronin needs to be bound to another remote control.[2][3][5][4][6][7][8][9][1]J3J4J2J1[10][11]Bind Button Please make sure the batteries have enough capacity before use. If the low voltage warning alert sounds, please replace the batteries as soon as possible. Use the correct type of battery. For long-term storage, remove the batteries from the remote control.[1] Antenna [2] Carrying Handle [3] 3-Position Switch MODE [4] 3-Position Switch FUNCTION [5] Joystick 1(J1;J2) [6] Joystick 2(J3;J4) [7] Neck Strap Attachment [8] Power Switch [9] Power Indicator [10] Battery Compartment [11] Micro-USB Port Remote Control](https://usermanual.wiki/SZ-DJI-TECHNOLOGY/HG9001407.user-manual-part-2/User-Guide-2384709-Page-12.png)