Sagem Wireless 95310001 Wireless Local Loop Terminal User Manual H S EN COURS TRA TRA 2
Sagem Wireless Wireless Local Loop Terminal H S EN COURS TRA TRA 2
UserManual.wiki
>
Sagem Wireless
>
95310001 User Manual
Users Manual
Navigation menu
Upload a User Manual
Namespaces
Wiki Guide
HTML
PDF
Info
Views
User Manual
Discussion / Help
Navigation


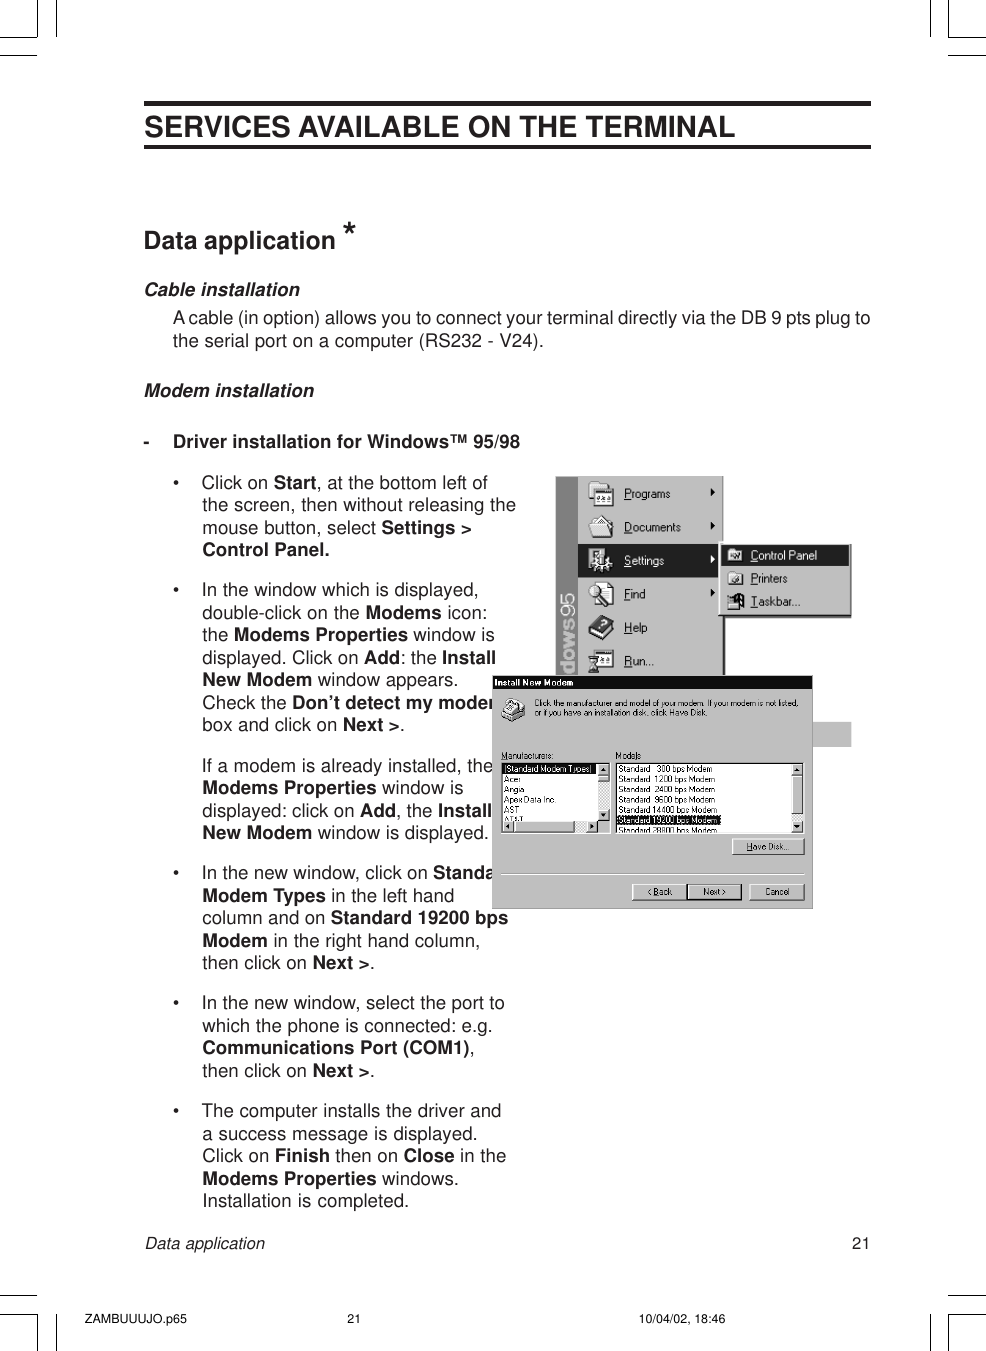
![27• Select the Command tab and fill itas follows:• Click on OK then on Close toreturn to the window Line setup.Select the modem created and theserial port wanted then click onOK.• The application initializes themodem and goes into waitingstate.AT commandsNotation [-] = optional parameterThe following AT commands are handled by the phone:ATE[0|1]<CR> Command echo:0= off1= on.ATV[0|1]<CR> Answers to AT commands:0= digital format1= text format.ATQ[0|1]<CR> 0= Answers to AT commands are sent to the computer.1= Answers to AT commands are not sent to the computer.ATD<number>[;]<CR>orATDP<number>[;]<CR> Dialing.orATDT<number>[;]<CR>The characters for: ‘P’ or ‘p’ (pulse), ‘T’ or ‘t’ (tone), ‘W’ or ‘w’ (wait), ‘,’(pause) are accepted and indifferent.«;» at the end of the command, before <CR>, means: phone call (asopposed to data call).Data applicationSERVICES AVAILABLE ON THE TERMINALZAMBUUUJO.p65 10/04/02, 18:4627](https://usermanual.wiki/Sagem-Wireless/95310001/User-Guide-238584-Page-28.png)
![28 Data applicationSERVICES AVAILABLE ON THE TERMINALATA<CR> Answer a call.ATH[0]<CR> Disconnect existing link.ATS0=i<CR> Answer calls after ”n“ rings.i = 0: no automatic off-hook.ATBi<CR> Data rate selection:ATB7 : Analogue modem 2400 (V22BIS)ATB11 : Analogue modem 4800 (V32)ATB13 : Analogue modem 9600 (V32)ATB25 : UDI 2400 - ISDN callATB27 : UDI 4800 - ISDN callATB29 : UDI 9600 - ISDN call.AT\N4<CR>or RLP.AT\N6<CR>AT\N0<CR> Non RLP.A/ Repetition of the previous line.During a data call:+++ Return to command mode (Allows to hang up using ATH as soon asthe modem has sent OK).Note: The commands may be combined:For exampleATE0V0<CR>ATV0E0<CR>ATE0<CR> then ATV0<CR>are equivalent.ZAMBUUUJO.p65 10/04/02, 18:4628](https://usermanual.wiki/Sagem-Wireless/95310001/User-Guide-238584-Page-29.png)