Samsung Electronics Co 9519D User Manual T85D
Samsung Electronics Co Ltd T85D
UserManual.wiki
>
Samsung Electronics Co
>
9519D User Manual
USER MANUAL
Navigation menu
Upload a User Manual
Namespaces
Wiki Guide
HTML
PDF
Info
Views
User Manual
Discussion / Help
Navigation
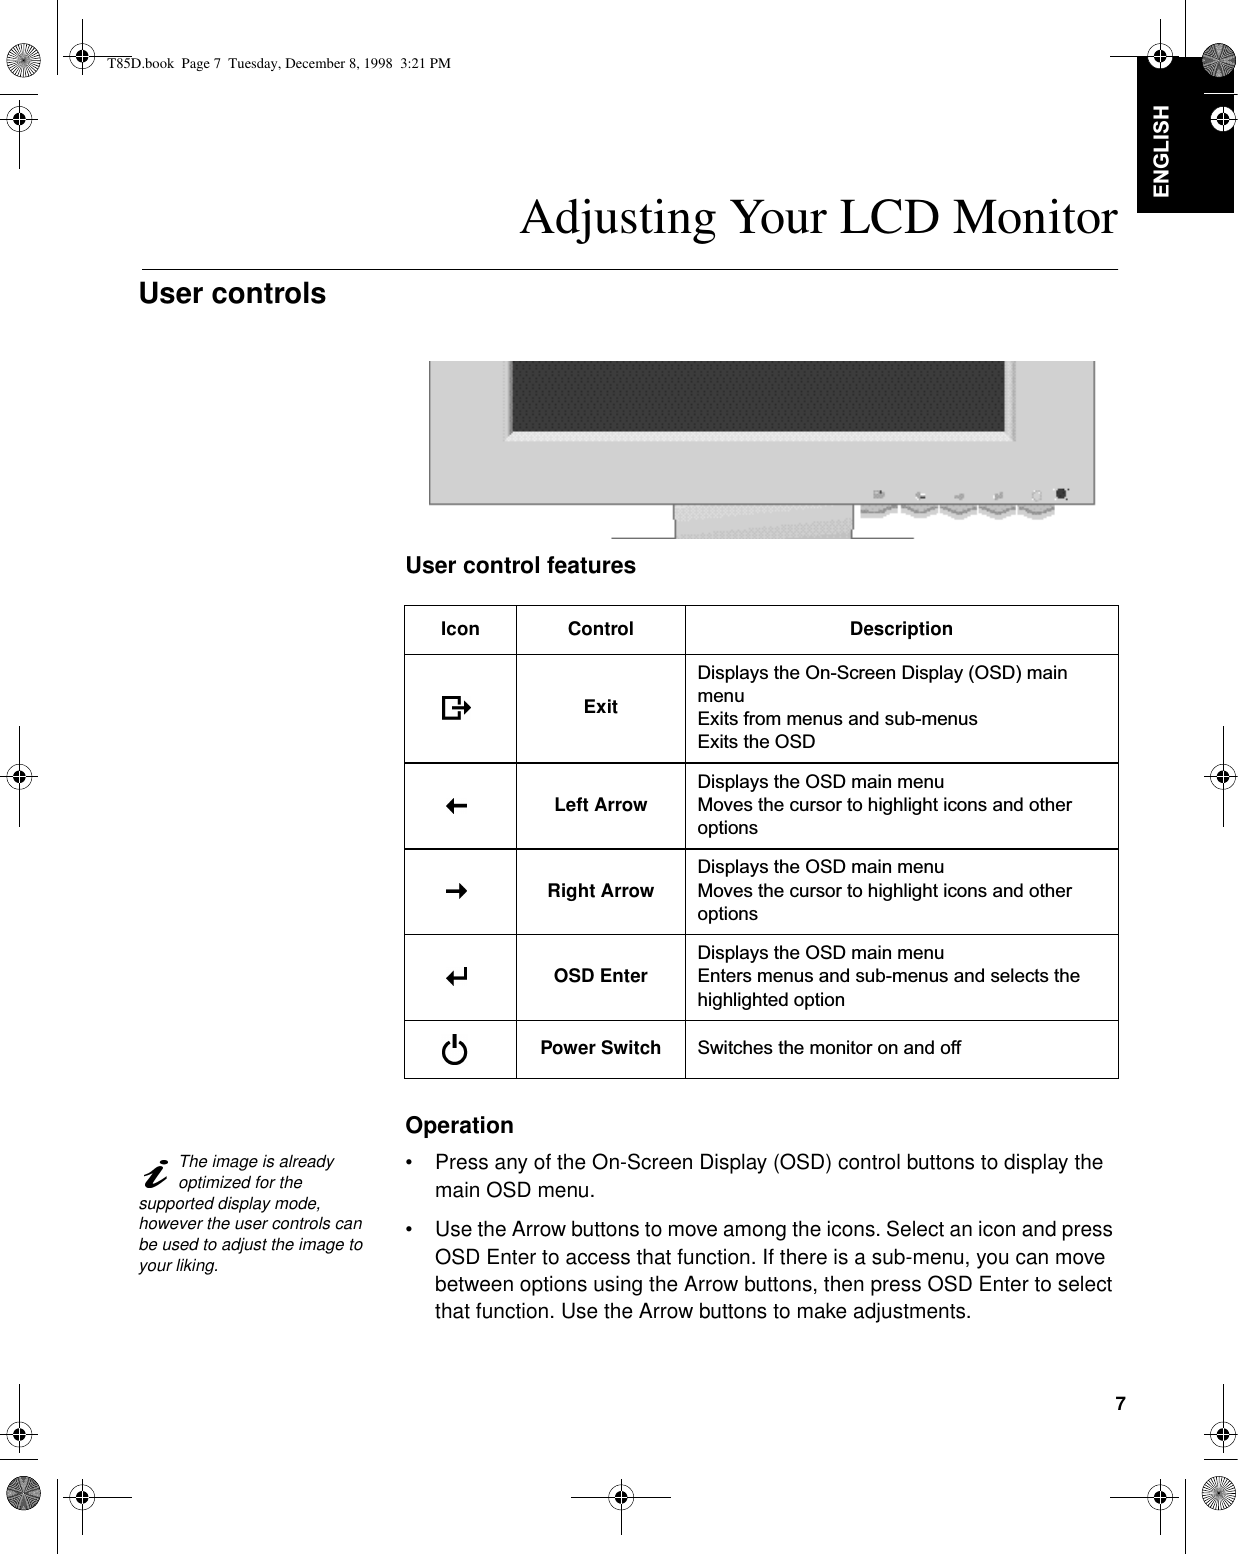
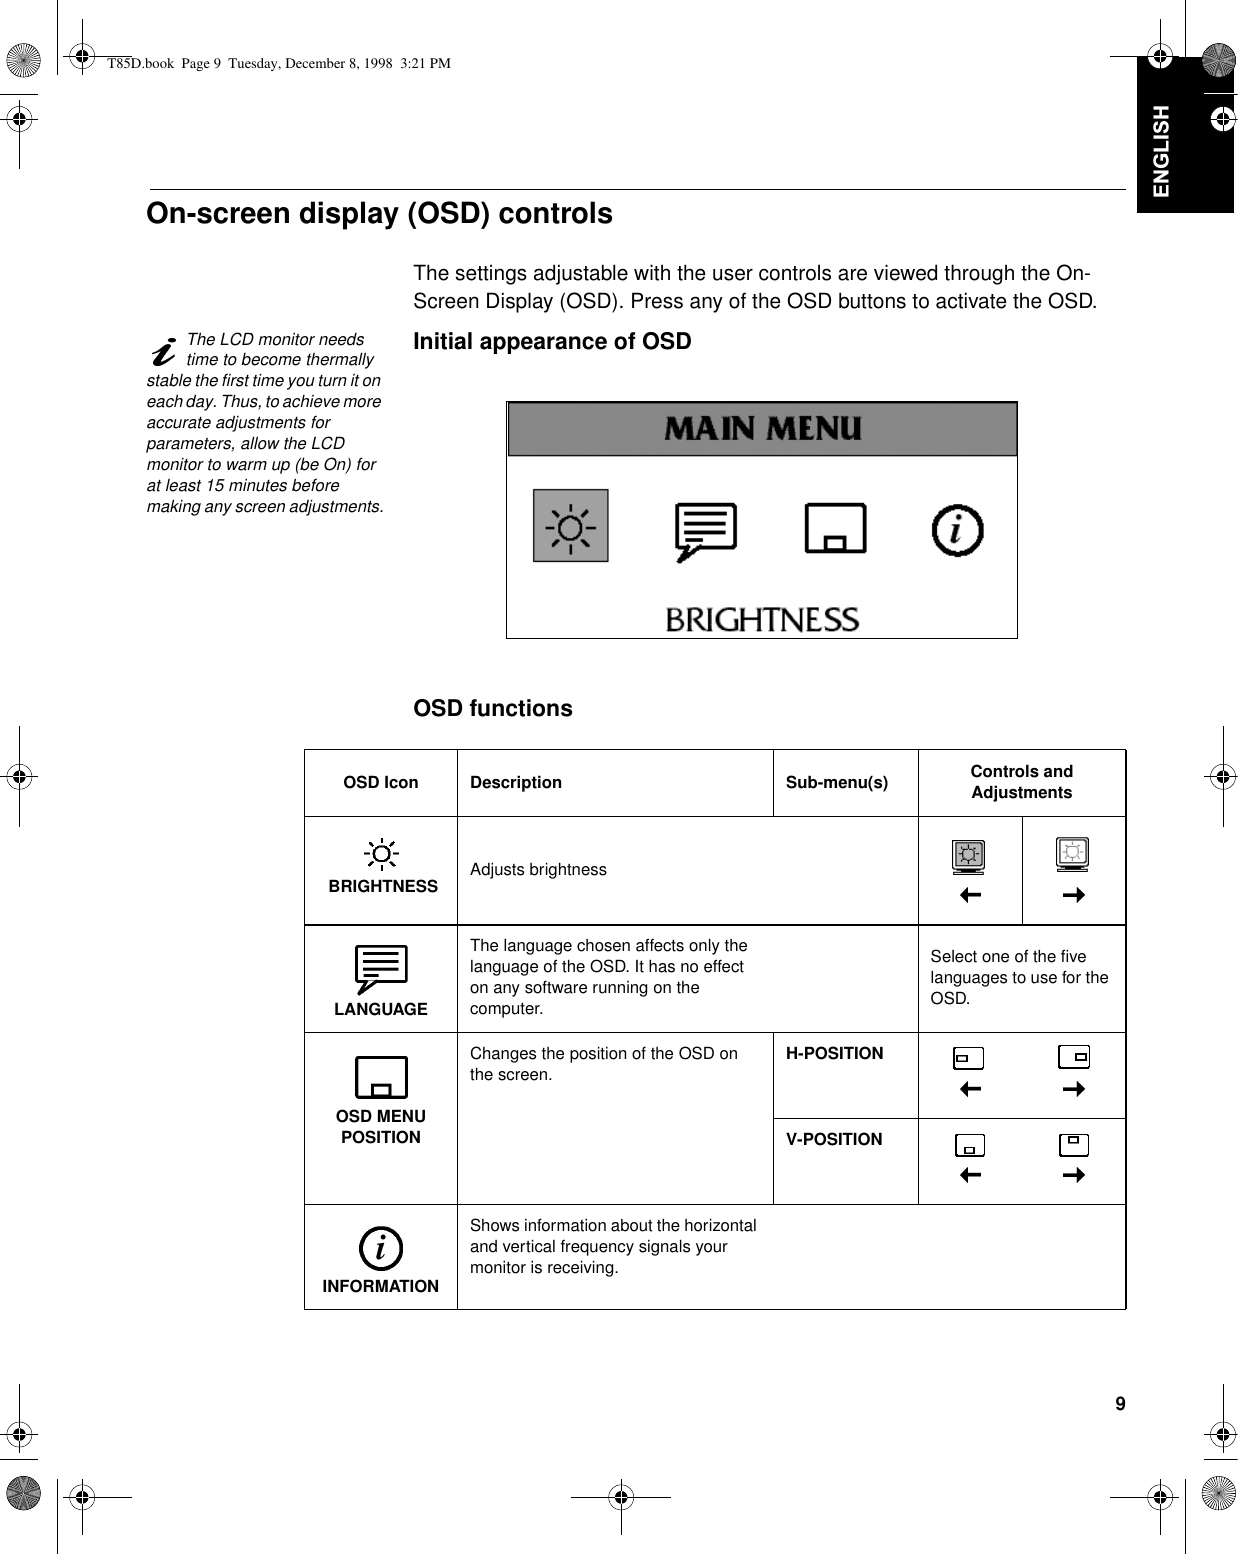
![VAARA6ÍKNÝLVNXQYDDUDQYÍOWWÍPLVHNVLv °OÍDYDDODLWWHHQNDQVLDPLVVÍÍQWLODQWHHVVD• Älä käytä laitetta, ellei jalustaa ole kiinnitetty.v °OÍN\WNHODLWHWWDSLVWRUDVLDDQWDLLUURWDVLWÍSLVWRUDVLDVWDXNRQLOPDQDLNDQDv 9LUWDMRKWRRQN\WNHWWÍYÍDVLDQPXNDLVHVWLMRKGRWHWWXXQMDPDDGRLWHWWXXQSLVWRUDVLDDQv .DLNNLPXXWNLQODLWWHHWMRLKLQWÍPÍWXRWHRQOLLWHWW\RQN\WNHWWÍYÍDVLDQPXNDLVHVWLMRKGRWHWWXLKLQSLVWRUDVLRLKLQ• Kun haluat erottaa näyttimen sähköverkosta, sinun pitää irrottaa sen verkkojohto pistorasiasta. Pistorasian pitäisi olla mahdollisimman lähellä näytintä ja vaivattomasti käsillä.KIN∆YNOΣ³ÒËÜÑÖË©ØÝßÐÓÒÖÍåÖØßÑÔÏÓÜÚØ©ÔÑ×ËÞ•¼ÑÖËÝËÒÚÏÜÏÜËÓËÔåÙÙËÜË•¼ÑÕÈÜÏÜÏÜØ©ÚØáãÖËßÜãÛÏÔÏÒÜØßÚÐË¡äÚÞÖËÏÖËÒÛÜÏÚÏäÙÈÖÑÑÌÆÛÑÜØß•¼ÑÛßÖÍÈÏÜÏË©ØÛßÖÍÈÏÜÏÜØ©ÚØáãÖËßÜãÓËÜÆÜÑÍÒÆÚÓÏÒËÑÔÏÓÜÚØÕåÏÔÔËÞ•¿ØÝÒÞÜØßÓËÔäÍØßÚÏßÙËÜØÔ©ÜÑ©ÚÈ©ÏÒÖËÛßÖÍÏÕÏÛÏÙÒË©ÚËÙÏÛäÛÜÓËÔäÍäÛÑÓËÒÐÏäÛÑ•¶ÆÕÏÛßÛÓÏßÛÜÑÖØ©ØËÛßÖÍÏÕÏËßÜãÜØ©ÚØáãÖ©ÚÈ©ÏÒÏ©ÛÑÞÖËÛßÖÍÏÕÏÛÏ©ÚËÙÏÛäÛÜÓËÔäÍäÛÑÓËÒÐÏäÛÑ•³ÒËÖËË©ØÙØÖ¤ÛÏÜÏÜÑÖØÕãÖÑË©ãÜÑÖ©ËÚØ¡ÚÏåÙËÜØÞ©ÚÈ©ÏÒÖËËÝËÒÚÈÛÏÜÏÜØÝÒÞË©ãÜÑÖ©ÚË´©ÚË©ÚÈ©ÏÒÖËÏÖËÒÛÏÛÑÙÏØÏåÓØÔË©ÚØÛÌÆÛÒÙØTEHLIKE)PIOXVMOpEVTQEWÑXILPMOIWMRHIROEpÑRQEOMpMR•.DSDNODUÐoÐNDUPD\ÐQÐ]•%XFLKD]ÐNDLGHVLQHWDNÐOÐGXUXPGDGHÎLONHQoDOÐÒWÐUPD\ÐQÐ]•%XFLKD]ÐHOHNWULNVHOIÐUWÐQDVÐUDVÐQGDSUL]HWDNPD\ÐQÐ]YH\DSUL]GHQoÐNDUPD\ÐQÐ]•(OHNWULNNDEORVXQXQILÒLHOHNWULNYHWRSUDNEDÎODQWÐODUÐXVXOQHX\JXQRODUDN\DSÐOPÐÒELUSUL]HWDNÐOPDOÐGÐU•%XFLKD]ÐQEDÎODQDFDÎÐGLÎHUWPFLKD]ODUGDHOHNWULNYHWRSUDNEDÎODQWÐODUÐXVXOQHX\JXQRODUDN\DSÐOPÐÒSUL]HWDNÐOPÐÒROPDOÐGÐU•0RQLW|UQHOHNWULNOHEDÎODQWÐVÐQÐNHVPHNLoLQILÒLQLSUL]GHQoHNPHQL]JHUHNOLGLU3UL]NROD\FDHULÒLOHELOHFHNELU\HUGHROPDOÐGÐUT85D.book Page f Tuesday, December 8, 1998 3:21 PM](https://usermanual.wiki/Samsung-Electronics-Co/9519D/User-Guide-18767-Page-5.png)