Samsung Electronics Co CLX3185FN Color Laser Printer User Manual zinnia guide english
Samsung Electronics Co Ltd Color Laser Printer zinnia guide english
UserManual.wiki
>
Samsung Electronics Co
>
CLX3185FN User Manual
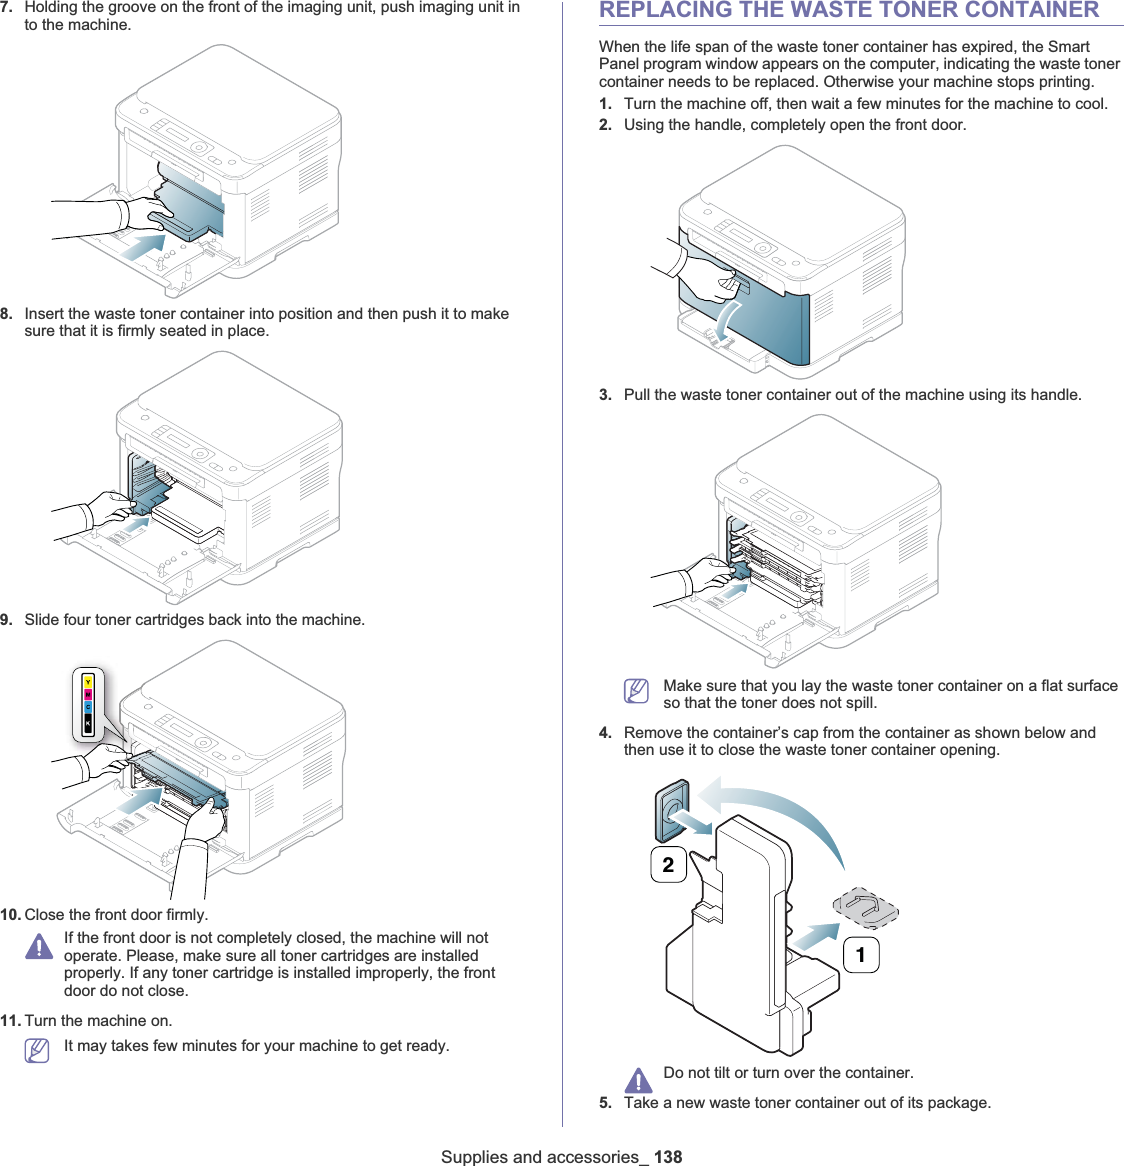
>
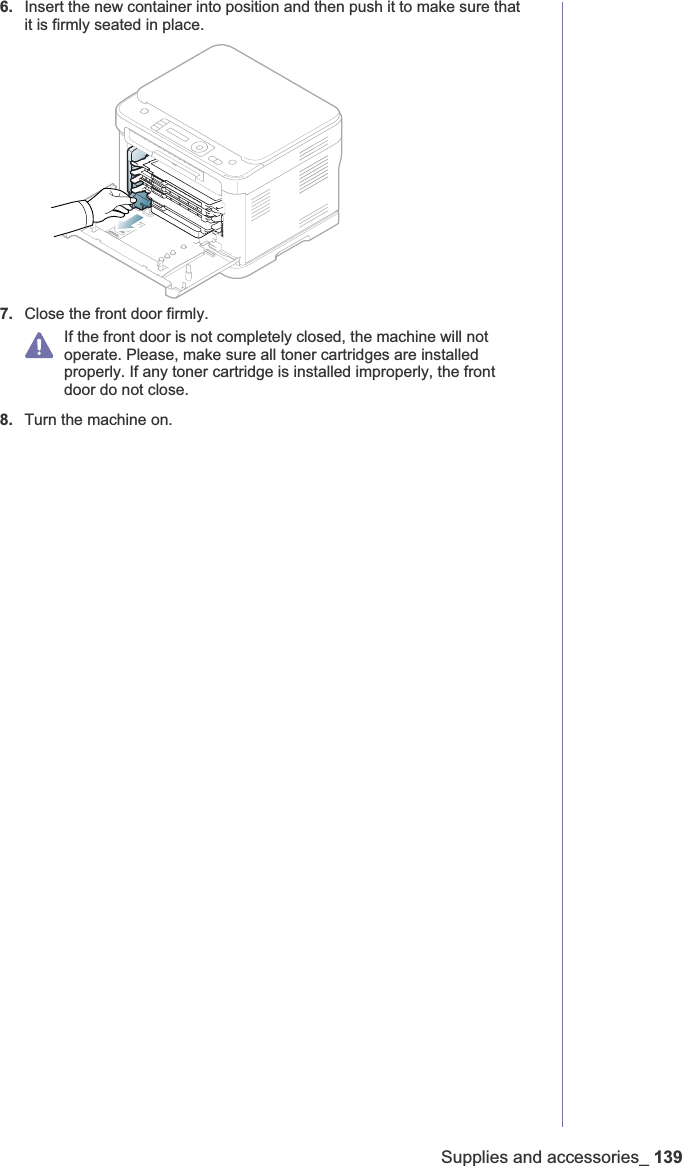
Users Manual 2
Contents
1.
Users Manual 1
2.
Users Manual 2
Users Manual 2
Navigation menu
Upload a User Manual
Namespaces
Wiki Guide
HTML
PDF
Info
Views
User Manual
Discussion / Help
Navigation
![Copying_ 802. Press the left/right arrow until Copy Feature appears and press OK.3. Press the left/right arrow until Reduce/Enlarge appears and press OK.4. Press the left/right arrow until the size setting you want appears and press OK.5. Press Stop/Clear to return to ready mode.To scale the copy by directly entering the scale rate1. Depending on the model, the operating procedure may differ.•For CLX-3185 and CLX-3185N, press Menu on the control panel.•For CLX-3185FN and CLX-3185FW, press (Copy) and Menu in order on the control panel.2. Press the left/right arrow until Copy Feature appears and press OK.3. Press the left/right arrow until Reduce/Enlarge appears and press OK.4. Press the left/right arrow until Custom appears and press OK.5. Press the left/right arrow to enter the copy size you want. Pressing and holding the button allows you to quickly scroll to the number you want. For CLX-3185FN and CLX-3185FW, you can also use the number keypad.6. Press OK to save the selection.7. Press Stop/Clear to return to ready mode.When you make a reduced copy, black lines may appear at the bottom of your copy.CHANGING THE DEFAULT COPY SETTINGSThe copy options including darkness, original type, copy size and number of copies can be set to those most frequently used. When you copy a document, the default settings are used unless they have been changed by using the corresponding buttons on the control panel.1. Depending on the model, the operating procedure may differ.•For CLX-3185 and CLX-3185N, press Menu on the control panel.•For CLX-3185FN and CLX-3185FW, press (Copy) and Menu in order on the control panel.2. Press the left/right arrow until Copy Setup appears and press OK.3. Press the left/right arrow until Change Default appears and press OK.4. Press the left/right arrow until the setup option you want appears and press OK.5. Press the left/right arrow until the setting you want appears and press OK.6. Repeat steps 4 through 5 as needed.7. Press Stop/Clear to return to ready mode.While you are setting copy options, pressing Stop/Clear cancels the changed settings and restores the defaults.ID CARD COPYINGYour machine can print 2-sided originals on one sheet of A4-, Letter-, Folio-, Oficio-, Executive-, B5-, A5- or A6-sized paper.The machine prints one side of the original on the upper half of the paper and the other side on the lower half without reducing the size of the original. This feature is helpful for copying a small-sized item such as business card.The original must be placed on the scanner glass to use this feature.1. Press ID Copy on the control panel. 2. Place the front side of an original facing down on the scanner glass where arrows indicate as shown. Then, close the scanner lid.3. Place Front Side and Press [Start] appears on the display.4. Press Color Start or Black Start.Your machine begins scanning the front side and shows Place Back Side and Press [Start].5. Turn the original over and place it on the scanner glass where arrows indicate as shown. Then, close the scanner lid.6. Press Color Start to begin color copying.Or, press Black Start to begin black and white copying.•If you do not press the Color Start or Black Start button, only the front side will be copied.•If the original is larger than the printable area, some portions may not be printed.•If you press Stop/Clear or if no buttons are pressed for approximately 30 seconds, the machine cancels the copy job and returns to ready mode. USING SPECIAL COPY FEATURESYou can use the following copy features.2-up or 4-up copying (N-up)Your machine can print 2 or 4 original images reduced to fit onto one sheet of paper.1. Depending on the model, the operating procedure may differ.•For CLX-3185 and CLX-3185N, press Menu on the control panel.•For CLX-3185FN and CLX-3185FW, press (Copy) and Menu in order on the control panel.1 21 23 4](https://usermanual.wiki/Samsung-Electronics-Co/CLX3185FN.Users-Manual-2/User-Guide-1264227-Page-5.png)
![Using USB memory device (CLX-3185N/CLX-3185FN/CLX-3185WK/CLX-3185FW only)_ 101customized (See “"Customizing Scan to USB" on page 101).Your machine begins scanning the original, and then asks if you want to scan another page.5. Press OK when Yes appears to scan more pages. Load another original to be scanned and press Color Start or Black Start.Regardless of the button you press, the color mode is decided as customized (See “"Customizing Scan to USB" on page 101).Otherwise, press the left/right arrow to select No and press OK.After scanning is complete, you can remove the USB memory device from the machine.Customizing Scan to USB You can specify image size, file format, or color mode for each scanning to USB job.1. Press (Scan) on the control panel.2. Press Menu on the control panel.3. Press the left/right arrow until Scan Feature appears and press OK.4. Press OK when USB Feature appears.5. Press the left/right arrow until the setting option you want appears and press OK.You can set the following options.•Scan Size: Sets the image size.•Original Type: Sets the original document’s type.•Resolution: Sets the image resolution.•Scan Color: Sets the color mode. If you select Mono in this option, you cannot select JPEG in Scan Format.•Scan Format: Sets the file format in which the image is to be saved. When you select TIFF or PDF, you can select to scan multiple pages. If you select JPEG in this option, you cannot select Mono in Scan Color.6. Press the left/right arrow until the desired status appears and press OK.7. Repeat steps 4 and 5 to set other setting options.8. When you have finished, press Stop/Clear to return to ready mode.You can change the default scan settings. For details, see "Changing the default scan settings" on page 85.PRINTING FROM A USB MEMORY DEVICEYou can directly print files stored on a USB memory device. You can print TIFF, BMP, JPEG and PRN files.Files types supported by Direct Print option•PRN: Only files created by provided driver with your machine are compatible. •PRN files can be created by selecting the Print to file check box when you print a document. The document will be saved as a PRN file, rather than printed on paper. Only PRN files created in this fashion can be printed directly from USB memory. See "Printing to a file (PRN)" on page 76 to learn how to create a PRN file.•BMP: BMP Uncompressed•TIFF: TIFF 6.0 Baseline•JPEG: JPEG BaselineTo print a document from a USB memory device1. Insert a USB memory device into the USB memory port on your machine, and then press Direct USB. If one has already been inserted, press Direct USB.2. Press OK when USB print appears.Your machine automatically detects the device and reads data stored on it.3. Press the left/right arrow until the folder or file you want appears and press OK.If you see [D] in the front of a folder name, there are one or more files or folders in the selected folder.4. If you selected a file, skip to the next step.If you selected a folder, press the left/right arrow until the file you want appears.5. Press the left/right arrow to select the number of copies to be printed or enter the number.6. Press OK,Color Start or Black Start to start printing the selected file. There are two types of mode as following.•OK or Color Start: Color print•Black Start: Black and White printAfter printing the file, the display asks if you want to print another job.7. Press OK when Yes appears to print another job, and repeat from step 2. Otherwise, press the left/right arrow to select No and press OK.8. Press Stop/Clear to return to ready mode.BACKING UP DATA Data in the machine’s memory can be accidentally erased due to power failure or storage failure. Backup helps you protect the system settings by storing them as backup files on a USB memory device.Backing up data1. Insert the USB memory device into the USB memory port on your machine.2. Press Menu on the control panel.3. Press the left/right arrow until System Setup appears and press OK.4. Press OK when Machine Setup appears.5. Press the left/right arrow until Export Setting appears and press OK.6. Press the left/right arrow until the option you want appears.For CLX-3185N, Setup Data option is only available.For CLX-3185FN/3185FW, Setup Data and Address Book options are available.7. Press OK to begin backing up the data.The data is backed up to the USB memory.Press Stop/Clear to return to ready mode.Restoring data1. Insert the USB memory device on which the backup data is stored in to the USB memory port.2. Press Menu on the control panel.3. Press the left/right arrow until System Setup appears and press OK.4. Press OK when Machine Setup appears.5. Press the left/right arrow until Import Setting appears and press OK.6. Press the left/right arrow until the data type you want appears and press OK.](https://usermanual.wiki/Samsung-Electronics-Co/CLX3185FN.Users-Manual-2/User-Guide-1264227-Page-26.png)
![Using USB memory device (CLX-3185N/CLX-3185FN/CLX-3185WK/CLX-3185FW only)_ 102For CLX-3185N, Setup Data option is only available.For CLX-3185FN/3185FW, Setup Data and Address Book options are available.7. Press the left/right arrow until the file containing the data you want to restore appears and press OK.8. Press OK when Yes appears to restore the backup file to the machine.9. Press Stop/Clear to return to ready mode.MANAGING USB MEMORYYou can delete image files stored on a USB memory device one by one or all at once by reformatting the device.After deleting files or reformatting a USB memory device, files cannot be restored. Therefore, confirm that you no longer need the data before deleting it.Deleting an image file1. Insert the USB memory device into the USB memory port on your machine.2. Press Direct USB.3. Press the left/right arrow until File Manage appears and press OK.4. Press OK when Delete appears. 5. Press the left/right arrow until the folder or file you want to delete appears and press OK.If you see [D] in the front of a folder name, there are one or more files or folders in the selected folder.If you selected a file, the display shows the size of the file for about 2 seconds. Go to the next step.If you selected a folder, press the left/right arrow until the file you want to delete appears and press OK.6. Press OK when Yes appears to confirm your selection.7. Press Stop/Clear to return to ready mode.Formatting a USB memory device1. Insert the USB memory device into the USB memory port on your machine.2. Press Direct USB.3. Press the left/right arrow until File Manage appears and press OK.4. Press the left/right arrow until Format appears and press OK.5. Press OK when Yes appears to confirm your selection.6. Press Stop/Clear to return to ready mode.Viewing the USB memory statusYou can check the amount of memory space available for scanning and saving documents.1. Insert the USB memory device into the USB memory port on your machine.2. Press Direct USB.3. Press the left/right arrow until Check Space appears and press OK.4. The available memory space appears on the display.Press Stop/Clear to return to ready mode.PRINTING DIRECTLY FROM A DIGITAL CAMERAThis machine supports the PictBridge feature. You can print images directly from any PictBridge-compatible device such as a digital camera, camera phone and camcorder. You do not need to connect it to a computer.1. Turn on the machine.2. Connect your PictBridge-compatible device to the memory port on the front of the machine using the USB cable supplied with the device.3. Send an order to print images from the PictBridge-compatible device.•Detailed information on how to print an image from a camera with PictBridge feature, refer to the manual provided with your camera.•Index printing is not support.•Date or file name printing is not supported.](https://usermanual.wiki/Samsung-Electronics-Co/CLX3185FN.Users-Manual-2/User-Guide-1264227-Page-27.png)

![Troubleshooting_ 1227. Carefully take the jammed paper out of the machine.8. Lower down the scan unit gently and slowly until it completely closed. Make sure that it is securely latched.Be careful no to pinch your fingers!9. Pull down the fuser lever.10. Close the rear door. Printing automatically resumes.UNDERSTANDING DISPLAY MESSAGESMessages appear on the control panel display to indicate the machine’s status or errors. Refer to the tables below to understand the messages’ and their meaning, and correct the problem, if necessary.Checking display messages•If a message is not in the table, reboot the power and try the printing job again. If the problem persists, call a service representative.•When you call for service, provide the service representative with the contents of display message.•Some messages may not appear on the display depending on the options or models.•[error number] indicates the error number. •[tray type] indicates the tray number. •[media type] indicates the media type.•[media size] indicates the media size.•[color] indicates the color of toner or imaging unit.MESSAGE MEANING SUGGESTED SOLUTIONS[COMM. Error] The machine has a communication problem.Ask the sender to try again.[Incompatible] The machine has received a fax from which is registered as a junk fax.The received fax data will be deleted. Reconfirm junk fax setup (See "Changing the fax setup options" on page 103).[Line Busy] The receiving fax machine did not answer or the line is already engaged.Try again after a few minutes.[Line Error] Your machine cannot connect with the receiving fax machine or has lost contact because of a problem with the phone line.Try again. If the problem persists, wait an hour or so for the line to clear and try again. Or, Turn the ECM mode on (See "Fax setup (CLX-3185FN/CLX-3185FW only)" on page 103).BOOTP problem Auto IP RunThe IP address assignment is failed. This happens when Auto IP for BOOTP is set in SyncThru Web Service.Change the IP address assignment method to DHCP or Static. If you do not change this option, the BOOTP server continually asks to assign the IP address.BOOTP problem Reconfigure DHCPThe IP address assignment is failed. This happens when Auto IP for BOOTP is not set in SyncThru Web Service.Change the IP address assignment method to DHCP or Static. If you do not change this option, the BOOTP server continually asks to assign the IP address.](https://usermanual.wiki/Samsung-Electronics-Co/CLX3185FN.Users-Manual-2/User-Guide-1264227-Page-47.png)
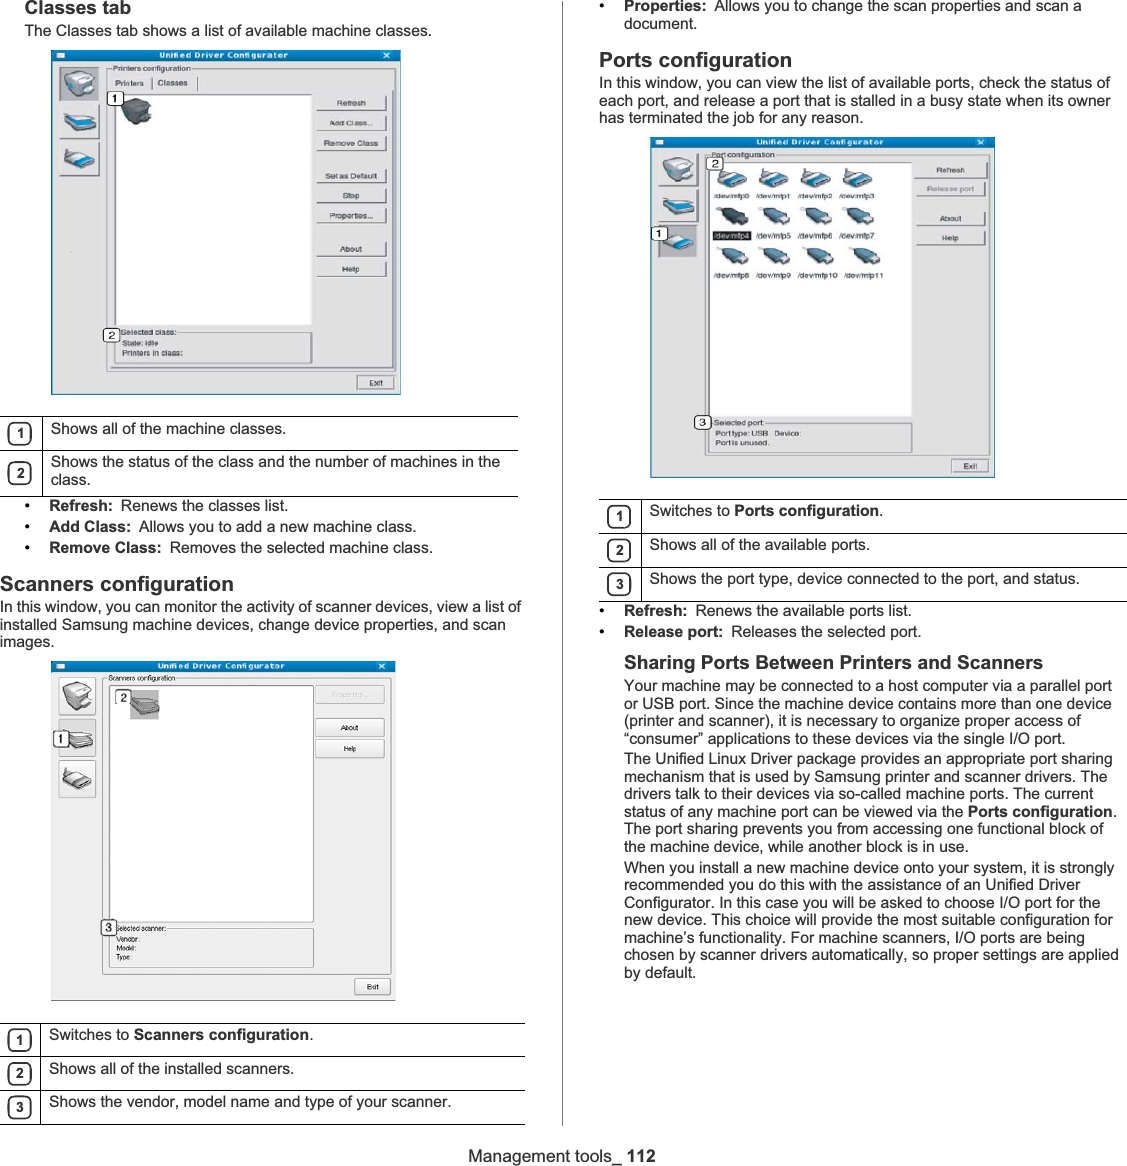
![Troubleshooting_ 123DHCP problem: Auto IP RunThe IP address assignment is failed. This happens when Auto IP for DHCP is set in SyncThru Web Service.Change the IP address assignment method to BOOTP or Static. If you do not change this option, the DHCP server continually asks to assign the IP address.DHCP problem Reconfigure BOOTPThe IP address assignment is failed. This happens when Auto IP for DHCP is not set SyncThru Web Service.Change the IP address assignment method to BOOTP or Static. If you do not change this option, the DHCP server continually asks to assign the IP address.Document Jam. Remove JamThe loaded original document has jammed in the ADF.Clear the jam (See "Clearing original document jams (CLX-3185FN/CLX-3185FW only)" on page 119).Door OpenClose itThe front door is not securely latched.Close the door until it locks into place.Error [error number]Call for serviceA system error has occurred.Turn the power button off and on. If the problem persists, call a service representative.Error [error number]Turn off then onA system error has occurred.Turn the power button off and on. If the problem persists, call a service representative.Install TonerźThe toner cartridge is installed improperly or not installed.Reinstall the toner cartridge two or three times to confirm it is seated properly. If the problem persists, the toner cartridge is not being detected. Contact the service representatives.Memory Full Remove JobThe memory is full. Press the left/right arrow to highlight Cancel or Start, then press OK. If you select Cancel, the machine stops the fax job. If you select Start,the machine only sends scanned documents of the fax job.Network Problem: IP ConflictThe IP address is used elsewhere.Check the IP address or obtain a new IP address.No Answer The receiving fax machine has not answered after several redial attempts.Try again. Make sure that the receiving machine is operational.MESSAGE MEANING SUGGESTEDSOLUTIONSNot Compatible[color] tonerThe toner cartridge is not suitable for your machine.Install the corresponding toner cartridge with a Samsung-genuine cartridge (See "Replacing the toner cartridge" on page 136).Not installedWaste tankThe waste toner container is not installed.Install the waste toner container.Not original[color] tonerThe toner cartridge is not a Samsung-genuine toner cartridge.Install the corresponding toner cartridge with a Samsung-genuine cartridge (See "Replacing the toner cartridge" on page 136).Output bin fullRemove mediaThe output tray is full. Or the sensor is not facing down.Remove papers from the output tray, the machine resumes printing. Or make sure the sensor is facing down. If the problem persists, call a service representative.Paper Emptyin Tray1There is no paper in tray 1.Load paper in tray 1 (See "Loading paper in the tray" on page 68).Paper jamin exit areaPaper has jammed in the paper exit area.Clear the jam (See "In the paper exit area" on page 121).Paper jamin Tray 1Paper has jammed in the Tray 1 area.Clear the jam (See "In the tray" on page 120).Paper jaminside machinePaper has jammed inside the machine.Clear the jam (See "In the fuser unit area" on page 120).Prepare IMG unitźThe estimated life of imaging unit is close.Prepare a imaging unit for replacement (See "Available supplies" on page 135).Prepare new Transfer beltThe estimated life of transfer unit (ITB) is close.The estimated life of a transfer unit (ITB) is close (See "Available maintenance parts" on page 135).Remove seal tape& Install TonerThe machine cannot detect a toner cartridge.Remove the sealing tape from the toner cartridge. Refer to the Quick Installation Guide.Replace new Transfer beltThe transfer unit (ITB) has almost reached its estimated life.Prepare the transfer unit (ITB) with a new one (See "Available maintenance parts" on page 135).MESSAGE MEANING SUGGESTED SOLUTIONS](https://usermanual.wiki/Samsung-Electronics-Co/CLX3185FN.Users-Manual-2/User-Guide-1264227-Page-48.png)