Samsung Electronics Co CSM920 User Manual MANUAL
Samsung Electronics Co Ltd MANUAL
UserManual.wiki
>
Samsung Electronics Co
>
CSM920 User Manual
MANUAL
Navigation menu
Upload a User Manual
Namespaces
Wiki Guide
HTML
PDF
Info
Views
User Manual
Discussion / Help
Navigation

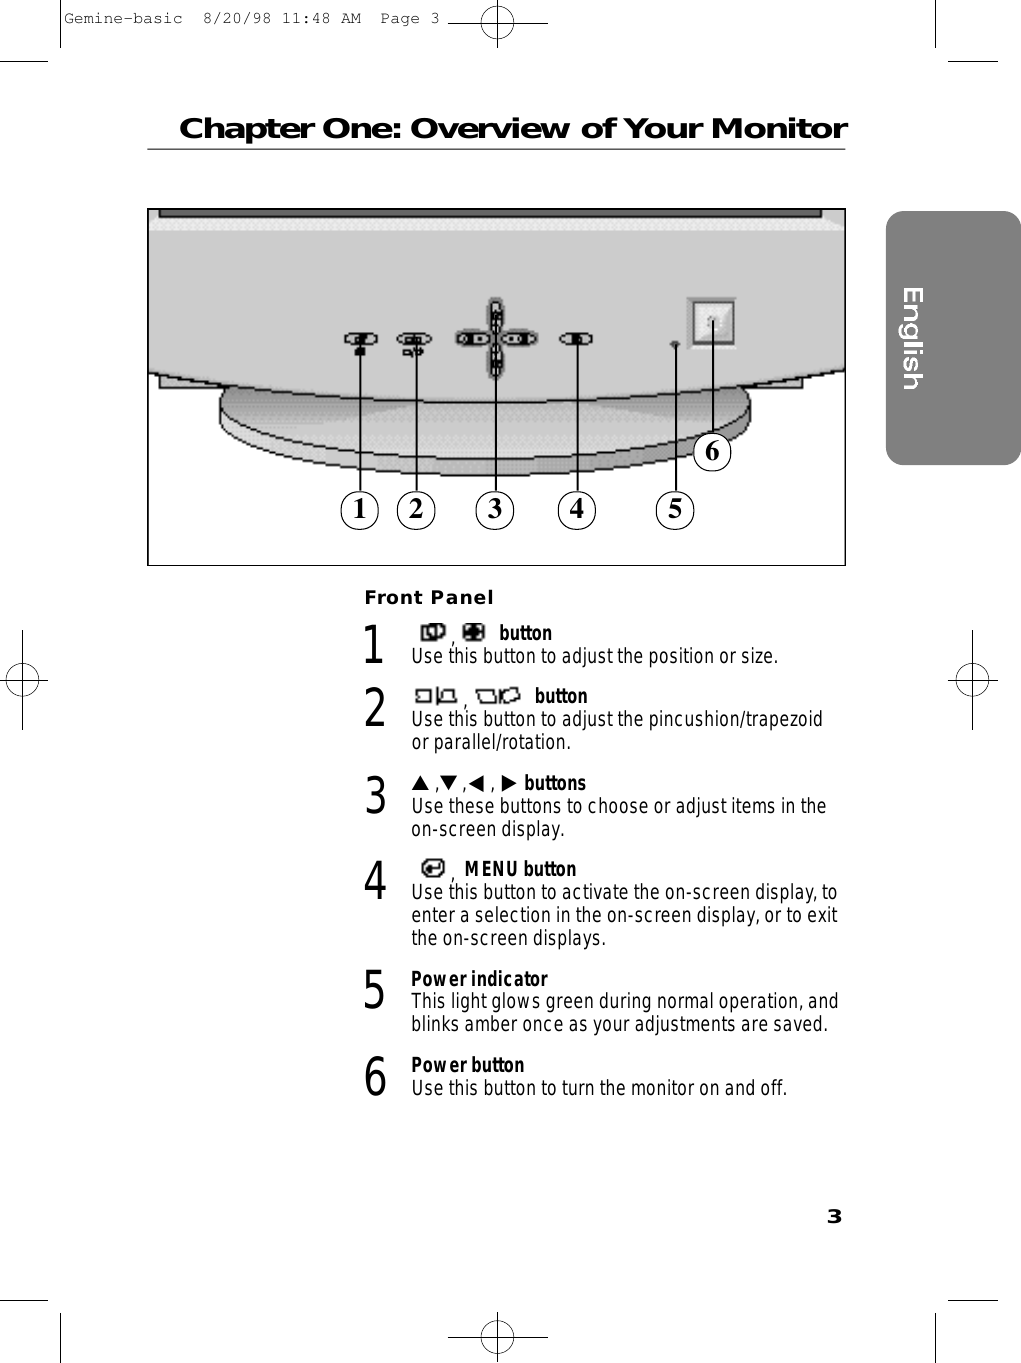
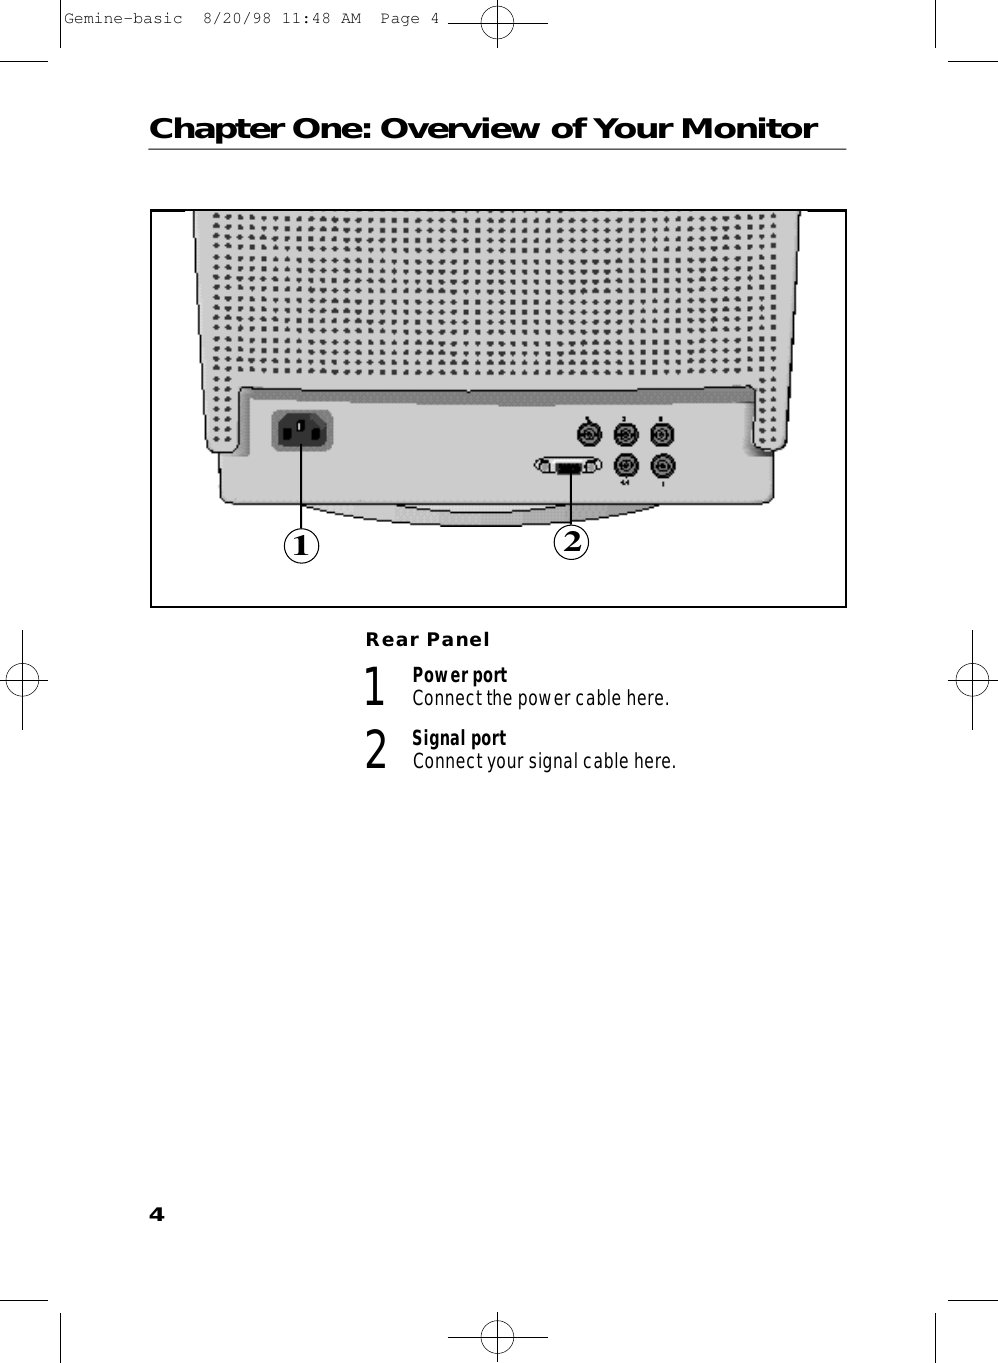
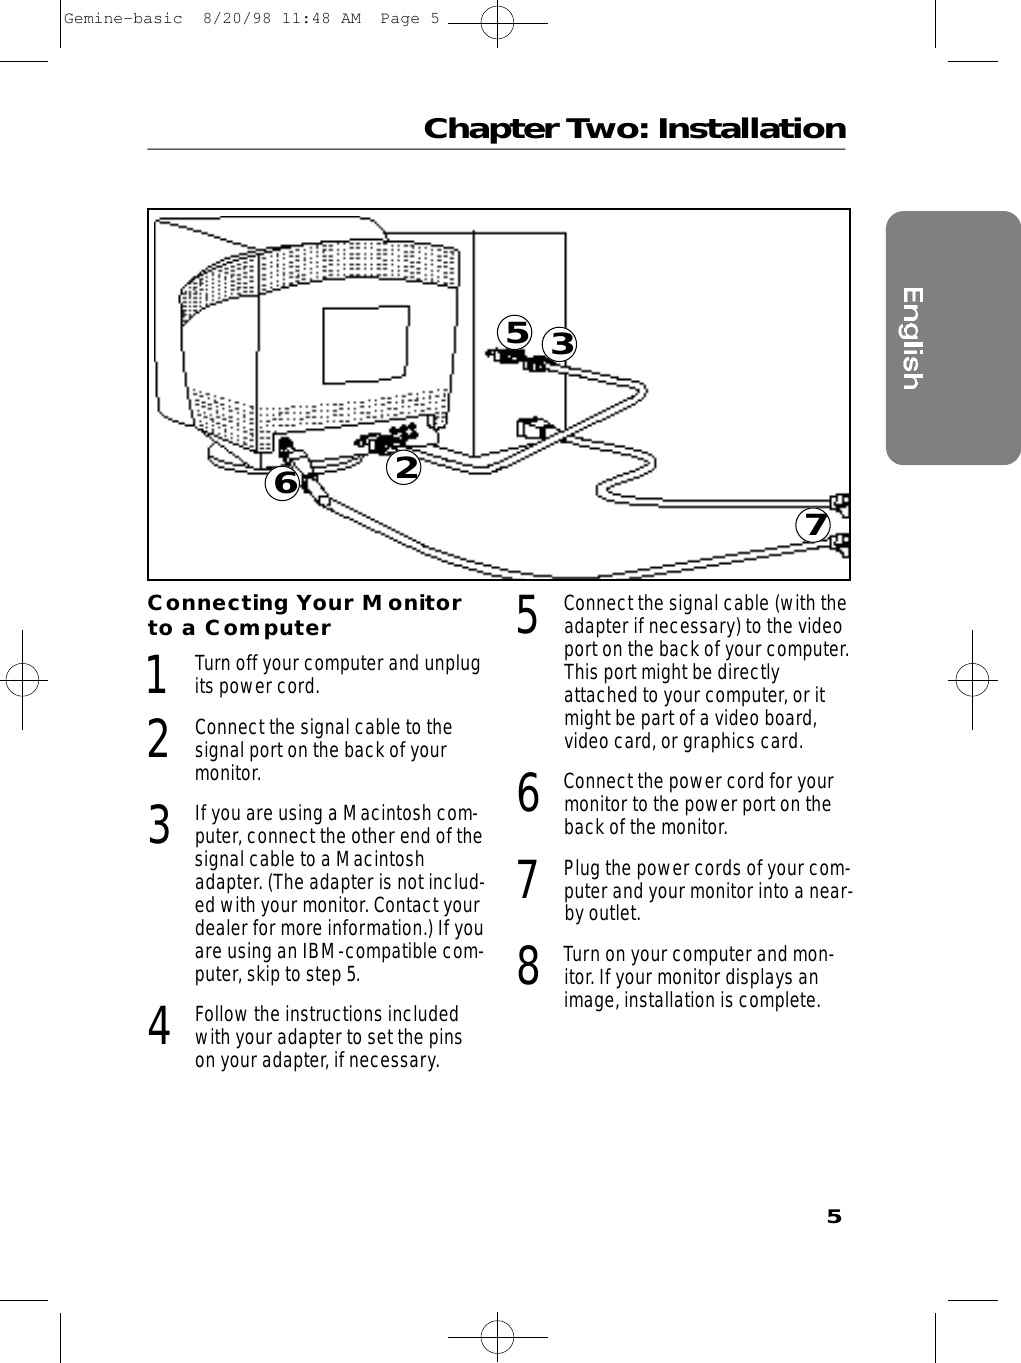
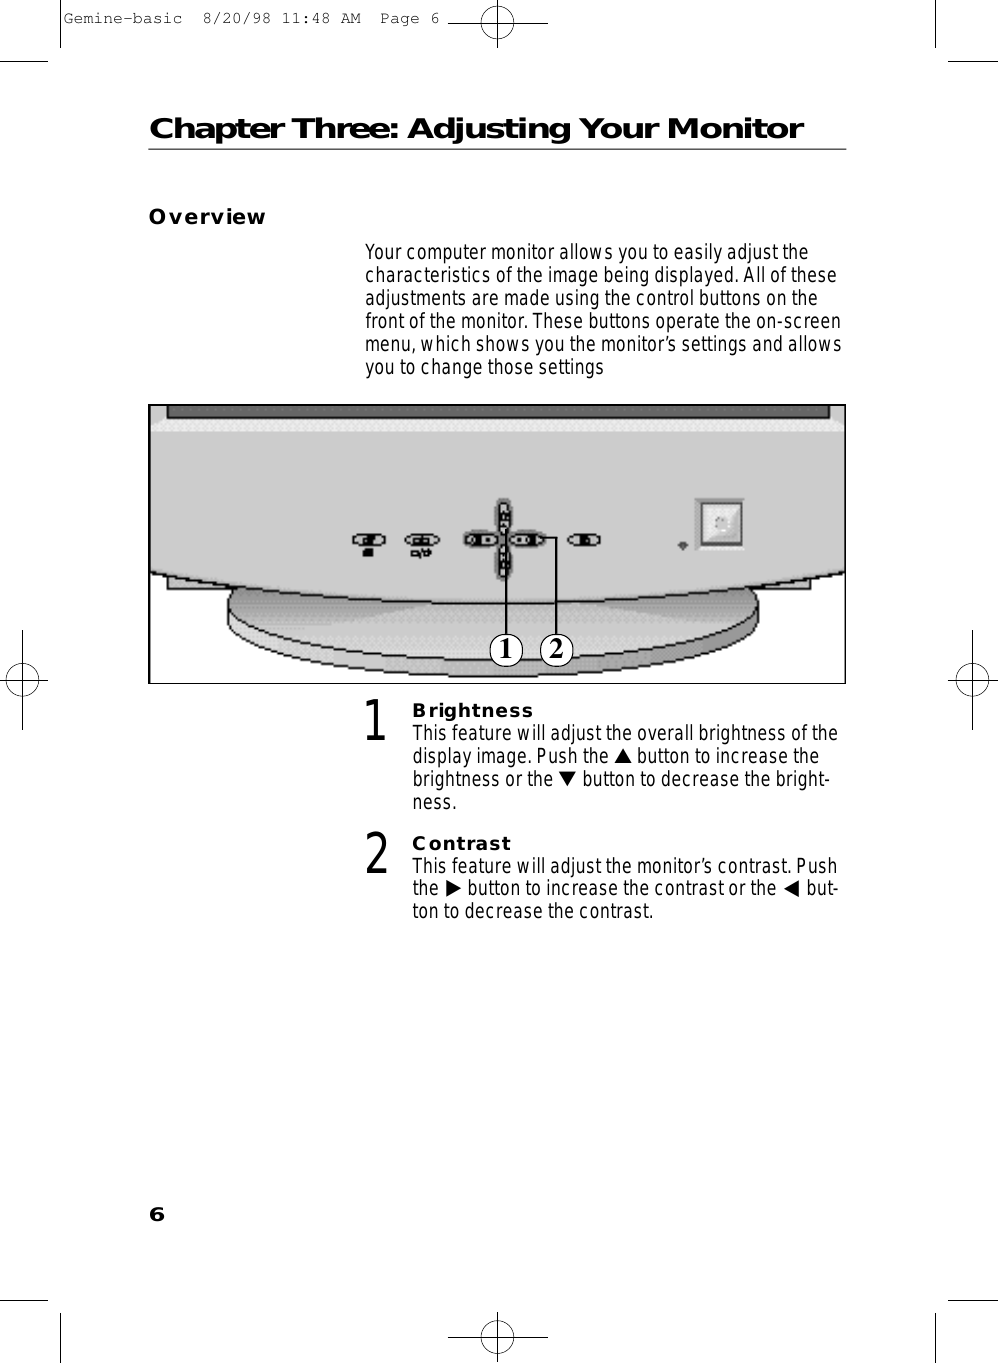
![16AppendixSpecificationsPicture Tube • 48.2 cm (19") Full square type [45.7cm (18.0") viewable]• Flat face, 100˚ deflection• 0.25 Dot pitch• Anti-reflection coating with anti-electrostatic properties• Medium-short persistence phosphorSynchronization • Horizontal: 30 kHz to 96 kHz (automatic)• Vertical: 50 Hz to 160 Hz (automatic)Display Color • Unlimited colorsMaximum Resolution • Horizontal: 1600 dots• Vertical: 1200 linesActive Display • Horizontal: 350 ± 3 mm ( 13.78 ± 0.12 )( 4:3 )328 ± 3 mm ( 12.91 ± 0.12 )( 5:4 )• Vertical: 262.5 ± 3 mm ( 10.33 ± 0.12 )(Active display size is dependent upon signal timing)Input Signal,Terminated • Video signal: Analog 0.714 Vpp positive at 75 Ω• Separate sync: TTL Level, positive or negative• Composite sync: TTL Level, positive or negative• Sync-on-Green: Composite sync 0.286 Vpp negative ( Video 0.714 Vpp positive )Maximum Pixel Clock • 207 MHzPower Supply • AC 100-240 Volt ± 10%, 60 Hz/50 Hz ± 3 HzPower Consumption • 160 Watt maximumDimensions/Weight • Unit: 460 x 407 x 465.8 mm ; 21.2 kg18.1 x 16.0 x 18.3 inch (W x D x H); 46.7 lbs• Carton: 580 x 510 x 566 mm; 23.5 kg22.8 x 20.1 x 22.3 inch (W x D x H); 51.8 lbs(All measurements are approximate.)Environmental Considerations• Operating Temperature: 32˚F to 104˚F (0˚C to 40˚C)Humidity: 10% to 80%• Storage Temperature: -4˚F to 113˚F (-20˚C to 45˚C)Humidity: 5% to 95%NOTE: Design and specifications are subject to change without prior notice.Gemine-basic 8/20/98 11:48 AM Page 16](https://usermanual.wiki/Samsung-Electronics-Co/CSM920/User-Guide-7660-Page-18.png)