Samsung Electronics Co DVDVR320A DVD Recorder/ Video Cassette Recorder User Manual 00588A 00 VR320 1 XAA eng
Samsung Electronics Co Ltd DVD Recorder/ Video Cassette Recorder 00588A 00 VR320 1 XAA eng
Contents
- 1. Users Manual 1
- 2. Users Manual 2
Users Manual 1

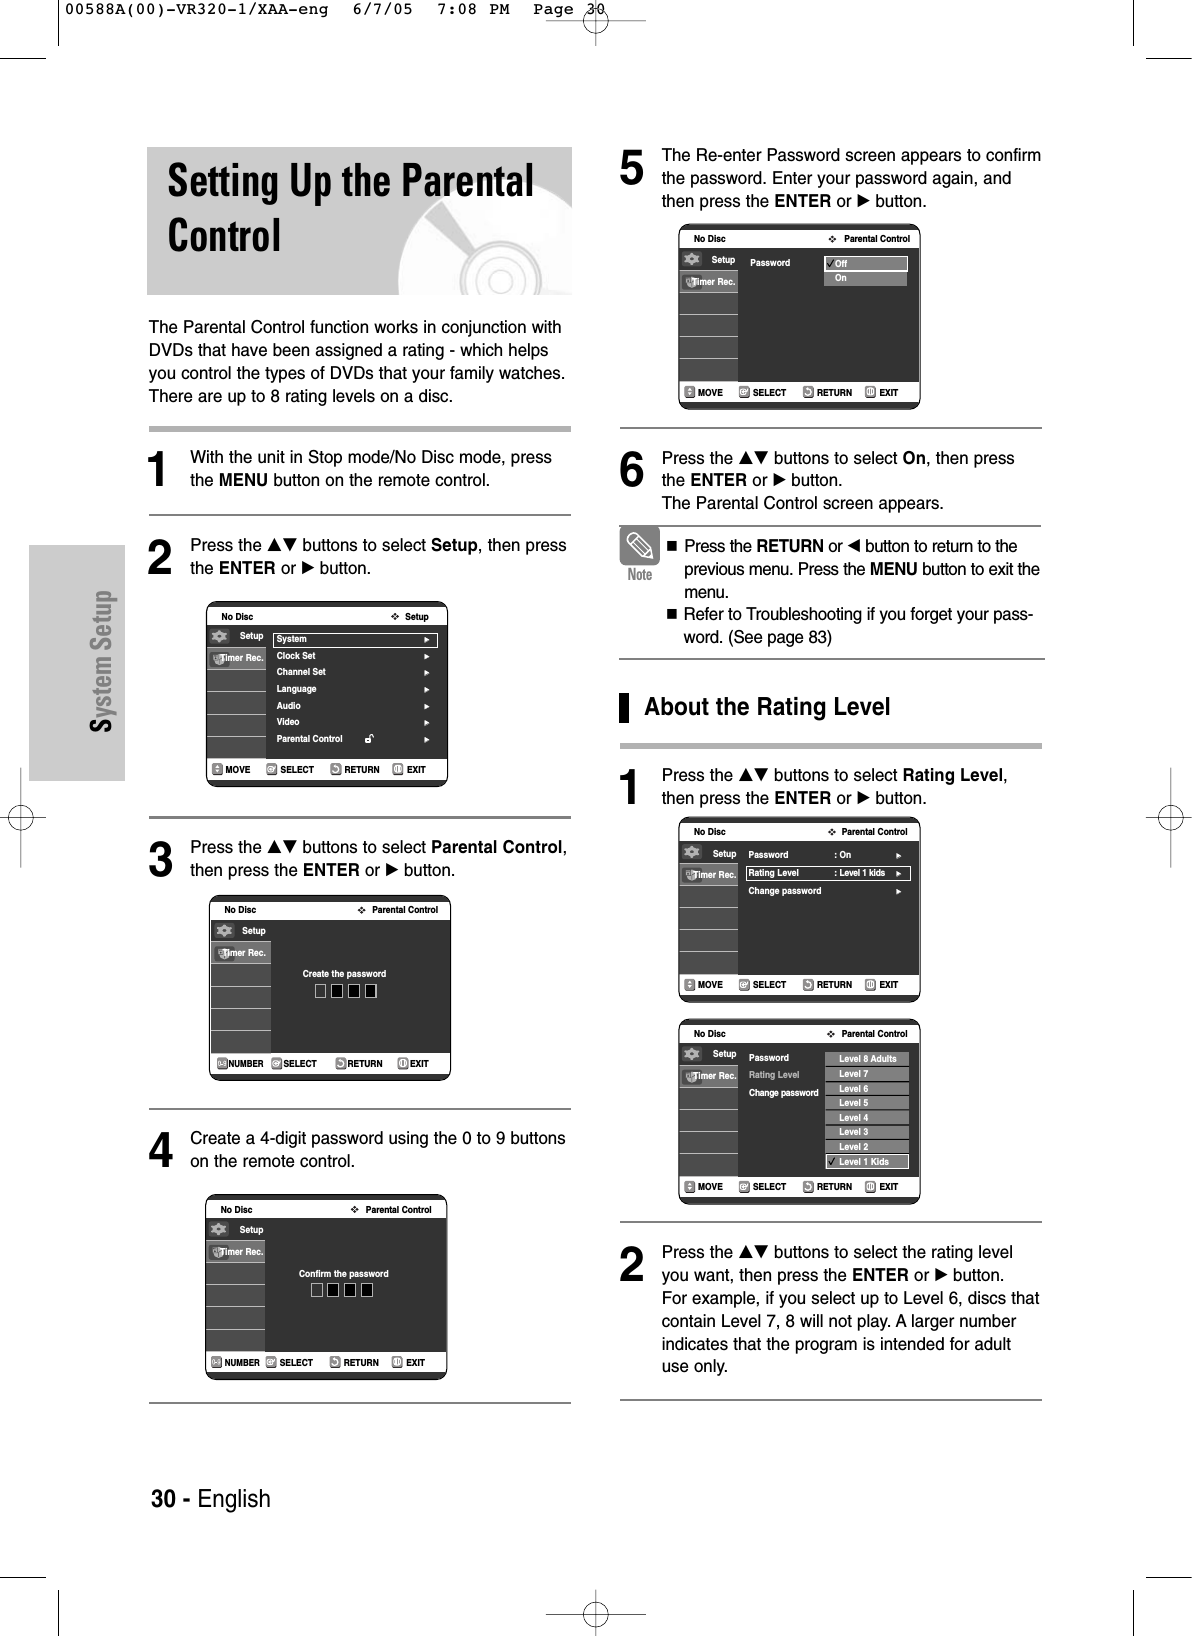
![Getting StartedEnglish - 5• DVD-RW (VR mode)- This is a format that is used for recording data on a DVD-RAM or DVD-RW disc. You can record multiple titles,edit, delete, partial delete, create a playlist, etc.- Adisc that is recorded in this mode may not be playedby existing DVD players.• DVD-RW (Video mode)-This is a format that is used for recording data on aDVD-RW or DVD-R disc. The disc can be played by anexisting DVD player once it has been finalized.- If a disc that has been recorded in Video mode by a dif-ferent manufacturer's recorder but has not been finalizedit cannot be played or additionally be recorded by thisrecorder.DVD-RAM Disc Playback and Recording• For cartridge type DVD-RAM discs, remove the cartridge and use the disc only.• Ensure that the recording mode is set to VR mode.Otherwise, this product will not be able to play therecording.• You cannot play a DVD-RAM in most DVD players dueto compatibility issues.• Only DVD-RAM standard Version 2.0 discs can beplayed in this unit.• DVD-RAM recorded on this unit may not work with otherDVD Players. To determine compatibility with these DVD-RAM discs, refer to the user’s manual for the player.Protection• Program-protected: See page 66 “Locking a Title”• Disc-protected: See page 78 “Disc Protection”❋DVD-RAM/DVD-RW/DVD-R discs that are incompatiblewith the DVD-VIDEO format cannot be played with thisproduct.❋For more information on DVD recording compatibility,consult your DVD-RAM/DVD-RW/DVD-R manufacturer.❋Use of poor quality DVD-RAM/DVD-RW/DVD-R discsmay cause following unexpected problems including,without limitation, recording failure, loss of recorded oredited materials or damage to the recorder.• Many DVD discs are encoded with copy protection.Because of this, you should only connect your DVDRecorder & VCR directly to your TV, not to a VCR.Connecting to a VCR results in a distorted picturefrom copy-protected DVD discs.• This product incorporates copyright protection tech-nology that is protected by methods claims of certainU.S. patents and other intellectual property rightsowned by Macrovision Corporation and other rightsowners. Use of this copyright protection technologymust be authorized by Macrovision Corporation, andis intended for home and other limited viewing usesonly unless otherwise authorized by MacrovisionCorporation. Reverse engineering or disassembly isprohibited.COPY PROTECTIONDo not use the following discs!• LD, CD-G, CD-I, CD-ROM, DVD-ROM, VCD, DVD+Rand DVD+RW discs should not be used in this product.[Note]Disc types that can be played : CD/CD-R/CD-RW/MP3/JPEG/DVD-Video/DVD-RAM/ DVD-RW/DVD-R. However,if your DVD-RW disc was recorded with another device, itcan be played only if it was recorded and finalized in videomode.• Some commercial discs and DVD discs purchased out-side your region may not be playable with this product.When these discs are played, either “No disc.” or“Please check the regional code.” will be displayed.• If your DVD-RW disc is an illegal copy or is not in DVDvideo format, it may also not be playable.❇We recommend using one of the discs in the tableas they have been confirmed to be compatible withthis unit. Other discs may not perform correctly.• We take no responsibility and offer no compensation forany recording failure, loss of recorded or edited materialand/or damage to the recorder arising from usage ofnon-recommended discs.DiscNo. of maximum recordings by disc typeDVD-RAM 100,000DVD-RW 1,000DVD-R 1Media Brand SpeedTDK 4xBeall 4xSony 4xDVD-R That’s 4xMitsubishi 4xMaxell 4xPanasonic 4xTDK 2xMaxell 2xOptodisc 2xDVD-RW JVC 2xMitsubishi 2xRadius 2xVerbatim 2xMaxell 3xMaxell 2xFujifilm 3xDVD-RAM Panasonic 2xTDK 2xPanasonic Gold 3xPanasonic 3x00588A(00)-VR320-1/XAA-eng 6/7/05 7:08 PM Page 5](https://usermanual.wiki/Samsung-Electronics-Co/DVDVR320A.Users-Manual-1/User-Guide-563430-Page-5.png)

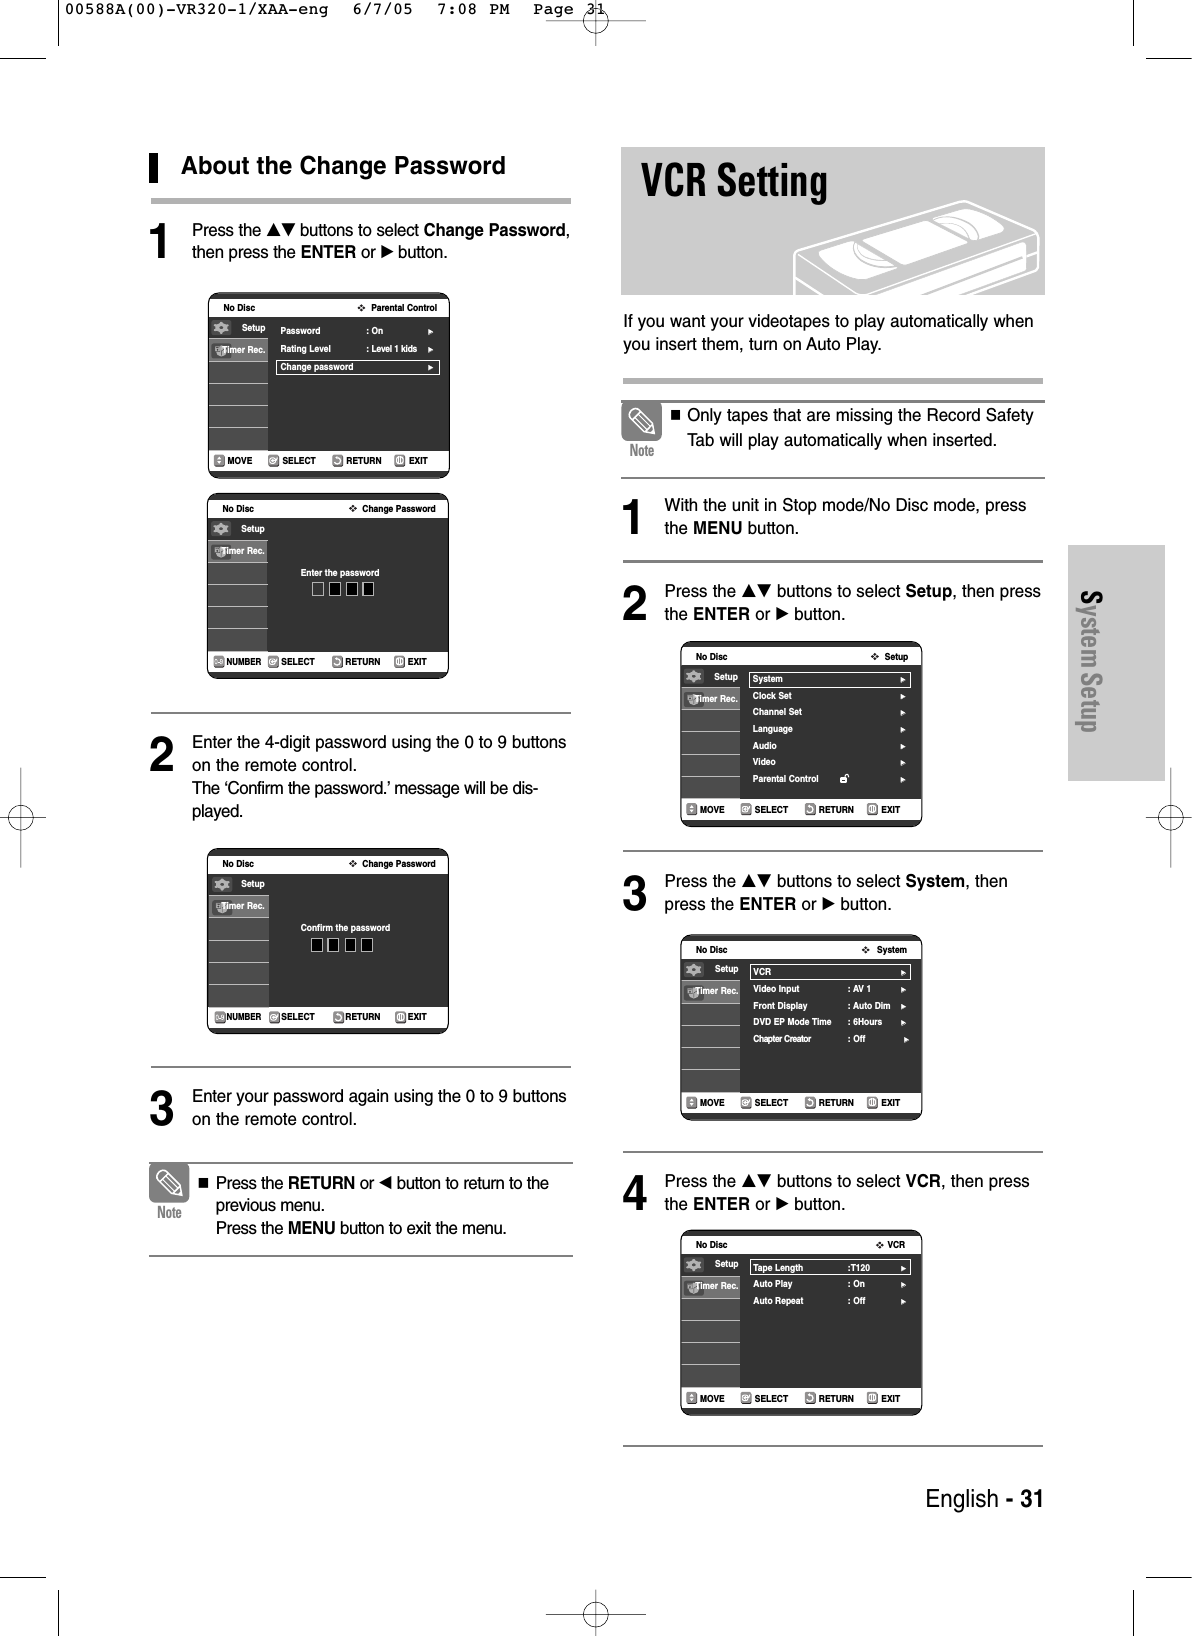
![ConnectionsEnglish - 17Method 2 : Connecting to an S-videoinput jackConnect an S-video cable(not included) between the S-VIDEO OUT jack on DVD Recorder & VCR and S-VIDEO IN jack on your TV (or AV amplifier).• You will enjoy high quality images. S-Video separatesthe picture element into black and white (Y) and color(C) signals to present clearer images than regularvideo input mode.• Connect audio cables(white and red) between the AUDIO L, R OUT Jacks (AV OUT) on the DVDRecorder & VCR and AUDIO IN jacks on TV(or AVamplifier). (See pages 18 to 19)• You will enjoy high quality accurate color reproductionimages. Component video separates the picture element into black and White(Y), blue(PB), red(PR) signals to present most clear and clean images.INPUTS-VIDEOS-VIDEOMethod 3 : Connecting to Componentvideo input jacks(Y,PB,PR)Your TV must support progressive scan input to allowyou to watch progressive scan component video output.1. Connect Component video cables(not included)between the VIDEO OUT jacks (COMPONENT OUT)on DVD Recorder & VCR and COMPONENT VIDEOIN jacks on your TV (or AV amplifier).2. Press the P.SCAN button on the front panel while theunit is in Stop mode. The message [Press “Yes” toconfirm Progressive scan mode. Otherwise press“No”.] will be displayed. Press the œ√buttons to select Yes, and then pressthe ENTER button. Make sure that the disc hasstopped completely before changing the mode.COMPONENT■Make sure that the color coded connections match. That is, the Y, PBand PRcomponent output jacks of your DVD Recorder & VCR should be connected to the exact correspond-ing component input jacks on your TV. Otherwise, red or blue images will be displayedon the TV screen.■ Make sure that the left and right audio outputjacks of your DVD Recorder & VCR are con-nected to the left and right audio input jacks ofyour TV, respectively.(page 18)Note00588A(00)-VR320-1/XAA-eng 6/7/05 7:08 PM Page 17](https://usermanual.wiki/Samsung-Electronics-Co/DVDVR320A.Users-Manual-1/User-Guide-563430-Page-17.png)