Samsung Electronics Co DVDVR330 DVD Recorder / Video Cassette Recorder User Manual 2
Samsung Electronics Co Ltd DVD Recorder / Video Cassette Recorder Users Manual 2
UserManual.wiki
>
Samsung Electronics Co
>
DVDVR330 User Manual
>
Users Manual 2
Contents
1.
Users Manual 1
2.
Users Manual 2
Users Manual 2
Navigation menu
Upload a User Manual
Namespaces
Wiki Guide
HTML
PDF
Info
Views
User Manual
Discussion / Help
Navigation


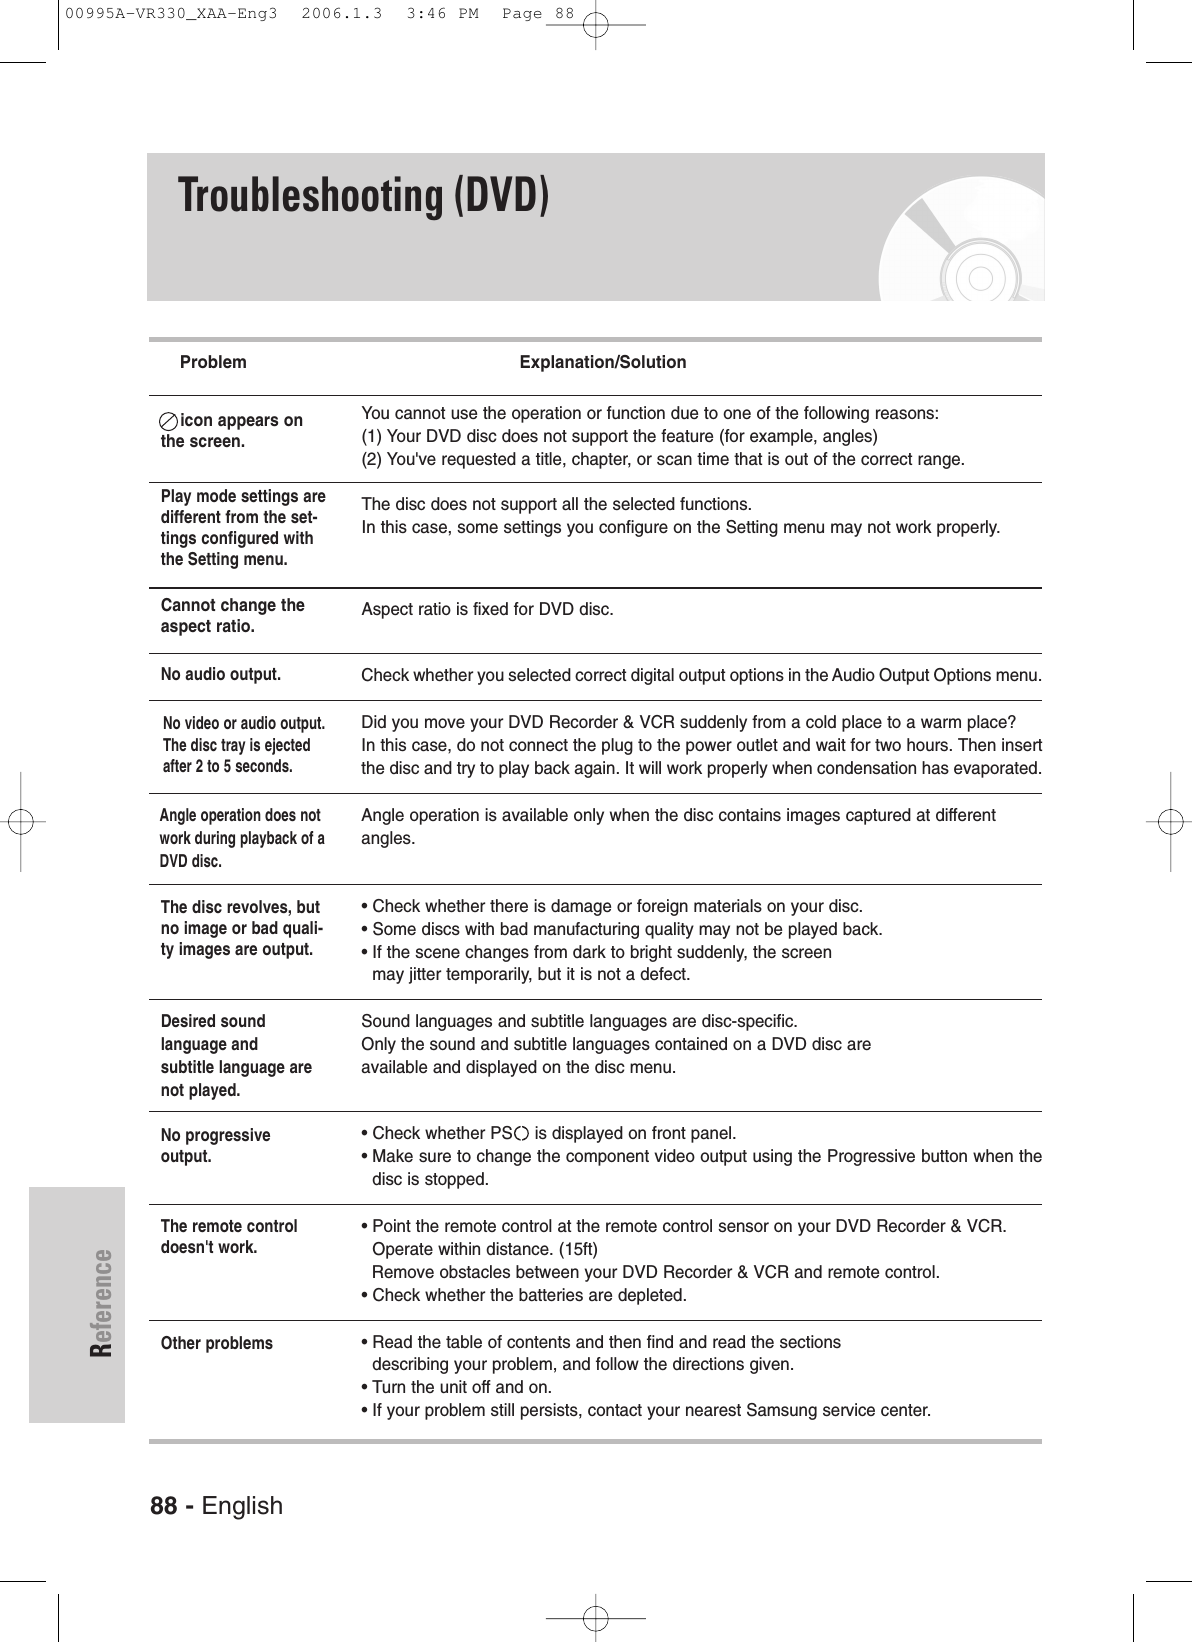
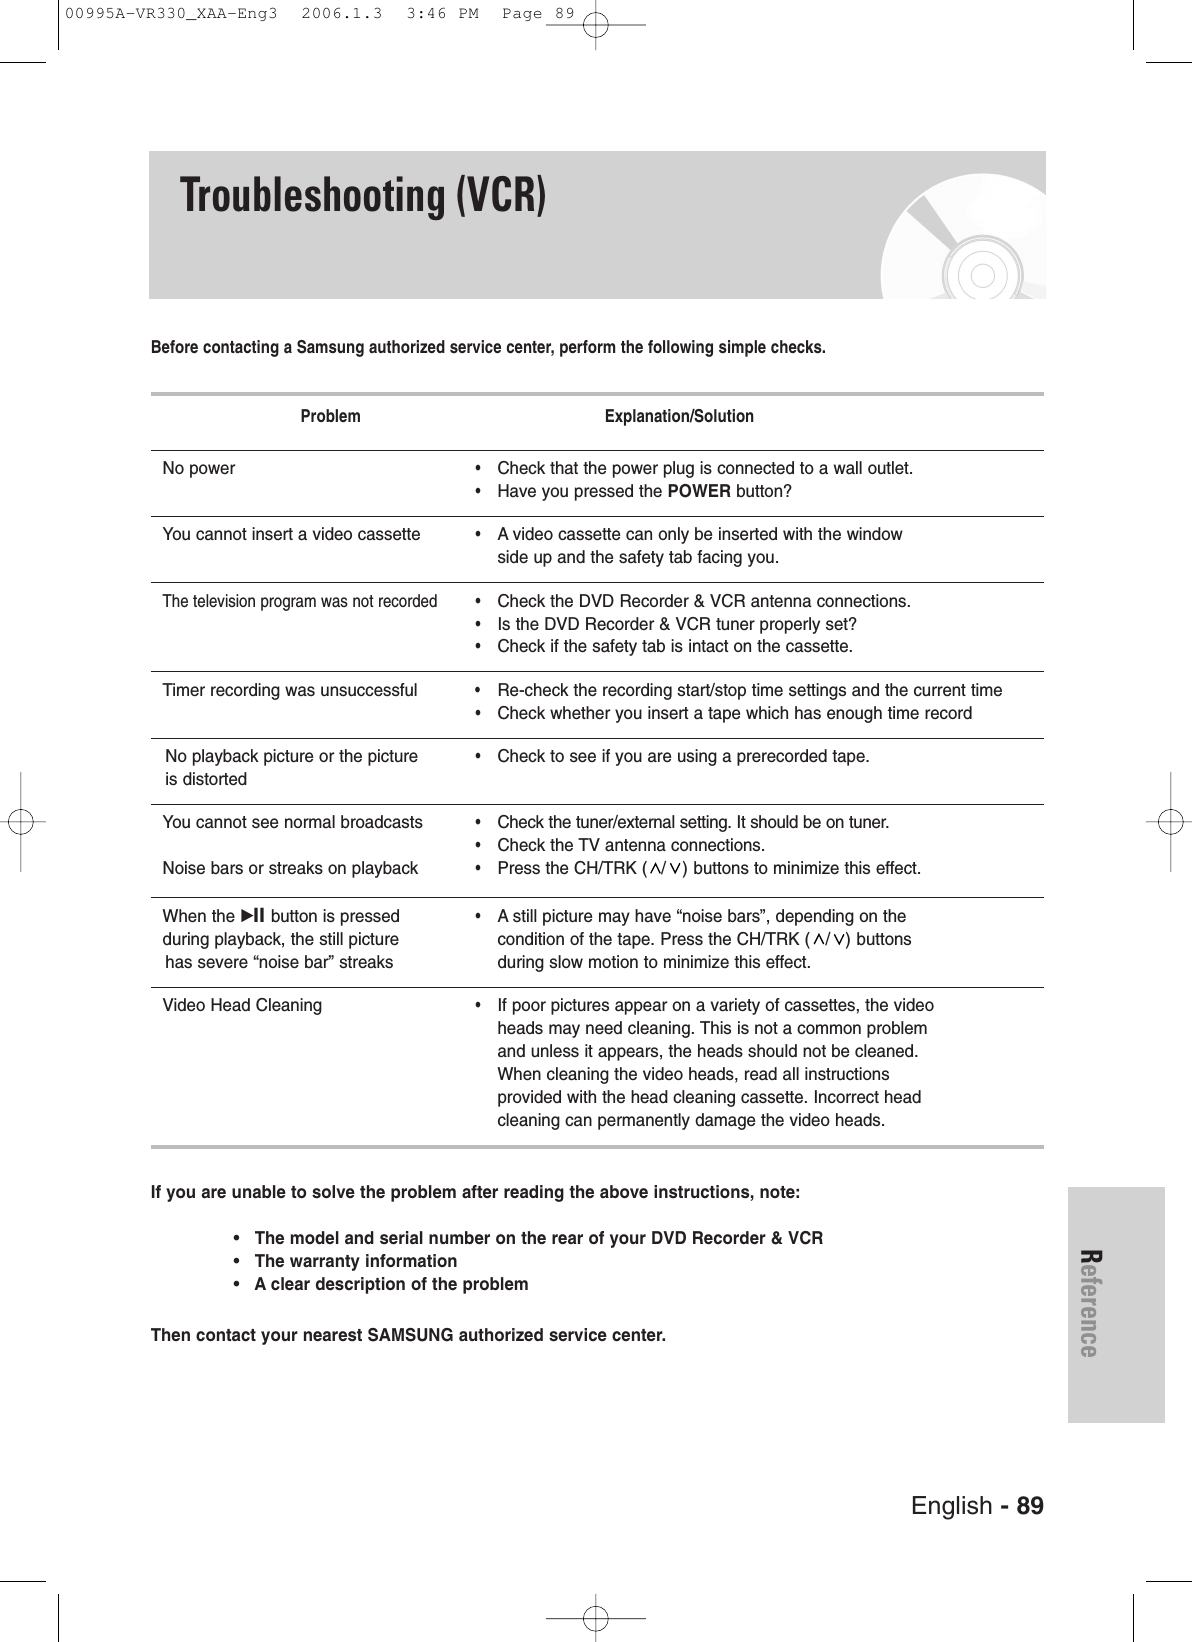
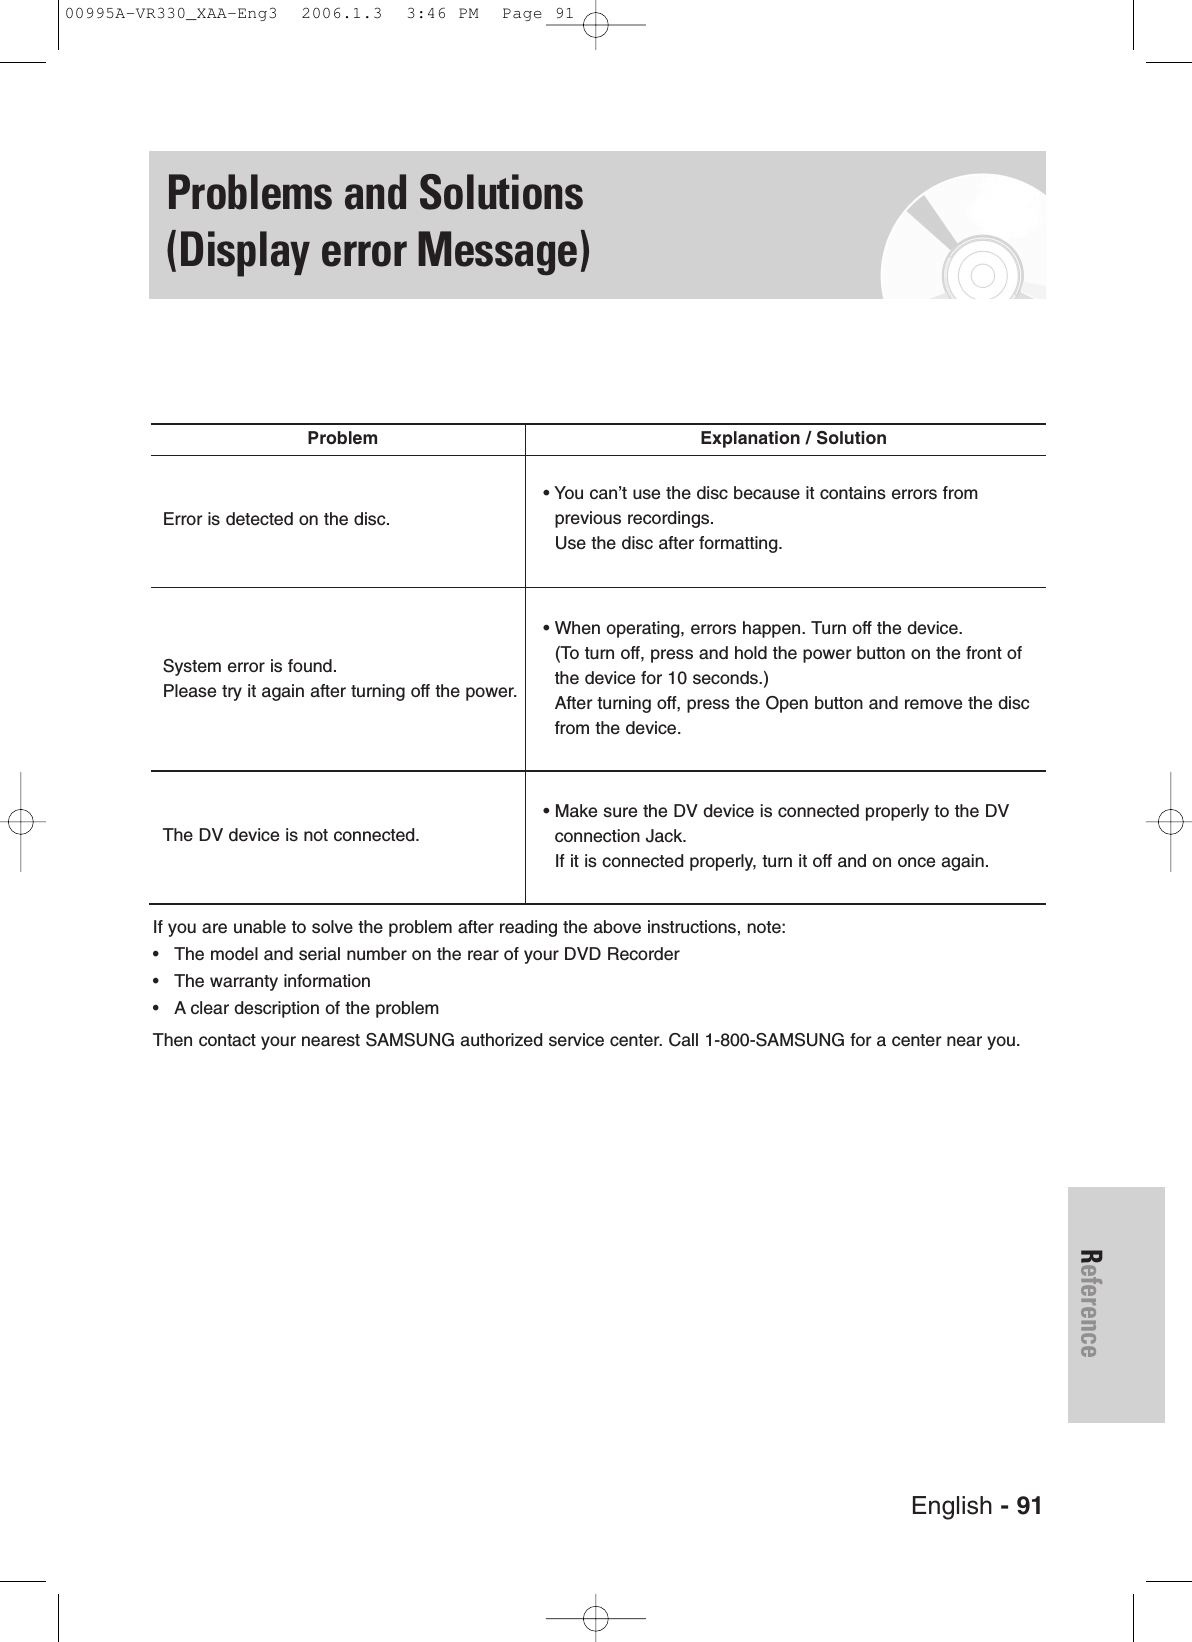
![90 - EnglishReferenceProblems and Solutions(Display error Message)Explanation / Solution• You can’t record the video since it is protected by copyright.• Disc you are using is protected. To record on this disc or usethis function, cancel the disc protection function. Refer topage 85. • The disc does not match the regional code for your area and cannot be played on this device.• Make sure there are no scratches or dirt on the disc.• The disc is PAL format and cannot be played on this unit.• Make sure there are no scratches or dirt on the disc. • You can’t use the disc because it contains errors from previous recordings.Use the disc after formatting.ProblemYou cannot record a copy protected movie.You cannot record. This disc is protected.This disc cannot be formatted (the disc isprotected).This disc cannot be renamed(the disc is protected).The disc cannot be finalized (the disc is protected).This [Menu] is not available (the disc is protected).The disc cannot be played,Please check the regional code of the disc.This disc cannot be formatted.Please check the disc.You could not format the discbecause of error detection.You could not finalize the discbecause of error detection.You could not unfinalize the discbecause of error detection.The disc cannot be played,Please check the TV system.The disc can be neither played nor recorded.The disc cannot be played, Please check thedisc.If the disc has invalid information, no more titles can be recorded. Please format the disc beforehand.Before contacting a Samsung authorized service center, perform the following simple checks.00995A-VR330_XAA-Eng3 2006.1.3 3:46 PM Page 90](https://usermanual.wiki/Samsung-Electronics-Co/DVDVR330.Users-Manual-2/User-Guide-618618-Page-40.png)