Samsung Electronics Co DVDVR345 DVD Recorder / Video Cassette Recorder User Manual 1
Samsung Electronics Co Ltd DVD Recorder / Video Cassette Recorder Users Manual 1
UserManual.wiki
>
Samsung Electronics Co
>
DVDVR345 User Manual
>
Users Manual 1
Contents
1.
Users Manual 1
2.
Users Manual 2
Users Manual 1
Navigation menu
Upload a User Manual
Namespaces
Wiki Guide
HTML
PDF
Info
Views
User Manual
Discussion / Help
Navigation
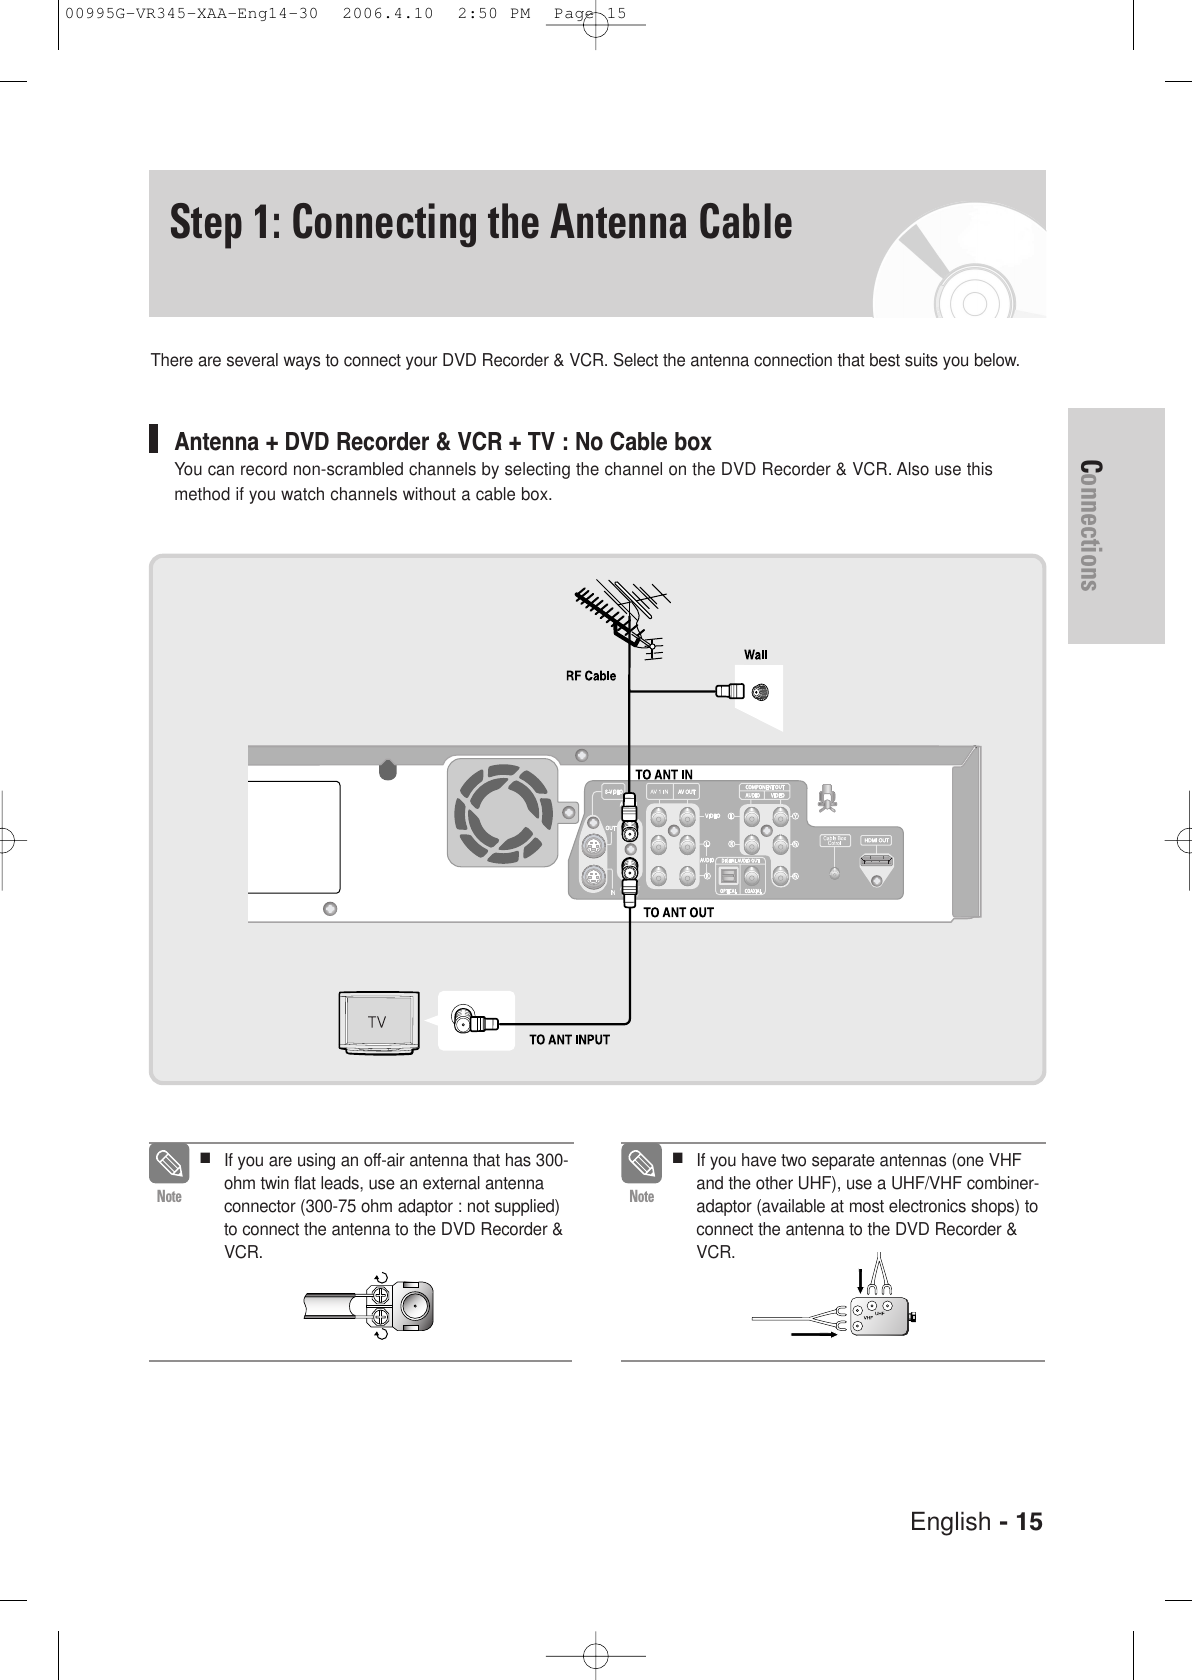
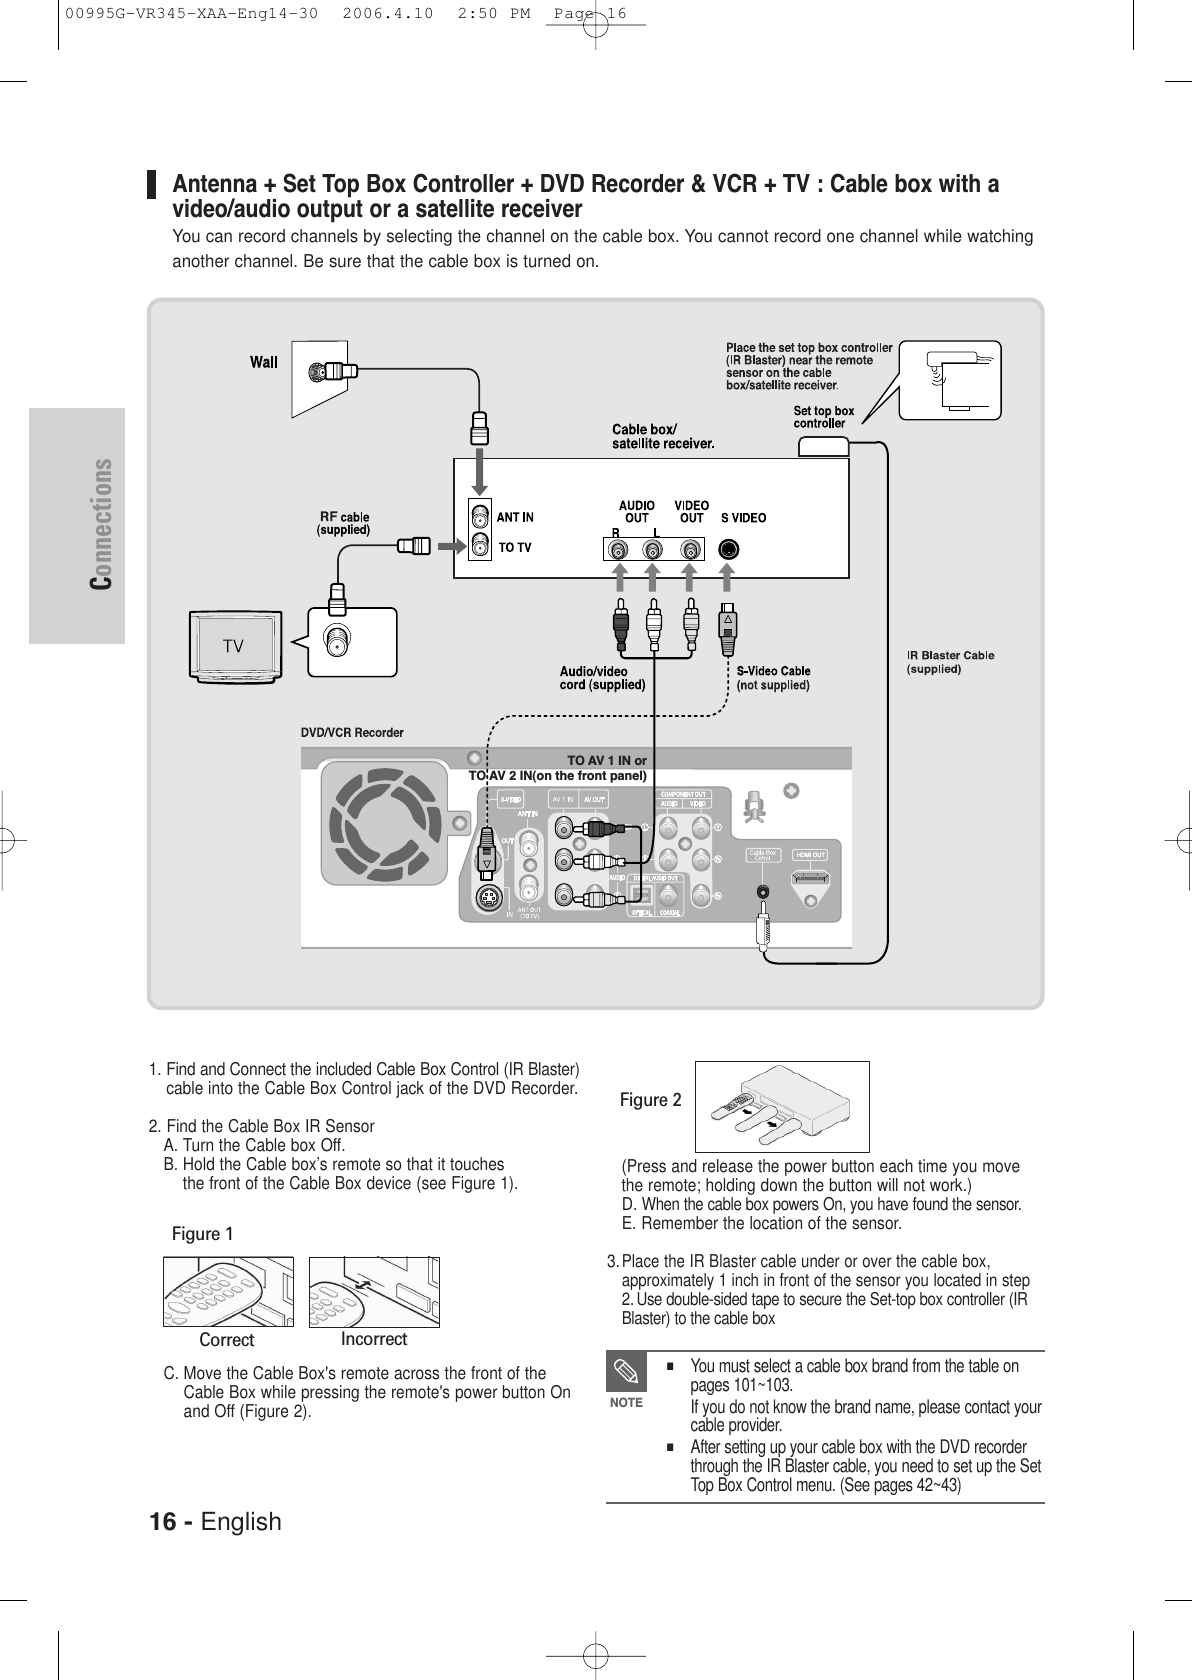
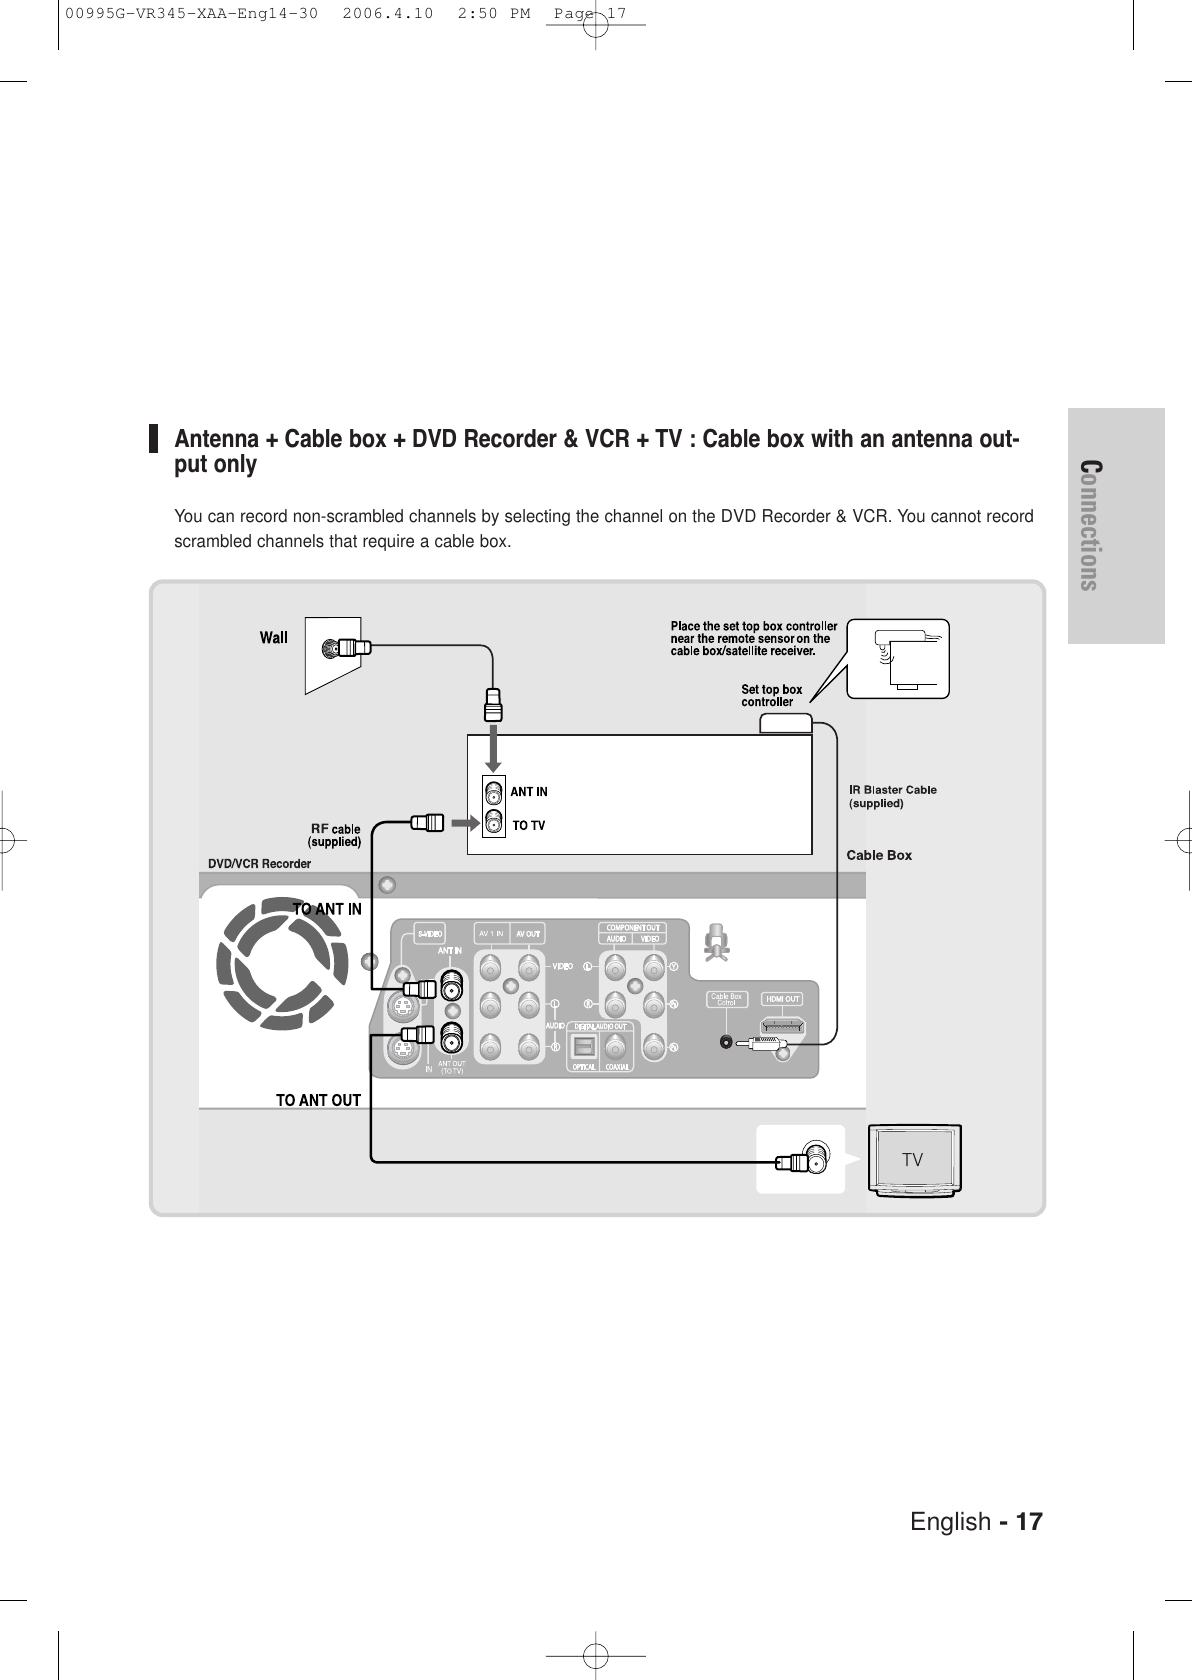
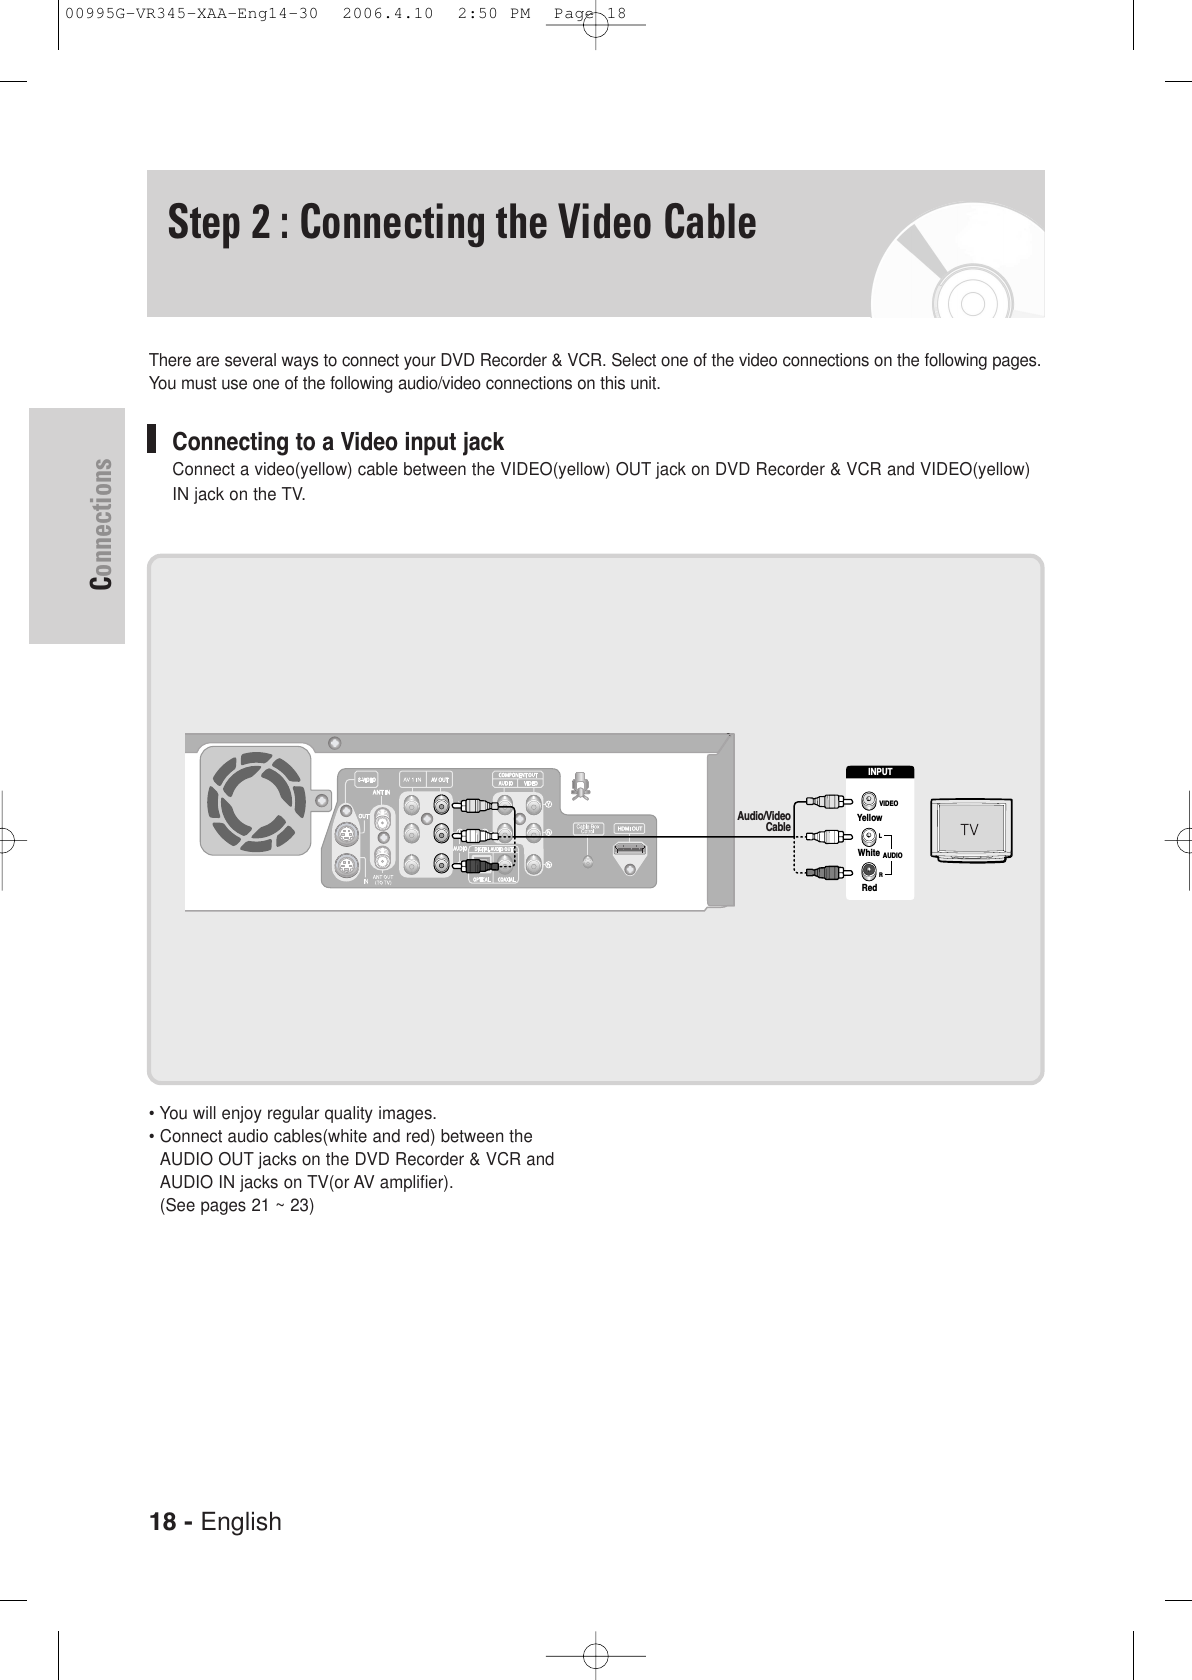
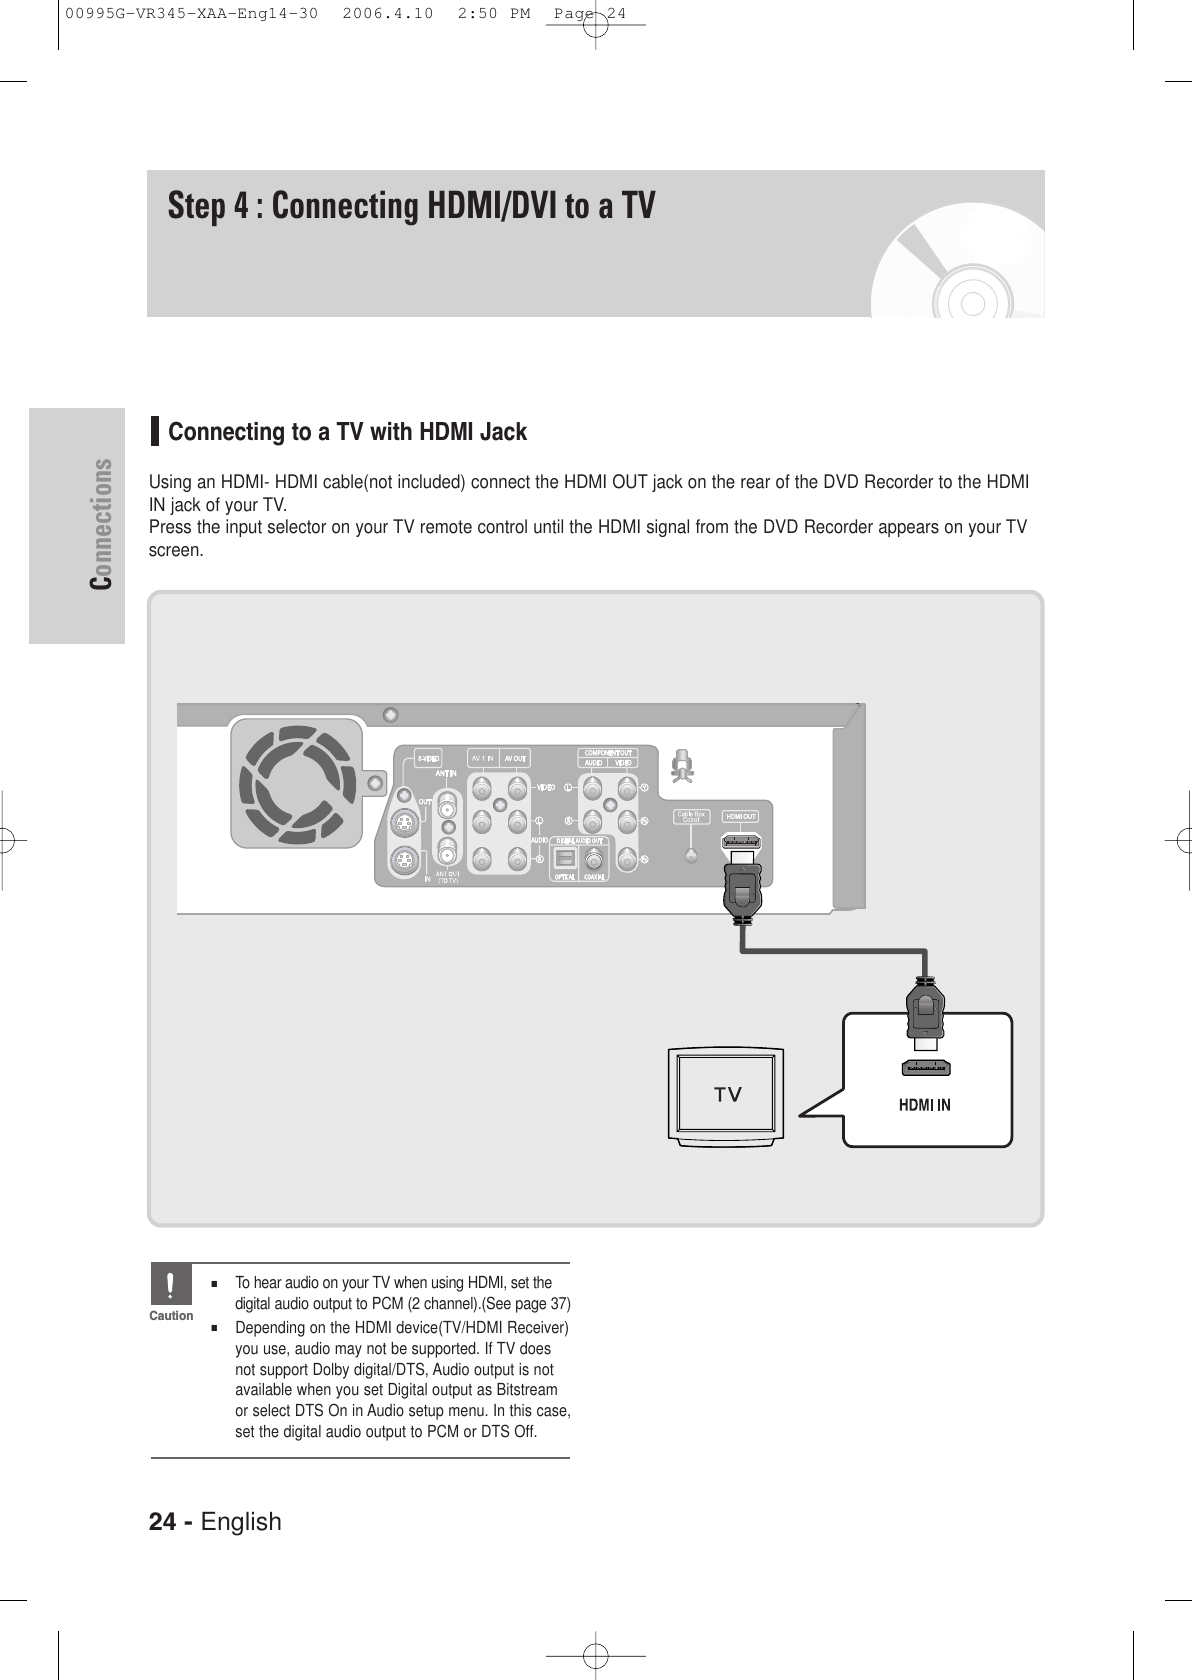
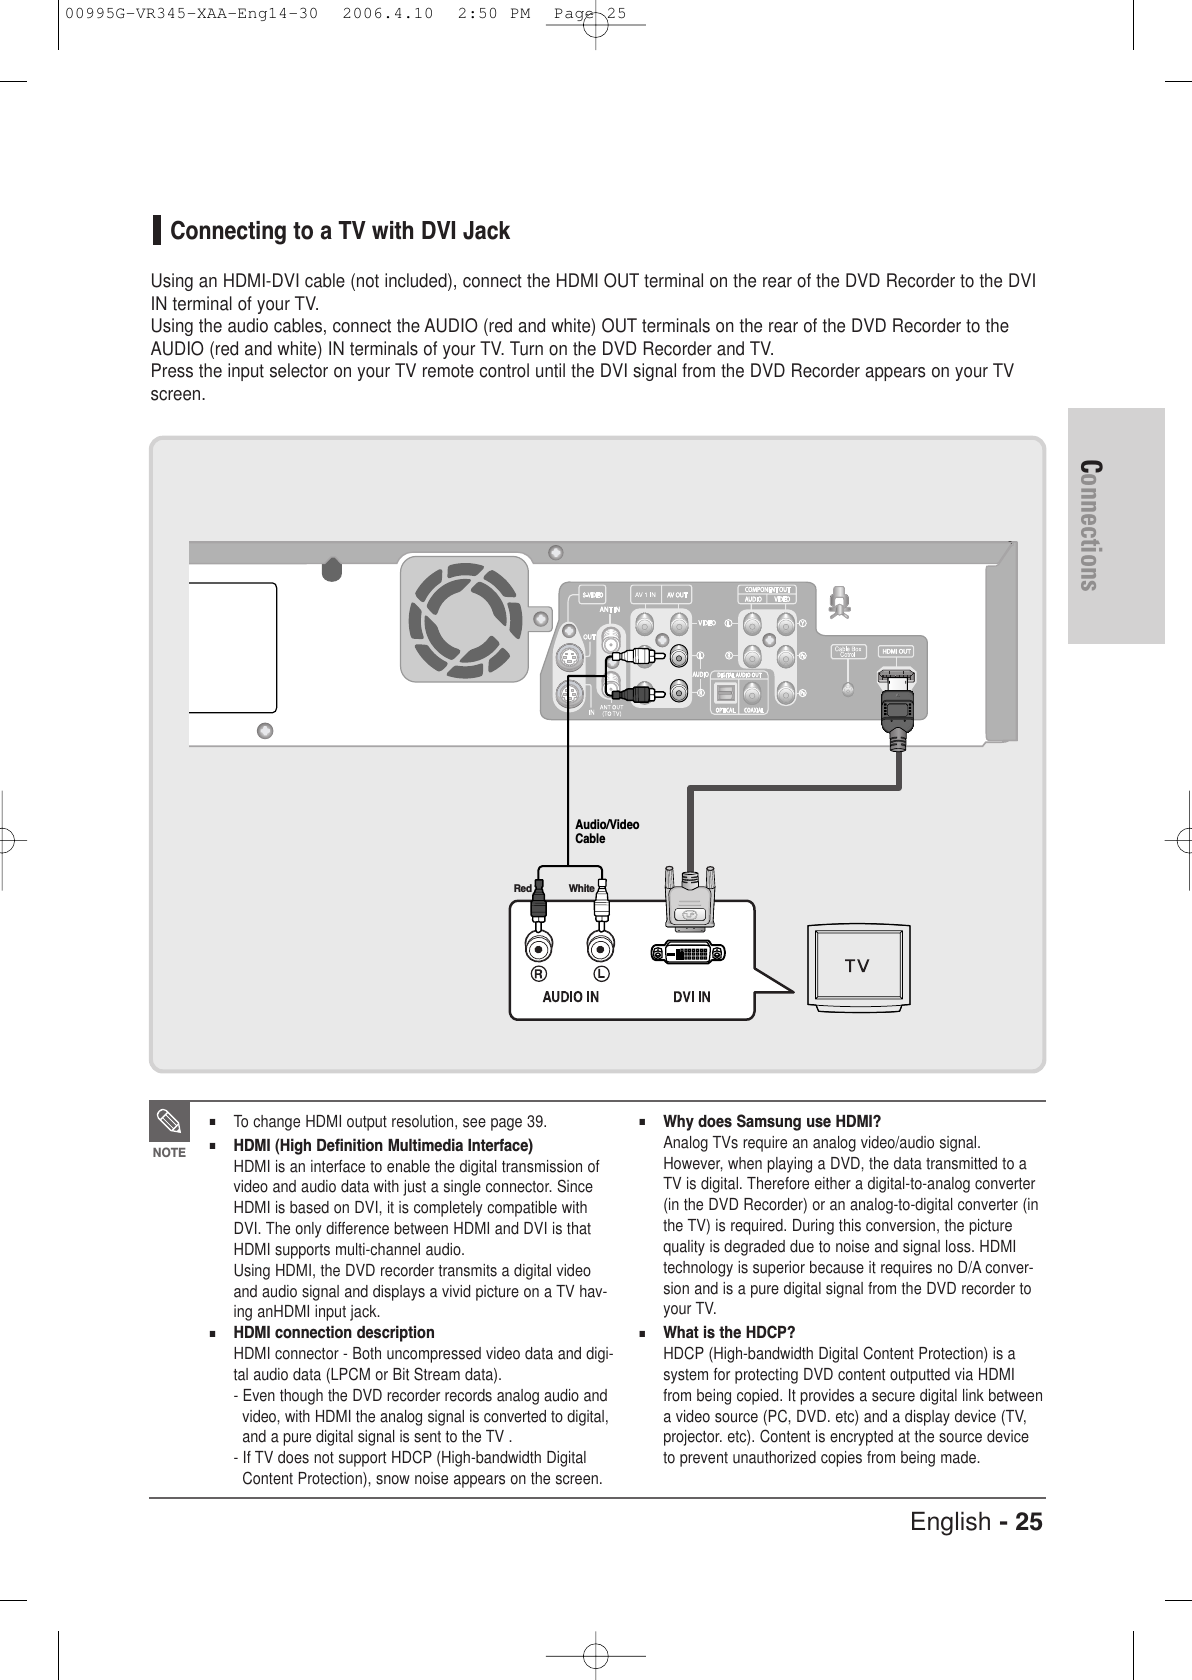
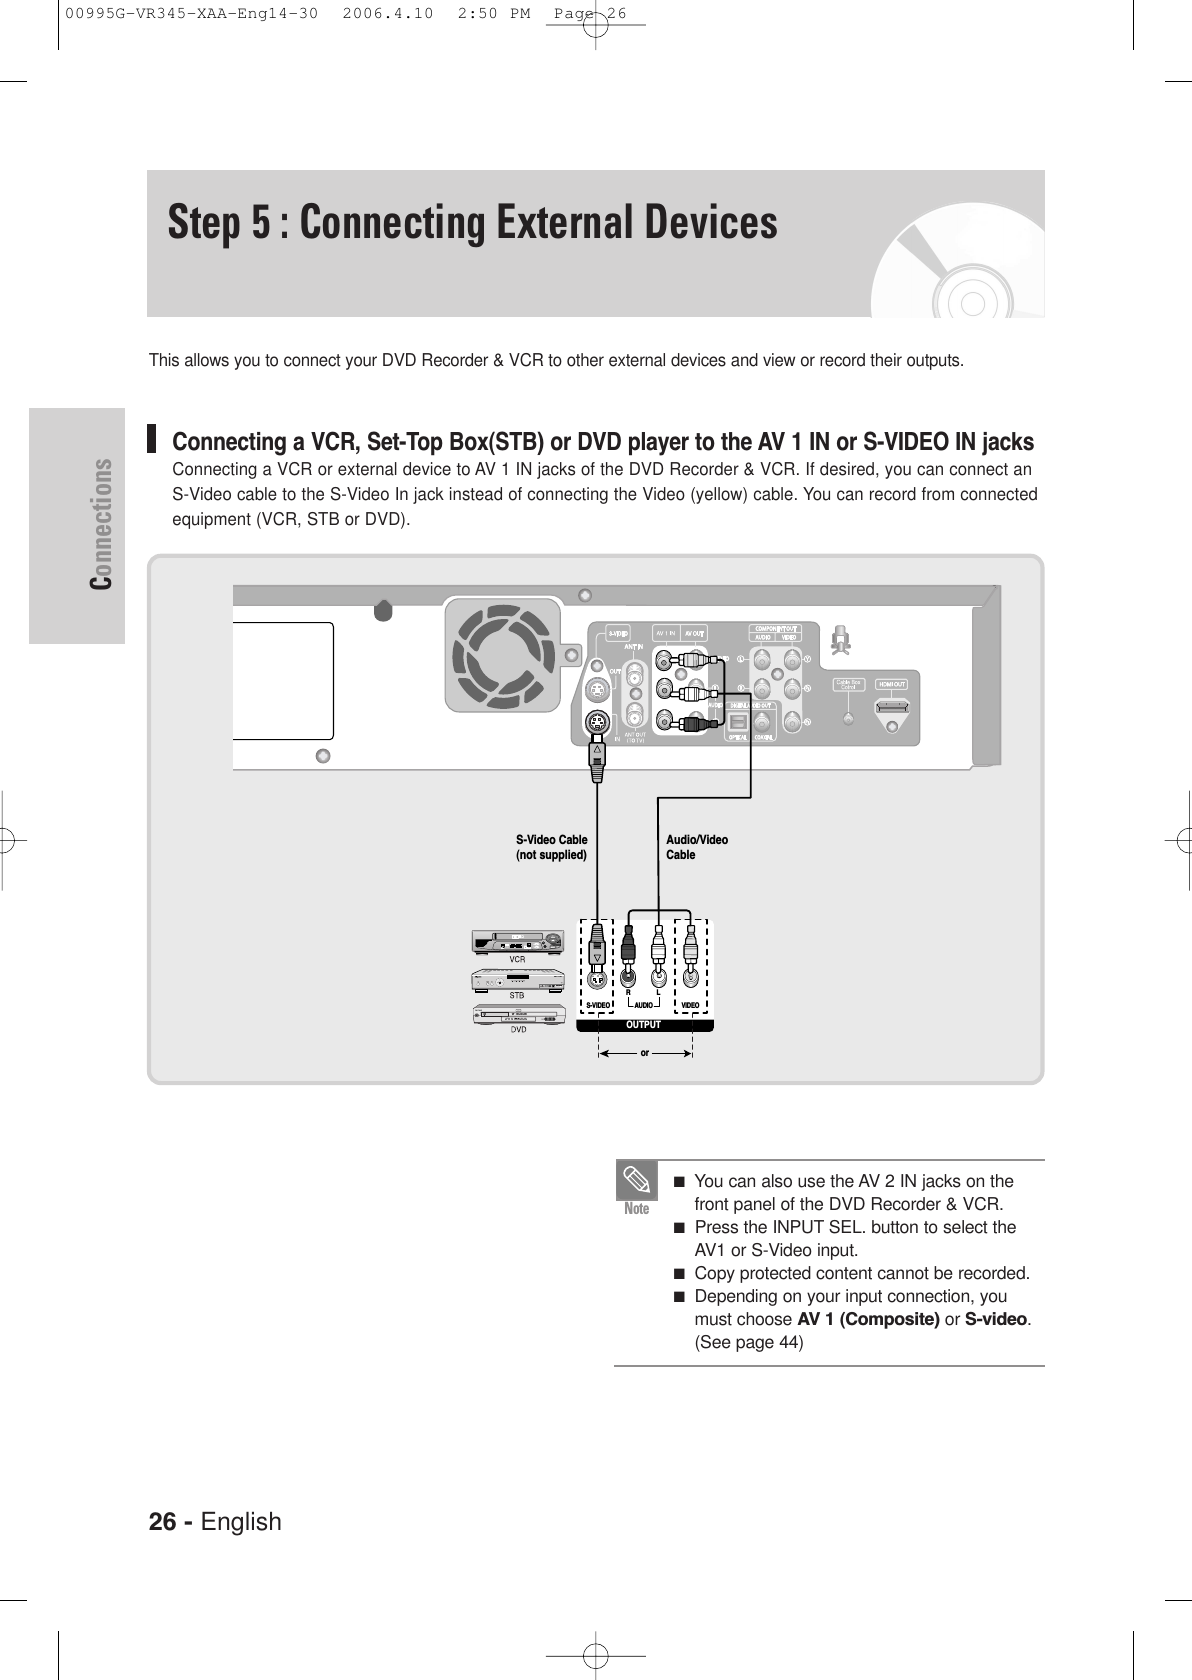
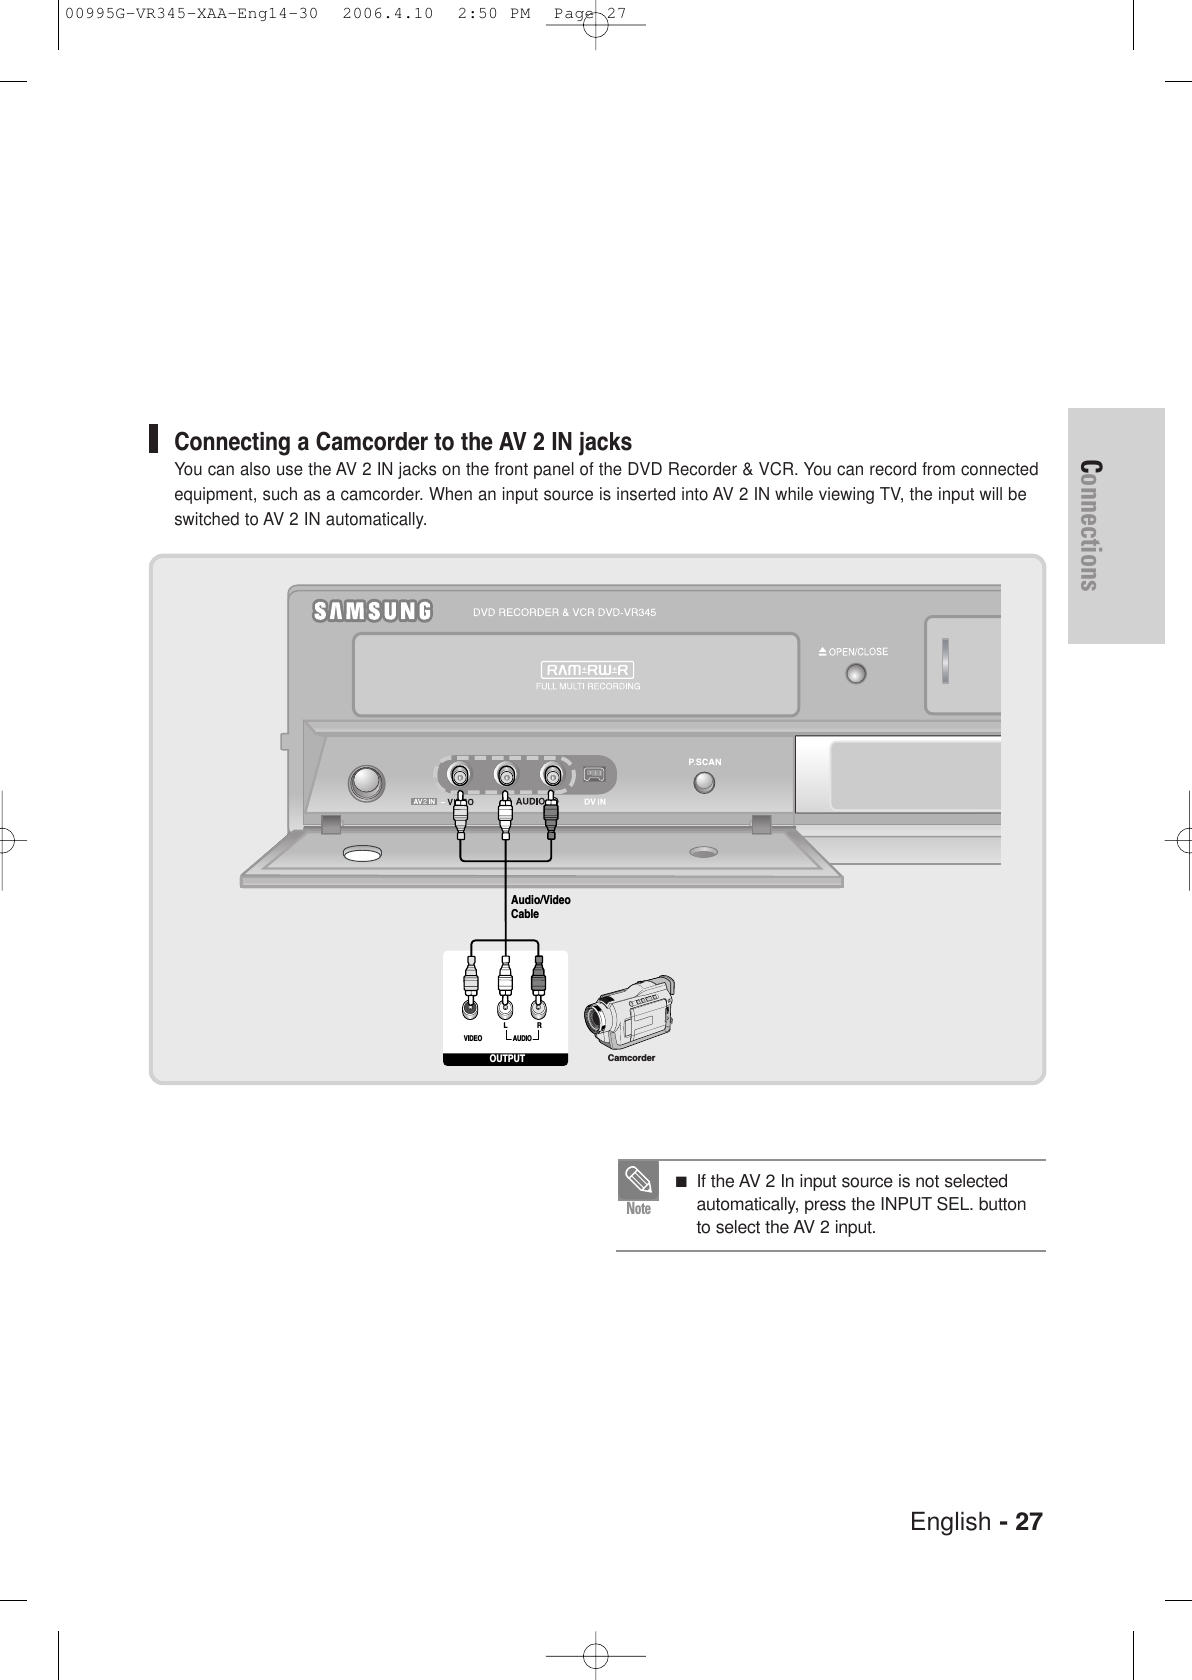
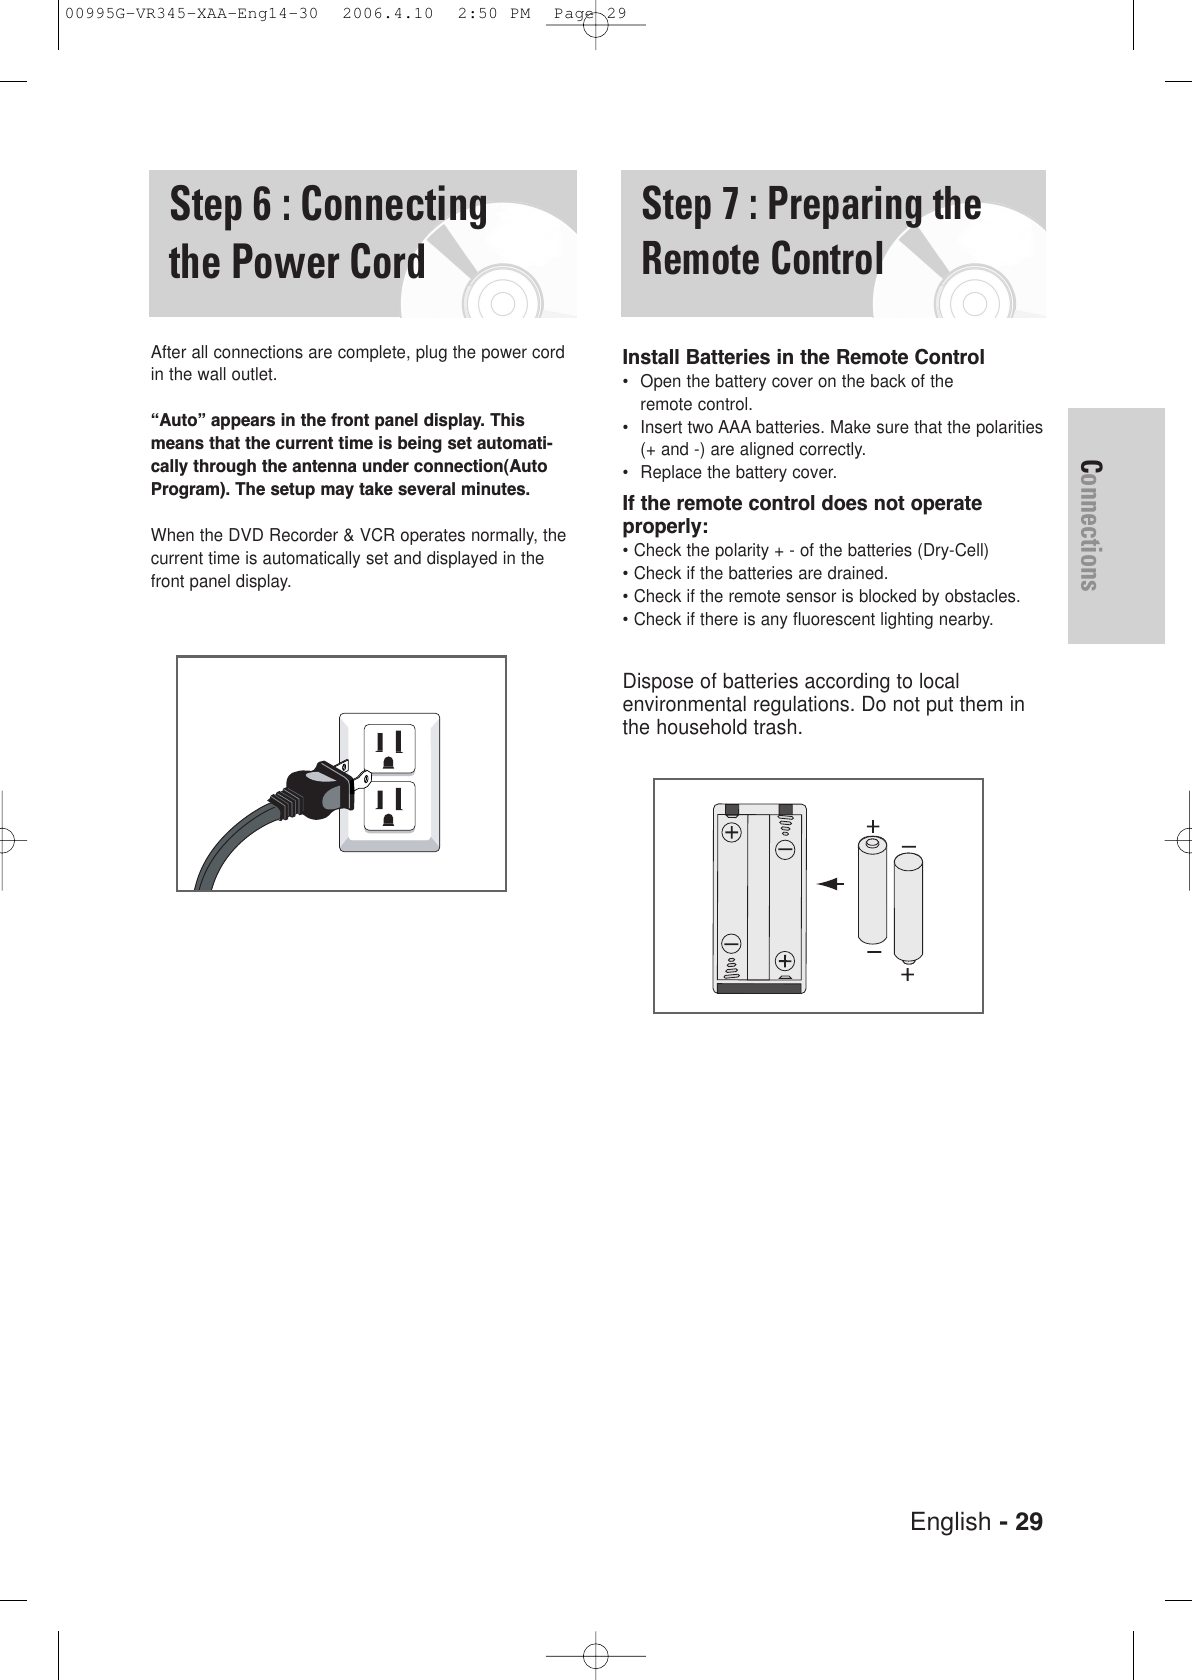
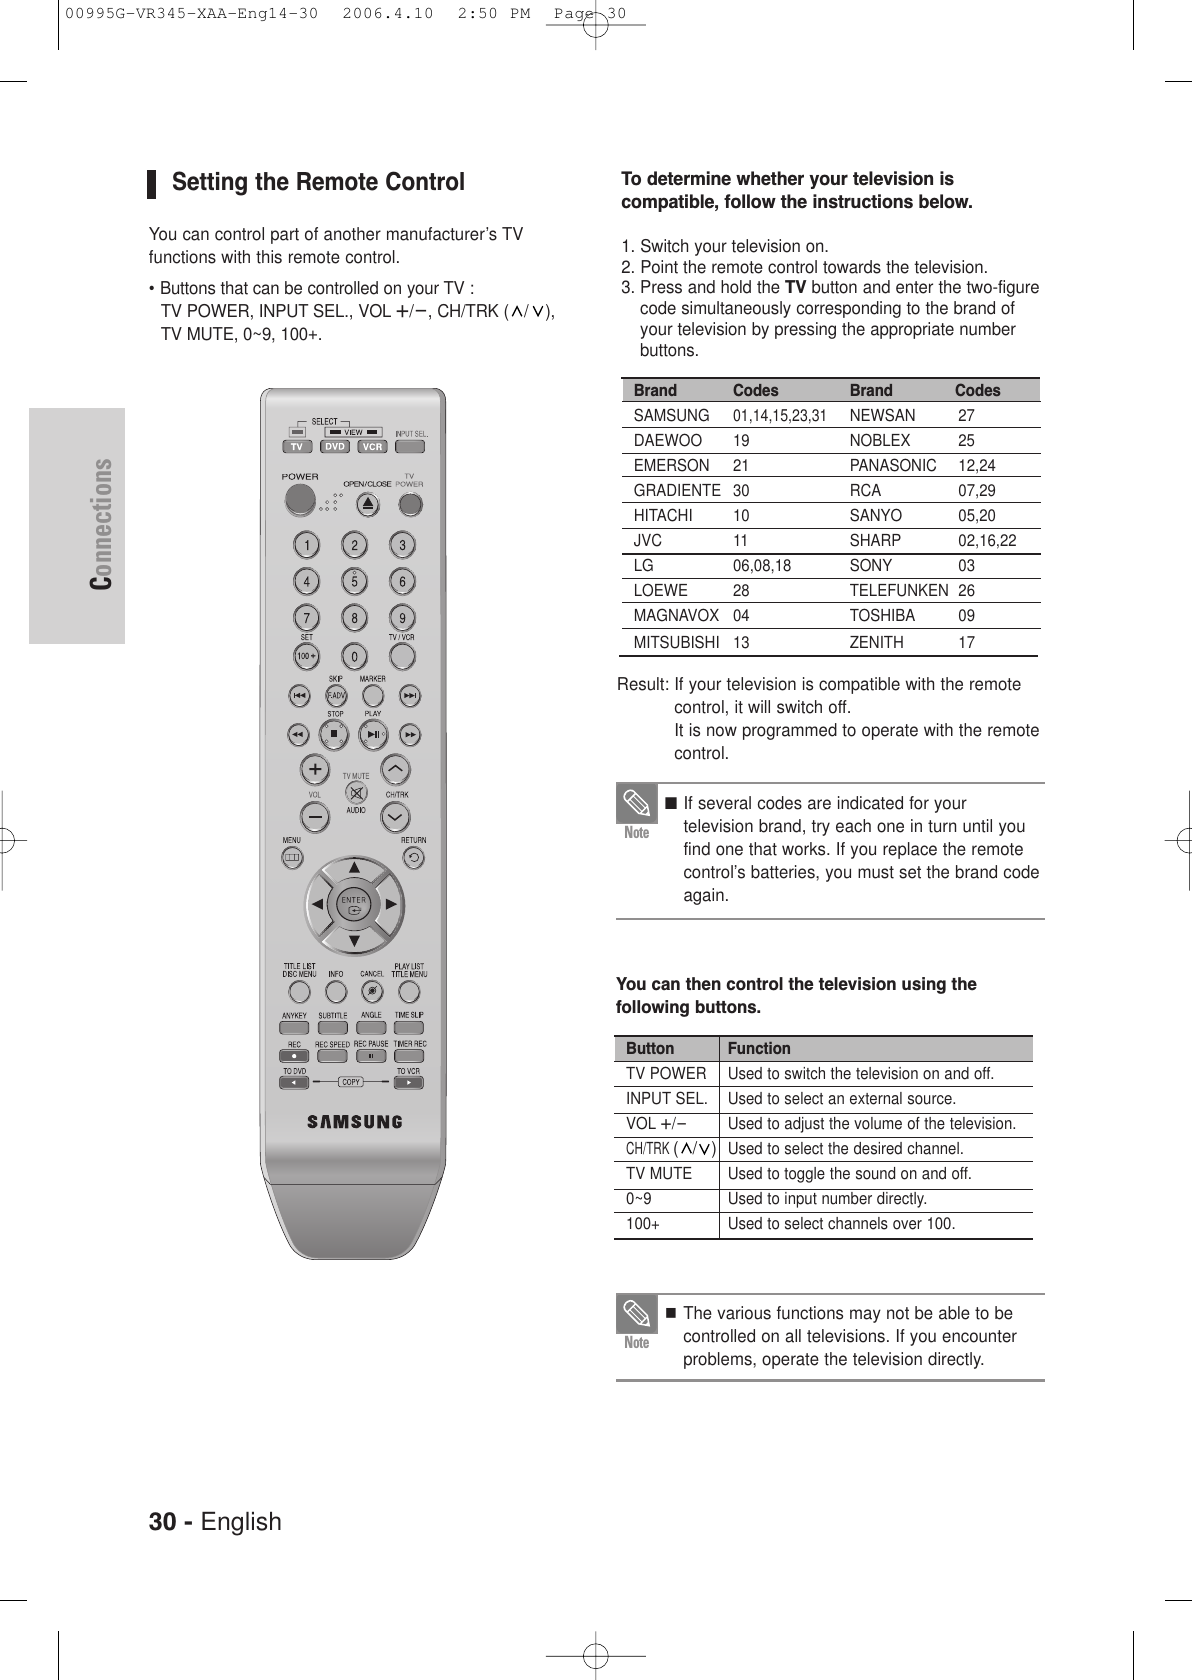
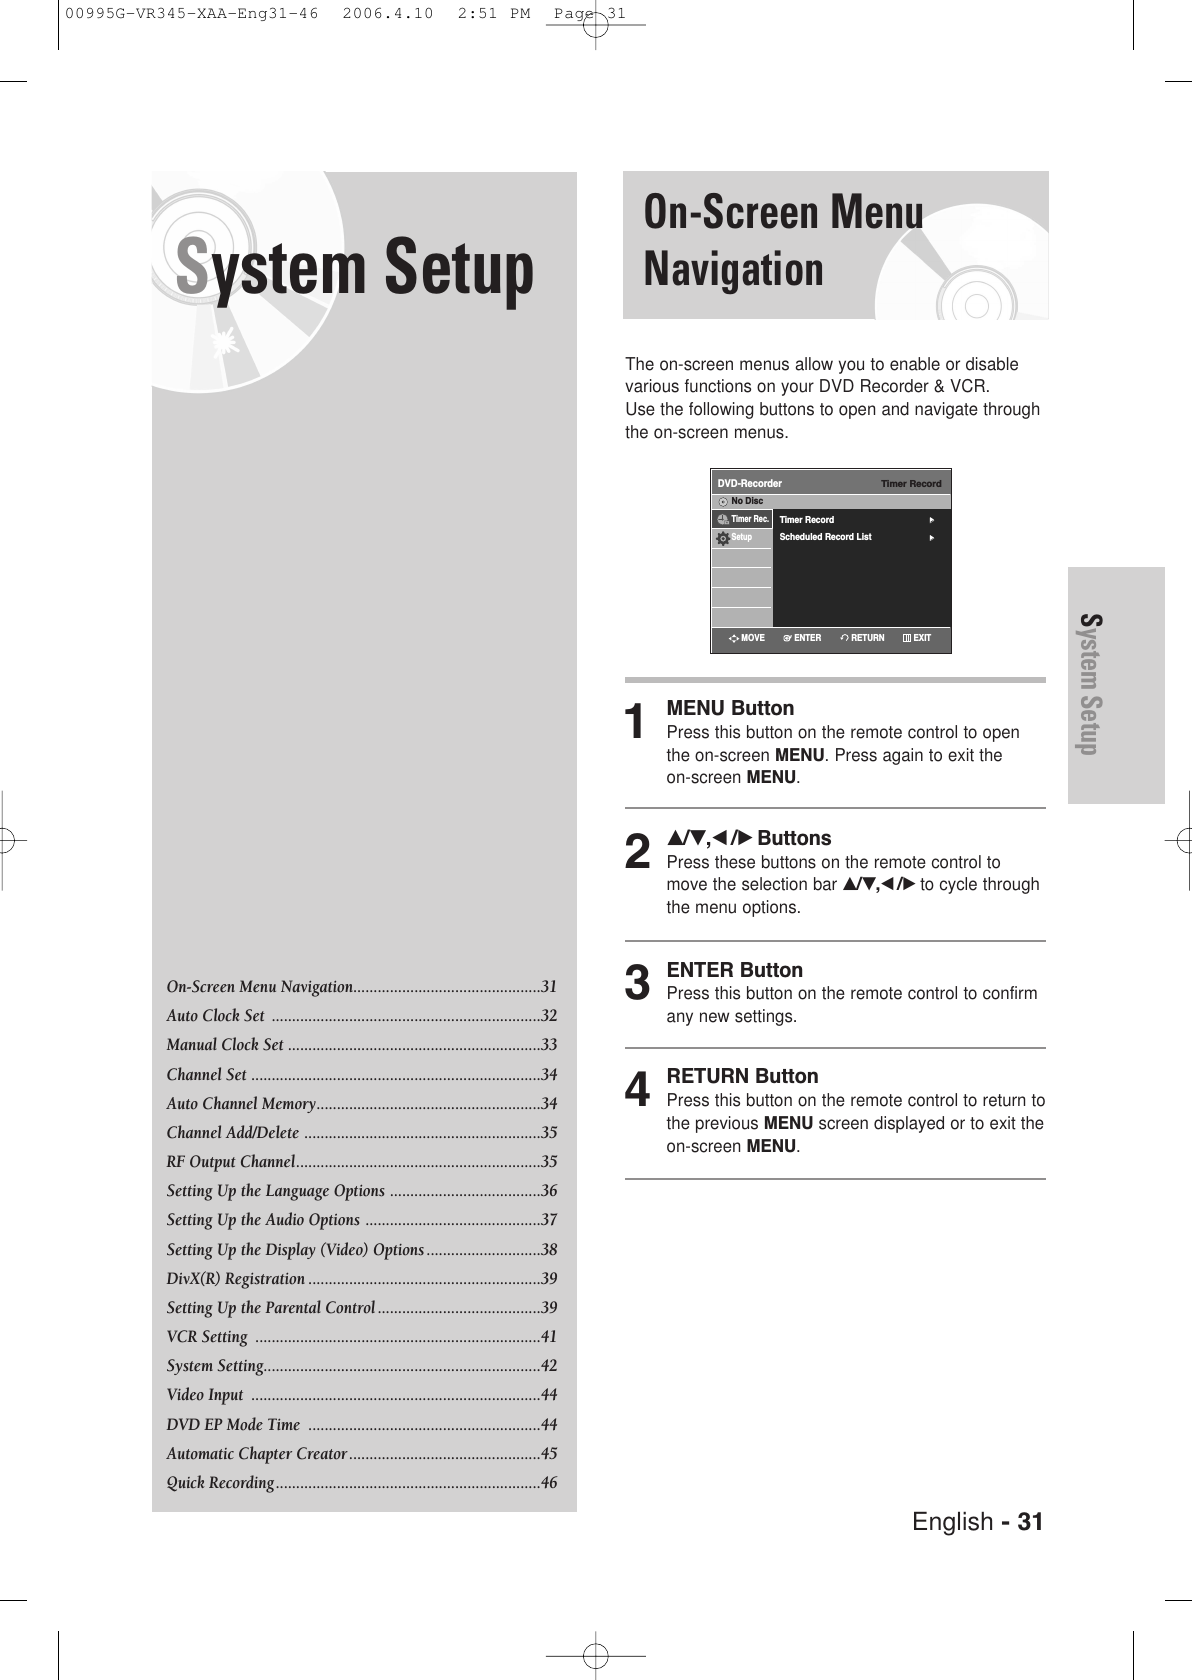
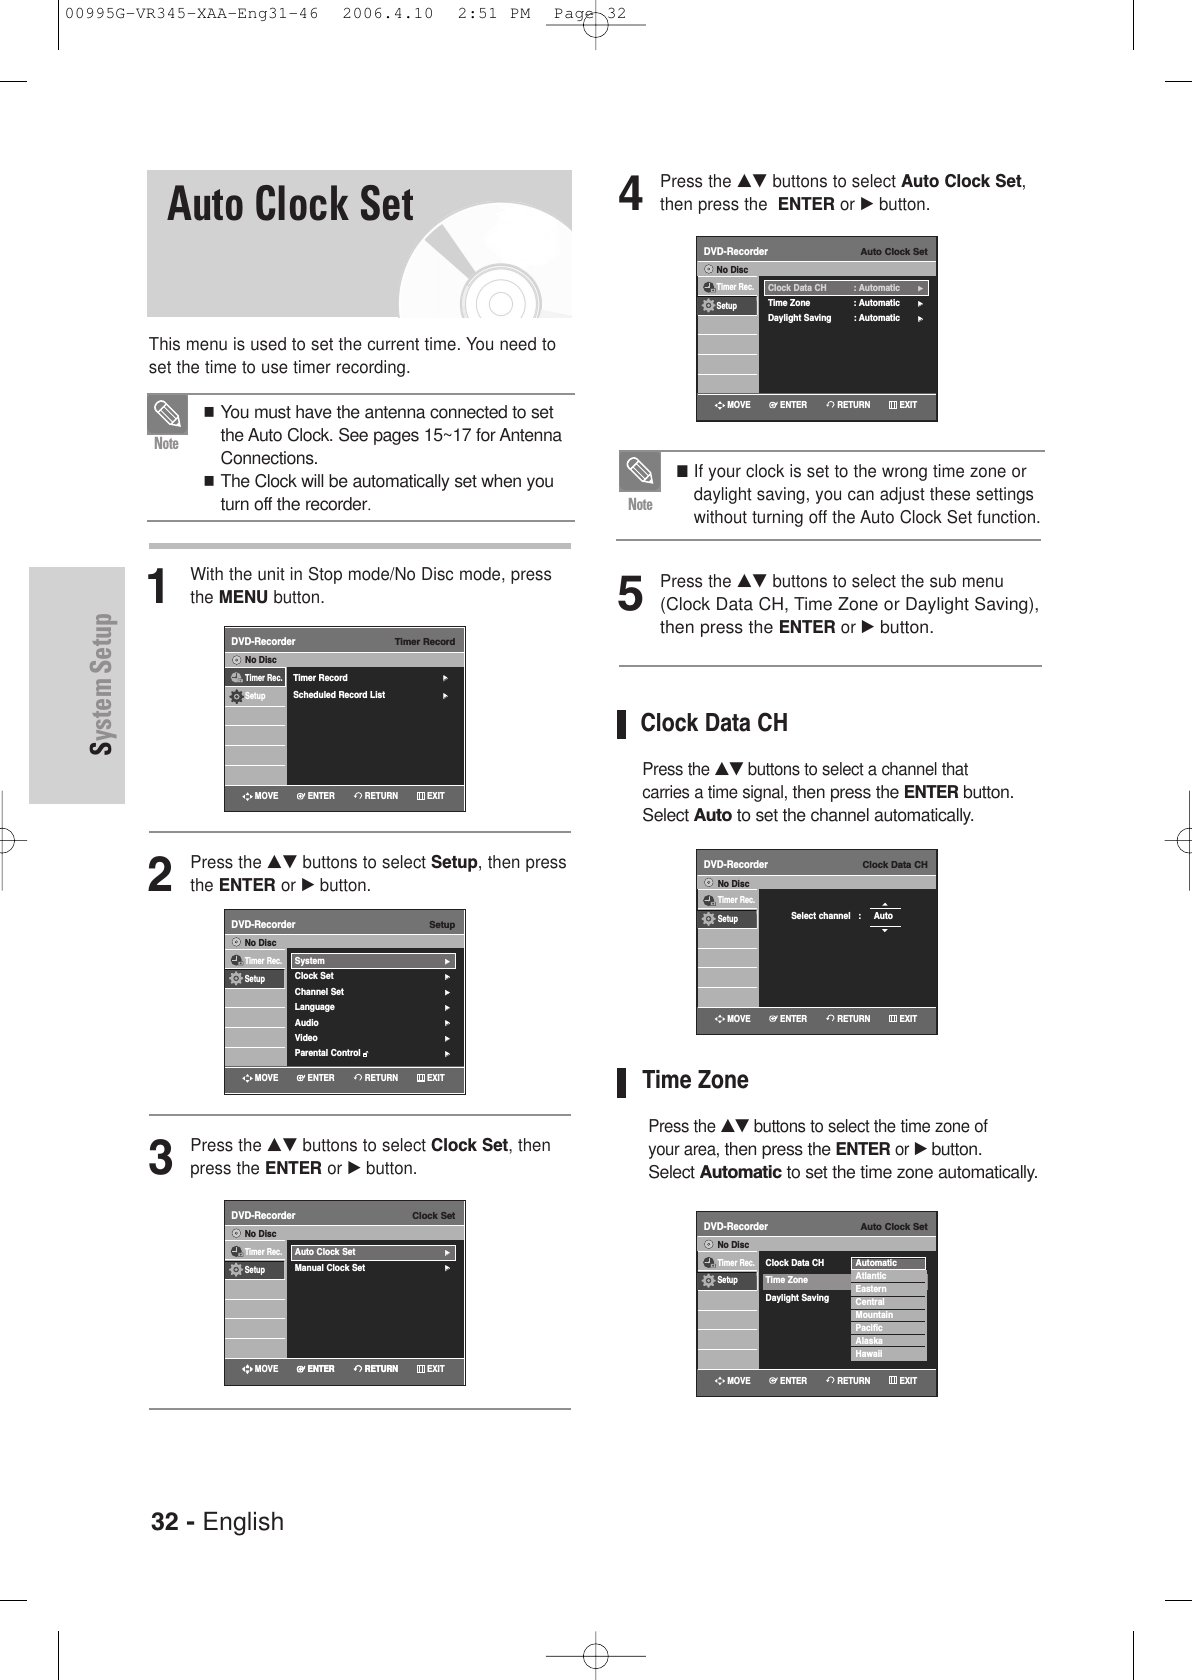
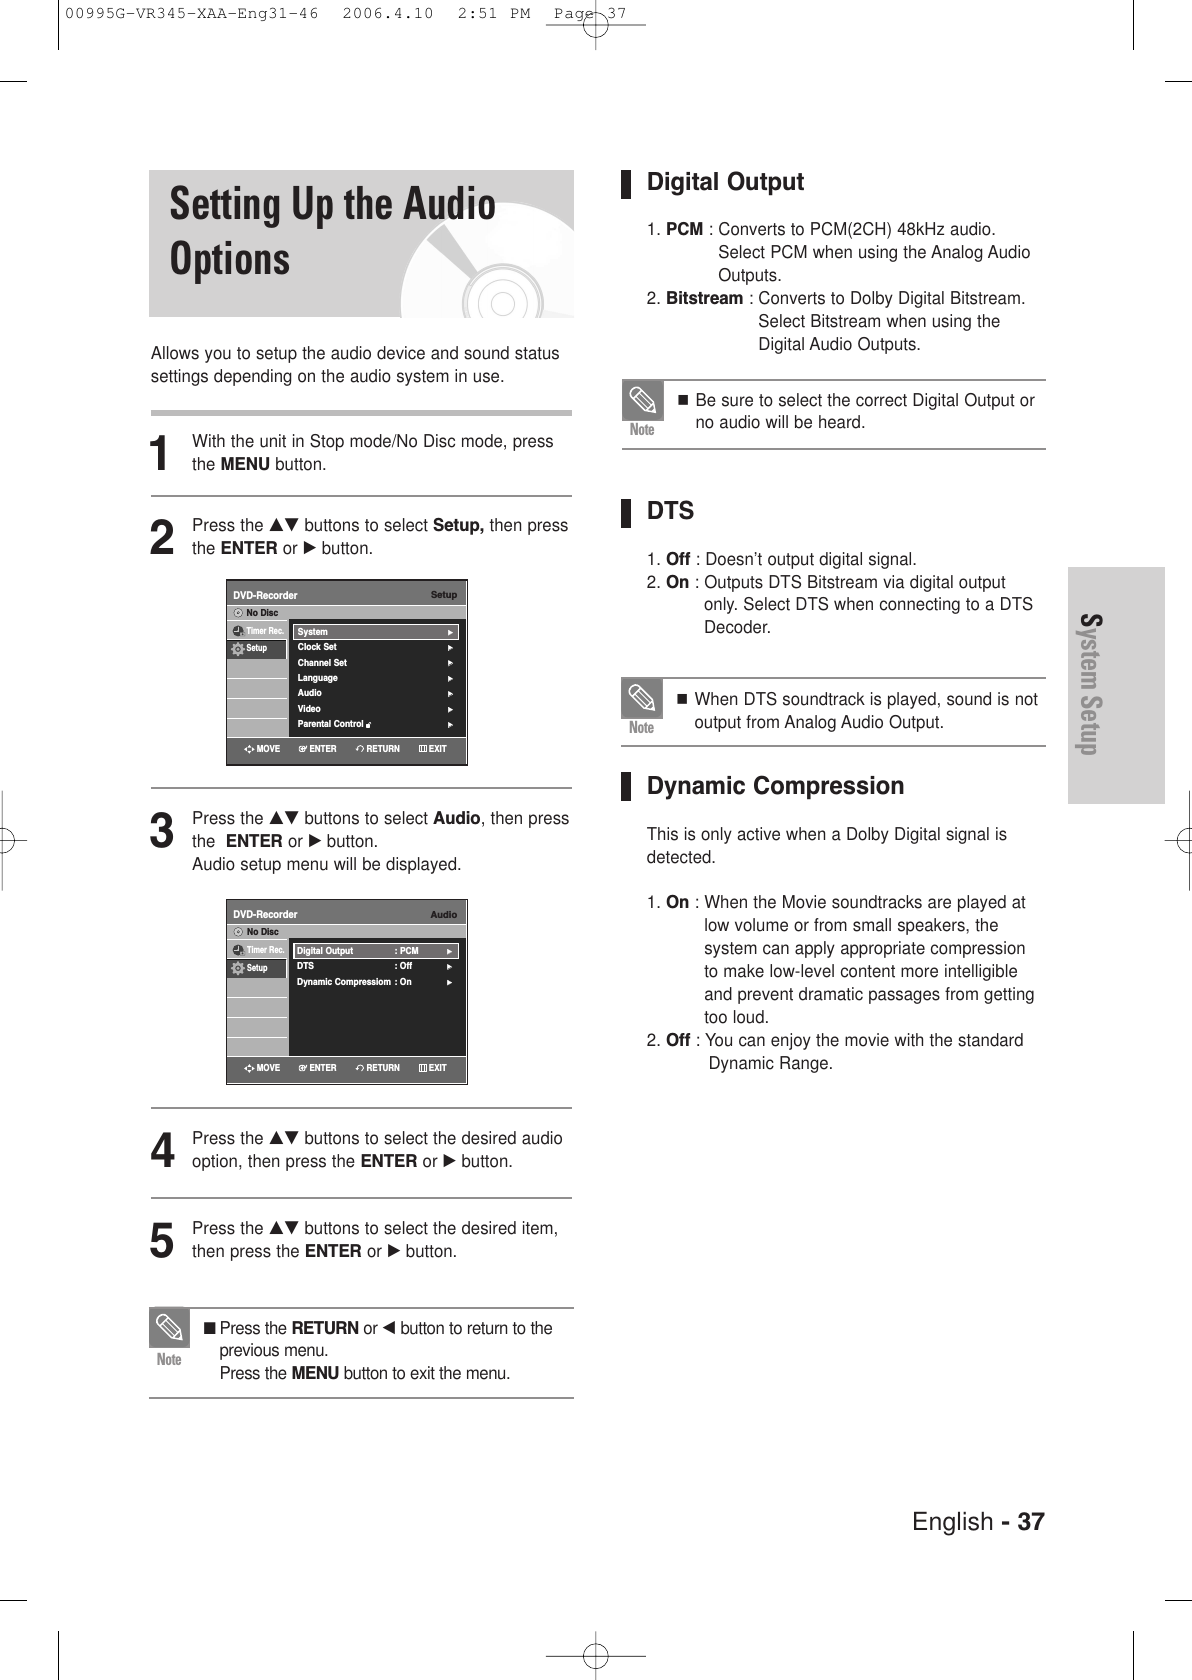
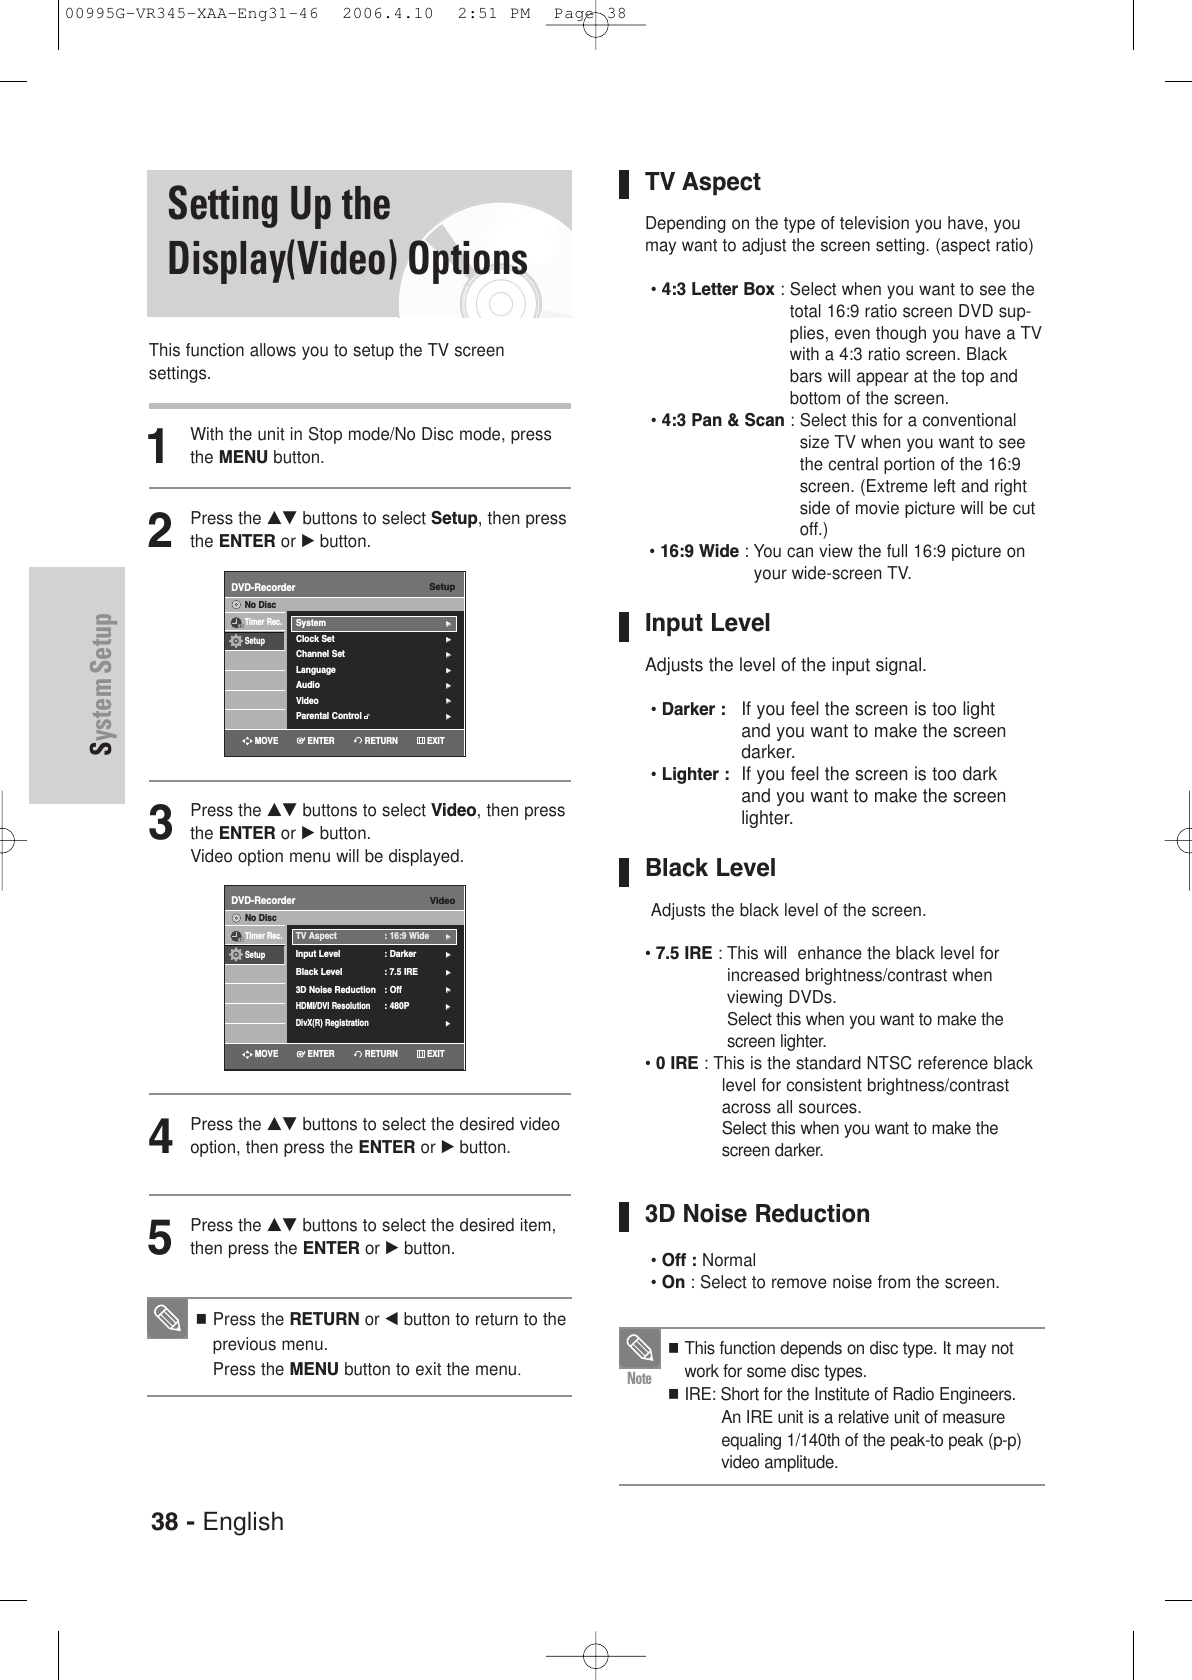
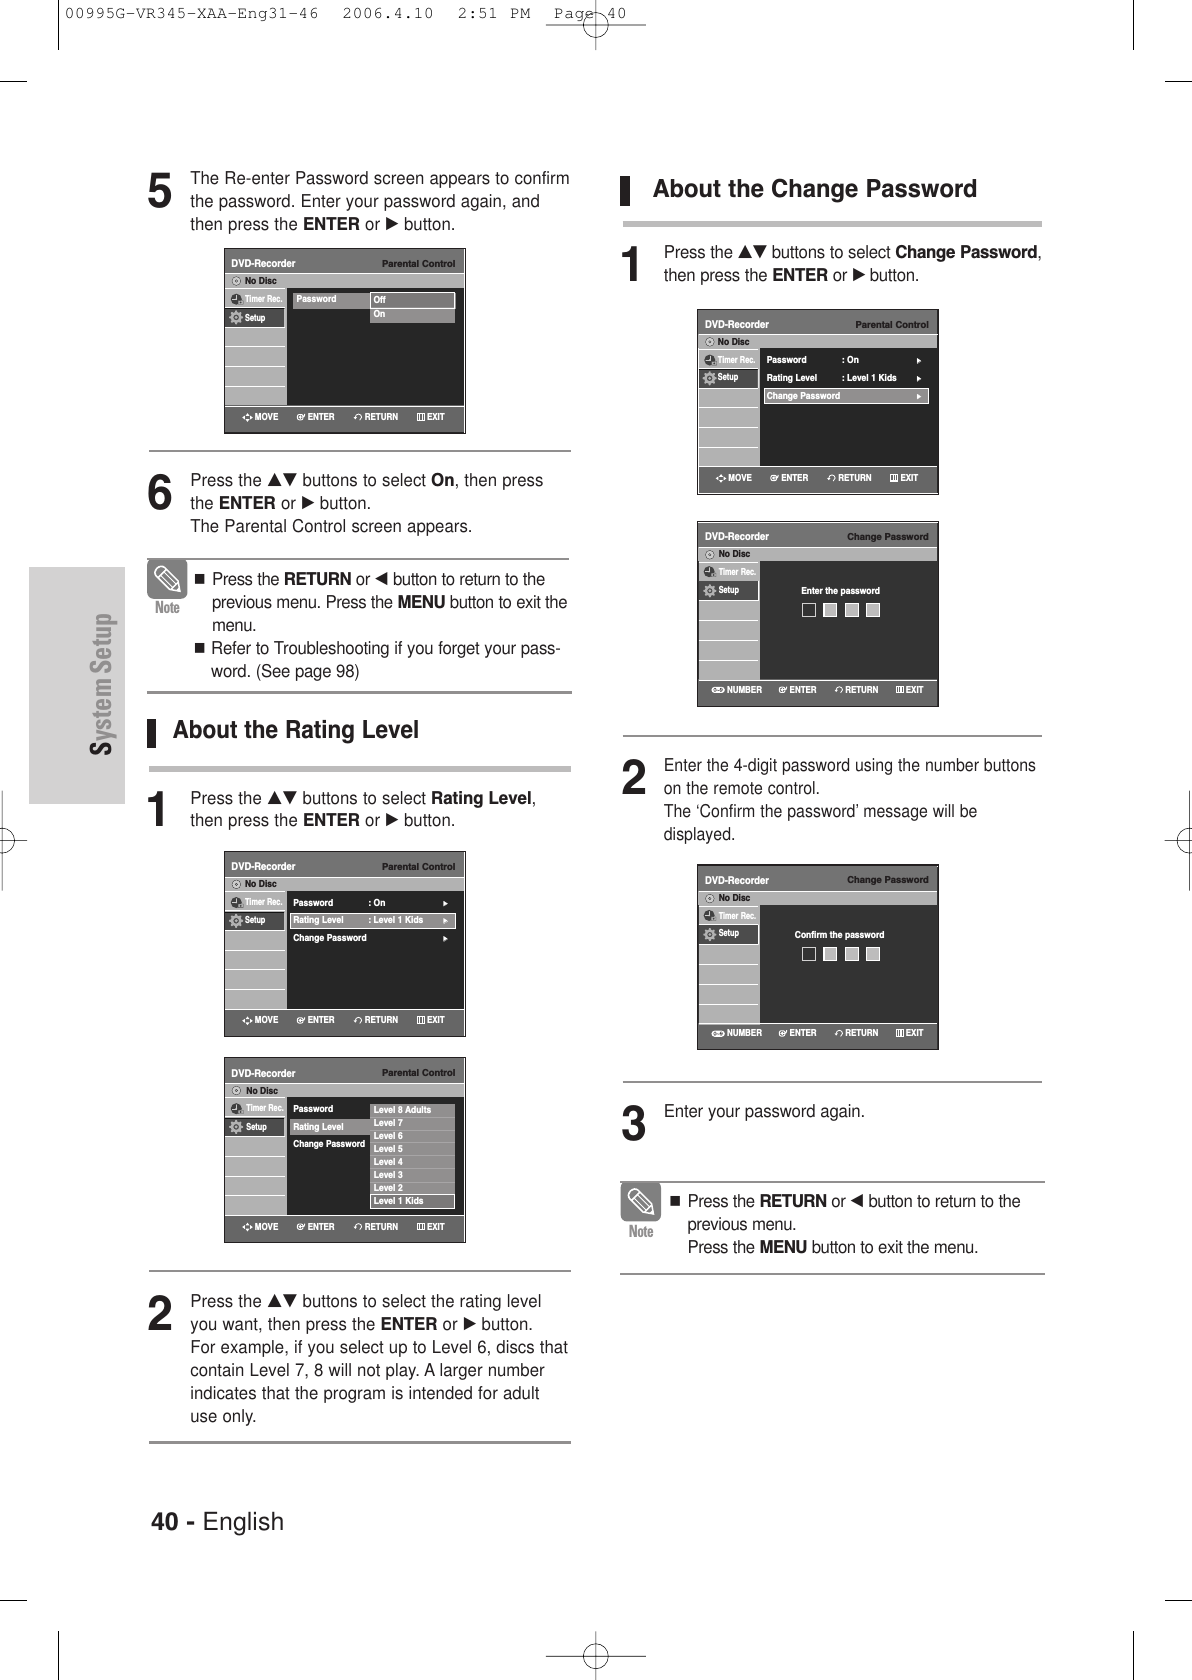
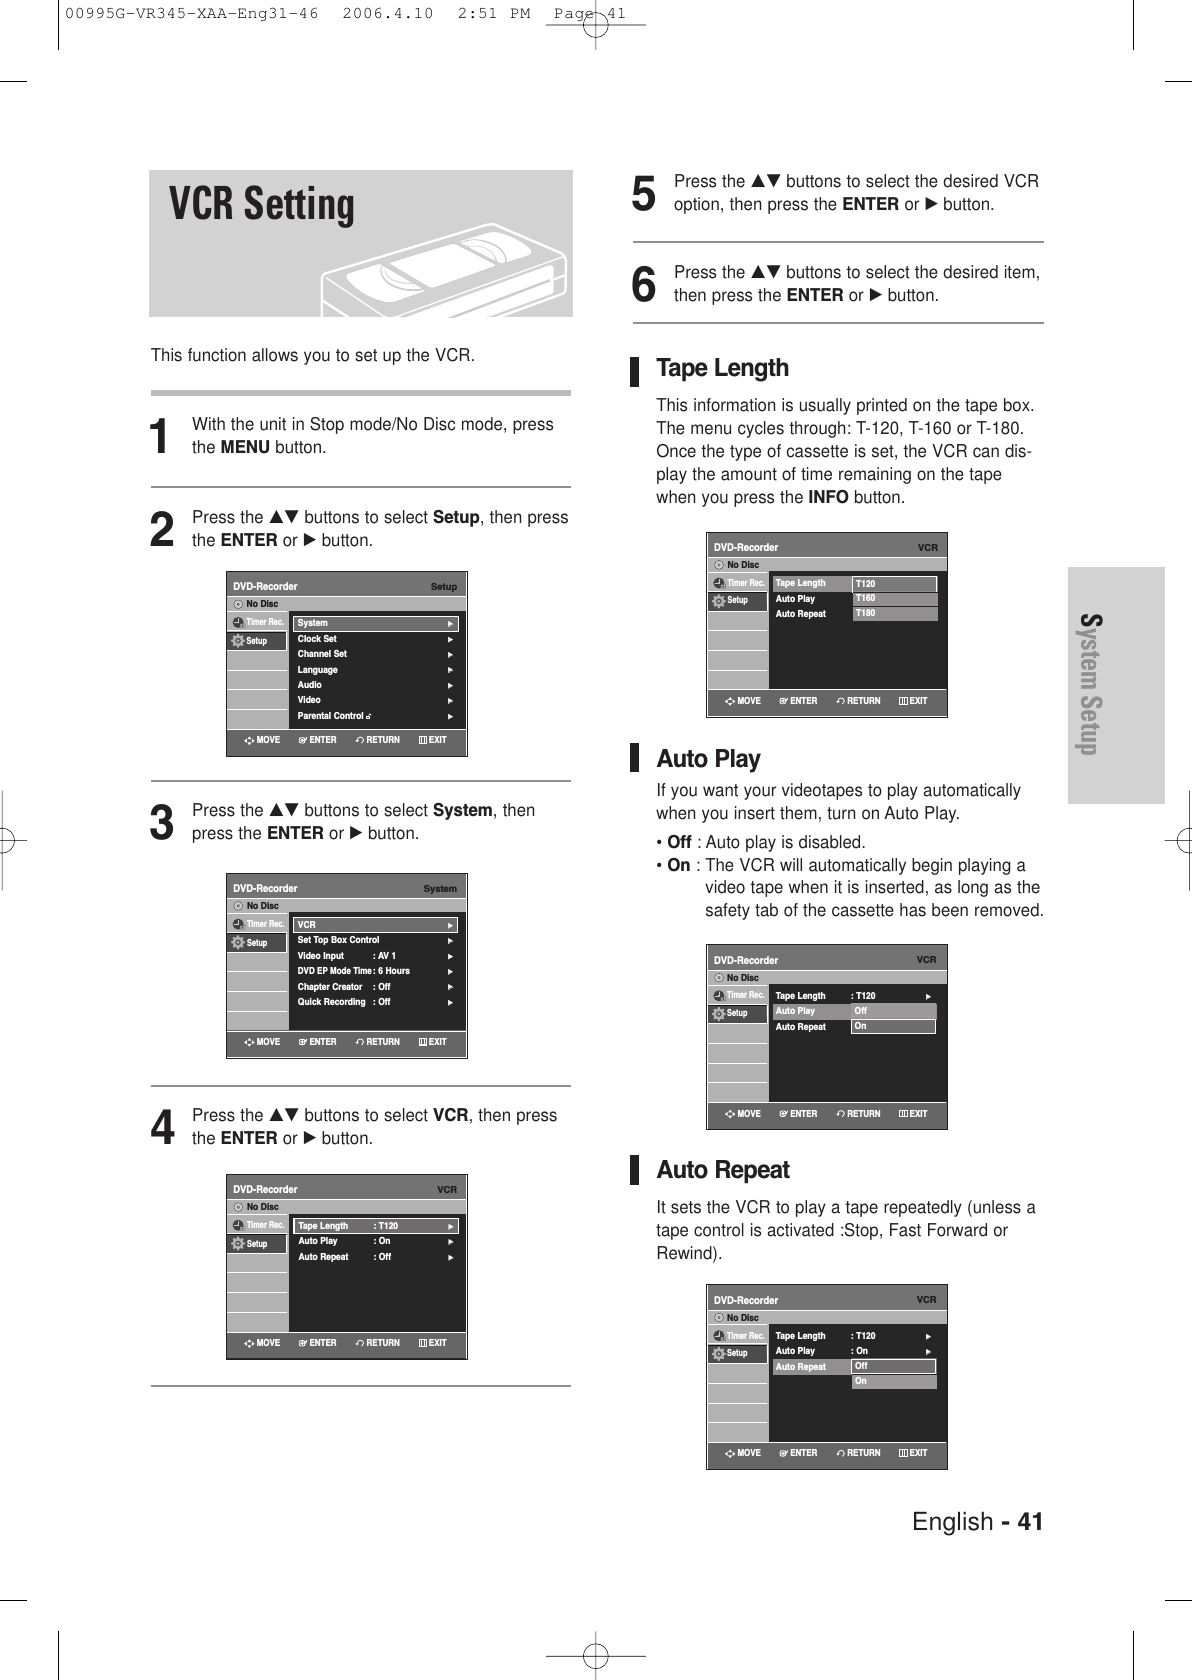
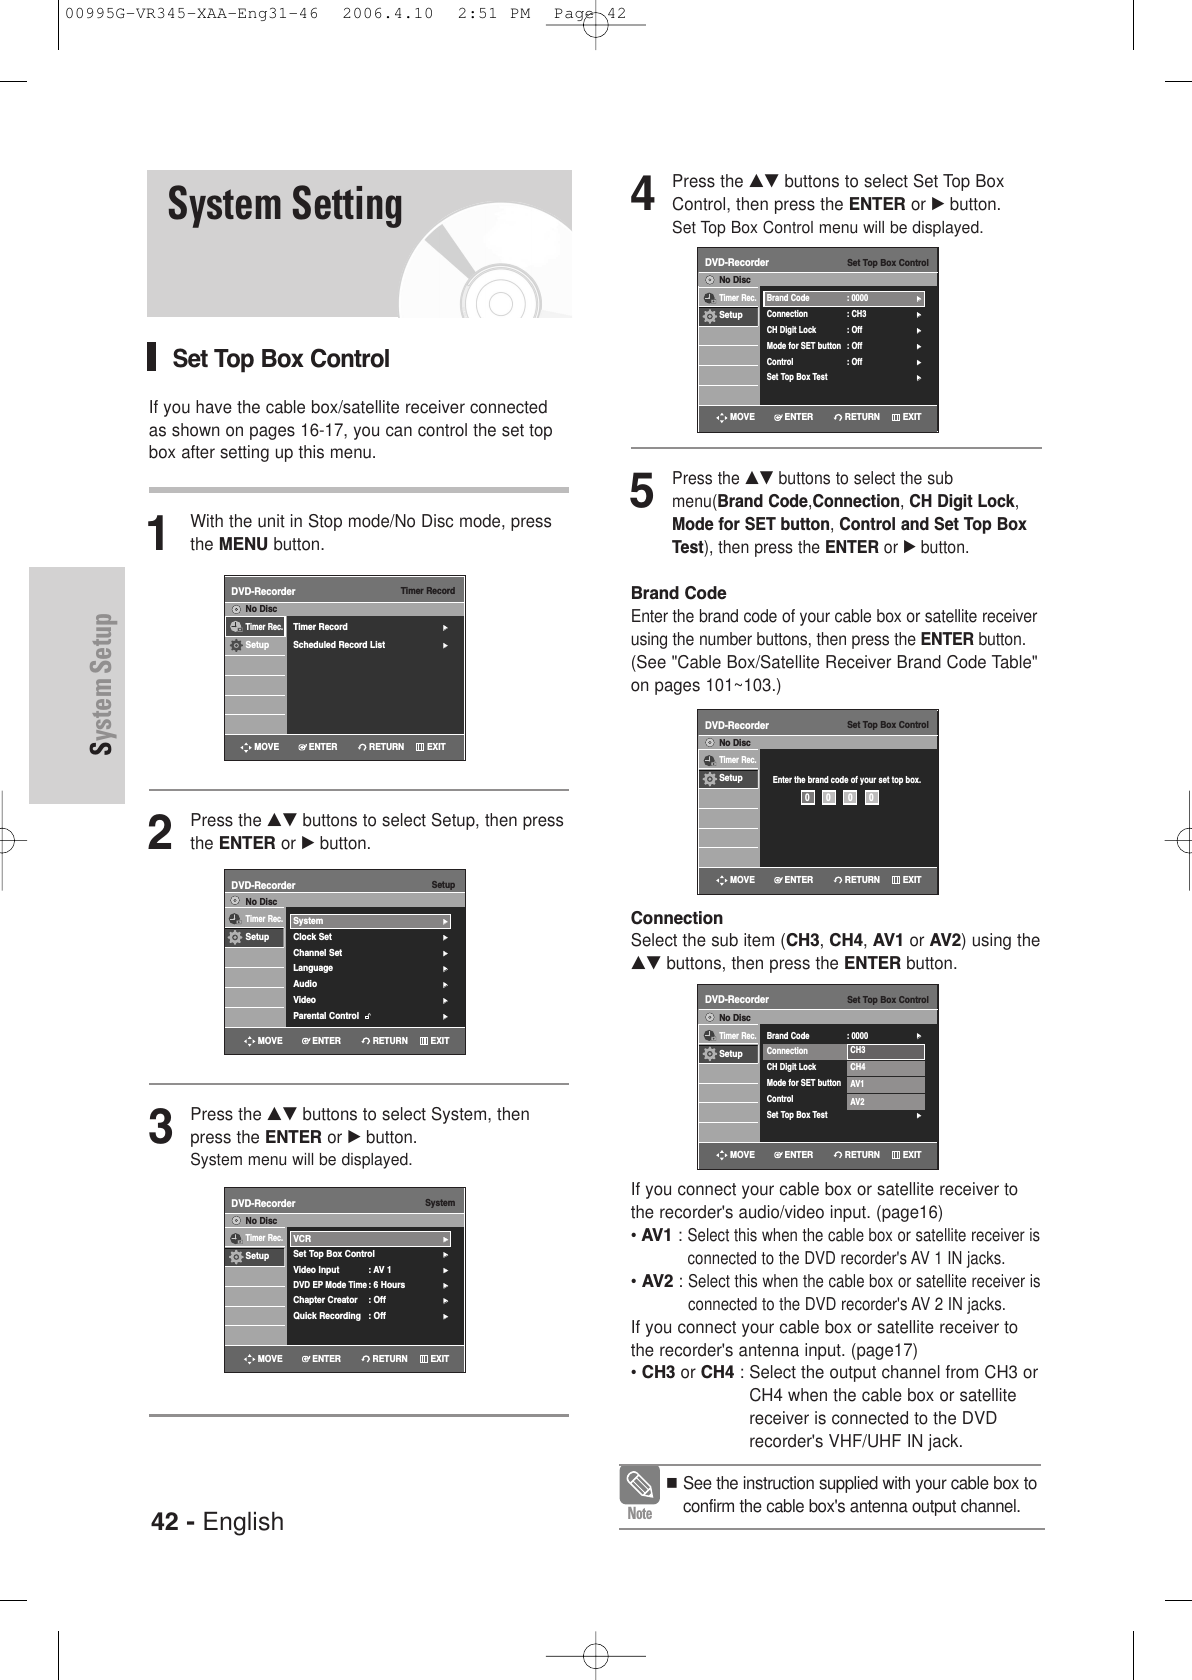
![English - 5Getting StartedDVD-RW Disc Playback and Recording• Recording and playback can be performed on DVD-RW discs in both Video and VR Modes.• Once a DVD-RW recorded in VR Mode or Video modeis finalized, you cannot perform additional recording.• Once a DVD-RW recorded in Video Mode is finalized,it becomes DVD-Video. •In both modes, playback can be performed before and afterfinalization, but additional recording, deleting and editing cannot be performed after finalization. •If you want to record the disc in VR Mode and then record inV Mode, be sure to execute format. Be careful when execut-ing Format because all the recorded data may be lost.•For an unused disc, a message that asks whether to initializea disc or not. If you select “Yes”, disc will be formatted in VRmode. • DVD-RW (VR mode)- This is a format that is used for recording data on DVD-RW disc. You can record multiple titles, edit, delete, par-tial delete, create a playlist, etc.- A disc that is recorded in this mode may not be playedby existing DVD players.• DVD-RW (Video mode)-This is a format that is used for recording data on aDVD-RW or DVD-R disc. The disc can be played by anexisting DVD player once it has been finalized.- If a disc that has been recorded in Video mode by a dif-ferent manufacturer's recorder but has not been finalizedit cannot be played or additionally be recorded by thisrecorder.DVD+RW Disc Playback and Recording• With DVD+RW discs, there is no difference betweenDVD-Video format (Video mode) and DVD-VideoRecording format (VR mode).• You can make your own chapters on DVD+RWs and editthem using the Chapter Edit menu.• Finalizing is generally unnecessary when using aDVD+RW disc. DVD-RAM Disc Playback and Recording• For cartridge type DVD-RAM discs, remove the cartridge and use the disc only.• Ensure that the recording mode is set to VR mode.Otherwise, this product will not be able to play therecording.• You cannot play a DVD-RAM in most DVD players dueto compatibility issues.• Only DVD-RAM standard Version 2.0 discs can beplayed in this unit.• DVD-RAM recorded on this unit may not work with otherDVD Players. To determine compatibility with theseDVD-RAM discs, refer to the user’s manual for the player.Protection• Program-protection: See page 79 “Locking a Title”• Disc-protection: See page 92 “Disc Protection”❋DVD-RAM/DVD±RW/DVD±R discs that are incompati-ble with the DVD-VIDEO format cannot be played withthis product.❋For more information on DVD recording compatibility,consult your DVD-RAM/DVD±RW/DVD±R manufacturer.❋Use of poor quality DVD-RAM/DVD±RW/DVD±R discsmay cause following unexpected problems including,without limitation, recording failure, loss of recorded oredited materials or damage to the recorder.Do not use the following discs!• LD, CD-G, CD-I, CD-ROM and DVD-ROM discs shouldnot be used in this product.[Note] • Some commercial discs and DVD discs purchased out-side your region may not be playable with this product.When these discs are played, either “No Disc” or “Thedisc cannot be played. Please check the regional codeof the disc.” will be displayed. • If your DVD-RAM/DVD±RW/DVD±R disc is an illegalcopy or is not in DVD video format, it may also not beplayable.• A 8X speed DVD+RW or greater disc can be played, butmaximum recording speed is 4x.• Not all brands of discs will be compatible with this unit.• The latest firmware upgrade to improve recording &playback quality can be downloaded from our web site.(Download Center at www.samsung.com)• If disc compatibility problems continue, or there is anissue upgrading your recorder, contact the Call Center at1-800-SAMSUNG.Disc compatibility• Many DVD discs are encoded with copy protec-tion. Because of this, you should only connectyour DVD Recorder & VCR directly to your TV,not to a VCR. Connecting to a VCR results in adistorted picture from copy-protected DVD discs.• This product incorporates copyright protectiontechnology that is protected by methods claims ofcertain U.S. patents and other intellectual proper-ty rights owned by Macrovision Corporation andother rights owners. Use of this copyright protec-tion technology must be authorized byMacrovision Corporation, and is intended forhome and other limited viewing uses only unlessotherwise authorized by Macrovision Corporation.Reverse engineering or disassembly is prohibited.COPY PROTECTION00995G-VR345-XAA-Eng1-13 2006.4.10 2:49 PM Page 5](https://usermanual.wiki/Samsung-Electronics-Co/DVDVR345.Users-Manual-1/User-Guide-649703-Page-5.png)