Samsung Electronics Co GOBI2000 Gobi2000 PCI Express Mini Card User Manual Manual 2
Samsung Electronics Co Ltd Gobi2000 PCI Express Mini Card Manual 2
UserManual.wiki
>
Samsung Electronics Co
>
GOBI2000 User Manual
>
Manual 2
Contents
1.
Manual 1
2.
Manual 2
Manual 2
Navigation menu
Upload a User Manual
Namespaces
Wiki Guide
HTML
PDF
Info
Views
User Manual
Discussion / Help
Navigation

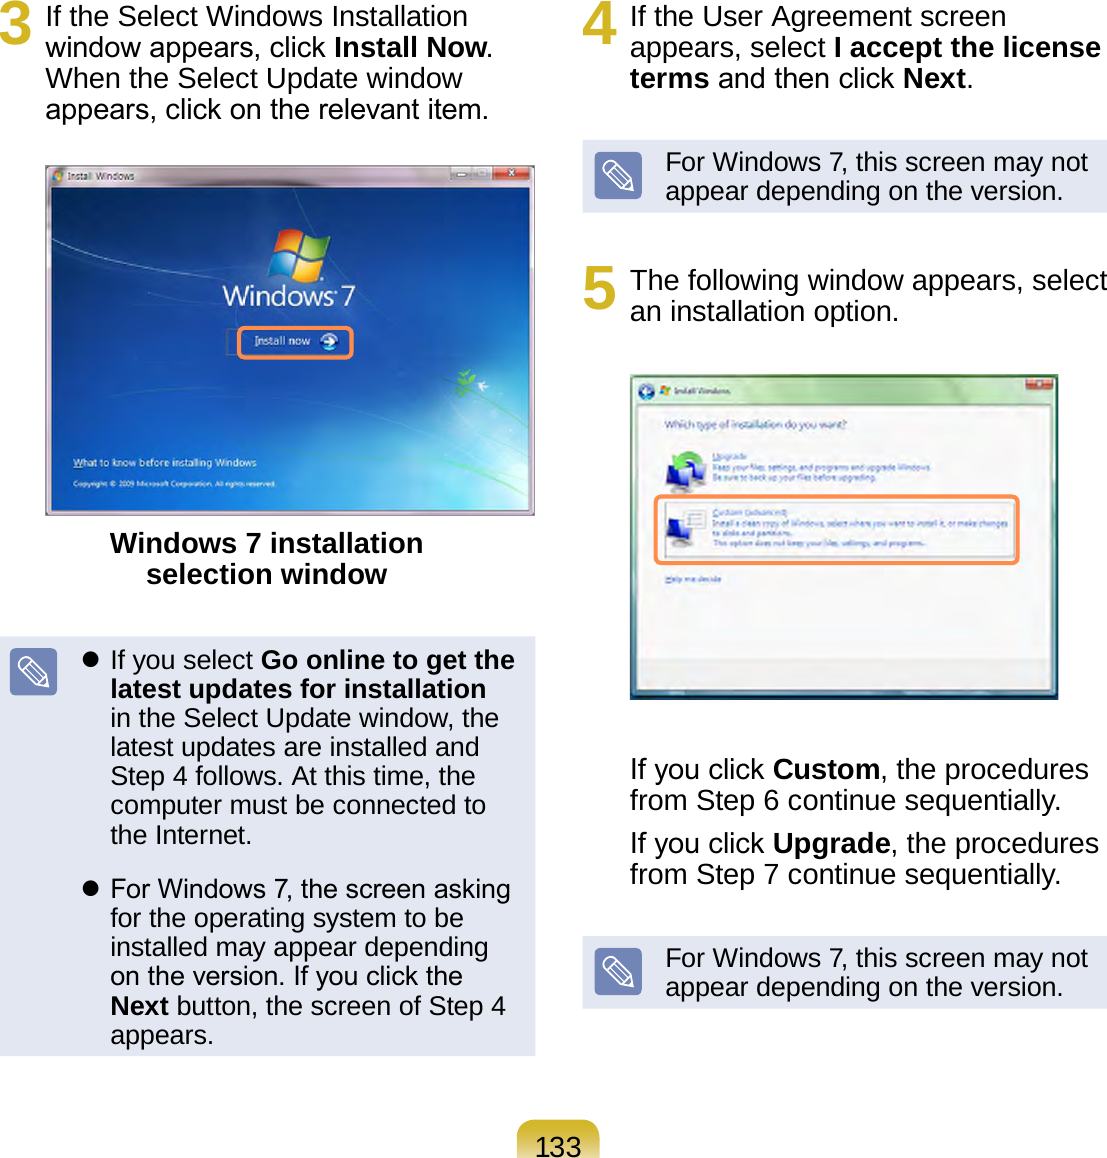
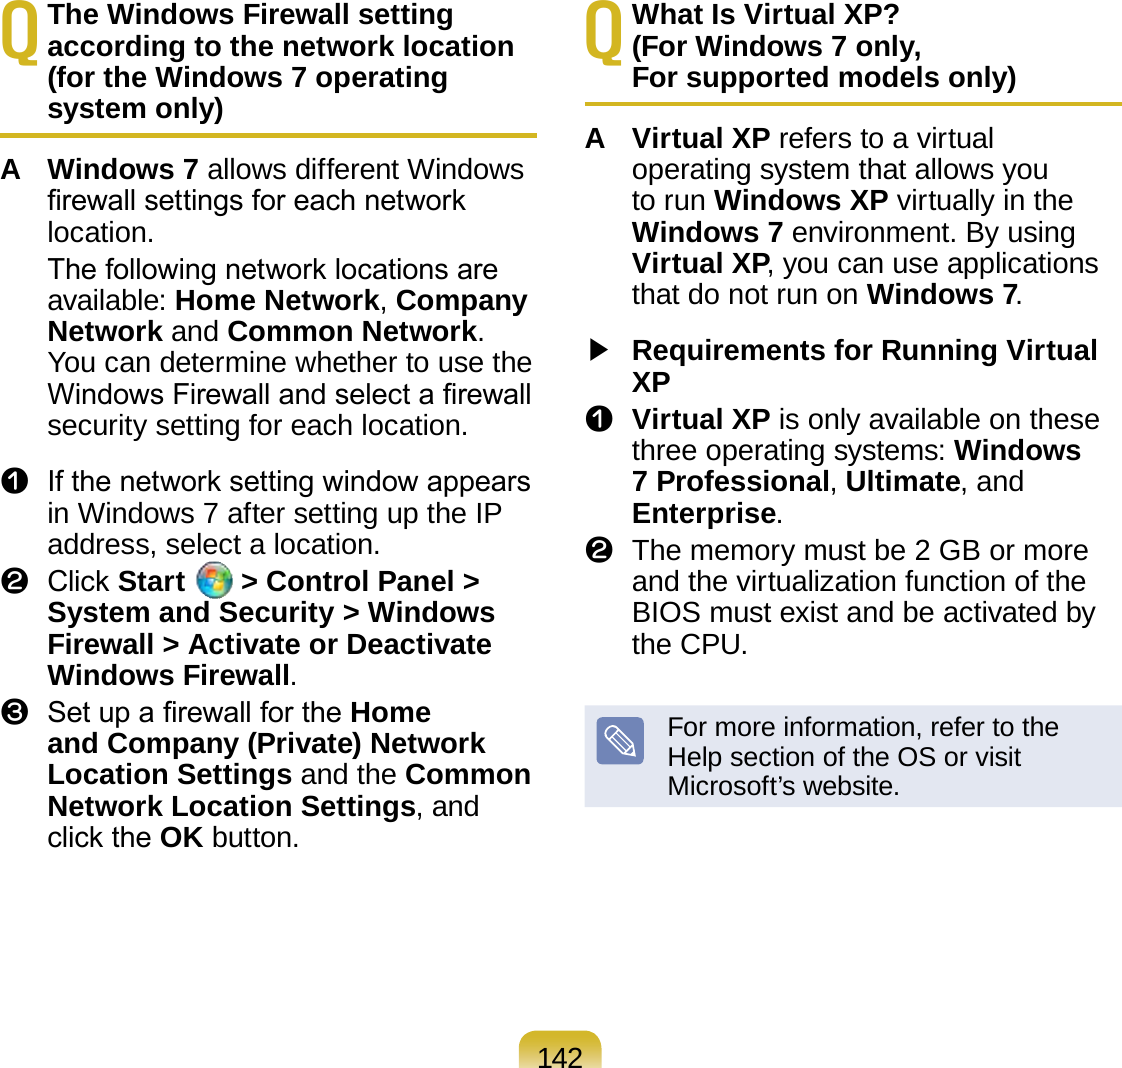
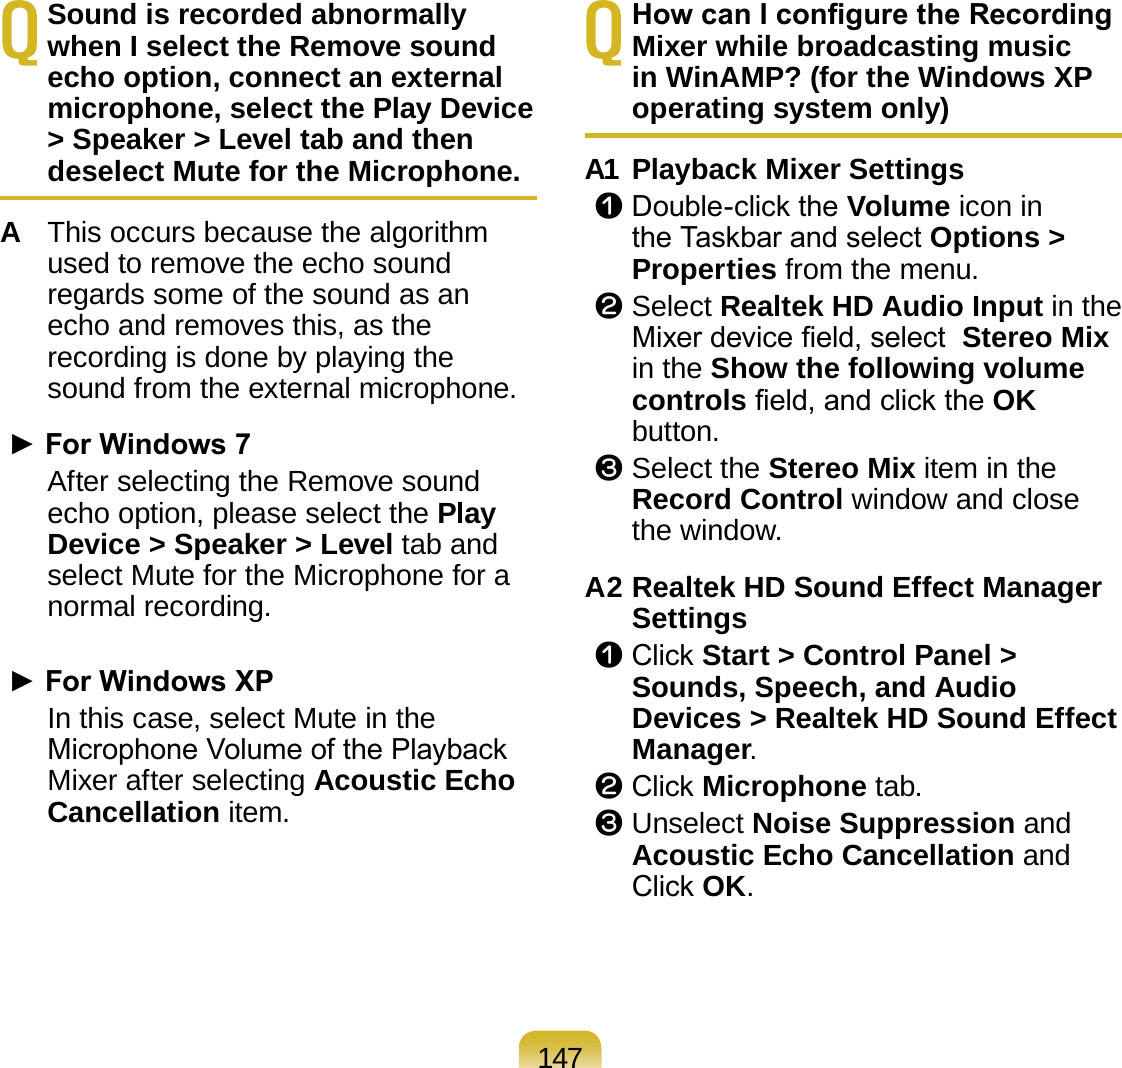
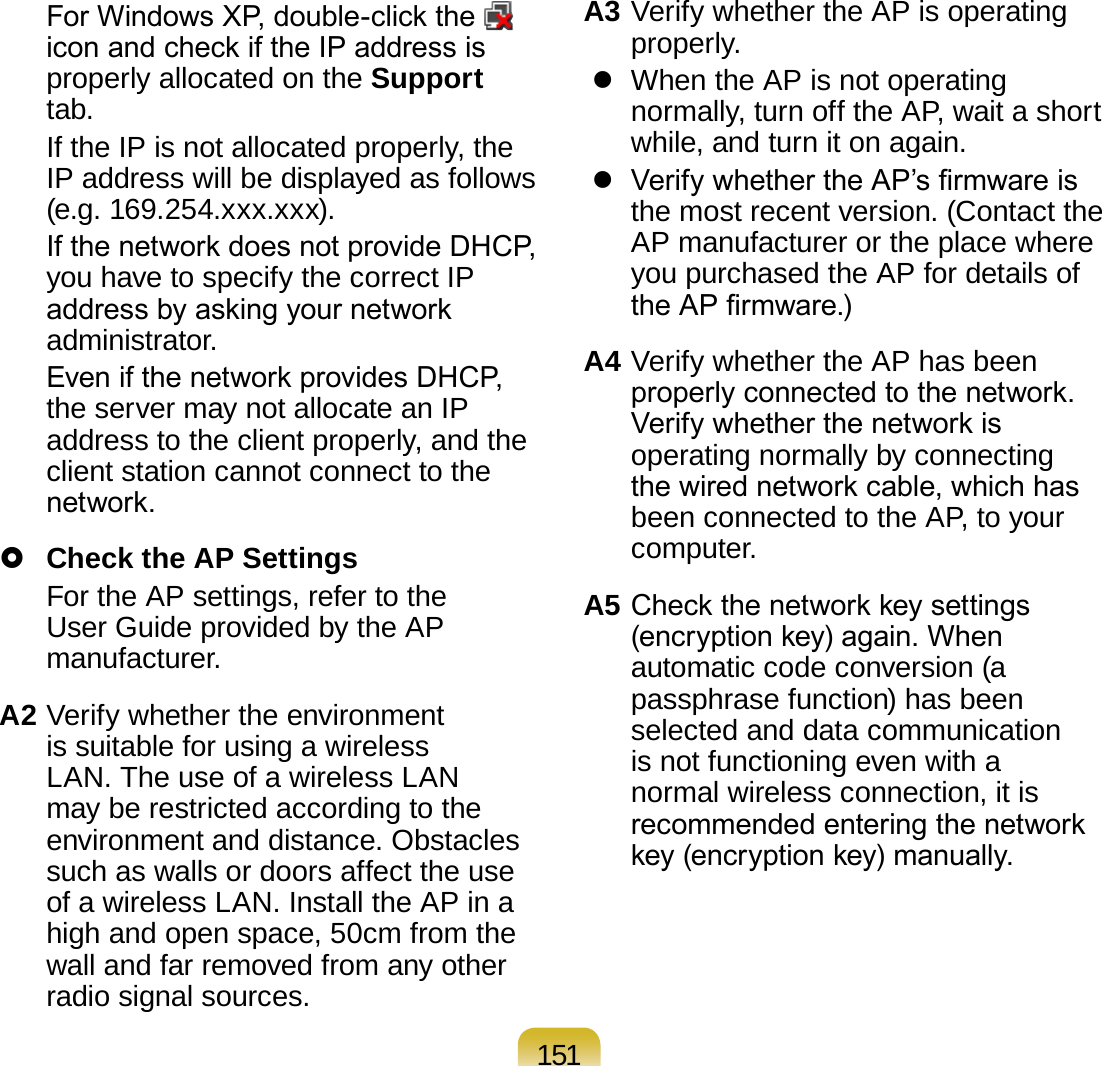
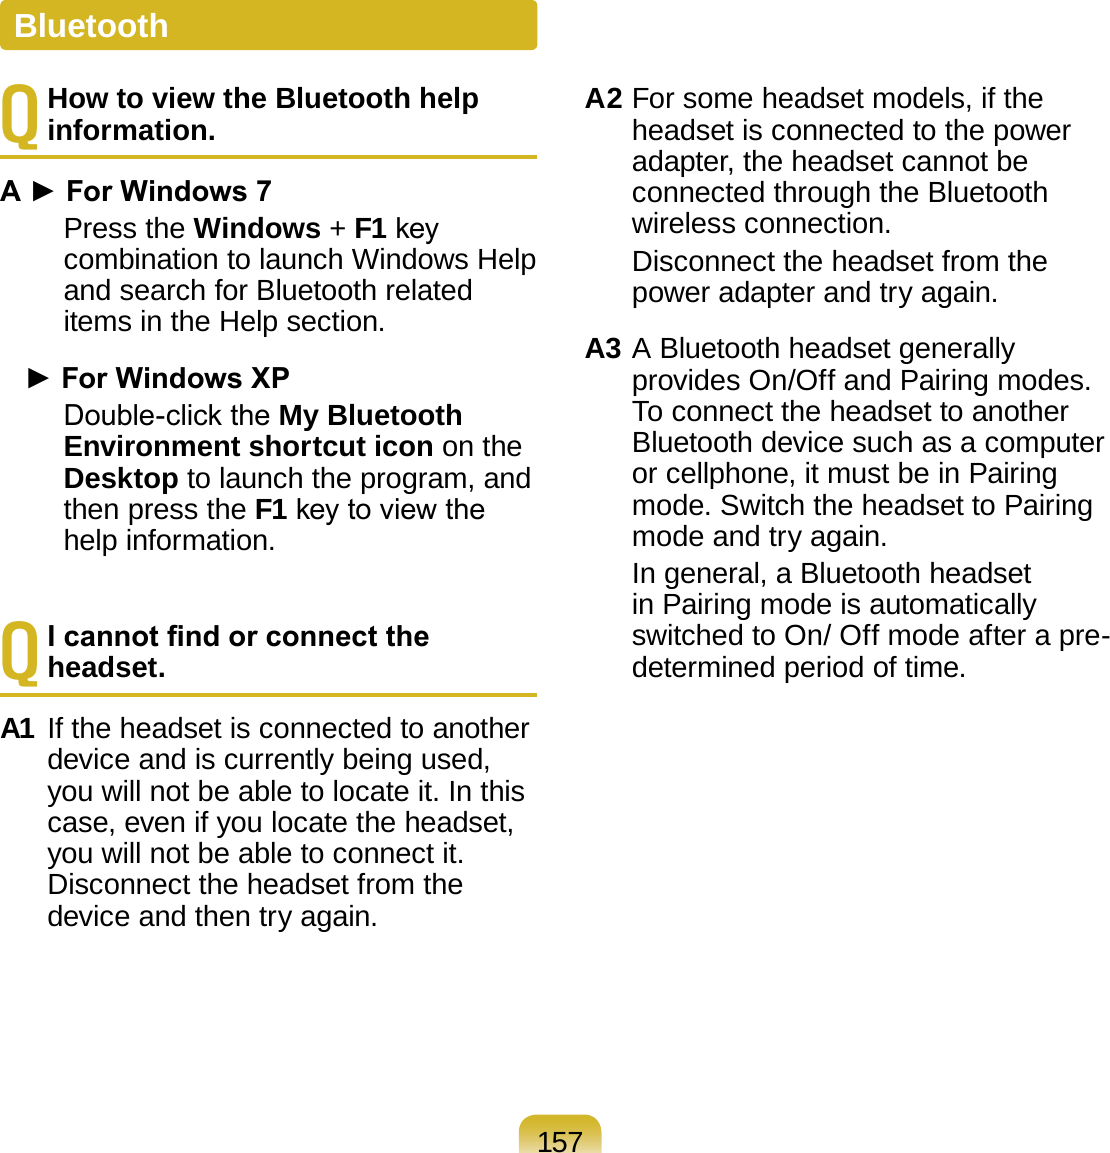
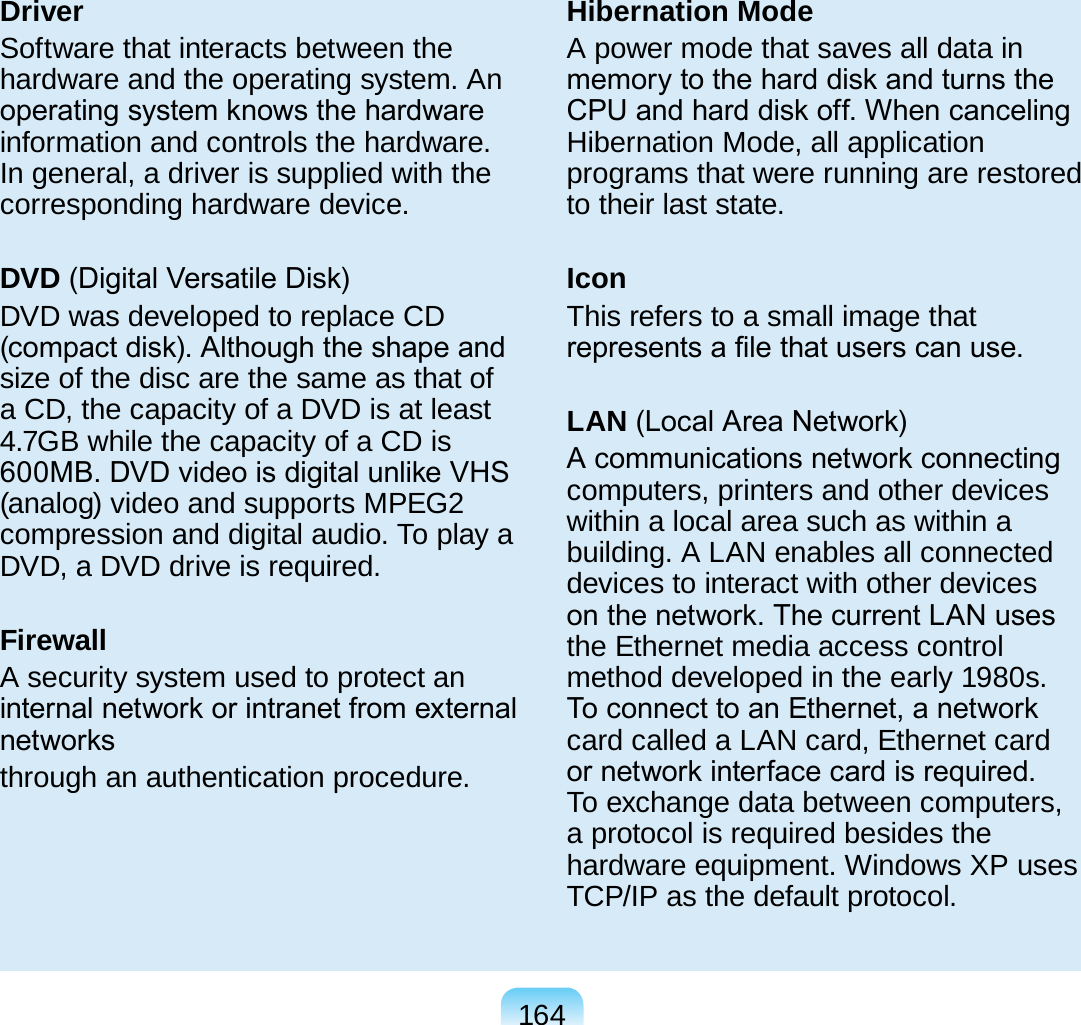
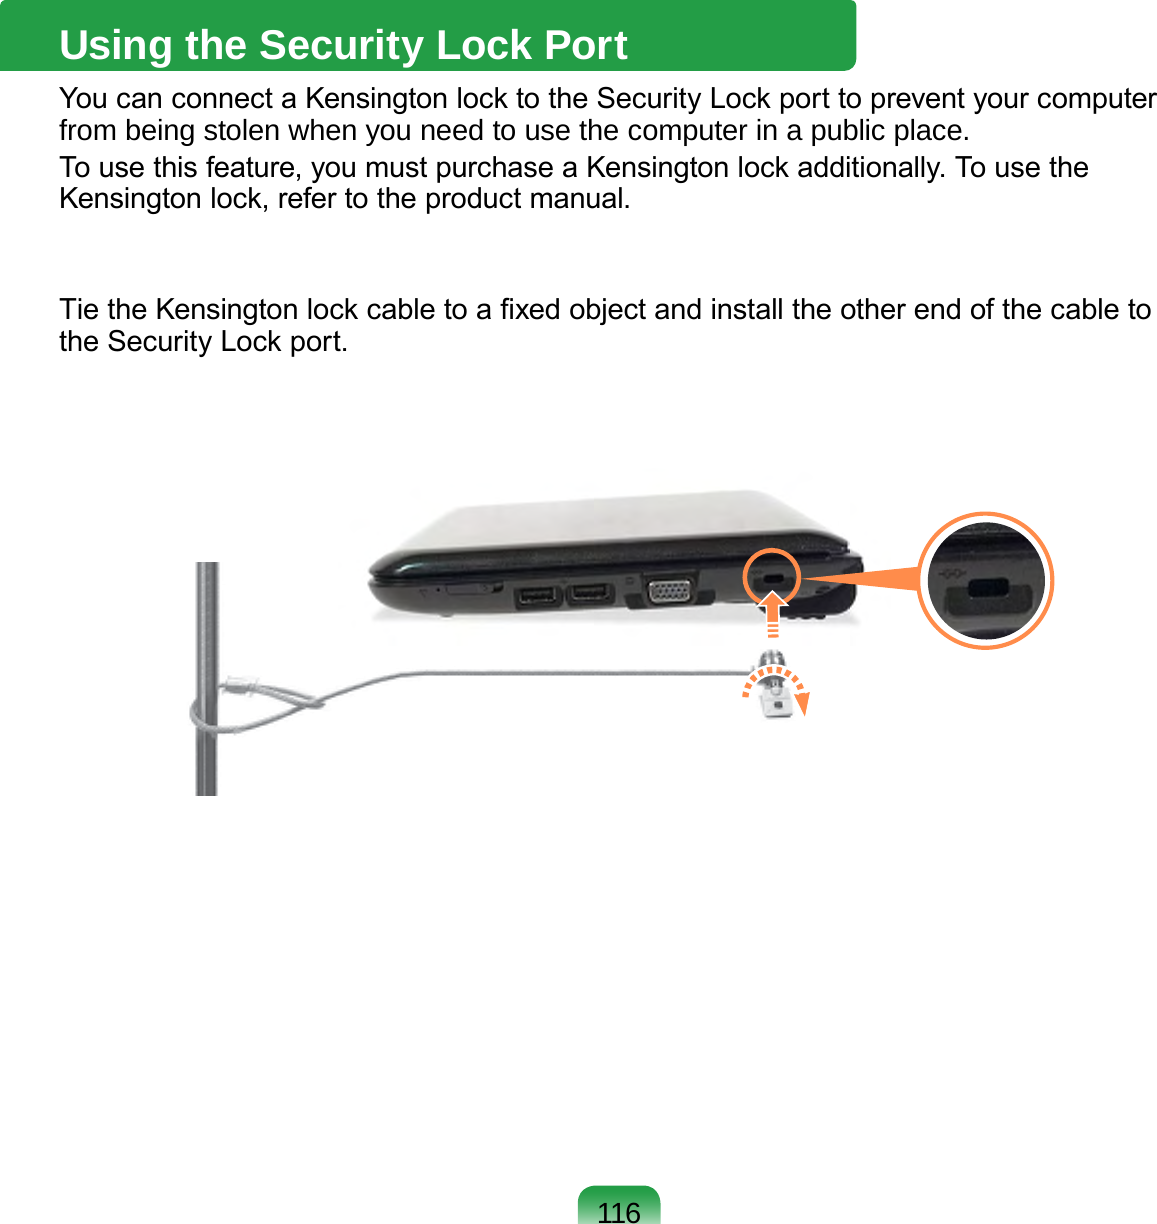
![103The BIOS Setup ScreenSystem Time [10:21:53]System Date [07/30/200X]SATA Port 1 XXXXXXXXCPU VendorCPU Type XXXXXXXXCPU Speed X.XX GHzTotal Memory XXX MBBIOS Version XXXXXXXXMICOM Version XXXXXXXXXXXXXXXXSetup MenuSetup ItemsHelpHelp for the selected item appears automatically.Setup Menu DescriptionMain Used to change the basic system and environment settings.Advanced Used to congure advanced functions on your computer for devices and chipsets.Security Used to congure security functions, including passwords.Boot Used to set the boot priority and other boot optionsExit Used to exit the Setup either saving the changes or not.](https://usermanual.wiki/Samsung-Electronics-Co/GOBI2000.Manual-2/User-Guide-1237381-Page-3.png)
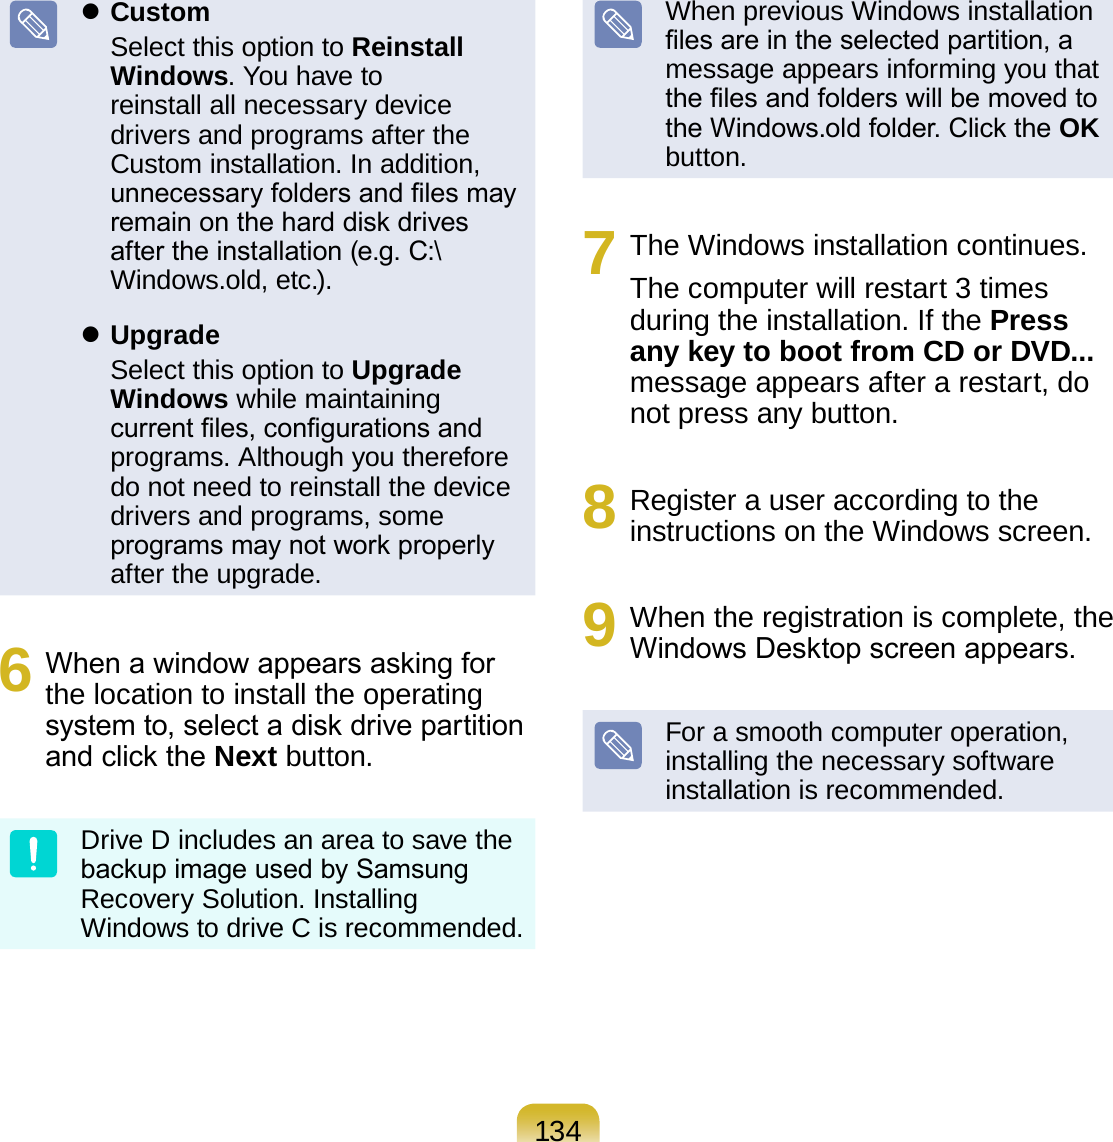
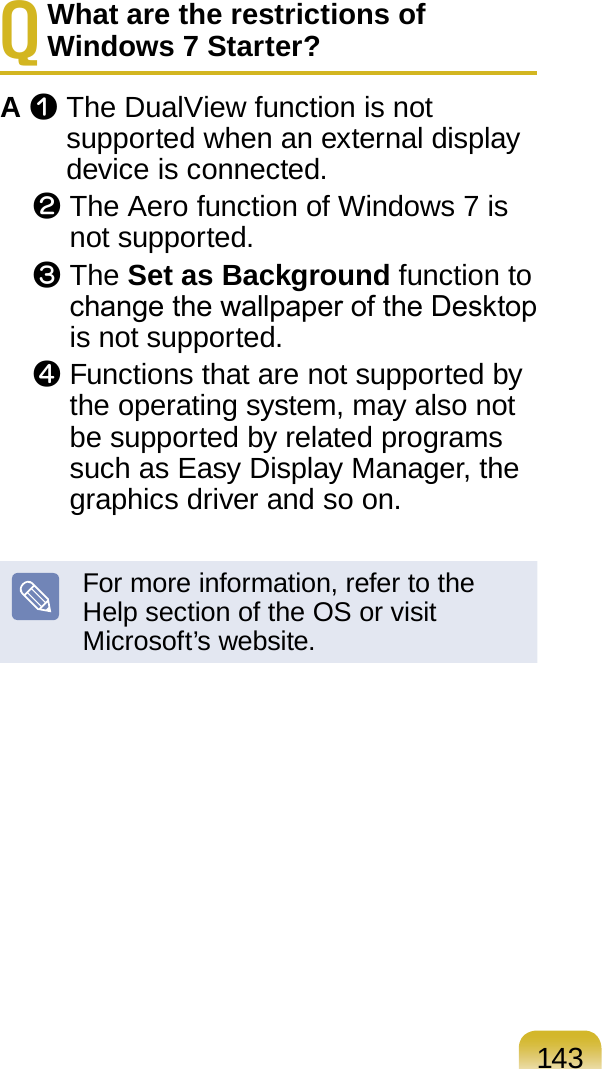
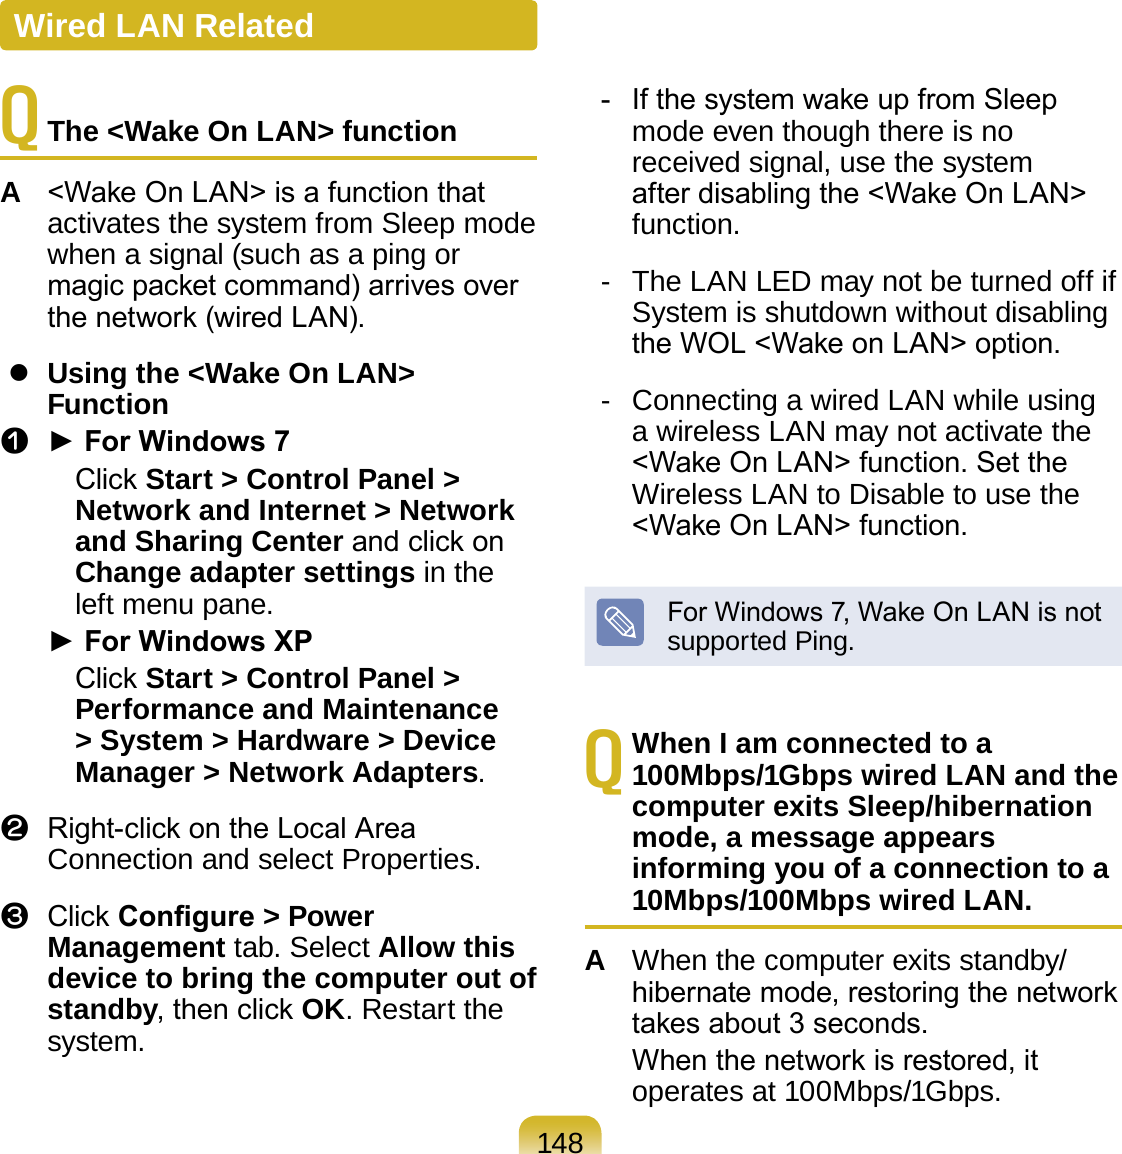
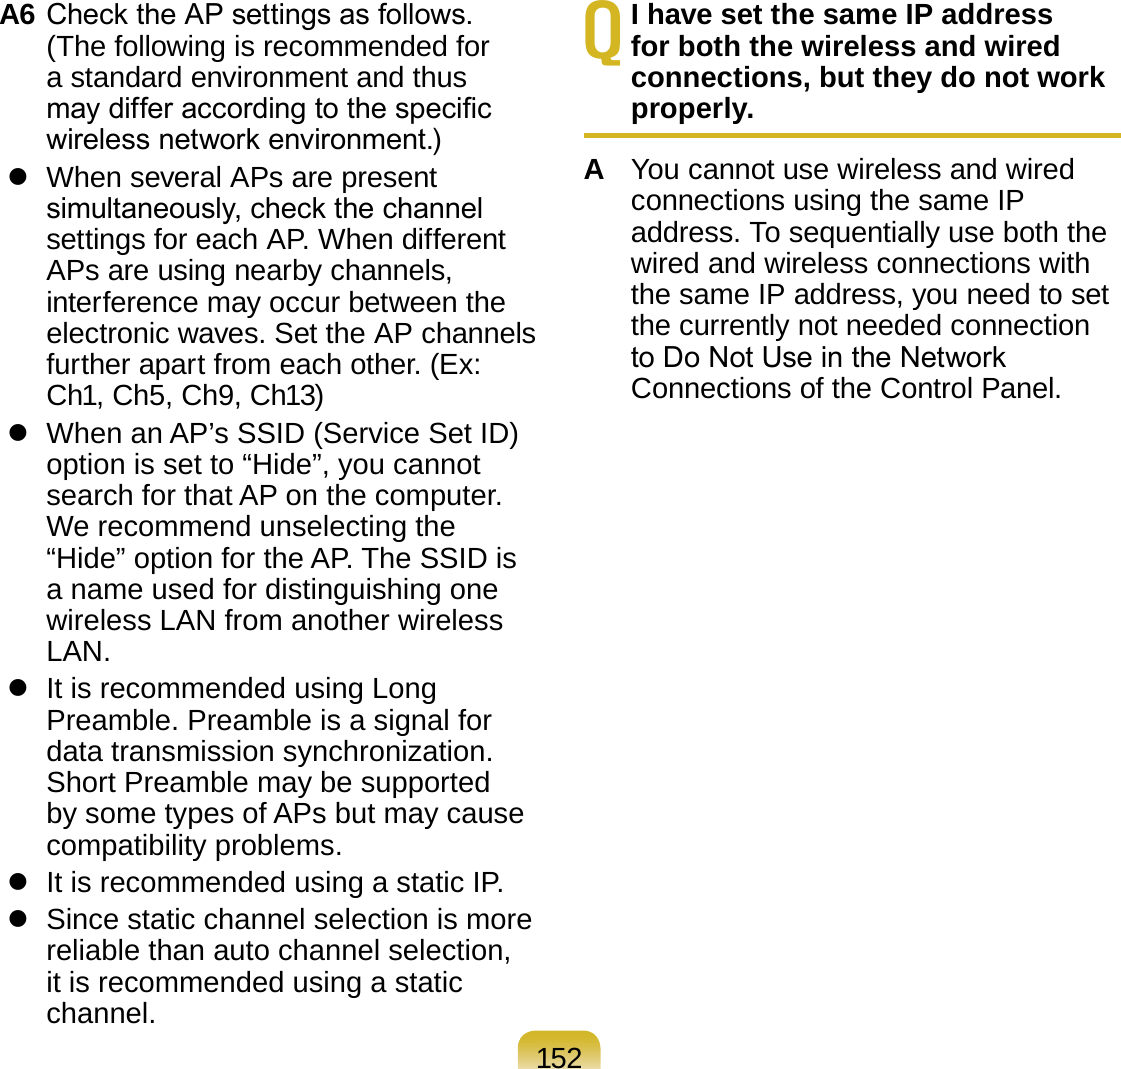
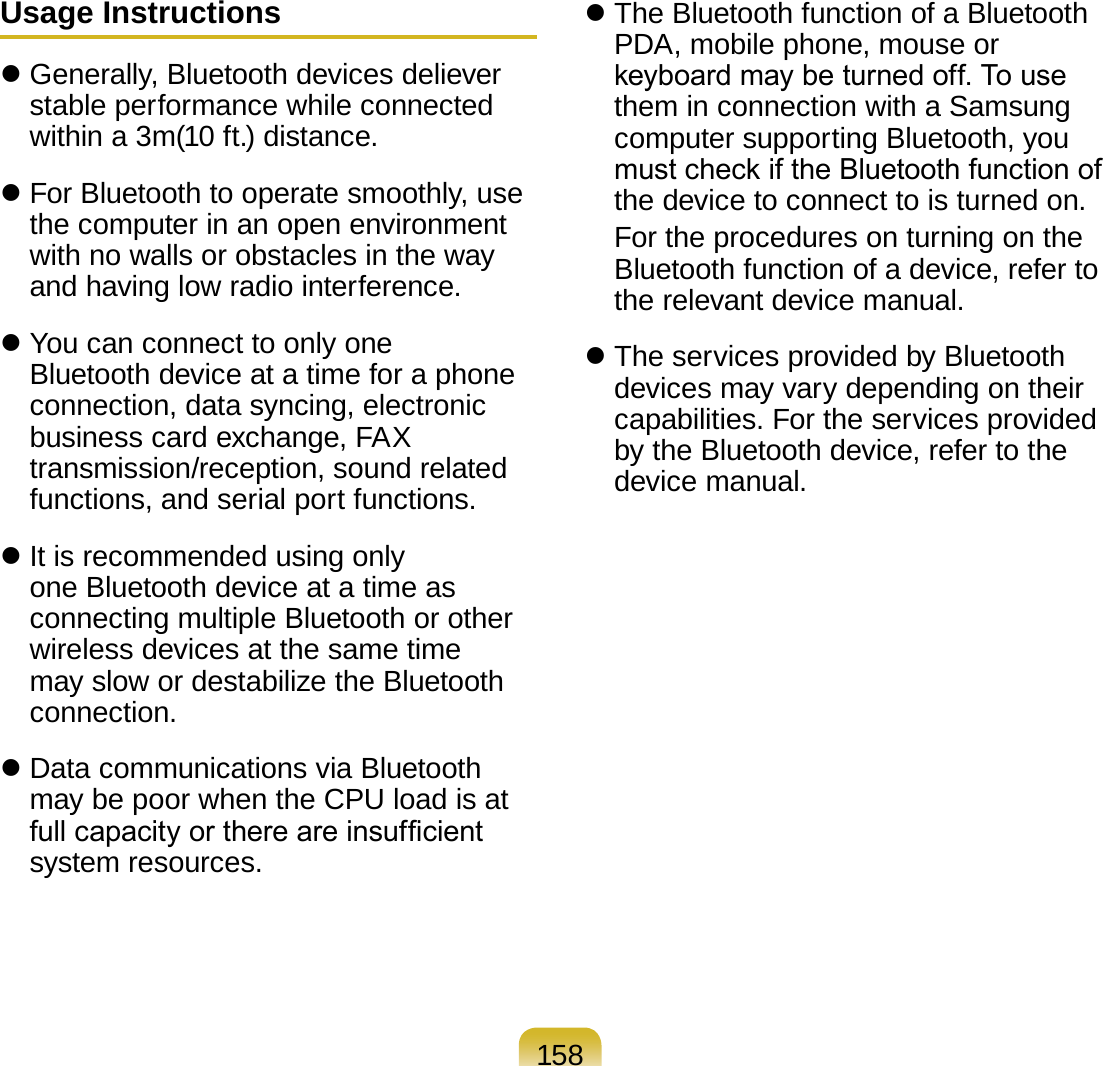
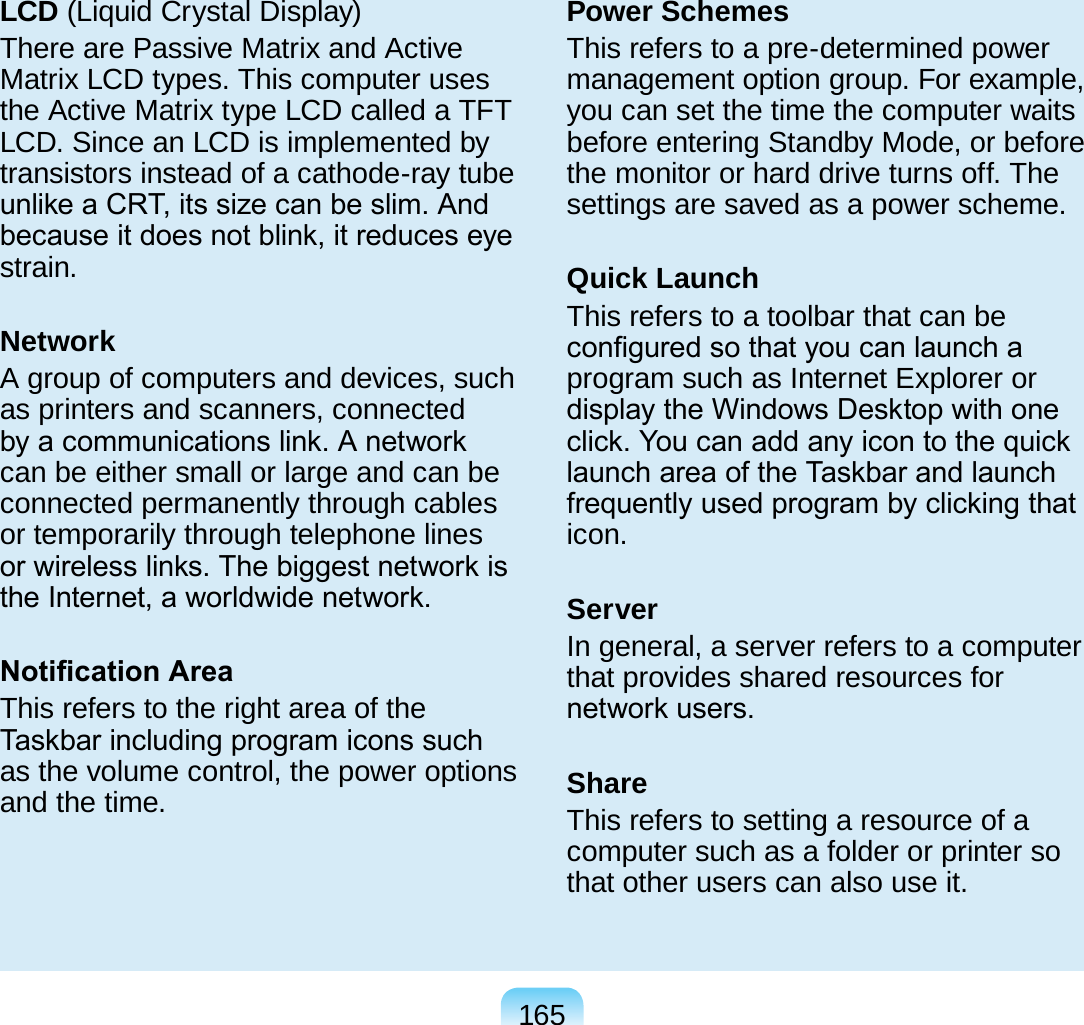
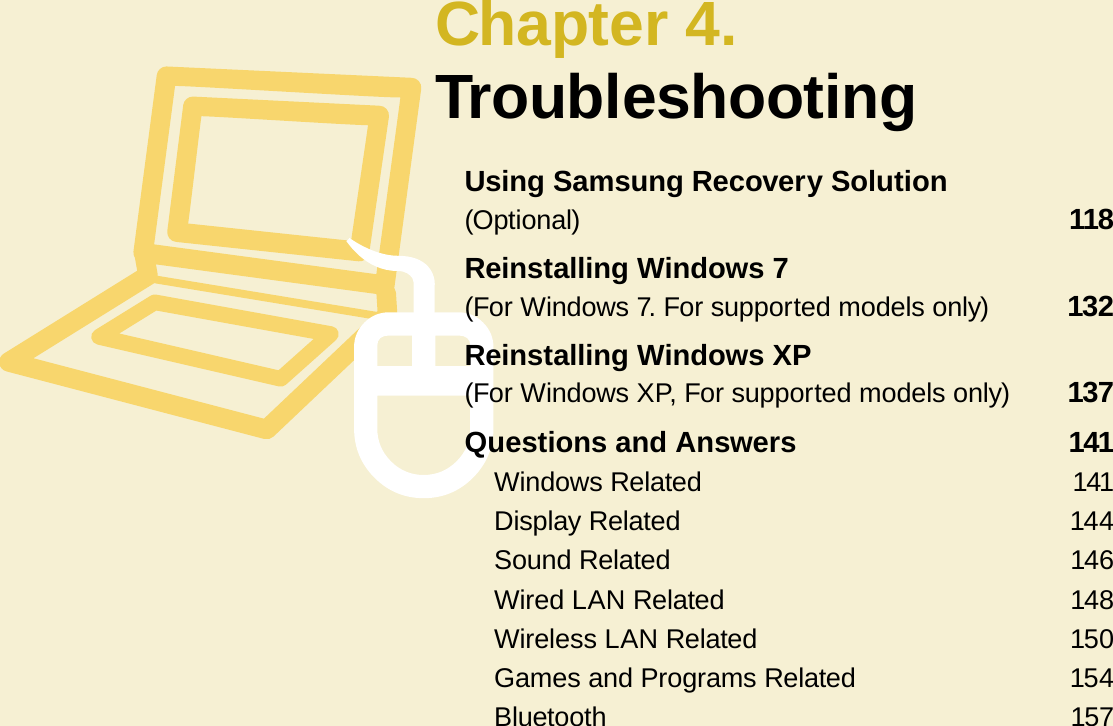
![1081 Select the Boot menu in the BIOS Setup.2 Press <Enter> on the Boot Device Priority item.XXXXXXXX3 Press the down key (↓) to move to the IDE HDD item and press the F6 key to move the item to the top.[Boot priority order] 1. USB CD : N/A 2. IDE HDD : XXXXXXXX 3. PCI BEV : N/A 4. USB FDD : N/A 5. USB KEY : N/A 6. USB HDD : XXXXXXXX 7. 8.[Excluded from boot order] - USB ZIP : N/A - USB LS120 : N/A - PCI SCSI : N/A - Other USB : N/A - PCI : N/ABoot Device Priority4 Press the F10 key to save the settings and exit Setup. The highest boot priority device is now set to the Hard Drive.Changing the Boot PriorityThis computer is congured to boot from an external-type ODD rst.This chapter describes how to change the boot priority so that the computer boots from the hard disk drive rst.](https://usermanual.wiki/Samsung-Electronics-Co/GOBI2000.Manual-2/User-Guide-1237381-Page-8.png)
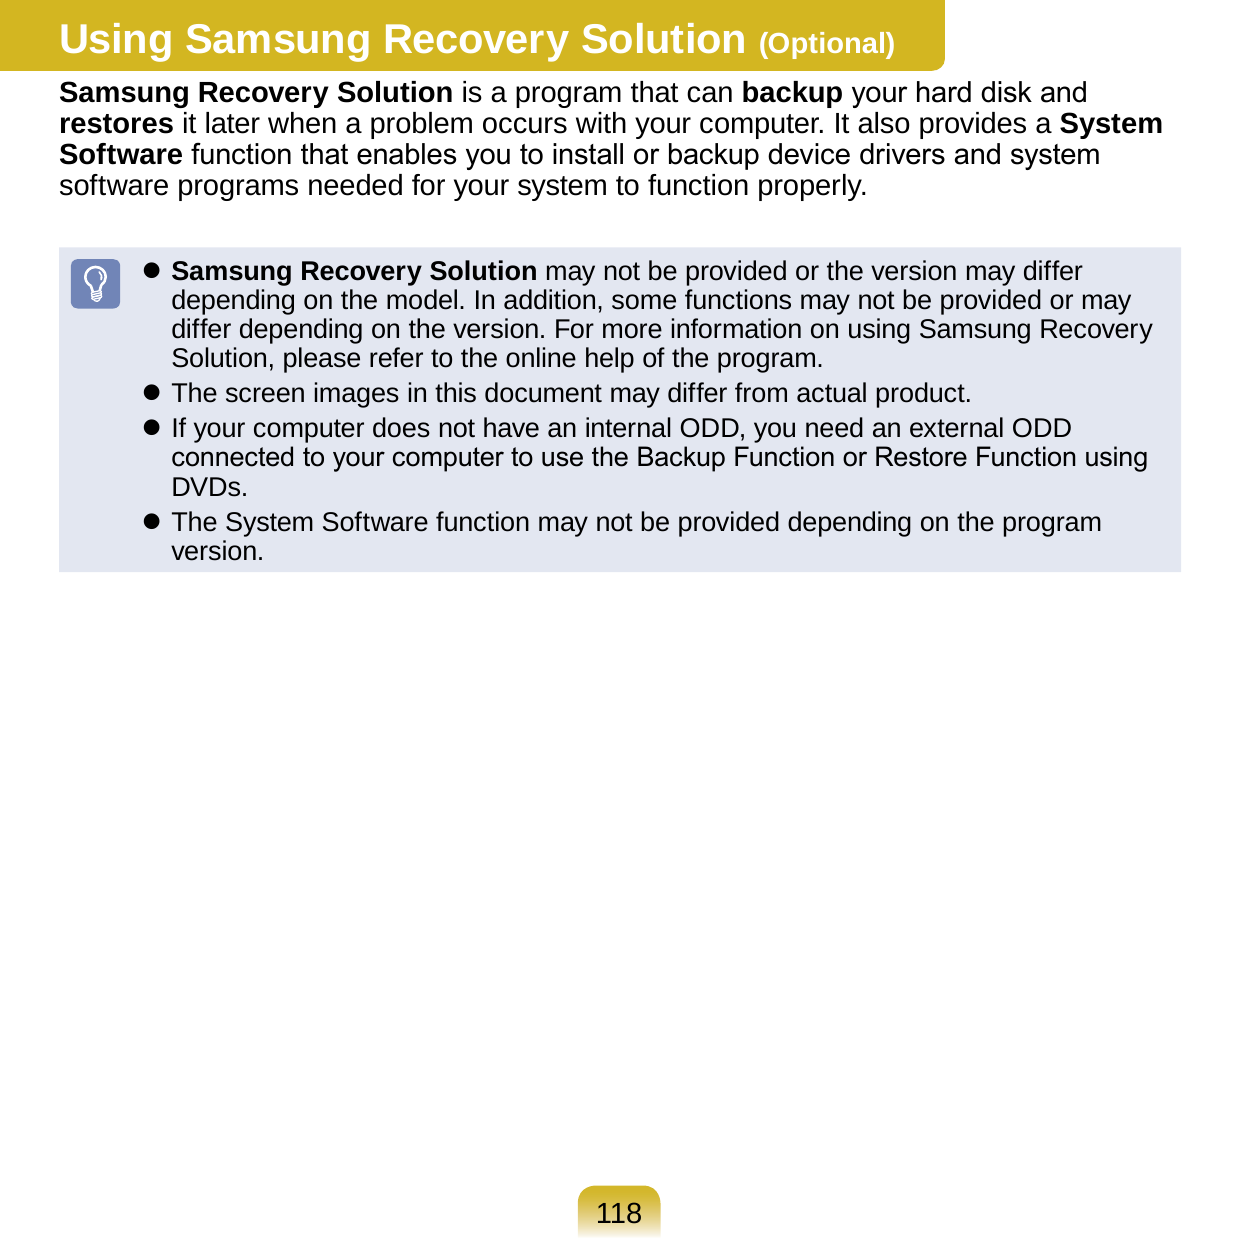


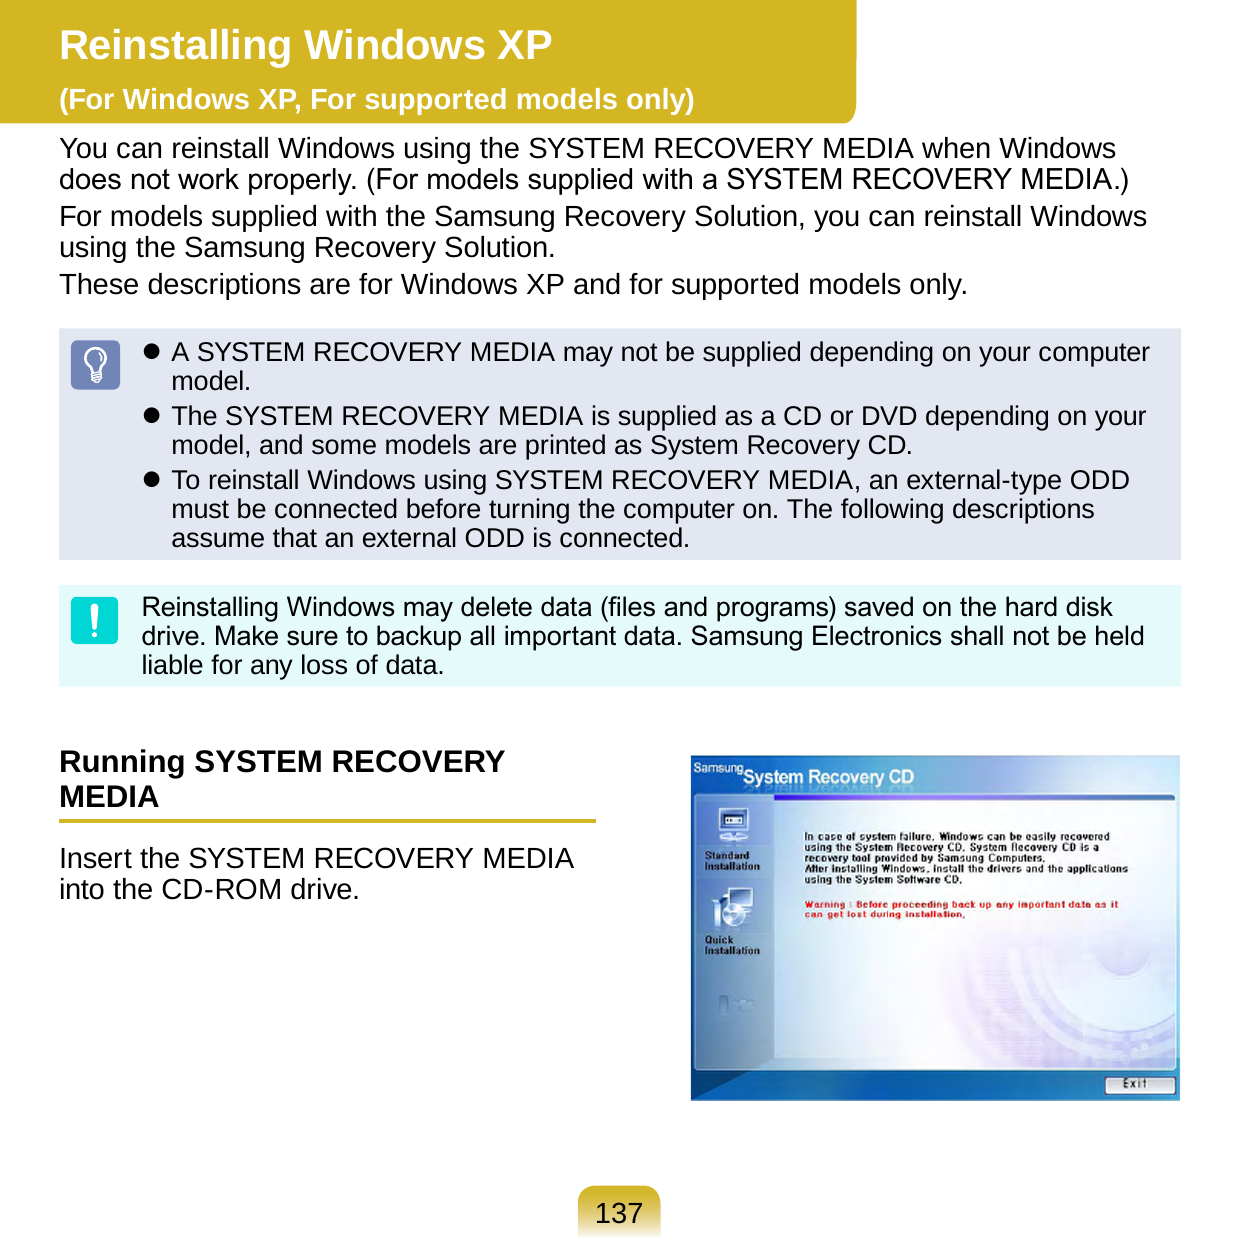
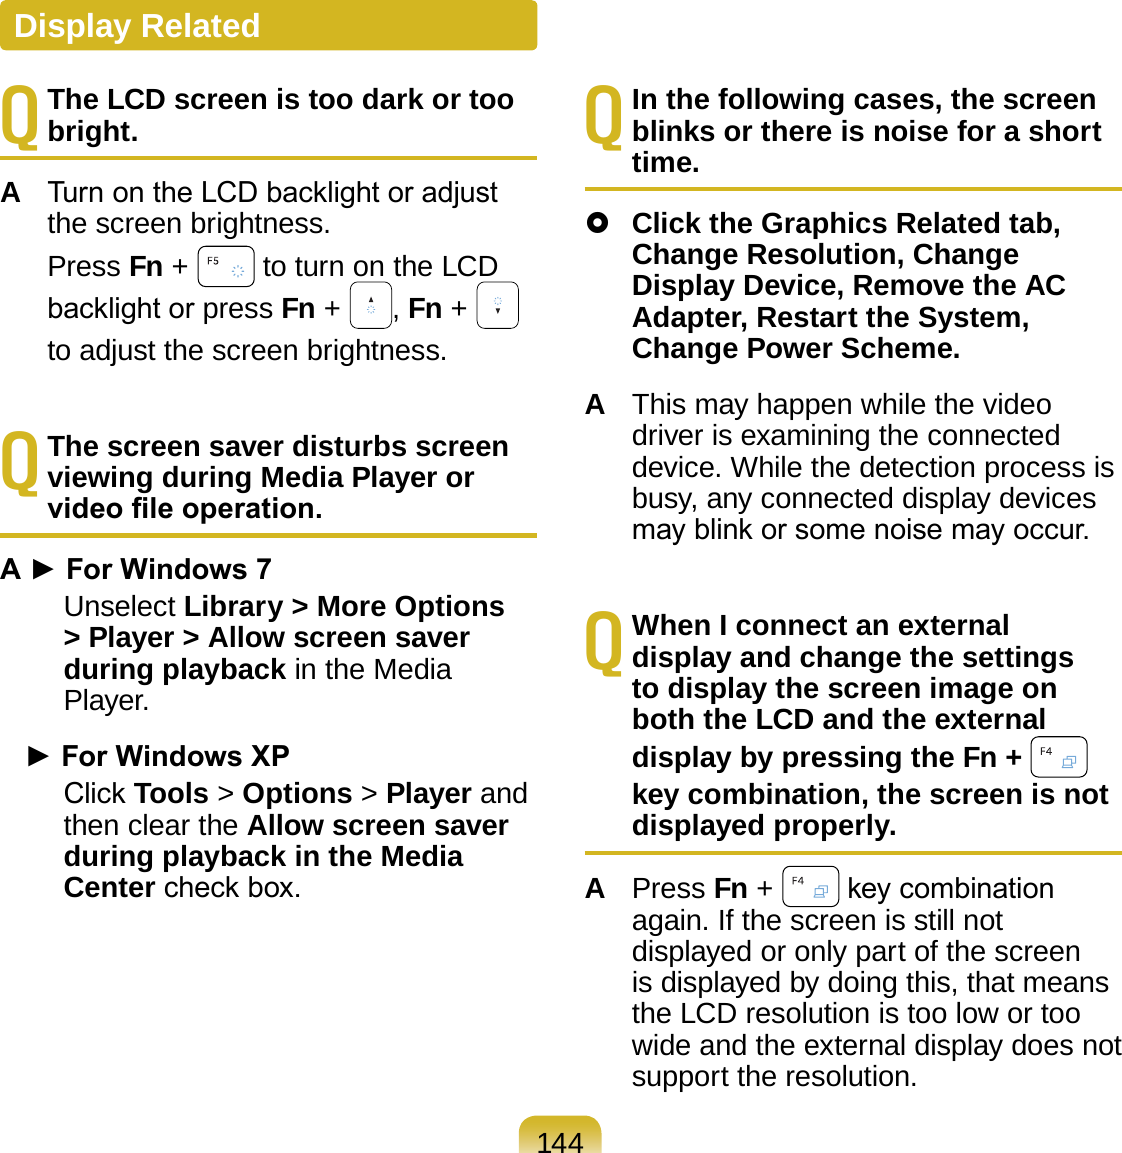
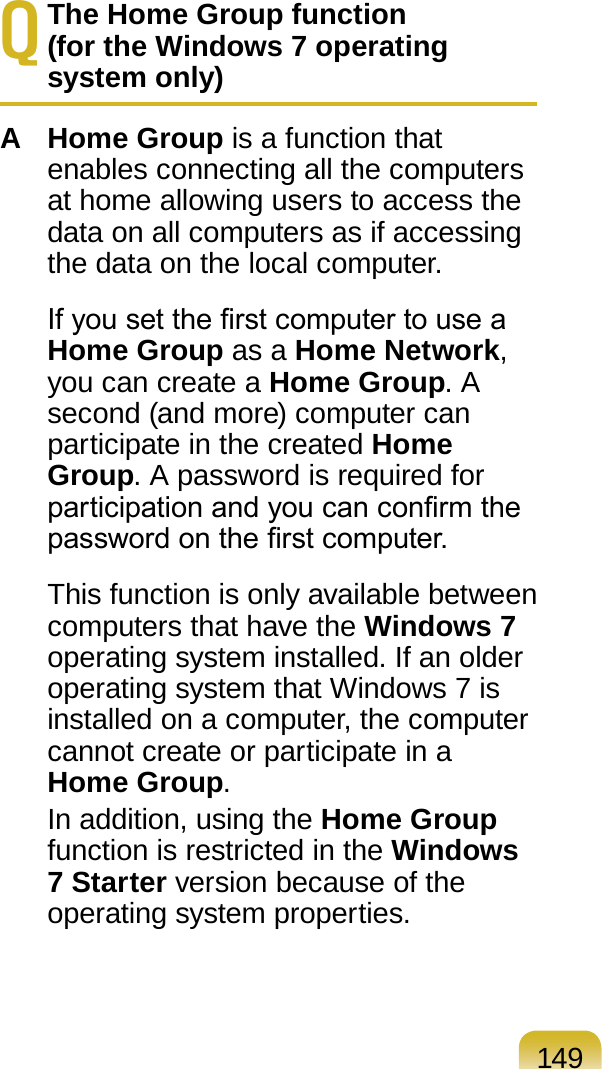
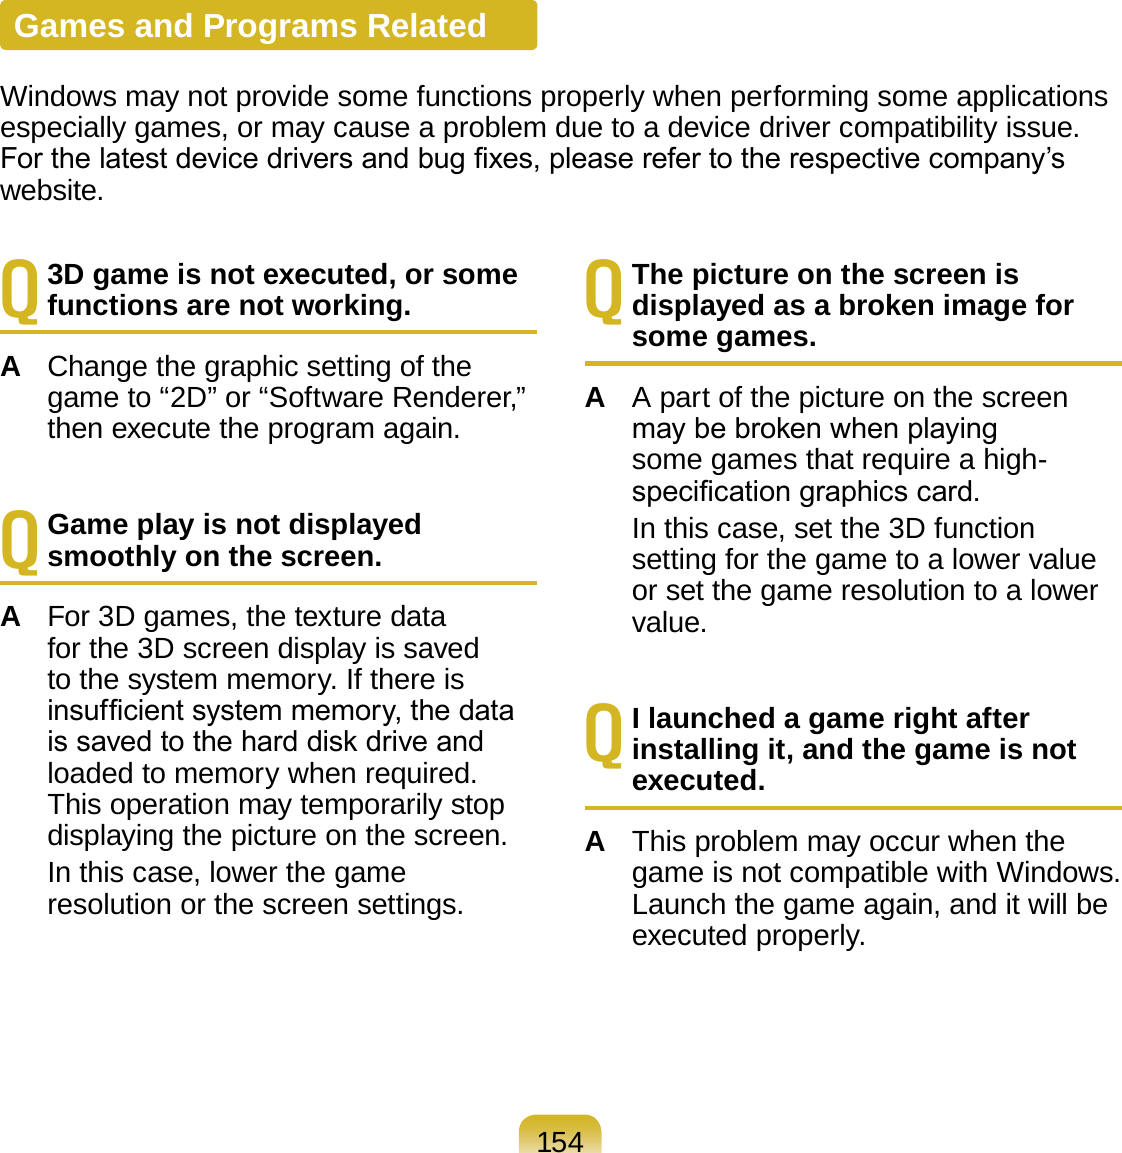
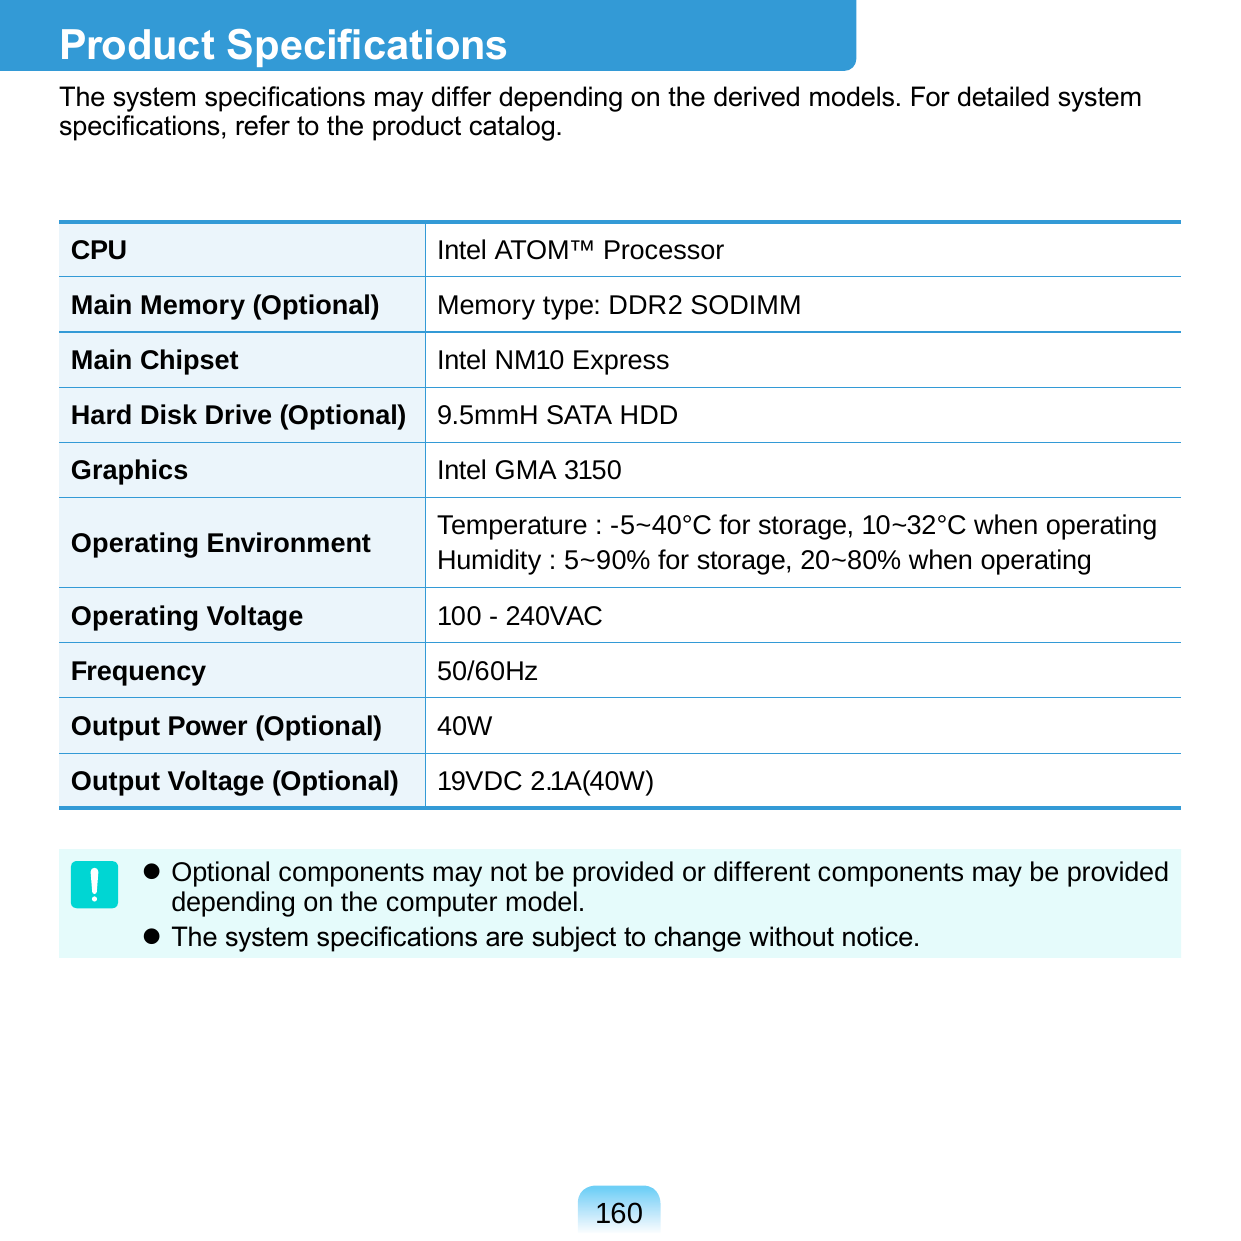
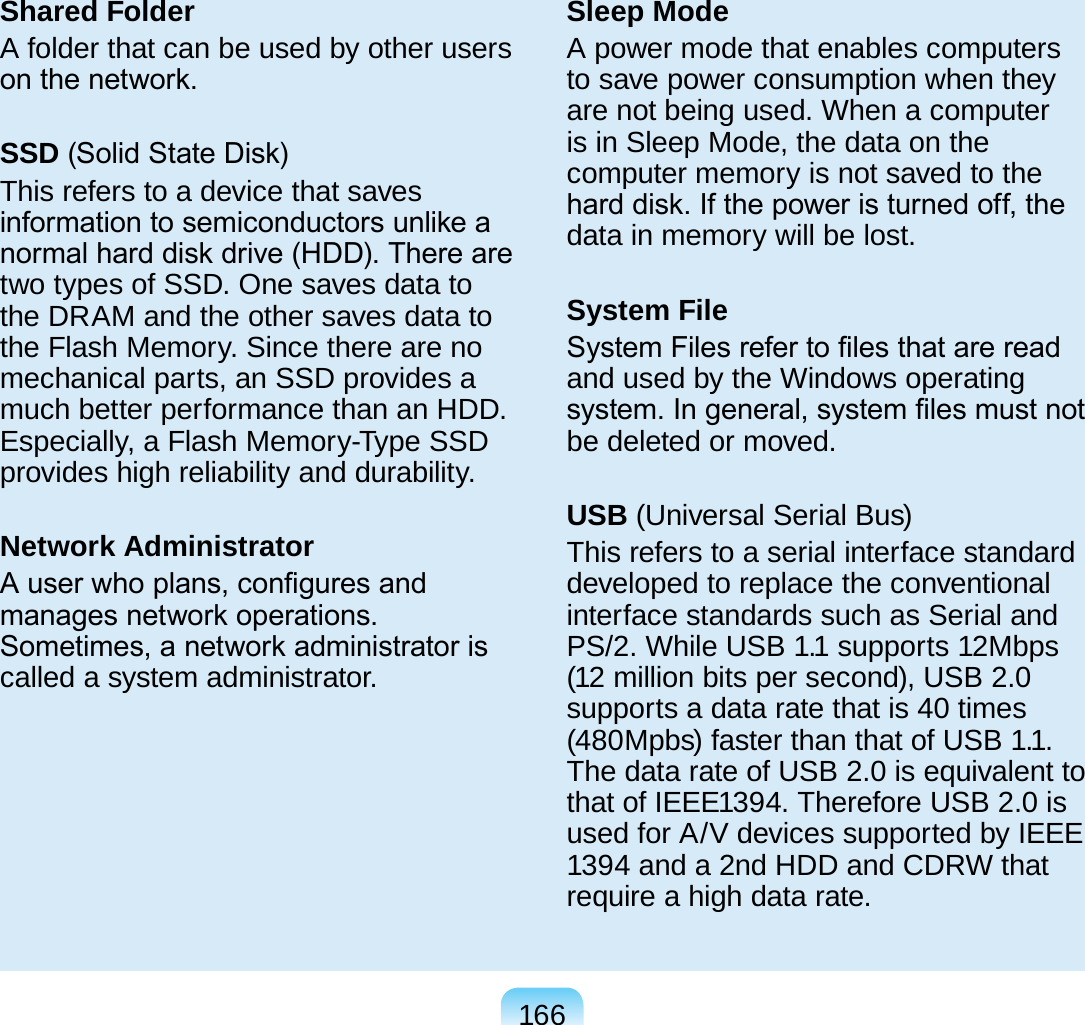
![132Reinstalling in Windows1 Insert the SYSTEM RECOVERY MEDIA into the DVD drive.2 When the AutoPlay window appears, select Run setup.exe and click Allow.This screen may not appear depending on the security level.Reinstalling Windows 7 (For Windows 7. For supported models only)You can reinstall Windows using the SYSTEM RECOVERY MEDIA for Windows when Windows is no longer working properly. (For models supplied with a SYSTEM RECOVERY MEDIA.)For models supplied with the Samsung Recovery Solution, you can reinstall Windows using the Samsung Recovery Solution.These descriptions are for Windows 7 and for supported models only. A SYSTEM RECOVERY MEDIA may not be supplied depending on your computer model. If you cannot start Windows, or if you want to delete all existing data and reinstall Windows, install Windows according to the descriptions in [Reinstalling when Windows does not start]. To reinstall Windows using SYSTEM RECOVERY MEDIA, an external-type ODD must be connected before turning the computer on. The following descriptions assume that an external ODD is connected.Reinstalling Windows may delete data (les and programs) saved on the hard disk drive. Make sure to backup all important data. Samsung Electronics shall not be held liable for any loss of data.](https://usermanual.wiki/Samsung-Electronics-Co/GOBI2000.Manual-2/User-Guide-1237381-Page-32.png)