Samsung Electronics Co GTI8250 PCS GSM/ EDGE Phone with WLAN and Bluetooth User Manual
Samsung Electronics Co Ltd PCS GSM/ EDGE Phone with WLAN and Bluetooth Users Manual
UserManual.wiki
>
Samsung Electronics Co
>
GTI8250 User Manual
Users Manual
Navigation menu
Upload a User Manual
Namespaces
Wiki Guide
HTML
PDF
Info
Views
User Manual
Discussion / Help
Navigation

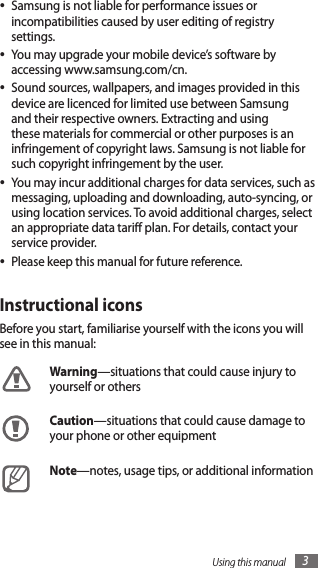
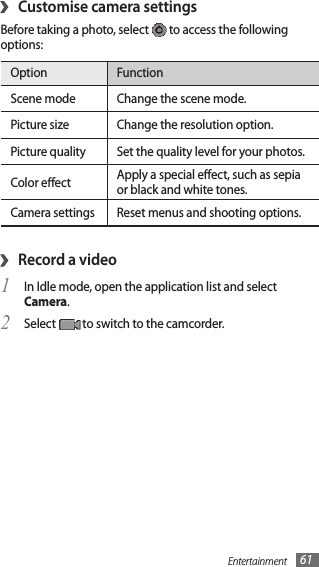
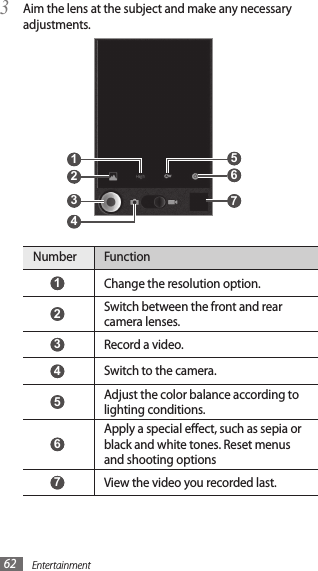
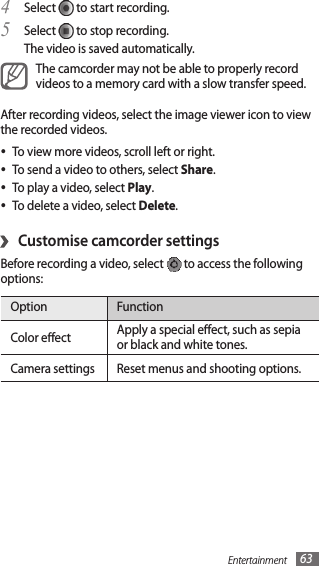
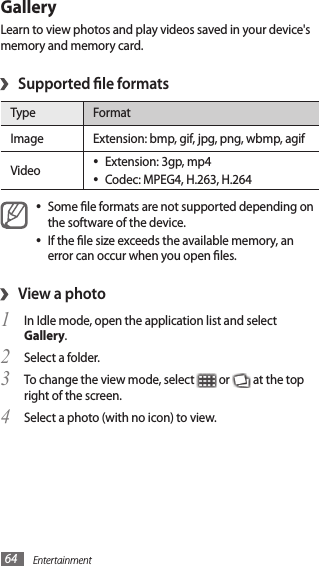
![Using this manual4►Refer to—pages with related information; for example: ► p.12 (represents “see page 12”)→Followed by—the order of options or menus you must select to perform a step; for example: In Idle mode, open the application list and select Settings →About phone (represents Settings, followed by About phone)[ ] Square brackets—device keys; for example: [] (represents the Menu key)CopyrightCopyright © 2011 Samsung ElectronicsThis user manual is protected under international copyright laws.No part of this user manual may be reproduced, distributed, translated, or transmitted in any form or by any means, electronic or mechanical, including photocopying, recording, or storing in any information storage and retrieval system, without the prior written permission of Samsung Electronics.](https://usermanual.wiki/Samsung-Electronics-Co/GTI8250/User-Guide-1663744-Page-5.png)

![Getting started28Double-tap: Tap an item twice •quickly.Flick: Scroll up, down, left, or •right to move through lists or screens.Your device turns o the touch screen when you do •not use the device for a specied period. To turn on the screen, press any key except for [ ].You can also adjust the backlight time. In Idle mode, •open the application list and select Settings → Display → Screen timeout.](https://usermanual.wiki/Samsung-Electronics-Co/GTI8250/User-Guide-1663744-Page-29.png)
![Getting started 29Lock or unlock the touch screen and keysYou can lock the touch screen and keys to prevent any unwanted device operations.To lock, press the Power/Lock key. To unlock, turn on the screen and drag right until it reaches the dot.Get to know the idle screenWhen the device is in Idle mode, you will see the idle screen. From the idle screen, you can view your device’s status and access applications.The idle screen has 7 panels. Scroll left or right to a panel of the idle screen. You can also select a dot on the top of the screen to move to the corresponding panel of the idle screen directly.Add items to the idle screen›You can customise the idle screen by adding shortcuts to applications or items in applications, widgets, or folders. To add items to the idle screen,Press [1 ] → Add or tap and hold the empty area on the idle screen.](https://usermanual.wiki/Samsung-Electronics-Co/GTI8250/User-Guide-1663744-Page-30.png)
![Getting started 31Bluetooth• : Activate or deactivate the Bluetooth wireless connection feature. ► p. 84Data On• /Data O: Activate or deactivate the data connection feature.Silent• : Activate or deactivate the silent mode.Auto rotation• : Activate or deactivate the auto rotation.Available options may vary depending on your region or service provider.Add or remove panels to the idle screen›You can add or remove panels of the idle screen to organise widgets according to your preferences and needs.In Idle mode, press [1 ] → Edit.You can also place your two ngers on the screen and pinch to switch to Edit mode.Add or remove panels by using the following features:2 To remove a panel, tap and hold the thumbnail of a •panel and drag it to the trash bin at the bottom of the screen.To add a new panel, select • .To change the order of the panels, tap and hold the •thumbnail of a panel and drag it to the location you want.When you are nished, press [3 ].](https://usermanual.wiki/Samsung-Electronics-Co/GTI8250/User-Guide-1663744-Page-32.png)
![Getting started32Access applicationsTo access your device’s applications,In Idle mode, select 1 to access the application list.Scroll left or right to another application screen.2 You can also select a dot on the top of the screen to move to the corresponding main menu screen directly.Select an application.3 You can add a shortcut to an application by tapping and holding the application icon from the application list. You can move the icon to the location you want on the idle screen.Press [4 ] to return to the previous screen; Press [ ] to return to the idle screen.Your device has a built-in motion sensor that detects its orientation. If you rotate the device while using some features, the interface will automatically switch to landscape view. To set the interface to keep the orientation when you rotate the device, select Settings → Display → Auto-rotate screen.Organise applications›You can reorganise the applications in the application list by changing their order or grouping them into categories to suit your preferences and needs.In the application list, press [1 ] → Edit. Tap and hold an application.2](https://usermanual.wiki/Samsung-Electronics-Co/GTI8250/User-Guide-1663744-Page-33.png)
![Getting started 33Drag the application icon to the location you want.3 You can move an application icon to another main menu screen. You can also move most-used applications next to .Press [4 ] → Save.To change the order of the main menu screens,In the application list, place your two ngers on the 1 screen and pinch.Tap and hold the thumbnail of a screen and drag it to 2 the location you want.Access recent applications›Press and hold [1 ] to open the list of applications you have accessed recently.Select an application to access.2 Use the task manager›Your device is a multitasking device. It can run more than one application at the same time. However, multitasking may cause hang-ups, freezing, memory problems, or additional power consumption. To avoid these problems, end unnecessary programs using the task manager.In Idle mode, open the application list and select 1 Task manager → Active applications.The list of all the applications currently running on your device appears.To close an application, select 2 End.To close all active applications, select End all.](https://usermanual.wiki/Samsung-Electronics-Co/GTI8250/User-Guide-1663744-Page-34.png)
![Getting started 35Change your ringtone›In Idle mode, open the application list and select 1 Settings → Sound → Phone ringtone.Select a ringtone from the list and select 2 OK.Activate animation for switching windows›In Idle mode, open the application list and select Settings → Display → Animation → Some animations or All animations.Select a wallpaper for the idle screen›In Idle mode, press [1 ] →Wallpaper →an option.Select an image.2 Select 3 Save or Set wallpaper.Samsung is not responsible for any use of default images or wallpapers provided on your device.Adjust the brightness of the display›In Idle mode, open the application list and select 1 Settings → Display → Brightness.Clear the check box next to 2 Automatic brightness.Drag the slider3 to adjust the level of brightness.Select 4 OK.The brightness level of the display will aect how quickly the device consumes battery power.](https://usermanual.wiki/Samsung-Electronics-Co/GTI8250/User-Guide-1663744-Page-36.png)


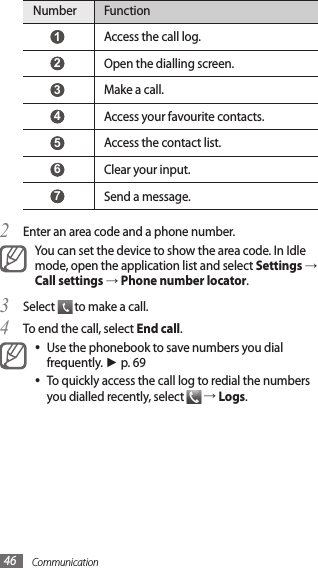

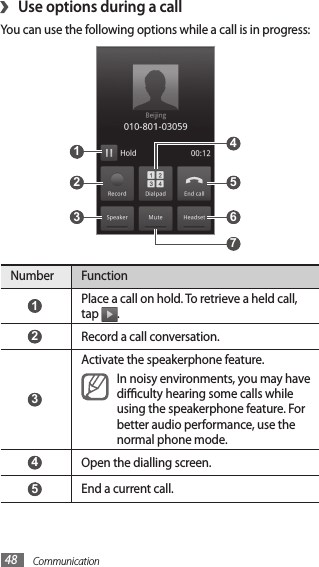
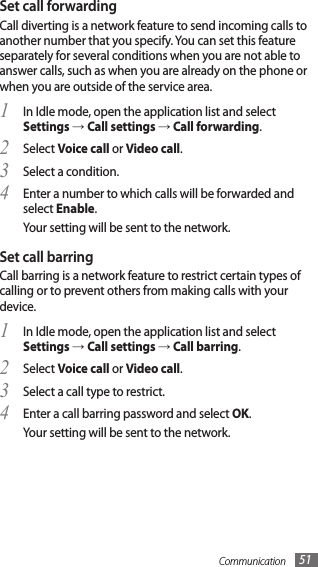
![Communication50Use additional features›You can use various other call-related features, such as auto rejection, Fixed Dialling Number (FDN) mode, or call diverting or barring.Set auto rejectionUse auto rejection to reject calls from certain numbers automatically. To activate auto rejection and set up the reject list,In Idle mode, open the application list and select 1 Settings → Call settings → Auto reject.Select 2 Voice call or Video call.Select 3 Enable auto reject to activate auto rejection.Select 4 Auto reject list.Press [5 ] → Create. Enter a number to reject and select 6 Save.To add more numbers, repeat steps 4-5.7 Use Fixed Dialling Number (FDN) modeIn FDN mode, your device will restrict outgoing calls, except for the numbers stored in the FDN list. To activate FDN mode, In Idle mode, open the application list and select 1 Settings → Call settings → Fixed Dialing Numbers → Enable FDN.Enter the PIN2 supplied with your SIM or USIM card and 2 select OK.Select 3 FDN list and add contacts to be used in FDN mode.](https://usermanual.wiki/Samsung-Electronics-Co/GTI8250/User-Guide-1663744-Page-51.png)
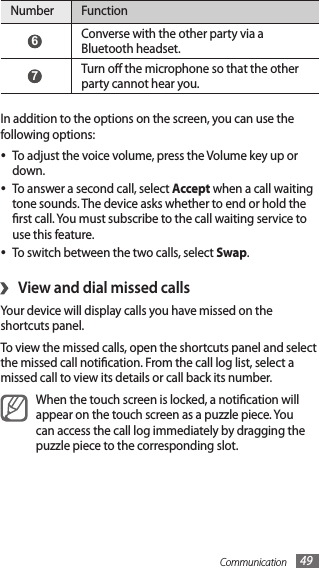
![Communication52View call logs›You can view logs of your calls ltered by their types. In Idle mode, select 1 → Logs.Press [2 ] → View by → an option to sort the call logs. From the call logs, you can make a call or send a message directly to a contact by quickly icking the contact to the left or right.Select a log to view its details.3 From the detail view, you can dial the number, send a message to the number or add the number to the phonebook or reject list.MessagesLearn to create and send text (SMS), multimedia (MMS), or email messages, and view or manage messages you have sent or received.Send a text message›In Idle mode, select 1 → New message.Select 2 Contacts.You can enter a number manually or select one from the recent recipients or contact groups by selecting another button.Select contacts and select 3 Add.](https://usermanual.wiki/Samsung-Electronics-Co/GTI8250/User-Guide-1663744-Page-53.png)
![Communication 53Select 4 Tap to compose and enter your message text.To insert emoticons, press [ ] → Insert smiley.Select 5 Send to send the message.Send a multimedia message›In Idle mode, select 1 → New message.Select 2 Contacts.You can enter a number manually or select one from the recent recipients or contact groups by selecting another button.Select contacts and select 3 Add.When you enter an email address, the device will convert the message as a multimedia message.Select 4 Tap to compose and enter your message text.To insert emoticons, press [ ] → Insert smiley.Press [5 ] → Attach → an option and add an item.You can select a le from the le list or create a new photo, video, or sound.Press [6 ] → Add subject and add a subject for the message.Select 7 Send to send the message.View a text or multimedia message›In Idle mode, select 1 .Your messages are grouped into message threads by contact, like a messenger.Select a contact.2](https://usermanual.wiki/Samsung-Electronics-Co/GTI8250/User-Guide-1663744-Page-54.png)
![Communication 55Select 4 Next (for general email accounts) or Manual setup (for other company email accounts).Follow the on-screen instructions.5 When you are nished setting up the email account, the email messages are downloaded to your device. If you have created more than two accounts, you can switch between email accounts; Press [ ] → Accounts and select one you want to retrieve messages from.Send an email message›In Idle mode, open the application list and select 1 Email →an email account.Press [2 ] → Compose.Select 3 Contacts.You can enter an email address manually or select one from the recent recipients or groups by selecting another button.Select contacts and select 4 Add.Select the Cc/Bcc eld to add more recipients.5 Select the subject eld to enter a subject.6 Select the text input eld to enter your email text.7 Select8 Attach and attach a le.You can select a le from the le list or create a new photo, video, or sound.Select 9 Send to send the message.If you are oine or outside your service area, the message will be held in the message thread list until you are online and in your service area.](https://usermanual.wiki/Samsung-Electronics-Co/GTI8250/User-Guide-1663744-Page-56.png)
![Communication56View an email message›When you open an email account, you can view previously retrieved emails oine or connect to the email server to view new messages. After retrieving email messages, you can view them oine.In Idle mode, open the application list and select 1 Email → an email account.Press [2 ] → Refresh to update the messages folder.Select an email message.3 FetionLearn to chat with friends and family via the Fetion messenger. With Fetion, you can stay available to other users by receiving and sending instant messages. For more information, contact your service provider.Log in to the Fetion messenger›In Idle mode, open the application list and select 1 Fetion.Enter your user name and password and select 2 Log in.Start a chat›In Idle mode, open the application list and select 1 Fetion.Select a contact from the 2 All list. The chat screen opens.If you are not logged in, you can send a text message to one of your phonebook contacts. Select Local contact → a contact.](https://usermanual.wiki/Samsung-Electronics-Co/GTI8250/User-Guide-1663744-Page-57.png)
![Communication 57Enter your message and select 3 Send.To end the chat, press [4 ] → End chat.139 邮箱You can receive emails from your preset account assigned by your service provider, and reply promptly when a new email arrives. For more details, contact your service provider.Set up an email account using 139 mail›You can use your phone number as your email account and send or receive emails.In Idle mode, open the application list and select 1 139 邮箱.Start the 139 Mail wizard to create a 139 Mail account.2 The account will be added to the message centre automatically.View an email message›In Idle mode, open the application list and select 1 139 邮箱.Select an email message.2](https://usermanual.wiki/Samsung-Electronics-Co/GTI8250/User-Guide-1663744-Page-58.png)
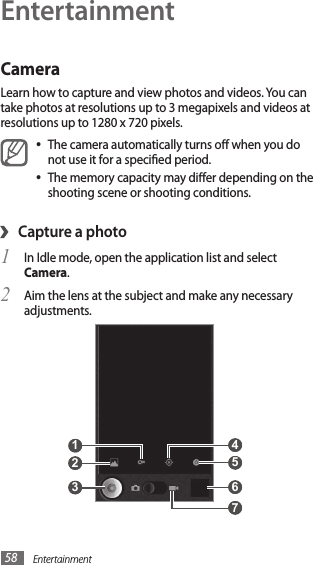
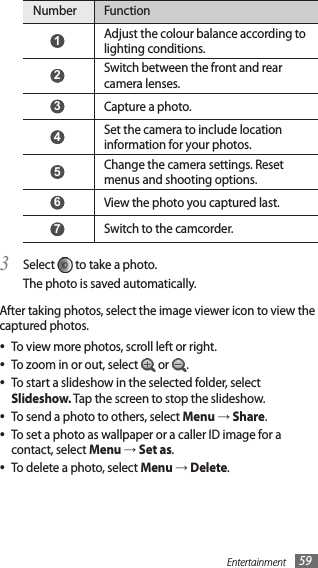
![Entertainment 65While viewing a photo, use the following options:To view more photos, scroll left or right.•To zoom in or out, select • or . You can also tap the screen with two ngers and spread them apart (move your ngers closer together to zoom out).To start a slideshow in the selected folder, select •Slideshow. Tap the screen to stop the slideshow.To use additional features using the photo, such as sharing, •deleting, and editing options, select Menu.Play a video›In Idle mode, open the application list and select 1 Gallery.Select a video (with the 2 icon) to play.Rotate the device anti-clockwise to landscape view.3 Control playback with the virtual keys.4 Share images or videos›In Idle mode, open the application list and select 1 Gallery.Select a folder.2 Press [3 ] and select images or video les.Select 4 Share → a sharing option.](https://usermanual.wiki/Samsung-Electronics-Co/GTI8250/User-Guide-1663744-Page-66.png)
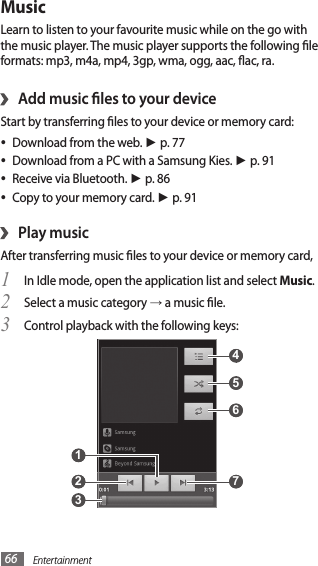

![Entertainment68Create a playlist›In Idle mode, open the application list and select 1 Music.Select a music category 2 → a music le.Press [3 ] → Add to playlist → New.Enter a title for your new playlist and select 4 Save.To add more music les to the playlist, play a le and 5 press [ ] → Add to playlist →the new playlist.](https://usermanual.wiki/Samsung-Electronics-Co/GTI8250/User-Guide-1663744-Page-69.png)
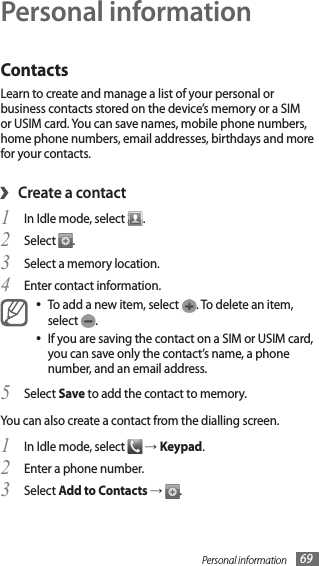
![Personal information70Select a memory location.4 Enter contact information.5 Select 6 Save to add the contact to memory.Find a contact›In Idle mode, select 1 .Scroll up or down on the contact list.2 Select a contact’s name.3 Once you nd a contact, you can:call the contact by selecting the phone number.•send a message by selecting • Message.edit the contact information by pressing [• ] → Edit.share the contact information with others by •pressing [ ] → Send via → a sharing option.Set a speed dial number›In Idle mode, select 1 .Press [2 ] → More → Speed dial.Select a location number 3 → a contact.You can quickly dial this number by touching and holding the location number from the dialling screen.Create your namecard›In Idle mode, select 1 .Press [2 ] → My prole.](https://usermanual.wiki/Samsung-Electronics-Co/GTI8250/User-Guide-1663744-Page-71.png)
![Personal information 71Enter your own personal details.3 Select 4 Save.You can send your namecard by attaching it to a message or email or transferring it via the Bluetooth wireless feature.Retrieve contacts from your community ›accountsYou can view the list of community site accounts and select an account to add a contact from the website to your phone contacts.In Idle mode, select 1 .Press [2 ] → Get friends.Select an account.3 Follow the on-screen instructions.4 Create a group of contacts›By creating groups of contacts, you can manage multiple contacts and send messages or email to an entire group. Start by creating a group.In Idle mode, select 1 → Groups.Press [2 ] → Create.Enter a name and select a ringtone for the group.3 Select 4 Save.](https://usermanual.wiki/Samsung-Electronics-Co/GTI8250/User-Guide-1663744-Page-72.png)
![Personal information72›Copy contactsYou can copy contacts to and from the SIM or USIM card.In Idle mode, select 1 .Press [2 ] → Import/Export → Import from SIM card or Export to SIM card.Select contacts to copy and select 3 Import or Export.For exporting contacts, select 4 Yes to conrm.Import or export contacts›You can save all of your contacts as vcf les in a memory card, and export them from a memory card.In Idle mode, select 1 .Press [2 ] → Import/Export → Import from SD card.Select a memory location.3 If you have more than one account, select an account to which you want to add the contact.Select an option for importing a single contact le, 4 multiple contact les, or all contact les, and select OK.Select contact les to import and select 5 OK.To export contacts from your device to a memory card,In Idle mode, select 1 .Press [2 ] → Import/Export → Export to SD card.Select 3 Yes to conrm.](https://usermanual.wiki/Samsung-Electronics-Co/GTI8250/User-Guide-1663744-Page-73.png)
![Personal information74CalendarLearn to create and manage daily, weekly or monthly events, and set alarms to remind yourself of important events.Create an event›In Idle mode, open the application list and select 1 Calendar.Press [2 ] → More → Create.Enter the details of the event as required.3 Select 4 Done.View events›To change the calendar view,In Idle mode, open the application list and select 1 Calendar.Select a view mode from the top of the calendar.2 To view events of a specic date,In Idle mode, open the application list and select 1 Calendar.Select a date on the calendar.2 To move to a specic day by entering a date manually, press [ ] → More → Go to, enter the date by selecting + or -, and select Set.To select today's date, press [ ] → Today.Select an event to view its details.3](https://usermanual.wiki/Samsung-Electronics-Co/GTI8250/User-Guide-1663744-Page-75.png)
![Personal information 75Stop an event alarm›If you set an alarm for a calendar event, the event alarm icon will appear at the specied time.Open the shortcuts panel from the top of the screen.1 Select a reminder to view more details about the event.2 To snooze or dismiss the reminder, select 3 Snooze all or Dismiss all.NotesLearn to create and view notes.Create a note›In Idle mode, open the application list and select 1 Notes.Press [2 ] → Add note.Enter your memo text.3 View notes›In Idle mode, open the application list and select 1 Notes.Select a note to view its details.2 To delete the note, press and hold the note and select Delete.](https://usermanual.wiki/Samsung-Electronics-Co/GTI8250/User-Guide-1663744-Page-76.png)

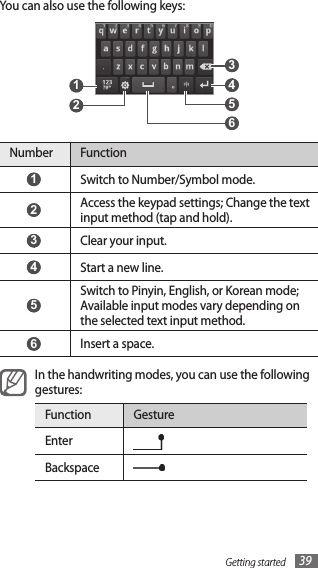
![Web78Navigate web pages with the following keys:2 2 1 The above screen may dier depending on your region or service provider.Number Function 1 Enter an web address of the web page to access. 2 Open a list of saved bookmarks, frequently visited pages and recent internet history.While browsing the web page, use the following options:To zoom in or out, double-tap the screen. You can also use •the two nger zoom; Place your two ngers on the screen and slowly pinch or spread apart.To open a new window, press [• ] → New window.To view the currently active windows, press [• ] → Windows. You can open multiple pages and switch back and forth between them.](https://usermanual.wiki/Samsung-Electronics-Co/GTI8250/User-Guide-1663744-Page-79.png)
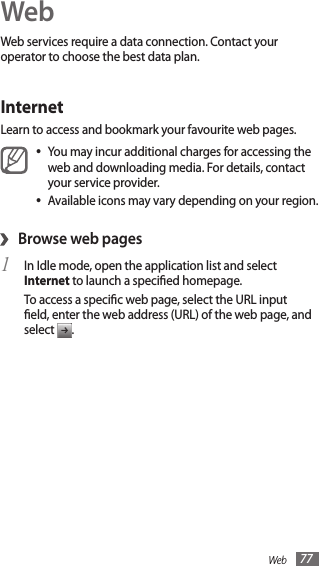
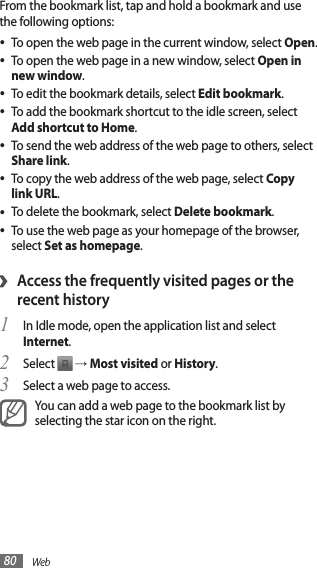
![Web 79To reload the current web page, press [• ] → Refresh.To go to the next page in history, press [• ] → Forward.To bookmark the current web page, press [• ] → Add bookmark.To add the bookmark shortcut to the idle screen, press •[] → More → Add shortcut to Home.To add the RSS feed, press [• ] → Add RSS feeds.To search for text on the web page, press [• ] → More → Find on page.To view the web page details, press [• ] → More → Page info.To send the web address (URL) of the web page to others, •press [ ] → More → Share page.To view the download history, press [• ] → More → Downloads.To customise the browser settings, press [• ] → More → Settings.Bookmark your favourite web pages›If you know the web address of the web page, you can manually add a bookmark. To add a bookmark,In Idle mode, open the application list and select 1 Internet.Select 2 →Bookmarks.Select 3 Add or press [ ] → Bookmark last-viewed page.Enter a page title and a web address (URL).4 Select 5 OK.](https://usermanual.wiki/Samsung-Electronics-Co/GTI8250/User-Guide-1663744-Page-80.png)
![Connectivity 85Find and pair with other Bluetooth-enabled ›devicesIn Idle mode, open the application list and select 1 Settings → Wireless & networks → Bluetooth settings → Scan for devices.Select a device.2 Enter a PIN for the Bluetooth wireless feature or the 3 other device’s Bluetooth PIN, if it has one, and select OK. Alternatively, select Pair to match the PIN between your device and the device.When the owner of the other device enters the same PIN or accepts the connection, pairing is complete. If the pairing is successful, the device will automatically search for available services.Some devices, especially headsets or hands-free car kits, may have a xed Bluetooth PIN, such as 0000. If the other device has a PIN, you must enter it.Send data using the Bluetooth wireless ›featureSelect a le or item, such as a contact, calendar event, 1 memo, or media le, from an appropriate application or My Files.Press [2 ] →Share, Send via, or Send namecard via →Bluetooth.Search for and paired with a Bluetooth-enabled device.3](https://usermanual.wiki/Samsung-Electronics-Co/GTI8250/User-Guide-1663744-Page-86.png)

![Connectivity 93Option FunctionVPN name Enter a name of the VPN server.Set VPN server Enter the IP address of the VPN server.Enable encryption Set to encrypt the VPN server.Set IPsec pre-shared key Enter a pre-shared key.Enable L2TP secretSet to use the L2TP secret password.Set L2TP secret Enter the L2TP secret password.Set user certicateSelect a user certicate that the VPN server uses to identify you. You can import certicates from the VPN server or download from the web.Set CA certicateSelect a certicate authority (CA) certicate that the VPN server uses to identify you. You can import certicates from the VPN server or download from the web.DNS searchdomainsEnter the domain name server (DNS) address.When you are nished, press [4 ] → Save.](https://usermanual.wiki/Samsung-Electronics-Co/GTI8250/User-Guide-1663744-Page-94.png)
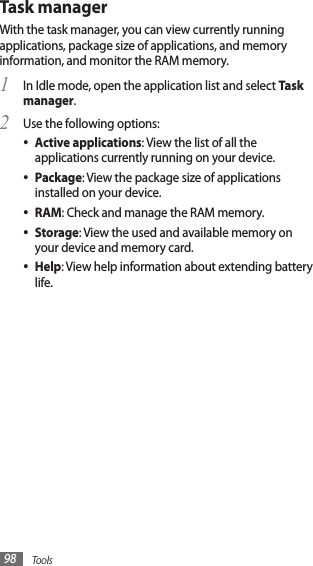
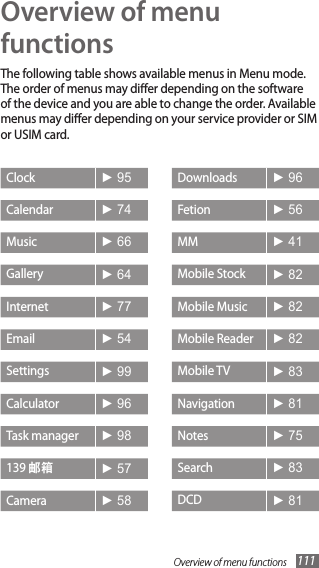
![Tools 95ToolsClockLearn to use clock display on the Idle screen, and set and control alarms for important events.Use the clock display›In Idle mode, open the application list and select 1 Clock.While using the clock display, use the following features:2 To create or delete an alarm, select • .To play a slideshow with photos in Gallery, select • .To launch the music player, select • .To return to the idle screen, select • .Set a new alarm›In Idle mode, open the application list and select 1 Clock.Press [2 ] → Add alarm.Set alarm details.3 When you are nished, select 4 Done.Stop an alarm›When the alarm sounds,Select • Dismiss to stop the alarm.Select • Snooze to repeat the alarm after a specied length of time.](https://usermanual.wiki/Samsung-Electronics-Co/GTI8250/User-Guide-1663744-Page-96.png)
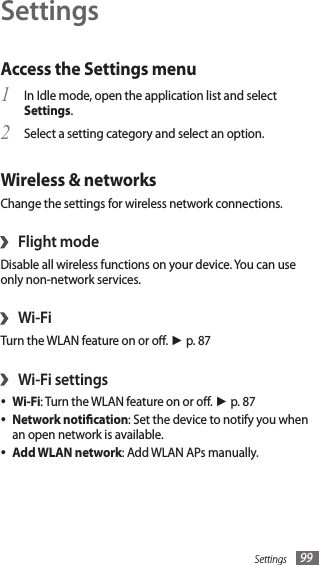
![Tools96CalculatorLearn to perform mathematical calculations directly on your device like a typical hand-held or desktop calculator.In Idle mode, open the application list and select 1 Calculator.Use the keys that correspond to the calculator display to 2 perform basic mathematical operations.Press [3 ] →Advanced panel to use scientic calculator.DownloadsLearn to open and manage les you have downloaded from the web and email.In Idle mode, open the application list and select 1 Downloads.Select a download folder.2 To open a le, select the le.3 To delete a le, select the check box and then select Delete.](https://usermanual.wiki/Samsung-Electronics-Co/GTI8250/User-Guide-1663744-Page-97.png)
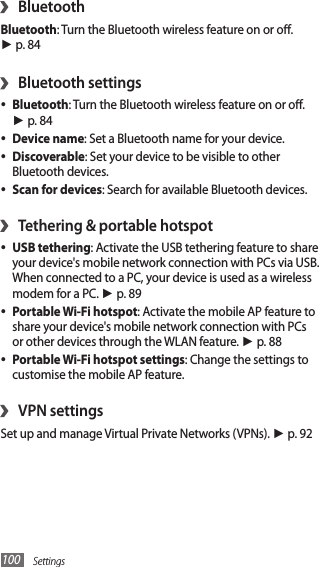
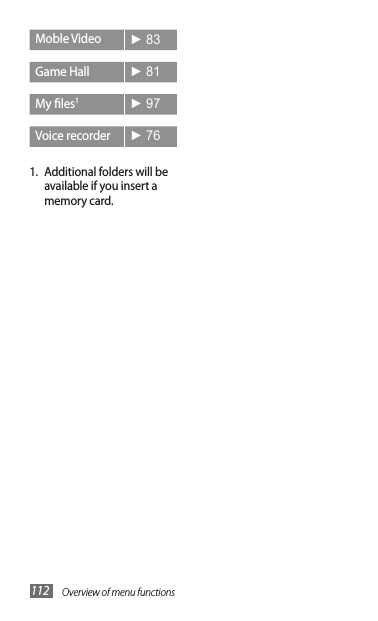
![Tools 97My lesLearn to quickly and easily access all of your images, videos, music, sound clips, and other types of les stored in your device and memory card. In Idle mode, open the application list and select 1 My les.Select a folder 2 →a le.In a folder, press [ ] to use the following options:To send a le to others via multimedia message, email or •the Bluetooth wireless feature, select Share.To create a new folder, select • Create folder.To delete les or folders, select • Delete.To change the view mode, select • View by.To sort les or folders, select • List by.To use additional features using a le, such as moving, •copying, or renaming options, select More.](https://usermanual.wiki/Samsung-Electronics-Co/GTI8250/User-Guide-1663744-Page-98.png)